1
Step 2
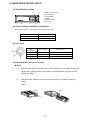
2-1. Push the released latch to slide the top cover backwards and remove. (Fig.3)
Step 3
3-1. Insert the DC power cable and IDE cable on the HDD. (Fig.4)
3-2. Position the HDD into carrier body and secure the HDD using the four 6#-32 screws
provided. (Fig.5)
Step 4
4-1. Slide the top cover back to the carrier body by sliding forward to secure. (Fig.6)
Step 5
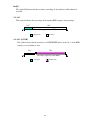
5-1. Slide the carrier body into the recorder and push carrier body further into cartridge
frame until it is fully inserted. (Fig.7 and Fig.8)
17