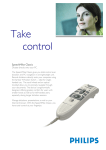
Download SpeechMikeII User Manual - HTH Engineering Support Files
Transcript
2 _________________________________________________________________________ Philips SpeechMike User Manual
Philips SpeechMike User Manual
COPYRIGHT
© 1997 – 2005 Philips Speech Processing - Dictation Systems.
All rights reserved. Reproduction in whole or in part is prohibited without the written consent of the copyright owner.
Information in this manual is subject to change without notice.
TRADEMARKS
Digital Pocket Memo and SpeechMike are trademarks of Philips.
DISCLAIMER AND NOTICES
Philips Dictation Systems has carried out extensive testing with most popular configurations. However, since PC add-ons and
drivers change very rapidly, we are unable to guarantee conflict-free operation. Possible solutions for solving such conflicts can
be found in the Readme file.
The CE mark confirms that the machine corresponds to the relevant guidelines of the European
Union.
This manual has been printed on chlorine-free, recycled paper, in line with the highest standards
of environmental friendliness.
The cardboard used for packaging can be recycled. This electronic facility contains recyclable
material.
Technical changes and errors excepted.
Declaration of Conformity
Model Numbers:
Trade Name :
Responsible Party:
Address:
Telephone Number:
LFH 5260, LFH 5262, LFH 5270, LFH 5272, LFH 5274, LFH 5276
SpeechMike Classic, SpeechMike Pro
PHILIPS DICTATION SYSTEMS
64 Perimeter Center East, Fifth Floor
Atlanta, GA 30346
USA
+1 770 821 2400
This device complies with Part 15 of the FCC Rules. Operation is subject to the following two conditions:
(1) This device may not cause harmful interference, and (2) this device must accept any interference
received, including interference that may cause undesired operation
Tested To Comply
With FCC Standards
FOR HOME OR OFFICE USE
Philips SpeechMike User Manual _________________________________________________________________________ 3
Introduction
Thank you for buying a Philips SpeechMike product.
The SpeechMike family of products has been designed to offer optimum user convenience and greater efficiency for your daily
work. This manual covers the installation of the SpeechMike Classic, SpeechMike Classic PLUS, SpeechMike Pro and
SpeechMike ProPLUS hardware and software, the handling of the SpeechMike device and its associated software utilities.
SpeechMike features
•
Professional multimedia input device for single-handed operation.
•
LEDs for visual and built-in loudspeaker for acoustic feedback.
•
All buttons can be programmed to suit individual user preferences.
Support and feedback
For the latest information not contained in this manual, please refer to the Readme file on the Driver & Utility CD, or in the
SpeechMike Driver Utility program group of the Windows Start menu.
For the latest version of the Driver & Utility software package, please contact your software vendor.
For additional information on professional speech processing and speech recognition solutions from Philips Speech
Processing, please visit our web site at: http://www.philips.com/dictation
For further information, please refer to the "World-Wide Service Information" booklet included with this package.
4 _________________________________________________________________________ Philips SpeechMike User Manual
Installation
System requirements
•
IBM-compatible PC with Pentium II, 233MHz processor (Pentium III, 500MHz recommended)
•
At least 64 MB RAM (128 MB recommended)
•
75 MB hard disk space for SpeechMike drivers & software
•
A self-powered USB port with 300mA of output power (see the Troubleshooting section for details)
• Windows 98 SE*, Windows Me*, Windows 2000 or Windows XP
It is highly recommended that you have the latest Service Packs installed for your operating system.
* Note: Windows 98 SE and Windows Me operating systems are supported for driver installation only!
Hardware installation
Windows 2000 and Windows XP:
1. Turn on your computer and plug the SpeechMike device into the USB port.
2. The New Hardware Found message will be displayed on your screen shortly.
Note: If this message does not appear, verify whether the USB port is enabled in the BIOS of your system. See your
hardware documentation for details or contact your hardware vendor.
3. Installation will proceed automatically.
Windows 98 SE and Windows ME:
Note: The Windows 98 Second Edition CD contains the USB drivers for the microphone and loudspeaker only. The drivers for
the LED display and dictation buttons must be installed from the Driver & Utility CD before connecting the hardware.
1.
2.
3.
4.
5.
6.
7.
8.
Double-click the My Computer icon on the desktop.
Double-click the CD-ROM drive icon; you will be shown the contents of the CD.
Start the program autorun.exe by double-clicking it.
Click Install to begin installation.
Remove the Driver & Utility CD and insert your Windows 98 SE or Windows ME CD.
Plug the SpeechMike device into the USB port. Windows will find a total of five new devices.
When the Add New Hardware Wizard starts, click Next.
On the next screen, make sure that Search for the best driver for your device. (Recommended) is selected. Then click
Next.
9. On the following screen, the only option selected should be Specify a location, and the path of the Windows\inf folder
should be displayed in the field. If necessary, uncheck all other options and click Next.
10. Windows will now start looking for the necessary files; click Next.
Note: The required files from the Windows 98 SE or Windows ME CD can be found in the Setup/Win98 or Setup/WinME
subdirectory (respectively), browse to this directory and click OK.
11. After the first part of the installation has been completed successfully, click Finish.
12. Repeat steps 7–11 until all five SpeechMike components are installed correctly.
Software installation
Note: A user must have administrator rights to install the program under Windows 2000 or Windows XP. Contact your system
administrator if you need help.
Windows 2000 and Windows XP:
The SpeechMike software is delivered on the Driver & Utility CD. When you insert the Driver & Utility CD into your CD-ROM
drive, the SpeechMike setup program is automatically started. Select Install to begin the installation. If the setup program is not
run when you insert the Driver & Utility CD, start setup manually by doing the following:
1. Double-click the My Computer icon on the desktop.
2. Double-click the CD-ROM drive icon; you will be shown the contents of the CD.
3. Start the program autorun.exe by double-clicking it and select Install.
Windows 98 SE and Windows ME:
The SpeechMike Recorder, SpeechMike Control Application and SpeechMike Device Configuration Tool utilities are not
available for Windows 98 SE and Windows ME. The necessary SpeechMike drivers have already been installed as part of the
hardware installation described above.
Philips SpeechMike User Manual _________________________________________________________________________ 5
Handling the SpeechMike Classic and SpeechMike ClassicPLUS
Place the SpeechMike in the palm of your hand with the thumb on the 4-position switch and your index finger across the trigger
underneath.
Alternatively, you can use your SpeechMike on your desktop like a conventional trackball.
SpeechMike Classic and SpeechMike ClassicPLUS button functions
When the SpeechMike Classic is installed correctly, the Record, Play/Stop, Fast Rewind and Fast Forward functions and the
trigger button are available and ready for use. However, the functionality of each button depends on the application and
whether the buttons are used in a programmed mode. For more information on individual button settings and on how to
program buttons, see the Software chapter below.
6 _________________________________________________________________________ Philips SpeechMike User Manual
Handling the SpeechMike Pro and SpeechMike ProPLUS
Place the SpeechMike Pro in the palm of your hand with your thumb resting on the trackball and your index finger across the
trigger underneath.
Alternatively, you can use your SpeechMike on your desktop like a conventional trackball.
SpeechMike ProPLUS button functions
When the SpeechMike ProPLUS is installed correctly, the Record, Play/Stop, Fast Rewind and Fast Forward buttons and the
trigger button are available and ready for use. However, the functionality of each button depends on the application and
whether the buttons are used in a programmed mode. For more information on individual button settings and on how to
program buttons, see the Software chapter below.
Display states of the feedback LEDs
Record LED
The multicolor recording indicator LED is positioned around the microphone inlet. Its colors and display mode (blinking or
static lit) give you information about the recording status of the SpeechMike device as follows:
Red - static
The device is in Record (overwrite) mode.
Red - blinking
The device is in Record Standby (overwrite) mode.
Green - static
The device is in Record (insert) mode.
Green - blinking
The device is in Record Standby (insert) mode.
Yellow - static
The device is recording a spoken instruction.
Insert/Overwrite LED
This green indicator LED is positioned near the INS/OVWR button. When lit, the device is in Record mode with the insert mode
engaged. When blinking, the device is in either Record Standby or Stop mode with the insert mode engaged. When unlit,
overwrite mode is engaged.
Instruction LED
This yellow indicator LED is positioned near the INSTR button (SpeechMike Classic versions) or the EOL button (SpeechMike
Pro versions). When the LED is lit, the device is recording a spoken instruction.
Note: The LED color is depending on the PC-dictation application and may be different in your environment.
Philips SpeechMike User Manual _________________________________________________________________________ 7
Software
The software package for the SpeechMike includes the control application SpeechMike Control, the recording application
TestRecorder, and the Device Configuration Tool.
SpeechMike Control Application
With the SpeechMike control software, you can create individual button command schemes to control and navigate through
standard Windows applications. This allows you to use your SpeechMike to control your applications instead of using your
mouse.
You can program text or hotkeys (shortcuts) or a combination of both for each button on your SpeechMike and assign the
commands to almost any Windows application. Separate commands can be programmed for when each button is pressed
alone, as well as for when each button is pressed together with Ctrl and Shift on your keyboard.
The buttons available for programming are different for the SpeechMike Pro and the SpeechMike Classic, the Control
Application includes a Show Buttons button that allows you to display the buttons available on your device.
The SpeechMike control program must be active in order to use the customized button controls. This means you need to open
the program and keep it active in the background, or click Hide to hide it on the taskbar. For your convenience, you can have
the SpeechMike control application start automatically when Windows is started by adding it to your Startup folder in the Start
menu.
Command line parameters for the SpeechMike control application
If you start the SpeechMike control application automatically by adding it to the Startup folder in the Start menu, and you do
not want the application window to be displayed each time you start Windows, you can use command line parameters. The
parameter has to be entered in the Target field of the shortcut dialog after the program path. The content of the Target field
should look like this:
"C:\Program Files\Philips Speech\SpeechMike\MIKEAPP.EXE" /h
Note: The /h has to be outside the path in quotation marks.
You can use the following parameters:
/h
Hidden start: the mouse icon is displayed on the taskbar (status notification area), but no window is opened on Windows
startup.
/t
Taskbar symbol hidden: no mouse icon is displayed on the taskbar (status notification area), and no window is opened on
Windows startup.
This parameter can also be used by system administrators to prevent users from editing their configurations.
To display the application window, you have to start the SpeechMike control application manually, or click the mouse icon if
displayed in the taskbar.
SpeechMike Control window
To open the SpeechMike Control window, go to the Start menu, Programs,
SpeechMike Driver Utility and select Control Application.
New Scheme:
Click this button to create a new scheme. All input fields are cleared. You
can now enter new settings for the SpeechMike buttons and save these
settings under a new file name with Save Scheme.
Open Scheme:
Press this button to open an existing SpeechMike scheme. Pressing the
arrow to the right of this button displays a list of available schemes (*.scm
files) containing settings for SpeechMike buttons.
Save Scheme As:
Saves the current scheme. Enter the desired file name when saving your new scheme for the first time. The necessary file
extension *.scm will be added automatically.
Button Properties:
Click this button to call up the button properties window to define the desired commands and/or text for each button.
Enable Auto Assign:
Activate this check box if you want to assign specified schemes/settings to different Windows applications.
Select the desired application (*.exe) file in the Assigned Application field and activate this button. When the selected
application is started and the SpeechMike control application is active (the white mouse icon is displayed on the taskbar),
the corresponding scheme is automatically activated.
If the check box is not selected, each application will use the same (current) scheme. If you do not specify an application,
the current scheme on the screen is used for all applications.
Hide:
If you want to use the programmed buttons but do not want the window to be displayed, click this button to hide the
application on the taskbar. Clicking the SpeechMike mouse icon on the taskbar will display the control window again.
8 _________________________________________________________________________ Philips SpeechMike User Manual
Exit:
Click this button to close the application; the programmed buttons will no longer be activated.
Assigned Application:
If this field is empty (default) the current setting is applied to all Windows applications.
If you intend to assign a specific scheme to a certain application, then click the Browse button and browse for the *.exe file
of the desired application (e.g. the scheme notepad.scm for the Notepad application c:\Notepad path\notepad.exe).
You can also select the check box Enable Auto Assign to activate this setting.
Browse:
Click this button to select the desired application for the Assigned Application function.
Show Buttons:
Click this button to select which SpeechMike model you wish to display the buttons for (SpeechMike Classic,
SpeechMike ClassicPLUS, SpeechMike Pro, or SpeechMike ProPLUS).
Programming the SpeechMike Buttons
To program the buttons of your SpeechMike, double click the desired button or select the
desired button in the button list by clicking on it and press the Button Properties button
to call up the Button Properties window.
Keyboard Input:
Keyboard input can be entered line by line and hotkey by hotkey in the field in this
window. The list box above will show the complete text and/or hotkeys configured for
the button/key combination selected in the buttons list. Each new command or text is
inserted at the end of an existing list.
By clicking the Hotkey or Text button next to the input line, you can specify whether
you want to assign a command/shortcut or a text to a SpeechMike button.
For a hotkey or a series of hotkeys, click Hotkey, then press the hotkey combination on your keyboard (such as Ctrl+N to
open a new document). It is recommended that you open the application for which you want to program hotkeys and switch
between the applications on your screen to check the correct input and execution of a shortcut right away.
For text or text blocks, click Text, type in the required text and finish by pressing the Enter key on your keyboard (do not
forget to press Enter to confirm each text block). For a new text line (carriage return) in your text block, press Enter.
If you want to insert a new hotkey or text at a specific position in the list of commands, place the cursor at the following
text/hotkey and start your new entry. The addition will be inserted immediately before the highlighted text/hotkey.
You can also enter a command to start an application. Select Text, enter !start *.exe (do not forget the '!') with the name of
the executable (.exe) file for the desired application and press the Enter key on your keyboard.
Up:
Click this button to move the selected command or text line up one line in the list.
Down:
Click this button to move the selected command or text line down one line in the list.
Delete Selected Item(s):
Select one or more lines of a command/text sequence and click this icon to delete the selected line(s).
Example scheme: Sample.scm
A basic sample for programming and working with customizable button settings has been prepared for you for Windows
Notepad.
1.
2.
3.
4.
5.
6.
Go to the Start menu, Programs, SpeechMike Driver Utility and select Control Application.
Click the Open icon; the Open dialog box appears.
Select the file Sample.scm and click Open.
In the SpeechMike Control window, click Hide to hide the control application on the taskbar.
Open Notepad.
Press the Fast Forward button on your SpeechMike Pro. The address of Philips Speech Processing, the date and time will
appear.
7. Next, press the INS/OVWR button; a reference text will show up on your screen.
8. Now press the Play/Stop button; a short text will be displayed.
9. Press the Fast Rewind button to display the last lines of the letter.
10. Finally, press the EOL button. The Find dialog box appears and will automatically start to look for "SpeechMike".
Note: This only works properly for the English version of Notepad due to the different shortcut letters.
For more information on how to program your own schemes, refer to the SpeechMike Control online help.
Philips SpeechMike User Manual _________________________________________________________________________ 9
Example scheme: Scroll.scm
The SpeechMike control application is delivered with a set of commands that provide enhanced control features for Windows
applications like Microsoft Office 97 or Microsoft Internet Explorer 3.0 or higher. To open the Scroll.scm scheme, do the
following:
1. Go to the Start menu, Programs, SpeechMike Driver Utility and select Control Application.
2. Click the Open icon; the Open dialog box appears.
3. Select the file Scroll.scm and click Open.
The list of keyboard commands for this scheme will be displayed in the left pane of the SpeechMike Control window.
The following button commands are supported:
Record
When you press the Record button on your SpeechMike Pro, the contents of the window
that is active on the desktop will be enlarged in size.
Play/Stop
When you press the Play/Stop button, the contents of the window that is active on the
desktop will be reduced in size.
Fast Rewind
Use the Fast Rewind button for scrolling up a specified number of units on a page. The
range is between 1 and 10; the default value is 1.
Fast Forward
Use the Fast Forward button for scrolling down a specified number of units on a page. The range is between 1 and 10; the
default value is 1.
EOL
Use the EOL button to move to the previous page. (For example, in Microsoft Internet Explorer pressing this button
simulates clicking the Back button on the toolbar.)
INS/OVWR
Use the INS/OVWR button to move to the next page. (For example, in Microsoft Internet Explorer pressing this button
simulates clicking the Forward button on the toolbar.)
Command button
Pressing this button allows quick positioning in large documents.
For more detailed information, see the Readme file on the Driver & Utility CD or in the SpeechMike Driver Utility program
group of the Windows Start menu.
10 ________________________________________________________________________ Philips SpeechMike User Manual
SpeechMike Device Configuration Tool
With the Device Configuration Tool you can customize
the behavior of all SpeechMike buttons by reassigning
the functions they carry out. For example you can
switch the left and right mouse buttons for a more
comfortable left handed operation, or make the
Instruction button start a recording instead of the
Record button, if that feels a better fit for you. For
another example you could turn the button layout of
your SpeechMike Classic Philips version into that of an
International version or vice versa.
The software also allows you to enable/disable the
scroll wheel and the trackball, or turn the device into
low power consumption mode.
For more information about the Device Configuration
Tool see the online help (available from the Help menu
of the software).
SpeechMike Test Recorder
With the SpeechMike Test Recorder software you can create sound recordings of up to
60 seconds. To start the SpeechMike Test Recorder, go to the Start menu, Programs,
SpeechMike Driver Utility and select Recorder. The TestRecorder window will be
displayed.
New File: Opens a new recording.
Open File: Displays all your saved recordings and enables you to select one of
them.
Save File: Saves the current recording.
Acoustic Feedback: Allows you to listen to the recorded speech while forwarding or rewinding.
Record: Starts the recording.
Play: Starts playback.
Stop: Stops any action in progress.
Fast Rewind: Winds the recording back.
Fast Forward: Winds the recording forward.
Begin: Goes directly to the beginning of the recording.
End: Goes directly to the end of the recording.
Philips SpeechMike User Manual ________________________________________________________________________ 11
Troubleshooting
For the latest information not included in the user manual, please refer to the Readme file. The file can be found on the
Driver & Utility CD and in the SpeechMike Driver Utility program group of the Windows Start menu.
If you are using your SpeechMike with Windows 98 SE, check that all components are installed properly as follows:
1. Go to the Start menu and select Settings, Control Panel.
2. Double-click the Multimedia icon; ensure that USB audio device is selected for playback and recording. If the SpeechMike
is not available in the Control Panel, unplug it and reconnect it.
3. Ensure that the following components are installed in the Device Manager:
Under Human Interface Devices:
• HID compliant consumer control device
• HID compliant consumer control device
• HID human interface device
• USB human interface device
• USB human interface device
• USB human interface device
Under Mouse:
• HID-compliant mouse
Under Keyboards:
• HID-compliant keyboard
Under Universal Serial Bus Controllers:
• Generic USB Hub
• USB composite device
• USB composite device
Under Sound, video and game controllers:
• USB audio device
• USB audio device
Known issues
•
Using the Philips SpeechMike together with certain USB hubs on certain PCs may cause the operating system to stop
responding when the PC is started. To workaround this: unplug your SpeechMike before starting the PC and reconnect it
afterwards. To solve this problem, we recommend replacing the USB hub or connecting your SpeechMike directly to the
USB port of your PC.
•
Some PC providers limit the output power of USB ports to 100mA (milliamps). These USB ports are called bus-powered
USB ports. Such ports may not provide enough power for some USB devices to function properly. To resolve this issue,
connect a self-powered USB hub to the USB port of your PC, then connect the USB device via the self-powered hub.
•
If the LEDs and buttons of your SpeechMike do not work correctly, refer to the Readme file.
Warning
The cable of your SpeechMike can be damaged if it is kinked or if it is pulled or twisted too much. Please handle the cable
carefully to ensure the best possible performance of your SpeechMike.
For more information please refer to the online help or to the FAQ section on the Internet at: http://www.philips.com/dictation


