1
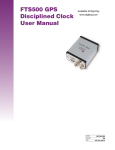
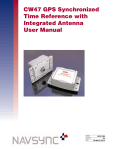
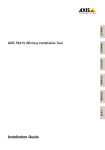
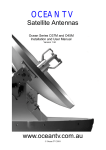
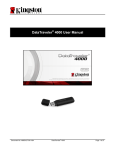
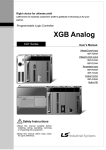
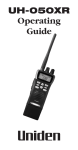
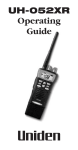
Real Time Player Monitoring System By: Ravi Butani Sudden Impact Wearable Design Challenge Sponsered By element14, ADI, Tektronix, Electrolube and Leeds Beckett University Check List: 1. 2. 3. 4. 5. 6. 7. Chest Strap Module with micro SD Card (CSM) Chest Strap Module Charging USB Cable (CSM-CC) Helmet module (HM) Helmet Module Charging USB Cable (HM-CC) Multi Player Simulator module with micro SD Card (MPSM) Multi Player Simulator module with USB Power Supply Cable (MPSM-PC) (This is same cable as CSM-CC) CD contains necessary Software and documents 1|Page Realtime Player Monitoring System User Manual Table of Contents Sr. No 1. 2. 3. 4. 5. 6. 7. 8. 9. 10. 11. 12. 13. 14. 15. 2|Page Content Introduction How to wear Chest Strap How to Remove and Insert SD Card from Chest Strap module How to Remove and Insert SD Card from Multi Player Simulator module How to Power On Chest Strap Module How to Power On Helmet Module How to Power On Multi Player Simulator Module Installing Android GUI Application Installing PC GUI Application Steps for setup Multiple players monitored by Multiple coach (Multiplayer Application) Steps for setup personal health monitoring (Single Player Application) How to get Logged Data? Battery Recharging Instruction Future Scope Important Links of video and project progress Page No. Page 3 Page 4 Page 4 Page 5 Page 5 Page 6 Page 6 Page 7 Page 7 Page 8 Page 9 Page 10 Page 11 Page 12 Page 12 1. Introduction: “Real time player monitoring system” is low cost open source project for measure and notifies vital body parameters of sport person or entire team (i.e. Heart Rate, Body Temperature, Helmet Impact Force and Chest Impact Force) to coach Via WiFi Link. Heart Rate, Body Temperature and Chest Impact Force are sensed by Chest Strap module and Helmet Impact is sensed by helmet module. Helmet module can be placed anywhere on helmet as per user choice. Chest Strap and Helmet module communicate via SUB GHz short range Wireless Link. Chest Strap module can be connected to Remote GUI application Running on Windows/Linux PC and/or Android Cell phone via WiFi with UDP Protocol. Remote GUI Application provides visualization of vital body parameter with configurable thresholds to get audio visual notification under certain conditions. Chest Strap Module: Helmet Module: Multi Player Simulator module: 3|Page 2. How to wear Chest Strap: Use Left (L) and Right(R) marking on chest strap module to align with your chest left and right side. By wearing Chest Strap Power On Switch and SD card is upward so user can turn on/off end remove/insert SD Card from the module while it is on body. The Proper Location of chest strap is shown in picture below. 3. How to Remove and Insert SD Card from Chest Strap module: Please follow alignment of SD Card, Shown in pictures below while remove or insert SD Card. 4|Page 4. How to Remove and Insert SD Card from Multi Player Simulator module: Please follow alignment of SD Card, Shown in pictures below while remove or insert SD Card. 5. How to Power On Chest Strap Module: Use Pen/Pencil to toggle power Switch to On or Off Position As Shown In Picture below. 5|Page 6. How to Power On Helmet Module: Toggle power Switch to On or Off Position As Shown In Picture below. 7. How to Power On Multi Player Simulator Module: Just connect cable marked with MPSM-CC to Multi player simulator module and USB Power Supply (PC/Laptop/USB HUB) as it do not have battery. 6|Page 8. Installing Android GUI Application: Download attachment ANDROID_APK.rar from http://www.element14.com/community/community/design-challenges/suddenimpact/blog/2015/05/05/realtimemonitor-real-time-player-monitoring-system-post15-releasing-all-thegui-codes-under-cc-by-sa-license or find it from CD in folder named CD:\GUI_APP\Android_GUI 2. Unzip this attachment and move RTPMS_AD-debug.apk to android cell phone/tablet. 3. Simply install RTPMS_AD-debug.apk in android cell phone/tablet by allowing third party application as this application is not signed package. 4. That’s it You have done…… 1. 9. Installing PC GUI Application: Download RTPMS_PC_MIN.rar from http://www.element14.com/community/community/designchallenges/sudden-impact/blog/2015/05/05/realtimemonitor-real-time-player-monitoring-system-post15releasing-all-the-gui-codes-under-cc-by-sa-license or find it from CD in folder named CD:\GUI_APP\PC_GUI 2. Unzip this attachment on your PC you will found four folder named application.windows32,application.windows64,application.linux32 and application.linux64 3. Open any one folder as per your Operating system and run RTPMS_PC executable file. 4. That’s It you have done….. 1. 7|Page 10. Steps for setup Multiple players monitored by Multiple coach (Multi Player Application): 1. Install android and PC application on Android Cell phone/Tablet and Windows/Linux PC 2. Note down SSID and Password of WiFi router/WiFI Hotspot (Which will be used for link between multiple players and coaches). 3. Remove SD Card from Chet Strap module and insert it to PC. 4. Open nwconfig.txt file and update it with your NetworkSSID, Password and Player ID. Open readme.txt to get more information about setup nwconfig.txt Note: Set Player ID valid from 00 (Zero Zero) to 10 (One Zero)in case of Multi player Application as Multi player Application Support monitoring of maximum 11 Players simultaneously. 5. Save nwconfig.txt and safely remove SD Card from PC. 6. Insert SD Card to Chest Strap and Turn On Chest Strap. (Step 7 to 10 are optional and only used for evaluate functionality of System with Simulated data for remaining team players ) 7. Remove SD Card from Multiplayer Simulator module and insert it to PC. 8. Open nwconfig.txt file and update it with your NetworkSSID, Password and Player ID. Open readme.txt to get more information about setup nwconfig.txt Note: Set Player ID value same as Chest Strap Module So Multiplayer simulator simulates for remaining 10 players on network (i.e if Player ID is 5 than module generates junk data for Player 00 to 04 and 06 to 10) 9. Save nwconfig.txt and safely remove SD Card from PC. 10. Insert SD Card to Multiplayer Simulator Module and Power On Multiplayer Simulator Module with USB Cable marked with MPSM-PC. 11. Wear Chest Strap on Chest and Helmet Module on Helmet. 12. Start WiFi Router / WiFi Hot Spot. 13. Connect Multiple PC and Android Cell phone with Same WiFi Router/ PC. 14. Start Android Application/PC Application and select Multi Player go to next and set desired thresholds for different body parameters in each application. Note: In each GUI Application user can set different Threshold value and user can get notification according to that. 15. User will get notification when certain threshold crossed. To acknowledge the Visual notification select OK and to acknowledge Audio Notification Touch any portion of display between 2/3 of display height to complete display height as shown in picture below. 8|Page 11. Steps for setup personal health monitoring (Single Player Application): 1. 2. 3. 4. 5. 6. 7. 8. 9. 10. Install android application on Android cell phone/Tablet. Note down SSID and Password of WiFi Hit Spot on Android Cell Phone/Tablet. Remove SD Card from Chet Strap module and insert it to PC. Open nwconfig.txt file and update it with your NetworkSSID, Password and Player ID. Open readme.txt to get more information about setup nwconfig.txt Note: Set Player ID is 00 (Zero Zero)in case of Single player Application as Single player Application Support only Player ID 00. Save nwconfig.txt and safely remove SD Card from PC. Insert SD Card to Chest Strap and Turn On Chest Strap. Wear Chest Strap on Chest and Helmet Module on Helmet. Start WiFi Hot Spot on Android Cell Phone / Tablet. Start Android Application and select Single Player go to next and set desired thresholds for different body parameters User will get notification when certain threshold crossed. To acknowledge the Visual notification select OK and to acknowledge Audio Notification Touch any portion of between from 2/3 of display height to complete display height as shown in figure below. 9|Page 12. How to get Logged Data? A. Retrieve Processed Logged Data from Android/ PC: every time when user opens GUI Application in PC or Android Cell Phone/Tablet Log file is automatically generated with Time stamp, and arranged in folder with date stamp with data collected at 10Hz rate. Location of log file is found at below Location for Windows32 PC Application. Browse to folder location as below , RTPMS_PC\application.windows32\rtpms_monitor_log\rtpms_monitor_log_YYYY_MM_DD\ Location of log file is found at below Location for Windows64 or linux32 or linux64 PC Application. Browse to folder location as below , RTPMS_PC\application.XXXX\rtpms_monitor_log\rtpms_monitor_log_YYYY_MM_DD\ Where XXXX is windows64 or linux32 or linux64 Location of log file is found at below Location for Android Cell Phone Application. Browse to folder location as below , Primary Storage of your device\rtpms_monitor_log\rtpms_monitor_log_YYYY_MM_DD\ In this folder open desired log file with name ‘rtpms_monitor_log_HH_MM_SS.txt’ In this log file following data are available in Columns formatted with single space Column Data Remarks No 1 Time stamp HH:MM:SS Time when sample arrived 2 Player ID From which player sample arrived 3 Max Helmet Acceleration (0-200g) Processed Helmet Acceleration data 4 Max Chest Acceleration (0-200g) Processed Chest Acceleration Data 5 Body Temperature (0-60 ‘C) 6 Heart Rate (0-200BPM) As this log file is formatted with single space it can be easily used with Microsoft excel/ GNUPlot/Matlab/Labview etc for post processing. B. Retrieve Raw Logged Data from Chest Strap SD Card: every time when user turn on chest strap, Log file is automatically generated with Time stamp, and arranged in folder with date stamp and Player ID these data are collected at 100Hz rate. Remove SD card from chest strap and insert it in to PC. Browse to folder location as below SDCARD_root:\PIDXX\YYYYMMDD\ In this folder open desired log file with name ‘HHMMSS.txt’ In this log file following data are available in Columns formatted with single space Column Data Remarks No 1 Helmet acceleration in X (0-200g) Processed Helmet Acceleration X data 2 Helmet acceleration in Y (0-200g) Processed Helmet Acceleration Y data 3 Helmet acceleration in Z (0-200g) Processed Helmet Acceleration Z data 4 Chest Acceleration in X(-200g to +200g) Raw Chest Acceleration X Data 5 Chest Acceleration in Y(-200g to +200g) Raw Chest Acceleration Y Data 6 Chest Acceleration in Z(-200g to +200g) Raw Chest Acceleration Z Data 7 Body Temperature (0-60 ‘C) Raw Body temperature Data 10 | P a g e 8 Heart Rate (0-200BPM) Raw Heart Rate Data As this log file is formatted with single space it can be easily used with Microsoft excel/ GNUPlot/Matlab/Labview etc for post processing 13. Recharging instruction: Helmet module Recharging: Keep the power switch in OFF/CHARGING Position. Use cable marked HM-CC for recharging Helmet module using USB Power supply (PC/LAPTOP/USB Hub) as shown in picture below. Note: Do not recharge module more than 30 minutes. Align (NC + - ) and (NC + - ) Sign in to connect charger cable. Chest Strap module Recharging: Remove SD card and SUB GHz transreceiver from module. Keep the power switch in ON Position. Use cable marked CSM-CC for recharging Chest strap module using USB Power supply (PC/LAPTOP/USB Hub) as shown in picture below. Note: Do not recharge module more than 180 minutes. 11 | P a g e 14. Future Scope: Improvement in form-factor of hardware modules, and more work on look and feel of modules.. Conductive fabric will be used as ECG Electrode to make chest strap more convenient to wear.. Improve Android and PC application with more functionality SD Card Log file transfer and Network Configuration through GUI App via WiFi so no need to remove SD Card from chest strap. More interactive library for GUI App and mcu for easy implementation/modification. Adding mqtt support to android/PC GUI Application so notifications can be sent to other person on internet who have subscribed to the topic. 15. Important Video Link: http://www.element14.com/community/videos/16208/l/realtimemonitor-real-time-player-monitoringsystem-final-prototype-hardware-introduction http://www.element14.com/community/videos/16197/l/realtimemonitorreal-time-player-monitoringsystem-sd-card-setup-and-log-files-in-sd-card http://www.element14.com/community/videos/16271/l/realtimemonitor-real-time-player-monitoringsystem-basic-setup-and-personal-fitnessimpact-monitor-demo http://www.element14.com/community/videos/16214/l/realtimemonitor-real-time-player-monitoringsystem-multiplayerteam-monitoring-demo http://www.element14.com/community/videos/16147/l/realtimemonitor-real-time-player-monitoringsystem-cc3200-module-demo-with-android-app 12 | P a g e http://www.element14.com/community/videos/16210/l/realtimemonitor-real-time-player-monitoringsystem-android-app-in-action-with-real-time-graphs http://www.element14.com/community/videos/15865/l/realtimemonitor-android-application-test-withdummy-udp-packet http://www.element14.com/community/videos/15964/l/realtimemonitor-cc3200-mod-based-mcumodule-test Link for track progress of the project: http://www.element14.com/community/community/design-challenges/suddenimpact/blog/2014/12/31/realtimemonitor-real-time-player-monitoring-system-table-of-contents Please send your query/comments /feedback to [email protected] Technical Support: 13 | P a g e e-mail : [email protected] (Available 24x7) Contact No: +91-9724727742 (Available 24x7)