1
BX
Jubula Installation Manual
Jubula Team
BREDEX GmbH
May 19, 2011
May 19, 2011
1
Jubula Installation Manual
BREDEX GmbH
Mauernstr. 33
38100 Braunschweig
Germany
Tel: +49-531 - 243 30 - 0
Fax: +49-531 - 243 30 - 99
www.bredex.de
GUIdancer is a registered trademark of BREDEX GmbH
Title:
Jubula Installation Manual
Author:
Jubula Team
File:
install
State:
RELEASE
Version:
V5.1.00118
Released by: BREDEX GmbH
Released at: May 19, 2011
2
May 19, 2011
install V5.1.00118
Contents
Contents
1 System requirements
1.1 Hardware requirements . . . . . . .
1.2 Software requirements . . . . . . .
1.3 AUT Agent requirements . . . . . .
1.4 Java policies and security managers
.
.
.
.
.
.
.
.
.
.
.
.
.
.
.
.
.
.
.
.
.
.
.
.
5
5
5
7
7
2 Important! Migration information
2.1 Securing projects from previous versions . . . .
2.2 Updating to the new version of the unbound
modules . . . . . . . . . . . . . . . . . . . . .
10
3 Installation
3.1 Environment variable: known problem . . . . .
3.2 Jubula components . . . . . . . . . . . . . . .
13
13
14
4 Windows installation
15
5 Mac installation
17
6 Unix installation
19
7 Database configuration
7.1 Using the embedded database with Jubula . .
7.2 Using an Oracle database with Jubula . . . . .
7.3 Using a MySQL database with Jubula . . . . .
21
21
21
22
8 Uninstalling Jubula
25
install V5.1.00118
May 19, 2011
9
9
3
Jubula Installation Manual
4
May 19, 2011
install V5.1.00118
System requirements
Chapter 1
System requirements
1.1
Hardware requirements
Since Jubula is Java-based, it is theoretically independent of
any specific hardware platform, and can run on any hardware
setup for which a Java implementation exists. However, certain minimum resource requirements should be met, as stated
below.
Minimal setup
• A 1 Ghz processor
• 512MB random access memory
• 350MB free hard drive space
• 300MB temporary space during installation
Recommended setup
• A 2 Ghz processor
• 1GB random access memory
1.2
1.2.1
Software requirements
Supported operating systems
The following operating systems are supported by Jubula:
• Microsoft Windows (tested on XP, Vista and Windows 7)
install V5.1.00118
May 19, 2011
5
Jubula Installation Manual
• Linux (tested on fedora 11 and centos 5 with GTK)
• Mac OSX (not for SWT AUT’s)
Although the software may run on other systems, we cannot
guarantee that Jubula will run properly on them; nor can we
support an installation on such systems.
1.2.2
Supported Java environments
Jubula client component (Integrated Test Environment, ITE):
JRE version 1.5 minimum
Jubula server component (AUT Agent): JRE version 1.4 minimum
AUT: JRE version 1.4 minimum
Java 1.6 is provided in the Jubula installation.
For the ITE, you will need a 32-bit Java version. The operating
system you use can be 32 or 64 bit, however.
1.2.3
Database requirements
Jubula supports Oracle 9-10 as a multi-user database. There
is an embedded database which is installed with Jubula, but
we only recommend using this for demo purposes.
Other databases may work, as supported by Eclipse Link, but
we can offer neither guarantee of their proper use nor technical support.
1.2.4
Firewalls and Jubula
Jubula has to be able to perform interprocess communication in order to run tests. No information is sent to external
sources during this process.
The ports required by Jubula are:
1. From the ITE to the AUT Agent: this port is defined in the
Jubula preferences.
2. From the AUT to the ITE: this port is dynamically chosen,
and cannot currently be defined. Therefore, any ports available on your test machine must also be open on the machine from which the test is being run.
6
May 19, 2011
install V5.1.00118
System requirements
If opening all ports in this way is not an option, we recommend using the Jubula test executor on the test machine to
run the tests, so that all communication is done locally.
1.2.5
Supported Eclipse versions
Eclipse RCP AUT’s must be based on version 3.1 or higher of
Eclipse to be tested with Jubula.
1.3
AUT Agent requirements
The AUT Agent requires a system with a TCP/IP-capable network. To run the server, the system should have at least 16
MB free random access memory. Additional requirements for
the AUT Agent depend on the application under test (AUT).
1.4
Java policies and security managers
If the AUT uses a security manager (or, in some cases, a Java
Policy), please be aware that the Jubula service component
requires permission to create and use ClassLoader instances.
Most policies will not permit this action for security reasons.
The service component uses the ClassLoader to separate the
program code used to inspect the AUT from the AUT itself as
much as possible.
To grant the necessary permission, please use the following
policy snippet (please use a personal installation directory instead of the Jubulainstallation directory).
grant {
permission java.io.FilePermission "<<ALL FILES>>",
"read, write, delete, execute";
permission java.lang.RuntimePermission
"getClassLoader";
permission java.lang.RuntimePermission
"createClassLoader";
permission java.lang.RuntimePermission
"setContextClassLoader";
permission java.lang.RuntimePermission
"accessDeclaredMembers";
permission java.lang.RuntimePermission
"modifyThreadGroup";
permission java.lang.RuntimePermission "exitVM";
permission java.lang.reflect.ReflectPermission
"suppressAccessChecks";
install V5.1.00118
May 19, 2011
7
Jubula Installation Manual
permission java.util.logging.LoggingPermission
"control";
permission java.util.PropertyPermission "*",
"read, write";
permission java.net.SocketPermission "*",
"accept, connect, listen, resolve";
permission java.awt.AWTPermission
"listenToAllAWTEvents";
permission java.awt.AWTPermission
"showWindowWithoutWarningBanner";
permission java.awt.AWTPermission "createRobot";
permission java.awt.AWTPermission "accessClipboard";
permission java.awt.AWTPermission "accessEventQueue";
};
If these permissions are not granted, a SecurityException will
be thrown when the AUT is started. This means that the AUT
cannot be tested by Jubula.
8
May 19, 2011
install V5.1.00118
Important! Migration information
Chapter 2
Important! Migration
information
2.1
Securing projects from previous versions
If you have an older version of Jubula installed, we recommend that you follow these steps:
1. From the old version of Jubula, export and backup all the
Projects from the database.
Make sure you also export and back up any library
Projects used in your tests, e.g. the unbound modules
Projects.
2. Back up any extensions you have made to Jubula: any customized plugins and implementation classes you have written.
3. Uninstall the old version of Jubula.
4. Clear (empty) the database schema for all necessary Jubula
users. You can do this via a database administration tool
which will let you carry out the action Drop Tables.
If you have an Oracle database and are upgrading from
Jubula 4.3, then you can use the SQL script installed
with Jubula in the migration directory to clear your
database.
install V5.1.00118
May 19, 2011
9
Jubula Installation Manual
5. Install the new version of Jubula.
If you have AUT Agents running on other machines, be
sure to install the new version of the AUT Agent there
too.
6. Add any extension plugins you backed up from the old
version.
If you are testing RCP AUT’s, bear in mind that you will
need to remove the old version of the RCP Remote Control plugin from your application and insert the new
version in its place. We also recommend starting your
application with -clean to ensure that the old RCP Remote Remote Control plugin is no longer used.
7. Start Jubula.
2.2
Updating to the new version of
the unbound modules
We recommend that you always update the version of the
unbound modules Projects to the new versions installed with
Jubula. You can do this via the Project properties in the ITE.
This is described in the user manual in the Tasks section under
Projects.
You should also check to make sure that your current tests do
not use any modules that have become deprecated.
1. In the Test Case Browser, open the category:
unbound_modules/DEPRECATED_modules
2. For the latest version or versions, select each module marked
as deprecated and press »F7«. If this module is used in your
tests, the places will be shown in the search result view.
3. For any deprecated modules, look in the new unbound
modules for the new version of the module, or read in
the release notes for a description of the suggested new
module.
10
May 19, 2011
install V5.1.00118
Important! Migration information
4. Add the new module to your test and copy over the data
and component names from the old module to the new
module. Remove the old module and save the Test Case.
install V5.1.00118
May 19, 2011
11
Jubula Installation Manual
12
May 19, 2011
install V5.1.00118
Installation
Chapter 3
Installation
Jubula uses a graphical installer to make installation as straightforward as possible.
You don’t need administrative privileges to install Jubula, but
the folder where the software will be installed must be writable
and allow program execution.
See the following sections for information on installing Jubula
on Windows and Unix systems. For installation on other platforms, please follow the Unix installation procedure, and adapt
the instructions as necessary.
3.1
Environment variable: known problem
There is a known problem with an environment variable which
is installed with certain products, including other test tools,
and may not be uninstalled when these products are uninstalled.
The variable is called ”_JAVA_OPTION” and causes problems
for Jubula and possibly also for other Java-based software.
To see if this variable is installed on your computer, rightclick on the ”my computer” icon on your desktop and select
”properties”.
In the dialog which appears, select the ”advanced” tab and,
at the bottom, click on the ”environment variables” button.
You will see a list of environment variables on the computer.
If the ”_JAVA_OPTION” variable is present, and you have uninstalled the program which used it, then you can simply remove the variable.
install V5.1.00118
May 19, 2011
13
Jubula Installation Manual
3.2
Jubula components
The Integrated Test Environment (ITE): This is where test
are created. Tests can also be executed from the client.
You can think of this as the main application. The ITE can
also run headless – the test executor.
The AUT Agent: This component is responsible for controlling the AUT during test execution. It must be installed on
the machine(s) where you want your AUT and tests to run.
It requires a network connection to communicate with the
ITE.
During the installation process you can choose between different bundles of these programs to be installed:
• Jubula, this bundle includes
– the ITE and test executor
• AUT Agent, this bundle includes only the AUT Agent, which
handles the testing of your AUT.
• Jubula Documentation, this bundle includes the PDF Documentation.
14
May 19, 2011
install V5.1.00118
Windows installation
Chapter 4
Windows installation
1. Browse to the directory where you saved the setup file
when you downloaded Jubula.
2. Double-click the file ”setup.exe”.
3. A welcome screen appears (Figure 4.1 → page 15 ). Click
”Next” to begin installation.
Figure 4.1: Welcome Screen
4. The license agreement will appear. Read it and accept it
to continue. You can view and print this license later. It
is saved in the Jubula installation directory and is called
license-agreement.txt.
install V5.1.00118
May 19, 2011
15
Jubula Installation Manual
5. At the next dialog, choose where to install Jubula. You can
search or enter a directory or use the default. Click ”Next”.
6. Choose the components to be installed. You can install the
AUT Agent and the ITE on different machines if you want
to. If this is the case, carry out the installation for the other
component (AUT Agent or ITE) later.
To be able to access the manual as a .pdf file, install the
Jubula documentation. Click ”Next”.
7. Choose a start menu folder to create the shortcuts in. If
you are installing as an administrator, there is a checkbox
with the option to install the shortcuts for all users. To
continue, click ”Next”.
8. The selected components will be installed.
9. Once the installation is finished, a dialog appears to confirm this (Figure 4.2 → page 16 ).
Figure 4.2: Installation complete
10. Click ”Next” and then ”Finish” to exit the installation wizard.
16
May 19, 2011
install V5.1.00118
Mac installation
Chapter 5
Mac installation
1. Browse to the directory where you saved the setup file
when you downloaded Jubula.
2. Double-click on the setup.dmg icon. The setup directory
will open. This directory must later be ejected from the
desktop.
3. Double-click on the ”GD Installer” icon.
4. From this point, follow the instructions for the Unix installation ( → page 19) .
install V5.1.00118
May 19, 2011
17
Jubula Installation Manual
18
May 19, 2011
install V5.1.00118
Unix installation
Chapter 6
Unix installation
The following instructions may vary according to the vendor, version, and specifications of the operating system being
used. Please adapt them as necessary. Consult the operating
system documentation for details.
1. From the command shell, navigate to the directory where
you saved the setup file you downloaded.
2. Launch the installation program by starting the script:
./setup.sh
Because the files are being decompressed, this make take
some time.
3. The license agreement will appear. Read it and accept it
to continue. You can view and print this license later. It
is saved in the Jubula installation directory and is called
license-agreement.txt.
4. At the next dialog, choose where to install Jubula. You can
search or enter a directory or use the default. Click ”Next”.
5. Choose the components to be installed. You can install the
AUT Agent (the server component) and the ITE on different
machines if you want to. If this is the case, carry out the
installation for the other component (ITE or AUT Agent)
later.
To be able to access the manual as a .pdf file, install the
Jubula documentation. Click ”Next”.
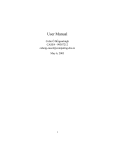
6. Choose the directory in which symlinks for Jubula should
be created (Figure 6.1 → page 20 ). The directory must
be writable by the user installing the program, i.e. a nonadminstrator may use his home directory. Symlinks should
be created in a folder contained in the $PATH variable.
install V5.1.00118
May 19, 2011
19
Jubula Installation Manual
If you do not want to create symlinks, check the box for
this option. Click ”Next” to continue.
Figure 6.1: Configuring symlinks location
7. The selected components will be installed.
8. Once the installation is finished, a dialog appears to confirm this.
9. Click ”Finish” to exit the installation wizard.
20
May 19, 2011
install V5.1.00118
Database configuration
Chapter 7
Database configuration
Jubula uses a database to store Projects. The necessary tables
for the database are created automatically by Jubula. For this
reason, it is important to use a clean database with no other
tables in it.
You can configure the type of database to use in the ITE via
the preferences. The following sections give some advice on
configuring the database setup for optimum use with Jubula.
7.1
Using the embedded database with
Jubula
The embedded database is the default database. If you do not
specify a different database, a connection will automatically
be made to the embedded database.
The embedded database is a H2 file-based database. It is
saved to:
home/.jubula/database
We recommend only using the embedded database for
demo or tryout purposes.
7.2
Using an Oracle database with Jubula
Jubula is tested with Oracle and we recommend using an Oracle or Oracle Express database for working with Jubula.
install V5.1.00118
May 19, 2011
21
Jubula Installation Manual
7.2.1
Some tips for working with Oracle Express
Problems creating the database scheme: DBA rights
There is a known issue with Oracle Express when creating
database schemes with DBA-rights. In some cases, the creation of the database scheme may fail. To avoid this problem,
do not use DBA-rights when creating the database scheme.
Increasing sessions and processes
Oracle Express uses a relatively small amount of sessions. Insufficient sessions can lead to problems when working with
Jubula. To combat this problem, the sessions and processes in
Oracle Express should be set higher.
We recommend 100 as a suitable amount. The sql script to
do this looks like this:
sqlpls / nolog
connect / as sysdba
alter system set sessions=100 scope=spfile;
alter system set processes=100 scope=spfile;
quit
You must run the script as an administrator and restart the
database once the script has run.
UTF-16 support
If you want to test AUT’s which run in languages such as
Japanese, you will need the universal edition of Oracle Express, which supports UTF-16 character encoding. The ISO8859 edition of Oracle Express does not support Japanese
(and similar) characters.
User roles
When creating users for the database, bear in mind that each
user must have the roles connect and resource to be able to
work with the database.
7.3
Using a MySQL database with Jubula
Users working with a MySQL database may want to increase
the maximum allowed packet size to avoid problems during
the communication of large amounts of information (more
than one MegaByte) between the AUT Agent and the ITE.
22
May 19, 2011
install V5.1.00118
Database configuration
To change the default packet value, you must:
1. Log into the MySQL command line client.
2. Enter the following into the console:
SET GLOBAL max_allowed_packet=33554432
This sets a value of 32 MegaBytes (1048576 * 32 = 33554432).
3. Check that the value has been successfully set using:
SHOW VARIABLES
4. Restart Jubula for the changes to take place.
install V5.1.00118
May 19, 2011
23
Jubula Installation Manual
24
May 19, 2011
install V5.1.00118
Uninstalling Jubula
Chapter 8
Uninstalling Jubula
1. In Unix, start ./uninstall.
2. In Windows, select uninstall from the Jubula start menu.
3. A dialog box will appear to confirm this choice.
4. If you click yes, you will see a dialog which will remind you
to export your Projects from the current database, and to
backup any extensions of configurations you have used.
5. Select the options you have completed and then click ”Yes”
again to uninstall Jubula.
6. Once the program has been uninstalled, you will see a message to confirm this.
install V5.1.00118
May 19, 2011
25