1
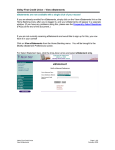
NetTeller User Manual
Table of Contents
Introduction .................................................................................................................................................. 2
Choosing a Security Image ............................................................................................................................ 3
Security Questions ........................................................................................................................................ 5
Changing your 717 Number (NetTeller ID) ................................................................................................... 7
Account Aliases ............................................................................................................................................. 8
Becoming Inactive ......................................................................................................................................... 9
Reset Your Own Password .......................................................................................................................... 10
Transferring From Account to Account....................................................................................................... 12
Setting up Alerts.......................................................................................................................................... 15
To Set Up a Balance Alert:....................................................................................................................... 15
To Set Up an Event Alert: ........................................................................................................................ 17
To Set Up an Item Alert:.......................................................................................................................... 18
To Set Up a Personal Alert: ..................................................................................................................... 19
Using Bill Pay ............................................................................................................................................... 20
Adding a Payee........................................................................................................................................ 20
Creating a One-Time Payment ................................................................................................................ 22
Signing Up for eStatements ........................................................................................................................ 24
Downloading Statements (eStatements) .................................................................................................... 27
Downloading Statements (not through eStatements) ............................................................................... 29
Using MyNetTeller ...................................................................................................................................... 31
pg. 1
4/16/2014
Introduction
This manual was created by First National Bank, for First National Bank NetTeller customers.
Throughout this manual you will find screen prints and steps for some of the functionality throughout
NetTeller. There is functionality outside of what is in this manual. Not all functionality has been
documented. If you find that there is functionality that you would like to have documented and have
instructions for, please contact the Waupaca bookkeeping department and put in a request.
Throughout this document you may find that there are fields/amounts that have been blurred in the
image. This is to protect the individual NetTeller account that was used to create these screen prints.
pg. 2
4/16/2014
Choosing a Security Image
Upon logging in for the first time and selecting your new password, you will be presented with selecting
a security image. This image will appear every time you log in to NetTeller after entering your NetTeller
ID. Seeing your security image will give you peace of mind that you have entered First National Bank’s
NetTeller and not some other fraudulent site. If you ever do not see your image, exit immediately.
Attempt to go to NetTeller again starting at www.fnbwaupaca.com and clicking on the button to go to
NetTeller. After you log in, your security image will also be displayed on every page of NetTeller either
in the bottom or top corner of the screen. Again, this is to give you peace of mind that you are at the
legitimate NetTeller site. To select your security image for the first time, follow these instructions:
1. This is the screen you will be shown when you first enter NetTeller and after you select your
new password. There are hundreds of security images to choose from. You can page through
them 6 at a time using the <<<Prev and Next>>> buttons until you find one that you like.
pg. 3
4/16/2014
2. Once you find one that you like, select the picture from the group of 6 and it will then appear in
the “Current Image”. Press the Submit button once you are certain.
3. If at a later date you find that you do not like your image, you can change it. Simply go to
Options>Personal and click on your current image to change. You will then follow the same
steps as in 1 & 2 to select a new image.
pg. 4
4/16/2014
Security Questions
The NetTeller system has security questions that you must choose and then give the appropriate
answers to. These will need to be chosen the first time that you log in and from time to time, NetTeller
will recollect these questions/answers from you. These questions will then be asked of you if you are
making a high risk transaction (high dollar amount using Bill Pay) or in case your login activity is not
typical of your normal use (you are using a different computer, a different IP address, you are coming
from a foreign country, etc.).
1. This is the screen you will be presented with for choosing your security questions and entering
the answers. You will need to choose 3 different questions and give the appropriate answers.
2. When choosing the questions and entering the answers, make sure that you spell names
correctly. When you are prompted to answer these at a later time, you will want to make sure
you can get the answers right. After you have chosen all 3 questions and answered them all
pg. 5
4/16/2014
completely, select the Submit button.
3. Upon clicking Submit, you will be presented with the questions and answers again to confirm
them. Make sure they are what you want them to be since there is no way for you to manually
reset these questions/answers. The only ways is if NetTeller prompts you for a recollection or if
you were to contact First National Bank bookkeeping.
4. Upon continuing, you will then be prompted to confirm your email address. You will want to
make sure this is correct for the notifications regarding eStatements, alerts, or resetting your
password will go through your email account.
pg. 6
4/16/2014
Changing your 7170 Number (NetTeller ID)
When you first use the NetTeller system, you will be given a NetTeller ID. This ID will be a 12 digit
number starting with “7170”. You can keep this ID as your ID to login to the system, or it is possible to
change it to a more meaningful username if you wish. (Make sure you hold on to the original 7170
number in case you have problems in the future.)
1. To change your NetTeller ID, go to the “Options” button on the top menu
2. When you go to Options, it will default to the “Personal” tab.
3. Locate the “Modify Login Information” section on the page. Here it will display your NetTeller ID
4. In the “Enter New” text box, you may enter in a different ID to use for your username for the
system. This is also known as an alias. As you can see from the screen, the alias must be
between 4 and 12 characters, consist of at least 1 letter and numbers are allowed. Also, the
listed special characters are allowed.
5. After you have entered the alias that you wish to use, select the “Submit” button to save your
changes.
pg. 7
4/16/2014
Account Aliases
Your NetTeller will not contain your actual account numbers for the accounts that are linked. Rather it
will be something like this:
You have the ability to change these names to more meaningful names if you wish. We recommend
that you do NOT change them to be your actual account numbers. To change these names:
1. Select Options > Accounts from the top menu bar.
2. You can then type in different names in the “New Account Pseudo Names” fields. Once you
have created the names you wish, click the Submit button.
pg. 8
4/16/2014
Becoming Inactive
If you allow your NetTeller to become inactive for more than 1 year, your NetTeller ID will be deleted
from the system. This is done for your own safety so that someone does not compromise your account
without you being aware of it.
pg. 9
4/16/2014
Reset Your Own Password
You can set up NetTeller so that if you forget your password you do not need to call the bank.
1. Go to the “Options” button on the top menu
2. When you go to Options, it will default to the “Personal” tab.
3. Locate the “Modify Personal Settings” section on the page.
4. Enter a “Password Reset Question” and a “Password Reset Answer” in the two fields. You will
want the question to be something that only you know the answer to, that it difficult to know.
5. Make sure your “Current Email Address” is correct. This will need to be correct in order to use
the Self Password Reset funcationality.
6. Once you have entered them, click the “Submit” button at the bottom of the page.
Once you have done these steps, if in the future you need to reset your password, you will enter in your
NetTeller ID and then click the “Forgot my Password” link. You’ll then need to enter your NetTeller ID,
the email address that we have on file and specify what you like the email subject to be.
pg. 10
4/16/2014
If you entered in the correct email address and NetTeller ID, you will be sent an email (make sure you
check your junk folders with a link. Click the link and then you will need to enter in your NetTeller ID
again along with the answer to your Password Reset Question. Upon entering these correctly, you can
then reset your password.
pg. 11
4/16/2014
Transferring From Account to Account
NetTeller is designed so that you can transfer money between your own accounts. You can move
money from your checking to your savings, savings to checking, checking to a loan. (At this time,
NetTeller is not able to do transfers from one financial institution to another.) To transfer money, follow
these instructions:
1. From the main NetTeller screen, click on “Transfers”.
2. You will then be presented with this screen where you can choose where you want the money
to come FROM and where you want the money to go TO.
3. Make the appropriate selections and then enter in the amount. If you want to regularly transfer
money to an account for savings purposes or for a loan payment, you can change the frequency
pg. 12
4/16/2014
drop down appropriately for your needs.
a. For a one-time transfer, the transfer date will default to today’s date. You can change
this if you like.
b. For a reoccurring transfer, you will need to make the appropriate selections based on
the frequency. For instance, in this example, I am making a transfer two times a month,
on the 5th and the 22nd of each month and will do this starting now and ending on
12/28/2025.
4. Entering a transfer memo is optional. You can enter one describing the transfer if you like.
5. Once you have created the transfer correctly, select the Submit button.
6. You will then see a confirmation screen describing the transfer. You will receive a confirmation
number for the transfer.
7. Note: You will only be able to transfer money between the accounts that are linked to your
NetTeller. If you are missing an account, contact Waupaca Bookkeeping to have the account
added to your NetTeller. Also, if an account is dormant, you will not be able to transfer money
pg. 13
4/16/2014
to/from that account until it is taken off of dormancy. (Contact Waupaca bookkeeping at 715258-8381 to have an account taken off of dormancy.)
pg. 14
4/16/2014
Setting up Alerts
NetTeller has the ability to alert you for certain events. For example, you can receive an email if your
account balance goes above or below a certain limit. To set up alerts:
1. Go to Options > Alerts in the top menu bar.
2. There are 4 different type of alerts:
a. Events (receiving a wire, bill pay being changed, reoccurring transfers expiring, maturing
CDs)
b. Balance (a balance going above or below a threshold)
c. Item (when an item clears)
d. Personal (alerted with aa message on a certain date)
To Set Up a Balance Alert:
1. Go to the Balance tab or click on “Add Balance Alerts” on the Alerts Listing tab.
pg. 15
4/16/2014
2. You will then see this screen:
3. You will need to make the appropriate selections based on how you want to be alerted:
a. Via email or at login
b. What account you want to be alerted regarding
c. If the balance goes Above or Below
d. The amount that you want as the threshold
4. When you are done, it should look something like this:
5. Click Submit when you are done.
6. If you selected an email alert, you will then be asked to confirm your email address so that the
alert is delivered to the correct email account.
7. It will then be added to the Alerts Listing:
pg. 16
4/16/2014
To Set Up an Event Alert:
1. Go to the Event tab or click on “Add Event Alerts” on the Alerts Listing tab.
2. You will then see this screen:
3. Select the checkbox next to any of the events that you are interested in receiving an alert for.
(Currently NetTeller is configured only to give these alerts at login. If you wish to receive these
via email, please contact Waupaca bookkeeping to put in the request.)
4. Once you have selected the events to alert on, select the Submit button.
pg. 17
4/16/2014
To Set Up an Item Alert:
1. Go to the Item tab or click on “Add Item Alerts” on the Alerts Listing tab.
2. You will then see this screen:
3. Select the checkbox next to Login. Enter in the check number that you are wanting to be alerted
on. Then select the account in the drop down. (Currently NetTeller is configured only to give
these alerts at login. If you wish to receive these via email, please contact Waupaca
bookkeeping to put in the request.)
4. Once you have configured the alert, select the Submit button.
pg. 18
4/16/2014
To Set Up a Personal Alert:
1. Go to the Personal tab or click on “Add Personal Alerts” on the Alerts Listing tab.
2. You will then see this screen:
3. Select the checkbox next to Login. Select the date in which you want to be alerted. Enter in the
message that you want to be given on the selected date. (Currently NetTeller is configured only
to give these alerts at login. If you wish to receive these via email, please contact Waupaca
bookkeeping to put in the request.)
4. Once you have configured the alert, select the Submit button.
pg. 19
4/16/2014
Using Bill Pay
Bill Pay is an additional feature that you can sign up for to complement your Internet Banking
functionality. (If you click on Bill Pay within NetTeller and you have not signed up to it, you will be taken
to the main screen of NetTeller.)
To pay an individual or company one-time, the high level steps are:
1. Add the payee
2. Create a One Time Payment
To pay an individual or company on a recurring basis, the high level steps are:
1. Add the payee
2. Create a Recurring Payment
These high level steps are broken down below.
Adding a Payee
1. Click on the Bill Pay button on the top menu.
2. Click on the “Add Payee” button in the menu
3. If you will be paying a company, click on “Pay a Company”. If you will be paying an individual,
click on “Pay an Individual”. This example will pay a company.
pg. 20
4/16/2014
4. Fill in the fields for the company that you are paying, using your bill as a guide. (The following
example has fictitiuos information for the company.)
5. Click the “Search” button when you are done. At this time, the NetTeller system is searching to
see if this company has information to accept electronic payments.
6. Upon completing the search. NetTeller will tell you if it found the payee to be an electronic
payee. If NetTeller could not locate the payee, you will receive this message:
7. If you want to pay this company via check through Bill Pay, click the “Add Check Payee”. Upon
clicking this, the payee will display as in step 8 except it will say “Check” instead of “Electronic”
after payee name.
8. If NetTeller was able to find the payee, the screen will refresh and will display like this:
pg. 21
4/16/2014
9. Click the “Submit” button to continue.
10. The screen will then refresh showing you all of the Payees that you entered on the Payee
screen. It will also show a message saying that the Payee was successfully added:
Creating a One-Time Payment
1. Within Bill Payment, select “New Payment” in the secondary menu.
2. The screen will default to the “Quick Payment”. If you are paying a one-time payment, you can
either go through the Quick Payment screen or the Add Payment screen. If you need to pay on
a recurring basis (say your mortgage to another bank) then you will need to go through the “Add
Payment screen.
3. To pay one-time through the Quick Payment screen, use the checkbox to select which payee(s)
you wish to pay and then click “Continue”.
4. On the next screen, enter in the amount you wish to pay, the date, and the memo (optional).
There will be a drop-down for you to select which account will be paying the money. However,
when you sign up for Bill Pay, you will select at that time which accounts should be linked to Bill
pg. 22
4/16/2014
Pay. Most people only have their Checking Accounts linked to their Bill Pay. Once you have
made these entries, select the “Continue” button.
pg. 23
4/16/2014
Signing Up for eStatements
eStatements (also known as eDocs) is a great feature to become more green and to reduce the amount
paper you need to keep and or shred! eStatements are available to any NetTeller customer. Some of
the advantages are:
•
•
•
•
•
•
Better security – your financial statements are not traveling through the mail.
Reduce the amount of paper in your home/office.
No need to shred statements – since you don’t have the paper.
eStatements will store the last 18 months of statements for you online! (Note: You will not
have 18 months of statements immediately. These will accumulate over time.)
You can get your statement wherever you are, even when you are on vacation.
Be green! It’s better for our environment.
To sign up for eStatements:
1. Click on the eDocs button of the main top menu.
pg. 24
4/16/2014
2. If you have not enrolled in eDocs, you will be taken to the Enrollment screen:
3. The first step is to select which accounts you wish to receive eStatements for. By default, all of
your accounts and all documents will be selected for you. If you wish to deselect any of these
accounts, click on the “Details” link on the page:
4. Next, confirm your email address. This email address will be receiving the notifications when an
eStatement is available. So you will want to make sure the email address is correct so you
receive the email.
5. Third, select a security phrase. This security phrase will be in the email from the bank when a
statement is available. It can be, “I love summer”, “Hunting is great!”, or “I miss my cat”. This is
a phrase so that you know that the email coming from the bank is legitimate and not a phishing
attempt.
6. Next, enter the enrollment passcode. To see the passcode, click on the “click here” link on the
page. You will then be presented with what the passcode is. This is a security feature of the
website.
pg. 25
4/16/2014
7. Scroll through and read the eStatement Disclosure statement. If you agree with these terms,
check the box for “I agree to the listed terms”
8. Finally, select the Enroll Now button at the bottom of the screen.
pg. 26
4/16/2014
Downloading Statements (eStatements)
If you have signed up for eStatements you will receive an email from the bank notifying you when a
statement is ready for you to view within NetTeller. To view the statement, follow these instructions:
1. Click on eDocs in the top menu bar.
2. By default you will be taken to the Statements/Notices page within eDocs. Here you will be able
to see your statements for the accounts that selected to receive eStatements for. To view
another account’s statements, change the drop down selection for “View Statement/Notices
For:”
3. To view the statement, click the “View” link next to the month/year of the statement you wish
to view.
4. In Internet Explorer, you will most likely get a popup at the bottom of the screen asking if you
want to open or save or cancel the download of this file.
pg. 27
4/16/2014
5. To open it (without saving it), click the Open button. The file will then open in your PDF viewer.
(Most likely Adobe Reader.)
6. If you wish to save it first, select Save or Save As. If you select Save As, you can select where you
want the file to be saved on your computer. If you select Save,
pg. 28
4/16/2014
Downloading Statements (not through eStatements)
If you do not sign up for eStatements (eDocs), NetTeller can give you your previous month’s statement
for an account. (At certain times of the month, it will be able to give you the month prior to the month
previous. However this is not guaranteed.) Note: for checking accounts, these statements only
contain the transaction activity, they do not contain the check images. In order to get statements with
the check images, you will need to sign up for eDocs. Your statement that you download will not
contain your actual account number. Your account number will be listed as “@XXXXXXXX@”.
1. From the main NetTeller screen, select the drop down next to the account in which you wish to
retrieve the statement. Select “Statements” from the drop down.
2. You will then be taken to this screen.
3. You will need to make a selection in the drop down next to the statement you wish to view and
select how you wish to view the statement. You can either view it as a PDF file (Adobe Reader
will be needed to view the file), HTML (viewing it within Internet Explorer or another browser)
or you can view it as text ().
a. If you select PDF, you will then be taken to this screen:
b. Follow the instructions on the screen. There may be some variation based on how your
browser downloads file.
c. If you select HTML, the statement will be the next screen that you are taken to. (For this
screen, many of the fields were blurred to protect the privacy of the person whose
pg. 29
4/16/2014
account was used for this example. Your statemnet will have real data where it is
blurred on this screen.)
d. If you select Text, you will be taken to this screen:
e. Select the link and follow the instructions. There may be some variation based on how
your browser downloads file. Depending on your computer and what programs you
have installed on it, your statement will most likely open within Notepad.
pg. 30
4/16/2014
Using MyNetTeller
My NetTeller provides everything that NetTeller provided and gives you, our customer, a means to
customize the content so that you can see the accounts and information that is important to you!
1. In order to access the new My NetTeller, click on the My NetTeller link that is in the upper left
hand corner:
2. Upon clicking on My NetTeller, you will see this screen:
pg. 31
4/16/2014
3. From here you can customize which widgets you see in the left column, center column and right
hand column. A “widget” is a component of a user interface. For example, in the screen above,
you can see widgets in the center column for My Accounts, Recent Statements, Recent
Transactions, and Recent Transfers.
In My NetTeller, you can decide what you want to have visible to you on this page. Click on the
“Configure This Page” link in the upper left corner to customize which widgets you want to see:
4. Once you click on Configure This Page, you will see this screen:
5. You can either drag and drop the items from one side to another or click on the + or – to add or
remove them from your visibility. The drop down at the top will tell you which column you are
configuring. In this example above, I am configuring the Left Column and I have Account
Balances, GoTo, Messages, Transfer, Alerts and Downloads as visible. Make Payments is not
pg. 32
4/16/2014
visible. If I want to make it visible, I would click the + next to it and it would move over and
become visible. If I didn’t want to see the Messages widget, I would click the – next to and it
would move into the section of not visible.
6. You will need to do this same process for the Left Column, the Center Column and Right Column
by clicking on the dropdown button (Select Column to Configure) if you want to change what is
visible by default. Once you have made your changes, be sure to click the Save button in the
button right hand corner.
7. Once you have configured which widgets are visible, you will then need to configure each
widget to determine which accounts you have visible in them. For instance, in my Accounts
Balances widget (left column) I really only care to see the balance of my Checking and Money
Market Account. To do this, I click on the gear icon for Configure Account . The screen will look
like this:
pg. 33
4/16/2014
8. To add an account to the widget, click the + symbol next to the account you wish to add. Once
you have added the accounts, click Save to continue.
9. Upon saving, your widget will now be populated with the accounts that you had selected, like
this:
pg. 34
4/16/2014
10. You will need to repeat this process for each of the widgets that allows for customizing the
accounts that you see. Remember to click Save upon making changes, or if you want to revert
back to what you previously had, click Cancel and do not Save.
11. Finally, to make sure that My NetTeller is your initial screen going forward upon login, make
sure you check the checkbox for “Set as Start Page” in the upper left hand corner:
12. Once you check this box, you will be prompted to confirm this setting. Click “Yes” on the next
screen when asked if you are sure.
13. The configuring of the page and customization is a set-up process that you will not need to do
often. Chances are, you will probably only do it one time unless of course you change or add
accounts at First National Bank.
pg. 35
4/16/2014