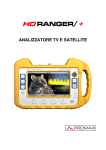
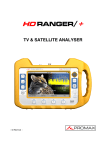
Download NetUpdate 4 user manual (control software for PROMAX equipment)
Transcript
NetUpdate-4
Control Software for PROMAX equipment
INSTRUCTION MANUAL VERSION
Version
1.0
Date
January 2014
Software Version
4.15
TABLE OF CONTENTS
1
INTRODUCTION ..........................................................................................3
1.1 Description .......................................................................................3
1.2 Hardware and software requirements ...................................................3
1.3 Installation .......................................................................................4
1.3.1 Installation in WINDOWS 8..............................................................7
1.3.2 Legal conditions.............................................................................8
1.4 Connection between PROMAX equipment and the PC ..............................9
2 OPERATING INSTRUCTIONS ....................................................................... 10
2.1 Starting ......................................................................................... 10
2.2 Communicating with the equipment ................................................... 10
2.3 Description of the main window ......................................................... 11
2.4 Applications .................................................................................... 13
2.4.1 Automatic Firmware Update .......................................................... 13
2.4.2 Manual Firmware Update .............................................................. 14
2.4.3 Run PRO file................................................................................ 17
2.4.4 Resource Updates ........................................................................ 19
2.4.4.1 Description............................................................................. 19
2.4.4.2 Operation .............................................................................. 20
2.4.4.3 Resource Update Options ......................................................... 21
2.4.5 Advanced Utilities ........................................................................ 22
2.4.5.1 Channel Plan .......................................................................... 22
2.4.5.2 Datalogger ............................................................................. 32
2.4.5.3 Terminal ................................................................................ 33
2.4.5.4 CSV Viewer ............................................................................ 35
2.4.5.5 Text Editor ............................................................................. 35
2.4.5.6 Log ....................................................................................... 36
2.5 Main Window Options ....................................................................... 36
2.5.1 Language selection ...................................................................... 36
2.5.2 Notification area .......................................................................... 37
2.5.3 Promax News .............................................................................. 38
2.5.4 Email Log File.............................................................................. 38
2.5.5 Check Software Updates ............................................................... 38
2.5.6 Start NetUpdate at Windows Startup .............................................. 39
2.5.7 Starting in Recovery Mode ............................................................ 39
ANNEX 1 MAKING CHANNEL PLANS FOR SATELLITES FROM .INI FILES ............... 40
ANNEX 2 TYPES OF REPORT ......................................................................... 47
January 2014
January 2014
NetUpdate CONTROL SOFTWARE
1 INTRODUCTION
1.1
Description
This software is a software application developed to allow communication
between a PC and a compatible PROMAX equipment.
PROMAX products compatible with this software are:
HD RANGER+
∗
TV EXPLORER
TV EXPLORER
TV EXPLORER
TV EXPLORER
TV EXPLORER
EN-106
II
HD
HD+
HD LE
It has the following functions:
Update the main firmware of the equipment.
Open/Receive/Save/Print data files captured with the Datalogger function.
Transmit/Receive/Edit/Save channel plans.
Create/Edit channel plans.
1.2
Hardware and software requirements
To use the program properly, your computer must meet the following
requirements:
►
Hardware requirements
Minimal Configuration
IBM PC compatible with Pentium or higher.
100 Mb free available space on a hard drive.
Available USB port (in the case of TV EXPLORER a serial port is
required).
∗
In the HD RANGER+ equipment, channel plan is called channel set.
January 2014
Page 3
►
Software requirements
To run this software is imperative to have a Windows® O.S. (XP/7/8). It is
also very important to have an internet connection.
1.3
Installation
It is recommended to download and install the last version of the NetUpdate
software. This software is available at the download area of the PROMAX
website:
Click on the Download menu at www.promaxelectronics.com.
Click on "Firmware and Software".
Select your equipment on the drop-down menu.
It will show all the software associated with the equipment selected.
Click on NetUpdate and Save to start the download.
The download process takes between 1 and 5 minutes, depending on the
Internet connection:
Figure 1.
Page 4
January 2014
Once downloaded, go to the folder where the file has been saved and unzip
it:
Figure 2.
Run the NUSetup_v4.xx file (where “xx” is the current version of the
software) and select the language on the drop-down menu:
Figure 3.
January 2014
Page 5
Follow the configuration process pressing the “Next” button. The
installation can run occasionally other program configuration processes.
Continue pressing the “Next” button until the installation program had
finished:
Figure 4.
Once installed, the program shows the message "NetUpdate installation
was completed successfully”.
Figure 5.
Page 6
January 2014
Once installed, NetUpdate checks periodically if there are available new
software or firmware updates for the equipment, and it offers the
possibility of download and install it.
NOTE: The products within the PROMAX family require special drivers to connect
and be recognized by the computer operating system. The driver installation
is an automated process that takes place during the installation of
NetUpdate.
PLEASE DO NOT CONNECT THE EQUIPMENT TO THE COMPUTER BEFORE
THE NETUPDATE PROGRAM HAS BEEN INSTALLED.
1.3.1
Installation in WINDOWS 8
By default Windows 8 doesn’t allow to install unsigned drivers. For this reason,
in order to be able to install NetUpdate4 (and all the drivers) please follow this
procedure:
Move your mouse to the bottom-right corner of your screen and click
over the “Settings” button.
Select “Change PC Settings”.
Click on the “General” category.
On the right panel, scroll down and click the “Restart now” button
located on the “Advanced startup” category.
Once restarted, a screen titled “Choose an option” appears. Click
“Troubleshoot” tile.
Select “Advanced options”.
Select the “Startup Settings” tile then click the “Restart” button to
reboot the computer again.
On the Startup Settings screen, tap the F7 or 7 key on your keyboard
to select the “7) Disable driver signature enforcement” option.
Windows 8 will immediately boot to its typical lock screen. Sign into
Windows 8 as you normally would — everything will look the same,
except Windows will no longer demand driver signatures until you next
reboot.
Install now NetUpdate by launching the NU4Setup_vxxx.exe file and
follow the instructions showed on the installation wizard. This
procedure will automatically install the drivers for the meters of the
product ranges “TVEXPLORER HD” and “HD RANGER”.
January 2014
Page 7
Reboot Windows.
Now you can launch and use NetUpdate.
NOTE:
1.3.2
If you have problems with access permissions in Windows Vista,
Windows 7 or Windows 8, click the right mouse button on the icon
NetUpdate and select "Run as administrator".
Legal conditions
Read the contract carefully in its entirety before you install the program.
Installing the program means that you have accepted the following terms and
conditions.
1.
SUBJECT. The subject matter of this Contract is the grant to the end user
by PROMAX ELECTRONICA, S. L. a non-exclusive and non-transferrable
personal license to use this version of the program for an indefinite period of
time.
2.
LICENCE. The Licence of Use granted hereby refers exclusively to the end
user, who shall be considered legitimised to use the program only.
3.
OWNERSHIP OF THE SOFTWARE. The end user acknowledges that the
program referred to in this Contract is the exclusive property of PROMAX
ELECTRONICA, S. L. The end user may only acquire the personal and nontransferrable right to use the software that is the subject matter of this
Contract for the purposes herein expressed.
Since the program granted is protected by industrial and intellectual
copyright, infringements by the user of these aforementioned obligations will
give rise to the corresponding liabilities in accordance with the legislation in
force.
4.
RESOLUTION. The licence or authorisation of use is granted for an
indefinite period of time. However, in the event of non-compliance by the
end user with any of the clauses hereof, the Contract may as of right be
terminated without any legal formality.
5.
EXPLANATORY PROVISION. Not with standing the accuracy of the
software granted, PROMAX ELECTRONICA, S. L. is fully exempt of liability
for consequences arising from any possible omission existing in the program
or from improper use by the end user of any of the information it contains
and generates. Nor can PROMAX ELECTRONICA, S. L. be held liable for
the suitability or accuracy of the data obtained for particular purposes or
functions, since the only obligation of the latter, under this Contract, is the
provision of means and not of results.
Page 8
January 2014
1.4
6.
FINAL CLAUSE. The use of this software referred to herein signifies the
tacit and unconditional acceptance of its conditions.
7.
JURISDICTION. Both parties, explicitly waiving any rights that may
correspond to them, agree to submit all controversies that may arise from
this Contract to the jurisdiction and competence of the Judges ad Courts of
Barcelona.
Connection between PROMAX equipment and the PC
The connection between the PROMAX equipment and the PC is done by a USB
or RS232 data transmission cable.
Connect the cable to the communication port of your PC.
Connect the cable to the connector of your equipment.
Switch on the equipment.
Figure 6. Connection between a PROMAX equipment (HD RANGER+) and a PC.
January 2014
Page 9
2 OPERATING INSTRUCTIONS
2.1
Starting
Follow these steps to start working with the NetUpdate software:
Check PROMAX equipment is on.
Connect the communication cable between the PROMAX equipment
and the computer.
Run the program by clicking twice on the NetUpdate icon on the
desktop.
It appears the main window of the program.
2.2
Communicating with the equipment
Figure 7.
In order to communicate with the equipment:
In the “Select port” option at the main window, select the port where
your equipment is connected or select the “Auto” option if you are not
sure or you do not know what port is.
Press the “Detect” button. The program will look for the PROMAX
equipment on the selected port or it will scan all ports in case of the
“Auto” option.
Page 10
January 2014
If it establishes communication with the equipment, the program
shows a confirmation message and some details appears on the
“Equipment details” window. Buttons with available options for the
equipment will be enabled.
2.3
Description of the main window
The program main window it is divided into the following parts:
Title bar:
It shows the program name and options to minimize
and close.
Menu bar:
All options are accesible trough these drop-down
menus.
Equipment
Detection Window:
Equipment Details
Window:
Application
buttons:
January 2014
It allows the user to select the port to communicate
with the PROMAX equipment.
Once the PROMAX equipment connects with the
computer, the program identifies it and shows the
equipment details.
With these buttons the user can access the main
applications in the program. Only the options
compatible with the connected equipment will be
enabled. These options are accessible from several
windows.
Page 11
Figure 8.
Applications are:
Automatic firmware update:
The program detects the equipment firmware and if it does not have the
latest version installed, it is automatically updated. This is the option
recommended. This option is enabled only if the equipment is connected.
Manual firmware update:
The update is made manually by the user. It is only for advanced users. This
option is enabled only if the equipment is connected.
Run PRO file:
It runs a set of commands through a PRO file.
Resource updates:
It manages resources such as channel plans, videos, languages, etc.
Advanced utilities:
With these utilities the user can edit channel plans, dataloggers and
communicate with the equipment with basic commands.
See the chapter dedicated to each option for more information.
Page 12
January 2014
2.4
Applications
2.4.1
Automatic Firmware Update
Automatic firmware update is the most suitable way to update the firmware of
the equipment to the latest version. This type of update is recommended for all
users.
Connect your equipment to the computer by means the supplied
communication cable.
Switch on the equipment.
Click on the “Detect” button.
It starts the process to detect the equipment.
If detection is successful, data about the equipment appears on screen
and all options will be enabled.
The program automatically checks the firmware version installed on the
equipment and compares it with the version available on the server.
According to the results it shows a status message at the lower part of
the screen.
If after checking you want to automatically update, just click on
“Automatic firmware update” to start the updating process.
When enter this option, the program will compare the firmware version
available on the server with the equipment current version. If the
server version is the same as the equipment version, then there will not
be need to update and the following message will appear: "The server
reports that your equipment is up to date”.
If a new version is available on the server, the automatic update
window opens. This window contains some details about the new
firmware version, giving the option to update or not.
If you want to update your equipment to the latest firmware version,
just click the "Update" button. Otherwise, click on the "Exit" button to
return to the main window.
After clicking the Update button, you are requested to confirm that you
really want your equipment to be updated with that version. Normally
your reply should be "Yes". Otherwise, click "No" to return to the
Automatic Update window.
January 2014
Page 13
If you click the "Yes" button, then the firmware is being downloaded
automatically from the server to your PC.
This updating process may take between 5 and 30 minutes, depending
on the equipment. Please be patient and make sure nothing can
disconnect the equipment from the computer while the update process
is going on.
Please observe the user has the possibility to cancel the update (by
clicking the "Exit" button or the "Close" button), but only if it is strictly
necessary (Not recommended).
After finishing the firmware update process, it shows a confirmation
message. Otherwise, it appears a message with related information
about the error.
2.4.2
Manual Firmware Update
Manual firmware update is a manual updating process that allows the user to
choose the specific firmware version to be updated into the equipment or in case
there is no Internet connection but the user has the firmware update file on a
storage medium. It is recommended to use this function only under supervision
of a PROMAX Engineer.
Connect your equipment to the computer by means the supplied
communication cable.
Switch on the equipment.
Click on the “Detect” button.
It starts the process to detect the equipment.
If detection is successful, data about the equipment appears on screen
and all options will be enabled.
The program automatically checks the firmware version installed on the
equipment and compares it with the version available on the server.
According to the results it shows a status message at the lower part of
the screen.
Page 14
January 2014
Click on “Manual Firmware Update” to start the updating process. The
following window shows up:
Figure 9.
You can select the firmware file (INI extension) you want by clicking
the "Browse" button in the Manual Firmware Update window. You can
exit the window by clicking the "Exit" button.
January 2014
Page 15
If you click the "Browse" button, a window opens to select a file, as
shown in the following figure:
Figure 10.
On the left side of the window you will see all versions of firmware
available on the hard drive, if they exist.
To list the files at the PROMAX server, click on the "Check Server"
button at the lower left part of the dialogue box. This will list all
available firmware versions on the server and the ones that are
compatible with the connected equipment.
To download a version from the server, select the proper file and click
on the "Download to PC" button just below the "Check Server" button.
The file will be downloaded to the default folder of the program.
Page 16
January 2014
After deciding which version to be updated into your equipment, select
the adequate (.INI) file and click "Open".
Then click on the "Update" button to start updating your equipment to
the selected version. Before, starting the update process, NetUpdate
will request confirmation to update the firmware version to your
equipment.
After confirmation, the update process starts and will take up between
5 and 30 minutes, depending on the equipment. Please observe that
you have the possibility to cancel the update, should it be strictly
necessary (Not recommended).
After successful completion of the update process, a pop up will be
displayed. If the update is not successful, an error message will appear
with relevant information and suggestions as how to proceed.
2.4.3
Run PRO file
This function allows you to run a set of special commands to upgrade the
equipment performance. It is recommended to use this function only under
supervision of a PROMAX Engineer.
Connect your equipment to the computer by means the supplied
communication cable.
Switch on the equipment.
Click on the “Detect” button.
It starts the process to detect the equipment.
If detection is successful, data about the equipment appears on screen
and all options will be enabled.
January 2014
Page 17
Click on the button “Run PRO file”. On clicking this button, a dialogue
box will be opened (see next figure):
Figure 11.
In this window click the “Browse” button. Then an exploration window
opens. Locate the “.PRO” file you need and then select "Open".
Make sure that the selected “.PRO” file is for the detected equipment.
WARNING:
Sending a wrong “.PRO” file may cause severe harm to the
equipment.
After selecting the proper ".PRO" file, click the "Update" button to
execute the ".PRO" file or click “Exit” to skip the update process.
After clicking “Update”, the program will ask for confirmation to
proceed with the ".PRO" file update. Please click “Yes” to execute the
".PRO" file or click “No” to return to the Update window. If your answer
is “Yes”, then the update process will continue.
Page 18
January 2014
After finishing the firmware update process, it shows a confirmation
message. Please observe that the user has the possibility to cancel the
update, but only if it is strictly necessary (Not recommended).
Resource Updates
2.4.4
2.4.4.1
Description
Resource updates utility manages the resources such as languages, channel
plans, video, etc. in the equipment. In resource updates, a resource can be send
from a PC to the equipment, from the equipment to the PC or it can be deleted
on the equipment. Resources can also be send from the PROMAX server to a PC.
In the Resource Updates window, you can see three separate panels named
SERVER, PC and EQUIPMENT. The first time you get into the utility, it shows the
root folder for each one (see next figure).
Figure 12.
SERVER window:
It shows all the available resources at the PROMAX
server.
Options:
Server to PC:
January 2014
It copies all selected files from the server to the
folder selected on the PC.
Page 19
PC window:
It shows all the available resources in the local
folder
on
the
PC.
This
folder
is
at
“c:\Netupdate4\Resource”.
Options:
PC to equipment:
Files selected on the panel are copied from the PC to
the equipment.
Delete from PC:
Files selected on the PC are deleted.
Explore folder:
It opens and allows browsing through folders using
the windows folder explorer.
Equipment window:
It
shows all the
equipment folder.
available
resources
at
the
Options:
Equipment to PC:
It copies the selected files from the equipment to
the PC folder.
Delete from
equipment:
2.4.4.2
Selected files are deleted on the equipment.
Operation
To browse through folders:
Click twice on the name folder to access its content.
Click twice on the folder icon to exit the folder and access one level
higher.
Selected files can also be drag and drop from one window to another.
Keep in mind that user cannot drag and drop from the server to the
equipment, from the equipment to the server or from the PC to the
server.
Selected files are downloaded on the user’s PC and they are shown on
the PC window inside its corresponding folders.
Page 20
January 2014
To transfer files from the PC:
In the PC window, there will be a folder named “PC” which is used to list the
resource folders available in the PC. If you want to send the resource file(s)
from the PC to the equipment, please select one or more files from the
respective folder which is in the “PC” window and then click the “PC to
Equipment” button. The selected file(s) will be sent from the computer to the
equipment. You can also drag the desired files from PC to the Equipment, to
send them
To delete files on the PC:
If you want to delete any resource from the PC, please select the
corresponding file in the respective folder and then click the “Delete from PC”
button. You can also select multiple files to delete.
To transfer files from the equipment:
In the equipment window, there is a folder named as “Equipment” which is
used to display the list of folders in the equipment. If you want to send the
resource files from the equipment to the PC, then please click on the
corresponding one or more files from the respective folder and then click the
“Equipment to PC” button. The selected file(s) will be sent from the equipment
to the PC. You can also drag the desired file(s) from one window on to
another, to copy them.
To delete files from the equipment:
If you want to delete the resource file(s) in the equipment, please select a file
in the respective folder in the EQUIPMENT window and then click the “Delete
from Equipment” button. You will be prompted to delete the selected resource
from the equipment. You have to confirm whether to delete the resource or
not. On clicking "Exit" button the program will return to previous window.
2.4.4.3
Resource Update Options
At the top of the window there is the "Options" button which gives access to the
following settings:
Specifying Transfer Type:
You can specify the data transfer type from Equipment to PC as either
“Binary” or “Text”. Please note that “Text” mode of transfer is available only
for the Generic resources, such as Spectrum, Carrier and Constellation. These
resources will support both “Text" and “Binary” mode of transfer. Other
resources will not support “Text” mode transfer.
January 2014
Page 21
Resource file Download Path:
You can change the default download directory location to a specific location.
To do this, please select “Specific” radio button and then specify the location
by clicking “Browse” button. You can also change the download directory
location to the default location whenever needed by selecting the “Default”
radio button. After finishing everything, please click “OK” to return to the
main window.
2.4.5
Advanced Utilities
The “Advanced Utilities” button opens a window with access to three utilities.
They are:
2.4.5.1
Channel Plan.
2.4.5.2
Datalogger.
2.4.5.3
Terminal.
There is also a menu with access to these utilities:
2.4.5.4
CSV Viewer.
2.4.5.5
Text Editor.
2.4.5.6
Log.
In the following sections each one is explained in detail.
2.4.5.1
Channel Plan
Channel Plan tab can create a new Channel Plan or edit an existing Plan and send
it to the equipment. You can also receive Plan(s) from the equipment to PC.
The file format for channel plans is ".CAN" for the EXPLORER family, and ".XML"
for the RANGER family.
Page 22
January 2014
Screen Description:
On screen are 4 windows. These windows are interrelated. They are as
follows:
Figure 13.
Plan List:
It shows all channel plans, either created or loaded.
Plan Configuration:
It shows all configuration data for the plan selected on the window “Plan
List”.
Channel List:
It shows all channels of the plan selected on “Plan List”.
Channel Configuration:
It shows all configuration data of the channel selected on “Channel List”.
January 2014
Page 23
Below each window there are several options associated to each one. They are:
Plan List Window:
New Plan.
Edit Plan.
Delete Plan.
Plan Configuration Window:
Add Configuration.
Edit Configuration.
Delete Configuration.
Channel List Window:
New Channel.
Edit Channel.
Delete Channel.
Channel Config Window:
Add Configuration.
Edit Configuration.
Delete Configuration.
Common to all Windows:
Load one Plan.
Load Plan Set.
Save one Plan.
Save Plan Set.
Send one Plan.
Send all Plans.
Receive Plan(s).
Plan Download.
Page 24
January 2014
Each option it is now described:
New Plan:
You can create a new Plan in the channel Plan editor. To create a new Plan
click the button “New Plan”. It opens a window where the user has to enter
the parameters for the new plan: plan name, band by default
(terrestrial/satellite) and if it is modifiable or protected (can not be edited on
the equipment).
Figure 14.
Once it is completed, the new plan will be added to the Plan List Window, and
it appears with the name and parameters that identifies it.
January 2014
Page 25
Edit Plan:
You can change the type of a Plan to be protected or modifiable in the
equipment. To do this, please select a Plan, and check the option “Modifiable”
or “Protected”. Checking the option “Modifiable” will let you to modify the Plan
in the equipment after sending this Plan to the equipment. Checking the
option “Protected” will not allow you to do any modification after sending the
Plan to the equipment. The default value is “Protected”. You can also change
the band of the channel plan between satellite (SAT) or terrestrial (TER). To
do it, in the "Band" option select between "SAT" and "TER". The value by
default is "TER".
Figure 15.
Delete Plan:
You can delete the Plan created or loaded. To delete a Plan click the button
“Delete Plan” and the selected Plan will be deleted from the Plan list.
Add Configuration (for a Plan):
You can specify the configuration parameters for each Plan. To edit the
settings of a Plan, please select a Plan in the Plan list and click “Add config”.
The window “Add Plan Config” opens and shows some parameters. Check the
box of the parameters you want to add in the configuration and select the
values from the drop-down menu or edit them. It will add the selected
parameters to the Plan.
Please note that the configuration values are available according to the band
selected for the Plan.
Page 26
January 2014
Figure 16.
Edit configuration (for Plan):
It allows you to edit the configuration values (see last paragraph) for the
channel plan selected in the Plan List.
Delete Configuration:
It allows you to delete the configuration values for the selected plan. To do
this select the parameter from the “Plan Config” window and click on “Delete
Configuration”. This will remove the parameter selected from the plan.
New Channel:
User can add a new channel for the selected plan in the Plan List. To create
one channel in a plan, select the plan and then click on “New Channel”. This
will create a new channel for the selected plan.
Figure 17.
January 2014
Page 27
The channel will be at the band of the channel plan. User must give a name,
frequency type (centre or video), the bandwidth and the frequency.
If the Plan is in the TER band, then the user must select the centre or video
frequency and the bandwidth. Check the corresponding box to edit the centre
or video frequency for the channel.
Edit Channel:
It allows the user to edit the parameters for the channel (see last paragraph)
which belongs to the channel plan selected in the Channel List.
Delete Channel:
To delete a channel from a plan, select the Plan and the channel to remove
and then clic on “Delete Channel”. This will delete the selected channel for this
plan.
Add Configuration (for Channel):
The user can select the configuration parameters for each channel. To select
these parameters, previously you have to select the channel from the channel
list. It opens a window with several parameters associated to the channel.
Check the parameters you want to add and select or edit the value for the
parameter. This parameters will be added to the channel configuration.
Figure 18.
Page 28
January 2014
Keep in mind that some settings are available depending on the selected band
for the channel and the type selected for the Plan. The configuration
parameters for one channel are:
Type
System
LNB
Spectral Inversion
Code Rate
Carrier
Guard
Constellation
Offset
Bandwidth
Symbol Rate
Depending on the selected band for the Plan and type selected for the
channel, only certain configurations can be specified. Values for each
parameter can be edited or chosen by selecting the values in the drop-down
menu.
Delete Configuration (for Channel):
You can also delete an added parameter in a channel. To delete a
configuration parameter in a channel, you have to select the channel in the
“Channel list” window and then select the configuration parameter in the
“Channel Config” window and click on “Delete Config” button to delete the
selected parameter.
The next functions are common in the Channel Plan tab
Load plan
Load Plan Set
Save one Plan
Save Plan Set
Send one Plan
Send all Plans
Receive Plan(s)
Plan Download
January 2014
Page 29
Load Plan:
This option allows you to load a file ".CAN" or ".XML", where information of a
single plan is stored. Click "Load Plan" and a dialog box will open to select a
file ".CAN" or ".XML". After selecting the file, click "Open" to load the file
content in the Channel Plan editor.
If the selected file is a valid one, then the Plan content will be displayed in the
channel Plan editor.
Load Plan set:
Load Plan set loads a “.PRO” file where is stored a list of several plans. When
clicking on “Load Plan set”, a dialog box opens to select a “.PRO” file. After
selecting a “.PRO” file click "Open" to load the content of the “.PRO” file in
the channel Plan editor.
If the selected “.PRO” file is a valid one, then the Plan content will be
displayed in the channel Plan editor.
Save one Plan:
Save one Plan saves Plan information to a “.CAN” file (for the TV EXPLORER
family) or a ".XML" file (for the HD RANGER family) selected on the Plan list
window. On clicking “Save one Plan”, a file dialog box will be opened to give a
name for the file. After specifying the file name, the file will be saved in the
specific location.
Before saving the Plan, please ensure the information provided in the channel
Plan editor is correct.
Save Plan Set:
Save Plan saves the Plan(s) added in the Plan list box to a “.PRO” file. On
clicking the “Save Plan set”, a file dialog box will be opened to give a file
name for the Plan set. In the box "Type" the user must select which meter
family is going to use the Plan Set created, either the TV EXPLORER family or
the HD RANGER family. After specifying the file name, the ".PRO" file will be
saved in the location specified.
Please note that the Plan information is stored in a ".PRO" file and this will not
save in the individual Plan information.
Send one Plan:
Send one Plan sends one Plan selected from the Plan list window to the
equipment. On clicking "Send one Plan", the selected Plan will be sent to the
detected equipment. Please note that, when sending one Plan to the
equipment, the equipment must have been detected by NetUpdate. You can
detect the equipment by clicking the "Detect" button. Before sending one Plan
to the equipment, make sure whether the information provided in the channel
Plan editor for the selected Plan is correct.
Page 30
January 2014
Send all Plans:
Send all Plans enables us to send all the Plans added in the Plan list box to the
detected equipment. When clicking “Send all Plans”, all the Plans listed in the
Plan list box will be sent to the detected equipment.
Please note that, to send all Plans to the equipment, the equipment must be
detected by NetUpdate. You can detect the equipment by clicking the “Detect”
button. Before sending all Plans to the equipment, make sure the information
provided in the channel Plan editor for all the Plans is correct.
Receive Plan(s):
Receive Plans allows you to receive plans from the equipment, in order to
explore the content of the Plan received. Please note that to receive plans
from the equipment, the equipment must be detected by NetUpdate. You can
detect the equipment by clicking on the "Detect" button. Clicking on "Receive
Plans", a window will appear and automatically plans from the equipment will
appear in a new window. You can select one or more plans to receive from the
equipment. After selecting the files to receive, click "Receive" to receive the
selected files from the equipment.
Plan Download:
It opens a window with several website addresses that lets you download
channel plans compatible with your equipment. Select the address and press
"Go". The Internet browser will open and the selected web page will load. You
should go to the download section to download some of the available plans.
For more information see Annex 1 "Creating channel sets for satellite from a
.INI file".
Figure 19.
January 2014
Page 31
2.4.5.2
Datalogger
Description
Datalogger provides the functionalities to create six types of reports from
the datalogger files in the equipment. With this function, you can list the
datalogger files in the equipment and receive one or several files from the
equipment.
The datalogger file format is ".DL" for TV EXPLORER family, and ".XML" for
RANGER family.
Operation
Figure 20.
The equipment must be detected before receiving or listing the
datalogger file(s). The equipment can be detected by clicking the
“Detect” button at the top of the window.
Datalogger reports can only be generated from PC files. To create a
report with a datalogger in the equipment, previously the file must be
send from the equipment to the PC and then the report can be created.
Page 32
January 2014
To send files to the PC, click twice on the "Datalogger” folder in the
Equipment window. All data files in the equipment will appear. Select
one or several files in the list and click on “Send to PC”. Now the files
selected will be shown on the PC folder.
Several type of reports can be generated:
España: Actualizaciones ICT. Orden ICT/1644/2011, de 10 de
junio.
España: Nuevas ICT. Orden ICT/1644/2011, de 10 de junio.
Fenitel DIGITAL- Protocolo Nuevas ICT.
Fenitel DIGITAL- Protocolo Actualizaciones ICT.
Generic Report.
Sky: Integrated reception system completion certificate (signal
records).
Please, refer the Annex about reports for more information. The above mentioned
reports can be generated either in the form of PDF or XML. All the measurements
in the datalogger file can be also generated in CSV format.
To create any report you must follow these steps:
Select the datalogger file(s) in the PC list window.
Select the report type you want to create from the the “Generate
Report” drop-down menu.
Click on “View” button to view the selected report.
2.4.5.3
•
Terminal
Description
This option is for advanced users. It allows to communicate directly with the
equipment through some specific commands.
January 2014
Page 33
•
Operation
Figure 21.
To start communication:
Connect the communication cable between the PC and the equipment.
Click on “Detect” to confirm the connection between the equipment
and the PC. If you do not know the communication port, select the
“Auto” option.
Select the parameters to communicate with the equipment: port, baud
rate, bits, stop bits and parity. In the instruction manual of the
equipment must be defined these parameters.
Click on the "Start" button. Now the terminal window will start
listening to the port and display the data received from the selected
serial port in the text area of the terminal window. After clicking the
“Start” button, all buttons are disabled but “Stop”.
Enter the remote communication command in the command box and
click "Go". The command is sent to the equipment.
The equipment answer is show on the terminal window. In the
command box, all the commands sent to the serial port will be stored
and they can be easily resend by selecting and then clicking the “Go”
button.
You can check all the remote commands for the equipment in its
instruction manual.
Once the communication is finished, click on “Stop” to close the port.
Page 34
January 2014
2.4.5.4
CSV Viewer
The CSV viewer opens any CSV file. In CSV Viewer you can open a CSV file by
clicking the "Open" button and selecting it. By clicking on the "Exit" CSV Viewer
closes.
Figure 22.
2.4.5.5
Text Editor
The text editor provides basic functionalities to work with a text file.
Using the text editor the user can create, save, open and print a text file.
Functions available are Undo, Cut, Copy and Paste.
Figure 23.
January 2014
Page 35
2.4.5.6
Log
This function records every activity of the application.
Figure 24.
The log opens in a text window. The menu options are edit, save and print
among others.
2.5
Main Window Options
2.5.1
Language selection
At present, NetUpdate is translated to six languages. The languages supported in
NetUpdate are English, Catalan, French, Italian, German, Norwegian, Russian and
Spanish. The default selected language in NetUpdate is English.
You can choose the language in NetUpdate under the menu “Language” in the
NetUpdate main window. After choosing, NetUpdate will switch over to the
selected language.
Page 36
January 2014
2.5.2
Notification area
When NetUpdate is running, it shows a NetUpdate icon on the notification area
(see the figure below). Click the right button on the icon to show a pop-up menu
with the following options:
Help
PROMAX News
Logging
Exit
Figure 25.
Help:
It opens the instruction manual.
PROMAX News:
It accesses the PROMAX website, where you can check the last news about
the company and the telecommunication industry and also about technology
world. From here you can also follow us on the social networks, such as
twitter, linkedin, google+ or subscribe to the blog in order to receive regular
an updated information.
By default, PROMAX News is updated and every two weeks you will receive a
notification from PROMAX.
Logging:
This menu has three options: On, to enable the logging, Off to disable the
logging or Open, to open the logger in a text window. Refer to section “Log”
for more details.
Exit:
It closes the NetUpdate software.
January 2014
Page 37
2.5.3
PROMAX News
It accesses the PROMAX website, where you can check the last news about the
company and the telecommunication industry and also about technology world.
2.5.4
Email Log File
NetUpdate has an option to send a log file as an email to PROMAX in order to
solve a problem with the equipment, if any.
To do this, simply click the menu "Help -> Email log file." This will send the log
file to PROMAX.
See the figure below.
Figure 26.
2.5.5
Check Software Updates
NetUpdate will automatically check PROMAX server for any software update for
NetUpdate. If there is any update then a pop up window will be displayed
prompting the user to download or to remind after some days.
We can set the reminder option and can specify the reminder period as next
week or next month. If you specify the reminder period, then NetUpdate will
automatically remind for software update as chosen before.
Page 38
January 2014
2.5.6
Start NetUpdate at Windows Startup
NetUpdate can be started during the windows startup. This can be done under
the menu “Options --> Start NetUpdate at windows Startup”.
To start NetUpdate at windows startup, please check and tick the menu “Options
--> Start NetUpdate at windows startup”.
To disable NetUpdate startup during windows startup, please uncheck the menu
“Options--> Start NetUpdate at windows Startup”
2.5.7
Starting in Recovery Mode
NetUpdate provides a feature to detect the equipment in BOOT mode. When a
equipment is in BOOT mode, it can receive firmware data only and it cannot
handle resources.
During Firmware update, the update might fail due to low battery or any external
disturbances caused. Due to this failure, sometimes, the equipment will not
respond and the equipment remains in BOOT mode and sometimes in unknown
state. If the equipment does not start after the Firmware update failure, then the
equipment may be in BOOT mode or we might need to induce BOOT mode to
recover the equipment.
To put the equipment in BOOT mode you should contact with PROMAX.
When NetUpdate detects that the equipment is in BOOT mode, you will receive a
message asking you to recover the equipment or not
At that time we recommend that you first do as suggested by NetUpdate, to turn
OFF and ON your instrument, probably everything will be alright.
If the equipment still does not start, then please put the equipment in BOOT
mode and recover the instrument. During the recovery process, please observe
that you are given possibility to cancel the update (clicking close button), should
it be strictly necessary (Not recommended).
If the equipment is updated and recovered successfully, then you can update the
equipment with the latest version or the version you want by using any type of
update. If the equipment is not recovered successfully, then please contact
PROMAX for further troubleshooting.
January 2014
Page 39
ANNEX 1 MAKING CHANNEL PLANS FOR SATELLITES FROM
.INI FILES
The NetUpdate software, from version 4.13, can make channel plans
automatically from INI files, which are available on several websites. This
websites are a very reliable source of information about satellite channels and
are also always updated.
A1.1
Procedure
Run the NetUpdate program (v4.13 or higher).
Click on the ADVANCED UTILITIES button.
Select the CHANNEL PLAN tab.
Click on the PLAN DOWNLOAD button.
Figure 1.
Page 40
January 2014
It appears a new window, with a list of websites where you can
download INI files compatible with the NetUpdate software. To access
one of this websites, just click twice on the name. Three websites are
in the list:
http://es.kingofsat.net
http://satellites-xml.eu
http://satbeams.com
The information on these websites is often quite similar, but
sometimes it changes slightly. For example, a website can include
only broadcast transponders in the plan, and another can include
broadcast transponders and also feeds, and so on. We suggest you to
try the same plan in each website and then choose the one that suits
you.
Open one of these websites (either double clicking on the NetUpdate
or copying the address on your web browser) and download the INI
file that corresponds to the satellite you want to work.
This documents explains the procedure for the websites KINGOFSAT and
SATELLITE-XML.
► KINGOFSAT: http://es.kingofsat.net/
This site contains basically information about the main satellites received in
Europe. For satellites from other parts of the world, we recommend you to use
the SATELLITE-XML website.
In the left column, select SATELLITE DIRECTORY:
Figure 2.
January 2014
Page 41
It opens a new page that contains a list of satellites, which are grouped and
classified by orbital position.
Click on the icon
INI file.
at the orbital position you want in order to download its
For example, if we choose the 13ºE (Eutelsat Hotbird) :
Figure 3.
Please be sure you know the folder in your PC where the file has been
downloaded, and also its name (in the example, the file is called 0130.ini), so
you can take it.
► SATELLITES-XML : http://satellites-xml.eu
This website contains information of all the satellites in the world.
It offers the possibility to download the INI file of:
All satellites.
Satellites between two orbital positions.
Satellites selected from a list.
All satellites from a region (Europe, Asia, etc.).
Figure 4.
Page 42
January 2014
For example, if you want to download all satellites:
Select the tab ALL.
Check the ALL CHANNELS box.
Check the .INI box.
Enter the security code.
Click on DOWNLOAD to download the INI files.
Figure 5.
Note that if you are downloading a lot of satellites at the same time, a
file ZIP is created, which contains inside all the INI files for each
satellite. Therefore, you must unzip that file in your PC.
In the example, the zip file is called transponders.zip and the 13ºE
satellite plan, inside the zip, is called 0130.ini
6. Once you have the INI file, for example 0130.ini corresponding to
the 13ºE orbital position, return to the NetUpdate program,
ADVANCED UTILITIES > CHANNEL PLAN.
January 2014
Page 43
Click on the button LOAD ONE PLAN.
Figure 6.
In the window that opens, select ChannelPlan(*.INI) in the dropdown menu and then go to the folder where the plan has been
downloaded (in this case 0130.ini):
Figure 7.
Select the INI file and accept.
Page 44
January 2014
The NetUpdate program will load all the information of the satellite
from the INI file (frequencies, symbol rate, constellation, etc):
Figure 8.
Check that the information is correct, and if it is necessary make the
appropriate adjustments. For example, if you do not like the plan
name, just double-click on the name and edit it.
January 2014
Page 45
Now you can sabe the plan in one format of the followings:
XML: compatible with HDRANGER field strength meters.
CAN: compatible with TVEXPLORER field strength meters.
To do it, select the plan from the list and click on the SAVE ONE
PLAN button:
Figure 9.
In the window that opens, select the folder where you want to save the
new plan, enter a name, select the format (XML or CAN) and
accept. The file name must be the same than the plan name (if you use
other name for the file, the plan name will change automatically).
Figure 10.
Now you have a channel plan upgraded for the satellite and in a format that is
compatible with the PROMAX field strength meter.
Page 46
January 2014
ANNEX 2
A2.1
TYPES OF REPORT
Generating Reports
Types of reports than can be generated in NetUpdate are:
*
España: Actualizaciones ICT. Orden ITC/1644/2011, de 10 de junio.
*
España: Nuevas ICT. Orden ITC/1644/2011, de 10 de junio.
*
FENITEL DIGITAL - Protocolo Nuevas ICT.
*
FENITEL DIGITAL - Protocolo Actualizaciones ICT.
*
Generic Report.
*
Sky: Integrated
records).
reception
system
completion
certificate
(signal
Please refer the individual report section given below for more information on the
reports. The above mentioned reports can be generated either in the form of PDF
or XML. All the measurements in the datalogger can be generated as CSV format
also.
In the datalogger window there are two list boxes, one list box with the name
“Equipment” where are the datalogger files in the equipment and other list box
with the name “PC” where are the datalogger files in the PC. The text box
“Current directory” is the path to the folder where the files are. This path can be
changed by the user at any moment by clicking on the “...” button.
To create any report you must follow the below steps:
Select the datalogger file(s) in the PC list window.
Select the type of report from the drop-down menu at "Generate
Report"
Click on "View" button to see the report and to configure the view.
January 2014
Page 47
A2.2
España: Orden ICT/1644/2011, de 10 de junio (Nuevas ICT /
Actualizaciones ICT).
After selecting report type and clicking on the view button you will see all
the measurements in the datalogger file.
►
Report format:
You can select if you want to generate a report in PDF or CSV format
("spreadsheet") by clicking on the corresponding checkbox.
►
Working with reports:
Depending upon the file selected, you will be informed, whether you
have chosen a Terrestrial or Satellite file. This information is
available near the file selection combo box.
There is also a grid list which is green in color. This grid list has all
the measurement in the datalogger file.
The first column of the grid list is the Test points and the remaining
columns are the channel measurements.
The header of grid list displays the name of the channels from the
second column in the datalogger file.
Figure 11.
Page 48
January 2014
Measurement view for the channels:
Each channel may have one to fourteen measurement types, which
may be Level, V/A, C/N, Power, MER, CBER, VBER, Frequency offset,
MPEG-2, Locked/Unlocked, Noise Margin, REF ICT, L/N referenced,
SER and LBER.
Above each channel name header, there will be a combo box in
which you can choose to show which measurement type for that
channel. If you change the measurement type for channel then you
can observe the values displayed in the column under each channel.
There is also a check box named “Block” near the measurement
type chooser combo box. If we check this box, then the values
changed in any one type of measurement combo box will reflect for
all the channel measurements and not only to that particular
channel.
Specifying broadcast name:
There is also an option to specify the Broadcast name for each
channel displayed. To do this you can input the Broadcast name for
a specific channel in the text box provided at the top of channel
measurement type chooser.
Choosing branch and type:
You can select the type of test point and the branches for the test
point.
You can select up to 15 branches.
The report must have the following to create report properly:
Measurement point at input headend.
Measurement point at output headend.
One best point and one worst point for at least one branch.
If there is more than one branch, each branch should have one
best and one worst point.
It is only possible one input headend and one output headend for
each report.
When all the above conditions are satisfied then the report will be
created properly.
The check box PDF has to be checked to generate a PDF report.
After specifying all the parameters, now you can click the “Generate
Report” button which is near to PDF checkbox to create the report.
January 2014
Page 49
Test SAT IF:
There is a checkbox called “SAT IF TEST”. This test is an optional one
and it is only available for satellite datalogger files.
This type of test it is done when there is no satellite dish in the
installation and an IF simulator is used for this type of test. Please note
that there should not be no input and output headend when SAT IF
check box is checked.
Observations:
Clicking on “Generate Report” will show you a pop up window immediately after you
specify the filename for the PDF. In this pop up window you can enter the
observations for the report created for each table. This will be displayed in the report
created. After entering the details click on “Done” or if you wish not to specify any
observations then please click on “No observation”.
A2.3
Fenitel DIGITAL
Fenitel ICT:
After selecting Fenitel ICT report type and clicking on the “View” button
will show you all the measurements in the datalogger file.
Creating Fenitel ICT report:
Fenitel ICT report will be generated in XML format. You can also export
all the measurements to a CSV file.
Working with Fenitel ICT report:
Select the file in the combo box which is located at the side of
“Generate Report” button.
Depending upon the file selected, you will be informed, whether you
have chosen a Terrestrial or Satellite file. This information is
available near the file selection combo box.
There is also a grid list which is green in color. This grid list has all
the measurement in the datalogger file.
Page 50
January 2014
The first column of the grid list is the Test points and the remaining
columns are the channel measurements.
The header of grid list displays the name of the channels from the
second column in the datalogger file.
Figure 12.
Measurement view for the channels:
Each channel may have one to fourteen measurement types, which
may be Level, V/A, C/N, Power, MER, CBER, VBER, Frequency offset,
MPEG-2, Locked/Unlocked, Noise Margin, REF ICT, L/N referenced,
SER and LBER.
Above each channel name header, there will be a combo box in
which you can choose to show which measurement type for that
channel. If you change the measurement type for channel then you
can observe the values displayed in the column under each channel.
There is also a check box named “Block” near the measurement
type chooser combo box. If you check this box, then the values
changed in any one type of measurement combo box will reflect for
all the channel measurements and not only to that particular
channel.
January 2014
Page 51
Specifying broadcast name:
There is also an option to specify the Broadcast name for each
channel displayed. To do this you can input the Broadcast name for
a specific channel in the text box provided at the top of channel
measurement type chooser.
Choosing branch and type:
You can select the type of test point and the branches for the test
point.
You can select up to 15 branches.
The report must have the following to create report properly:
Measurement point at input headend.
Measurement point at output headend.
One best point and one worst point for at least one branch.
If there is more than one branch, each branch should have one
best and one worst point.
It is only possible one input headend and one output headend for
each report.
When all the above conditions are satisfied then the report will be
created properly XML according to Fenitel ICT.
The XML checkbox has to be checked to generate a XML report.
After specifying all the parameters, now you can click the “Generate
Report” button which is near to XML checkbox to create the report.
Page 52
January 2014
Test SAT IF:
There is a checkbox called “SAT IF TEST”. This test is an optional one
and it is only available for satellite datalogger files.
This type of test need to be done when there is no satellite dish in the
installation and an IF simulator is used for this type of test. Please note
that there should not be no input and output headend when SAT IF
check box is checked.
A2.4
Generic Report
This report shows detailed information of all measurements in the datalogger
file, which can be created in PDF and XML format. You can also export all the
measurements to a CSV file. After selecting the report type and clicking on
the “View” button it will show you all the measurements in the datalogger file.
Clicking on the button “Generate Report” will let you to create the report.
Figure 13.
January 2014
Page 53
Sky: Integrated reception system completion certificate (signal
records)
A2.5
This report groups terrestrial and satellite channels into the same test points, and
this report is especially used by British Sky Broadcasting Limited. To create Sky
report, it is always preferred to select terrestrial datalogger file as well as
satellite datalogger file. If any file is missed while selecting, then the report will
not be created properly. After selecting the Sky report and clicking on the “View”
button, it will show the measurements in the datalogger file in a separate
window. You will see the measurements for the selected terrestrial datalogger file
and satellite datalogger file displayed in the same window.
There is an added feature on Sky report that highlights on screen and on paper
the measurements that are over the threshold. You can also drag the rows in Sky
report to arrange it in such a way that the flat names in terrestrial and satellite to
be coherent. In Sky report view window, you can see two separate windows for
the terrestrial file and the satellite file.
Figure 14.
•
TERRESTRIAL Window::
In the terrestrial window, you can see the terrestrial datalogger files
selected previously from the datalogger window in the combo box.
Clicking “Save to CSV” will save all the measurements of the terrestrial
datalogger file to a CSV format.
Page 54
January 2014
There will be a grid list which is green where all the measurements are
displayed. The first column header displays the flat name, whereas from the
second column header the names of the channel are displayed.
Measurement view for the channel:
Each channel may have one to fourteen measurement types which
may be Level, V/A, C/N, Power, MER, CBER, VBER, Frequency offset,
MPEG-2, Locked/Unlocked, noise margin, REF ICT, C/N reference,
SER and LBER.
Above each channel name header, there will be a combo box near
the “Block” check box in which we can choose to show which
measurement type for that channel. If you change the measurement
type for the channel then we can observe the values displayed in the
column under each channel.
There is a check box named “Block” near the measurement type
chooser combo box. If you check this box, then the values changed
in any one type of measurement combo box will reflect for all the
channel measurements and not only to that particular channel.
Specifying service name:
You can assign services to each channel in terrestrial datalogger file.
There are 13 service names available and you can choose any one
service name to a particular channel.
It is recommended to assign each service to a single channel, that is, a
service name specified for one channel should not be repeated for
another channel. Also, it is recommended to assign all services to all
the channels available. If you did not assign the services properly then
the report will not be created properly.
Selecting type:
To create proper Sky reports you must specify the type of the test
point. The test point type may be Off air, Flat and Launch. There are
some conditions to be met in order to generate certificate foe sky
reports and they are as follows:
Only one off air, one launch point type is allowed.
More number of Flat points is allowed.
January 2014
Page 55
Choosing the type is available under “Type” label. Please note that
the selection of type in terrestrial panel is also applicable to satellite
files.
Selecting flat names to display in report
You can choose the flat names for the Sky report. You can select either
the terrestrial flat name or the satellite flat name. To display terrestrial
flat name in the report, please click the radio button “Select these flat
names to generate certificate” in the terrestrial panel.
Specifying Off Air offset and Launch offset:
You can also specify offsets for Level and Power and also to display
added offset values in the sky report. To specify the offset value for
Power measurement, enter the values in “Launch Offset”. The entered
value will be added with the existing power value and it will be
displayed in the report.
To specify the offset value for Level measurement, enter some values
in “Off Air Offset”. The entered value will be added with the existing
level value and it will be displayed in the report. Please note that the
offset value range must be between 0 and 30.
•
SATELLITE Window:
In satellite window, you can see the satellite datalogger files selected
previously from the data logger window in the combo box. Clicking on “Save
to CSV” will save all the measurements of the satellite datalogger file to a
CSV format.
There will be a grid list which is green where all the measurements are
displayed. The first column header displays the flat name, whereas from the
second column header the names of the channel are displayed.
Measurement view for the channel:
Each channel may have one to fourteen measurement types which
may be Level, V/A, C/N, Power, MER, CBER, VBER, Frequency offset,
MPEG-2, Locked/Unlocked, noise margin, REF ICT, C/N reference,
SER and LBER.
Page 56
January 2014
Above each channel name header, there will be a combo box near
the “Block” check box in which you can choose to show which
measurement type for that channel. If you change the measurement
type for the channel then you can observe the values displayed in
the column under each channel.
There is a check box named “Block” near the measurement type
chooser combo box. If you check this box, then the values changed
in any one type of measurement combo box will reflect for all the
channel measurements and not only to that particular channel.
Selecting flat names to display in report:
You can choose the flat names for the Sky report. You can select either
the satellite flat name or the terrestrial flat name. To display satellite
flat name in the report, please click the radio button “Select these flat
names to generate certificate” in the satellite window.
Specifying Off Air offset and Launch offset:
You can also specify offsets for Level and Power and also to display
added offset values in the sky report. To specify the offset value for
Power and also measurement, enter the values in “Launch Offset”. The
entered value will be added with the existing power value and it will be
displayed in the report.
To specify the offset value for Level measurement, enter the values in
“Off Air Offset”. The entered value will be added with the existing level
value and it will be displayed in the report. Please note that the offset
value range must between 0 and 30.
Generate certificate:
Clicking on the “Generate Certificate” will show you a popup window
immediately after you specify the filename for the PDF.
Certificate information:
Clicking on the “Generate Certificate” will show you a popup window
immediately after you specify the filename for the PDF. In this popup
window you can specify the name for the “Transmitter”, “Satellite
position”, “Project engineer name”, “Site Address”, “Engineer name”
and “on behalf of” to complete the report in a fulfilled format. You can
also save the above entered information to a file by clicking “Save to
file”. By this way you can retrieve the information in future by clicking
the button “Load from file”. After specifying all recovery information
click on “Done” to create the report successfully.
January 2014
Page 57
PROMAX ELECTRONICA, S. L.
Francesc Moragas, 71-75
08907 L’HOSPITALET DE LLOBREGAT (Barcelona)
SPAIN
Tel. : 93 184 77 00 * Tel. Intl. : (+34) 93 184 77 02
Fax : 93 338 11 26 * Fax Intl. : (+34) 93 338 11 26
http://www.promaxelectronics.com
e-mail: [email protected]


