1
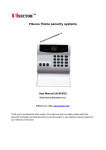
Home Security System User Manual Profile For a better understanding of this product, please read this user manual thoroughly before using it. Warning Do not remove the front or back cover of the unit and keep it intact. There is no part that can be repaired by user. If repair is needed, please send it to seller or authorized service point. The information contained in this manual is prepared for the alarm system only. It adopts a sustainable development strategy. Therefore, the company retains the right to modify or make improvement to any product described herein without giving prior notice. All rights reserved. The name of other companies or products referred to herein may be the brand or product name of their respective owners. Thank you for purchasing this alarm system. For proper use and your safety, please read these instructions thoroughly and carefully before you put the system in use. Keep this manual carefully for your reference in the future. Precautions Please read and follow the brief instructions below, otherwise physical danger or system damage may be incurred. This manual contains more detailed information about safety issues concerning the system in other parts hereof. Proper use Waterproofness The alarm system is Read this manual not waterproof. carefully before you put Please keep it dry. the system in use. Operate in accordance with the instructions herein. Backup Be sure to back up all important information stored in the system. Switch on safety Do not switch the Device on when wireless phone use is prohibited or when it may cause interference or danger. Original parts and batteries Qualified maintenance service Only those qualified maintenance professionals may repair the alarm system. Addition of other equipment Only original parts and batteries approved by manufacturer may be used, otherwise the warranty term may be breached and danger may occur. Before adding other equipment,please read the user manual for detailed safety instructions.Be sure not to connect incompatible products to the system. Interference Switch off in restricted areas All wireless devices may be susceptible to interference, which could affect performance. Follow any restrictions. Switch the device off in aircraft, near medical equipment, fuel, chemicals, or blasting areas. Catalogue Features 2 Phone Line Trouble Reminder 11 Installation 3 Ringing Times Setting 11 Main panel 3 Siren Alarming Time 11 Door Sensor 4 Remote Controller Warning Tone 12 Wireless PIR Detector 5 Reset 12 Wired Detector 5 Operation Instructions 12 Function Settings 6 Out Arm 12 Record alarm message 6 Home Arm 13 Add or Delete Wireless Detectors 7 Disarm 13 Set Alarm Numbers 8 Emergency 13 Change password 9 Receive Alarm Call 13 Defense Zone Setting 9 Remote Control by Phone 14 Warning Tone for Defense Zone 10 Components List 14 Anti-interference 10 Technical Parameters 16 Anti-decode 11 Care and Maintenance 18 1 I. Features 1. Anti-interfere function: when someone interferes it with the same frequency, the main panel will activate siren to alarm. 2. Support anti-decode with remote control 3. Digital LED defense zone display: users can know which defense zone is triggered. 4. 32 wireless defense zone display (1 to 32) and 7 wired defense zone display (91-97). 5. Every defense zone can set independently arm, disarm, delay alarm and so on. 6. Have the function of “one-button arm”: “Home arm” or “Out arm” by pressing one button on remote controller. 7. Can set the reminder sound of defense zones: warn users to arm the alarm system when going out. 8. Can work with other products of our company: such as wireless big outdoor siren and mini siren. 9. It stores 2 monitoring center and 6 user phone numbers to dial out and play the recorded message when alarming. 10. Can arm/ disarm with remote controller or keypad on the main panel. 11. Can arm/disarm/listen-in by calling the main panel number. 12. Telephone line failure alert: if telephone line is cut or short circuit, the siren will alarm. 13. Have the superior of alarm call even when the alarm phone number is busy. 14. Built-in backup battery can continue to work when electricity is cut off or in failure. 2 II. Installation 1. Main panel a. Insert the siren to the port of main panel, and connect telephone line with the port of “out line” and “telephone” with the telephone set. That is to say, the telephone must be connected with main panel. The telephone can still work normally. b. Power the system on and switch it to “ON”, the power status LED will blink and the system sounds “beep”, showing the main panel works normally. It will sound three “beep” every 30 seconds, which reminds user of setting alarm phone numbers. The sound “beep” will stop after finishing the alarm phone number setting. Please press “ ” on the remote controller to make the system disarmed to avoid activating the siren to alarm when registering sensors. 3 Attention: Try to install the main panel in the center of defense zone and pull out the antenna to get longer wireless receiving distance. Installation position should be far away from huge metal objects and wireless interference. Connect the trunk line with main panel in order that it can dial out immediately when there is an alarm. 2. Install the main panel in a hidden place. Door sensor Door sensors are used for detecting the status of open and close of windows and doors. It will detect it and send the signal to main panel. Tear apart the double-side adhesive tape on the magnet and the transmitter. Then adhere them to the appropriate position. Magnet should be near to the side of transmitter with indicator. The two should align with each other and the distance should not exceed 10mm. Please plug out the antenna for better signal. If the low-power indicator is on, please change the battery. 4 3. Wireless PIR detector PIR detectors are used to detect the movement within a certain range. Fix the adjustment bracket on the wall with the provided screws and attach the detector to the bracket. It is recommended to mount it at a height of 2-2.2m above the floor. Effect of the PIR detection is best when the detection direction is in 90°angle with the walking direction of the intruder. Choose the most suitable installation place and angle according to actual situation and taking the following installation diagram as reference to ensure the detection effect is best. Please do not fix it under direct sunlight or other strong lights and also keep it away from places with frequent strong air stream. 4. If the low-power indicator is on, please change the battery. Wired detectors At the back side of the host, there is a wired connector which can link with 7 wired detectors. The +12v and GND are to connect with the power supply; the COM is the public port. When using the wired detectors, connect the +12v and GND to the power supply, connect one line of the wired detector to the COM, and the other to 1, or 2, or 3 … or 7. 5 III. Function settings Before any operation, please enter passwords (Default is 1234) and press button “PROGRAMME”. You will hear two beeps and the OUT ARM, HOME ARM LED light up, indicating the system enters set up status. Each time you input an instruction, hearing two beeps means successful. If you hear four short beeps, it means false operation. You have to try again. Please press “EXIT” to end the set up status. System will exit automatically if there is no operation for 30 seconds. 1. Record alarm message Input “6#” to start record message after hearing a beep. After 10 seconds the system exits recording with two beeps automatically. Each new recorded message will replace the last message. The message should be short and clear. For example, “This is room xxx building xxx, intruder, please come to offer help”. Press “6*” on the main panel, it will play the recorded message through the telephone. 6 2. Add or delete wireless detectors Each detector has its unique ID. It must be coded with the main panel for normal working. If it is not coded with main panel, the main panel would not identify it and could not receive the signal, so the alarm will fail. The door sensor and the remote controller in the standard kit have been coded to the main unit. If you want to add more wireless sensors, please refer to the instructions as follows. a. Input “7#”, there will be a beep and the ARM status LED starts flashing. The unit enters coding status. Now you can start to register sensors by triggering the new sensors or detectors. It means successful operation if you hear two beeps. The unit will exit automatically if there is no operation for 3 minutes. b. How to trigger the detectors: Door sensor: separate the two parts; PIR detector: move across the detector; remote controller: press any key on it; gas and smoke detectors: there is a black switch on the left side; you can press it to code it with main panel. After finishing coding, please press “#” to exit (two beeps). c. Delete sensors In coding status, input “7*”, you will hear “beep, beep”. At this time, all coded information has been deleted. There are 32 defense zones, so you can install sensors in any of defense zone. You will know what sensors are triggered from the screen of main panel. You can input XX# and then trigger sensors and then enter into this defense zone. 7 For example, if you want to code the detectors and sensors into the 2nd or 4th defense zone, do as follows: 3. Set alarm phone numbers (when the system alarms, it will call or send SMS to the numbers) Command: 31* the 1st User phone number # 32* the 2nd User phone number # 33* the 3rd User phone number # 34* the 4th User phone number # 35* the 5th User phone number # 36* the 6th User phone number # 38* the 1st phone number of monitoring center # 39* the 2nd phone number of monitoring center # Note: Do not setup the monitoring center number if you do not have monitoring center. You can enter a blank order if you want to delete one Alarm Phone Number. Fox example: To delete the 4th Alarm Phone Number: input 34*#. 8 Operation sketch: 4. Change password Command: 10*password# (password must be 4 digits) This password is used for remote control. The following are special settings. 5. Defense zone setting You can set the type of defense zone according to your needs. The system default is “Instant Zone” for all zones. Only wireless zone “01~08”, and wired zone “91~97” can be set. Command: * Zone No. + 2 +X + [#]. X is zone type: 0--- Closes Zone (do not send detecting information) 1--- Instant Zone (default, alarm immediately if triggered) 2--- Delay Zone (alarm 30 seconds after being triggered) 3--- Urgent Zone. (It will alarm if triggered, no matter it is in arm or 9 disarm status.) 5--- Inner Zone. (In “home arm” situation, it won’t alarm if detectors are triggered.) E.g.: If you want to set the second defense zone to be inner zone. You can input: *0225#. Suggestions: Usually, we set the door/window sensors installed around windows, balcony and doors as “Immediate Zone”. The detectors in this area will activate alarm in any mode of arming. Set wireless PIR detectors as “Inner Zone”, they will work in the mode of “Out Arm”, but do not work in the mode of “Home Arm”. You can set the door sensors at the main gates as “Delay Zone” if you do not want to take remote controller when going out. In this case, you can disarm the system within 30 seconds after opening the door, but the alarm system will not activate during this period. 6. Turn on/off warning tone for defense zone If you turn on the warning for defense zone, it will “beep” for three times to remind users of arming the system before going out. Command: On: * Zone No.+ 71 # Off: * Zone No.+ 70 # System default: Off 7. Turn on/off the function of anti-interference When turning on the function of anti-interference in arming status, it will activate siren to alarm (not calling users) if someone interferes the alarm system with the same frequency. Command: On: 17 * 1 # Off: 17 * 0 # 10 System default: Off 8. Turn on/off the function of anti-decode In order to prevent people from decoding the alarm system, it is recommended to turn on this function. Disarm only by the keypad. Command: On: 18 * 1 # 9. Off: 18 * 0 # System default: Off Turn on/off the reminder for phone line trouble It will warn you if the phone line is cut or short circuit. It will sound three “beep” every 10 seconds. Command: On: 22 * 1 # Off: 22 * 0 # System default: On 10. Set the ringing times Call the alarm host, after the ringing circle, it will get through automatically. At this time, you can remote control the alarm system For example, set the circle times as 04, and then you dial the number of the alarm system, it will get through after you hear 4 times of the ring. Command: 12 *XX #. XX shows times of ring, from “00--12”; 00 means the host will not get through and you can not remote control the system. System default is 00. 11. Set the alarming time of siren You can set alarming time of the siren according to the use’s request from 0 to 30 minutes. Command: 29 * XX #. XX is 00---30minutes. System default: 01 minute. 11 12. Turn on/off the warning tone of remote controller Turn on this function, the siren will make a short beep each time you press the remote controller. Command: On: 8# Off: 8* System default: On 13. Reset Reset means deleting all registered information including passwords. All the settings will return to the original status. Command: 0000 #. IV. Operation Instructions 1. Out Arm: Press the “Out Arm ” button on the remote controller or press “Out” button on the main panel for 2 seconds, 30 seconds later, there will be a “beep” and the OUT LED on the main panel will flash. The system enters Out Arm mode, and all the detectors will be in working status. 12 2. Home Arm: Press the “Home Arm ” button on the remote controller or press “Home” button on the main panel for 2 seconds, 30seconds later, there will be a “beep” and the Home LED on the main panel will flash. The system enters Home Arm mode. Detectors inside the house (in inner defense zone) will not work, only the detectors outside the house (in outside defense zone) will work, so that people inside can move freely, but others who break in from outside will trigger the alarm. 3. Disarm: Press “Disarm ” button on the remote controller or input “password+disarm” by the main panel, the system will enter into disarmed status. 4. Emergency: When there is an emergency, press the “Emergency ” button on the remote controller or the main panel, the system will alarm immediately no matter it is in arm or disarm status. 5. Receive alarm call When there is an alarm, the siren will start ringing, the “alarm” indicator on the main panel will light up, the defense zone indicator will display the number, and the system will make alarm call. After answering the call, user will hear the recorded message, and then can do the following 13 operations: Press *: listen-in for 30 seconds. (You will hear what is happening at the alarm spot.) Press #: confirm that you have received the alarm and the system will stop alarm. If you do not input #, the alarm system will continue to dial out all alarm phone numbers circularly. 6. Remote control by phone You can call the host phone number to remote control the system. After getting through, input “passwords + #”. (If the password is correct, the system will sound “beep” twice. If wrong, it sounds “beep” four times.) And then you can control the system with following commands: Press “1” to arm. (make sensors working) Press “2” to disarm (make sensors stop working) Press “*” to listen-in for 30 seconds; for continued listen-in, press “*” again to listen-in for another 30 seconds. Press “#” to exit. Note: The system will hang off automatically if passwords are wrong for 3 times or not any operation for 20 seconds. V. Components list Main panel 1 pc, Remote controller 2 pcs, PIR sensor 1 pc, 14 Door sensor 1 pc, Siren 1 pc, Power adapter 1 pc, Phone cable 1 pc, User manual 1 pc. The following sensors are optional: Optional sensors/detectors are packed separately. You can choose according to your specific requirements. 15 VI. Technical Parameters Main Panel Power Supply: AC: 220V±10%, DC: 9V Inside Battery: Ni-MH rechargeable battery: DC=7.2V Working Current: ≤50mA Alarm Current: ≤300mA Wireless Receiving Frequency: 315/433MHz±0.5MHz Wireless Receiving Sensitivity: 5mV/m Anti-jamming Intensity: 1V/m (frequency range: 20-1000 MHz) Outside Alarm Siren: 110db Working Condition: Temperature: -10℃~+40℃ Relative Humidity≤90% Detector Capability: 99pcs 16 Wireless Door/ Window Detector Power Supply: DC12V (built-in 12V battery) Static Current: ≤20uA Transmission Current: ≤15mA Transmission Frequency: 315/433MHZ±0.5MHZ Transmission Distance: No obstacle 80m Alarm Distance: 15mm Working Condition: Temperature -10℃~+40 ℃ Humidity ≤ 90% rh Wireless PIR Detector Power Supply: DC9V (built-in 9V battery) Static Current: ≤100uA Transmission Current: ≤20mA Transmission Frequency: 315/433MHZ±0.5MHZ Transmission Distance: No obstacle 80m Detective Speed: 0.3~3m/s Detective Distance: 5~12m Detective Range: Horizontal 110° Vertical 60° Working Condition: Temperature -10 ℃~+40 ℃ Humidity ≤ 90% rh Remote Controller Power Supply: DC 12V (built-in 12V battery) Static Current: 0 Transmission Current: 15mA Transmission Frequency: 315/433±0.5 MHz 17 Transmission Distance: No obstacle 80m Working Condition: Temperature -10℃~+40℃ Relative Humidity≤90% VII. Care and Maintenance The alarm system has excellent design and used advanced technologies. It shall be used with care. The following suggestions are required to maintain your obligations under the warranty terms, and for prolonging the service life of the system. Place the control panel and all parts and accessories out of children’s reach. Keep the alarm system dry. Rain, humidity and various fluids or moisture all will corrupt the electronic circuit. Do not use or place the alarm system in dirty locations, otherwise the electronic elements will be damaged. Do no place the system in excessively hot locations. High temperature will shorten the service life of electronic equipment, damage batteries, deform or even melt some plastic parts. Do not place the system in excessively cold locations. Otherwise condensation many occur and damage the circuit board of the alarm system. It is recommended that you check and test the alarm system periodically: Check the main unit every three months: 1. Whether it can arm/disarm normally. 2. Whether it can dial the number for alarm normally. 3. Whether it can receive wireless detectors’ signal normally 18 4. Whether the back-up battery can work normally. Check the wireless detectors once a month: 1. Trigger wireless detectors to see if system can alarm normally. 2. Check all detectors’ batteries to see if it’s in low voltage. 3. Check whether wireless detectors can send signal to the main unit normally. Since the alarm system is continuously in operation or standby mode, the supply adaptor of the control panel shall be connected to a safe and reliable socket. Do not place the system near your bedroom or office table, because the siren will make high-loudness sound in the case of alarm, which may adversely affect your rest or work. If the alarm system will not be used for a long time, please disconnect the system from the power supply. Please do not disassemble, repair and alter the products without permission, or it may cause accidents and faults. Do not drop this product on the ground or on hard objects, as it may lead to massive impact to cause faults and damages. Without approval and consent of relevant authorities, please do not set “110”, “119” or the alarm phone number of police station for this main unit. Please read the suggestions above carefully and follow the instructions herein. If any of the equipment does not work properly, please send it to the dealer or authorized service point for repair. We will try our best to solve the problem for you as soon as possible. 19 Brief list of setting command Description Command Record alarm message 6# Replay the message 6* Code wireless detectors 7# Delete wireless detectors 7* Set Alarm Phone Numbers Remarks [31~35]*phone number# Set monitoring center [38/ 39]*number# Do not set it if do not have 10*new password# new password should be 4 number a monitor center. User password digits; default: 1234 Zone No.: 01~08,91~97 X indicates zone type: Defense zone type *zone No. 2 X # 1: instant, 2: delay, 3: urgent, 5: inner, 0: close Defense zone warning *zone No. 71# ON tone *zone No. 70# OFF (System Default) Remote controller warning 8# ON (System Default) tone 8* OFF Anti-interference 17*1# ON 17*0# OFF (System Default) 18*1# ON Anti-decode 18*0# OFF (System Default) Telephone line trouble alert 22*1# ON (System Default) 22*0# OFF Ringing times 12*XX# XX: 00~12; default: 00 Siren alarming time 29*XX# XX: 00~30 minutes; Reset 0000# default: 01 20 FAQ Problems Causes 1. Hasn’t armed 2. Less than 30 seconds after arming 3. Set wrong phone Solutions 1. 2. 4. The two parts of door/window sensor is 3. to the manual 4. Remote controlling distance is too short and the light indicator is not on bright enough 6. Hasn’t checked code 1. The battery of remote controller is rusty 2. Low battery Adjust the installation place of the door each other Haven’t activated PIR Set the number again according installed too far from 5. Operate after 30 seconds number Cannot alarm by phone Arm the unit sensor 5. Activate the PIR 6. Check code again 1. Clean the rust 2. Change battery Light indicator of door sensor and PIR is always Low power battery Change battery on. Dial alarm number slowly The main panel has stored other numbers Set it again according to the operation manual 1. Low power battery in the accessory 2. There is block between the 1. Replace the battery 2. Pull out the antenna The main panel cannot control panel and the of the accessory and receive signals from the wireless accessory or the the main panel, and accessory distance between them is too far adjust the position 3.Code it to the main 3. The accessory has not been coded to the panel 21 panel