1
wall bracket up into its
tracks on the back of the
controller and, together,
mount the bracket and
controller back on the wall.
Make sure that hole "D" in
the bracket and the hole in
the back of the lower compartment of the controller
are aligned with each other
and with the pilot hole in
the wall's surface.
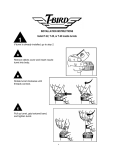
2. Pull upward on the sliding door (for controllers
with doors) to the latched
position that exposes the
face panel controls and
then with a firmer tug pull
the door upward and off
the controller. Remove the
lower access cover by
placing your fingers under
the door at the bottom of
the controller and your
thumb on top of the access
door on its latch hook.
Then, press gently down
on the latch hook and
swing the door outward
and downward away from
the controller. Turn the
controller upside down on
the edge of a flat surface
(see illustration).
CONNECT MAIN POWER WIRES
WARNING: Make sure the power source is off before
connecting any power wires.
3. Place a flat blade screwdriver in the groove of the
knockout labeled "A" in the illustration. With the
palm of your hand, strike the end of the screwdriver
handle to punch in one side of the knockout. Repeat
the process on the other edge of the knockout and
remove it. One knockout hole is sized for 3/4" conduit. If the size and number of valve wires require
more than 3/4" conduit, punch out the second
knockout for 1 " conduit instead.
OUTDOOR CONTROLLER
4. Slide the controller down over the mounting
bracket until lower mounting hole "D" aligns with the
hole in the back of the terminal strip compartment.
You may want to wait until after you have cut your
wire conduits to length before driving the last mounting screw through the aligned holes to secure the
controller to the wall or stud.
The illustrated "side view" shows how the controller,
"J" box, conduit and fitting are used for outdoor installations.
The slide-in clip holds the "J" box to the controller,
however, the "J" box must be screwed to the wall.
Cut both the power supply conduit to the right length
and your valve wire conduit.
Note 3: For installations with low overhead clearance
(and with no controller sliding door), slide the wall
bracket up and off the wall. Slide the
12