1
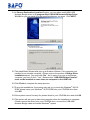
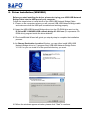
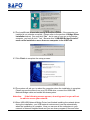
USER’S MANUAL
USB NETWORK CABLE
BF-110N
1. Introduction
Congratulations on your purchase of the Net-LinQ: an USB-USB Network Bridge
cable. This Net-LinQ USB Network Bridge cable provides a quick and easy solution
to network up to 17 USB computers via hot Plug and Play technology without adding
any network interface card. It is suitable for small offices, home offices, mobile users,
and network gamers.
Net-LinQ USB Network Bridge cable allows you easily to construct a network via
USB port, share all the resources such as files, printer’s peripheral equipments, etc.
2. Package Content
§
§
§
Hardware: USB-USB Network Bridge cable, USB A-B cable
Software: Net-LinQ driver software
User’s Manual or Quick Guide
3. Product Features
§
§
§
§
§
§
USB specification revision 1.1 compliant
USB host to host communication, Single cable solution for network
communication, construct USB Network up to 17 PCs
Resources sharing such as Printers, CD-ROMs, Modems, Scanners, etc.
Support TCP/IP, NetBEUI, IPX/SPX protocols
Standard Windows ® Explorer user interface
Data transfer rate: Up to 5M bits/sec
§
§
§
§
IBM PC 486DX4-100 MHz or higher or compatible system
Available USB port
CD-ROM drive
Windows ® 98, Windows ® ME, Windows ® 2000, Windows ® XP
4. System Requirements
5. Driver Installation (WIN98&ME)
Before you start installing the driver, please Don’t plug your USB-USB Network
Bridge Cable into the USB port of your computer.
Follow the steps below to install driver of the USB-USB Network Bridge Cable:
5.1 Power on the computers where you will connect USB-USB Network Bridge cable
and make sure that the USB port is enabled and working properly.
5.2 Insert the USB-USB Network Bridge driver into the CD-ROM drive and run the
D:\Driver\BF-110N\USB-USB network bridge V1.8.0.0.exe (D: represents CDROM drive) program inside the driver diskette.
5.3 The InstallShield Wizard will guide you step-by-step to complete the installation
process.
USB Net- Work Cable User’s Manual 1
5.4 In Choose Destination Location Window, you can either install USB-USB
Network Bridge driver to C:\program files\ USB-USB Network Bridge Driver
V1.8.0.0 or you can install it to the specified directory you want. Click NEXT.
5.5 The InstallShield Wizard wills pop-up a Question Window. If the computer you
installed is not a bridge computer. (Please refer to the section of Bridge Driver
installation below) you must click “No”, but in case of you are on the bridge
computer, you have to click ”Yes”. Because this “USB-USB Bridge Protocal”
must not be installed on more than one computer in the USB LAN
5.6 Click Finish to complete the setup process.
5.7 During the installations, the system may ask you to insert the Windows ® 98 CDROM, please insert your Windows ® 98 CD-ROM into your CD-ROM drive then
click OK.
5.8 If the system cannot find any file, please direct to your CD-ROM drive and click OK.
5.9 The system will ask you to reboot the computer when the installation is complete.
Please remove the driver from your CD-ROM drive, connect the USB-USB
Network Bridge cable and restart Windows ® system
USB Net- Work Cable User’s Manual 2
Attention: If the following screen appears, do not bypass it or you will not be
able to access your network.
5.10
Since USB-USB Network Bridge V1.8 has finished installing the network
driver during the installation, your USB network environment is set up
automatically when the installation is complete. Now you can see all the
computers in your network in Network Neighborhood and you can share programs,
files and other peripheral devices through the standard Windows ® interfaces, e.g.
Windows ® Explorer and Network Neighborhood.
5.11
To start sharing the resources, please follow the instructions below. Click
the Start menu, point to Programs\Windows Explorer.
5.12
Expand the desktop and select the drive, folder, file or printer you want to
share.
5.13
Move mouse cursor and click right button on the resource.
5.14
Select Sharing.
5.15
Select Shared As and enter the Shared Name to be recognized by other
computers.
5.16
Select an access type. For example, choose full to give the complete access
right to this resource or Read-Only to give others the read-only right to the
resource.
5.17
Click OK.
Note: When the installation is complete, system will assign IP address and
Submask automatically. Don’t try to change any settings unless you are an
Expert network user. Any improper settings would cause system fail on
some network functions.
USB Net- Work Cable User’s Manual 3
6. Driver Installation (WIN2000)
Before you start installing the driver, please don’t plug your USB-USB Network
Bridge Cable into the USB port of your computer.
Follow the steps below to install driver of the USB-USB Network Bridge Cable:
6.1 Power on the computers where you will connect USB-USB Network Bridge cable
and make sure that the USB port is enabled and working properly.
6.2 Insert the USB-USB Network Bridge driver into the CD-ROM drive and run the
D:\Driver\BF-110N\USB-USB network bridge V1.8.0.0.exe (D: represents CDROM drive) program inside the driver diskette.
6.3 The InstallShield Wizard will guide you step-by-step to complete the installation
process.
6.4 In Choose Destination Location Window, you can either install USB-USB
Network Bridge driver to C:\program files\ USB-USB Network Bridge Driver
V1.8.0.0 or you can install it to the specified directory you want.
6.5 When the windows appear as below, please click “Yes” to continue.
USB Net- Work Cable User’s Manual 4
6.6 The InstallShield Wizard wills pop-up a Question Window. If the computer you
installed is not a bridge computer. (Please refer to the section of Bridge Driver
installation below) you must click “No”, but in case of you are on the bridge
computer, you have to click ”Yes”. Because this “USB-USB Bridge Protocal”
must not be installed on more than one computer in the USB LAN.
6.7 Click Finish to complete the setup process.
6.8 The system will ask you to reboot the computer when the installation is complete.
Please remove the driver from your CD-ROM drive, connect the USB-USB
Network Bridge cable and restart Windows system.
Attention:
If the following screen appears, do not bypass it or you will not
be able to access your network.
6.9 Since USB-USB Network Bridge Driver has finished installing the network driver
during the installation, your USB network environment is set up automatically
when the installation is complete. Now you can see all the computers in your
network in Network Neighborhood and you can share programs, files and other
USB Net- Work Cable User’s Manual 5
peripheral devices through the standard Windows ® interfaces, e.g. Windows ®
Explorer and Network Neighborhood.
Note:
When the installation is complete, system will assign IP address and
Submask automatically. Don’t try to change any settings unless you are an
Expert network user. Any improper settings would cause system fail on some
network functions.
USB Net- Work Cable User’s Manual 6
7. Driver Installation (WINXP)
Before you start installing the driver, please don’t plug your USB-USB Network
Bridge Cable into the USB port of your computer.
Follow the steps below to install driver of the USB-USB Network Bridge Cable:
7.1 Power on the computers where you will connect USB-USB Network Bridge cable
and make sure that the USB port is enabled and working properly.
7.2 Insert the USB-USB Network Bridge driver into the CD-ROM drive and run the
D:\Driver\BF-110N\USB-USB network bridge V1.8.0.0.exe (D: represents CDROM drive) program inside the driver diskette.
7.3 The InstallShield Wizard will guide you step-by-step to complete the installation
process.
7.4 In Choose Destination Location Window, you can either install USB-USB
Network Bridge driver to C:\program files\ USB-USB Network Bridge Driver
V1.8.0.0 or you can install it to the specified directory you want.
7.5 When the windows appear as below, please click “Yes” to continue.
USB Net- Work Cable User’s Manual 7
7.6 The InstallShield Wizard wills pop-up a Question Window. If the computer you
installed is not a bridge computer. (Please refer to the section of Bridge Driver
installation below) you must click “No”, but in case of you are on the bridge
computer, you have to click ”Yes”. Because this “USB-USB Bridge Protocal”
must not be installed on more than one computer in the USB LAN.
7.7 Click Finish to complete the setup process.
7.8 The system will ask you to reboot the computer when the installation is complete.
Please remove the driver from your CD-ROM drive, connect the USB-USB
Network Bridge cable and restart Windows system.
Attention:
If the following screen appears, do not bypass it or you will not
be able to access your network.
7.9 Since USB-USB Network Bridge Driver has finished installing the network driver
during the installation, your USB network environment is set up automatically
when the installation is complete. Now you can see all the computers in your
USB Net- Work Cable User’s Manual 8
network in Network Neighborhood and you can share programs, files and other
peripheral devices through the standard Windows ® interfaces, e.g. Windows ®
Explorer and Network Neighborhood.
Note:
When the installation is complete, system will assign IP address and
Submask automatically. Don’t try to change any settings unless you are an
Expert network user. Any improper settings would cause system fail on some network
functions.
8. TCP/IP Setup: Access Internet through Ethernet
With USB-USB Network Bridge cable, you can access Internet through Ethernet. We
need to construct an USB LAN and an Ethernet LAN environment, as the diagram
shows below:
8. Network Construction
Computer A: Connects Computer B with USB-USB Network Bridge cable.
Computer B: The Bridge Computer which connects Computer A through USBUSB Network Bridge cable and connects Computer C with an Ethernet Adapter.
Computer C: One PC of the Ethernet LAN connects Computer B with an
Ethernet Adapter and can access the Internet directly.
USB Net- Work Cable User’s Manual 9
9. Bridge Driver Installation
Take this Network Construction above as an example, Computer B has to be the
Bridge Computer, and it needs Bridge Driver while installing. The InstallShield
Wizard will pop-up a Question Window; In case of Computer B, it has to be the
Bridge Computer, you must click “Yes”, but in case of Computer A, you have to
click ”No”. Because this “USB-USB Bridge Protocal” must not be installed on
more than one computer in the USB LAN.
After you install this Bridge Driver on Computer B, there will be one more protocol:
USB-USB Networking Bridge in the Network Configuration. This is a routing
protocol; you can use it to bridge between an USB LAN and an Ethernet LAN.
10. TCP/IP Setup on Computer A
10.1
When all installation processes are completed, you have to specify an IP
address, Subnet Mask and Gateway on Computer A:
10.2
Click the Start menu, point to Setting\Control Panel. Double click Network
icon. In Configuration tab, select TCP/IP -> USB-USB Network Bridge Adapter,
and then click Properties.
10.3
In IP Address tab, please choose “Specify an IP Address”, and fill in the IP
address and Subnet Mask value properly. This information should be from your
MIS people and make sure this IP Address, which is not in use of your Ethernet,
or it will cause a network failure.
USB Net- Work Cable User’s Manual 10
10.4
In Gateway tab, you must specify a proper value. This IP Address of
Gateway should be the same with the other Computers in the Ethernet.
10.5
When complete all these TCP/IP setup processes, you have to restart your
computer again. After that, the Computer A can use USB-USB Network Bridge
cable to connect Computer B to access the resources of Ethernet (File, CDROM, and Scanner sharing) and execute all the functions on Internet (WWW,
Email, FTP, Telnet, Gopher… etc.).
11. Driver Uninstallation
11.1 Follow the steps below to remove the the USB-USB Network Bridge driver from
Windows ® system:
11.2 Click the Start menu, point to Settings\Control Panel. Double click
Add/Remove Programs icon.
11.3 In Install/Uninstall tab, select USB-USB Network Bridge Driver V1.8.0.0
11.4 Click Add/Remove button and then click OK.
11.5 Restart Windows ® system.
USB Net- Work Cable User’s Manual 11
12. Troubleshooting
If you have successfully installed the driver, but can’t see either your or the other
computers’ names in Window’s Network Neighborhood, please check the following
points.
12.1
Make sure the USBUSB Network Bridges Cables
are firmly connected to the
USB ports of your computers
or USB hubs.
12.2 Click the Start menu, point to
Settings\Control Panel.
Double click Network icon. In
Identification tab, ensure each
computer has been given a
unique name, not to conflict
with each other. Make sure the
Workgroup name is the same
for all the computers in the
network.
12.3
In Configuration tab,
check the USB-USB
Network Bridge Adapter is
in the following network
compenents are installed
list.
12.4
In Configuration tab,
click File and Print Sharing
button. Make sure both I
want to be able to give
others access to my files
and I want to be able to
allow others to print to my
printer(s) functions are
selected. It would cause the
File and printer sharing for
Microsoft networks service
be installed and enable this
computer to share its files
and printers to the others.
After checking all these points, if the network is still not working properly, please contact
your supplier instead of revising the settings by yourself unless you are an expert
network user.
USB Net- Work Cable User’s Manual 12
13. Disclaimer
Information in this document is subject to change without notice. The manufacturer
does not make any representations or warranties (implied or otherwise) regarding
the accuracy and completeness of this document and shall in no event be liable for
any loss of profit or any other commercial damage, including but not limited to
special, incidental, consequential, or other damages.
No part of this document may be reproduced or transmitted in any form by any
means, electronic or mechanical, including photocopying, recording or information
recording and retrieval systems without the express written permission of the
manufacturer.
All brand names and product names used in this document are trademarks, or
registered trademarks of their respective holders.
14. FCC Statement
This device generates and uses radio frequency and may cause interference to
radio and television reception if not installed and used properly. This has been
tested and found to comply with the limits of a Class B computing device in
accordance with the specifications in Part 15 of FCC Rules. These specifications
are designed to provide reasonable protection against such interference in a
residential installation. However, there is no guarantee that interference will not
occur in a particular installation. If this device does cause harmful interference to
radio or television reception, which can be determined by plugging the device in
and out, the user can try to correct the interference by one or more of the following
measures:
§
Reorient or relocate the receiving antenna.
§
Increase the separation between the device and receiver.
§
Connect the computer into an outlet on a circuit different from that to
which the receiver is connected.
§
Consult the dealer or an experienced radio/TV technician for help.
15. Technical Support
If you encounter any technical problem, please contact us through:
Taiwan First Line Electronics Corp.
No. 40, Chung-Shan Road, Tu-Cheng Industrial Area, Taipei Hsian,
Taiwan, R.O.C.
Web site: www.bafo.com.tw
OR
Quality Computer Accessories Inc. NJ
70 Ethel Road West, Unit 1, Piscataway, NJ 08854, USA
Web site: www.bafo.com
USB Net- Work Cable User’s Manual 13