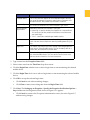
1
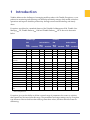
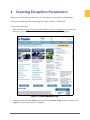
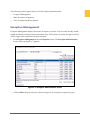
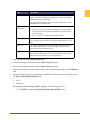
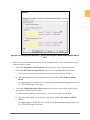
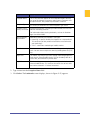
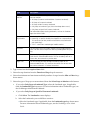
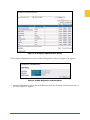
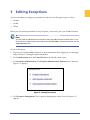
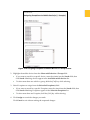
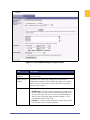
• Week Nights
• Weekends • Nights and Weekends b. Click the Day drop down menu in the Begin Monitoring column to change the day of the week, as needed.
c. Click the Clock icon in the Begin Monitoring column to change the daily time using the Hour, Min and AM/PM fields as needed. d. Click the Day drop down menu in the End Monitoring column to change the day of the week, as needed.
e. Click the Clock icon in the End Monitoring column to change the daily time using the Hour, Min and AM/PM fields as needed. f.
To clear the selected options and re‐enter information, click Clear.
g. Click Next to advance to the next screen. Click Previous to return to the last screen. Click Cancel to return to the Exception Administration screen.
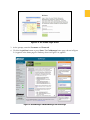
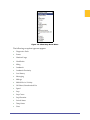
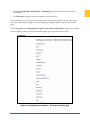
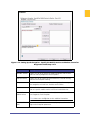
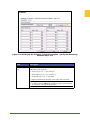
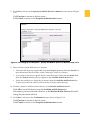
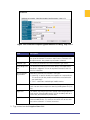
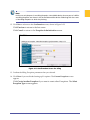
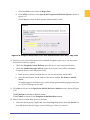
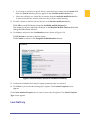
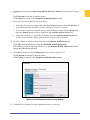
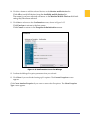
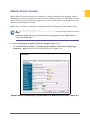
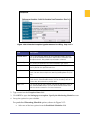
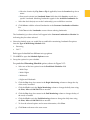
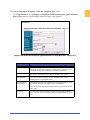
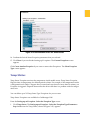
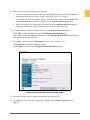
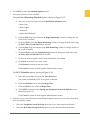
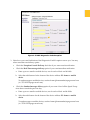
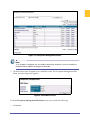
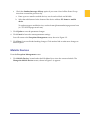
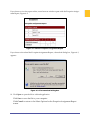
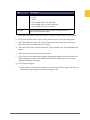
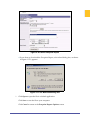
For 24 X 7 Schedule options, shown in Figure 2–16:
a. Select the correct time zone from the Time Zone field.
The system will default to PDT if no option is selected.
b. Click the Calendar icon to select the Begin Date. c. Click the Clock icon to select the Begin Time.
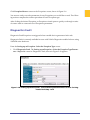
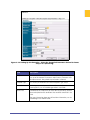
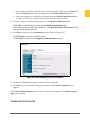
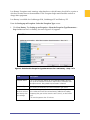
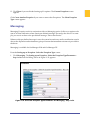
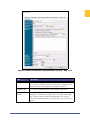
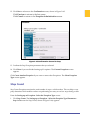
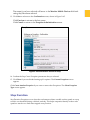
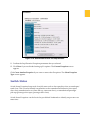
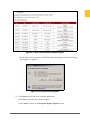
d. Click NEXT to advance to the Specify the Exception Notification Options screen, shown in Figure 2–17
Click Cancel to return to the Exception Administration screen.
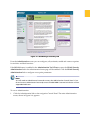
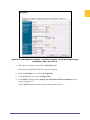
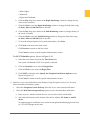
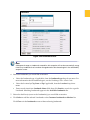
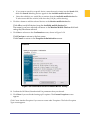
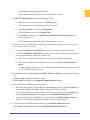
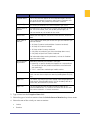
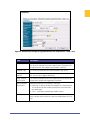
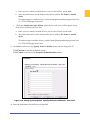
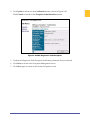
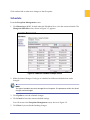
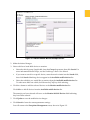
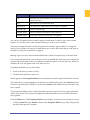
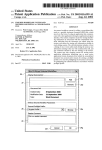
8. Select how you want Notification of the Handset Usage Exceptions sent to you. You may select more than one delivery option.
•
Check the Exception Console Delivery check box if you want console notification.
•
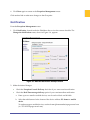
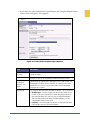
Check the Real‐Time message delivery option if you want immediate notification. a. Enter up to two email or mobile devices, one for each of the 1. and 2. fields.
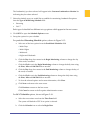
b. Select the radio button for the format of the device address: PC format or mobile device. To send messages to mobile devices, use the format {phonenumber}@page.nextel.com (i.e. [email protected]).
Trimble MRM Confidential
29