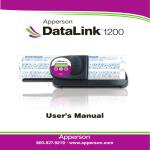
Download EZ Assessment User Manual
Transcript
EZ Assessment Administer Test User Manual Table of Contents Getting Started Application Overview page 2 Online Testing Assign a Test Manage a Test Student Testing Close Test page 3 page 4 page 5 page 5 Offline Testing Pre Slug Forms Scan Tests Upload/Preview Results page 6 page 7 page 8 Score Tests / Publish Results Score Tests Publish Results Unpublish Results page 9 page 10 page 10 Application Overview Create tests using the item banks or define an answer key View data from assessments administered using EZ Assessment Add questions to school item bank Administer tests either online or offline For information about creating items, creating tests, or viewing test data, please refer to the EZ Assessment Manual - Creating Itesm/Tests and Viewing Data. 2 Online Testing Assign a Test Select Administer >Online > Assign to assign an online test to a group of students. Complete the appropriate information in the Test Assignment Form. Each assignment must have a description Click Save Data when the form is complete Choose the test the students will take Select the teacher Choose a testing date Students will log in by either typing in their student ID number or choosing their name from a list Delete a student from the list Select a period (optional) Choose a class and click Add Class Choose a student and click Add Student After clicking Save Data the user will be taken to the Manage a test page. This page is also accessible on the menu page by going to Administer > Online > Manage (see pg. 4). 3 Manage a Test Edit an online testing assignment View the test that has been assigned View student progress View and score student responses Open a Test (for student testing) To open a test for student testing, check the box to the left of the row and select ‘Open for Testing’. The student access code will appear in the far right column. Student Online Testing (see page 5) Close a Test (see page 5) See ‘Score Tests / Publish Results’ (pg. 9-10) for information on how to score test and publish (promote) data to view and analyze. 4 Online Student Testing Students will go to https://www.ezatest.com/testing and enter the access code (available on the test list once the test has been opened for testing) for the assignment they will be completing, and either put in their student number or choose their name from a list. Once the name is selected or ID number entered, the student test will open. After answering a question the student will click Submit Answer to move to another question. After answering a question, the question link for that question turns green. When completely finished taking the test, the student will click I’m Done. Close a Test (for scoring and publishing) When the test is ready to score and publish the user must close the test. From the Manage Test List place a check mark to the left of the test, then select ‘Close for Testing’ from the drop down list. Until an assignment is closed, it cannot be scored or published. See ‘Score Tests / Publish Results’ (pg. 9-10) for information on how to score test and publish (promote) data to view and analyze. 5 Offline Testing Pre Slug Forms To test students offline, users will need a Benchmark 3000 scanner and scan forms (both attainable from Apperson @ 1-800-438-0162). It is important to be sure the lettering scheme of the test matches the lettering scheme of the scan form. The scan forms will need to be Pre Slugged. 1. Log into EZ Assessment, click on Pre Slug under Offline in the Administer Test menu. 2. Choose the Pre Slug criteria: a. If tests are organized by folder, choose the folder location. Otherwise, leave Choose Folder set to ALL. b. Next to Choose Test, select the level the test was created on (District/School/Teacher) and then the test itself from the drop down menu. c. Select the teacher of record (test will be attributed to this person in the test data) from the Choose Testing Teacher. If a teacher’s name is not in the list, add the teacher as a user using Administrator tools (see Site Administrator at the Support page at www.k12els.com for directions). If there are duplicate teacher names, change names using Administrator on the dashboard. d. Next to Choose Testing, select Class or Students according to whether you want to add an entire class of students to the list or just one student at a time. Then from the Choose Testing drop down menu select either a teacher’s class (if you chose Class) or an individual student (if you chose Students). e. Select a Period or leave set to N/A if period does not apply. Period must be designated in order to view results by period. 3. Click Add to List. The list created below can be edited by deleting students from the list who will not be tested. 3. Select corresponding form from the Form drop down menu. Form number appears at the bottom left of Apperson test form. 4. When your list has been created (we suggest printing no more than 200 test records at a time), click on Create PDF. 5. Place blank forms into a laser printer and print. Users will need to be careful that all settings on their printer that may cause the file to shrink (shrink to fit, print scaling, fit to page) are set in such a way as to not affect the size of the file. Do not divide the scan forms before pre slugging. Once the forms are pre slugged, they are ready to be used for the assessment. After the students take the test, the forms will need to be scanned and uploaded. 6 Important Note: ELS and/or Apperson Education Products will not be held liable for test forms damaged or rendered unusable by this pre-slugging process. Please test carefully prior to printing a large batch of forms. We recommend first printing a few forms and scanning them to make sure they are properly read by the scanner and ELS Interface software prior to printing a large batch of forms. Pre-Slugging Do’s and Don’ts Pre-Slugging Do’s Do: Choose a form with the same answer pattern as the test. Do: Monitor printed forms at a minimum of every 20 forms. Barcodes should be dark, crisp and centered horizontally on the blue line. Do: Use a laser printer. Do: Check one form from each new pack to make sure that it fits into the scanner tray. Pre-Slugging Don’ts Do Not: Separate the forms prior to printing. Do Not: Pre-Slug ‘A-D/F-J’ forms for an ‘A-D’ test (or vice-versa). Do Not: Print large batches of forms without monitoring the printed forms. Do Not: Print forms with an Ink Jet printer. Do Not: Use a printer or copier that is low on toner. Scan Tests Initial Setup 1. 2. 3. 4. Go to www.k12els.com >Support>EZ Assessment and click on ELS Interface Download/Install and select ELS Scanning Interface Setup.exe to install the software. Click Run and follow prompts to complete install. Open the ELS Interface software and install the scanner drivers for the Benchmark 3000. [If the scanner install dialogue screen doesn’t initially appear, go to Help>USB Drivers and install the ‘Benchmark 3000’ driver if the light is red. If the light is green, the driver is already installed.] Close the ELS Interface software. Unpack the Apperson Benchmark scanner, put in the ink cartridges, and connect the scanner via USB 1. To Scan Forms a. Open the ELS Interface software. b. Go to Scanner and select Scanner Settings, set the sequence number to ‘1’ and click on Print Batch/ Sequence #. c. Select your desired scoring mode from the menu bar (Test Scoring mode if using a key, Data Collection, the most common mode for ELS users, if not). If you are doing Test Scoring method, place the key face up in the scanner tray and push the Scan/Pause button on the scanner. d. Place the test forms in the scanner tray, face up, and push the Scan/Pause button on the scanner. e. When scanning is complete, click Results Export to export your data. Name and save the file to a location you can easily recall. Note: Multiple teachers and/or test can be scanned in each batch if so desired. 7 Upload Results a. Click Upload to PM from the menu bar in ELS Interface or choose Administer Test > Offline > Uploads, from the EZ Assessment menu page. b. Set the criteria for the upload file. If your file contains the Test and Teacher ID’s, the criteria can be left From Upload File. If you wish to overwrite a particular test and/or teacher id to all records in the file, select a test and/or teacher from the drop-down list(s). If there are duplicate teacher names in the list, change the names using Administrator tools (see Site Administrator at the Support page at www.k12els.com for directions) on the dashboard. c. Set the date that the test was administered. Set the same date for all tests that you want grouped together. d. Select the ‘browse’ button and select the scanned upload file that was saved in step 1e. e. Select ‘Save’ and the test records will appear in a preview screen. Preview Results a. On the Preview Screen, edit Student Name, Teacher Name, Test Name, Period. b. Choose one of the following options on the screen: Score Upload, Preview Later, or Delete Upload. c. Selecting Score Upload will send the test results into Score Tests/ Publish Results (see pg. 9-10) (To Upload Additional Test Files) a. Return to ELS Interface, go to Scanner>Reset Scanner and respond No when asked whether you wish to save the session. b. Repeat steps 1 and 2 to upload additional test files. Test Form Collection Directions (for teachers) 1. 2. 3. 4. 5. Don’t use paper clips on forms. Don’t use any sticky notes on the test forms. Remove all blank forms or partially finished that you don’t want included in totals. Stack forms in order by test and teacher. If the front edges of forms are bent, stack the forms together and put a heavy weight (e.g. ream of paper or several textbooks) on top of the forms for a period of time. See ‘Score Tests / Publish Results’ (pg. 9-10) for information on how to score test and publish (promote) data to view and analyze. 8 Score Tests / Publish Results (For Both Online & Offline Tests) Score Tests For Teacher and/or Administrator Scoring of constructed response items: Go to the Menu page and select Offline > Scoring or Online > Manage, depending on which type of tests you wish to score. (Teachers or Administrator users can perform this step) Place a check next to the test section(s) and choose Open Scoring Grid (if the test contains constructed response items) or Publish to Reporting if the test sections are ready to move to reporting (for viewing of results and reports). Scoring Grid Multiple choice items will be scored automatically. Constructed response items (if included in assessment) must be scored manually. By clicking the red box of the item, users are able to see the student response (if an online assessment) and apply a score to it. Users are also able to click View Question or View Rubric to see information about the item. Once an item is scored, users can click Next Question or Next Student to continue. When scoring is complete, select Back to List. 9 Publish Results Once assessments are scored they can be published to reporting so that test data can be viewed and reports created, View Results Results can be viewed by going to the EZ Assessment menu and choosing View Data > View Test Data. (See more information regarding data views and data reports available in the EZ Assessment Manual.) Unpublish Results If test data needs to be rescored or deleted, the user must go to Administer > Offline > Score or Administer > Online > Manage and change the filter to Published, then select Unpublish from Reporting. The results can now be rescored (see Scoring Tests / Publishing Results on previous page). 10 Support Information Support Please contact us by phone (1-877-233-7833) or e-mail ([email protected]) with any questions you may have regarding our products. System Requirements The ELS Product Suite is a web application that is hosted by Educational Leadership Solutions, Inc. Because it is an internet-based application, users (teachers and administrators) can access it from any computer that has access to the internet. The applications can run on web browsers, including Internet Explorer, Mozilla Firefox, and Safari. Training The ELS Product Suite has been designed to require little or no formal training. It is our goal to make the application user-friendly to the point that it can be mastered by following written instructions. All training documents, user manuals, and product demos are available at our website: www.k12els.com. Educational Leadership Solutions, Inc. also provides on-site training for schools who desire additional assistance with implementing the ELS Product Suite. ELS, Inc. Customer Support 877-233-7833 [email protected] 11 12


