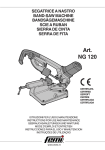
1
X Rocker Gaming Chair SKU#5148001
Have this item number ready when contacting customer services
Thank you for purchasing the X Rocker!
Welcome to the world of interactive audio. With your
new X Rocker you can not only hear your music
but actually FEEL it. Whether you are listening
to music, watching a movie, or playing a game, you
will become a part of it. We know you will enjoy
your X Rocker experience!
Get ready to experience sound as you never have
before!
IMPORTANT: You must keep your original retail receipt as proof of purchase.
UK resident and need assistance?
Contact customer services at www.x-rocker.co.uk or call
+44 (0) 118 907 0140
Non-UK residents contact customer services at www.thexrocker.com for assistance
Mon - Fri 09:30 - 17:00 excluding bank holidays.
1
FEATURES
A-Control panel
A1-Bass Volume Adjustment
A2-Volume Adjustment
A3-Audio input jack
A4-Audio output jack for linking multiple chairs
A5-Wire mode / Bluetooth mode Switch
A6-USB Power Port
A7-Power On / Off Switch
A8-9V DC Power input jack
A9-Power indicator Light
A10-MP3 Input Jack
A11-Headphone jack
A12-Bluetooth indicator light
A1
A2
A3 A4 A5 A6
A12
A7
A8
A9
A10 A11
Answers to frequently asked questions are available at www.x-rocker.co.uk
Use the Contact Us online form or call
+44 (0) 118 907 0140
2
9.84ft/3m
B1
B3
B2
B5
B4
B-Accessories Supplied
B1-3m RCA Stereo to RCA stereo plug cable(1 PC)
B2- INPUT:100-240V AC 50/60Hz
OUTPUT:9V DC 2000mA Main POWER Adapter.
B3-RCA female to female barrel adapter(2PCS)
B4-1m 3.5mm stereo male to 3.5mm stereo male cable(1PC)
B5-0.15m RCA stereo male to 3.5mm stereo male cable(1PC)
C-Audio Specifications
1.The unit specifications:
1)Signal -to-Noise Ratio(Amplifier):
Subwoofer:>65dB
Satellite:>60dB
2)Frequency Response:60Hz~15kHz
3)Distortion:Subwoofer:<4%(F=100Hz)
Satellite:<1%(F=1kHz)
4)Input: DC 9V
2A
* Some parts may vary slightly
D-Information of power supply unit:
Trade mark: BI
Model: BI24-090200-AdB
Input: 100-240 V~, 50/60 Hz, 0,5 mA;
Output: 9 V
2A
IMPORTANT: The power supply must be a fixed voltage with good main suppression.
Notice:
1) As a power-saving feature, the control panel (part A) switches off automatically 15 minutes after track play
reaches the end and no control is operated, to reboot the control panel, you just need press the power on/off
switch twice, make sure the power indicator lights light up again.
2) The apparatus shall not be exposed to dripping or splashing and that no objects filled with liquids, such as
vases, shall be placed on the apparatus.
3) The MAINS plug or an appliance coupler is used as the disconnect device, the disconnect device shall remain
readily operable.
Trade mark: BI
Model: BI24-090200-AdB
Input: 100-240 V~, 50/60 Hz, 0,5 mA;
Output: 9 V
2A
ATTENTION:
•
•
•
•
•
USB port only can be used to charge electronic devices.
Bluetooth connection has a 30 feet / 10 meters range of virtually unlimited wireless listening in your home.
When using in wire mode, please keep the band to “AUX” (A5).
When using in Bluetooth mode, please keep the band to “ ” (A5).
Your X-Rocker Bluetooth enabled chair is enabled to pair with the majority of Bluetooth enabled devices,
however certain gaming consoles limit the ability of their Bluetooth technology to connect with 3rd party devices.
Answers to frequently asked questions are available at www.x-rocker.co.uk
Use the Contact Us online form or call
+44 (0) 118 907 0140
3
FUNCTIONS:
•
•
•
•
•
•
•
•
Foldable construction for ease of storage and portability.
Side control panel with volume, bass control, input/output jacks, and band switch.
Ergonomic design with full back support.
Headphone Jack for personal use.
Easy to clean, heavy duty upholstery grade PU cover.
Connect most Bluetooth devices to your X Rocker
Control your music from your Bluetooth device.
Easily connect your Bluetooth device without going near the X Rocker.
READ BEFORE USE:
•
•
•
•
•
•
•
•
•
•
•
•
•
•
•
•
•
•
•
•
•
•
•
Keep these instructions for future reference.
Heed all warnings.
Follow all instructions.
Do not use the chair near water.
Clean only with dry cloth.
Do not block any ventilation openings, Install in accordance with these instructions.
Do not install near any heat sources such as radiators, heat registers, stoves, or other apparatus(including amplifiers) that
produce heat.
Do not defeat the safety purpose of the polarized or grounding-type plug. A polarized plug has two blades with one wider
than the other. A grounding type has two blades and a third grounding prong. The wide blade or the third prong are provided
for your safety. If the provided plug does not fit into your outlet, consult an electrician for replacement of the obsolete outlet.
Protect the power cord from being walked on or pinched particularly at plugs, convenience receptacles, and the point where
they exit from the chair.
Only use attachments/accessories specified by the manufacturer.
Use only with the cart, stand, tripod, bracket, or table specified by the manufacturer, or sold with the chair, When a cart is used,
use caustion when moving the cart/chair combination to avoid injury from tip-over.
Unplug this chair during lightning storms or when unused for long periods of time.
Refer all servicing to qualified service personnel, Servicing is required when the chair has been damaged in any way, such as
power-supply cord or plug is damaged, liquid has been spilled or objects have been fallen into the chair, the chair has been exposed
to rain or moisture, does not operate normally, or has been dropped.
Always make sure hinge is locked before moving.
Always make sure hinge is locked before sitting in the chair.
Excessive use of audio equipment could lead to hearing loss.
Excessive sound pressure from earphones and headphones can cause hearing loss.
Children under the age of 13 should not use this product without adult supervision.
Strictly for indoor use. Do not expose to direct sunlight,moisture or extreme temperatures.
if the cover becomes wet, disconnect the power immediately and don’t use until it is completely dry.
Do not attempt to remove the cover or any components. Removal of the cover or tampering with components puts you
at risk for injury or death from electrical shock.
The apparatus shall not be exposed to dripping or splashing and that no objects filled with liquids, such as
vases, shall be placed on the chair.
The MAINS plug or an appliance coupler is used as the disconnect device, the disconnect device shall remain
readily operable.
SET UP:
1. Lift X Rocker out of box.
2. Keep the chair in the folded position and place it on the floor so that the back side of the chair is touching the floor and
the bottom of the seat is facing up.
3. Review the set up diagrams to familiarize yourself with the X Rocker’s components, accessories, and set-up.
4. Please complete steps 1- 4 to assemble the chair.
5. Unpack the power adapter and connect it to the main power outlet, then to the power jack on the control panel(A8).
6. Press the power button(A7) and confirm that the power indicator light(A9) is on. In Bluetooth mode, please keep the
band to “ ” (A5), confirm that it’s indicator light is flashing(A12).
7. Follow the connection diagrams. They show how to connect the X Rocker to the audio source of your choice.
8. More information please reference the additional assembly instructions.
9. Adjust the bass and volume levels to your preference...start rocking.
Answers to frequently asked questions are available at www.x-rocker.co.uk
Use the Contact Us online form or call
+44 (0) 118 907 0140
4
WIRE MODE CONNECTION GUIDE
GAMING SYSTEMS
XBOX , XBOX360 , XBOX ONE , Wii, PLAYSTATION 3 , PLAYSTATION 4 , etc.
TM
TM
TM
TM
TM
MP3/CD/DVD/GAMES/PSP/IPOD/IPAD
Answers to frequently asked questions are available at www.x-rocker.co.uk
Use the Contact Us online form or call
+44 (0) 118 907 0140
5
BLUETOOTH MODE CONNECTION GUIDE
BLUETOOTH DEVICE
Call
Pairing your X Rocker:
Only 1 device can be paired to X Rocker at a time, to pair X Rocker with a mobile device, refer to the Bluetooth paring
procedurs in corresponding mobile phone or music player user manual and follow the steps below:
•
•
•
•
•
•
Make sure there are no wires or leads that are inserted into your device before using Bluetooth.
Make sure the band(A5) is on “ ” position, and blue Bluetooth indicator light is flashing rapidly on the control panel.
Select the device name “ X Rocker ” on the screen of your device, add the unit to your device’s paired device list.
When pairing is successful, the blue LED indicator(A12) will stay on, if you play music, the indicator(A12) will be slowly flashing.
Confirm the connection on your device.
Your X Rocker is now connected and ready to play music! Just play music on your device as you normally would and
the sound will came out of X Rocker!
Once BLUETOOTH devices are paired, there is no need for pairing again,
Keep in mind that X Rocker has a 30 feet / 10 meters range.
Changing connected device:
If you want to switch from one device to another, follow the steps below:
• End the existing Bluetooth connection with the connected device, access the Bluetooth Manager and disable the Bluetooth
function of the device.
• The X Rocker can now be connected to a different device.
• Follow the directions in “ Pairing your X Rocker ” to connect a different device.
Bluetooth License
The Bluetooth® word mark and logos are registered trademarks owned by Bluetooth SIG Inc. and any use of such marks by Ace Bayou
Corporation is under license. Other trademarks and trade names are those of their respective owners.
Answers to frequently asked questions are available at www.x-rocker.co.uk
Use the Contact Us online form or call
+44 (0) 118 907 0140
6
Wired Connection
IMPORTANT: Refer to TV Manual for the audio outputs your TV has. You will require:
-Headphone socket
-Red and White RCA (not next to a yellow socket)
If you have a scart socket, you will need a scart to an audio output adapter.
Direct connection to game console
If you use component or AV cable to connect console to TV:
•Fit the B3 connectors to the ends of the B1cable
•Unplug the Red and White plugs of the console’s AV cable from the TV, leaving the Yellow (video)
plug in place.
•Plug the Red and White plugs of the console’s AV cable into the B3 connectors on the Rocker’s B1
cable.
Component or AV cables are supplied with new models of PlayStation 3, X Box Elite and Wii,
as well as earlier generation consoles.
If you use HDMI cable to connect to TV
Connect Rocker to one of TV’s Audio Out connections, Most HD-ready TV sets have some combination of RCA,
mini-plug or optical audio interfaces enabling audio connection to accessories. Many have all three.
•RCA connection is direct to the RCA plug terminations of the Rocker’s B1 cable, but make
sure you are connecting to an Audio Out pair. If your TV has only two RCA sockets and
they are not marked Audio Out, they are probably input sockets and cannot send audio
Information to the Rocker.
•Mini Plug connection. Mini Plug sockets are often found on the front or side of the TV
set, marked with the headset icon². Fit the RCA-to-Mini Plug adapter[B4 on instructions]
to the RCA ends of your three-meter cable[B1 on the instructions], converting your three
-meter cable to a mini plug-to-mini plug connector. Plug one end into TV’s headset socket
and the other into Rocker’s mini Plug input socket.(This is same configuration as for MP3 and other portable
/handheld devices.) NOTE:Audio out volume through this outlet is usually separately adjustable from speaker volume,
Please consult TV’s user guide for how to regulate output.
•Optical Audio Out: A few models of TV only have optical audio out. if you have one of these sets,you will need an
optical to cable or optical to RCA coaxial adapter, sometimes called a Toslink to RCA adapter, and some connecting
cables. There are several models of adapter available at reasonable prices from general electronic retailers and HD
specialist shops and web sites.
Wireless Connection
•If you use the console’s Component or AV cable: For direct connection to a game console, fit the mini-plug end of
the B4 Mini Plug-RCA adapter to the Rocker’s transmitter. Fit the RCA socket ends to the the red and white audio plugs
of the component or AV cable.If they are plugged into the TV, remove them, leaving the yellow video cable in place.
•If you use HDMI connection to the TV: Fit the rocker’s transmitter to an available audio-out on the TV, using the
appropriate connector mini-plug to mini-plug for the headset audio-out, or mini plug -to-RCA for RCA audio-out.
•Other sound sources: Connect transmitter to MP3 players or handheld games using mini plug-to-mini plug
connector. For other devices such as stereo amplifiers, locate the most suitable audio output. Connectors compatible
with most sound sources are included with your X Rocker.
Answers to frequently asked questions are available at www.x-rocker.co.uk
Use the Contact Us online form or call
+44 (0) 118 907 0140
7
TROUBLE SHOOTING
-Unable to connect to game consoleMost gaming consoles are shipped from the manufacturers with an Audio/Video RCA cable. The A/V RCA cable has three
RCA plugs: a video plug(yellow) and two audio plugs(red and white). if your gaming console came with an A/V RCA cable.
please follow the instructions supplied by the manufacturer for setting it up and connecting it to the TV. Please note that
you must leave the red and white audio jacks on the A/V cable UNCONNECTED. Once the console is properly connected to
your TV. please follow the diagram in the illustrated X Rocker Set-up guide to connect the gaming console to the X Rocker.
If your gaming console was shipped with a coaxial cable, Instead of an A/V RCA cable, you must follow an alternate set-up
procedure (coaxial cable is the same type of cable that is used to connect a VCR to the TV). You will quickly recognize if your
gaming console uses this type of cable. it connects the gaming console directly to the television and carries both the audio
and video signal over a single cable, if your gaming console uses a coaxial cable, you CAN NOT connect it directly to the
X Rocker. Instead,you must use an intermediary A/V device(such as a TV,VCR,DVD,TIVO,etc).
a. Connect your gaming console to the intermediary A/V device via the coaxial cable.
b. Connect the X Rocker to the ‘Audio Out’ jack on the intermediary A/V device.
c. Follow diagram 2 in the X Rocker Set-up guide to connect the X Rocker to the intermediary A/V device and
finalize the setup.
If your gaming console is attached to an HD TV with an HDMI cable.You will need to connect the chair using either the
audio out jacks on the back of the TV or by plugging into the headphone jack on the front of the TV.
-Unable to hear any sound from the X Rocker1. Check to ensure that the power adapter is properly connected to the power jack(A8). When properly connected, the
indicator light(A9) on the control panel should light up when the power switch(A7) is turned on. If the indicator light(A9)
does not light up, try to use another power outlet in your home.
2. Make sure the power unit is turned on and indicator light on the control panel is lit. If it is not, please press the power
switch on the control panel.
3. When you use wire mode, make sure the band(A5) is on “ AUX ” position.
4. When you use Bluetooth mode:
• Make sure that there is no wired line that insert in your device before using Bluetooth.
• Make sure the band(A5) is on “ ” position.
• Make sure the volume of X Rocker and the volume of mobile musice device is set to a comfortable listening level.
• Make sure you are within range of the X Rocker and your mobile music device is connected via Bluetooth technology
with the X Rocker.
5. Once you have successfully completed 1 - 4. Please review the X Rocker illustrated set-up guide. Double check all audio
connections. Finally, check that the volume on the hand remote is turned to an audible level on both the TV and the chair.
6. If you have completed 1 - 5 and still do not hear sound, try connecting another audio source(CD player, television,VCR or
game console) and go through the steps again.
DO NOT SHIP ANYTHING TO US WITHOUT CONTACTING US FIRST. DO NOT SHIP ANY PARTS OR WHOLE UNITS TO THIS
ADDRESS FOR REPAIR WITHOUT OUR CONFIRMATION.
Answers to frequently asked questions are available at www.x-rocker.co.uk
Use the Contact Us online form or call
+44 (0) 118 907 0140
8