1
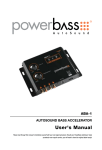
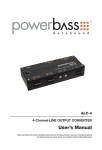
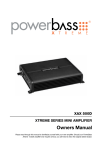
ASC 1.2
ASC 2.4
AUTOSOUND DIGITAL STIFFENING CAPACITOR
User's Manual
Please read through this manual to familiarize yourself with your new capacitor. Should your PowerBass AutoSound Capacitor
ever require service, you will need to have the original dated receipt.
Thank you and Congratulations
Thank you for your decision to purchase a PowerBass USA Stiffening Capacitor, commonly called a Power Cap. Capacitors are nearly indestructible and will provide years of service if installed and used in accordance with the instructions
in this manual. PowerBass capacitors are energy storing devices capable of delivering large amounts of power on
demand and they recharge more rapidly than a battery. Fitted with a highly visible digital top you can easily monitor
your systems operating voltage.
DIGITAL STIFFENING CAPACITOR
This installation manual contains valuable information on how to get the most out of your new PowerBass ACP Stiffening
Capacitor. Virtually any car stereo system will benefit from the addition of this unique and versatile product.
To learn more about PowerBass Autosound, please visit us on the World Wide Web at
http://www.powerbassusa.com
∆ WARNING ∆
This stiffening capacitor may explode and cause serious injury if abused or connected improperly. Please refer to the instructions contained in this manual for correct mounting, charging/discharging and wiring for this Capacitor prior to installation.
3
FEATURES
Supercharged Electrolyte Fluid: 16 volt (20 volt peak) electrolyte fluid provides a quicker response/
recharge time– POWER ON DEMAND!
Low E.S.R./Equivalent Series Resistance: Advanced manufacturing techniques give PowerBass capacitors the ability to discharge current very quickly based on resistance (the lower the E.S.R. the better).
Our caps can deliver to up to 10,000 amps instantly!
Through Post Platinum Connectors: The digital monitor is wired “through the post” in parallel with
the capacitor. This avoids adding any resistance which can reduce the current making the capacitor much
less effective.
Digital Voltage Meter: When the system is turned on, the 4-digit red display will show DC at the capacitor voltage down to 0.01 V
CAUTION
To prevent injury and damage to the unit, please read and follow the instructions in this manual. If you feel unsure about installing this system yourself, have it installed by an Authorized
PowerBass dealer or technician. Before attempting installation always disconnect the negative
(-) battery terminal.
4
POWER WIRING CONSIDERATIONS
Installation of your PowerBass capacitor is simple and straightforward. When installing the capacitor,
we recommend using the same gauge wire as that of the power connection to the amplifier. Ground the
capacitor to the nearest chassis ground using the same gauge wire as that used for the power connection.
It is strongly recommended the capacitor be fused (not included) at the battery. The fuse value should
be the same as that of the power fuse used for the amplifier. This fuse should be installed no more then
18-inches (0.5m) from the battery.
INSTALLATION AND MOUNTING
The capacitor should be mounted as close to the amplifier as possible (18-inches or less). Keep the wire
runs as short as possible to reduce voltage loss and provide your PowerBass capacitor with as much power
as possible.
Use the mounting brackets supplied to secure the capacitor. The brackets will need to be attached to the
capacitor before you attempt to install it.
Use caution to install the capacitor in a dry safe place where it will not be exposed to water, oil or heat. The
capacitor may be mounted in any position; however, care should be taken to ensure the venting hole on top
is unobstructed at all times. Be sure the digital display will be visible in the location you choose.
5
CHARGING THE CAPACITOR
NOTE: CAPACITORS ARE SHIPPED WITH NO ELECTRICAL CHARGE AND MUST BE CHARGED BEFORE USE.
A charging resistor (supplied) is required to properly charge the capacitor. The capacitor MUST be charged
BEFORE connecting it to the electrical system. Take care not to over-tighten screws on the capacitor input/
output terminals! Stripped or broken terminals are NOT covered by the warranty.
Charge the capacitor as follows (NOTE: it is extremely important to follow the steps below to eliminate the
possibility of damaging the capacitor, car battery and/or audio devices being powered)
1. Connect the ground cable from the capacitor’s NEGATIVE (-) terminal to a chassis ground.
2. Temporarily place the supplied charging resistor between the POSITIVE (+) terminal of the capacitor
and the Power cable from battery’s POSITIVE (+) terminal using electrical tape. Do this for 30 seconds.
3. Immediately after the charging process, remove the resistor and electrical tape from the circuit and
permanently connect the positive cable of the battery to the POSITIVE (+) terminal on the capacitor.
To verify the charging process is complete, using a Volt-Ohm Meter (VOM) measure the voltage across the
battery and capacitor. The voltage reading should be the same on both.
CAUTION: The resistor and resistor wires will become hot!
6
WIRING
For all wiring connections, use cable of the same or heavier guage than those of which are used for the
amplifier. Always use the largest guage Power/Ground cable possible--remember, bigger wire is better!
Keep the positive power wire as short as possible and connect it directly to amplifier's positive input (+).
Kepping the wire runs short will minimize voltage losses in the cables. The ground cable for the capacitor
should also be as short as possible and connected directly to a good clean bare metal chassis ground
point.
It is strongly recommended the capacitor be fused at the battery--no further than 18-inches (0.5m).
DO NOT ground the capacitor directly to the amplifier ground terminal or ground cable.
7
DISCHARGING THE CAPACITOR
Should you want to remove the capacitor from the system you will need to discharge (release) the power stored
in the capacitor. With the battery power disconnected, place the resistor across the capacitor’s POSTIVE (+)
and NEGATIVE (-) terminals as shown:
CAUTION: The charging resisitor and resistor wires will become hot!
Wait about 30 seconds for the capacitor to become discharged. Then it will be safe to remove the capacitor
from the circuit.
To verify the capacitor has been discharged, check with a Volt-Ohm Meter (VOM ) and measure the voltage
across the capacitor. If the voltage is at a nominal level (less then 1 volt), it is safe to remove the capacitor
from the vehicle.
NOTE: Keep the charging resistor in a safe place. In case of lost or damaged charging resistor,
you may use a 47-ohm 2 watt resistor as a replacement. This resistor can be found at most electronics supply or parts stores.
8
SPECIFICATIONS
Model No.:ASC-1.2
Capacitance---------------------------------- 1,200,000 microFarad (1.2 Farad)
Working Voltage------------------------------ 16 DC
Surge Voltage--------------------------------- 20 DC
E.S.R. (Equivalent Series Resistance)--------- 0.0015 ohm @120hz/ 25°C
Capacitance Tolerance------------------------ ± 10%
Dimensions (H) x (D)-------------------------- 9.69” (246mm) x 3.0” (76mm)
Model No.:ASC-2.4
Capacitance---------------------------------- 2,400,000 microFarad (2.4 Farad)
Working Voltage------------------------------ 16 DC
Surge Voltage--------------------------- ----- 20 DC
E.S.R. (Equivalent Series Resistance)--------- 0.0015 ohm @120hz/ 25°C
Capacitance Tolerance------------------------ ± 10%
Dimensions (H) x (D)-------------------------- 10.25” (261mm) x 3.5” (89mm)
NOTE: Height is measured from the top post to the base.
9
POWERBASS AUTOSOUND LIMITED WARRANTY POLICY
PowerBass USA, Inc. offers limited warranty on PowerBass products under normal use on the following terms:
PowerBass Autosound Electronics are to be free of defects in material and workmanship for a
period of one (1) year.
This warranty applies only to PowerBass products sold to consumers by Authorized PowerBass Dealers in the United States
of America. Products purchased by consumers from a PowerBass dealer in another country are covered only by that country’s Distributor and not by PowerBass USA.
This warranty covers only the original purchaser of PowerBass product. In order to receive service, the purchaser must
provide PowerBass with the receipt stating the consumer name, dealer, product and date of purchase.
Products found to be defective during the warranty period will be repaired or replaced (with a product deemed to be equivalent) at PowerBass’s discretion and will not be liable for incidental or consequential damages. PowerBass will not warranty
this product under the following situations:
• Electronics received with apparent rust or corrosion
• Any evidence of liquid damage or exposure to excessive heat
• Attempted repairs or alterations of any nature
• Product that has not been installed according to this owners manual
Any implied warranties including warranties of fitness for use and merchantability are limited in duration to the period of
the express warranty set forth above. Some states do not allow limitations on the length of an implied warranty, so this
limitation may not apply. No person is authorized to assume for PowerBass any other liability in connection with the sale
of this product.
Please call (909) 993-5399 for PowerBass Customer Service. You must obtain an RA# (Return Authorization Number)
to return any product to PowerBass. The RA number must be prominently marked on the outside of the shipping
carton or the delivery will be refused. Please pack your return carefully; we are not responsible for items damaged in
shipping. Return the defective product along with a copy of the original dated retail sales receipt, plus $12.00 for handling
and diagnostic evaluation to:
PowerBass USA, Inc.,
Attn: Returns (RA#__________)
13936 Mountain Avenue, Chino, CA 91710
Residents of HI, AK and US territories will be charged for return shipping. All inquires regarding service and warranty should
be sent to the above address.
Removed or altered serial numbers will void this warranty
10
Due to constant improvement, specifications are subject to change without notice.
This manual is the exclusive property of PowerBass USA, Inc. Any reproduction of this manual, or use other than its intentions is strictly prohibited without the express consent of PowerBass USA, Inc. © Copyright 2012 PowerBass USA, Inc.
PowerBass Autosound – A division of PowerBass USA, Inc.
13936 Mountain Avenue – Chino, CA 91710
Tel. (909) 993-5399 – Fax (909) 993-5393
www.powerbassusa.com