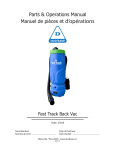
1
Adressen Beheer Systeem
Documentation
Release 2.4
InterExperts
November 26, 2014
Contents
1
2
3
4
5
Introduction
1.1 Key concepts . . . . . . . . .
1.2 Logging in . . . . . . . . . .
1.3 Where can I find everything? .
1.4 Workflow . . . . . . . . . . .
.
.
.
.
.
.
.
.
.
.
.
.
.
.
.
.
.
.
.
.
.
.
.
.
.
.
.
.
.
.
.
.
.
.
.
.
.
.
.
.
.
.
.
.
.
.
.
.
.
.
.
.
.
.
.
.
.
.
.
.
.
.
.
.
.
.
.
.
.
.
.
.
.
.
.
.
.
.
.
.
.
.
.
.
.
.
.
.
.
.
.
.
.
.
.
.
.
.
.
.
.
.
.
.
.
.
.
.
.
.
.
.
.
.
.
.
.
.
.
.
.
.
.
.
.
.
.
.
.
.
.
.
.
.
.
.
.
.
.
.
.
.
.
.
.
.
.
.
.
.
.
.
3
3
3
4
4
Working with companies
2.1 Searching for companies . . .
2.2 Viewing company information
2.3 Adding a company . . . . . .
2.4 Editing a company . . . . . .
2.5 Delete a company . . . . . .
2.6 Selecting companies . . . . .
2.7 Main locations . . . . . . . .
.
.
.
.
.
.
.
.
.
.
.
.
.
.
.
.
.
.
.
.
.
.
.
.
.
.
.
.
.
.
.
.
.
.
.
.
.
.
.
.
.
.
.
.
.
.
.
.
.
.
.
.
.
.
.
.
.
.
.
.
.
.
.
.
.
.
.
.
.
.
.
.
.
.
.
.
.
.
.
.
.
.
.
.
.
.
.
.
.
.
.
.
.
.
.
.
.
.
.
.
.
.
.
.
.
.
.
.
.
.
.
.
.
.
.
.
.
.
.
.
.
.
.
.
.
.
.
.
.
.
.
.
.
.
.
.
.
.
.
.
.
.
.
.
.
.
.
.
.
.
.
.
.
.
.
.
.
.
.
.
.
.
.
.
.
.
.
.
.
.
.
.
.
.
.
.
.
.
.
.
.
.
.
.
.
.
.
.
.
.
.
.
.
.
.
.
.
.
.
.
.
.
.
.
.
.
.
.
.
.
.
.
.
.
.
.
.
.
.
.
.
.
.
.
.
.
.
.
.
.
.
.
.
.
.
.
.
.
.
.
.
.
.
.
.
.
.
.
.
.
.
.
.
.
.
.
.
.
.
.
.
.
.
.
.
.
5
5
5
6
6
6
6
6
Working with company locations
3.1 Looking up locations . . . . . . . .
3.2 Viewing location details . . . . . .
3.3 Creating a new company location .
3.4 Create a new contact for a location
3.5 Link existing contact to location . .
3.6 Edit a location . . . . . . . . . . .
3.7 Delete a location . . . . . . . . . .
3.8 Selecting locations . . . . . . . . .
.
.
.
.
.
.
.
.
.
.
.
.
.
.
.
.
.
.
.
.
.
.
.
.
.
.
.
.
.
.
.
.
.
.
.
.
.
.
.
.
.
.
.
.
.
.
.
.
.
.
.
.
.
.
.
.
.
.
.
.
.
.
.
.
.
.
.
.
.
.
.
.
.
.
.
.
.
.
.
.
.
.
.
.
.
.
.
.
.
.
.
.
.
.
.
.
.
.
.
.
.
.
.
.
.
.
.
.
.
.
.
.
.
.
.
.
.
.
.
.
.
.
.
.
.
.
.
.
.
.
.
.
.
.
.
.
.
.
.
.
.
.
.
.
.
.
.
.
.
.
.
.
.
.
.
.
.
.
.
.
.
.
.
.
.
.
.
.
.
.
.
.
.
.
.
.
.
.
.
.
.
.
.
.
.
.
.
.
.
.
.
.
.
.
.
.
.
.
.
.
.
.
.
.
.
.
.
.
.
.
.
.
.
.
.
.
.
.
.
.
.
.
.
.
.
.
.
.
.
.
.
.
.
.
.
.
.
.
.
.
.
.
.
.
.
.
.
.
.
.
.
.
.
.
.
.
.
.
.
.
.
.
.
.
.
.
.
.
.
.
.
.
.
.
.
.
.
.
.
.
7
7
7
8
8
8
8
9
9
Working with contacts
4.1 Searching in contacts . . . . . .
4.2 Viewing contact details . . . . .
4.3 Creating a contact . . . . . . .
4.4 Editing a contact . . . . . . . .
4.5 Removing a contact . . . . . .
4.6 Preparing a selection of contacts
.
.
.
.
.
.
.
.
.
.
.
.
.
.
.
.
.
.
.
.
.
.
.
.
.
.
.
.
.
.
.
.
.
.
.
.
.
.
.
.
.
.
.
.
.
.
.
.
.
.
.
.
.
.
.
.
.
.
.
.
.
.
.
.
.
.
.
.
.
.
.
.
.
.
.
.
.
.
.
.
.
.
.
.
.
.
.
.
.
.
.
.
.
.
.
.
.
.
.
.
.
.
.
.
.
.
.
.
.
.
.
.
.
.
.
.
.
.
.
.
.
.
.
.
.
.
.
.
.
.
.
.
.
.
.
.
.
.
.
.
.
.
.
.
.
.
.
.
.
.
.
.
.
.
.
.
.
.
.
.
.
.
.
.
.
.
.
.
.
.
.
.
.
.
.
.
.
.
.
.
.
.
.
.
.
.
.
.
.
.
.
.
.
.
.
.
.
.
.
.
.
.
.
.
.
.
.
.
.
.
11
11
11
11
12
12
12
Selections
5.1 Clearing your selection . . . . . . . . .
5.2 Removing a single item from selection
5.3 Exporting to Excel spreadsheet . . . .
5.4 Exporting to a CSV-file . . . . . . . .
.
.
.
.
.
.
.
.
.
.
.
.
.
.
.
.
.
.
.
.
.
.
.
.
.
.
.
.
.
.
.
.
.
.
.
.
.
.
.
.
.
.
.
.
.
.
.
.
.
.
.
.
.
.
.
.
.
.
.
.
.
.
.
.
.
.
.
.
.
.
.
.
.
.
.
.
.
.
.
.
.
.
.
.
.
.
.
.
.
.
.
.
.
.
.
.
.
.
.
.
.
.
.
.
.
.
.
.
.
.
.
.
.
.
.
.
.
.
.
.
.
.
.
.
.
.
.
.
.
.
.
.
15
15
15
15
15
.
.
.
.
.
.
.
.
.
.
.
.
i
5.5
5.6
5.7
6
Selection exportcolumns . . . . . . . . . . . . . . . . . . . . . . . . . . . . . . . . . . . . . . . . .
Printing labels . . . . . . . . . . . . . . . . . . . . . . . . . . . . . . . . . . . . . . . . . . . . . .
Other export options . . . . . . . . . . . . . . . . . . . . . . . . . . . . . . . . . . . . . . . . . . .
15
16
16
The search filter
6.1 Quick search . . . . . . . . . . . . . . .
6.2 Advanced searching with extended filters
6.3 Saving filters . . . . . . . . . . . . . . .
6.4 Using saved filters . . . . . . . . . . . .
6.5 Filter overview . . . . . . . . . . . . . .
6.6 Remove filters . . . . . . . . . . . . . .
6.7 Edit filters . . . . . . . . . . . . . . . .
.
.
.
.
.
.
.
.
.
.
.
.
.
.
.
.
.
.
.
.
.
.
.
.
.
.
.
.
.
.
.
.
.
.
.
.
.
.
.
.
.
.
.
.
.
.
.
.
.
.
.
.
.
.
.
.
.
.
.
.
.
.
.
.
.
.
.
.
.
.
.
.
.
.
.
.
.
.
.
.
.
.
.
.
.
.
.
.
.
.
.
.
.
.
.
.
.
.
.
.
.
.
.
.
.
.
.
.
.
.
.
.
.
.
.
.
.
.
.
.
.
.
.
.
.
.
.
.
.
.
.
.
.
.
.
.
.
.
.
.
.
.
.
.
.
.
.
.
.
.
.
.
.
.
.
.
.
.
.
.
.
.
.
.
.
.
.
.
.
.
.
.
.
.
.
.
.
.
.
.
.
.
.
.
.
.
.
.
.
.
.
.
.
.
.
.
.
.
.
.
.
.
.
.
.
.
.
.
.
.
.
.
.
.
.
.
.
.
.
.
.
.
.
.
17
17
17
18
18
18
18
18
Imports
7.1 Importing new data . . . . . . . . . .
7.2 Viewing import history . . . . . . . .
7.3 Associate a category to imported data
7.4 Comment on imported data . . . . .
7.5 Removing imported data . . . . . . .
.
.
.
.
.
.
.
.
.
.
.
.
.
.
.
.
.
.
.
.
.
.
.
.
.
.
.
.
.
.
.
.
.
.
.
.
.
.
.
.
.
.
.
.
.
.
.
.
.
.
.
.
.
.
.
.
.
.
.
.
.
.
.
.
.
.
.
.
.
.
.
.
.
.
.
.
.
.
.
.
.
.
.
.
.
.
.
.
.
.
.
.
.
.
.
.
.
.
.
.
.
.
.
.
.
.
.
.
.
.
.
.
.
.
.
.
.
.
.
.
.
.
.
.
.
.
.
.
.
.
.
.
.
.
.
.
.
.
.
.
.
.
.
.
.
.
.
.
.
.
.
.
.
.
.
.
.
.
.
.
19
19
20
21
21
21
8
The status of your database
8.1 The overview . . . . . . . . . . . . . . . . . . . . . . . . . . . . . . . . . . . . . . . . . . . . . . .
8.2 Refreshing statistics . . . . . . . . . . . . . . . . . . . . . . . . . . . . . . . . . . . . . . . . . . .
23
23
23
9
Activity log
9.1 Recent changes on start screen . . . . . . . . . . . . . . . . . . . . . . . . . . . . . . . . . . . . . .
9.2 Recent changes for contacts, companies and company locations . . . . . . . . . . . . . . . . . . . .
9.3 Detailed activity log . . . . . . . . . . . . . . . . . . . . . . . . . . . . . . . . . . . . . . . . . . .
25
25
25
26
10 Deduplicating contacts
10.1 Choosing a deduplication method . . . . . . . . . . . . . . . . . . . . . . . . . . . . . . . . . . . .
10.2 Deduplicating . . . . . . . . . . . . . . . . . . . . . . . . . . . . . . . . . . . . . . . . . . . . . .
29
29
29
11 Managing categories
11.1 Viewing categories . . . .
11.2 Adding new categories . .
11.3 Editing existing categories
11.4 Removing categories . . .
11.5 Category quick add . . . .
.
.
.
.
.
.
.
.
.
.
.
.
.
.
.
.
.
.
.
.
.
.
.
.
.
.
.
.
.
.
.
.
.
.
.
.
.
.
.
.
.
.
.
.
.
.
.
.
.
.
.
.
.
.
.
.
.
.
.
.
.
.
.
.
.
.
.
.
.
.
.
.
.
.
.
.
.
.
.
.
.
.
.
.
.
.
.
.
.
.
.
.
.
.
.
.
.
.
.
.
.
.
.
.
.
.
.
.
.
.
.
.
.
.
.
.
.
.
.
.
.
.
.
.
.
.
.
.
.
.
.
.
.
.
.
.
.
.
.
.
.
.
.
.
.
.
.
.
.
.
.
.
.
.
.
.
.
.
.
.
.
.
.
.
.
.
.
.
.
.
.
.
.
.
.
.
.
.
.
.
.
.
.
.
.
.
.
.
.
.
.
.
.
.
.
.
.
.
.
.
31
31
31
31
31
32
12 Managing users
12.1 User roles . . . . . . . .
12.2 Inspecting user details .
12.3 Creating a new user . .
12.4 Editing an existing user
12.5 Deleting a user . . . . .
.
.
.
.
.
.
.
.
.
.
.
.
.
.
.
.
.
.
.
.
.
.
.
.
.
.
.
.
.
.
.
.
.
.
.
.
.
.
.
.
.
.
.
.
.
.
.
.
.
.
.
.
.
.
.
.
.
.
.
.
.
.
.
.
.
.
.
.
.
.
.
.
.
.
.
.
.
.
.
.
.
.
.
.
.
.
.
.
.
.
.
.
.
.
.
.
.
.
.
.
.
.
.
.
.
.
.
.
.
.
.
.
.
.
.
.
.
.
.
.
.
.
.
.
.
.
.
.
.
.
.
.
.
.
.
.
.
.
.
.
.
.
.
.
.
.
.
.
.
.
.
.
.
.
.
.
.
.
.
.
.
.
.
.
.
.
.
.
.
.
.
.
.
.
.
.
.
.
.
.
.
.
.
.
.
.
.
.
.
.
.
.
.
.
.
.
.
.
.
.
.
.
.
.
.
33
33
34
34
34
34
13 User groups
13.1 Special user groups . . . .
13.2 Creating a new user group
13.3 Editing a user group . . .
13.4 Deleting a user group . . .
13.5 Permission model . . . .
.
.
.
.
.
.
.
.
.
.
.
.
.
.
.
.
.
.
.
.
.
.
.
.
.
.
.
.
.
.
.
.
.
.
.
.
.
.
.
.
.
.
.
.
.
.
.
.
.
.
.
.
.
.
.
.
.
.
.
.
.
.
.
.
.
.
.
.
.
.
.
.
.
.
.
.
.
.
.
.
.
.
.
.
.
.
.
.
.
.
.
.
.
.
.
.
.
.
.
.
.
.
.
.
.
.
.
.
.
.
.
.
.
.
.
.
.
.
.
.
.
.
.
.
.
.
.
.
.
.
.
.
.
.
.
.
.
.
.
.
.
.
.
.
.
.
.
.
.
.
.
.
.
.
.
.
.
.
.
.
.
.
.
.
.
.
.
.
.
.
.
.
.
.
.
.
.
.
.
.
.
.
.
.
.
.
.
.
.
.
.
.
.
.
.
.
.
.
.
.
35
35
36
36
36
36
7
14 Managing label sheets
ii
.
.
.
.
.
.
.
.
.
.
39
14.1
14.2
14.3
14.4
Viewing label sheets . . . .
Creating a new label sheet .
Editing existing label sheets
Removing label sheets . . .
.
.
.
.
.
.
.
.
.
.
.
.
.
.
.
.
.
.
.
.
.
.
.
.
.
.
.
.
.
.
.
.
.
.
.
.
.
.
.
.
.
.
.
.
.
.
.
.
.
.
.
.
.
.
.
.
.
.
.
.
.
.
.
.
.
.
.
.
.
.
.
.
.
.
.
.
.
.
.
.
.
.
.
.
.
.
.
.
.
.
.
.
.
.
.
.
.
.
.
.
.
.
.
.
.
.
.
.
.
.
.
.
.
.
.
.
.
.
.
.
.
.
.
.
.
.
.
.
.
.
.
.
.
.
.
.
.
.
.
.
.
.
.
.
.
.
.
.
.
.
.
.
.
.
.
.
39
39
39
40
15 Plugins
15.1 Letters plugin . . . . . . . . . . . . . . . . . . . . . . . . . . . . . . . . . . . . . . . . . . . . . . .
15.2 Direct mailing plugin . . . . . . . . . . . . . . . . . . . . . . . . . . . . . . . . . . . . . . . . . . .
15.3 Files plugin . . . . . . . . . . . . . . . . . . . . . . . . . . . . . . . . . . . . . . . . . . . . . . . .
41
41
41
41
16 Direct mailings
16.1 Creating a new direct mailing .
16.2 Editing a direct mailing . . . .
16.3 Copy an existing mailing . . . .
16.4 Sending a direct mailing . . . .
16.5 Monitoring progress and status
16.6 Working with templates . . . .
16.7 Tips for working with templates
.
.
.
.
.
.
.
.
.
.
.
.
.
.
.
.
.
.
.
.
.
.
.
.
.
.
.
.
.
.
.
.
.
.
.
.
.
.
.
.
.
.
.
.
.
.
.
.
.
.
.
.
.
.
.
.
.
.
.
.
.
.
.
.
.
.
.
.
.
.
.
.
.
.
.
.
.
.
.
.
.
.
.
.
.
.
.
.
.
.
.
.
.
.
.
.
.
.
.
.
.
.
.
.
.
.
.
.
.
.
.
.
.
.
.
.
.
.
.
.
.
.
.
.
.
.
.
.
.
.
.
.
.
.
.
.
.
.
.
.
.
.
.
.
.
.
.
.
.
.
.
.
.
.
.
.
.
.
.
.
.
.
.
.
.
.
.
.
.
.
.
.
.
.
.
.
.
.
.
.
.
.
.
.
.
.
.
.
.
.
.
.
.
.
.
.
.
.
.
.
.
.
.
.
.
.
.
.
.
.
.
.
.
.
.
.
.
.
.
.
.
.
.
.
.
.
.
.
.
.
.
43
43
45
45
45
46
47
47
17 Fields
17.1 Field groups . . . . . . . . . . . . . . .
17.2 Field types . . . . . . . . . . . . . . . .
17.3 Field options . . . . . . . . . . . . . . .
17.4 Setting options for multiple choice fields
.
.
.
.
.
.
.
.
.
.
.
.
.
.
.
.
.
.
.
.
.
.
.
.
.
.
.
.
.
.
.
.
.
.
.
.
.
.
.
.
.
.
.
.
.
.
.
.
.
.
.
.
.
.
.
.
.
.
.
.
.
.
.
.
.
.
.
.
.
.
.
.
.
.
.
.
.
.
.
.
.
.
.
.
.
.
.
.
.
.
.
.
.
.
.
.
.
.
.
.
.
.
.
.
.
.
.
.
.
.
.
.
.
.
.
.
.
.
.
.
.
.
.
.
.
.
.
.
49
49
49
49
50
18 Support
18.1 Application administrator . . . . . . . . . . . . . . . . . . . . . . . . . . . . . . . . . . . . . . . .
18.2 Support information . . . . . . . . . . . . . . . . . . . . . . . . . . . . . . . . . . . . . . . . . . .
18.3 Contacting the support desk . . . . . . . . . . . . . . . . . . . . . . . . . . . . . . . . . . . . . . .
51
51
51
51
.
.
.
.
.
.
.
.
.
.
.
.
.
.
.
.
.
.
.
.
.
.
.
.
.
.
.
.
iii
iv
Adressen Beheer Systeem Documentation, Release 2.4
This manual describes usage and management of the Adressen Beheer Systeem by InterExperts.
If you’re not yet familiar with ABS, you might want to get acquinted with ABS and the structure of the application.
See the chapter Introduction for an introduction to ABS.
If you have questions that this manual does not cover, you may contact your application administrator or the InterExperts support desk for additional support. For more information, please refer to the chapter Support.
Contents
1
Adressen Beheer Systeem Documentation, Release 2.4
2
Contents
CHAPTER 1
Introduction
The ABS system (a Dutch acronym for Address Management System) by InterExperts is a user friendly and accessible
application for managing enterprise contact information. With ABS, you are able to build and manage an efficient
customer database, or track support requests with your suppliers.
All contact information stored in ABS can be used for further modification. When you use the clever search filters,
you will be able to quickly find the right contacts. You can use ABS to print address labels, send letters, mail digital
newsletters or export contact lists to further manipulate in a spreadsheet.
1.1 Key concepts
It is useful to know around which key concepts ABS is built. ABS identifies the following contact types as seperate
entities:
• Companies (Working with companies)
• Company locations (Working with company locations)
• Contacts (Working with contacts)
Companies are a collection of all sorts of organisations. For example: a company can be a supplier or customer.
Companies can be linked to categories and remarks can be made to specific companies.
Locations are the physical adresses of an organisation. Locations are always linked to a single company. A company
can have one main location and unlimited secondary locations. For any location you can maintain information like an
address, phone numbers and much more.
Contacts are the people you are in touch with. A contact can either be a private person, or be related to a company. In
this last situation you will be able to link a contact to a company location.
Tip: It’s possible that company locations are disabled in your ABS instance. In this case, you will only work with
companies (with one main location) and contacts.
1.2 Logging in
Before using ABS you will have to sign in. ABS will ask you for your username and password. If you have forgotten
your password, you should contact your application manager to reset your password.
Not using ABS for an extended period of time will automatically log you out of the system. As a protection, you will
have to sign in again.
3
Adressen Beheer Systeem Documentation, Release 2.4
1.3 Where can I find everything?
Navigation in ABS takes place in the main menu. The main menu is the bar with tabs in the top part of the screen.
Using these tabs you can navigate to the part of ABS you want to use, like Companies or Import. The main menu is
always available in ABS.
While using ABS you will notice the blue bar under the main menu. This is the action bar. Depending on the function
you are using, the action bar will have different buttons. For instance, in the main menu tab Companies, you will find
the actions New company or Select all companies in this overview. In the tab Deduplicate you will only find actions
related to the deduplicating contacts.
At the right side of the action bar you will find so-called ‘Breadcrumbs’. An example would be * Home » Companies
» New company*. You can quickly identify where you are in the system using the breadcrumbs.
Some features in ABS have additional help in the application itself. You can recognize these feature by the
Hover over this icon to see context-specific help.
icon.
1.4 Workflow
In the next chapters, we will describe the workflow for adding companies, locations and contacts. You will also learn
how to edit and remove adresses from the system and how to search effectively through your contacts.
We will also explain the selection of entities for further manipulation and the management of the application itself,
like adding users and categories.
4
Chapter 1. Introduction
CHAPTER 2
Working with companies
Companies is the collective name of all organisations you will maintain in ABS. Charities, government branches and
other organisations should all be added as a company. In this chapter you will learn how to search for companies, how
to add new companies and how to edit existing companies in the system.
2.1 Searching for companies
All companies can be found by clicking the main menu tab Comapnies. All companies will be shown in alphabetical
order. You can change sorting of the table by clicking a table header. Clicking on a row in the companies table opens
the details view for the company. The page numbers above the table can be used for navigation through larger lists.
You can perform a quick search using the quicksearch feature in the top right of the companies view. Searching for a
complete or partial company name and clicking on the magnifying glass will immediately show only the companies
that meet your search term.
It’s possible to perform a more complex search as well. You can exactly specify what information to include or exclude
in your search. You can also search for companies in specific categories. You can open the extended search filter by
clicking on the filter icon next to the search field. A window will open with advanced search options. Editing and
using this filter is more thoroughly described in The search filter.
2.2 Viewing company information
After opening the detail view for a company by clicking on a company name in the overview, you will be able to see
the information entered into the system for a specific company. You can also view the locations linked to a company
here.
The address information shown in the company detail page are extracted from the main location. If the company
doesn’t have a location linked to it yet, ABS will advise you to add this.
When viewing company details remarks can be added. Enter your remark in the textfield and click the button Add to
add it to the system. Old remarks can be removed by clicking Remove beneath a remark.
At the bottom of the page you can view the locations linked to the company. The main location will be marked with a
blue color next to the location name. By clicking on a location you navigate to the detail view of that location.
5
Adressen Beheer Systeem Documentation, Release 2.4
2.3 Adding a company
Adding a company is a three step process. First you create the company itself, then you’ll add a main location with
address information, and finally you can add a contact person related to the new company.
You can add a new company by clicking the tab Companies in the main menu and clicking New company in the action
bar. You can now fill in a company name and link categories to the company. Clicking Save and create location
concludes this step.
After saving the company, a new location window will be shown. Here you can enter any address information and
location specific details.
See also:
Check out Creating a new company location for more information about creating a location.
2.4 Editing a company
In the detail view of a company you can click be action button Edit company to change company information. To go
to the edit screen directly from the company overview click the edit icon in the row of the company.
You can change the name and categories of the company, as well as extra fields. For changing address information, you
should edit the main location for this company. See chapter Working with company locations for more information.
2.5 Delete a company
To remove a company from ABS you can click the action button Remove company in the company detail screen. ABS
will ask for confirmation. Once removed, a company can no longer be retrieved. Removing a company will also
remove linked locations. Contacts from these locations will become unlinked.
It is possbile to remove multiple companies at once, by selecting them in the company overview and clicking the
Remove selected companies button.
2.6 Selecting companies
In ABS you can select companies for further processing, like exporting or printing labels. In the company overview
you can click the actionbutton Select ... companies in this overview. ABS will then select every company that matches
the current search filter.
Alternatively you can mark specific companies in the overview and select these using the actionbutton Select ticked
companies.
2.7 Main locations
Every company should have a main location. An example of a main location is a company headquarters. When adding
a company to ABS, a new main location is automatically linked. You can change main locations by going to a location
detail view and clicking the action button Make main location.
6
Chapter 2. Working with companies
CHAPTER 3
Working with company locations
ABS defines company locations as the places where a company or organization is located. You may think of locations
as branches. For each company, you must define at least one company location. This is the main location. When
needed, you can add more locations, for instance to register regional offices, branches, or different factories. For each
company location, you can register the contact details. You can link contacts to one company location.
In this chapter, you will learn how to look up company locations, how to add new locations and how to edit existing
locations.
Tip: It is possible that company locations are disabled in your ABS instance. In this case, you will only work with
companies (with one main location) and contacts.
3.1 Looking up locations
You can find an overview of all locations by clicking the main tab Company locations. All company locations that are
defined in the system will be shown, ordered alphabetically.
Click on a location to see all details of the location. Use the column titles to sort the list of locations, click again to
reverse the sort order.
To search a location, you may use the quick search function in the upper right part of the location list. Enter your
search term and press Enter (or click the magnifying glass). ABS will display the search results.
If your search query wasn’t satisfying, you may change your query, or use the advanced search filter. Click the icon
next to the magnifying glass. A search form will expand and you can search specific fields or select which categories
apply. Click Show results to execute your search query. The number behind Show results shows the number of results
that your search query will find. This number changes when you modify your search criteria.
For more information about the search functionality, see The search filter.
3.2 Viewing location details
You open the details of a company location by clicking on the location name (in the overview). You’ll find all details
for this company location in the detail screen. You will also find contacts linked to this location (if any).
When viewing a location, you can easily add a remark. Enter your remark in the text field and click Add to save your
remark. All remarks are shown in the list of remarks. You can delete a remark by clicking Remove (underneath the
remark you want to delete).
7
Adressen Beheer Systeem Documentation, Release 2.4
3.3 Creating a new company location
You can make a new location by clicking the main tab Company locations and then choosing New company location.
A form will open, where you can enter all details for the new company location. Don’t forget to select the company
for which you are creating the new company location. You can enter a part of the company name to select a company.
You can then enter all other details. It is not mandatory to enter the postal address, if you leave it empty, ABS will use
the visitor address instead. In some cases, ABS will suggest to correct or supplement address details. An alert will
show up underneath the address fields to ask whether you want to apply the suggestion.
You can link the new location to one or more categories. Select all categories which apply and click Save to save
your new location. ABS will then proceed to creating a new contact person for your new location. See Working with
contacts for more details.
3.4 Create a new contact for a location
When you want to create a new contact that is linked to a company location, you can create a contact directly from a
location detail page. Click New contact person in the action bar. The contact that you’ll create will be linked to the
correct location.
3.5 Link existing contact to location
You can link an existing contact to a company by choosing the action Link existing contact in the action bar. You may
use the search filter if necessary. Click the contact you would like to link. It will be linked immediately.
You may also add multiple contacts at once. Choose Link existing contact from the action bar, and tick the check
boxes of the contacts you would like to add. Click Add ticket contacts to location to link all selected contacts.
3.6 Edit a location
Edit a location’s details by clicking Edit from the action bar (when you are in the location detail screen) or by clicking
the pencil icon in the list of locations.
8
Chapter 3. Working with company locations
Adressen Beheer Systeem Documentation, Release 2.4
3.7 Delete a location
You can delete a location by clicking the Delete action in the action bar. When you delete a location, all linked contacts
and the linked company will still remain in ABS. The contacts that were linked to a deleted location are converted to
private contacts (not linked to any company).
You may delete multiple locations at once from the overview screen. Tick the check boxes of all locations which you
would like to delete and click Delete ticket company locations. ABS will ask for confirmation before deleting the
selected locations.
3.8 Selecting locations
You can select company locations for further processing, like exports of printing label sheets. You can select all
locations shown in the overview (including locations on other pages). Click Select . . . locations in this overview.
Alternatively, you can select individual locations by ticking the appropriate check boxes and clicking Select ticket
locations.
3.7. Delete a location
9
Adressen Beheer Systeem Documentation, Release 2.4
10
Chapter 3. Working with company locations
CHAPTER 4
Working with contacts
Contacts in ABS are the people you want to keep in touch with. Contacts are linked to a company, or unlinked as
private-parties.
This chapter describes how to search in your contact list, how to add new contacts and edit existing ones.
4.1 Searching in contacts
All contacts van be found by using the main menu tab Contacts. Every single contact in the system will be shown in
this overview, sorted by name. By clicking on a contact row, you will be able to see more details. By clicking on the
table headers, you are able to adjust the sorting of the overview. Clicking the paging numbers on the top of the pages
navigates you through the available contacts.
You can search for a contact using the quicksearch in the left top of the contact overview page. By typing a (part of a)
property of the person you are looking for and clicking search you will be able to filter through a large list.
By clicking the the advanced filter button you will be able to exactly specify the criteria and categories to search for,
and have more influence over the results, as wel as loading preset filters.
4.2 Viewing contact details
Opening the detail screen for a contact is done by clickign the contact row from the contact overview page. On the
detail page you can see all properties of a contact in ABS.
When viewing the contact details, you can add remarks by entering your text in the remark textarea and clicking the
Add button. Unlimited remarks can be made to a contact. Old remarks can be removed by clicking remove under it.
4.3 Creating a contact
You can create a new contact by navigating to the contact overview page and clicking the New contact button. In the
following screen you will be able to define all properties for this contact. The company and company location can be
specified under the header Company. To link the contact to an existing company, start typing and after 3 characters
any available companies will show up. Click the location name to assign this location to the contact.
Additionally, you can specify a name and adress for your new contact. Choosing a country and entering house number
and postal code will trigger automatic completion of the address when available. Some fields can be mandatory or have
other requirements such as minimal length or maximal length. You will be warned when you have entered insufficient
information.
11
Adressen Beheer Systeem Documentation, Release 2.4
Optionally you can link one or more categories to the contact. Do this by clicking on the category name to select it.
To finalize the creation of a new contact you must click the save button.
4.4 Editing a contact
From the contact detail page, use the submenu button edit to change details for your contact. Alternatively you can
click the edit icon from the contact overview page.
Editing a contact is just as easy as creating a new one. Simply change the data and klik save to make changes
permanent.
4.5 Removing a contact
To remove a contact, simply navigate to a contacts detail page and click remove in the submenu bar. Contacts can also
be removed directly from the contact overview page by clicking on the red delete icon. ABS will ask for confirmation
of this action, as it can not be easily reversed.
In order to remove multiple contacts at once you should select the contact from the contact overview page and then
use the action Delete ticked contacts to remove all selected items.
4.6 Preparing a selection of contacts
To prepare contacts for further processing, such as exports and printing labels, you should navigate to the contact
overview.
The first option is to select all items in the overview. You can do this by clicking Select . . . contacts in this overview.
Depending on your filter, this will be all or a part of the complete list of contacts in your database.
Alternatively, you can tick the box in front of a contact row and click the Select ticked contacts action button.
12
Chapter 4. Working with contacts
Adressen Beheer Systeem Documentation, Release 2.4
If you have already prepared a selection, you will be prompted to either replace the current selection with your new one,
or add the new selection to the existing selection. Any adresses selected twice will de deduplicated in the selection.
For more information on selections and exporting, see the chapter Selections.
4.6. Preparing a selection of contacts
13
Adressen Beheer Systeem Documentation, Release 2.4
14
Chapter 4. Working with contacts
CHAPTER 5
Selections
In the previous chapters you have learned to create and edit companies, locations and contacts. In order to use these
entities for further processing, you need to select and export them. Click on the menu button Selection. Here you will
find three tabs, containing your current selection.
5.1 Clearing your selection
To clear the entite selection, use the button Clear selection. The selected entities will only be removed from your
selection. They will not be permanently deleted. If you want to delete something, you can do this at the respective
entity page.
5.2 Removing a single item from selection
Click the trash can icon next to an entity row to remove it from your current selection. The entity will not be deleted
from the database.
5.3 Exporting to Excel spreadsheet
After you press the button Excel spreadsheet, a small pop-up appears with a progress indicator. When the export is
complete, a download will start containing the exported data. The data is split into multiple sheets in the Excel file.
5.4 Exporting to a CSV-file
By clicking the CSV file button, you will download a zip file containing your exported information.
5.5 Selection exportcolumns
When exporting data to CSV or Excel files, you have the option to select which fields will be available in the exported
document. By clicking Select export columns you will get an overview of all exportable data. Select the columns
you need in your export file. In this screen you can also save your column selection to reuse at a later stage, or use
a previously saved export column selection by clicking its name. Removing a saved column selection by clicking
Remove beneath its name. By default, all columns will be used in an export.
15
Adressen Beheer Systeem Documentation, Release 2.4
5.6 Printing labels
If you want to a mailing to your contacts, it may be useful to generate the address labels using ABS. Click Print
labels when you have selected the contacts to which you would like to address your mailing to. In the next screen,
choose a type of label sheet, and whether a KIX code should be on the label. Then you can choose to use the address
of the company to which they are linked instead of their private address. You can also choose to use mail addresses
instead of visiting the addresses of business locations. When you are finished, click Generate label. When the export
is completed you can download a ZIP archive containing the label sheets that you just created. Open the PDF file and
print on your label sheet.
See also:
For more information in creating, removing and editing label sheets, see the chapter Managing label sheets.
5.7 Other export options
Depending on your ABS installation, there may be more export options. For more information on these other options
see Plugins.
16
Chapter 5. Selections
CHAPTER 6
The search filter
In order to navigate and find what you need quickly in a large directory, you can use the search filter in ABS. It
allows you to search for specific contacts on the basis of known data or prepare multiple entities for exporting to other
programs. The advanced search screen might seem a little intimidating at first glance, but you will see that it is a very
powerful tool in ABS.
6.1 Quick search
Using the quick search box you only need a few keywords to find contacts. Type a keyword in the search field and
click the button to search. All the default search fields checked for the keyword. Want to know exactly what is being
filtered? In the advanced filter you can see the exact setup of your search.
6.2 Advanced searching with extended filters
Using the advanced filter, you can create complex queries that take into account categories, beginning or end of
keywords and exclusions. The search button at the bottom of the panel shows the number of results that match your
criteria. When you have finished making the search, click Show results to carry it out.
6.2.1 Filtercriteria
You have the choice to let all, or any of the criteria apply during the search action. You can switch your search option
by selecting either One of the criteria must meet or :guilabel: All criteria must meet. This way you can switch between
‘First name = John AND Last name = Vries’ and ‘First name = John OR Last name = Vries’.
To add a new criterion, click the button Add criterion. You can add as many criteria as you like. To remove a criterion,
click the X next to the criterion.
A criterion consists of three parts. The search field, search type and search term. First, choose the search field. This
will be the attribute of an entity to look for. Then, set up a search type. The most versatile option is ‘includes’. You
can also use search types such as starts with or is exactly. You can also use exclusion variants of these search types. In
the last field. fill in your search keyword. If you leave this empty, you will be searching for fields that have not been
filled in.
17
Adressen Beheer Systeem Documentation, Release 2.4
6.2.2 Filter categories
Categories can be used in three different ways. You can select them by choosing either Or one of these categories,
And one of these categories or And all of these categories.
By clicking on a category, you can change the status of the category for the filter. When a dash (-) position, the
category is not included in the search. When there’s a check mark is the category is included in the search. When
there’s a cross (X), results in a category explicitly excluded.
6.3 Saving filters
Using the advanced filter you can easily save your complex filter, for reuse at a different time. Fill in a name and click
Save filter. When the message Filter has been saved appears, you can reuse it at any time.
6.4 Using saved filters
In the area Save and search you can use the selection box to choose a previously made filter. Choosing a filter fromt
his list will load the filter options in the advanced filter above.
Tip: Use complex filter to segment your contacts and to reuse search queries which are often repeated.
6.5 Filter overview
For detailed information on editing and deleting filters look in the menu under the button System administration and
then filters.
6.6 Remove filters
Click the actionbutton Remove filter in the filter row. This action can not be undone.
6.7 Edit filters
From the filter overview you can edit a filter by clicking on the name of that filter. Editing has the same steps as
making a new one. Finalize your changes by clicking Save.
18
Chapter 6. The search filter
CHAPTER 7
Imports
Using the import functionality in ABS it is easy to migrate data from other software packages to ABS and process this
data in ABS. You can import Excel files and CSV files. It is possible to inspect older imports and eventually you can
remove an earlier import.
7.1 Importing new data
You can import Excel (XLSX) files and comma separated (CSV) files in ABS. Files in other formats should be converted to one of these formats first before you can import them.
The import process consists of four steps.
1. Upload file
2. Prepare importing
3. Assign category (optional)
4. Add remark (optional)
7.1.1 Upload file
From the main menu, click on the button Import and then click the button Import CSV file.
In this screen, you select the file that you want to import. You can select Excel spreadsheets (XLSX files, no XLS
files) or comma separated text files (CSV files). If you have another file format, you must first convert it to an Excel
file or CSV file. See the following references for converting commonly used file formats:
• LibreOffice/OpenOffice Calc
• Google Docs Spreadsheet
• For other applications: see the appropriate documentation of your application.
Select the file you want to import and click Prepare import file to proceed to the next step.
7.1.2 Prepare importing
The next stap, Preparing import, allows you to choose which columns contain data. A preview of the first rows is shown. Select th
It is not necessary to choose a field for every column in your import file: leave the field empty if the column
should not be used in ABS.
19
Adressen Beheer Systeem Documentation, Release 2.4
Tip: When importing a company name, location name and contact data from single row, this data will automatically
be linked in ABS.
Tip: Some columns can be automatically identified on the basis of the first line in the file. We recommend you to
check whether all columns are selected correctly.
If necessary, you can choose how many lines should be skipped from the start of the file. By default, the first line will
be skipped (as ABS assumes that this lines contains the column headers). You can also define a separator character
(when importing a CSV file). ABS tries to detect this symbol automatically, so only change this value if the columns
don’t seem to be separated correctly.
Click the button Import and then click OK to start the import. Depending on the size and complexity of the data,
importing may take some time.
7.1.3 Asign category
In the next step, Assign category, you can associate all imported data with a category. Select one or more categories
that apply to the imported data and click Add categories to link the new items to the chosen categories.
You may skip this if you do not want to assign categories to the newly imported items. Click Skip this step to continue
to the next step without assigning categories.
7.1.4 Add remark
The last step allows you to add remarks to all new imported items. Enter a remark and click :guilabel: Add comment
to add the entered remark to all the imported entries.
You may skip this by clicking Skip this step.
7.1.5 Final check
After the last step, an overview of all newly imported entries will be shown. You can check here whether the import
was successful and all data has been imported correctly. Optionally, you can undo the import by clicking Delete import
and linked data.
Tip: After importing a large dataset, it is useful to check the statistics over your contact database (see The status
of your database). You may see missing data or entries that are not entered correctly. Using the statistics, you can
enhance your contact database to use it in the most optimal way.
7.2 Viewing import history
Using the main menu item Imports you can navigate to an overview of earlier import jobs in ABS. You can view
details of the import job by clicking on the table row.
In the detail view you will see all data that has been imported during the import. By clicking a row you will navigate
to the detail view for the imported item.
20
Chapter 7. Imports
Adressen Beheer Systeem Documentation, Release 2.4
7.3 Associate a category to imported data
In the import detail screen, click on the button Link category to imported data to link a category to all imported
contacts, companies and locations.
In this screen, select one or more categories and click Add Categories to link all imported data to the given categories.
7.4 Comment on imported data
When viewing details of an import, use the button comment on imported data to open the screen where you can add a
remark. If you press the button Add remark after you have filled in a comment it will be added to all import data.
7.5 Removing imported data
When viewing an import, click on the button Delete import and linked data. You can also do this from the import
history screen by pressing the action button delete import. This action can not be undone. Even data that has changed
after the import will be deleted.
7.3. Associate a category to imported data
21
Adressen Beheer Systeem Documentation, Release 2.4
22
Chapter 7. Imports
CHAPTER 8
The status of your database
To be able to get most value from your contact database, the database should be in optimal condition: complete and
clean. With automatically completing addresses, allowing for mandatory fields and other checks ABS tries to help in
kepping a clean and consistent work environment. Using the statistics page you will be able to get an overview of the
completeness of your system.
8.1 The overview
Navigate using the main menu item Statistics to reach the overview. On this page you’ll be able to view information
on companies, company locations and contacts by clicking on the correspondig tab.
For each tab you will get insight into the missing values and complete data. By clicking on the numbers beneath the
charts, you will be taken to a filter that shows the entities missing information.
You can also create a statistics page over you current selection by going to the selection menu and clicking Statistics
about selection.
8.2 Refreshing statistics
Statistics will be automatically updated every 10 minutes. This will happen when you access the overview page. If
you want to manually refresh the statistics, you can do so by clicking the Refresh button in the submenu bar.
23
Adressen Beheer Systeem Documentation, Release 2.4
24
Chapter 8. The status of your database
CHAPTER 9
Activity log
ABS logs all modifications in the application, like modifications on contacts, companies and company locations. All
additions, modifications and removals are logged in this activity log. A modification is for instance creating a new
contact or changing an address field. Some important applications actions are also logged, such as creating a new
application user or changing a system setting.
In the activity log, not only the modification itself is registered, but also the time when the modification was performed
and the user who made the change. When data is changed or removed for a contact, company or company location,
ABS logs both the old and the new values for each address field. Using this method, you can always review information
that has been changed and possibly undo a modification.
9.1 Recent changes on start screen
When you have logged in to ABS, you see a list of all recent changes (unless this list has been disabled by your system
administrator). The changes you can see here are all changes which have recently been made in the application; the
most recent changes are on top of the list. The list is limited to the 10 most recent changes. When you click More
changes, you open the full activity log with all modifications which have been made in the past.
In the list of recent changes on the start screen, you can see the name of the user who made the change and the
time when the change was made (in small type below the name of the user). When available, you can see additional
information for the change that was made. When contact data was modified, for instance, you can see which contact
fields have been changed during the edit.
For some changes, additional information is available. When you move the cursor of the mouse above the name of
the user, you can see the user profile: you can see the username of the user, his or her e-mail address, and user group
(when user groups are enabled). If you hover the mouse above the relative time when the change was made, you can
see the exact date and time. If you hover your mouse above the list of changed address fields, you can see old and new
values (when available).
9.2 Recent changes for contacts, companies and company locations
For contacts, companies and company locations, you can view the most recent change in the most upper part of the
screen of the detail view. This way, you can quickly view when the item was last modified. In the bottom part of the
screen, you can see the last 10 recent changes for the item you are viewing. Both parts function the same like the list
of recent changes on the start screen.
When you click More changes you open the full activity log for this item.
25
Adressen Beheer Systeem Documentation, Release 2.4
9.3 Detailed activity log
Besides the list of recent changes mentioned above, there is also a detailed activity log available. This log contains all
actions that have been done in the application. You can also filter this log on username, date, object type, etc.
You can open the detailed activity log as follows:
• System administrators and super users open the activity log by the tab clicking System administration and then
choosing Log.
• Other users choose the tab Log in the main menu.
If you don’t see either tab, you do not have permission to view the activity log.
The activity log shows all modifications that have been made in the system. By default, the newest log entry is on top
of the list. You can navigate through the list of changes by selecting another page number.
For each change, you’ll see the following fields:
• Log ID: internal identification number for log entry
• User: user who made the change
• Group of user current user group of user who made change (only when user groups are enabled)
• Time: date and time when change was made
• Activity: modification type, like ‘Edited’ or ‘Created’
• Object type: object type, like ‘Contact’ or ‘Company’
• Group of object: user group to which the object is linked (only when user groups are enabled, currently only
for contacts)
• View: the display name of the object, like the full name of a contact
• Object ID: unique identification number for a object (contact, company, etc.)
9.3.1 Sorting and searching
By clicking a column name, you can sort on the data in the column. By clicking a column name again, you reverse the
sort order.
The search filter in the upper right part of the table allows you to search to specific log entries. The search filter works
equally to other search filters in ABS, like the search filters for contacts or companies.
9.3.2 Modified address fields
In some cases, ABS registers extra information in the activity log. When data for a contact, company or location is
modified, ABS registers both the old and the new value for a specific contact field. You can view both the old and new
data in the activity log.
When this information is available, ABS shows a blue arrow right to the display name (column View). When you click
this name, additional information will expand below the log entry. In the expanded information block, you’ll see a
table with old and new information for each address field. You can dismiss this information by clicking the display
name again.
26
Chapter 9. Activity log
Adressen Beheer Systeem Documentation, Release 2.4
9.3.3 Exporting the activity log to a CSV file
You can export the activity log to a comma separated text file (CSV file). In the CSV file, all information is stored
that you can also find in the detailed activity log (including modified fields). You can download a CSV file by clicking
Download CSV file in the action bar.
When you have entered a search query and you are looking at a filtered view of the activity log, you will also download
a filtered version of the activity log. Clear your search query before downloading the activity log if you like to
download the complete activity log.
9.3. Detailed activity log
27
Adressen Beheer Systeem Documentation, Release 2.4
28
Chapter 9. Activity log
CHAPTER 10
Deduplicating contacts
In order to find relevant information rapidly and minimize mistakes, it’s vital to keep your contact database clean.
Deduplication of contacts helps by finding duplicate contacts and allowing them to be merged.
10.1 Choosing a deduplication method
ABS has a few defined methods to find duplicates of the same contact. The most specific of these are the ‘Duplicate
email’ and ‘Duplicate postcode/housenumber combinations’. Also prodivded are options to deduplicate by name. You
should however be carefull. Having the same doesn’t necessarily mean being the same person.
10.2 Deduplicating
Deduplicating is a three step process.
After choossing a deduplication method you will see an overview with found possible duplicates. Clicking on a row
will show details of the duplicate entries.
After clicking you will be able to refine the selection by ticking the boxes in front of them. Choose at least 2 contacts
and click the Merge selected addresses... button to continue the process.
In the last screen you will choose the defining information. When there are different values for the selected contacts,
you will get a dropdown so you can choose the right content. If there are no details for any of the selected contacts,
the field won’t be filled. Remarks will be combined and reordered by date. After clicking the save button, the selected
contacts will be combined to a single new one. The old contacts will be removed. This action can not be reversed.
29
Adressen Beheer Systeem Documentation, Release 2.4
30
Chapter 10. Deduplicating contacts
CHAPTER 11
Managing categories
Using categories in ABS, you will be able to group information and find them quickly using advanced filters.
11.1 Viewing categories
Categories are found in a lot of places in ABS. Almost every company, location and contact screen you’ll be able to
view and change category information. Adding, modifying or deleting category properties is done in the main menu
option system administration under the submenu item categories.
11.2 Adding new categories
To add a new category, you can click the New category button in the categories overview. In the following screen,
you set can set an optional abbreviation and a name. This information is used to identify categories in the rest of the
system. You are able to nest categories by assigning a parent category. IF you want a new top-level category, you
should assign no parent category.
You can make the choice for a category mandatory by selecting the option Users must select at least one category.
Users will now receive a warning when they are trying to create a new entity that does not have one of the child
categories of the mandatory category selected.
You can specify which entities the category applies to by selecting an entity in make category available for.... The
category will now only be available in the specified entity.
By pressing the save button, the category will be created in the system and be ready or use.
11.3 Editing existing categories
To edit a categorie you click the category you want to edit in the overview. The rest of the editing process will follow
the same steps as adding a new category.
11.4 Removing categories
Clicking the categorie you want to remove in the overview screen takes you to the edit page. After this, the sub
menu will contain a button Remove category. Clicking this button and confirming the deletion will remove the current
category and any nested categories under it. All entities linked to the category will be unlinked.
31
Adressen Beheer Systeem Documentation, Release 2.4
11.5 Category quick add
Given the right permissions, you will be able to add new categories in any entity editing screen. In the category you
will find a button Nieuwe categorie. Clicking this will open a modal window for creating a new category.
The process of adding a new category will be the same as creating one in the categories overview. After adding a
category, it can be used immedietly.
32
Chapter 11. Managing categories
CHAPTER 12
Managing users
In ABS, access to the application is provided by logging in with a unique username and password. Privileges in the
application are dependent on the rights assigned to a person.
This chapter learns you to create new users and how to edit existing users. You will also learn about the permission
model that is used in ABS.
Tip: The amount of users that has access to the application is limited by the maximum amount of users that is
specified for your license. You can find this information in the tab System administration. You cannot create more
users than your license allows you to.
12.1 User roles
The following global user roles are available in ABS:
• Read-only
• Limited write rights
• Full write rights
• Administrator
When you use user groups, only the permissions Full write rights and Administrator are available. Other permissions
depend on the user group of the user. See for more information User groups.
A user with a read only role has privileges that are limited to viewing information in ABS. The user has no permission
to insert, edit or remove data in the system. These users cannot make any change to the data stored in the database.
Users with the role Limited write rights have the same permissions as users with read-only permissions, and additionally, they can insert new data or edit existing data. They can also add comments and deduplicate contacts. Users with
this role cannot remove data from ABS. They also have no access to the system administration menu.
Users with Full write rights have all permissions to create, edit or remove data. They inherit the permissions of users
with limited write rights, and additionally these users can remove information from the system. They also have access
to the category administration.
Administrators have the same permissions as users with full write rights, and additionally, these users can perform
all administrative actions in the application, like creating, editing or blocking users, changing application settings, or
viewing full details in the system logs.
Tip: When in doubt when you are assigning a user role for a new user, start with the lowest user role (read-only) and
choose a higher user role when needed. You can always increase or decrease the role for a user.
33
Adressen Beheer Systeem Documentation, Release 2.4
See also:
Permissions for additional modules is not covered in this chapter.
12.2 Inspecting user details
As an administrator, you’ll find all users when choosing the tab System administration and then clicking Users. You
will see an overview of all users in the application. Click a username to view more details.
12.3 Creating a new user
To create a new user, click the action button New user. In the next screen, you can enter personal details of the user
(like his or her name and e-mail address) and you enter a unique username and a password. If you allow the user to
change his/her password, make sure to check the checkbox Allow user to change password. After you have entered
the username and password, you must choose the user role for the new user. Choose the user group for the new user if
you have enabled user groups. Verify all information and then click Save to create the new user.
12.4 Editing an existing user
When you click a user in the overview of all users, you can change the details for the user. You can modify the user’s
full name, e-mail address, username, password and user role. If you leave the password field empty, it will not be
changed when saving the new details. Enter only a password in this field if you need to change it.
Click Save to save your changes.
12.5 Deleting a user
You can remove a user from the application by clicking the Delete icon in the overview of all users. The application
will ask for your confirmation before removing the user. When removing a user, all information that the user has stored
in the system will remain available.
As a protection, you can never delete the user account which you are currently logged in with.
Tip: Do you want to block access to an account only temporarily? In that case, it is more convenient to just change
the password and not to remove the user account. When you need to unblock the account, you just have to set a new
password and communicate that to the user.
34
Chapter 12. Managing users
CHAPTER 13
User groups
You can use user groups in ABS, to separate contacts between different groups of users. When you enable user groups,
all users are linked to a user group. All contacts are also linked to a group. Permissions for viewing and editing contacts
will now depend on the linked user group.
You can create an unlimited amount of user groups. You can (and should) also define a super user for a user group.
The super user is the main contact person for a user group and he or she can manage user within the user group.
Contacts in ABS are linked to user groups. A user can only modify or delete a contact when the contact is linked to
the same user group as the user. When a user creates a new contact, the new contact will be linked to the same user
group as the user creating the contact. Companies and company locations are not linked to user contacts and can be
modified by all users.
Super users have the same permissions of normal group members, but they can also create new users for their user
group. Super users have no further additional permissions; they have no additional rights for creating or modifying
contacts and they are also not able to create new user groups.
13.1 Special user groups
You can define special user groups in ABS. Special groups are for users that require read and write access access to all
contacts in the system, including contacts that are not linked to their own user group. You can use ABS for instance
in a setup where various departments in your organization can manage their own group of contacts. For departments
that require access to all contacts, like a corporate communication department, or other centralized departments that
need to work with all contacts, you define a special user group. Employees of this central department are member of
the special user group and have access to all contacts.
Users linked to a special user group can specify to which user group a new contact should be linked, when creating
a new contact. They are also able to change the user group of existing contacts, so that a contact can be assigned to
another user group.
Special group users can also define new users for the application and create new user groups. They cannot, however,
create new application administrators. They also can’t modify users of their own user group. These actions are reserved
for system administrators.
You can edit user groups via the tab System administration and then User groups. Here, you’ll see an overview of
existing user groups in the system, and you can create a new user group.
35
Adressen Beheer Systeem Documentation, Release 2.4
13.2 Creating a new user group
You create a new user group by clicking New user group. You have to enter a name for the new group, and optionally
you can set a super user. You can only choose users who are not yet super user for another group. If you choose an
existing user as super user, he or she will automatically made member of the new user group. If you are a system
administrator, you can also define whether the new group is a special user group or a normal user group. If you are not
an administrator, you can only create normal user groups.
Tip: You do not need to set a super user immediately when creating a new user group. You can also set a super user
at a later time.
When you click Save the new user group will be created. The application will automatically open the detail screen for
a user group.
In the group detail screen, you can add new members to the user group. Click Add to user group to create a new user
that will be linked to the user group you just have created. If you want to link an existing user to the new user group,
search the user through the user management and edit the existing user. When editing the user, you can change the
group membership.
13.3 Editing a user group
You can edit a user group by clicking the user group in the overview screen which shows all groups. This will
automatically open the user group detail screen. Click Edit in the action bar in the upper left part of the screen to
modify the name or group super user and click Save to save your changes.
13.4 Deleting a user group
You can remove a user group from the system by clicking the user group in the overview screen which shows all
groups. Click Delete in the action bar in the upper left part of the screen to remove the group. The application will
first ask for confirmation before actually removing the user group.
When deleting a user group, all contacts and users that are linked to the user group remain in the system. You only
delete the user group. After deleting the group, all contacts that were previously linked to the user group will not be
linked to a user group anymore. The same goes for group users; the users still have access to the application, but they
are not linked to a user group anymore. Because these users are not linked to a user group anymore, they cannot create
or edit contacts. However, you should delete them from the system when you want to block these users from accessing
the data in the application.
13.5 Permission model
ABS uses the following permissions per user when user groups are enabled:
36
Chapter 13. User groups
Adressen Beheer Systeem Documentation, Release 2.4
Permission
Read permissions (unlimited) for
contacts own user group
Write permissions (unlimited) for
contacts own user group
Read permissions (limited) for all
contacts
Read permissions (unlimited) for all
contacts
Write permissions (unlimited) for all
contacts
Changelog for contacts own user group
Changelog for all contacts
Create special group users
Modify or remove special group users
Create super user for group
Set or remove super user for group
Create users and assign to own user
group
Create users and assign to other user
group
Create and modify user group
Remove user group
System administration
Export all contacts (all data)
Export contacts own user group (all
data)
Import contacts for own user group
Duplicates report for all contacts
Category administration
Create or modify extra fields
View direct mailings
Create new direct mailing
Send direct mailing to all contacts
Create or edit direct mailing template
Set direct mailing master template
Edit direct mailing master template
User Super
user
x
x
Member
special group
x
Super user
special group
x
Administrator
x
x
x
x
x
x
x
x
x
x
x
x
x
x
x
x
x
x
x
x
x
x
x
x
x
x
x
x
x
x
x
x
x
x
x
x
x
x
x
x
x
x
x
x
x
x
x
x
x
x
x
x
x
x
x
x
x
x
x
x
x
x
x
x
x
x
x
x
x
x
x
x
x
x
x
x
x
x
x
x
x
x
x
x
Users inherit rights from more permissive user roles. For instance: a user who is a super user and also system
administrator, will have the permissions of a system administrator. A super user cannot be a member of another group
than the group for which he is super user.
13.5. Permission model
37
Adressen Beheer Systeem Documentation, Release 2.4
38
Chapter 13. User groups
CHAPTER 14
Managing label sheets
You can print directly addresses on label sheets using ABS. By default, ABS comes with a number of commonly used
label sheet formats. You can define your own formats if you use other label sheet formats. You can create new formats,
and edit or delete existing formats.
See also:
This page is about managing label sheet formats. For information about exporting contacts to label sheets, see the
chapter Selections.
14.1 Viewing label sheets
You can see all label sheet formats by selecting the tab System administration in the main menu, and then navigating
to the submenu page Label sheets. You now see an overview of all label sheet formats that are currently defined.
14.2 Creating a new label sheet
To create a new label sheet, click the button New label type (from the overview screen). The label creation screen will
be opened.
You you can enter a name for the new label type in the field Description. This name will be used by ABS to identify
the label. When you have chosen a name for the label, you can set the paper size. This is done according to the
A-standard (e.g. A4, A5, etc.). For Paper margins, enter the distance (in millimeters) from the edge of the paper to
the label. Then choose whether the labels are printed in portrait or landscape mode. If the labels aren’t pre-cut, it is
convenient to turn the option line on. With this option a black guideline between the labels will be printed.
You must then enter the number of rows and columns of the label sheet. In label margins fill the distance in millimeters
from the text to the edge of the label. Finally, choose a font and font size to use in the label. You save the new label
sheet by clicking the button :guilabel: Save.
Tip: Before using a label, print a test sheet to make sure you have configured the new label sheet correctly.
14.3 Editing existing label sheets
From the label sheet overview, click on a label sheet to edit the sheet configuration. Editing a sheet has works the same
as creating a new one. Click :guilabel: Save to save the configuration.
39
Adressen Beheer Systeem Documentation, Release 2.4
14.4 Removing label sheets
In the label sheets overview, click the red icon Delete label to delete a label sheet. This operation can not be undone.
40
Chapter 14. Managing label sheets
CHAPTER 15
Plugins
The functionality of ABS can be extended by using optional plugins. These plugins integratie the rest of the application, but they are not always activated. Below you can find an overview of available plugins.
15.1 Letters plugin
Using the letters plugin we add the ability to send personalised physical mailings to your contact database. Mailings
can be standardised and filled with personal data like names, dates and other properties. Sending a new letter is done
in the Selection overview.
15.2 Direct mailing plugin
The direct mailing module adds functionality to send mass e-mails from ABS. The mailings are throttled and can be
personalised. Templates can be used to standardise mailing designs. Sending direct mailings is done via the Selection
tab.
• See Direct mailings for more information about direct mailings.
15.3 Files plugin
The files plugin adds the capability to enhance entities with attachments, using files. Files are organised by year and
complemented by a subdirectory. An uploaded file can be removed by clicking Delete beneath a file.
Files are not available when exporting. It is not possible to search the contents of files.
15.3.1 Quota
There is a maximum file size of 8 MB per file. Larger files will be rejected when uploading.
A quotum is in place for the total collection of all files in the application. Administrators are able to see the currently
used amount through the System administration / File disk usage menu. When the total amount of files approaches the
quotum limit, a warning will appear. It is not possible to upload new files when the quotum limit has been reached or
exceeded. Remove files first or enlarge the file storage space.
41
Adressen Beheer Systeem Documentation, Release 2.4
42
Chapter 15. Plugins
CHAPTER 16
Direct mailings
The Direct Mailing module in ABS makes it easy to send mass e-mails to large groups of recipients. First you create
a new mailing, then you select the recipients and finally, you send the mailing to all selected recipients.
This chapter learns you how to create new direct mailings and templates, and how to send a direct mailings to your
contacts.
The most important actions for managing direct mailings can be found in the tab Direct mailing in the main menu.
When you open this tab, you’ll see an overview of all existing direct mailings (both sent and unsent mailings). Normally, the tab Direct mailings is opened (showing all direct mailings). When you click the tab Templates, you’ll find
an overview of all templates.
16.1 Creating a new direct mailing
You create a new direct mailing by clicking the tab Direct mailing in the main menu, and then clicking the action
Create direct mailing. Now you may choose the template that you want to use for the new direct mailing. By default,
the main template is selected. If you have defined more templates, you may choose the template that you wish to use
as a base for your new mailing.
If you haven’t created any templates yet, ABS will ask you to create a template first. See below for more information
about creating templates.
When you have chosen a template, click the button Use template to create the new mailing and to enter other information. The internal name, subject, sender and content will be copied from the template. You may change all these fields
when editing your mailing.
For Internal name, you may enter your own description for the mailing. This name will not be visible for the recipients
of your mailing and it is solely used for your own administration.
16.1.1 Subject and sender
The subject and sender details are visible to your recipients. You can specify a subject as you like (just like composing
a regular e-mail), but a subject is required. You may use variables in the e-mail subject (see below for more information
about using variables).
The sender consists of a name and an e-mail address. Both fields are required. If you wish to indicate to recipients
that you do not want to receive replies to an e-mail, you may use an e-mail address like [email protected]
(where you replace example.com with the domain name of your own organization). Optionally, consult the system
administrator of your organization for choosing an optimal sender e-mail address.
43
Adressen Beheer Systeem Documentation, Release 2.4
16.1.2 Text version and HTML version
The content of the direct mailing is specified below Text version and HTML version. The text version is the content of
the mailing in plain text; you can’t use formatting or images in the plain text version. Some e-mail clients only show
the plain text version. Often, the plain text is also shown on mobile mail clients until the user has fully loaded the mail.
The HTML version contains the formatted content of your mailing. You can use text formatting, images, colors, fonts
and you can insert links or images. You have a lot of freedom when creating your mailing. However, do consider
that not every markup element is supported by every e-mail client. It is recommended to test your mailing in various
e-mail clients before sending it to a large group of recipients.
16.1.3 Variables
You can use variables in both the text version and the HTML version of your mailing. Variables are special codes
which will be replaced by personalized content when sending your mailing. You can use a variable to address the
recipient of your mailing in a more personal way, for instance by using the name of a recipient, or by using the date
when you send the mailing. The full list of variables that can be used is shown below the HTML text editor. Every
variable starts and ends with a percent sign (%) and consists of alphabetical characters, numbers or underscores. The
precise meaning and an example value is shown for each variable. You can use almost all details of your contacts; for
example, you may use %std_achternaam% to use the last name of a recipient.
You can also use variables in the e-mail subject.
The tracker variable is a special variable. This variable is only applicable to the HTML version. By using the tracker
variable, you add an invisible image to your mailing, which ABS uses to track whether recipients have opened the
mailing.
An example of a mailing which uses variable may look like this:
Dear Sir/Madam %std_achternaam%,
This is a test message, sent on %F% %j% %Y%.
Kind regards,
%afzender_naam%
Opt-out for this mailing:
go to %afmelden%.
When this mailing would be sent, the contents would be replaced as follows:
Dear Sir/Madam Johnson,
This is a test message, sent on July 10 2014.
Kind regards,
ABS
Opt-out for this mailing:
go to http://example.adressenbeheersysteem.nl/afmelden.
When you use variables, it is always recommended to send a test mailing in which you verify that all variables are
replaced as expected. ABS will replace unavailable adress fields with empty text.
44
Chapter 16. Direct mailings
Adressen Beheer Systeem Documentation, Release 2.4
16.1.4 Attachments
It is possible to send a attachment with a mailing. We recommend to limit the number of attachments and the total
file size: you prevent full e-mail boxes for the recipients of your mailing, and furthermore, you prevent that ABS is
overloaded with sending large e-mail messages.
You can add an attachment by selecting a file below the header Attachments. Do you want to add more attachments?
You can select extra files by clicking the button Add attachment and selecting another file.
16.1.5 Saving
You save the direct mailing by clicking Save. After saving, you return to the overview of direct mailings.
16.2 Editing a direct mailing
You can edit a direct mailing by clicking the direct mailing in the overview of all direct mailings. You can only edit
direct mailings that have not been sent yet. When you click a mailing that has been sent already, you’ll open the
progress report for the mailing (see below for more information).
You can change all fields when editing a direct mailing. You cannot choose another template for an existing direct
mailing. If you have already uploaded attachments, you will find those attachments below the header Attachments.
You can delete an existing attachment by clicking Delete. You save changes by clicking Save.
16.3 Copy an existing mailing
It is possible to copy an existing mailing.
You can easily copy an existing mailing in the overview of direct mailings. Click the icon Copy direct mailing to
the right of a mailing (in the table). ABS then creates a new mailing that has the same subject, sender, contents and
attachments as the original mailing. You can also copy mailings that have already been sent. Using this method, you
can re-use old mailings to send a mailing for a second time.
16.4 Sending a direct mailing
When you have created a mailing and you are satisfied with the contents and lay-out, you can send the mailing to your
contacts.
Tip Send the mailing to yourself before sending a mailing to all your contacts, so you are able to verify whether the
mailing can be received correctly. Define a number of test contacts in ABS and send the mailing to these test contacts.
You start sending the mailing by identifying which contacts should receive the mailing. Select the contacts to which
you want to send your mailing. See the chapter Selections for more tips about making a good selection.
When you have made a selection, you can send the mailing to your contact persons. Go to the Selection tab in the
main menu and choose the action Send direct mailing.
16.4.1 Automatic deduplication by e-mail address
When you are about to send a mailing, ABS automatically deduplicates your contact selection by e-mail address,
in order to prevent that you send the same mailing multiple times to an e-mail address. This deduplication is done
16.2. Editing a direct mailing
45
Adressen Beheer Systeem Documentation, Release 2.4
automatically over your selection when you are about to send a direct mailing. If the application detects that your
selection contains multiple contacts who have the same e-mail address, you will receive an alert and ABS will show
a report of all duplicate contacts. One single contact person per e-mail address will be chosen by ABS to use for the
direct mailing. Other contacts will be removed from the selection. ABS will indicate which contact persons remain in
the selection; those contacts are marked in the list of duplicate contacts (indicated by the text ‘this contact will be used
in your selection’). Contacts which are not marked with this label will be removed from your selection.
The selection will be deduplicated when you click Deduplicate. Note that your current contact selection will change
when you execute this action.
16.4.2 Select mailing and final check
You are now about to select the direct mailing you wish to send and to perform a final check before sending. On top of
the screen, you see the amount of recipients which will receive the mailing. If ABS has deduplicated your selection,
you will also see the number of contacts that have been removed from your selection. At this point, you can still abort
sending the mailing by clicking a tab in the main menu.
If you are confident about the number of recipients, you can choose the direct mailing that you want to send. Select
the correct mailing in the list. You can only select mailings that have not been sent yet.
Tip: If you want to send a mailing that has been sent already, you may create a copy of the existing mailing. See
above for more information.
When you have selected the mailing you want to send, click Send direct mailing. The mailing will now be prepared
for sending (this takes some time) and will be delivered to your recipients. The delivery will be delayed intentionally,
in order to prevent that anti-spam measures from e-mail providers will be triggered. You can monitor the delivery of
your mailing by the progress report that will be opened automatically after preparing the mailing.
Warning: Do not execute any action whilst your mailing is being prepared and do not close the browser window,
but wait instead until the progress report has been opened.
16.5 Monitoring progress and status
During the actual sending of your mailing and after sending, you can monitor the progress of your mailing and see
how many recipients have opened your mailing (if you have included a tracker image). The progress report is opened
automatically after preparing your mailing for delivery (see above). You can also open the progress report by selecting
the tab Direct mailing in the main menu, and then selecting the mailing from the overview. The progress report will
then be opened.
In the upper part of the screen, you see the amount of recipients that has received the mailing (or is scheduled to
receive it). Below the number of recipients, you can see how many unique recipients have opened the mailing. This is
calculated by using the tracker image (which you must have included in your mailing to use this statistic). This number
is not 100% reliable; not every recipient allows external images to be opened. The effective amount of recipients that
has opened the mailing will often be higher than the amount shown in this screen.
In the lower part of the screen, you can see the delivery progress. This is shown as a bar chart: the sum of all parts is
100% of the recipients. You may see the following statuses:
• Pending: this is the amount of e-mails that is scheduled for delivery, but is still waiting in the queue (and has
not been sent yet). ABS sends out mails in timed, small batches rather than sending a large batch of e-mails
at once, in order to prevent exhausting system resources of your recipients. The number of e-mails that is still
waiting in the queue should diminish over time. When there are no pending mails anymore, your mailing has
been sent completely.
46
Chapter 16. Direct mailings
Adressen Beheer Systeem Documentation, Release 2.4
• Sent: this is the amount of mails that has been sent successfully. Successful sending of an e-mail does not
necessarily mean that the mail has also been received successfully by your recipient: errors that occur while
receiving mail (like a full mailbox or a holiday rule) cannot be detected by ABS.
• Failed: this is the number of e-mails where an error occurred while ABS tried to send it out, for instance because
the e-mail address is invalid. By default, ABS tries to send a mail 5 times before considering it as ‘failed’.
• Opted out: recipients may opt-out for receiving e-mails from you, using the opt-out form that you can provide
in your mailings. Recipients that have opted out for further e-mails are registered as ‘opted out’ in the progress
report. The contact data for these recipients is still available in ABS, but ABS will never send a mailing to
contacts that use an e-mail address that has opted out for further mailings. You can see the number of opt-outs
in the progress report.
You can leave the progress report opened in your browser while your mail is being send out, but it is not required to do
so. ABS will continue to deliver your mailing in the background. The progress report is refreshed every 30 seconds
with new information.
16.6 Working with templates
Templates are the base for composing a new mailing. A template is actually very much like a direct mailing which
is constantly being re-used to compose a new mailing. You can edit the same information as you would for a direct
mailing: you can define an internal name, subject, contents, attachments, and so on. You can find an overview of all
templates by selecting the tab Direct mailing, and then choosing the tab Templates.
You may define an unlimited amounts of templates in ABS to use for your mailings. However, you should define one
template as a master template: this template is used as a base when you create a new template, and it is selected by
default when you compose a new direct mailing.
The master template is marked in the list of templates by a blue square next to the template name. You can define
another template to be the master template by clicking the icon Set as master template (icon with light bulb) in the
right part of the table.
You can edit a template by clicking the template name. Editing a template is equal to editing a mailing. You can create
a new template by clicking the action New template in the action bar on top of the screen. The master template is used
by default when you create a new template. A template can be deleted by clicking the red delete icon in the right part
of the table.
16.7 Tips for working with templates
By using templates effectively, you can save a lot of time when sending mailings and warrant that your mailings
comply to minimum quality requirements.
• You can lay-out and markup your mailing perfectly in a template. When you have created a well-defined layout
in your template, all new mailings based on the template will use this layout.
• By using variables, you can easily personalize your mailings. You may also use variables for the current date
(e.g. month or year), so your subject and mailing contents always use the correct date (you don’t have to change
it when composing a new mailing).
• When you include a tracker image in your templates, you can monitor the open rate of all direct mailings that you
will send using ABS. Although this statistic is not 100% reliable, it still provides you with useful information.
• Are you going to send a lot of different mailings? You can create a specific template for each type of mailing
and use that specific template when you compose a new mailing.
16.6. Working with templates
47
Adressen Beheer Systeem Documentation, Release 2.4
48
Chapter 16. Direct mailings
CHAPTER 17
Fields
Most data in ABS is stored in fields. These fields can are split into two group, and can have one of multiple types.
17.1 Field groups
There is a distinction between default fields and extra fields. Default fields are part of the main application. Most
default fields are always available, although some fields are optional.
Extra fields can be specified by an ABS administrator. This way, specific information for your contact database can be
stored in appropiate fields in ABS. Administrators can add or remove extra fields in the System administration menu.
17.2 Field types
All fields in the contact database have a type. Depending on this type a field will have different ways of inserting data,
and various filtering methods.
• Textfield: Free input.
• Date: Must be a valid date in the format yyyy-mm-dd.
• Multiple choice (single value): Choose from a list of options, specified by an administrator.
• Multiple choice (multiple values): Choose from a list of options, specified by an administrator.
• Yes/No: Choice between yes and no.
• Calculated fields: These fields are generated by the application and cannot be set manually.
17.3 Field options
Fields can be enhanced with the following options:
• Mandatory: An item can’t be saved if the value for this field is empty.
• Minimum length: Require a minimum length (characters) for a field. A field can be empty, when it is not
mandatory.
• Maximum length: Limit the input to the maximum length (in characters).
• Enfore uppercase: Automatically corrects the first letter into a capital one.
49
Adressen Beheer Systeem Documentation, Release 2.4
• Require e-mail: Value must be a valid email address (contains a @ and a .).
• Pre-check filter: Ignores specified characters when checking for mandatory, minimum and maximum lengths.
• Financial field: Only for locations. The field requires the same rights as financial fields.
17.4 Setting options for multiple choice fields
Edit options by clicking the pencil icon in the extra field overview. Options are automatically sorted alphabetically. It
is not possible to set a default value.
50
Chapter 17. Fields
CHAPTER 18
Support
When you have a problem using ABS and this manual does not provide you with sufficient information to resolve your
problem, you can get support through various ways.
18.1 Application administrator
Always try to resolve any problems with ABS first by contacting the application administrator in your organization.
He knows best how your ABS instance is used and how to resolve common problems.
18.2 Support information
If you are an application administrator, you can see various administrative and technical details about your ABS
instance. Go to System administration, where you will see various details which may be relevant for resolving your
problem.
18.3 Contacting the support desk
The InterExperts support desk is happy to assist you if you have questions about ABS or when you run into problems.
You can reach our support desk during Dutch office hours (CET/CEST time zone) by telephone or e-mail. The most
up-to-date contact details and opening hours can be found at our website, www.interexperts.nl.
• E-mail: mail to [email protected]
• By telephone: call +31 10 254 0500
51