1
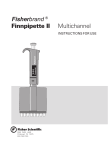
FINNPIPETTE VARICHANNEL INSTRUCTIONS FOR USE Code 4347010 4347020 4347030 Volume range 5-50 µl 40-200 µl 200-1000 µl OPERATING BUTTON Labsystems GRIPPY 1 5 .0 HANDLE TIP EJECTOR PUSHER DIGITAL DISPLAY BODY COVER MOVABLE TIP CONES DISPOSABLE TIPS Thermo Labsystems Oy P.O.Box 100, FIN-01621 Vantaa, Finland Tel. +358-9-329 100, Fax +358-9-3291 0414 www.finnpipette.com A Thermo Electron Business 1 7 7 6 6 6 5 17 18 19 20 8 13 16 9 12 15 10 11 8 10 10 14 12 No. of channels 9 Spacing in mm TIP CONE SPACINGS 2 ADJUSTING THE TIP CONE SPACING fig.1 Follow these steps: 1. Press the operating button all the way down. 2. Move and adjust the tip cones to the spacing required. 3. Use the accompanying drawing for help to adjust the spacing accurately. 4. The maximum spacing available with different number of channels is shown in the table below. Number of Spacing Spacing channels 200-1000µl 5-200 µl 2 100 mm 100 mm 3 50 mm 50 mm 4 25 mm 25 mm 6 20 mm 20 mm 7 16.7 mm 16.7 mm 8 14.3 mm 14.3 mm 9 12.5 mm 12.5 mm 10 11 mm 11 mm 11 -------10 mm 12 -------9 mm Maximum spacing PRODUCT DESCRIPTION The VARICHANNEL DIGITAL MULTICHANNEL PIPETTE is a hand held, adjustable volume and adjustable channel spacing micropipette for sampling and dispensing of accurate liquid volumes. It operates on an air displacement principle (i.e. an air interface) and uses detachable, disposable tips. The VARICHANNEL can be assembled and adjusted into any configuration between 1 and 12-channel pipettes with variable tip spacing starting from a minimum of 9 mm. A tip ejector system is provided adjusting automatically to the selected tip spacing. The VARICHANNEL is available in three models covering a total volume range of 5 to 1000 µl. The volume ranges are: Volume range Scale Division 5-50 µl 0,5 µl 40-200 µl 1,0 µl 200-1000 µl 5,0 µl PIPETTE OPERATION DIGITAL DISPLAY Fig.2 The adjusted delivery volume is clearly indicated by a digital display on the pipette handle. SETTING THE DELIVERY VOLUME Fig. 3 The delivery volume is set using the operating button on the top of the pipette. To increase the delivery volume turn the opera-ting button counter clockwise and to decrease turn it clockwise. Ensure that the desired delivery volume clicks into place and that the digits for the volume are completely visible on the handle display. Do not try to set volumes by force outside the pipette´s specified volume range! 3 TIP EJECTION Fig.4 Each pipette is fitted with a tip ejector system to help eliminate any contamination possibilities. The tip ejector system consists of a set of tip ejector squares (same amount as tip cones) operating together with the ejector ribs and tip ejector plunger. Direct the pipette towards a suitable waste receptacle and press the tip ejector plunger with your thumb. The tips will be ejected cleanly. PIPETTING TECHNIQUES FIGURES 5-7: A = READY POSITION B = FIRST STOP C = SECOND STOP Ensure that clean tips are firmly pushed on to the tip cones of the pipette. The operation of the pipette is controlled by the operating button. For the best possible accuracy: Operate the button slowly and with steady speed at all times, particularly when working with liquids having high viscosity. Never let the operating button snap back. When working with serum or biological fluids rinse the tips with the liquid before pipetting. This is done by filling and emptying the tips. Hold the pipette vertically (10 degrees maximum from vertical) during the liquid intake. For maximum hand control, hold the pipette tightly in the hand with the "Grippy" resting on the index finger. FORWARD TECHNIQUE fig.5 Fill a clean reagent reservoir with the liquid to be dispensed. 1. Depress the operating button to the first stop. 2. Dip the tips just under the surface of the liquid in the reservoir (2-3 mm) and slowly release the operating button. Withdraw the tips from the liquid touching them against the edge of the reservoir to remove exess liquid. 3. Deliver the liquid by gently depressing the operating button to the first stop. After a delay of about a second, continue to depress the operating button all the way down to the second stop. This action will empty the tips. 4. Release the operating button to the ready position. If necessary, change the tips and continue with the pipetting. REVERSE TECHNIQUE fig.6 The reverse technique is suitable for dispensing liquids having high viscosity or which have a tendency to foam easily. The technique is also recommended for dispensing very small volumes. Fill a clean reagent reservoir with the liquid to be dispensed. 1. Depress the operating button all the way down to the se-cond stop. 2. Dip the tips just under the surface of the liquid in the reservoir (2-3 mm) and slowly release the operating button.This action will fill the tips. Withdraw the tips from the liquid tou-ching them against the edge of the reservoir to remove exess liquid. 4 3. Deliver the preset volume by gently depressing the operating button to the first stop. Hold the operating button at the first stop. Some liquid will remain in the tip and should not be included in the delivery. 4.The remaining liquid is either discarded with the tips or pipetted back into the container. REPETITVE TECHNIQUE fig.7 The repetitive technique offers a rapid and simple procdure for repeated delivery of the same volume. Fill a clean reagent reservoir with the liquid to be dispensed. 1. Depress the operating button all the way down to the se-cond stop. 2. Dip the tips just under the surface of the liquid in the reservoir (2-3 mm)and slowly release the operating button. This action will fill the tips. Withdraw the tips from the liquid touching them against the edge of the reservoir to remove exess li-quid. 3. Deliver the preset volume by gently depressing the operating button to the first stop. Hold the operating button at the first stop. Some liquid will remain in the tip and should not be included in the delivery. 4. Continue pipetting by repeating the steps 2 and 3. INSERTING THE VARICHANNEL SYRINGES Fig.8, 9 To install or remove a cy-linder-piston combination follow the steps below: 1. Open the lid at the end of the body. 2. Depress the operating button all the way down. 3. To remove a syringe just pull it out of the body by holding it at the tip cone. 4. To insert a syringe is an opposite operation. Be sure that the round piece at the end of the piston is in the right position (see figures) as well as the tip ejector square. 5. Push the combination into its place taking care that each of the three parts goes into its appropiate grooves, - piston - cylinder - tip ejector square 6. Reinstall the lid. ASSEMBLING THE TIP EJECTOR PUSHER Fig.11 To remove or install the tip ejector pusher, first unscrew the small screw visible from the back of the handle, see figure below. MAINTENANCE When the FINNPIPETTE VARICHANNEL is not in use make sure it is safely stored in a vertical position. We recommended a FINNPIPETTE stand for this purpose. SHORT TERM CHECKING The pipette should be checked at the beginning of each day for dust and dirt on outside surfaces of the pipette. Particular attention should be paid to the pipettes tip cones. Solvents should not be used for cleaning the pipette. 5 LONG TERM MAINTENANCE If the pipette is used daily it should be checked at least twice a year. The servicing procedure is as follows: 1. Open the lid on the body and remove all the syringes. 2. Clean the pistons and O-rings with a dry napless cloth and grease them with high vacuum silicone grease (included in the package). 3. Reassemble the pipette. In the event of a malfunction send the pipette to nearest Labsystems representative. Please, enclose a complete list of liquids which have entered the pipette. CALIBRATION All Finnpipettes are factory calibrated and adjusted to give the volumes as specified with distillled or deionized water. Normally, the pipettes do not need adjustment, but they are constructed to permit recalibration and adjustment for liquids of different temperature and viscosity. Device requirements and test conditions An analytical balance must be used. The scale graduation value of the balance should be chosen according to the selected test volume of the pipette: Volume range readable graduation under 10 µl 0.001 mg 10-100 µl 0.01 mg above 100 µl 0.1 mg Test liquid: Water, distilled or deionized, grade 3 water conforming ISO 3696. Tests are done in a draft-free room at a constant (±0.5 C) temperature of water, pipette and air between 20C to 25C. The relative humidity must be above 55%. Espoecially with volumes under 50µl the air humidity should ve as high as possible to reduce the effect of evanporation loss. Special accessories, such as the evaporation trap, are recommended. CHECKING CALIBRATION One of the middle channels of the pipette is checked with the maximum volume (nominal volume) and with the minimum volume or 10 % of maximum volume, whichever is higher. E.g. Finnpipette 0.5-10 µl is tested at 10 µl and 1 µl. A new tip is first pre-wetted 3-5 times and series of ten pipetting are done with both volumes. A pipette is always adjusted for delivery (Ex) of the selected volume. Measuring volumes taken from balance is not allowed. If the calculated results are in the limits, the calibration of the pipette is correct. Procedure: 1. Do 10 pipettings with the minimim volume. 2. Do 10 pipettings with the maximum volume. 3. Caculate the accuracy (A) and precision (cv) of both series. 4. Compare the results to the limits in the Table 1. If the results are in the limits of Table 1, then the calibration of the pipette is correct. Otherwise the pipette must be adjusted and checked again. 6 Channel Range 12 5-50µl 12 40-200µl 10 200-1000µl Volume µl 50µl 5µl 200µl 40µl 1000µl 200µl Accuracy Precision µl % s.d.*µl cv% ±0,75 ±1,5 0,40 0,8 ±0,25 ±5,0 0,13 2,5 ±2,00 ±1,0 0,80 0,4 ±1,80 ±4,5 0,60 1,5 ±12,00 ±1,2 6,00 0,6 ±6,00 ±3,0 5,00 2,5 ADJUSTMENT Fig.10 Adjustment is done with the service tool. 1. Place the service tool into the openings of the calibration nut at the top of the handle. 2. Turn the service tool clockwise to increase, or counterclockwise to decrease the volume. 3. After adjustment check the calibration according to the instructions above. FORMULAS FOR CALCULATING RESULTS Conversion of mass to volume V = (w+e) x Z V = volume (µl) w = weight (mg) e = evaporation loss (mg) Z = conversion factor for mg/µl conversion Evaporation loss can be significant with low volumes. To determine mass loss, dispence water to the weighing vessel, note the reading and start a stopwatch. See how much the rading decreases during 30 seconds (e.g. 6 mg = 0,2mg/s). Compare this to the pipetting time from tareing to reading. Typically pipetting time might be 10 seconds and the mass loss is 2 mg (10s x 0.2mg/s) in this example. If an evaporation trap or lid on the vessel is used the correction of evaporation is usually unneccessary. The factor Z is for converting the weight of the water to volume at test temperature and pressure. A typical value is 1.0032 µl/mg at 22°C and 95 kPa. See the conversion table on page 9. Accuracy (systematic error) Accuracy is the difference between the dispensed volume and the selected volume of a pipette. A=V-V0 A = accuracy V = mean volume V = nominal volume Accuracy can be expressed as a relative value: A% = 100% x A / Vo Precision (random error) Precision refers to the repeatability of the pipettings. It is expressed as standasd deviation (s) or coefficient of variation (cv) s = standards deviation n v = mean volume 2 S (V - V ) n = number of measurements S = i=1 i cv is the relative value of standard n -1 deviation. cv = 100% x s / v 7 PACKAGE The FINNPIPETTE VARICHANNEL is shipped in a custom made expanded polystyrene package. The package contains the following items: 1. VARICHANNEL pipette 2. Instruction Manual 3. Tube of Lubric Grease 4. Samples of Tips 5. Service tool TROUBLE SHOOTING TABLE The following table is a guide to possible problems and their solutions. Fault Possible reason Solution Leakage Tip incorrectly attached Foreign bodies between tips and tip cones Foreign bodies between the piston and the O-rings in the cylinders Insufficient amount of grease on pistons and O-rings O-rings damaged Incorrect operation Attach firmly Labsystems Inaccurate dispensing with certain Tips incorrectly attached Calibration altered: caused e.g. by misuse Unsuitable calibration. Many high viscosity 1 5 .0 Inaccurate dispensing 1 8 Clean tip cones thoroughly and attach new tips Clean and grease O-rings and pistons Use high vacuum silicone grease Grease accordingly Change the O-rings Follow instructions carefully Attach firmly Recalibrate according to instructions Recalibrate with the liquids in question Conversion table Value of the conversion factor Z (µl/mg), as a function of temperature and pressure, for distilled water. Temperature °C Air pressure hPA (mbar) 800 853 907 960 1013 1067 15 15.5 16 1.0018 1.0018 1.0019 1.0018 1.0018 1.0020 1.0019 1.0019 1.0020 1.0019 1.0020 1.0021 1.0020 1.0020 1.0021 1.0020 1.0021 1.0022 16.5 17 17.5 1.0020 1.0021 1.0022 1.0020 1.0021 1.0022 1.0021 1.0022 1.0023 1.0022 1.0022 1.0023 1.0022 1.0023 1.0024 1.0023 1.0023 1.0024 18 18.5 19 1.0022 1.0023 1.0024 1.0023 1.0024 1.0025 1.0024 1.0025 1.0025 1.0024 1.0025 1.0026 1.0025 1.0026 1.0027 1.0025 1.0026 1.0027 19.5 20 20.5 1.0025 1.0026 1.0027 1.0026 1.0027 1.0028 1.0026 1.0027 1.0028 1.0027 1.0028 1.0029 1.0028 1.0029 1.0030 1.0028 1.0029 1.0030 21 21.5 22 1.0028 1.0030 1.0031 1.0029 1.0030 1.0031 1.0030 1.0031 1.0032 1.0030 1.0031 1.0032 1.0031 1.0032 1.0033 1.0031 1.0032 1.0033 22.5 23 23.5 1.0032 1.0033 1.0034 1.0032 1.0033 1.0035 1.0033 1.0034 1.0035 1.0033 1.0035 1.0036 1.0034 1.0035 1.0036 1.0035 1.0036 1.0037 24 24.5 25 1.0035 1.0037 1.0038 1.0036 1.0037 1.0038 1.0036 1.0038 1.0039 1.0037 1.0038 1.0039 1.0038 1.0039 1.0040 1.0038 1.0039 1.0041 25.5 26 26.5 1.0039 1.0040 1.0042 1.0040 1.0041 1.0042 1.0040 1.0042 1.0043 1.0041 1.0042 1.0043 1.0041 1.0043 1.0044 1.0042 1.0043 1.0045 27 27.5 28 1.0043 1.0044 1.0046 1.0044 1.0045 1.0046 1.0044 1.0046 1.0047 1.0045 1.0046 1.0048 1.0045 1.0047 1.0048 1.0046 1.0047 1.0049 28.5 29 29.5 30 1.0047 1.0049 1.0050 1.0052 1.0048 1.0049 1.0051 1.0052 1.0048 1.0050 1.0051 1.0053 1.0049 1.0050 1.0052 1.0053 1.0050 1.0051 1.0052 1.0054 1.0050 1.0052 1.0053 1.0055 La .0 1 5 3 2 9 absystems A A 1 1 1 2 2 2 3 5 3 3 7 10 absystems A absystems 4 4 B C 4 B C 6 4 B C 0 11 0.0 5 Labsyste ms Labsystems 1 5 .0 8 PISTON HEAD CROOVER CYLINDER GROOVER TIP EJECTOR SQUARE GROOVER 9 150 Labsystems 10 11 11 Cap 1057490, orange 1057500, yellow 1057510, blue Service Tool 10589070 Spring 1131710 Handle 2202011, 5-50 µl 2202580 40-200 µl 2202590 200-1000 µl Tip Ejector Pusher 1058530 Screw 0200040 Locking part 1057820 Ejector Bushing 1057800 Ejector Cover 1057810 Body Assembly 2203700, 5-50 µl 2203701, 40-1000 µl Cover 1056860 Piston Assembly 5-50 µl 2203740 Tip Ejector Beam 1057790 Piston Assembly 40-200 µl 2203730 Piston Assembly 200-1000 µl 2203720 TIP INFO: For volumes 5-50 µl use Finntip 250 Universal, Finntip 200 Ext or Finntip 300 For volumes 40-200 µl use Finntip 250 Universal, Finntip 200 Ext or Finntip 300 For volumes 200-1000 µl use Finntip 1000 or Finntip 1000 Ext Tip Ejector Square 5-200 µl 1057840 Tip Ejector Square 1000 µl 1057830 Product specifications are subject to change without prior notice. Finnpipette® and Finntip® are registered trademarks of Thermo Labsystems Oy. 12 1504490-06 SPARE PARTS