1
camSPECS / camSPECS express
3.1.4 EXPOSURE
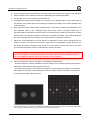
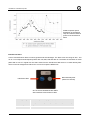
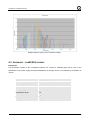
To get sufficient results the pictures of the filters may not be overexposed.
To find an appropriate exposure insert the filter with the highest intensity (usually one of the filters from 530 –
560 nm). Take a picture of the filters with equal exposure settings. Ensure that the green channel has a high
digital value without being saturated. One of the filters in this wavelength range should have the highest
intensity in case of usual consumer cameras. When testing special cameras, like infrared cameras, one has
to test possibly all filters to find out the brightest one.
When using the auto exposure an exposure correction might be necessary. The evaluation software can use
the camera's EXIF data or manually entered exposure data to correct the different exposure levels.
Note: Reasonable starting values are t: 1/10 sec, f-stop: 5.6, ISO: 100 (= 8.3 EV).
3.1.5 PHOTOGRAPHING THE FILTERS
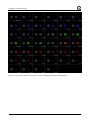
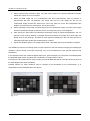
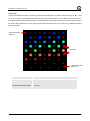
Take pictures of the filters in series. Use the transportation system of the projector (green button on remote
control) to change the filters.
Do not change the order of the filters. Do not alter the position of the camera during one series of
measurement. The supplied calibration data of the software will only work with all filters inserted.
3.2
CAMSPECS EXPRESS
3.2.1 CAMSPECS EXPRESS SETTINGS
Switch camSPECS on and let it run for a couple of minutes until it reaches a stable temperature.
Note: During the warm-up period the lamp may change its spectral behavior.
3.2.2 CAMERA SETTINGS
Set the camera to manual exposure mode. If a manual mode is not available, use the automatic exposure
mode. To get best results the camera shall be able to save pictures as linear raw files.
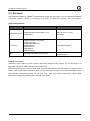
Recommended settings
Exposure program
Manual
Aperture
No default value
ISO Speed
Lowest value
Auto focus
Off
File type
RAW
7