1
®
Maintenance Procedures
Gate Seal Replacement
1. Clean the nozzle, especially the thread and runner.
2. Clean all residual plastic from the threads and counter bore of the gate
seal.
1
WARNING:
Ensure nozzles have cooled to room temperature. Failure to
do so may cause serious injury.
1
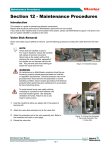
3. Check the bottom face of the nozzle counterbore for damage. If damFigure 12-16 Cleaning Location
aged, lap the bottom face of the nozzle in a circular fashion with a hard1. Remove Plastic
ened tool and 300 grit lapping compound. If nozzle counterbore is free of
damage, proceed to step 5.
4. After lapping is complete, blue the liner to the nozzle to ensure proper
mating. If the liner is making good contact, clean the bluing compound
off both faces.
5. Apply anti-seize (nickel based) to gate seal threads ONLY.
CAUTION:
Carefully apply anti-seize to threads of gate seal.
Any anti-seize that enters the internal runner
must be removed to prevent contamination of melt.
6. Using a socket wrench, re-install the gate seal being careful not to damage it.
7. Torque the gate seal to the appropriate value. Refer to Gate Seal Torque
Settings.
WARNING:
High temperature on the nozzle. Wear safety clothing such as
heat-resistant coat and heat-resistant gloves. Failure to do so
may cause serious injury.
8. Check that the nozzle has bottomed out, heat nozzle to process temperature and re-torque seal.
WARNING:
Failure to torque the gate seals at processing temperatures
may result in leakage.
Figure 12-17 Nozzle Preparation
Hot Runner User Manual
Revision 12
Not under documentation control if printed. May be revised without notice Electronic version is available at www.moldmasters.com
©05-2010
12-7