1
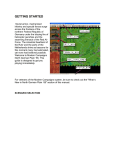
SUB ZERO WINTER BOWL INSTRUCTION MANUAL YOUR SYSTEM INCLUDES: Fully wired heavy duty battery box with relay wiring for motion eye solar panels with rack Winter water Bowl PS 150 Pump 1. PICKING THE PROPER LOCATION Set up well off water source, either a line from a well or a dugout. (Solar west recommends the use of a wet well). It can be 24” casing or larger, but you would need a reducer plate to fit the 24” bowl. Be sure the water level in the wet well is still 8’ below ground level when the dugout is at its highest possible level. see installation Diagram attached TIP: to prevent the pump from running when the cows are not drinking, make the ground a bit uncomfortable by putting a slope up towards the well cribbing so the cattle have to stand on the slope. 2. SETTING UP THE SOLAR PANELS AND BATTERY BOX a. Cut a 10’ length of 2 3/8” OD drill stem or pipe and push into the ground about 4-5’ where you are installing solar panel array. Mount the panel frame and panels on the drill stem. The panels should be facing south and slightly west. To set the optimum angle of the panels grab a can or nail and put it on the face of the panels. Do this at high sun and adjust panels so that there is NO shadow on the panels (you may need to re-adjust the panels through the season to get maximum efficiency). Tighten up both ¾” bolts to secure panels into position. b. Place your battery box at the base of the solar panels. Put enclosure around battery box and panel stand to keep livestock and wildlife away from it. The wires between your water source and the battery box, the solar panel wire and the motion eye wire are the lifelines of your watering system and should be protected all the time. Take care of these to ensure reliability of operation. If you wish to use an electric fencer to protect your equipment, talk to your Solar West Dealer about our 24v/12 V reducers for fencers. Setscrews 2 3/8Drill stem 3. INSTALLING THE PUMP Well application: a. Unscrew the hose barb fitting on top of the pump b. Take the steel loop out of the snap link c. Remove the black plastic disc d. Take the yellow Float off e. Screw the hose barb fitting back on top of the submersible pump f. Attach the low water sensor on the 1 ½” hose (use zip ties) g. Attach the steel loop back in the snap link h. Attach the rope to the in the snap link i. Lower the pump into the well casing to the desired level (based on water level and well recovery rate) j. Secure with the rope at that depth WATCH that you don’t put the pump in the well screens!! Pump is self-priming and water will drain back when it shuts off. Low water sensor attached to the hose Make sure you have a loop in the wire. So the steel loop can take the weight off the pump wire Snap link with rope and steel loop The rope will carry the weight of the pump and wire and hold it in place 4. PICKING THE PROPER LOCATION FOR THE AIR-X A specific step-by-step installation cannot be provided, because every set up and installation is different and unique. When picking the location for the Air-x you have to consider that even a small change in average wind speed (8mph) could change the power output. For example an increase of about 10% (9-10 MPH) results in approximately 30% increase in power output. The better the location, the better is the performance. So pick a location as high as possible and as far in the open, (no obstructions like trees…) as possible. Keep in mind: at a high speed of 275 mph the blades are almost invisible. Think safety first and install it, where nothing and nobody could accidentally touch or come in contact with the blades. 2 Basic requirements for optimal performance: -good average wind speed (at least 8 mph) -low wind turbulences (the less wind turbulences, the lower the stress on the Turbine – the more efficient and longer lasting it will be) Surface: The rougher the ground (covered with bushes and trees) the more friction you have- the higher you have to install the Air-x The smoother the ground (only covered with grass, sand, earth or dirt) the less friction you have- the better the performance. 5. INSTALLING THE AIR-X Pick a calm day and have a second person available to give you a hand. When you mount the Air-x on the tower, make sure you have the Air-x disconnected from the batteries. The Air-x can be installed on a 1 ½” schedule 40 steel pipe or a 2” SS-20 galvanized fence tubing (0.090 inch wall thickness). Do NOT plastic pipe to install the tower! The minimum recommended tower height is 25ft on open ground. Tower options: - Use concrete or cement - Use customized towers - Use guy-wires Again, every install is different. For tower installation refer to Air-X user manual or contact your Dealer. 6. INSTALLING THE MOTION EYE To pick a good spot for the motion eye keep the following in mind: Do not aim or mount sensor over or under something that moves such as waving branches, Air-X guy wire, hanging wire from the Air-X or solar panels, moving shadow from branches or the Air-X. Mount your motion sensor on a stable post close to the water-bowl and high enough so livestock and wildlife can`t reach it. Make sure the motion eye “arm” is tight and does not move. 7. SETTING THE MOTION EYE Solar West recommends the following settings: Sensitivity: as low as possible Photocell: day and night (24hr) Time: as low as possible (about 5 sec). 8. PREPARING THE PUMP a. Install the 1” hose with supplied hose-clamp on the hose barb on top of Y-Strainer. b. Attach the low water sensor with zip ties above the Y-Strainer c. Attach the supplied rope on the snap link. Low water sensor attached to the hose on top of Y-strainer Clean filter regularly Rope carries the pump weight and holds it in place Make sure you have a loop in the wire. So the steel mesh can take the weight off the pump wire 9. PREPARING THE BOWL AND INSTALL THE PUMP a. Slide the hose clamp over the 1” hose b. Cut the 1” hose to the length you need. (Pump should be about 6” above the bottom of the well and the hose should be a straight line.) c. Install the hose on the winter bowl and tighten up the hose-clamp d. Cut a hole or slot in casing to feed pump and low water sensor wires to the battery box - use hose, pipe or conduit to protect these wires from sharp edges where they pass through the casing. e. Lower pump into the well-use rope to secure the pump (6” from well bottom) f. Set the winter bowl on the well casing – to prevent possible freeze ups it is important to have a good seal between the bowl and the casing. 10. HOOK UP THE BATTERIES All you have to do is hook up the positive wire to the batteries. See diagram for reference 11. PLUG IN THE COMPONENTS Plug in the four plugs on the back of the battery box. (right to left solar panels, motion eye, low water sensor and pump. The white plug on top of the pump plug is the wind-charger plug). The plugs are all different, to prevent wrong plug in. 12. TURN YOUR SYSTEM ON (Switch is located at the bottom of the control box). The pump will start to pump as soon as you flip the switch. Allow the motion sensor about 10 min. to program/re-set itself. See motion eye trouble shooting for more details INFO When the motion sensor shuts the pump off and the water drains back to prevent freezing. To adjust the pump volume up or down use the grey knob with the red arrow inside the control box (RPM). Solar West recommends keeping the RPM setting as low as possible to save your battery power. SYSTEM CARE DURING THE SEASON To ensure reliability and performance the Solar West Sub Zero Bowl System requires only a little bit maintenance: SUB ZERO BOWL CARE Clean Y-strainer on top of the pump regularly (1-2 a week) Remove any straw from the bowl to prevent possible freeze-ups (do not pound on inside of water bowl) Sub Zero Bowl must have a good seal between lip and top casing so that no wind can blow down the casing and cause possible freeze-ups BATTERY CARE If it is overcast for a couple of days and not windy enough for the Air-X to charge the batteries, you may have charge them with a battery charger. Periodically check water to make sure batteries are working at their peak level Make sure all battery connections are tight – loose connections will cause improper charging and too much power draw SOLAR PANEL CARE Check for proper orientated solar panels at all times If panels are dusty or frosted with snow it will reduce the power output. Clean with soap and water or winter windshield washer fluid and a squeegee (or dust off with a broom) AIR-X CARE Check blades for chips (blades are balanced, always replace hole set ) Check nose cone for cracks Check if blade bolts and hub nut are tight Check electrical connections for corrosion Clean the blades from any build up dirt and debits For optimal performance the manufacturer recommends to change blades and bearings every 5 years FOR SERVICING ALWAYS REMEMBER: 1. Turn the system OFF 2. Disconnect the power sources (Solar panels and Air-X) 3. Disconnect wires from batteries 4. Service the system 5. Hook up wires to batteries 6. Connect the power sources (Solar panels and Air-X) 7. Turn the system back ON CASING INSTALLATION FOR DUGOUT Battery Connection Configurations 24V BATTERY SYSTEMS 4 – 12 V = 24V SERIES CONNECTION CONTROLLER & MOTION EYE AIR X INTERCONNECT CABLES CONTROLLER & MOTION EYE AIR X ____________________________________________ P.O. BOX 160 221 – 5TH AVENUE SOUTH ST. BRIEUX, SK S0K 3V0 PH: 306.275.3130 FAX: 306.275.3132 TOLL FREE: 1.877.275.9779 www.solarwest.ca