1
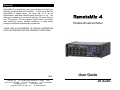
Warranty
RemoteMix 4 is covered by a two year warranty to be free from
defective workmanship and materials. In the event that the
RemoteMix 4 needs repair, you must call us to get an
authorization, and then carefully pack and ship it to us. You
will pay for shipping to us and we will pay for return back to
you, UPS ground. No free repairs will be made if the defect
was caused by misuse, weather conditions, or other cause,
except for defective workmanship or materials.
RemoteMix 4
Portable Broadcast Mixer
THERE ARE NO EXPRESSED OR IMPLIED WARRANTIES
WHICH EXTEND BEYOND THE WARRANTY HERE MADE.
12/07
JK Audio, Inc. 1311 E 6th Street, Sandwich, IL 60548
USA
Voice: (815) 786-2929
Toll Free: 800-JK-Audio
Fax: 815-786-8502
[email protected]
www.jkaudio.com
Copyright © 2007 JK Audio, Inc.
All rights reserved.
User Guide
JK Audio
Introduction
RemoteMix 4 is a four channel field mixer combined with a four channel headphone amplifier. It includes a telephone line hybrid and keypad, as well as a universal PBX handset interface and a 2.5 mm wireless phone interface. All this comes in a tough, portable unit that's
smaller than a lunch box. These parts were designed to work together
and save setup time in the field. There is no need to send an engineer
with patch cables. All the pieces work together in one reliable unit.
RemoteMix 4 also connects to any Bluetooth* Wireless Technology
enabled device. This “hands free” mode offers a mono, telephonebandwidth connection. RemoteMix 4 will connect to any Bluetooth
enabled cell phone, or other device such as a notebook or portable
that allows a stereo wireless headset connection. This stereo headset
mode offers full audio bandwidth.
Radio - RemoteMix 4 was designed for sports remotes. You can use
it as a phone line hybrid, calling into your studio talk show hybrid. Or,
use it as a front end mixer for your POTS, ISDN or IP codec. You can
also use it with your laptop codec.
FCC Registration (continued)
notice isn't practical, you'll be notified as soon as possible. You'll be
given the opportunity to correct the problem, and you'll be informed of
your right to file a complaint with the FCC.
Your telephone company may make changes in its facilities,
equipment, operations or procedures that could affect the proper
functioning of your JK Audio product. If such changes are planned,
you'll be notified by your telephone company.
FCC-A Part 15 Compliance
This equipment has been tested and found to comply with the limits for a
Class A digital device, pursuant to Part 15 of the FCC Rules. These limits
are designed to provide reasonable protection against harmful interfer-ence
when the equipment is operated in a commercial environment. This
equipment generates, uses, and can radiate radio frequency energy and, if
not installed and used in accordance with the instruction manual, may
cause harmful interference to radio communications. Operation of this
equipment in a residential area is likely to cause harmful interference in
which case the user will be required to correct the interference at his/her
own expense.
TV - RemoteMix 4 gives you the ultimate phone connectivity with four
IFB feeds. You can send and receive interview audio, and pull IFB out
of any business phone system, or even from your cell phone. This is
more than a field mixer, this is a shoot saver.
Changes or modifications not expressly approved by JK Audio can void the
user's authority to operate the equipment.
Great Sound - A soft limiter prevents overdriving the phone line interfaces, while the mixer XLR output is pre-limiter (full range). Bass
Boost adds some low end before sending the signal down the phone
line. The 3.5 mm Send and Receive jacks are convenient for recording the show, or mixing in your MP3 player.
This device has been tested and found to comply with the limits for a Class
B digital device, pursuant to Part 15 of the FCC rules. These limits are designed to provide reasonable protection against harmful interference when
the equipment is operated in a commercial environment. This equipment
generates, uses and can radiate radio frequency energy and, if not installed
and used in accordance with the instruction manual, may cause harmful
interference to radio communication. Operation of this equipment in a residential area is likely to cause harmful interference, in which case the user
will be required to correct the interference at his/her own expense.
Power Smart Design - The phantom power generator only runs if any
of the rear panel 48 V switches are set to “ON” to avoid any unnecessary drain on batteries. Low noise, low power ICs are used throughout to preserve battery life. The low noise 100-240 VAC desktop style
power supply (included) overrides the battery power only when the
supply is actually providing power. If the power goes out, the batteries
automatically cut in.
*The Bluetooth word mark and logos are owned by the Bluetooth SIG, Inc.
and any use of such marks by JK Audio, Inc. is under license. Other trademarks and trade names are those of their respective owners.
2
FCC-B Part 15 Compliance
Changes or modifications not expressly approved by JK Audio can void the
user's authority to operate the equipment.
Shielded interface cables and AC power cord, if any, must be used in order
to comply with the emission limits.
The internal antennas used for this mobile transmitter must not be colocated or operated in conjunction with any other antenna or transmitter.
19
FCC Registration
Connection
Your new JK Audio product has been registered with the Federal
Communications Commission (FCC). This product complies with the
standards in Part 68 of the FCC rules.
1. Mic inputs 1 and 2 are balanced XLR jacks with low-noise amplifiers.
1. Connection and use with the nationwide telephone network
The FCC requires that you connect this telephone equipment to the
national telephone network through a USOC RJ-11C modular
telephone jack.
This equipment may not be used with Party Line Service or Coin
Telephone Lines.
This equipment is hearing aid compatible.
2. Information for the telephone company
Upon request from your local telephone company, you are required to
provide the following information:
a) The "line" to which you will connect the telephone equipment (that
is, your telephone number), and
2. Mic inputs 3 and 4 are balanced XLR jacks with low-noise amplifiers. A mic/line selector switch adds a 40 dB pad for a line level
balanced input.
A switch on each of the 4 XLR mic inputs will provide 48 V phantom power. If inputs 3 or 4 are set to Line input, the 48 V will not
be present at the XLR jack even if the switch is left on.
3. The stereo 3.5 mm line level input can be used instead of or in
addition to the channel 4 XLR input. You can connect either a
mono or stereo signal to this mini jack. If you use a stereo input,
both channels will immediately be summed together. Then the
audio from the mini jack and the XLR would be added together
and treated as one mono signal on channel 4.
5
4
3
2
1
b) The telephone equipment's FCC registration number.This can be
found on the bottom of your telephone equipment, and,
c) The ringer equivalence number (REN) for this equipment.
The REN is used to determine the quantity of devices which will be
connected to the telephone line. Excessive RENs on the telephone
line may result in the devices not ringing in response to an
incoming call. In most, but not all areas, the sum of the RENs
should not exceed 5.0. To be certain of the number of devices
that may beconnected to the line, as determined by the total
RENs, contact the local telephone company.
3. Repair Instructions
If it is determined that your telephone equipment is malfunctioning, the
FCC requires that it not be used and that it be unplugged from the
modular outlet until the problem has been corrected. Repairs to this
telephone equipment can only be made by the manufacturer or its
authorized agents or by others who may be authorized by the FCC.
For repair procedures, follow the instructions outlined under the
warranty section of the manual.
4. Rights of the telephone company
If telephone equipment is causing harm to the network, the telephone
company may temporarily discontinue your telephone service. If
possible, they'll notify you before they interrupt service. If advanced
18
6
4. The stereo 3.5 mm line level output can be connected to your mini
disk or other recording device. The Master Output will be on the
Left channel and the Receive mix from the phone line and/or Cue
input will be on the Right channel.
5. The Master Output is a balanced XLR jack that contains the sum
of all four input XLRs and the 3.5 mm input. This audio signal has
a full 20 Hz to 20 kHz bandwidth.
6. Each of the four mono headphone jacks can be set to hear either
a mix of local mic and line inputs or the return from the phone line
which will include a lesser amount of your local mix.
3
Connection
Specifications
1. Connect your audio equipment, microphones, cue input, and
headphones to the input and output jacks on RemoteMix 4.
Inputs:
Microphones(4):
2. (a) Connect the jack marked "Phone Line" to any standard
analog telephone line, or
(b) Disconnect the handset on an existing telephone and plug the
coily cord from the phone into the Universal Handset Interface jack on RemoteMix 4, or
(c) Connect the Wireless Phone Interface jack to the headset
jack on your cellular telephone using the supplied JK Audio
interface cable.
The 1/4” Wireless Interface jack also serves as a Cue Input
that feeds the headphones. Connect any line level output
here, such as the output from your personal audio player.
This signal does not reach the XLR output but will be present
on the right channel (return) of the stereo output.
3. Turn on the power switch, flip the "Phone Line" switch to "Dial/
Talk", flip the keypad switch to “On” (only if dialing with the RemoteMix 4 keypad) and dial your call. You are now ready to
broadcast or record a telephone interview.
OR
Line Input:
3.5mm Stereo line input, 20k ohms
(-10 dBu nom.)
Headphone Cue In:
1/4" TRS, 20k ohms, -10 dBu nom.
Outputs:
Balanced Out:
2. (b) Handset jack
2. (c) Cell Phone
single analog
telephone line
on PBX telephone.
Set A-B-C switch for
best audio.
connection using
wireless phone
cable provided
4
Male XLR 50 ohms, +16 dBu max.,
20 Hz - 20 kHz ± 1dB
Line Out:
3.5mm Stereo line output, 100 ohms
-10 dBu nom.
Headphones(4):
1/4" Stereo TRS, 8 ohms, 1/3 watt per
channel
Phone Line Connector:
RJ-11C
Isolation: 1500 VAC
Ringer: 0.5B REN
Keypad: DTMF
PBX Interface:
RJ-22 PBX Handset interface
simulates electret, dynamic, and
carbon handset microphone types
Wireless Phone:
36" cable provided, with 2.5mm,
3-conductor headset plug
Power:
100-240 VAC, 50-60 Hz, 1.2 A
external power supply
-or- two 9 VDC batteries
Size:
9.5" x 8" x 3" (24.1 x 20.3 x 7.6 cm)
Weight:
3.8 lbs. (1.7 kg)
OR
2. (a) Standard
Female XLR 2k ohm, (-25 dBu nom.)
Channels 3 & 4 have -40 dB
Mic/Line pad switch
Line = +4 dBu nom., +16 dBu max.,
50k ohms
17
Block Diagram
Operation
X LR
In put
1
X LR
In put
2
X LR
In put
3
X LR
In put
4
Phantom
Phantom
Phantom
Phantom
3 .5 mm line in put
Phone Line
The RemoteMix 4 has an RJ-11 jack that can be connected to any
standard, single line analog telephone line. This jack should not be
connected directly to digital PBX or ISDN phone systems.
Mic / Lin e
Mic / Lin e
Handset Interface
If you do not have access to an analog phone line or if the phone
system is a digital or analog PBX, ISDN, or a key telephone system,
you can use the built-in handset interface. Disconnect the telephone
handset from the coily cord and plug the cord into the RemoteMix 4
Universal Handset Interface jack. Now select the handset type on the
3 position switch.
Mast er
L imiter
Blueto oth
Return
Bass Boost
LED
Me ter
Phone Line
Hand set
Jac k
Phone
Lin e
Hybrid
Universal
Handset
Inte rface
DTMF
Keypad
Trial and error works faster than a chart of handset types, but this
basic description may help.
Switch Position
A
B
C
Handset Microphone Type
Electret
Dynamic
Carbon
When using the wireless interface, it is important to keep your wireless telephone 12” - 24” away from the RemoteMix 4 and any microphone or headphone cables. This will help prevent unwanted RF
noise from entering the unit.
Maste r
Outpu t
3.5 m m
stere o
outp ut
Headp hone
1
16
He adpho ne
2
He adpho ne
3
He adpho ne
4
Wireless Pho ne/
Cue Input
RemoteMix 4
t Simplified
Mi 4
Block Diagram
H eadph one C ue
Headset
Emula tor
R
Wireless / Cellular Telephones
RemoteMix 4 comes equipped with a cellular phone interface built in
to the 1/4” Cue Input. This 1/4” wireless interface accepts a specially
designed 1/4” to 2.5 mm cable provided with the unit. This interface
works with any wireless phone that accepts standard third party
headsets and earpieces. Some wireless phones have the standard
2.5 mm jack while others have proprietary jacks. Adapters to convert
the proprietary jack to a standard 3-conductor 2.5 mm jack are available for most wireless telephones through their dealers, local electronic stores or many internet stores.
5
Features
Notes
Mic Level Controls
Each of the four XLR inputs has a level control knob with a separate
red Clip LED to indicate clipping on each channel. If you see more
than an occasional flash of the Clip LED you should decrease the
level for that channel.
Master Level Control
The Master control knob will set the overall level of the sum of all the
mic and line inputs. The LED meter for the master audio level ranges
from -30 dB to +3 dB.
Headphone Controls
Each of the four headphone outputs has a separate level control so
each listener can adjust their audio level independently. The switch
beside each control knob will set whether that channel will hear just
a Mix of the mic and line inputs from the internal mixer or the Return
audio from the phone line which will also contain some of the mic
mix but at a lesser level.
Warning! Long-term exposure to loud audio may cause
hearing damage. It is best to avoid extreme volume when
using headphones, especially for extended periods.
Cue Control
The Cue control adjusts the signal going to the headphones from the
1/4” Cue Input. When using the 1/4” Wireless Phone Interface, the
Main Feed control adjusts the level of your own voice in the headphones while the Cue control adjusts the level of the person on the
other side of the call in your headphones. You should keep in mind
that your wireless telephone also has level control. If you are having
level problems that cannot be corrected with the controls on the RemoteMix 4, try adjusting the level on the wireless telephone itself.
6
15
FAQs
Features
?
!
Bluetooth Wireless Technology
This multi-function switch activates the Bluetooth Wireless Technology. The blue LED directly above this switch indicates when it is on.
See pages 10-11 for more information.
?
How can I tell how much battery life is remaining?
The red “Power” LED functions as a battery life gauge that will
gradually dim as the battery runs down. This red LED will go completely dark about a half hour before the unit shuts down. Keep in
mind that the VU meter, Bluetooth, and clipping LEDs will remain
bright until the unit stops functioning.
Does the AC power supply charge the batteries?
! No. You may use rechargeable batteries, but you must remove
and recharge the batteries outside of the RemoteMix 4.
?
!
I've lost my power supply for my RemoteMix 4 unit. I have a
power supply that fits from a different product. Can I use this
instead?
NO! Never use a power supply other than the one that was supplied by your manufacturer. Power supplies are available in either
AC or DC output with many combinations of voltage and available
current. Most consumer power supplies are not regulated. This
could invariably damage your equipment, and also create a great
deal of noise. All of our DC power supplies are low noise with 5%
tolerance.
Bass Boost
With this switch turned on, the Master Output audio will be sent
through the Bass Boost before being routed to the telephone circuits.
Keypad ON / OFF
This switch disables the DTMF keypad to prevent unwanted tones
from being transmitted down the phone line during a broadcast.
Ringer
RemoteMix 4 does not have an audible ringer but there is a visual
ring indicator that will flash for incoming calls. This red LED is located directly below the keypad.
Phone Line Switch
When using the RJ-11 analog phone jack, this switch acts as the
switch-hook for the telephone line. The Hang Up position is the
normal on-hook position when you are not using the line or you are
waiting for a call. When you want to place a call, or when a call
comes in, switch to the Dial / Talk position.
Power
This is the main power switch that turns the unit on. Whenever the
power is turned on, the red LED above this switch will be lit. The
green AC LED will be lit whenever a live AC power source is connected, even if the main power switch is off.
Keypad
The telephone keypad provides DTMF tone dialing. You may use the
keypad at anytime during a call but keep in mind that both transmit
and receive audio are muted during a keypress.
Redial
Press this button to instantly redial the last telephone number that
was keyed in.
14
7
Features
FAQs
IFB
If using the phone line or handset interface for an IFB feed, the balanced male XLR output may be used to feed an IFB earpiece or
other device. If using the 1/4” cue input / wireless adapter jack for
the telephone connection, the IFB feed must be taken from one of
the 1/4” headphone jacks. This also applies if you are planning to
record both sides of the conversation while using the 1/4” wireless
adapter jack for the telephone connection.
?
!
Why doesn't my RemoteMix 4 ring when a call comes in?
The audible ringer found on some of our other RemoteMix units
was replaced with a visual ring indicator on the RemoteMix 4. This
red LED flashes when a call comes in. The Ring indicator is located directly below the keypad on the front of the unit.
?
!
Will any cellular telephone work with RemoteMix 4?
The wireless interface on the RemoteMix 4 works very well with
most cellular telephones. However, some wireless telephones
generate excessive RF noise which can be can be heard as a
“chattering” or “motor boat” sound. The noise from these particular telephones will be unacceptable for most broadcast applications. Also, some wireless phones have the standard 2.5 mm
headset jack while others have proprietary jacks. Adapters to convert the proprietary jack to a standard 3-conductor 2.5 mm jack
are available for most wireless telephones through their dealers,
local electronic stores or many internet stores.
?
!
What kind of device can I connect to the Cue Input?
Setting the switch for the dual-purpose 1/4” input to “Cue Input”
will provide a standard line level input from another audio device,
such as a portable radio. The audio signal will be sent to any of
the four headphone outputs if that headphone switch is set to
“Return”. This way, your announcers can listen for a cue from
their radio station at the end of a station break.
?
The cellular interface cable was left behind at our last event.
Can I get a replacement at our local audio supply store?
This is a custom made cable and is not wired the same as those
that may be available at your local electronics store. Please contact your JK Audio dealer or our Customer Service department
and ask for a CN045 replacement cable.
Bluetooth Wireless Technology
While the mono audio path is easy to follow on the block diagram
shown on Page 16, the stereo audio path is slightly different. When
in stereo mode, the left and right audio paths from the Bluetooth
device are mixed together before reaching the Receive bus. This is
a full bandwidth (20 Hz to 20 kHz) mono path, so you will hear the
full audio signal, but it will be mixed to mono.
The transmit path is a bit more creative. The left channel of the
Bluetooth enabled stereo receive device will receive the mic mixer
output with a bandwidth of 20 Hz to 17 kHz. The right channel will
receive the Cue Input signal.
Keep in mind that cell phones do not offer transmission of stereo audio signals. This stereo headset mode is typically “listen only” from
music player portables.
!
?
!
8
The output from Mic 3 is very low but the other mics are fine.
Check the position of the Mic/Line switch near Mic 3. This input as
well as the Mic 4 input can be switched to accept a line level signal from a mixer or other equipment. If your microphone audio is
too low, that switch may have been left in the “Line” position.
13
FAQs
Features
?
Power
RemoteMix 4 is powered by two 9 volt alkaline batteries located on
the side of the unit. The red Power LED on the front of the device will
gradually dim as the battery runs down, then extinguish about a half
hour before the unit shuts down. Since these two batteries are in
separate drawers and wired in parallel, you can hot swap one battery at a time so you never lose power.
!
?
!
?
!
?
!
Why do I keep getting an error message when I try to pair
with my Bluetooth enabled cell phone?
There is a difference between “Idle Mode” and “Pairing Mode”.
The first time you make a connection with a new Bluetooth enabled device, you must be in Pairing Mode. Please read carefully
through the instructions on Page 10 of this User Guide for detailed
information.
What is the range of the Bluetooth transmitter/receiver?
The RemoteMix 4 will transmit and receive audio signals up to 25
feet from your Bluetooth device. Because transmitting signals
over longer distances will require more power, you should keep
the RemoteMix 4 as close as possible to your Bluetooth device
to conserve battery power.
How do I send full bandwidth stereo through my Bluetooth
phone?
RemoteMix 4 supports A2DP (Sink), Hands Free and Headset
profiles with BlueCore 3-Multimedia technology. You will be able
to send full bandwidth stereo audio through any cell phone that
supports A2DP.
How long will the batteries last in my RemoteMix 4?
There are many variables that affect battery life, such as phantom
power, the number of headphones, and the use of Bluetooth. All
of our battery life tests included 4 headphones playing music at
average listening levels. These tests use standard alkaline batteries. Lithium batteries can add 3 to 4 times the battery life, at 3 to 4
times the cost.
The following numbers are from lab tests and may not represent
your usage:
It is important to replace both at the same time with identical
batteries. If two fresh batteries are not available, it is better to run
using only one good battery. Since the battery fixtures are wired in
parallel, it does not matter which one gets the single battery.
We also provide a high quality, regulated AC to DC adapter to power
RemoteMix 4 when AC power is available. Simply plug it into the
back of RemoteMix 4 and plug the transformer into a wall outlet. This
is a switching power supply so you can connect to a 110 or 220 VAC
power source. When the power connector is inserted into the jack,
the batteries are bypassed. The AC adapter does not charge the
batteries. If you lose power during your broadcast, the RemoteMix 4
automatically reverts to battery power so your broadcast will not be
interrupted.
Make sure you use only the supplied AC power adapter with the
RemoteMix 4. Using any other adapter could damage the unit.
WARNING! It is strongly recommended that this
product be connected to an adequate surge protection device for the power line as well as the telephone
line at all times.
7 hours of broadcast through a cell phone using Bluetooth Wireless Technology at a distance of 1 meter.
9 hours of broadcast through the phone line hybrid, using a phantom powered microphone.
10 hours of broadcast through the phone line hybrid, using dynamic microphones.
12
9
Connecting—Bluetooth Wireless Technology
Connecting—Bluetooth Wireless Technology
Establishing a Bluetooth connection varies with different cell
phones. On your phone, find and select the option to set up a connection. Monitor the Bluetooth audio path on headphones in the
"Return" position on the RemoteMix 4. Pull up on the Bluetooth
multi-function switch on the front of the RemoteMix 4 and hold for
approximately 5 seconds. You will hear a beep in your headphones,
followed by a second beep or beeps. The blue LED will begin to
flash rapidly as RemoteMix 4 enters Pairing Mode.
Now go to your Bluetooth device and search for Bluetooth connections. If this is the first time you have paired with this device you will
first need to select the option to add an audio device. Wait until the
cell phone has found the new Bluetooth device. Select from the list
the ID of "JKRM4xxx" where “xxx” corresponds to the last 3 digits of
the unit’s serial number. Enter “Yes” when asked to “Bond” with this
device. The pin is "0000". (Earlier units with serial numbers up
through RM401124 use a unique pin of 4xxx) When bonding is completed, the blue LED will flash at a rate of 1 second on, 2 seconds
off. Once RemoteMix 4 has been added to your cell phone, subsequent connections can be made more quickly from Idle Mode.
There is a difference between “Pairing Mode” and “Idle Mode” on a
Bluetooth device. The very first time you connect to a new device,
you must be in Pairing Mode. When you hold the Bluetooth switch
up, the blue LED will come on steady for a moment, then it will flash
at a rate of 200 ms on and 200 ms off. This first stage is Idle Mode. If
you continue to hold the switch up, the LED will flash rapidly, about
every 100 ms. This is Pairing Mode. Once in pairing mode, any
Bluetooth enabled device within range can pair with RemoteMix 4.
After pairing is complete, the connection to that device is secure.
Bluetooth LED pattern to initiate Bonding
Initialize
2 sec off,
2 sec on
Idle Mode
200 ms off,
200 ms on
Pairing Mode
100 ms off,
100 ms on
While all phones and portables are different, typically if you connect
in cell phone hands free mode, you will have a mono duplex connection. If you connect to a music player, you will be in stereo
mode. Consult your cell phone or portable device for more details.
The Bluetooth interface will first attempt to connect in hands free
mode to a cell phone, allowing 3.4 kHz telecom bandwidth. If this is
not available, it will attempt to connect in wireless headset mode to
any product that allows a Bluetooth wireless audio connection. The
wireless headset mode offers 20 kHz audio bandwidth.
To disconnect from the Bluetooth device, simply pull up on the
Bluetooth multi-function switch and hold for 5 seconds. If left unused in Idle mode or if a live call is disconnected, the RemoteMix 4
will automatically disconnect Bluetooth in two minutes.
Bluetooth LED pattern after Bonding
Hold Bluetooth switch up > 5 sec to reach Pairing
Mode the first time a new device is connected,
> 2 sec thereafter to connect from Idle Mode
Bonded
2 seconds off,
1 second on
10
11