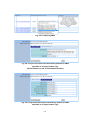
1
ASTER Search Site
User's Manual
December 15, 2014
Revision History
Version
1st Ver.
Date
2014/12/15
Description of Revision
Release of the first version.
Remarks
-
【Table of Content】
1.
ASTER Search ............................................................................................................ 1
1.1.
ASTER Search ........................................................................................................ 1
1.2.
Access to ASTER Search ........................................................................................ 1
1.3.
Definitions ............................................................................................................... 2
1.4.
Services Provided at ASTER Search Site ............................................................. 2
1.4.1.
Data Products Search Service............................................................................ 2
1.4.1.1.
Inventory Search ............................................................................................. 2
1.4.1.2.
Granule ID Search .......................................................................................... 2
1.4.2.
Data Product Order Service ............................................................................... 3
1.4.3.
DPR Status Display Service .............................................................................. 3
1.4.4.
Online User Registration Service ...................................................................... 3
2.
Operation Procedures ................................................................................................ 3
2.1.
Outline of Top Screen of ASTER Search ............................................................... 3
2.2.
User Registration ................................................................................................... 5
2.3.
Login ...................................................................................................................... 19
2.3.1.
Login (User Certification) ................................................................................ 19
2.3.2.
Available Services after User Certification .................................................... 21
2.3.3.
Logout ................................................................................................................ 23
2.4.
Confirm and Update User Registration Information ........................................ 23
2.4.1.
Confirm User Registration Information ......................................................... 23
2.4.2.
Modify User Profile ........................................................................................... 25
2.4.3.
Change Password.............................................................................................. 35
2.5.
Display ASTER Search Screen ............................................................................ 37
2.6.
Search Data Products .......................................................................................... 39
2.6.1.
Perform Inventory Search ................................................................................ 40
2.6.1.1.
Set ASTER Search Conditions ..................................................................... 42
2.6.1.2.
Perform Search .............................................................................................. 46
2.6.1.3.
Reset Search Conditions ............................................................................... 46
2.6.2.
Search by Granule ID ....................................................................................... 47
2.6.2.1.
Specify Granule ID........................................................................................ 47
2.6.2.2.
Perform Search .............................................................................................. 48
2.6.2.3.
Reset Search Conditions ............................................................................... 48
2.7.
2.7.1.
Confirm Data Product Search Result ................................................................. 48
Select Scenes on Search Result ....................................................................... 50
2.7.2.
Display Browse Image ...................................................................................... 51
2.7.3.
Show Details of Search Result ......................................................................... 52
2.7.4.
Display/Hide Scenes on Map............................................................................ 52
2.7.5.
Display Detailed Information on Data Product ............................................. 53
2.7.6.
Add Scenes to Cart ........................................................................................... 58
2.7.7.
Display Complete List of Search Result ......................................................... 59
2.7.8.
Download Search Result .................................................................................. 61
2.7.9.
Display Browse List.......................................................................................... 61
2.7.10.
2.8.
Search Scenes Covering the Same Area ...................................................... 65
Order Data Product .............................................................................................. 68
2.8.1.
Display Cart (Product Order Window) ............................................................ 68
2.8.2.
Display Product Detailed Info ......................................................................... 69
2.8.3.
Select Target Product Type and PG Parameter ............................................. 69
2.8.4.
Specify Delivery Sensor .................................................................................. 122
2.8.5.
Copy Product Processing Parameters and Media Type ............................... 123
2.8.6.
Delete Product Order...................................................................................... 123
2.8.7.
Empty a Cart................................................................................................... 123
2.8.8.
Display Expected Day of Completion and Cost Estimate............................ 124
2.8.9.
Order Products ................................................................................................ 124
2.8.10.
Select Field of Product ................................................................................ 125
2.8.11.
Select Payment Method .............................................................................. 126
2.9.
Data Product Request Status / Cancellation .................................................... 127
2.9.1.
Display DPR Status ........................................................................................ 127
2.9.2.
Refer to Detailed DPR Information ............................................................... 128
2.9.3.
Refer to Product Generation Parameter ....................................................... 129
3.
Operations on Map................................................................................................. 130
3.1.
Display Latitude and Longitude of Mouse Position......................................... 130
3.2.
Zoom-in and Zoom-out ....................................................................................... 130
3.3.
Move Area on the Map ....................................................................................... 132
3.4.
Select Map Projection......................................................................................... 132
3.5.
Specify Search Area in Rectangle...................................................................... 134
3.6.
Specify Search Area in Polygon ......................................................................... 135
3.7.
Switch Layers ..................................................................................................... 136
3.8.
Display Background Images in Time Series Order ......................................... 141
1. ASTER Search
1.1.
ASTER Search
ASTER Search provides services to search and order ASTER data products on the
website.
Internet Explorer 7.0 or greater, Fire Fox 12.0 or greater are recommended as web
browsers for using ASTER Search.
1.2.
Access to ASTER Search
Visit the following site of ASTER Search.
http://gds.ersdac.jspacesystems.or.jp/
The structure of ASTER Search is shown below, and each screen is accessible from its
top screen. Depending on a screen, user certification is required.
ASTER Search site
screen
Diplayed on
another tab
ASTER Search site
Cart screen
(Login screen before Login)
Diplayed on
another tab
ASTER
ASTER Search site
Login screen
Search site
Top screen
Diplayed on
another tab
ASTER Search site
User Profile Confirmation screen
ASTER Search site
On-line User
Registration screen
ASTER Search site
User Profile Modification screen
ASTER Search site
DPR Status screen
Accessible before Login
ASTER Search site
Download screen
Accessible after Login
Fig. 1.2-1 Structure of ASTER Search Site
1
You need your user account to login ASTER Search site and order data products. Get
your user account by registering on [User Registration] screen of ASTER Search.
Registrated information can be changed. For details, see “2.2 User Registration”.
1.3.
Definitions
■ ASTER L1A Product
ASTER L1A product is generated by applying realignment processing to ASTER
observation data. Geometric and radiometric correction coefficients including SWIR
parallax correction and inter-telescope miss-registration correction are appended. But
these corrections are not applied to the image data.
■ Inventory
Inventory is the catalog information on each scene, such as observation time,
geolocation, cloud coverage for ASTER, and quality assurance of image data. Inventory
information on the generated products is stored and managed in the database. By
inventory search described in later part, inventory information managed at GDS can be
retrieved under the specified search conditions.
■ Granule
Granule is the smallest aggregation of data for observation to be stored, managed, and
delivered at GDS (Global Data System). Each scene has a granule ID to identify its
corresponding inventory.
1.4.
Services Provided at ASTER Search Site
1.4.1. Data Products Search Service
Data product search service provides search ASTER data (L1A product).
Data product search is performed by methods shown below.
1.4.1.1. Inventory Search
Search ASTER data through specifying inventory information such as observation time
and area as search conditions. L1A scenes are retrieved by this method.
Select data products on the search results to add to [Cart] for making an order.
1.4.1.2. Granule ID Search
Search ASTER data through specifying granule IDs. L1A scenes are retrieved by this
2
method. Although you can search with high level products of ASTER data, only ASETR
L1A products are listed on [Search Result]. Up to 500 Granule IDs are searchable at one
time.
1.4.2. Data Product Order Service
You can make orders searched ASTER data. Processing parameters for each product
are specified in the ordering process to request higher level products.
User certification on ASTER Search is required to order data products.
1.4.3. DPR Status Display Service
Regarding data product orders, every status of the last orders are referred on [Data
Product Order Service]. Only unpaid orders can be cancelled there. User certification is
required.
1.4.4. Online User Registration Service
User registration is available on ASTER Search. User information is required to register.
You can confirmed and modify own user information
2. Operation Procedures
2.1.
Outline of Top Screen of ASTER Search
3
(1)
(2)
(4)
(3)
(5)
(6)
Fig. 2.1-1 [Top] Screen of ASTER Search
4
Table 2.1-1 [Top] Screen of ASTER Search
No.
(1)
Content
Links on side menu
Description
Links to each page of ASTER Search,
related sites of ASTER, User's
Manual, and others are displayed.
(2)
[Search/Order] button
ASTER Search opens on a new tab
by clicking this button.
(3)
[Login] link
Login screen for ASTER Search
opens on a new tab by clicking
(4)
[User Registration] link
User Registration for ASTER Search
opens on a new tab by clicking
2.2.
(5)
Information
Information about ASTER Search
(6)
What’s New
Latest revisions about ASTER Search
User Registration
Click [User Registration] on the top screen of ASTER Search.
5
Fig. 2.2-1 Click [User Registration] of ASETR Search
[User Registration] is displayed on a new screen. Regarding user registration, it is
necessary to comply with Agreements for Distribution and Use of ASTER data products.
You cannot register without the agreements of distribution and use for ASTER data
products.
6
Fig. 2.2-2 Online User Registration Application・Agreement for Distribution and Use
of ASTER Products
"Agreement for Distribution and Use ASTER Products" is displayed. If you read the
requirements carefully and agree with them, click the [Agree] button. When the [Disagree]
button was selected, the [Top] screen of ASTER Search appears again.
7
Fig. 2.2-3 [Online User Registration] Screen・User Profile Confirmation ➀
8
Fig. 2.2-4 [Online User Registration] Screen・User Profile Confirmation ➁
The online user registration is classified by four items: [User Account], [User Address],
[Shipping Address], and [Billing Address].
In each field, input alphanumeric characters in single-byte character as examples in
brackets: (). In addition, inputting the items of * mark is required.
9
Each input item of the [Online User Registration] screen is explained below.
Fig. 2.2-5 [Online User Registration] Screen・[NOTICE]
<User Account>
Input login name and password. All the items are required. Create [Login Name] in eight
alphabets and/or digits. Also, create [Password] in 8 and more alphabets and /or digits. It
has to be composed of each one from the following characters: (1) small letters, (2) capital
letters, (3) numbers, and (4) symbols.
A warning message is displayed and the registration fails in some cases; [Login Name]
and/or [Password] do not follow the above-mentioned input rules; or, the input login name
is already used by other users. In that case, check the input characters and then register
again according to the message.
The items and details are show below.
Fig. 2.2-6 Input Field of [User Account]
Table 2.2-1 Contents of [User Account]
No.
1
Content
Login name
Description
Create a login name for login
Condition
Required
8 single-byte alphanumeric characters
2
Password
Create a password for login
Required
8 and more single-byte alphanumeric
characters composed of the following
characters: (1) alphabets (small), (2)
alphabets (capital), (3) numbers and
(4) symbols.
3
Password (Retype)
Re-enter same as No.2
10
Same as No.2
<User Address>
Enter [User Address]. Input alphanumeric characters in single-byte character as
examples in brackets: (). The items of * mark are required to be input except middle name
of [Name].
Click either [Copy from Shipping Address] or [Copy from Billing Address] to copy each
input information of the same content from each input field.
The items and details of [User Address] are shown below.
Fig. 2.2-7 Input Field of [User Address]
Table. 2.2-2 Contents of [User Address]
No.
1
Content
Description
Condition
Name
First name, initial of middle
Required of first name and family name
(Alphabet)
name and family name by
input.
text input
Optional about middle name input.
First name and family name of 18 or
less characters in single-byte character.
One charecter for middle name.
2
Organization Form
Select from a pull-down
menu of [Organization
Form] list
11
Required
No.
3
Content
Organization
Description
Text input
Condition
Required
200 or less characters
4
Department
Text input
Optional
200 or less characters
5
Organization
Select from a pull-down
Category
menu of [Organization
Required
Category] list
6
Country
Select from a pull-down
Required
menu of [Country] list
7
State
Text input
Required
19 or less characters
8
City
Text input
Required
29 or less characters
9
Street Address
Text input
Required
95 or less characters
10
Zip code
Text input
Required
15 or less characters
11
Phone
Text input
Required
21 or less characters
12
FAX
Text input
Optional
21 or less characters
13
E-mail
Text input
Required
49 or less characters
14
E-mail (Retype)
Text input
Required
Same contents as No.14
49 or less characters
<Shipping Address>
Enter [Shipping Address]. Input alphanumeric characters in single-byte character as
examples in brackets: (). The items of * mark are required to be input except middle name
of [Name].
Click either [Copy from User Address] or [Copy from Billing Address] to copy each input
value of the same content from each input field.
The item and details of [Shipping Address] are shown below.
12
Fig. 2.2-8 Input Field of [Shipping Address]
Table 2.2-3 Contents of [Shipping Address]
No.
1
Content
Description
Condition
Name
First name, initial of middle
Required of first name and family name
(alphabet)
name and family name by
input.
text input
Optional about middle name input.
First name and family name of 18 or
less characters in single-byte character.
One character for middle name.
2
Organization
Text input
Required
200 or less characters
3
Department Name
Text input
Optional
200 or less characters
4
Country
Select from a pull-down
Select at least one
menu of [Country] list
5
State
Text input
Required
19 or less characters
6
City
Text input
Required
29 or less characters
7
Street Address
Text input
Required
95 or less characters
13
No.
8
Content
Zip code
Description
Text input
Condition
Required
15 or less characters
9
Phone.
Text input
Required
21 or less characters
10
FAX
Text input
Optional
21 or less characters
11
E-mail
Text input
Required
49 or less characters
12
E-mail (Retype)
Text input
Required
Same contents as No.12
49 or less characters
<Billing Address>
Enter [Billing Address]. Input alphanumeric character in single-byte character as
example in brackets: (). The items of * mark are required to be input except middle name of
[Name].
Click either [Copy from User Address] or [Copy from Shipping Address] to copy each
input value of the same content from each input field.
The items and details of [Billing Address] are shown below.
Fig. 2.2-9 Input Field of [Billing Address]
14
Table 2.2-4 Contents of [Billing Address]
No..
1
Content
Description
Condition
Name
First name, initial of middle
Required of first name and family name
(alphabet)
name and family name by
input.
text input
Optional about middle name input.
First name and family name of 18 or
less characters in single-byte character
One character for middle name
2
Organization
Text input
Required
200 or less characters
3
Department Name
Text input
Optional
200 or less characters
4
Billing Type
Choose [Corporation or
Required
Private] with radio button
5
Country
Select from a pull-down
Select at least one
menu of [Country] list
6
State
Text input
Required
19 or less characters
7
City
Text input
Required
29 or less characters
8
Street Address
Text input
Required
95 or less character
9
Zip Code
Text input
Required
15 or less characters
10
Phone
Text input
Required
21 or less characters
11
FAX
Text input
Optional
21 or less characters
12
E-mail
Text input
Required
49 or less characters
13
E-mail (Retype)
Text input
Required
Same contents as No.13
49 or less characters
<Confirm Input Items of User Registration>
To confirm input items of [User Registration], click the [Agree to Privacy Policy and
Submit] button at the bottom of the screen after confirming the input items. In case there is
15
no problem in the input items, the user account is registered and [User Profile
Confirmation] is displayed.
If there are errors in the input items, warning messages appear in red on input fields.
Check the input items in accordance with the messages, retype items and click the [Agree
to Privacy Policy and Submit] button again.
Fig. 2.2-10 Example of Errors in Input Items
<Reset User Information>
Click the [Reset] button at the bottom of the screen to clear all user registration
information. All the registered contents are deleted.
<Confirm Online User Registration Complete>
If user registration has been performed properly, the [Online User Registration Result]
screen is displayed. On the [Online User Registration Result] screen, you can check your
user information registered by users yourself.
16
17
Fig. 2.2-11 [Online User Registration Result] Screen
After the [Online User Registration Result] screen is displayed, the user account is
available on ASTER/PALSAR Unified Search.
By clicking a link to each item listed at the [NOTICE] window on the top of the [Online
user Registration Result] screen, the link goes to the each item field.
Fig. 2.2-12 [Online User Registration Result] Screen・[NOTICE]
By clicking the [OK] button, the display returns to the top screen of ASTER Search.
18
2.3.
Login
2.3.1. Login (User Certification)
Select the [Login] link on the [Top] screen of ASTER Search.
Fig. 2.3.1-1 Select [Login] Link on [Top] of ASTE Search
Login with the user account of ASTER Search is required to order ASTER data products,
display mosaic images to the background of the map for search/order screen, and
download data products online.
The [Login] screen and its details are shown below.
19
Fig. 2.3.1-2 [Login] Screen of [ASTER Search]
Table 2.3.1-1 Contents of [Login] Sceen
No.
1
Content
Login Name
Description
Login Name set at user registration
Input Value
Required
application is input.
2
Password
Input the password set for user
Required
registration application or the
password modified after user
registration.
For user certification, input [Login Name] and [Password], and click the [Certify] button.
Make sure that they are typed correctly. In addition, all the input items are cleared by
clicking the [Clear] button.
When Login has succeeded, the [Top] screen of ASTER Search is displayed. On the
other hand, when login has failed, the error message of "Invalid Login Name or Password"
appears as shown below. In this case, retype correct Login Name and Password.
20
Fig. 2.3.1-3 [Login] Window (Case of User Certification Failure)
2.3.2. Available Services after User Certification
Some services are newly added on the side menu of the [Top] screen of ASTER Search
after login. In addition, when there is the data of user's order of which download
preparation has been completed, a message is displayed so in the [Search/Order] window.
Before Login
(1)
(2)
Login
Before Login
(1)
(2)
Fig. 2.3.2-1
[Top] Screen of ASTER Search
Before and After Login
The contents of the top screens before and after Login are shown below.
Table 2.3.2-1 Contents on [Top] Screen of ASTER Search
Before or After Login
Content
Description before Login
Description after Login
Side Menu Link
Login
User Profile
(Search/Order)
User Registration
Product search / Order
21
Product search / Order
Cart
DPR Status
Download
Logout
Search/Order
Link to the [Login] and [User
Number of orders after completing
Button
Registration] screens of each
the preparations for download
of ASTER Search
(Case of 1 or more orders)
Link to ASTER Online distribution
site..
Menu items displayed on the header of each screen before and after Login differ as well.
Before Login
Login
After Login
Fig. 2.3.2-2 Header of Each Screen Before and After Login
The contents at the header of each screen before and after Login are shown below.
Table 2.3.2-2 Contents on [Top] Screen of ASTER Search Site
Before or After Login
Content before Login
Content after Login
22
Content before Login
Content after Login
ASTER Search site (See 2.5)
ASTER Search (See 2.5)
Login (See 2.3.1)
Cart (See 2.8.1)
User Registration (See to 2.2)
DPR Status (See 2.9.1)
Download
Login Name under Login
User Profile (See to 2.4)
Logout (See 2.3.3)
2.3.3. Logout
Users can logout by clicking the [Logout] link on the side menu of the [Top] screen of
ASTER Search or the header of each screen of ASTER Search. After logout, the ASTER
Search top screen appears.
2.4.
Confirm and Update User Registration Information
2.4.1. Confirm User Registration Information
Under login to ASTER Search, users can check their own user information at the [User
Profile (User Profile Confirmation)] screen by clicking [User Profile] on the side menu of the
[Top] screen or the header of each screen of this site.
23
Fig. 2.4.1-1 [User Profile Confirmation] Screen
24
2.4.2. Modify User Profile
Click the [Modify User Profile] link at the bottom of the [User Profile Confirmation] screen
to modify user Profile.
Fig. 2.4.2-1 Link to [Modify User Profile] Screen
Fig. 2.4.2-2 [Modify User Profile] Screen ①
25
Fig. 2.4.2-3 [Modify User Profile] Screen ②
On the [Modify User Profile] screen, you can change your own all information except
login names. For password, you can change your own password on the [Change
Password] screen.
Input alphanumeric characters in single-byte character as examples in brackets: (). The
items with * mark are required to be input.
26
By clicking a link to each item listed on the top of [NOTICE], the link jumps to the each
item field.
Fig. 2.4.2-4 [Modify User Profile] Screen・[NOTICE]
The contents of the [Modify User Profile] screen are explained below.
<User Address>
You can change [User Address]. In a content which needs to modify, input alphanumeric
character in single-byte character as examples in brackets: (). The items with * mark are
required to be input except middle name of [Name].
Click either [Copy from Shipping Address] or [Copy from Billing Address] to copy each
input value of the same content from each input field.
The contents of [User Address] and input field details are shown below.
27
Fig. 2.4.2-5 Input Field of [User Address]
Table 2.4.2-1 Contents of [User Address]
No.
1
Content
Description
Condition
Name
First name, middle initial,
Required of first name and family name
(Alphabet)
and family name by text
input. Optional about middle name
input
input.
First name and family name of 18 or
less characters by single-byte character
A letter for middle name
2
Organization Form
Select from a pull-down
Required
menu of [Organization
Form] list
3
Organization
Text input
Required
200 or less characters
4
Department
Text input
Optional
200 or less characters
28
No.
5
Content
Description
Organization
Select from a pull-down
Category
menu of [Organization
Condition
Required
Category] list
6
Country
Select from a pull-down
Required
menu of [Country] list
7
State
Text input
Required
19 or less characters
8
City
Text input
Required
29 or less characters
9
Street Address
Text input
Required
95 or less characters
10
Zip Code
Text input
Required
15 or less characters
11
Phone
Text input
Required
21 or less characters
12
FAX
Text input
Optional
21 or less characters
13
E-mail
Text input
Required
49 or less characters
<Shipping Address>
You can change [Shipping Address]. In a content which needs to modify, input
alphanumeric character in single-byte character as examples in brackets: (). The items with
* mark are required to be input except the middle name of [Name].
Click either [Copy from User Address] or [Copy from Billing Address] to copy each input
value of the same content from each input field.
The contents of [Shipping Address] and input field details are shown below.
29
Fig. 2.4.2-6 Input field of [Shipping Address]
Table 2.4.2-2 Contents of [Shipping Address]
No.
1
Content
Description
Condition
Name
First name, middle initial,
Required of first name and family name
(Alphabet)
and family name by text
input. Optional about middle name
input
input.
First name and family name of 18 or
less characters by single-byte
character
One letter for middle name
2
Organization
Text input
Required
200 or less characters
3
Department
Text input
Optional
200 or less characters
4
Country
Select from a pull-down
Required
menu of [Country] list
5
State
Text input
Required
19 or less characters
6
City
Text input
Required
29 or less characters
7
Street Address
Text input
Required
95 or less characters
30
No.
8
Content
Zip Code
Description
Text input
Condition
Required
15 or less characters
9
Phone
Text input
Required
200 or less characters
10
FAX
Text input
Optional
21 or less characters
11
E-mail
Text input
Required
49 or less characters
<Billing Address>
You can change [Billing Address]. In a content which needs to modify, input
alphanumeric characters in single-byte character as examples in brackets: (). The items
with * mark are required to be input except the middle name of [Name].
Click either [Copy from User Address] or [Copy from Shipping Address] to copy each
input value of the same content from each input field.
Contents of [Billing Address] and input field details are shown below.
Fig. 2.4.2-7 Input field of [Billing Address]
31
Table 2.4.2-3 Contents of [Billing Address]
No.
1
Content
Description
Condition
Name
First name and middle
Required of first name and family name
(Alphabet)
initial name , and family
input. Optional about middle name
name by text input
input.
First name and family name of 18 or
less characters by single-byte character
One letter for middle name
2
Organization
Text input
Required
200 or less characters
3
Department
Text input
Optional
200 or less characters
4
Billing Type
Choose [Corporation] or
Required
[Private] by radio button
5
Country
Select from a pull-down
Required
menu of [Country] list
6
State
Text input
Required
19 or less characters
7
City
Text input
Required
29 or less characters
8
Street Address
Text input
Required
95 or less characters
9
Zip Code
Text input
Required
15 or less characters
10
Phone
Text input
Required
21 or less characters
11
FAX
Text input
Optional
21 or less characters
12
E-mail
Text input
Required
49 or less characters
<Confirm Input Contents of Modify>
To confirm input items of User Registration, click [Modify] at the bottom of the screen
after confirmation of the input items. In case there are no problems in the input items, the
entered User Registration information is registered and the [Modify User Profile Result]
32
screen is displayed.
On the other hand, if there is an error in input item, message in apperes in red under
input field. In that case, re-enter the input item in accordance with the message and click
the [Modify] button again.
Fig. 2.4.2-8 Example of Errors of Input Items
<Cancel Modify User Profile>
When modification of user profile is canceled, click the [Cancel] button at the bottom of
the [Modify User Profile] screen. After canceling it, the screen moves back to [User Profile
Confirmation].
<Confirm Modify User Profile Confirmation>
In case performing user profile modification correctly, the [Modified User Profile Result]
sceren appears. At the [Modified User Profile Result] screen, you can confirm the modified
contents of user profile.
33
Fig. 2.4.2-9 [Modified User Profile Result]
After clicking a link to each item listed in [NOTICE] at the top of [Online User
Registration], the link goes to the each item field and then displays it.
34
Fig. 2.4.2-10 [Modify User Profile Confirmation] Screen・[NOTICE]
Moreover, by clicking on [User Profile Confirmation] link, the [Modify User Profile
Confirmation] screen is shown again.
2.4.3. Change Password
In order to change password for the account of [ASTER/PALSAR Unified Search], click
[Change Password] link at the bottom of the [User Profile Confirmation] screen. The
[Change Password] screen appears.
Fig. 2.4.3-1 [Change Password] Link
Fig. 2.4.3-2 [Change Password] Screen
35
Input the current password in [Old Password] and a new password in [New Password],
respectively. After that, re-enter the new password in [New Password (Re-enter)].In order
to change a password, the entry of all these itmes is necessary.
Create a new password with 8 or more alphabets and /or digits. The password must be
composed of 1 or more characters of each from the following letter types: (1) small letter,
(2) capital letter, (3) number, and (4) symbol.
Table 2.4.3-1 Contents of [Change Password]
No.
Content
Description
Condition
1
[Old Password]
Type the current Password
Required
2
[New Password]
Type a new Password
Required
8 or more alphabets and/or digits
including 1 or more characters of
each from the followings: (1)
alphabet (small letter), (2)
alphabet (capital letter), (3) number,
and (4) symbol
3
[New Password
Same contents as No.2
Same contents as No.2
(Re-enter)]
In order to set the entered password, click the [change] button at the bottom of screen
after checking all the input items.
In case there is no problem with the input items, those contents are registered, and the
[Change Password] screen is displayed. If the input passwords have problems, warning
messages appear in red above input field. In that case, check the entered passwords,
re-enter other passwords and then click the [change] button.
Fig. 2.4.3-3 [Change Password Result] (Succeeded) Screen
36
Fig. 2.4.3-4 [Change Password] (Failed) Screen
2.5.
Display ASTER Search Screen
To search ASTER data products, confirm search result, and add the selected products to
cart, click the [Search/Order] button on the top page of [ASTER Search] or the
[Search/Order] link on the side menu.
37
Fig. 2.5-1 Click [Search/Order]
The [ASTER Search] screen at which search and order products are performed
appears. Its outline is described below.
38
(2)
(1)
(3)
Fig. 2.5-2 [ASTER Search] Screen
Table 2.5-1 Contents of [ASTER Search] Screen
No.
(1)
2.6.
Content
Description
Filed to show search
Display Search result.
result
[<<] button switches display or hide.
(2)
Map area
Display a map
(3)
Field to input search
Display query
conditions
[>>] button switches display or hide.
Search Data Products
For switching search methods, select a tab on the top of the input field to set each
search condition.
39
Fig. 2.6-1 Inventory Search Tab, Granule ID Search Tab from the Left
2.6.1. Perform Inventory Search
Select the [Inventory Search] tab on the input field to set search conditions.
(1)
(2)
(3)
(4)
(5)
Fig. 2.6.1-1 Input Field of Search Conditions①
40
(6)
(7)
(8)
(9)
Fig. 2.6.1-2 Input Field of Search Conditions ②
Table 2.6.1-1 Contents of Inventory Search Tab
No.
(1)
Content
Description
[Search] button
Search is performed under the
specified search conditions.
(2)
[Reset] button
Search conditions return to default.
(3)
Sensor
ASTER is specified.
(4)
Search Date/Time
Search period is set.
button shows the field to set
detailed conditions.
(5)
Search Area
button shows the field to specify
area by coordinates.
(6)
ASTER: Instrument mode
ASTER observation mode is
specified.
(7)
ASTER: Day or Night
Day-time or night-time observation for
ASTER is specified
(8)
ASTER: Cloud Coverage
Cloud amount for ASTER is specified.
(9)
ASTER: Max No. of Granules
Maximum number of ASTER scenes
search to be retrieved is
specifiedset.
After setting each search condition and clicking the [Search] button, data search in the
specified conditions is performed.
The way to specify each search condition is explained below.
41
2.6.1.1. Set ASTER Search Conditions
Set the search conditions.
Fig. 2.6.1.1-1 Input Field of ASTER Search Conditions
<Sensor>
Specify ASTER as a target sensor.
<Search Date/Time>
Set the search period. Choose dates from calendar or directly enter the dates. By
clicking [details], the field to set more details appears.
Fig. 2.6.1.1-2 Click [details]
Fig. 2.6.1.1-3 Input Field of More Detailed Search Period
When [All] is selected, period is not reflected to search conditions.
When [Continuous Time Range] is selected, Start Date and End Date are required.
42
When [Annually Repeating Time Period] is checked, the specified interval of time (the
same interval of time for each year during the specified period) is searched. Start and end
dates for this interval of time period are required to input in the form of MM/DD. The relation
between interval time's start/end date and search period's start/end date is described
below.
Fig 2.6.1.1-4 Relation between Interval of Time and Search Period
<AOI>
AOI can be specified in rectangle or polygon on the map by a mouse. For more
information about AOI, see “3.5 Specify Search Area in Rectangle” and “3.6 Specify
Search Area in Polygon”.
AOI also can be specified by coordinate values. Click [details] to display the field of
specifying AOI, and select a Search Type from [Global], [Rectangle] and [Polygon].
43
Fig. 2.6.1.1-5 Input Filed of Specifying AOI
(a)Global
Search is performed globally.
(b)Rectangle
Input latitudes and longitudes of the rectangular search area in [Top Left Corner Lat Lon]
and [Bottom Right Corner Lat Lon]. An input format is selectable from [Decimal Degree] or
[Degree Min Sec].
Click the [Show] button to display the AOI on the map.
(c)Polygon
Input latitude and longitude of each vertex of a polygon in the [Polygon] field. Input each
vertex per line in the order of [latitude and longitude]. An input format is selectable from
[Decimal Degree] or [Degree Min Sec].
Information of the specified polygon can be downloaded and uploaded in KML format by
the [Download] and [Upload] buttons.
The specified polygon can be displayed on the map by the [Show] button.
44
Fig. 2.6.1.1-6 Input Field of ASTER Search Conditions②
<Observation Mode>
Select observation mode(s) from [Full Mode], [VNIR Only], [SWIR+TIR], [TIR Only],
and/or [Only scenes with valid SWIR data]. One or more observation modes must be
selected.
ASTER SWIR sensor has not been acquiring valid data since April 2007. When [Only
scenes with valid SWIR data] is checked, a search is performed in the condition of [Full
Mode] and [SWIR+TIR], and only the scenes observed before April 1, 2007 are retrieved.
For more information about ASTER observation modes, visit the URL shown below.
http://www.science.aster.ersdac.jspacesystems.or.jp/jp/documnts/users_guide/part1/07_0
1.html
<Day or Night>
Specify day-time and/or night-time observations. [Day], [Night] and [Both] are selectable.
<Cloud Coverage>
Set cloud amount. Check the [Select cloud coverage] box and then select cloud
coverage in percentage from the pull-down menu. Percentage to be specified refers to the
cloud amount covering the whole scene; the scenes of less than the specified cloud
coverage are retrieved. If the [Select cloud coverage] box is not checked, it is not reflected
to the search condition.
<Max. No. of Result>
45
Specify the maximum number of granules to be retrieved. This number can be specified
up to 500 and is a mandatory search condition.
If the number of scenes shown in search result is over 500 scenes, narrow down the
search conditions and search again. Meanwhile, by clicking the [Display search result]
button on search result window, the search results of up to 500 scenes are listed in the
order of the observational date.
Fig. 2.6.1.1-7 Case of Search Result Has over 500 Scenes
2.6.1.2. Perform Search
Click the [Search] button to start a search under the specified conditions. Search results
are shown on the [Search Result] window. For more information about Search Result, see
2.7 Confirm Data Product Search Result.
2.6.1.3. Reset Search Conditions
Click the [Reset] button to reset all the specified search conditions.
46
2.6.2. Search by Granule ID
Select the [Granule ID Search] tab on [ASTER Search]. The details of the [Granule ID
Search] window are described below.
(2)
(1)
(3)
Fig. 2.6.2-1 [Granule ID Search] Tab
Table 2.6.2-1 Contents of [Granule ID Search] Tab
No.
Content
Description
(1)
[Search] button
Search with the specified granule ID.
(2)
[Reset] button
Delete all granule ID entered in the
granule ID list field.
(3)
Granule ID list
Specify granule ID for search target.
2.6.2.1. Specify Granule ID
Input granule IDs to search in the [Granule ID list] field. In case of specifying more than
47
one ID, enter a granule ID per line.
2.6.2.2. Perform Search
Click the [Search] button to search scenes with the specified granule IDs. L1A scenes
are retrieved even though the granule IDs of other level products are specified. Search
results are shown on the [Search Result] window which orders can be placed. For more
information about the [Search Result] window, see “2.7 Confirm Data Product Search
Result”.
2.6.2.3. Reset Search Conditions
Click the [Reset] button to reset all the input granule IDs.
2.7.
Confirm Data Product Search Result
Scenes are shown up as search results on the [Search Result] window of ASTER Search.
The coverage of each scene is displayed on the map.
The structure of the [Search Result] field is described below.
48
(1)
(3)
(2)
(15)
(4)
(6)
(5)
(8)
(16)
(7)
(10)
(9)
(11)
(12)
(13)
Fig. 2.7-1: [Search Result]
Table 2.7-1 Contents of [Search Result]
No.
(1)
Content
Display scene on map
Description
Check to display all coverage of
ASTER scenes in search result on the
map
(2)
Display complete list
Click to show the complete list of
product search result on a new tab
(3)
Browse list
Click show browse list on a new tab
49
No.
(4)
Content
Browse Image
Description
Click to show a large browse image
on a new window.
While browse image doesn't exist, a
message of [No Browse Image]
appears.
(5)
Product Information
Product Information
(6)
Cart
Check to put into Cart
(7)
Map
Check to display a coverage of the
scene
(8)
Details
Show more information about each
scene
(9)
Full Screen
Show whole information about each
scene
(10)
Matching Scenes
Search other scenes under the scene
conditions
(11)
Paging
Displayed page of search result list is
switched by clicking [<<Previous],
[Next>>], or page number. 50 scenes
are on one page If search result has
more than 50 scenes, its list is divided
and every 50 scenes are listed on a
page. All scenes are displayed on a
page when clicking [all scenes on a
page].
(12)
Select All/Clear All (Each
[Cart]
page)
Check to select all scenes to Cart
[Map]
Check to show all scenes on the map
(13)
Add to Cart
Add selected scenes to Cart
2.7.1. Select Scenes on Search Result
Click the field of each scene in the [Search Result] list, and background color changes to
yellow and its corresponding scene coverage on the map is highlighted in yellow. Click the
coverage of a scene on the map, and field color of the corresponding scene in [Search
Result] is highlighted in yellow.
50
Fig. 2.7.1-1 Highlight Selected Scene
2.7.2. Display Browse Image
When a scene which has browse image is selected, its browse image is displayed on the
top of the [Search Result] list. When a browse image is clicked, its image in the original size
shows up on a new window.
ASTER search results show browse images of below sensors depending on observation
mode.
Table 2.7.2-1 ASTER Browse Image Types for Display
Observation Mode
Sensor
Full Mode
VNIR
VNIR Only
VNIR
SWIR + TIR
SWIR
TIR Only
TIR
51
2.7.3. Show Details of Search Result
Click [Details] in the list of [Search Result] to switch to the detailed display of the product.
Click [Simple] to go back to simple display.
→
→
Fig. 2.7.3-1 Detailed Display/Simple Display
2.7.4. Display/Hide Scenes on Map
Check [Map] in the [Search Result] list to display the scene on map, and uncheck to
hide.
52
Fig. 2.7.4-1 Display and Hide Scene on Map
Check [Map] at the bottom of the [Search Result] list to display all the search results on
the page.
Fig. 2.7.4-2 Check Box of [Map] at the Bottom of Search Result List
2.7.5. Display Detailed Information on Data Product
Click [Full Screen] on the search result list.
53
Fig. 2.7.5-1 Click [Full Screen]
A new window appears to show the detailed information on the selected scene.
The following example is [Product Detailed Info] window.
54
(1)
(2)
(3)
(4)
(5)
(7)
(6)
(8)
(9)
Fig. 2.7.5-2 Data Product Detailed Information
55
Table 2.7.5-1 Contents on [Product Detailed Info] Window
No.
(1)
Content
Description
Link to Core meta data
Core meta data and Specific meta data
and Specific meta data
can be accessed. Display of each meta
data is switched on tab.
(2)
Browse images
Browse images are displayed.
When browse image doesn't exist, a
message [No Browse Image] appears.
Enlarged image shows up on a new
window when clicking the image
(3)
Show ortho area
Expected scene area in case ortho
product is generated is shown in yellow
line
[Box unchecked]
[Box checked]
56
No.
Content
Description
(4)
Scene Info
Information of the scene
(5)
Observation Info
Observation of the scene
(6)
Quality Info
Information of its quality
(7)
Process Info
Information of data processing
(8)
Data Preservation Info
Information of data preservation
(9)
Other Info
Other information
Click the [Core meta data, Specific meta data] link at [Product Detailed Info] window to
show [Show Core meta data, Specific meta data].
(1)
(1)
(2)
(3)
(5)
(4)
(6)
Fig. 2.7.5-3 Left: [Core meta data] Tab, Right: [Specific meta data] Tab
Table 2.7.5-4 Contents of [Core meta data / Specific meta data] Screen
No.
(1)
Content
Description
Core meta data/Specific
Information of core meta data and
meta data tabs
specific meta data is displayed by
switching tab
57
No.
(2)
Content
Description
Class name drop-down
Class name list of core metadata is
list
shown
(3)
Show all meta data
All meta data is displayed on a new tab
(4)
Core meta data
Core meta data selected by class name
drop-down list is displayed
(5)
Item name drop-down list
Item name list of specific meta data is
shown
(6)
Specific meta data
Specific meta data selected by item
name drop-down list is shown
2.7.6. Add Scenes to Cart
Select scenes to order data products. Check [Cart] of each scene to add to [Cart]. The
selected scene is highlighted in red frame on the map.
Click [Add to Cart (ASTER)] to move to the [Cart] screen.
58
Fig. 2.7.6-1 Check [Cart] and Click [Add to Cart (ASTER)]
2.7.7. Display Complete List of Search Result
Click [Display complete list] on top of [Search Result] to show all the search results on a
list.
59
Fig. 2.7.7-1 Click [Display complete list]
An example of a complete list of search results is shown below.
60
Fig. 2.7.7-2 Complete List of Search Result
2.7.8. Download Search Result
Displayed complete list of product search results can be downloaded in KMZ and/or CSV
formats from the [Download] field. KMZ format is the compressed file of KML.
Fig. 2.7.8-1 Complete List of Search Result
Click [scenes: (xxkB)] to download the list.
2.7.9. Display Browse List
Click [Browse list] on top of the [Search Result] window to display all the browse images
61
of search results as a list on a single screen.
Select scenes to order and click [Add to Cart] on the [Browse list] screen.
Fig. 2.7.9-1 Click [Browse list]
An example of [Browse list] is shown below.
62
(1)
(3)
(2)
(4)
(6)
(5)
Fig. 2.7.9-2 ER [Browse list] Screen
Table 2.7.9-1 Contents on [Browse List] Screen
No.
(1)
Content
Description
Show entries pull-down
Select a number of scenes to display
menu
on a page
63
No.
(2)
Content
Inventory Information
Description
Show scenes inventory
・Detailed product information
・Center data time of scene
・Observation mod
・Cloud coverage (%)
・Day or Night
Product Detailed Info screen shows
up when clicking [Full Screen] link
under each granule ID. Also, scene
can be selected for order by checking
[Add to Cart].
Order of scenes can be sorted by item
name of selected column.
(3)
Browse Images
Browse Images are displayed.
In case browse image does not exist
for the scene, a message [No Browse
Image] appears. Browse image is
enlarged on a new screen when
clicking the image.
(4)
Paging
Displayed page of search result list is
switched by clicking [First], [Previous],
[Next], [Last], or a page number.
Scenes in search result list are
displayed on a page up to the number
of scenes specified by [Show Entries]
menu. If the search result has over the
specified number of scenes, they are
divided in plural pages
(5)
Add to Cart
The scene is added to cart when [Add
to Cart] is checked in the list.
64
No.
(6)
Content
Search
Description
Search is conducted for all the
contents in the list, which partially
match to the text entered in this box.
Only the scenes to meet the search
result are displayed.
2.7.10. Search Scenes Covering the Same Area
Click [Matching Scenes] on the [Search Result] window to search scenes covering the
same area.
Fig. 2.7.10-1 Select [Matching Scenes]
Specify the search conditions for the same area which opens in a new window.
65
Fig. 2.7.10-2 Specify Search Conditions for Matching Scenes
Specify the conditions below.
・ Observation mode
・ Cloud coverage
For more information, see [Observation Mode] and [Cloud Coverage] of “2.6.1.1 Set
Specific Search Conditions”.
After setting search conditions, click [Search]. The Search Result window shows search
results for scenes covering the same area.
Choose a scene you prefer to order from the search results and add it to [Cart].
66
(1)
(2)
(3)
(4)
(5)
(8)
(6)
(7)
(9)
Fig. 2.7.10-3 Search Result for Matching Scenes
Table 2.7.10-1 Contents of Search Result for Matching Scenes
No.
(1)
(2)
Content
Description
Inventory information filed of
Display Inventory information of Target Scene
Target Scene
specified by Search Result
Coverage map display of a
Display coverage map of Target Scene on Map
standard scene
(3)
Browse image of Target Scene
Display browse image of Target Scene
(4)
ASTER tab
Display search results
67
No.
Content
Description
(5)
Inventory Information on retrieved
Show the following inventory information.
scenes
[ASTER]
・Detailed Product Information
・Scene coverage
・Browse images
・Overlap rate (%)
・Observation date and time of scene center
・Observation mode
・Cloud coverage (%)
・Day or Night
Display detailed Product Info window when clicking
[Full Screen] link under each granule ID. Also,
select scene for order by checking [Add to Cart].
Coverage shows how the target scene (purple line)
and the retrieved scene (red line) overlap.
(6)
Paging
Switch displayed page of search result list by
clicking [First], [Previous], [Next], [Last], or each
page number. Search result list displays scenes in
one page up to the number specified on
[ShowEntries] menu. When search results
exceed the specified number of scenes, they are
divided in plural pages.
(7)
Add to Cart
Put checked scenes into Cart.
.
2.8.
Order Data Product
2.8.1. Display Cart (Product Order Window)
Add ASTER scene to [Cart] from the [Search Result] window (See“2.7.6. Add Scenes to
Cart”), the [Browse list] window (See“2.7.9 Display Browse List”); or search results for
[Matching Scenes] (See“2.7.10 Search Scenes Covering the Same Area”). [Product
Order] window appears in a new window. Check the content.
The [User Certification] (Login) window of [ASTER Search] appears first for the user who
hasn't performed certification for account of [ASTER Search].
68
Fig. 2.8.1-1 Cart (Product Order Window) of [ASTER Search]
[Cart (Product Order Window)] shows list of products added into [Cart].
Place an order by setting Target Product Type and specifying [PG Parameter].
2.8.2. Display Product Detailed Info
In order to display [Product Detailed Info], click the [Granule ID] link of [Granule ID] field
on product list. The [Product Detailed Info] window (See “2.7.5 Display Detailed
Information on Data Product“) appears in a new window.
2.8.3. Select Target Product Type and PG Parameter
Select a target product type and PG parameters for a necessary product from the [Target
Product Type] field and the [PG Parameter] field in the [Product Order] window.
Specify a target product type from the [Target Product Type] list. Selectable target
product types have restriction by the observation mode of raw data. For the restrictions
corresponding to each observation mode, check the following table. Target product types
not generated from the selected product is not displayed in the list.
69
Table 2.8.3-1 Selectable Target Product Types for Each ASTER Observation Mode
Observation Mode
Full Mode
Selectable Target Products
1A, 1B, 2B01V, 2B01S, 2B01T, 2B03, 2B04,
2B05V, 2B05S, 3A01, 4A01Z
VNIR Only
1A, 1B, 2B01V, 2B05V, 2B05S, 3A01, 4A01Z
SWIR+TIR
1A, 1B, 2B01S, 2B01T, 2B03, 2B04, 2B05S,
3A01, 4A01Z
TIR Only
1A, 1B, 2B01T, 2B03, 2B04
In addition, selectable PG parameters and input value per PG parameter vary by [Target
Product Type]. Select [PG Parameter] for an intermediate product, depending on a target
product type. [Target Product Type], selectable [PG Parameter] and its set value are as
follows.
70
Table 2.8.3-2 Selectable PG Parameters, Input Values and Conditions Applicable to ASTER Target Product Type
Target Product
Inetrmediate
Type
Product (*1)
1A
-
1B
PG Parematers
Set Values
-
-
Map Projection
"UTM (Universal Transverse Mercator)"
"Polar Stereo" is available only when
"LCC"
the latitude of [Center of Projection]
Polar Stereo
is north than 35 degrees N or south
SOM
than.
LATLON”
Resampling
"Cubic Convolution"
"Nearest Neighbor"
"Bi-Linear"
2B01V
1B
Conditions
Aerosol Source
"Climatology (NRL)"
Ozone Source
"Climatology (NRL)"
Carbon Dioxide Source
"Climatology (NRL)"
Water Vapor Profile Source
"Climatology (NRL)"
"NCEP"
Temperature Profile Source
"Climatology (NRL)"
"NCEP"
Pressure Profile Source
"Climatology (NRL)"
“NCEP"
Signal Scatter Albedo Source
"Climatic Value "
Aerosol Optical Depth Source
"Climatology (NRL)"
95
Target Product
Inetrmediate
Type
Product (*1)
2B01S
1B
PG Parematers
Set Values
Molecular Optical Depth Source
"Climatology (NRL)"
Yung Parameter Source
"Climatology (NRL)"
DEM
"ETOP05"
DEM Slope Selection
"ETOP05"
Crosstalk Correction
"Yes”
Aerosol Source
"Climatology (NRL)"
Ozone Source
"Climatology (NRL)"
Carbon Dioxide Source
"Climatology (NRL)"
Water Vapor Profile Source
"Climatology (NRL)"
“NCEP“
Temperature Profile Source
"Climatology (NRL)"
“NCEP“
Pressure Profile Source
"Climatology (NRL)"
“NCEP“
Signal Scatter Albedo Source
"Climatology (NRL)"
Aerosol Optical Depth Source
"Climatology (NRL)"
Molecular Optical Depth Source
"Climatology (NRL)"
Yung Parameter Source
"Climatology (NRL)"
DEM
"ETOP05"
DEM Slope Selection
"ETOP05"
96
Conditions
Target Product
Inetrmediate
Type
Product (*1)
PG Parematers
Set Values
Crosstalk Correction
"Yes"
"No"
2B01T
1B
Aerosol Source
"Climatology (NRL)"
Ozone Source
"Climatology (NRL)"
Carbon Dioxide Source
"Climatology (NRL)"
Water Vapor Profile Source
"Climatology (NRL)"
"NCEP"
Temperature Profile Source
"Climatology (NRL)"
"NCEP"
Pressure Profile Source
"Climatology (NRL)"
"NCEP"
2B03
1B
DEM
"ETOP05"
-
-
-
-
Aerosol Source
"Climatology (NRL)"
Ozone Source
"Climatology (NRL)"
Carbon Dioxide Source
"Climatology (NRL)"
Water Vapor Profile Source
"Climatology (NRL)"
2B01T
2B04
1B
2B01T
2B05V
1B
"NCEP"
97
Conditions
Target Product
Inetrmediate
Type
Product (*1)
PG Parematers
Set Values
Temperature Profile Source
"Climatology (NRL)"
"NCEP"
Pressure Profile Source
"Climatology (NRL)"
"NCEP"
2B05S
1B
Signal Scatter Albedo Source
"Climatology (NRL)"
Aerosol Optical Depth Source
"Climatology (NRL)"
Molecular Optical Depth Source
"Climatology (NRL)"
Yung Parameter Source
"Climatology (NRL)"
DEM
"ETOP05"
DEM Slope Selection
"ETOP05"
Crosstalk Correction
"Yes"
Aerosol Source
"Climatology (NRL)"
Ozone Source
"Climatology (NRL)"
Carbon Dioxide Source
"Climatology (NRL)"
Water Vapor Profile Source
"Climatology (NRL)"
"NCEP"
Temperature Profile Source
"Climatology (NRL)"
"NCEP"
Pressure Profile Source
"Climatology (NRL)"
"NCEP"
98
Conditions
Target Product
Inetrmediate
Type
Product (*1)
PG Parematers
Set Values
Signal Scatter Albedo Source
"Climatology (NRL)"
Aerosol Optical Depth Source
"Climatology (NRL)"
Molecular Optical Depth Source
"Climatology (NRL)"
Yung Parameter Source
"Climatology (NRL)"
DEM
"ETOP05"
DEM Slope Selection
"ETOP05"
Crosstalk Correction
"Yes"
"No"
3A01
Datum
"WGS84"
"Tokyo"
"Adindan"
"Arc1950"
"Arc1960"
"Australian1966"
-
"Australian1984"
"Camp Area Astro"
"Cape"
"European 1950"
"European 1979"
"Geodetic Datum 1949"
"Hong Kong 1963"
99
Conditions
Target Product
Inetrmediate
Type
Product (*1)
PG Parematers
Set Values
Conditions
"Hu-Tzu-Shan"
"Indian"
"North American 1927"
"North American 1983"
"Oman"
"Ordnance Survey 1936"
“Pulkovo 1942"
“Prov. S American 1956"
"South American 1969"
"WGS72"
"user defined"
Map Projection
Resamling
"UTM (Universal Transverse Mercator)"
"Polar Stereo" is available only when
"LCC"
the latitude of [Center of Projection]
"Polar Stereo"
is north than 35 degrees N or south
"LATLON"
than 35 degrees S.
"Cubic Convolution"
"Nearest Neighbor"
"Bi-Linear"
100
Target Product
Inetrmediate
Type
Product (*1)
PG Parematers
Set Values
Output Pixcel Spacing Type
Conditions
"Sensor depending"
"Matched to VNIR"
"Matched to SWIR"
"Matched to TIR"
Semi-Major Axis of Datum [m]
Input value
Available only for user-defined
specified as Datum
Reciprocal Flattening of Datum [m]
Input value
Available only for user-defined
specified as Datum
Datum Shift X [m]
Input value
Available only for user-defined
specified as Datum
Datum Shift Y [m
Input value
Available only for user-defined
specified as Datum
Datum Shift Z [m]
Input value
Available only for user-defined
specified as Datum
UTM Zone
Input value
Available only for UTM specified as
Map Projection
Center of Projection (Lon.) [deg]
Input value
Available only for LCC specified as
Map Projection
1st standard parallel (Lon.) [deg]
Input value
Available only for LCC specified as
Map Projection
101
Target Product
Inetrmediate
Type
Product (*1)
PG Parematers
Set Values
2nd standard parallel (Lon.) [deg]
Input value
Conditions
Available only for LCC specified as
Map Projection
Center of Projection (Lon.)
Input value
Available only for Polar Stereo
specified as Map Projection
"Origin of Projection (Lon.) [deg]"
Input value
Available only for LATLON specified
as Map Projection
"Origin of Projection (Lat.) [deg]"
Input value
Available only for LATLON specified
as Map Projection
4A01Z
-
Datum
"WGS84"
"Tokyo"
"Adindan"
"Arc1950"
"Arc1960"
"Australian1966"
"Australian1984"
"Camp Area Astro"
"Cape"
"European 1950"
"European 1979"
"Geodetic Datum 1949"
"Hong Kong 1963"
102
Target Product
Inetrmediate
Type
Product (*1)
PG Parematers
Set Values
Conditions
"Hu-Tzu-Shan"
"Indian"
"North American 1927"
"North American 1983"
"Oman"
"Ordnance Survey 1936"
"Pulkovo 1942"
"Prov. S American 1956"
"South American 1969"
"WGS72"
"user defined"
Map Projection
"Interpolation mode (sea)"
"UTM"
"Polar Stereo" is available only when
"LCC"
the latitude of [Center of Projection]
"Polar Stereo"
is north than 35 degrees N or south
"LATLON."
than 35 degrees S.
"not Interpolate"
"Constant"
"Interpolation mode (lake)"
"not Interpolate"
"Constant"
"Interpolate"
103
Target Product
Inetrmediate
Type
Product (*1)
PG Parematers
Set Values
"Interpolation mode (Cloud)"
Conditions
"not Interpolate"
"Constant"
"Interpolate"
"Interpolation mode (Abnormal)"
"not Interpolate"
"Constant"
"Interpolate"
Semi-Major Axis of Datum [m]
Input value
Available only for user-defined
specified as Datum
Reciprocal Flatterning of Datum
Input value
Available only for user-defined
specified as Datum
Datum Shift X [m]
Input value
Available only for user-defined
specified as Datum
Datum Shift Y [m]
Input value
Available only for user-defined
specified as Datum
Datum Shift Z [m]
Input value
Available only for user-defined
specified as Datum
UTM Zone
Input value
Available only for UTM specified as
Map Projection
Pixcel Spacing (Lon.)
"15m"
Available only for UTM specified as
"30m"
Map Projection
"90m"
104
Target Product
Inetrmediate
Type
Product (*1)
PG Parematers
Set Values
Pixcel Spacing (Lan.)
Conditions
"15m"
Available only for UTM specified as
"30m"
Map Projection
"90m"
Center of Projection (Lon.) [deg]
Input value
Available only for LCC specified as
Map Projection
1st standard parallel (Lat.) [deg]
Input value
Available only for LCC specified as
Map Projection
2nd standard parallel (Lat.) [deg]
Input value
Available only for LCC specified as
Map Projection
Pixcel Spacing (Lon.)
"15m"
Available only for LCC specified as
"30m"
Map Projection
"90m"
Pixcel Spacing (Lat.)
"15m"
Available only for LCC specified as
"30m"
Map Projection
"90m"
Center of Projection (Lon.)
Input value
Available only for Polar Stereo
specified as Map Projection
Pixcel Spacing (Lon.)
"15m"
Available only for Polar Stereo
"30m"
specified as Map Projection
"90m"
105
Target Product
Inetrmediate
Type
Product (*1)
PG Parematers
Set Values
Pixcel Spacing (Lat.)
Conditions
"15m"
Available only for Polar Stereo
"30m"
specified as Map Projection
"90m"
Pixcel Spacing (Lon.)
Input value
Available only for LATLON specified
as Map Projection
Pixcel Spacing (Lat.)
Input value
Available only for LATLON specified
as Map Projection
(*1) Specify Product Generation Parameters for intermediate product.
106
The way to specify a target product type and PG parameter for each specified target
product is as follws:
a) Specify 1A
Select 1A (No Product Generation) from the [Target Product Type] list. No PG parameter
specification.
Fig. 2.8.3-1 Specify 1A
b) Specify 1B
Select 1B from the [Target Product Type] list. PG parameters (default value) are set in
the [PG Parameter] field.
Fig. 2.8.3-2 Specify 1B
Click [Update] in the [PG Parameter] field to modify PG parameters. The [Product
Generation Parameters] window appears.
107
Fig. 2.8.3-3 Click [Update] in the [PG Parameter] Field
Fig. 2.8.3-4 [Product Generation Parameters] Window for 1B
Specify PG Parameter for 1B by selecting each [Map Projection] and [Resampling] item
of PG parameters in the [Product Generation Parameters] window. Refer to "Table 2.8.3-2
Selectable PG Parameters, Input Values and Conditions Applicable to ASTER Target
Product Type" for selectable PG parameters and input values.
Click [Set PG Parameters] in the [Product Generation Parameter] Window. Set PG
Parameters depending on the input values.Click [Reset] to reset specified conditions.
c) Specify 2B01V
Select 2B01V (Radience at the Earth's Surface VNIR) from the [Target Product Type] list.
PG parameters (default value) are set in the [PG Parameter] field.
Click [Update] in the [PG Parameter] field to modify PG parameters like 1B product. The
[Product Generation Parameters] window appears.
108
Fig. 2.8.3-5 Specify 2B01V
Fig. 2.8.3-6 [Product Generation Parameters] window for 2B01V
(PG Parameters for 1B, an Intermedediate Product)
109
Fig. 2.8.3-7 [Product Generation Parameters] window for 2B01V
(PG Parameters for 2B01V, a Target Product)
Specify PG Parameter for 2B01V as a target product and 1B as an intermediate product
respectively by selecting each [Map Projection] and [Resampling] item of PG parameters in
the [Product Generation Parameters] window.
Switch 1B and 2B01 by the [1B(Intermediate)] tab and the [2B01V(Target)] tab. Refer to
the "Table 2.8.3-2 Selectable PG Parameters, Input Values and Conditions Applicable to
ASTER Target Product Type" for Selectable PG parameters and set values.
d) Specify 2B01S
Select 2B01S (Radiance at the Earth's surface SWIR) from the [Target Product Type] list.
PG parameters (default value) are set in the [PG Parameter] field.
110
Fig. 2.8.3-8 Specify for 2B01S
Fig. 2.8.3-9 [Product Generation Parameters] window for 2B01S
Specified as a Target Product Type
(PG Parameters for 1B, an Intermediate Product)
111
Fig. 2.8.3-10 [Product Generation Parameters] window for 2B01S
Specified as a Target Product Type
(PG Parameters for 2B01S, a Target Product)
Specify PG Parameter for 2B01S as a target product and 1B as an intermediate product
respectively
e) Specify 2B01T
Select 2B01T (Radiance at the Earth's surface TIR). PG parameters (default value) are
set in the [PG Parameter] field.
Fig. 2.8.3-11 Specify 2B01T
112
Fig. 2.8.3-12 [Prodcut Generation Parameters] window for 2B01T
Specified as a Target Product Type
(PG Parameters for 1B, an Intermediate Product)
Fig. 2.8.3-13 [Product Generation Parameters] window for 2B01T
Specified as Target Product
(PG Parameters for 2B01T, a Target Product)
Specify PG Parameter for 2B01T as a target product and 1B as an intermediate product
respectively.
f) Specify 2B03
Select 2B03 (Temperature of the Earth's surface TIR). PG parameters (default value) are
set in the [PG Parameter] field.
113
Fig. 2.8.3-14 Specify 2B03
Fig. 2.8.3-15 [Product Generation Parameters]window for 2B03
Specified as a Target Product Type
(PG Parameters for 1B, an Intermediate Product)
Fig. 2.8.3-16 [Prodcut Generation Parameters] window for 2B03
Specified as a Target Product Type
114
(PG Parameters for 2B01T, an Intermediate Product)
Specify PG Parameter for 2B04 as a target product and 1B as an intermediate product
respectively.
g) Specify 2B04
Select 2B04 (Emissivity at the Earth's Surface TIR). PG parameters (default value) are
set in the [PG Parameter] field.
Fig. 2.8.3-17 Specify 2B04
Fig. 2.8.3-18 [Product Generation Parameters] window for 2B04
Specified as a Target Product Type
(PG Parameters for 1B , an Intermediate Product)
115
Fig. 2.8.3-19 [Product Generation Parameters] window for 2B04
Specified as a Target Product Type
(PG Parameteres for 2B01T, an Intermadiate Product)
Specify PG Parameter for 2B01T as a target product and 1B as an intermediate product
respectively. There is no PG parameter specification.
h) Specify 2B05V
Select 2B05V (Reflectance of the Earth's Surface VNIR). PG parameters (default value)
are set in the [PG Parameter] field.
Fig. 2.8.3-20 Specify 2B05V
116
Fig. 2.8.3-21 [Product Generation Parameters] window for 2B05V
Specified as a Target Product Type
(PG Parameters for 1B, an Intermediate Product)
Fig. 2.8.3-22 [Product Generation Parameters] window for 2B05V
Specified as a Target Product Type
(PG Parameters for 2B05V, a Target Product)
Specify PG Parameter for 2B05V as a target product and 1B as an intermediate product
respectively.
117
i) Specify 2B05S
Select 2B05S (Reflectance of the Earth's Surface VNIR). PG parameters (default value)
are set in the [PG Parameter] field.
Fig. 2.8.3-23 Specify 2B05S
Fig. 2.8.3-24 [Product Generation Parameters] window for 2B05S
Specified as a Target Product Type
(PG Parameters for 1B, an Intermediate Product)
118
Fig. 2.8.3-25 [Product Generation Parameters] window for 2B05S
Specified as a Target Product Type
(PG Parameters for 2B05S, a Target Product)
Specify PG Parameter for 2B05S as a target product and 1B as an intermediate product
respectively.
j) Specify 3A01
Select 3A01 (Orthogonal Projection Image). PG parameters (default value) are set in the
[PG Parameter] field.
Fig. 2.8.3-26 Specify 3A01
119
Fig. 2.8.3-27 [Product Generation Parameters] window for 3A01
Specified as a Target Product Type
Specify PG Parameter for 3A01 as a target product.
k) Specify 4A01Z
Select 4A01Z (Relativity Digital Elevation Model Z). PG parameters (default value) are
set in the [PG Parameter] field.
120
Fig. 2.8.3-28 Specify 4A01Z
Fig. 2.8.3-29 [Product Generation Parameters] window for 4A01Z
Specified as [Target Porduct Type]
Specify PG Parameter for 4A01Z as a target product.
121
2.8.4. Specify Delivery Sensor
Specification of [Delivery Sensor] is available only for 1A and 1B selected as target
products of ASTER data products. .
Click [Update] in the [Delivery Sensor] field. [Delivery Sensor] window appears.
Fig. 2.8.4-1 Specify [Delivery Sensor]
Fig. 2.8.4-2 [Delivery Sendor] window
Click one or more check box from [VNIR], [SWIR] and [TIR] in the [Delivery Sensor]
field as delivery sensor(s). Determine selected delivery sensor(s) by clicking [OK]. The
[Cart] window appears again. [Delivery Sensor] field displays selected delivery sensor(s).
Selection of [Delivery Sensor] for ASTER data products is not available except 1A and
1B. [Update] link is not displayed in the [Delivery Sensor] field.
Fig. 2.8.4-3 Case of Specifying VNIR and SWIR as [Delivery Sensor]
122
2.8.5. Copy Product Processing Parameters and Media Type
Copy is available for the product that the combination of Target Product Type, PG
Parameter and Media Type.
Click the [Copy] link in the [Copy] field of source product in product list on [Product
Order] window. The [Select Copy] window appears as below.
Fig. 2.8.5-1 [Select Copy] window
Select [Copy Target Type]. Check the item of [Target Product Type and PG Parameter],
or [Media Type] subject to a copy. The [Select] field for copiable product appears. Check in
the checkbox for the product subject to a copy. Click [Select All] to check all the boxes; to
reset them, click [Release All].
Check the product subject to a copy. Click [OK] to set copy for the selected [Copy Target
Type] condition to the product checked at [Select Copy] and [Product Order]. Click [Cancel],
to cancel the selected [Copy Target Type] condition. The [Product Order] window appears
again.
2.8.6. Delete Product Order
To delete a product order from product list, click the [Delete] link in the [Delete] field.
2.8.7. Empty a Cart
To empty a cart, click [Empty Your Cart] in the lower part of product list. When the dialog
123
[Are you sure to empty your cart?] appears, click the [OK] button to empty your cart. Click
the [Cancel] button to cancel empty your cart.
2.8.8. Display Expected Day of Completion and Cost Estimate
Click the [Quotation & Shipping Estimate] button in the [Cart] window. The [Quotation &
Shipping Estimate] window appears. Confirm the shipping estimate and total quotation of
ordered products.
Fig. 2.8.8-1 [Quotation & Shipping Estimate] window
Click the [OK] button to close the window .
2.8.9. Order Products
Click the [Submit DPR] button in the [Product Order] window. Confirm the ordered data
products.
124
Fig. 2.8.9-1 [Order Confirmation] window
Click [OK] if there is no problem in your order. The order is determined and the [Select
Payment Method] window appears. To modify product order, click [Cancel]. The [Product
Order] window appears again and you can modify product order.
2.8.10. Select Field of Product
Click [OK] in the [Order Confirmation] window. The [Field of Product] window appears.
Select utilization purpose of the data to order for the [Field of Product] list.
Fig. 2.8.10-1 [Field of product] window
Select a field of product of data to order from the following list. Selecting a field of product
is essential.
125
Table 2.8.10-1 List of [Field of product]
No.
Content
No.
Content
1
Resource (Oil/Mineral)/Energy
11
Civil Engineering
2
Science
12
Manufacturing
3
Education
13
Software
4
Disaster Prevention
14
Remote Sensing/GIS/Applications
5
Environment
15
Telecommunication
6
Ocean
16
Mass Media
7
Meteorology
17
Finance/Insurance
8
Forestry
18
Medical/Health
9
Agriculture
19
Pleasure/Trips
10
Fishery
20
Others
Select one from the [Field of product] list. Click the [OK] button. Selected societal benefit
area is determined. To cancel the selected field of product, click [Cancel] button. [Product
order] window appears.
2.8.11. Select Payment Method
Click [OK] in the [Field of Product] window. The [Payment Method] window appears.
Select payment method.
Fig. 2.8.11-1 [Payment Method] window
126
Select a payment method from [Bank Transfer] and [Credit Card].
In case of bank transfer, check [Bank Transfer] at [Payment Method]. Click the [OK]
button to order DPR. [Product Order Complete] appears, and it is completed.
Select [Credit Card] and click the [OK] button to pay with your credit card. Click [Credit
Card Payment Form] button to open the payment window. Follow the instruction and
complete your payment.
Click the [Cancel] button to cancel selected payment method.
ZEUS Co., Ltd. offers credit card settlement representation service. In payment window,
follow the instruction and enter your credit card information. If there is no generation of
product due to some kind of system failure, you are not charged. When procedure for your
payment succeeds, User Service of ASTER GDS sends acceptance notice of your DPR by
email. We strongly recommend you to check your User Profile before you order. You will
never receive email from User Service as long as your email address is incorrect.
2.9.
Data Product Request Status / Cancellation
2.9.1. Display DPR Status
Afer login to the user account of [ASTER Search], you can check your own DPR history
in the [DPR Status] window. Click [DPR Status] in each window to check your DPRs.
Fig. 2.9.1-1 [Data Product Request Status / Cancellation] window
127
In [DPR Status], you can check your own DPR status including processing. Change the
number of entries in the list by pull-down menu of the [Show ** Entries] field in the upper
left of the list. In case there are DPRs more than selected, list splits into multiple pages. To
switch a page, click the links in the upper right and bottom right of product list. By clicking
page number, DPR list on the clicked page is displayed. Also, by clicking [Previous] or
[Next], the current page jumps to its previous page or its next page. To jump to first page or
last page, click [First] or [Last].
You can check the detailed information of each DPR by clicking the [Details] button in the
list.It is possible to cancel DPRs from the list if it is berore payment; DPR status is [Booked]
in the [Status] field. You cannot cancel DPR in other status.
This service is available only for DPR ordered at [ASTER Search].
2.9.2. Refer to Detailed DPR Information
Click [Details] in the [Details] field to check detailed information of your DPRs.
Fig. 2.9.1-1 DPR Status window
The [DPR Product Request Detail Status] window shows detailed information of DPR
you selected in [DPR Status] window: [Product Name], [Base Granule ID], [Target Granule
ID], and [Product Price]. Click [>>] button in the [PG Parameter] field in DPR detail list.
The [PG Parameters Details] window appears and you can confirm the contents of PG
parameters specified at the time of order. In case you didn't specify parameters when
ordering, [NO] is displayed in the [PG Parameter] field.
128
2.9.3. Refer to Product Generation Parameter
Click the [>>] button in the [Product Generation Parameter] field of DPR details list in the
[DPR Details] window to check parameters of each product of DPR.
Fig. 2.9.3-1 [Product Generation Parameter Content] window
You can confirm the content of Product Generation Parameters specified in the [Product
Order] window .
To close this window, click [OK] button.
129
3. Operations on Map
Specify search area and confirm search result on the map.
3.1.
Display Latitude and Longitude of Mouse Position
When you place mouse on the map, you can see the latitude and the longitude of its
position in the right bottom of the map.
Fig. 0-1 Latitude and Longitude of the Mouse Position
3.2.
Zoom-in and Zoom-out
The following functions are available to zoom-in and zoom-out the map
・ +-buttons
・ A mouse wheel
・ A magnifier icon (for zoom-in only)
・ Double-click on the map to zoom-in
130
[+-Button]
To zoom in and out the displayed area with a central focus on the area, click [+] and [-]
buttons in the upper left of the map. Click the globe icon between [+] and [-] buttons. The
map shows the whole world.
[Mouse Wheel]
To zoom in the map with a central focus on current mouse cursor position, scroll mouse
upward. To zoom out, scroll downward.
[Magnifier Icon]
You can zoom in specified area by magnifier Icon. Click the icon circled in red in the
middle of left side of the map area.Rectangle appears by holding the left mouse button
down and dragging in the area on the map.Circle the target area with the rectangle and
release the mouse button.
This function is available for zoom-in only.
Fig. 3.2-1 Specify an Area to Zoom-in by Magnifier Icon
131
[Double-click on the Map]
Double-click a mouse on the map to zoom in with a focus on mouse cursor position.
3.3.
Move Area on the Map
Click the following icons to move area on the map.
・ Arrow Buttons
・ Palm Icon
[Arrow Buttons]
Click the arrows of right, left, up and down in the upper left of the map to move area.
[Palm Icon]
Palm Icon can move displayed area by dragging mouse on the map. Click the palm icon
in the middle of left side on the map area and drag mouse.
3.4.
Select Map Projection
Select a map projection. There is a combo-box to show available map projections on top
of the map. Select a map projection from this combo box to change the map projection.
・ Lat Lon:Uniform Lon/Lat(EPSG:4326)
・ North Pole:Polar Stereographic in North(EPSG: 32661)
・ South Pole:Universal Polar Stereographic in South (EPSG: 32761)
132
Fig. 3.4-1 Example of the Map Display (Lat/Lon Is Selected)
Fig. 3.4-2 Example of the Map Display (Poar Stereographic in North Is Selected)
133
Fig. 3.4-3 Example of the Map Display (Poar Stereographic in South Is Selected)
3.5.
Specify Search Area in Rectangle
Click the icon in the middle of left side of the map to draw AOI in a rectangle.
Fig. 3.5-1 Specify AOI in a Rectangle
134
3.6.
Specify Search Area in Polygon
Click the icon in the middle of left side of the map to draw a polygon as AOI on the map.
Click the mouse to specify each vertex of the polygon . To finalize the polygon, double-click
the mouse. The number of polygon's vertex must be between 3 and 1000.
Fig. 3.6-1 AOI in a Polygon
Click the pencil icon to edit the polygon. Move a vertex (indicated in unfilled circle) with
the mouse. To add vertex, move the point between two vertexes (indicated in filled circle)
with the mouse.
135
Fig. 3.6-2 Edit the Polygon
You cannot draw a polygon area across 180 degrees longitude. If you need, draw
a polygon so as not to across 180 degrees. Edit verdexes or middle points between
verdexes to draw a polygon area across 180 degrees longitude.
Fig. 3.6-3 Draw the Polygon Area across the 180 Degrees Longitude
3.7.
Switch Layers
To switch layers, click the [+] mark and spread out the menu on the top right of the map.
136
Fig. 3.7-1 Switch Layers
Layers which can be displayed on the map are as follows. Some layers are displayed
during loggin only.
Table 3.7-1 Types of Layers
Layer type
Base Map
Layer name
Condition to display
Physical
Always displayed
[Display
according
Description
Terrain Map
to
map projection]
Lat Lon: Possible
North Pole: Possible
South Pole: Possible
ASTER GDEM
Always displaed.
[Display
according
map projection]
Lat Lon: Possible
North Pole: No
South Pole: No
137
Terrain Map
to
Layer type
Mosaic Image
Layer name
Condition to display
Some, such as MosaicFBD
Displayed
during
Description
Mosaic Image
loggedin
[Display
according
to
map projection]
Lat Lon: Possible
North Pole: No
South Pole: No
Geographical name
city and town
Always
above
displayed
a
at
Name of countries,
certain
capital cities, and
magnification rate
[Display
cities
according
to
map projection]
Lat Lone: Possible
North Pole: No
South Pole: No
mountain and lake
Always
above
displayed
a
at
certain
Name of mountains
and lakes
magnification rate
[Display
according
to
map projection]]
Lat Lon: Possible
North Pole: No
South Pole: No
Vector Layer
National Boundary
Always displayed
[Display
according
map projection]]
Lat Lon: Possible
North Pole: No
South Pole: No
138
National Borders
to
Layer type
Layer name
Condition to display
Graticule
Always displayed
[Display
according
to
map projection]]
Description
Latitude
and
longitude
lines
grid lines
Lat Lon: Possible
North Pole: Possible
South Pole: Possible
WRS ASTER Ascending
Always
above
displayed
a
at
certain
ASTER’s
scene
nadir
boundary
magnification rate
observed
from
Lat Lon: Possible
nominal ascending
North Pole: Possible
orbit
South Pole: Possible
WRS ASTER Descending
Always
above
displayed
a
at
certain
ASTER’s
scene
nadir
boundary
magnification rate
observed
from
Lat Lon: Possible
nominal descending
North Pole: Possible
orbit
South Pole: Possible
WRS
LANDSAT-4/5
Ascending
Always
above
displayed
a
at
certain
LANDSAT’s
scene
nadir
boundary
magnification rate
observed
from
Lat Lon: Possible
nominal ascending
North Pole: Possible
orbit
South Pole: Possible
WRS
LANDSAT-4/5
Dicscending
Always
above
displayed
a
at
certain
LANDSAT’s
scene
nadir
boundary
magnification rate
observed
from
Lat Lon: Possible
nominal descending
North Pole: Possible
orbit
South Pole: Possible
[Display/Hide Mosaic Image]
When selecting a layer, check a name of Mosaic image such as MosaicFBD to display the
mosaic image on the map, and uncheck to display the base layer. This function is available
only during login.
139
Fig. 3.7-2 Map with a Mosaic Image
[Display/Hide Geographical Name]
Check or uncheck name of layers (city and town, mountain and lake) in the layer field to
switch the display of geographical names on the map. The displayed geographical names
are changed according to map scale.
Fig. 3.7-3 Map with Geographical Names
140
[Display/Hide Vector Layer]
Check or uncheck boxes of vector layers such as national borders, latitude and longitude
lines to switch the display/ hide on the map.
3.8.
Display Background Images in Time Series Order
Mosaic images can be displayed in time series order as the background layer. There is a
button to open control panel of time series layer on the left bottom of map area. This button
is displayed only when logging in.It is also displayed during the map projection is Lat Lon
only. In case the map projection is North Pole or South Pole, this button is not shown.
During using time series layers, layers other than below cannot be displayed on the map.
・ city and town
・ mountain and lake
・ National Boundary
Fig. 3.8-1 Button to Open Control Panel of Time Series Layers
Click the button to open control panel of time series layers.
141
Fig. 3.8-2 Open control Panel of Time Series Layers
Select a time series layer. The figure below is the close-up of control panel.
Fig. 3.8-3 Close-up of TimeSeries Layers Control Panel
(1)
(2)
(3)
(4)
Table 3.8-1 Contents of Control Panel of Time Series Layers
No.
Content
Description
(1)
Drop-down list for Time
Time series layer to display is selected
Series Layers
from this list
(2)
Shut down button
Close the control panel
(3)
Recurrent Information
Recurrence information is displayed
according to the slider position
142
No.
(4)
Content
Slider
to
Description
choose
recurrence
When a recurrence is chosen, the
corresponding mosaic image is overlaid
on map.
Slider is adjustable to right and left by
mouse.
Arrow keys of key board can move the
slider when the slider is active.
+ and –buttons can move slider right and
left.
Choose a recurrence using the slider, and the mosaic image corresponding to the
chosen recurrence is overlaid on map.
Fig. 3.8-4 Example of Time Series Layer (2010/12/16)
143
Fig. 3.8-5 Example of Time Series Layer (2011/01/31)
144