1
EN
MODEL
ELECTRONIC CASH REGISTER
ER-A411
ER-A421
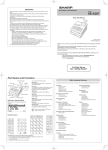
Basic User Manual
IMPORTANT
Keyboard
• Install the register in a location not subject to direct sunlight, unusual temperature changes, high humidity or
splashing water.
Installation in such locations could cause damage to the cabinet and the electronic components.
• Never install the register in saline areas (e.g.: close to the sea).
Installing the register in such locations could cause component failure with the corrosion.
• Never operate the register with wet hands.
The water could seep into the interior of the register and cause component failure.
• When cleaning the register, use a dry, soft cloth. Never use solvents, such as benzine and/or thinner.
The use of such chemicals will lead to discoloration or deterioration of the cabinet.
• The register plugs into any standard wall outlet (official (nominal) voltage).
Other electrical devices on the same electrical circuit could cause the register to malfunction.
• If the register malfunctions, call your authorized SHARP dealer for service - do not try to repair the register
yourself.
• For complete electrical disconnection, disconnect the main plug.
• To prevent the register from moving when the drawer opens, the fixing angle bracket is supplied with the
register. If you want to install the bracket, consult your authorized SHARP dealer.
• In order to operate the register properly, you must initialize it before operating for the first time. To initialize the
register, consult your authorized SHARP dealer.
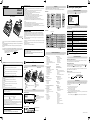
Standard keyboard layouts for ER-A411 and ER-A421 are as shown below.
For details on the key functions and optional keys, refer to “FULL DETAILED INSTRUCTION MANUAL”.
■ ER-A411
Printed in Thailand
14F TINSE2637BSZZ
Thank you very much for your purchase of the SHARP Electronic Cash Register, Model ER-A411/
ER-A421.
Please read this manual carefully before operating your machine in order to gain full understanding
of functions and features.
Please keep this manual for future reference. It will help you if you encounter any operational
problems.
For a free download of the FULL DETAILED INSTRUCTION MANUAL, please go to the following
related URL. For the countries other than described below, consult your authorized SHARP dealer.
- The United Kingdom and Republic of Ireland: www.sharp-pos.co.uk
- Netherlands and Belgium and Luxemburg: www.sharp.nl
- Sweden: www.sharp.se
Operating Modes
CAUTION:
The socket-outlet shall be installed near the equipment and shall be easily accessible.
VORSICHT:
Die Netzsteckdose muß nahe dem Gerät angebracht und leicht zugänglich sein.
ATTENTION:
La prise de courant murale devra être installée à proximité de l’équipement et devra être facilement accessible.
AVISO:
El tomacorriente debe estar instalado cerca del equipo y debe quedar bien accesible.
VARNING:
Det matande vägguttaget skall placeras nära apparaten och vara lätt åtkomligt.
LET OP:
Het stopcontact dient in de buurt van de kassa en gemakkelijk toegangbaar te zijn.
Department keys
This register has a built-in memory protection circuit which is operated by a rechargeable battery pack. It
should be known that all batteries will, in time, dissipate their charge even if not used. Therefore to insure an
adequate initial charge in the protection circuit and to prevent any possible loss of memory upon installation,
it is recommended that each unit be allowed to be recharged for a period of 24 to 48 hours prior to use by the
customer.
In order to charge the battery pack, the machine must be plugged in. This recharging precaution can prevent
unnecessary initial service calls.
The battery pack is a consumable part, and its operating time will get shorter gradually each time it is recharged
for memory backup.
When the battery pack cannot be charged enough to perform memory backup, it means that the service life of
the battery pack has expired.
If this is the case, consult your authorized SHARP dealer.
Direct PLU keys
Caution Scanner connection
In order to allow a plug & play connection of the optional scanner the Pin 9 of the D-Sub
connector 1 (Channel 1) uses +5V.
Be very careful of this +5V in case connection of a different device should be done so that a
damage of the register or device is avoided.
Main Functional Overview
CAUTION:
For a complete electrical disconnection pull out the mains plug.
VORSICHT:
Zur vollständigen elektrischen Trennung vom Netz den Netzstecker ziehen.
ATTENTION:
Pour obtenir une mise hors-circuit totale, débrancher la prise de courant secteur.
AVISO:
Para una desconexión eléctrica completa, desenchufar el enchufe de tomacorriente.
VARNING:
För att helt koppla från strömmen, dra ut stickproppen.
LET OP:
Trek de stekker uit het stopcontact indien u de stroom geheel wilt uitschakelen.
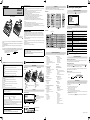
1 Part Names and Functions
External View
■ Front view
■ Rear view
ER-A411
ER-A421
Printer cover
SD card slot
Keyboard
(ER-A411: Normal type, ER-A421: Flat type)
Operator display
Drawer
RS232
This is a Class A product. In a domestic environment this product may cause radio interference in which case the user
may be required to take adequate measures.
1
3
2
4
Customer display
Drawer lock
WARNING:
Displays
■ Operator display
FOR CUSTOMERS IN U.K.
IMPORTANT
Sales information area:
Sales information you have just entered such as items
and prices will appear between 1st line and 3rd line.
Total is always appear at 4th line.
The wires in this mains lead are coloured in accordance with the following code:
BLUE:
BROWN:
Neutral
Live
As the colours of the wires in the mains lead of this apparatus may not correspond with the coloured markings
identifying the terminals in your plug proceed as follows.
The wire which is coloured BLUE must be connected to the terminal which is marked with the letter N or coloured black.
The wire which is coloured BROWN must be connected to the terminal which is marked with the letter L or coloured red.
The apparatus must be protected by a 3A fuse in the mains plug or distribution board.
CAUTION: DO NOT CONNECT THE LIVE (BROWN) WIRE OR THE NEUTRAL (BLUE) WIRE TO THE EARTH
TERMINAL OF YOUR 3-PIN MAINS PLUG.
Numeric entry area
Status area
Mode name
Status information
You can select any mode other than REG from the list in the mode selection window. Your register supports the
following operating modes:
■ ER-A421
The register has the following main functions. For details, refer to “FULL DETAILED INSTRUCTION MANUAL”.
CAUTION:
The cash register should be securely fitted to the supporting platforms to avoid instability when the drawer is open.
Mode Selection Window
When you turn the register on and press the
key, the mode selection window will appear on the display.
For example, when a clerk is signed on, the following window will appear.
Department keys
PRECAUTION
2 Selecting an Operating Mode
Clerk/cashier code
Item Entries
Single item entries
Repeat entries
Multiplication entries
Split-pricing entries
Successive multiplication entries
Single item cash sale (SICS)/single item finalize
(SIF) entries
Scan entries
Payment Treatment
Currency exchange
Received-on-account entries
Paid-out entries
No-sale (exchange)
Cashing a check
Cash payment transfer
Special Entries for PLU/EAN
Promotion function
PLU/EAN link entries
EAN learning function
PLU/EAN information inquiry (view) function
EAN price change function
Set PLU/EAN entries
PLU level shift (for direct PLUs)
Price level shift
Condiment entries
Overlapped Clerk Entry
Display of Subtotals
Subtotal
Difference subtotal (Differ ST)
Special Printing Function
Copy receipt printing
Guest check receipt (bill print)
Kitchen receipt print
Finalization of Transaction
Cash entries
Check entries
Credit entries
Computation of VAT (Value Added Tax)/Tax
VAT/tax system
VAT shift entries
Guest Check (GLU)
Guest look up (GLU) system
Deposit entries
Bill separation by item, amount, person
Bill printing
Auxiliary Entries
Refund entries
Percentage discount
Amount discount
Non-add code entry
Tip entries
Age Verification
Combined Cashier/Clerk Entry
Correction
Correction of the last entry (direct void)
Correction of the next-to-last or earlier entries
(indirect void)
Subtotal void
Correction after finalizing a transaction
Manager Mode
Manager sign-on
Override entries
Other Functions
Starting cash memory
Training mode
SD card mode
Electronic journal
Electronic journal data view function
WiFi SD card mode
Reports
General report
Transaction report
Department report
PLU/EAN report
Hourly report
Clerk report (All/Individual)
Daily net report
Electric Journal (Filter function)
Flash reports
Euro change
Compulsory cash/check declaration
REG mode
This mode allows you to enter various sales information. The mode selection window
does not list this mode. To select this mode from the mode selection window, press
the C key.
OPXZ mode
This mode allows clerks to take X or Z reports on their sales information.
OFF mode
This mode locks all operations of the register. When you select this mode, the
window will disappear. Pressing any key turns the register ON.
X1/Z1 mode
This mode is used to take various daily total reports (X1/Z1 reports).
X2/Z2 mode
This mode is used to take various weekly or monthly reports (X2/Z2 reports).
PGM1 mode
This mode allows you to program those items which need to be changed often such
as unit prices and discount percentages.
PGM2 mode
This mode allows you to program all items including date, time, functions, and the
items that can be programmed in the PGM1 mode.
AUTO KEY mode
This mode allows you to program AUTO menu key and automatic sequencing keys.
SD CARD mode
This mode allows you to save and load the data of your register to and from an SD
card.
iSDC mode
This mode allows you to save and load the data of your register to and from the
server using a WiFi SD card.
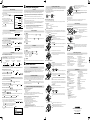
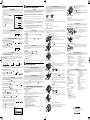
3 Prior to Making Entries
Preparations for Entries
■ Receipt and journal paper rolls
If the receipt or journal paper roll is not set in the register or it is getting low, install a new one according to
section “Replacing the Paper Rolls” under “Operator Maintenance.”
■ Receipt ON/OFF function
You can disable receipt printing in the REG mode to save paper using the receipt function. Press the
Select “1 RCP SW.” and press the
key. Select “2. OFF” to disable receipt printing and press the
When the function is in the OFF status, the receipt off indicator “R” is highlighted.
D
key.
key.
Your register will print reports regardless of the receipt state. This means that the receipt roll must be
installed even when the receipt state is “OFF”.
■ Clerk assignment
Prior to any item entries, a clerk must enter his/her clerk code into the register.
To sign on:
(In case secret code is 0000)
Clerk code
Secret code
or
To sign off:
Error Warning
In the following examples, your register will go into an error state accompanied with a warning beep and the
error message on the display. Clear the error state by pressing the
key and then take the proper action to
remedy the problem.
- When you exceed a 32-digit number (entry limit overflow):
Cancel the entry and re-enter a correct number.
- When you make an error in key operation:
Clear the error and try the entry again.
- When you make an entry beyond a programmable amount entry limit:
Check to see if the entered amount is correct. If it is correct, it can be rung up in the MGR mode. Contact
your manager.
- When an including-tax subtotal exceeds eight digits:
Clear the error message by pressing the
key and then press a media key to finalize the transaction.
■ Customer display
Shielded interface cables must be used with this equipment to maintain compliance with EMC regulations.
Noise level LpA: 57.6 dB(A-weighted)
Measured according to EN ISO 7779:2001
[Maximum value if the cash drawer springs open LpAI: 77.0 dB(A-weighted)]
Text/message display area
Numeric display area
(Continued on back side)