1
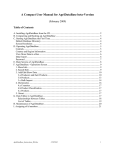
Camera Mouse 2013
User Manual
Version 2.1
March 16, 2013
Copyright © 2013 by Trustees of Boston College
INTRODUCTION AND WELCOME
Welcome to the Camera Mouse 2013 user manual!
Camera Mouse is a program that allows you to control the mouse pointer on a Windows
computer just by moving your head.
Camera Mouse uses a standard webcam to track your head. If you move your head to the left,
the mouse pointer moves to the left, and so on. Clicking can be done by “dwell time”. If you
hold the mouse pointer within a certain area of the screen for, say, a second a mouse click will be
issued by the program.
The purpose of Camera Mouse is to help people with physical disabilities to access the computer.
In particular, Camera Mouse has proved very helpful to people who have no voluntary
movement below the neck, people who can voluntarily control only their head. People with
Cerebral Palsy, traumatic brain injury, ALS, Multiple Sclerosis, and various other disorders have
used Camera Mouse to access the computer and internet.
Camera Mouse has been put to many other uses as well.
Camera Mouse is software that is designed to work with your Windows 8 or Windows 7 or
Windows Vista or Windows XP computer and your built-in webcam or USB webcam. Camera
Mouse is completely free and may be distributed freely.
Copies of Camera Mouse, copies of this manual, information about programs that work well with
Camera Mouse, and answers to Frequently Asked Questions can be found at
www.cameramouse.org.
A LITTLE HISTORY
Camera Mouse was invented by Prof. James Gips (Boston College) and Prof. Margrit Betke
(then at Boston College, now at Boston University). The original version of Camera Mouse was
made available to some families of children with disabilities and some schools and facilities on
an experimental basis.
The Camera Mouse technology then was licensed by Boston College to Camera Mouse, Inc., a
start-up company out of the IC2 Institute at the University of Texas, Austin. Camera Mouse, Inc.
developed a commercial version and made it available on their website at
www.cameramouse.com and through other channels. With the demise of the company the
license was revoked by Boston College in April 2007 and all the rights to use the intellectual
property given in the license were returned to Boston College.
Camera Mouse 2013 User Manual
March 16, 2013
Page 1 of 38
People continued to inquire about Camera Mouse but no version was available. We decided to
develop Camera Mouse 2007 and make it available for free on the web. Camera Mouse 2007
worked well but only with a small group of webcams. Camera Mouse 2008 was the same as
Camera Mouse 2007 but worked with a much wider variety of webcams. We have continued to
make improvements in Camera Mouse. We have added new features and tracked down and
corrected problems and kept up with changes in Windows. Camera Mouse 2013 is designed to
work with Windows 8 as well as Windows 7, Window Vista, and Windows XP and with the 64
bit versions of the operating systems as well as with the 32 bit versions.
Since the first version of Camera Mouse was made available for free in June 2007, over
1,400,000 copies have been downloaded from cameramouse.org.
It is very difficult to test Camera Mouse with all the combinations of computer hardware,
Windows operating systems, and cameras. If you have problems please notify me at
[email protected] .
HARDWARE
To run Camera Mouse 2013 you will need a computer with Windows 8 or Windows 7 or
Windows Vista or Windows XP and a webcam. We use a Logitech HD Pro Webcam C910 or a
Microsoft LifeCam Studio for development. Just about any good quality webcam should do,
including most built-in webcams. Very inexpensive webcams can produce noisier images, which
Camera Mouse can have a difficult time tracking.
BEFORE USING CAMERA MOUSE 2013
Before using Camera Mouse 2013 you should install the webcam according to the instructions
from the manufacturer. Be sure to install the driver software for the webcam that comes with the
webcam or the latest driver that is downloaded from the manufacturer’s website. Do not try to
use a generic Windows camera driver. If you can, test to make sure the webcam works before
using Camera Mouse.
GETTING STARTED WITH CAMERA MOUSE 2013
Place the webcam above or below your monitor so it is pointing at you. Start up Camera Mouse
2013 by double-clicking on the shortcut icon on your desktop. You should see a window with a
video screen that contains your face, like looking at yourself in the mirror.
Camera Mouse 2013 User Manual
March 16, 2013
Page 2 of 38
Use the mouse to click on a unique feature of your face. We usually use the inside corner of an
eyebrow or eye or the ridge below the nose. A green square should appear where you clicked.
Move your head around very slowly at first. The green square should track the feature. If by
chance it loses the feature, then move the mouse and select a different feature by clicking on it.
Camera Mouse 2013 User Manual
March 16, 2013
Page 3 of 38
Once the feature on your face is being tracked by the computer, just press the Ctrl key or
function key F9 or wait 4 seconds (“Auto start”). Now the tracking of your head should control
the mouse pointer. As you move your head slowly to the right, the mouse pointer should move
to the right. To return back to mouse control you can move the mouse or press the F9 key or the
Ctrl key again.
You can tell whether the mouse or the Camera Mouse is in control by looking below your picture
in the Camera Mouse window.
Select a target on the screen, perhaps an icon or a feature of the background picture. See if you
can move the mouse pointer to the target just by moving your head. If you have difficulty
reaching a portion of the screen, physically move the mouse to take back control, click on the
Settings button to open up the Camera Mouse Settings window, and change the Gain settings as
described below. Practice moving the mouse pointer around the screen with your head until it
comes easy.
If you haven’t already, you should download the Aliens and Paint program from the
cameramouse.org Downloads page. Also the Staggered Speech onscreen keyboard program
from staggeredspeech.org and the Midas Touch program from midastouch.org.
In Camera Mouse, click on a point on your face so it’s tracking. Now open up the Aliens
program. Try to keep your head steady so Camera Mouse continues to track. Press the Ctrl key
or the F9 key or wait 4 seconds. Move your head slowly. The red crosshairs should move with
your head. Now still with your head steady press the space bar. The first alien should appear.
Move your head so the crosshair is on top of the alien. You should hear and see an explosion as
the alien blows up. It’s just contact with the center of the crosshair. No need for clicking with
Aliens or Paint.
Close Aliens when you are finished. (But take a look at the manual or menus. You can substitute
any photo for the Alien.)
With Camera Mouse tracking your head, open up Paint. Same drill. Press the spacebar and you
are painting by moving your head. You can change the colors and shapes in the menus. Press
the spacebar to stop at any time. You can print the picture you have created with a dedication.
Slow, deliberate movements with Camera Mouse are better than fast, jerky movements.
RECENTERING
Each time you start up Camera Mouse or switch control to Camera Mouse, the mouse pointer
(usually) re-centers. (This can be changed in the Settings window; see below.) So during a
session a good way to center the mouse pointer in the screen is to press the Ctrl key or F9 key
twice in a row.
Camera Mouse 2013 User Manual
March 16, 2013
Page 4 of 38
CHANGING THE FEATURE ON THE FACE THAT IS TRACKED
At any time you can go into the main Camera Mouse window and use the mouse to click on a
new feature on the face to track. If you selected the tip of the nose and the green square is
slipping, try the inside corner of the eyebrow or the ridge between the nose and mouth.
MINIMIZING THE CAMERA MOUSE WINDOW
You can minimize the Camera Mouse window by pressing the Minimize button at the top right
of the window (the left of the three buttons).
If the Camera Mouse window is minimized, the window will not appear but the Camera Mouse
program will continue to run in the background and to track. You can continue to use Camera
Mouse to control the mouse pointer while the window is minimized. The Ctrl key and the F9
key and the mouse still will switch control back and forth to Camera Mouse even though the
program is minimized.
Minimizing the window can be a big help if a child is mesmerized by his or her appearance in
the video window or if the Camera Mouse program is distracting the user from the application
program.
To bring the Camera Mouse window back from being minimized just click on the Camera
Mouse tab (the green square0 that should appear at the very bottom of the Windows screen.
RUNNING CAMERA MOUSE IN WINDOWS 8
Camera Mouse can be run either from the tiled Start screen or from the Windows 8 desktop.
Once you start Camera Mouse you can switch back and forth between the Start screen the
desktop. Camera Mouse will continue to operate and control the mouse pointer. You can use
Camera Mouse to click on tiles and run apps just as you would by using your mouse or touchpad
or by touching the screen with your finger.
Camera Mouse 2013 User Manual
March 16, 2013
Page 5 of 38
DISPLAYING THE IMAGE IN A SMALLER WINDOW
By clicking on the button under the video image in the standard Camera Mouse window
you can have the video displayed in a smaller window.
This window will always stay on top of any application on the desktop. This is useful, for
example, if you are monitoring the Camera Mouse program while someone else uses it. You can
drag the window down to say the bottom right of the screen and look at it now and then to see if
the tracking slips. You can still take control with the mouse and click on the smaller video
window to reset the tracking. To return the Camera Mouse window to its normal size click on
the button below the video image.
Camera Mouse 2013 User Manual
March 16, 2013
Page 6 of 38
CAMERA MOUSE SETTINGS
Clicking the Settings button in the main Camera Mouse window
brings up the Settings window
Camera Mouse 2013 User Manual
March 16, 2013
Page 7 of 38
Settings uses a tab based interface with three pull-down menus (File, Camera, Help). Let’s go
through the various Camera Mouse Settings tabs, starting at the left.
The question mark icon at the bottom right brings up the interactive Help feature for the current
tab.
Clicking tab
On start up, Clicking generally is off in Camera Mouse 2013.
Camera Mouse 2013 User Manual
March 16, 2013
Page 8 of 38
Clicking in Camera Mouse is done using “Dwell Time”. That means that if you hold the mouse
pointer on the screen within a certain small area for a certain period of time then a mouse click
will be issued.
If you turn on Clicking then you can change the Radius of the area and the amount of time
during which the mouse pointer must be held in the area (the “Dwell Time”).
A Dwell Time of 0.1 second allows for relatively rapid clicks, as might be useful in a video
game.
CLICKING SOUNDS
You can have the program alert you with a clicking sound whenever it issues a click by checking
Play Clicking Sounds. You can listen to the sound the program would make when a click is
issued by clicking on the blue sound icon.
Camera Mouse 2013 User Manual
March 16, 2013
Page 9 of 38
DOUBLE-CLICKING
Once Clicking is turned on it’s possible to Enable Double-Clicking.
As soon as Enable Double-Clicking is checked a new button appears in the main Camera Mouse
window.
If the user clicks on the new “2-click” button then the very next click will be a double-click. So
if the user wants to open Paint by double clicking on the Paint icon, the user would first click on
the 2-click button. At this point the colors of the 2-click button would be inverted to indicate it is
active.
Camera Mouse 2013 User Manual
March 16, 2013
Page 10 of 38
Then the user would use Camera Mouse to move the mouse pointer directly so it dwells over the
Paint icon on the desktop, Camera Mouse would double-click (instead of single-clicking), and
the Paint program would be opened.
Clicking on the 2-click button tells Camera Mouse that the very next click should be a doubleclick.
SINGLE-CLICK TO OPEN AN ITEM (WINDOWS SETTING)
Double-clicking with Camera Mouse takes a while to get used to. An alternative is to set up
Windows so that programs, files, and folders are opened with a single-click instead of a doubleclick. This can be accomplished in the Windows Control Panel under Control Panel ->
Appearance and Personalization -> Folder Options -> Specify single- or double-click to open.
Instead of going to the Windows Control Panel we put an option for this Windows setting on the
Click tab of the Camera Mouse Settings. This makes opening programs and files much easier
using Camera Mouse. Since this is a Windows setting it continues after Camera Mouse is
closed.
Camera Mouse 2013 User Manual
March 16, 2013
Page 11 of 38
Control tab
The Control tab determines how we can switch from mouse control to Camera Mouse control
and back from Camera Mouse control to mouse control.
If the mouse has control there are three possible ways to begin Camera Mouse control of the
mouse pointer: you can leave the mouse untouched for a couple of seconds, you can press the F9
key, or you can press the Ctrl key. Which of these methods will work is determined in the
“Begin Camera Mouse control when” setting with the green Go.
If one or the other key does have meaning in the application program you are running, you can
click off its use for Camera Mouse.
Similarly, if Camera Mouse has control, there are three possible ways of switching back to
mouse control. The easiest way is to just physically move the mouse. Or you can press the F9
key or the Ctrl key. Which of the three ways is enabled is determined by which boxes are
checked under “End Camera Mouse control when” and the red Stop.
If you’d like, you can have Camera Mouse play a brief sound to alert you when control switches.
Just click a check in the box next to “Play sound when control changes”. You can hear the sound
that would be played by clicking on the blue sound icon.
Camera Mouse 2013 User Manual
March 16, 2013
Page 12 of 38
Exclude tab
The Exclude feature prevents the mouse pointer from moving to the edge of the screen.
The Exclude feature is included at the request of caregivers who like to run Camera Mouse but
don’t want the people using the computer to be able to, for example, click on menus at the top of
the screen or on other programs at the bottom of the screen or outside of the current window to
the right or left. For example, setting the Top Exclude amount to 10% would prevent the user
from moving the mouse pointer to the top 10% of the screen.
Camera Mouse 2013 User Manual
March 16, 2013
Page 13 of 38
Gains tab
The Gains determine how your head movements are translated into the mouse pointer
movements.
HORIZONTAL GAIN AND VERTICAL GAIN
If the Horizontal Gain is Low, then horizontal movements of your head result in relatively short
horizontal movements of the mouse pointer. If the Horizontal Gain is Very High, then horizontal
movements of your head result in relatively long horizontal movements of the mouse pointer.
The same for the Vertical Gain. There are seven possible Gain settings.
Camera Mouse 2013 User Manual
March 16, 2013
Page 14 of 38
Often people have a more difficult time moving the head vertically than horizontally. It is not
unusual to set the Vertical Gain higher than the Horizontal Gain.
An alternative to setting the Gains is to go into the Camera pull-down menu and select Camera
Settings. The Camera Settings have been provided by the camera manufacturer. Within the
Camera Settings there often is place to Zoom in or out. Zooming in effect increases the Gains.
REVERSE HORIZONTAL MOVEMENT
We think the most natural way to use Camera Mouse is for the video window to look like a
mirror. So that when you move your head to the right, the image of your head seems to follow
you to the right.
Some people prefer it reversed so that when you move your head to the right the head in the
image moves to the screen’s right which is to your left. The Reverse Horizontal Movement
checkbox allows you to reverse the horizontal movement.
Note that this may be complicated by the Camera Settings. Most cameras have their own
Settings window. You can access this window by selecting Camera Settings in the Camera pulldown menu. There you’ll probably find a Mirror Horizontal setting or something similar. We
suggest you keep this camera setting off. It can get unnecessarily confusing.
Camera Mouse 2013 User Manual
March 16, 2013
Page 15 of 38
Misc. tab
The Misc. tab contains controls for Smoothing, Multiple monitors, and Centering.
SMOOTHING
Smoothing allows you to smooth out the jerkiness of the mouse pointer movements. There are
eight possible settings:
Camera Mouse 2013 User Manual
March 16, 2013
Page 16 of 38
MULTIPLE MONITORS
If you have a single monitor (screen) on your computer this setting is grayed out and is not
applicable.
If you have multiple monitors this setting determines whether Camera Mouse will move the
mouse across just the main monitor or across all the monitors connected to the computer.
CENTERING THE MOUSE POINTER
You may not notice at first, but Camera Mouse automatically re-centers the mouse pointer in the
middle of the screen each time Camera Mouse begins control.
Thus if Camera Mouse has control and you press the Ctrl key twice then control will switch over
to the mouse and then back to Camera Mouse and the mouse pointer will be placed in the center
of the screen.
Some Camera Mouse users emailed to request that we provide other options for when Camera
Mouse should place the mouse pointer in the center of the screen.
The two other choices are to re-center the mouse pointer whenever a new feature on the face is
selected and to never have Camera Mouse re-center the mouse pointer.
Camera Mouse 2013 User Manual
March 16, 2013
Page 17 of 38
Start-Up tab
The Start-Up tab allows you to change how the feature to track is acquired when Camera Mouse
is started and also allows you to determine whether or not Camera Mouse is run automatically
when your computer is started.
ACQUIRING FEATURE TO TRACK AT PROGRAM START-UP
There are three possible ways that Camera Mouse can acquire the point to track when the
program begins.
The traditional way is for the user to click on the point on the face to track. In the figures above
we have used the corner of the eye. Some people use the ridge on the face between the nose and
Camera Mouse 2013 User Manual
March 16, 2013
Page 18 of 38
mouth (difficult with a beard). Some people use the tip of the nose. You can even put a small
bandage on your forehead or mark an X. If you wear glasses a good spot to track is some unique
shape on the structural elements.
The second alternative is to have Camera Mouse run the 5-4-3-2-1 routine whenever the program
is started.
What is the 5-4-3-2-1 routine? It is a way of setting the point on the face that is being tracked.
When the 5-4-3-2-1 routine starts a white square (not a green square) appears at the very center
of the screen and a white 5 appears on top of it. Camera Mouse then counts down from 5 to 4 to
3 to 2 to 1. The idea is to move your face so the feature you want to track is under the white
square when the countdown ends.
Camera Mouse 2013 User Manual
March 16, 2013
Page 19 of 38
Camera Mouse 2013 User Manual
March 16, 2013
Page 20 of 38
The third alternative is to have Camera Mouse automatically try to find the corner of the eye to
track on start up.
RUN CAMERA MOUSE AUTOMATICALLY WHEN COMPUTER STARTS
People who use Camera Mouse all the time can select “Yes” here and have Camera Mouse run
automatically whenever the computer is started.
Camera Mouse 2013 User Manual
March 16, 2013
Page 21 of 38
5-4-3-2-1 tab
In addition to running the 5-4-3-2-1 routine on the start-up of Camera Mouse 2013, there are
three other ways the 5-4-3-2-1 can be initiated depending on which boxes are checked in the 5-43-2-1 tab of Settings.
Again, the 5-4-3-2-1 routine puts a white square in the middle of the screen. The idea is for you
to move so that the point you want to track is in the middle of the white square when the
computer counts down from 5 to 4 to 3 to 2 to 1. Whatever is in the middle of the white square
at 1 will be tracked by the green square
Camera Mouse 2013 User Manual
March 16, 2013
Page 22 of 38
Whatever feature on the face is in the middle of the white square at 1 will be tracked by the green
square
Camera Mouse 2013 User Manual
March 16, 2013
Page 23 of 38
If you click on the box “Run 5-4-3-2-1 routine on F5 key press”
then you will be able to run the 5-4-3-2-1 routine whenever you press the function key F5 on the
keyboard.
If you click on “Place 5-4-3-2-1 button on video window”
then a new button appears on the Camera Mouse window. Clicking on the button (either with
the mouse or with Camera Mouse) triggers the 5-4-3-2-1 routine.
If this option is selected, the 5-4-3-2-1 button also appears on the smaller window.
Camera Mouse 2013 User Manual
March 16, 2013
Page 24 of 38
If you click on the option “Run 5-4-3-2-1 routine on loss of trackpoint”
then if the head moves off the screen and Camera Mouse loses tracking the 5-4-3-2-1 routine will
be run automatically.
Now let’s take a look at the menu items.
File menu
Camera Mouse 2013 User Manual
March 16, 2013
Page 25 of 38
Different Camera Mouse Settings might be used with different software or by different people.
With Camera Mouse 2013 you can Save the settings through the File pull-down menu.
SAVE AS …
The Save As… menu option allows you to give the current settings a name and then save them
on the disk for future use. ALL of the settings under all the tabs are saved in one file. For
example to save Alicia’s settings:
SAVE AS DEFAULT
Save As Default allows you to save the current settings as the default settings. These are the
Camera Mouse Settings that the program uses automatically when it is started up.
OPEN
Open allows you to Open a previously saved Camera Mouse Settings file.
Camera Mouse 2013 User Manual
March 16, 2013
Page 26 of 38
If the file you select was not saved by the current Camera Mouse 2013 version the program will
not be able to open the file and you will receive a message to that effect.
OPEN DEFAULT
Open Default allows you to open the current default file. The current default settings become the
new settings for Camera Mouse.
Camera Mouse 2013 User Manual
March 16, 2013
Page 27 of 38
USE FACTORY SETTINGS
If you want to return to the original settings that came with the program from the “Factory”
select Use Factory Settings in the File pull-down menu. This changes the Settings in the
window. They can then be saved on the disk as the default through the File menu.
EXIT
Selecting Exit in the File menu causes the Settings Window to close. Selecting Exit is the same
as clicking on the OK button at the bottom of the Camera Mouse Settings window.
Camera menu
Camera Mouse 2013 User Manual
March 16, 2013
Page 28 of 38
CAMERA SETTINGS
Camera Settings takes you to the control window for the USB camera you are using. Camera
Settings are provided by the manufacturer of the webcam you are using. For example, with my
Logitech HD Pro Webcam C910 camera here’s the window I see when I first click on Camera
Settings:
The most useful control here is the digital zoom control for the webcam.
Camera Mouse 2013 User Manual
March 16, 2013
Page 29 of 38
By adjusting the zoom you can adjust the size of the face in the video window. In the examples
above the zoom control is one notch up so the face appears to be larger in the video window than
with the default webcam setting.
If the facial feature with the Camera Mouse track point often moves off the edge of the screen
then it would be good to zoom out the camera some more if you can. The Gain settings and the
zoom counteract each other in the sense that if you are way zoomed out then you might need
higher Horizontal and Vertical Gain settings.
Note that you usually want “Follow my face” unclicked or off (or “Automatic Face Tracking
Off”) in the Camera Settings because Camera Mouse is doing face tracking and if your camera
is also then the two can counteract each other in strange ways. The only exception we have found
is if the person using Camera Mouse has large spastic movements of the head. Then putting on
automatic Face Tracking in the camera might prove useful.
Usually you want Auto-focus turned on, as above.
Clicking on the Advanced Settings tab shows the following window:
Camera Mouse 2013 User Manual
March 16, 2013
Page 30 of 38
Using “RightLight” usually is good because this causes the camera driver to automatically adjust
the brightness and coloring for best viewing and also for best tracking.
CHANGE VIDEO SOURCE
If there is just one camera or source of video connected to the computer then the Change Video
Source menu item will be gray and not able to be selected.
If two or more cameras are connected to the computer then you can choose this menu item to
change the cameras for Camera Mouse if you would like
This menu item also is useful if you have a television tuner or other non-related video source
connected to your computer.
Camera Mouse 2013 User Manual
March 16, 2013
Page 31 of 38
Help menu
The Help menu can be used to call up the Interactive Help facility as well as this manual.
The About selection displays the About box:
The About box shows the version number of the software you are using.
Camera Mouse 2013 User Manual
March 16, 2013
Page 32 of 38
Selecting EULA in the Help menu shows the End User Licensing Agreement (EULA) for
Camera Mouse.
Camera Mouse 2013 User Manual
March 16, 2013
Page 33 of 38
Making the Mouse Pointer Larger and Easier to See
Some people report “losing” the mouse pointer on the screen when using Camera Mouse.
You can make the mouse pointer larger than usual and thus easier to see using the Windows
Control Panel. (These instructions are for my Windows 7 Home Premium. Other versions of
Windows are similar but may not be exactly the same.)
In the Windows menu select Control Panel
Camera Mouse 2013 User Manual
March 16, 2013
Page 34 of 38
In the Control Panel select Ease of Access.
In Ease of Access select Change how your mouse works.
Camera Mouse 2013 User Manual
March 16, 2013
Page 35 of 38
Then select the size and type of mouse pointer you would like
And click OK.
This should make the mouse pointer more visible and Camera Mouse easier to use.
Camera Mouse 2013 User Manual
March 16, 2013
Page 36 of 38
WHO IS RESPONSIBLE FOR CAMERA MOUSE 2013?
Camera Mouse was invented by Prof. James Gips (Boston College) and Prof. Margrit Betke
(then at Boston College, now at Boston University) in 1999-2000. The initial version was
developed by Peter Fleming and then Chris Fagiani, who were undergraduates at Boston
College. The initial version made use of a $1,000 Sony pan-tilt-zoom video camera and a special
purpose video capture board. The first prototype using a USB webcam was developed by Jon
Gips.
The Camera Mouse technology was licensed by Boston College to Camera Mouse, Inc., a startup company based in Texas, in 2004. They developed and sold a webcam-based commercial
version of the program, but couldn’t make a financial success of it.
In 2007 Wajeeha Akram, a graduate student at Boston University working with Prof. Betke,
developed a research version of Camera Mouse.
Camera Mouse 2007 was engineered and implemented under contract with Boston College by
Donald Green, of Mekinesis, with the functional specifications of the program developed by Jim
Gips. Don and Jim and Matt McGowan continued to expand and improve the program in releases
of Camera Mouse 2008, 2009, 2010, and 2011. Camera Mouse 2012 was a complete rewrite.
The functional specifications, user interface, and overall project are the responsibility of Jim
Gips. Don Green heads the software engineering working with Christine Hsu Nason, his
colleague at OpCode Consulting, and with Matt McGowan. The automatic feature detection
routine for locating the eye on start-up is based on work by Yinghao Cai when she was a Visiting
Scholar at Boston College. Camera Mouse 2013 is directly based on Camera Mouse 2012.
Our efforts currently are supported by gifts from the Philanthropy Committee of Mitsubishi
Electronic Research Labs (MERL) and Mitsubishi Electric America Foundation, for which we
are most grateful. Boston College is most generous in its continuing support.
Camera Mouse 2013 User Manual
March 16, 2013
Page 37 of 38
QUESTIONS OR SUGGESTIONS?
Prof. James Gips
Fulton Hall 460
Boston College
Chestnut Hill, MA 02467
www.cs.bc.edu/~gips
[email protected]
Please see the website at www.cameramouse.org for more information about Camera Mouse
and for information about programs that can be used about Camera Mouse and for answers to
FAQs (Frequently Asked Questions) that may not be answered in this manual.
Thank you for using Camera Mouse 2013!
Camera Mouse 2013 User Manual
March 16, 2013
Page 38 of 38