1
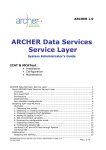
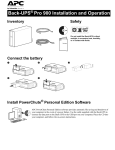
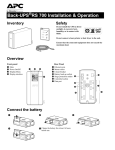
Push To Talk Pro PoC PC Client
User Manual
(Version 1.8)
Copyright © 2011-2012, Push To Talk Pro Networks.
1/22
All rights reservedwww.Push
To
Talk
Pro.com
COPYRIGHT © 2011-2012 Push To Talk Pro Networks
Push To Talk Pro Networks is a registered trademark .
Push To Talk Pro Networks Confidential:
The information contained in this document is considered confidential by Push To Talk
Pro Networks. Release of this information to a 3rd party or use for other than evaluation
is prohibited. All efforts must be exercised to protect the confidential nature of this
information.
More information of Push To Talk Pro Networks at [email protected] or at
http://www.PushToTalkPro.com
Copyright © 2011-2012, Push To Talk Pro Networks.
2/22
All rights reservedwww.Push
To
Talk
Pro.com
Document Change History
Date
Revision
Author
Description
2011-01-01
1
Victor Iniesta
Initial draft
2012-02-09
2
Tomasz Gebarowski
Major changes in the document due to significant
updates in Push To Talk Pro PoC client
2012-04-13
3
Tomasz Gebarowski
Replaced old sceenshot.
Changed descriptions due to UI changes
2012-10-04
5
Wojciech Monka
Added licence section
Table 1: Document History
Copyright © 2011-2012, Push To Talk Pro Networks.
3/22
All rights reservedwww.Push
To
Talk
Pro.com
1. Disclaimer
Note: Push To Talk Pro PoC PC client is still under development, it is possible that some of the
functionalities explained in this document are not fully developed or may change in future.
2. License
After Push to Talk PC Dispatcher installation, it is needed to copy license to roper directory.
Plesae ask Push To Talk Pro support for license file if you do not have one.
Windows OS: copy pttd_config.xml to C:\Program Files\pttd\ or C:\Program Files x86\pttd
3. Push To Talk Pro PoC PC client startup
After invoking Push To Talk Pro PC client a Login dialog appears asking to select user profile and
type associated password.
After confirming the password with OK button, the registration procedure begins. Depending on
the connection type the whole process may take up to several seconds. During this time
corresponding notifications are displayed to indicate application state.
Note: If the application is started for the first time, no profile has been created before. For this
purpose press Cancel on the above dialog and proceed to Configuration section.
4. Configuration
As first step to run the PoC PC client it is necessary to configure the various parameters needed
to guarantee PoC server connectivity and audio capture/playback.
Copyright © 2011-2012, Push To Talk Pro Networks.
4/22
All rights reservedwww.Push
To
Talk
Pro.com
From the application Main window menu select Dispatcher | Preferences
The following configuration dialog is displayed:
From the User Settings tab, it is possible to define different connection profiles to access the
PoC system. The profile being shown is the one which is currently active. Only one profile is
active and being used at a given moment. To create a new profile select New Profile from the
User Profile combo box.
Each profile has to provide the following set of mandatory parameters:
●
Profile name: It allows the user to identify this specific profile.
●
User SIP address: Identifies the user in the PoC system. It is defined as a numeric
sequence, followed by “@” and the domain given by your PoC supplier.
Copyright © 2011-2012, Push To Talk Pro Networks.
5/22
All rights reservedwww.Push
To
Talk
Pro.com
●
Nickname: Nickname associated to your PoC user.
●
SIP Proxy Address: IP address of the PoC Server.
●
SIP Proxy Port: PoC Server port.
●
PoC SIP Domain: PoC domain associated to your PoC supplier
●
XDMS XCAP Address and port: IP and port of the XDMS server.
●
Content folder: Local folder where all the information generated by the PoC PC client will
be stored (XDM content, recorded conversation, etc...).
●
Language: The language used to show the application texts and messages.
Additionally for presence service support the following optional parameters may be specified:
●
Presence Support: Deactivates or Activates presence services
●
Default state: Default published state of PC Dispatcher when application starts
The “Save Profile” button saves the information of the currently selected profile.
The “Delete Profile” button deletes the selected profile.
In the Sound Settings tab user may configure its sound device options:
●
Player Device gives you a list with the available play sound devices.
●
Capture Device gives you a list with the available sound capture devices.
Copyright © 2011-2012, Push To Talk Pro Networks.
6/22
All rights reservedwww.Push
To
Talk
Pro.com
●
Sound Normalization: If checked, sets the volume level for all incoming calls
The Keyboard Shortcuts tab allows to map a key from the keyboard to be used as hot-key for
Push-To-Talk floor request. To map it, click the blank button to enable capture mode. After that
press any key that you want to associate to this functionality.
NOTE: The hot-key assigned to the “Push-To-Talk” functionality can be invoked even if the
application is minimized or does not have the focus.
The Advanced settings tab allows to specify optional features of PC Dispatcher, this includes:
•
Local SIP Port – Local machine UDP/TCP port used for SIP signalling, this feature can be
used when dispatcher is behind NAT and port forwarding is used
•
UDP Keepalive – UDP keepalive time in seconds, used to refresh 3G channels, to avoid
IDLE state
When the user profile is ready, save it and accept by pressing OK button. Now it should be
possible to register in PoC using newly created profile by selecting Dispatcher | Connect from
application main menu.
5. Push To Talk Pro PoC PC Client main window
Once the PoC PC client is connected, the XDM data associated to the PoC account will be
automatically loaded. Map module and toolbar icons become enabled and can be accessed by
Copyright © 2011-2012, Push To Talk Pro Networks.
7/22
All rights reservedwww.Push
To
Talk
Pro.com
the user.
The PoC client area is composed of two panes for managing contacts and groups. Likewise in
majority of instant messaging applications, the Contact and Group panes allows for calling
selected entities and sending them callback or group advertisement requests.
Each Contact or Group may be called directly from the list, changing its state correspondingly.
When Contact is called its height expands and the following additional information is
presented:
●
Basic session information (Name of group or callee and session type)
●
Total call duration
●
Nickname of active floor owner
●
Number of active members
●
Sound (Muted/Unmuted)
Note: Active session (the one reacting on Push-to-talk button press) has orange rounded
border.
The LBS module is an enhanced version of Google Map with displayed contact icons
representing mobile PoC terminal location and status. Both location and status information is
displayed in real-time, allowing to establish PoC calls only to contacts within a given
geographical area.
Copyright © 2011-2012, Push To Talk Pro Networks.
8/22
All rights reservedwww.Push
To
Talk
Pro.com
6. PTT Contacts/PTT Groups lists
The user can select any contact or group. Depending on the entity type (Contact/Group)
buttons attached to the right side of selected entity may invoke different actions:
Copyright © 2011-2012, Push To Talk Pro Networks.
9/22
All rights reservedwww.Push
To
Talk
Pro.com
●
●
Contact:
○
Call (make 1-to-1 call with contact)
○
Send text message to individual contact
Group
○
Call (join indicated group)
○
Send text message to group
More entity specific functionality may be invoked from selected entity context menu, this
includes:
•
Sending callback request (User only)
•
Sending group advertisement (Group only)
•
Displaying contact on map (User only)
7. Active sessions
Once a call has been successfully established, corresponding entity will change its appearance.
Copyright © 2011-2012, Push To Talk Pro Networks.
10/22
All rights reservedwww.Push
To
Talk
Pro.com
For each active call, the following information is shown:
●
Name: Name associated to the ongoing call, used to identify them. It will shown the
contact name in case of a 1-to-1 call or the group name in the case of a group call.
Note: Orange border around call represent its active state. Meaning that any outgoing
talkburst is directed to this call. No border means that call is in listen mode only. Active
calls can be switch by clicking on them.
●
Type: Type of call: “1-to-1”, “1-to-many”, “Chat” or “Pre-arranged”.
●
Time: Time passed since the call has been established.
●
Members: Number of active members in the current session.
●
Sound: Sound status (Muted/Unmuted).
The following session specific options are available (through context menu):
●
End call: Finish the selected call.
●
Mute/Unmute sound: Mutes selected call incoming sound. Clicking again enables audio.
●
Active members: It displays the active members in the current call (only for group calls).
The user can map keyboard shortcuts to the different ongoing calls. With the desired call
selected, the user can assign a number key from 0 to 9 to it by pressing the combination CRTL
+ (0-9). Later, the session can be selected and make active by pressing the associated number
key when the PC dispatcher has the focus.
8. Groups management
User may create/edit/delete groups and upload them directly to XDMS for remote storage. This
Copyright © 2011-2012, Push To Talk Pro Networks.
11/22
All rights reservedwww.Push
To
Talk
Pro.com
can be done either by using application main menu or toolbar:
Create new group
Using Create new group option, in the “Groups” menu, it is possible to create a new
group, owned by the user.
The user can define the following group parameters:
● Group Name
●
Group Type: Chat or Pre-arranged.
●
“Key participant”: Indicates if user is a Key participant in 1-to-many-to-1 conversations.
Using checklist of contacts, the user can select the users that will be added to the group ACL.
Add existing group
Using “Add existing group” option in the “Groups” menu it is possible to add a new “Guest
group”, where the user is not its owner.
Copyright © 2011-2012, Push To Talk Pro Networks.
12/22
All rights reservedwww.Push
To
Talk
Pro.com
The user can define the following group parameters:
● Group URI: Full group URI (without “sip:” prefix)
●
Group Name
●
Group Type: Chat or Pre-arranged.
Manage groups
The user can edit or delete information about any group (Owned or Guest) that has stored
using Manage groups option.
9. Contacts management
User may create/edit/delete contacts and upload them directly to XDMS for remote storage.
This can be done either by using application main menu or toolbar:
Copyright © 2011-2012, Push To Talk Pro Networks.
13/22
All rights reservedwww.Push
To
Talk
Pro.com
Add contact
The user can add a new contact to the contact list from the Add contact option inside toolbar
The following information must be provided for any new contact:
●
User URI: Contact URI formatted according to the following pattern (number@domain)
●
User Nickname: Nickname associated with the contact
Manage contacts
User can edit or delete information about any stored contact using Manage groups option.
Copyright © 2011-2012, Push To Talk Pro Networks.
14/22
All rights reservedwww.Push
To
Talk
Pro.com
Talk to many
User may create an adhoc session by selecting “Talk to many” option from application toolbar.
The following information must be provided for any new adhoc session:
●
Call name: Name for the adhoc session
●
List of member invited to session
Copyright © 2011-2012, Push To Talk Pro Networks.
15/22
All rights reservedwww.Push
To
Talk
Pro.com
Contact access rules
By selecting Accepted/Blocked list option user may define automatically accepted and blocked
contacts
Copyright © 2011-2012, Push To Talk Pro Networks.
16/22
All rights reservedwww.Push
To
Talk
Pro.com
10. Miscellaneous
Event log
The event log allows the user to verify the current state of the PoC PC client. To access the
Event Log window, click on the Window | Show Logger option in the application main menu.
The Record Logs button saves to disk all the logs entries generated.
The Clear Logs button clear all the entries from the Activity Log screen.
Sending talkbursts
To talk inside an active session, user must press the Push-to-talk button, in the main window.
The first push will request permission to talk. In case of being granted, a beep will be played,
indicating the user has permission to talk.
Once the user has finished talking, he/she has to push again the “Push-to-talk” button to
indicate is over.
The user will talk in the current active session.
Copyright © 2011-2012, Push To Talk Pro Networks.
17/22
All rights reservedwww.Push
To
Talk
Pro.com
Recording conversations
The user can record audio from all active sessions, by pressing the Record audio button (last
on the picture below). Pressing the button again will stop the recording. The audio files are
stored in the file path defined in the Content Folder entry for the active profile being used.
Advanced conversation recording
In order to provide accurate understanding of the events occurring when listening to previously
recorded conversation, the PoC PC client offers the possibility of creating an enhanced version
of audio files.
When activating conversation recording during a PoC PC client session, a subtitle file is created,
which contains all the events that has occurred during recording. Both audio and subtitle files
are stored in the media sub-folder inside the PoC PC client content folder.
From the audio and subtitle file, a synchronised video file can be obtained, displaying video and
events. To do this, enter the scripts folder in the PoC PC client folder and execute the following
script:
gen_video_records.sh PATH_TO_DISPATCHER_INSTALLATION_FOLDER PATH_TO_DISPATCHER_MEDIA_FOLDER
Instant Messaging
To guarantee rich user experience Instant Messaging functionality has been added to PC
Dispatcher. Text messages may be sent to groups and individual users with a single click.
Message delivery status is confirmed and indicated with meaningful icons.
Copyright © 2011-2012, Push To Talk Pro Networks.
18/22
All rights reservedwww.Push
To
Talk
Pro.com
Compact mode
When map module is not used (i.e. due to lack of LBS Presence Server or GPS enhanced PoC
mobile terminals), Push To Talk Pro PoC PC client may be started in a compact mode.
The compact mode resembles a standard instant messaging application. Different icons
represent various contact states. For the convenience sake the floor may be requested both
using a build-in button or system global shortcut (working also when application is minimized/in
background)
Copyright © 2011-2012, Push To Talk Pro Networks.
19/22
All rights reservedwww.Push
To
Talk
Pro.com
11.
LBS and Presence
Presence States
When presence support is enabled (see Configuration section) PoC PC client may subscribe to
presence information of all contacts and publish its own presence status.
The following states are supported:
Online
User is online and willing to talk
Offline
User is offline
Do Not Disturb
User is online but not willing to talk
Unknown
State of user could not be determined. Either it has never
been registered, it was registered a long time ago, its
terminal does not support presence state publication or some
error occurred
Contact with
geographical
information
Contacts in any state may have visible globe icon, indicating
that geo location is available for this contact (either current
or last observed). Contacts with globe icon are only
displayed on the Contact List.
Note: Depending on customer requirements the list of states may be easily extended.
State publishing
User may freely change its published presence state by selecting appropriate state with Profile
button.
Map
interactions
The LBS module is an enhanced version of Google Map with displayed contact icons
Copyright © 2011-2012, Push To Talk Pro Networks.
20/22
All rights reservedwww.Push
To
Talk
Pro.com
representing mobile PoC terminal location and status. Both location and status information is
displayed in real-time, allowing to establish PoC calls only to contacts within a given
geographical area.
Agents displayed on the map are refreshed when receiving incoming NOTIFY message from the
terminal itself. Hence the refresh rate can vary basing on the terminal settings. Depending on
the application one should find the golden ratio between battery consumption and position
accuracy.
Making adhoc call from selected contacts
In order to establish an adhoc session with contacts visible on the map. Select individual
(making them blue) by left clicking on them.
Copyright © 2011-2012, Push To Talk Pro Networks.
21/22
All rights reservedwww.Push
To
Talk
Pro.com
When all required contacts are selected open context menu by clicking right mouse button.
From the menu choose Call selected to start adhoc session.
Location search and state filtering
The LBS map includes a toolbar allowing for location searching and filtering displayed agents
by their published state.
Copyright © 2011-2012, Push To Talk Pro Networks.
22/22
All rights reservedwww.Push
To
Talk
Pro.com