1
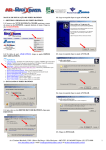
Ritenergy Pro (Version 3.XX) ACCESS CONTROL SYSTEMS USER MANUAL 1 User Manual| Ritenergy International, LLC TABLE OF CONTENTS RITENERGY PRO PROGRAMMING GUIDE 3 System Requirement 3 System Components 3 Basic Programming Install Ritenergy Pro Software Create a new Account Initialize the locks Add Users Add Doors Upload users to the doors 3 4 4 6 7 8 10 Advanced Programming Manage Schedules Retrieve Information from the lock iKey iCode Views Database Maintenance 11 12 14 16 17 18 19 TERMINOLOGY 2 User Manual| Ritenergy International, LLC 20 RITENERGY PRO PROGRAMMING GUIDE SYSTEM REQUIREMENT The following hardware and software minimum requirements are recommended to use the Ritenergy Pro software: IBM compatible PC (Pentium II or greater) capable of running Windows with an available USB port for an iButton USB Encoder. Screen area resolution capability of 1024 x 768 pixels. CD-RW driver for installing the software and for backing up the database. Hard disk drive with at least 100 MB of disk free space. Minimum system memory of 128 MB, or as recommended by the operating system. Microsoft® Windows® 7 32-Bit/64-Bit, Microsoft Windows Vista® 32-Bit and Microsoft Windows XP. SYSTEM COMPONENTS The Ritenergy Access Control System requires the following components: RITENERGY PRO series locks PC and the Ritenergy Pro software USB iButton encoder iButton Programmer ibutton Credential (optional) iKey Credential(optional) You have installed the locks in the doors. Now you want to use Ritenergy Pro software to program the locks. Here are the steps to start: BASIC PROGRAMMING Install the Ritenergy Pro software 3 User Manual| Ritenergy International, LLC 1. 2. 3. 4. 5. Create a new Account Initialize the locks Add Users Add locks Upload Users to the doors INSTALL RITENERGY PRO SOFTWARE Please read the readme.txt file for the latest information about your Ritenergy Pro software and System Requirements. 1. Place Software CD into the CD-ROM drive. The Autorun will start the installation Menu automatically 2. If the installation Menu does not automatically start, you can start it manually by open the D drive (CD/DVD drive), and click the “CD_Start “ file 3. Install 1-Wire USB Drive first. After finished installation, insert the USB encode to the PC, the computer will find the new device and prompt you through the process. 4. Install the Rite Pro Software second. The Setup Wizard will guide you through the installation process. Your software Serial Number is located on the CD holder. CREATE A NEW ACCOUNT The Ritenergy Pro has now been loaded and is ready for login. The software displays the login screen: 4 User Manual| Ritenergy International, LLC Note: The default User Name is “Admin” and Password is left blank. These will only be used for the initial login to the software, and must be changed to proceed further. 1) Click OK to login the software, from “Tools” drop down menu, select “Manage Account” 2) The software displays the “Manage Account” window 5 User Manual| Ritenergy International, LLC 3) In the “User Name” field, type in a new user name. 4) In the “Password” field, type in a password for the new user, make sure you have at least one “Administrator” user in the account. Note: Be sure to make a note of the password that was specified. If it is lost, you will have to reinstall the software, or call Technical Support line for assistance. INITIALIZE THE LOCKS 1) From “Tools” drop down menu, select “Facility Manager” 2) The software displays the “Facility Manager” window The default parameters are set to maximize the lock performance, but you can change them to meet your own preference. 3) Change Facility Code 6 User Manual| Ritenergy International, LLC Facility Code is a unique 8 digits code assigned to each lock, so your locks will be operated independently from others who had same system. All the locks come out of the box are identical; you need change the code and initialize the lock in order to communicate with your system. Note: The default Facility Code is 99912345 (8 digits). It is mandatory to change the facility code for security reason 4) Initialize the lock Make sure “Initialize Lock” button been checked. With the USB encoder connect to the PC, snap your Programmer (Yellow Fob) onto USB encoder reader (make sure only one key fob attach to the reader), Click “Upload”, the system information will write into the Programmer, and a successful massage will pop up. From the keypad, enter “*12345#”, green LED will lit up, place programmer fob against the iButton reader on the keypad, two beeps to confirm the job. Note: After initialize the lock, the manual programming functions will no longer work. You need full reset the lock in order to resume the manual programming. ADD USERS In the Ritenergy Pro software, you can add new users, define user type and set access schedule. The Ritenergy Pro software allows you to manage users from the Users menu. 7 User Manual| Ritenergy International, LLC To manage users, from the Users menu select Add Users, or click the Add Users button. . Note: You can define a maximum of 1,000 users to each lock, but unlimited number of users in the software 1) Add iButton User With the USB encoder connect to the PC, snap your iButton fob (Black Fob) onto USB encoder reader (make sure only one fob attach to the reader) Double Click Here Click Add button, point mouse to “iButton ID” field and double click the mouse, the iButton ID will pop up. Fill in “First Name” and “Last Name”. If you are familiar with the software, you can select “Access Schedule” and “Holidays” for each user at this time, otherwise leave them as it is and click Save. 2) Add Other Type of Users Toggle Pin/iButton unlock the lock indefinitely. When the toggle code/iButton is entered again, the lock will immediately lock back. One time Pin will only work once and will be purged from lock memory. Supervised Pin requires an iButton first (iButton plus Pin). ADD DOORS 8 User Manual| Ritenergy International, LLC Door location provide a way to manage multiple doors at a site. The Ritenergy Pro software allows Operators to group doors according to its location. For example, your site may be an office complex where you will be installing the RITENERGY PRO serial locks in three different buildings. In this case, you can create three different door groups and name them Bldg A, Bldg B, and Bldg C, you can create many door names within a building like Suite 101, Suite 102 1) Manually Add Lock ID (Door ID) Each lock has a unique and unalterable lock ID (Door ID), you can find the lock ID on back of the keypad. Click “Add” button, manually input the lock ID. 2) Retrieve Lock ID (Door ID) from the lock From the Download menu select Download Doors, or click the Download button With the USB encoder connect to the PC, snap your Programmer (Yellow Fob) onto USB encoder reader (make sure only one key fob attach to the reader), Click “Upload”, the system information will write into the Programmer, and a successful massage will pop up. Unplug the Programmer; and place it against the iButton reader on the lock 9 User Manual| Ritenergy International, LLC keypad, the green LED lit up with two beeps to confirm the job. Snap the Programmer back onto the encoder, click Add button, under Lock Information, point mouse to “Door ID” field and double click the mouse, the lock ID will pop up. Double Click Here UPLOAD USERS TO THE DOORS The Upload function allows you to assign one door or multiple doors (up to 15 doors) at a time. To manage door access assignment, select Upload Doors from the Upload menu, or click the Upload button. If you are first time user, we recommend that you program one lock at a time. 1) Select a lock from the lock list 2) Add users to the lock by click “Add”, Add All” buttons. 10 User Manual| Ritenergy International, LLC 3) If you have already programmed a lock, and want the second lock to be exactly the same, simply click “Copy From Another Lock” and select the lock need to be copied and click Select 4) Snap the Programmer (Yellow Fob) onto USB encoder reader and Click “Upload” 5) The Upload information will write into the Programmer, and a successful massage will pop up. 6) Unplug the Programmer; and place it against the iButton reader on the lock keypad, the green LED blinks with two beeps to confirm the job If you have multiple locks and familiar with the system, then multiple lock assignment will be the choice 1) Select the locks (up to 15 locks and maximum 128 users per lock) from the lock list 2) Snap the Programmer (Yellow Fob) onto USB encoder reader and Click “Upload” 3) A “Select Upload Type” window will pop up Upload Lock Setting -assign door schedules to the locks Upload User List-Assign users to the locks ADVANCED PROGRAMMING 1. 2. 3. 4. 5. 6. Manage Schedules Retrieve Information from the lock iKey iCode Views Database Maintenance 11 User Manual| Ritenergy International, LLC MANAGE SCHEDULES M ANAGE ACCESS S CHEDULES An Access Schedule is a defined time period during the span of a week in which users can be granted access to the door. The Ritenergy Pro software allows you to pre-define access schedules. Once you have defined access schedules, you will assign them to the users who will access those doors. There are eight access schedules in the software. However, the Always access schedule is fixed in the software; it cannot be changed or deleted. The Always schedule allows 24/7 access to its associated users. To manage access schedules, from the Tools drop down menu select Access Schedules: 1) From the Access Schedules window, select an access schedule to edit by clicking it. 2) Click Edit. The software will activate the Edit Access Schedule panel on the right. 3) In the Access Schedule Name field, change the name of the access schedule. 4) Select the appropriate check box for the day(s) of the week you want to set the access schedule. These are the days that users will have access to a door. 5) In the Start Time field, change the start time, if necessary. This is the time that access begins each day. 6) In the End Time field, change the end time, if necessary. This is the time that access ends each day. 7) Click Save to save the change. M ANAGE D OOR S CHEDULES 12 User Manual| Ritenergy International, LLC A Door Schedule is a defined time period during the span of a week in which locks can be programmed to operate by itself, such as change lock mode from storeroom to classroom, or/and unlock/lock the door. There are 32 access schedules in the software. However, the Always Close and Always Open schedules are fixed in the software. They cannot be changed or deleted. The Always Close schedule work as storeroom lock, it lock the door back immediately after the entry. The Always Open schedule work as classroom lock, it unlock the door indefinitely after the entry. To manage door schedules, from the Tools drop down menu select Door Schedules. 1) From the Door Open Schedules window, click Add. The software will activate the Edit Door Schedule panel on the right. 2) In the Door Schedule Name field, type the name of the schedule you are adding. 3) Select the appropriate check box for the day(s) of the week you want to set the door schedule. 4) In the Start Time field, change the start time, if necessary. This is the time that door begins to operate each day. Check the “Unlock” box if you want to automatically unlock the door 5) In the End Time field, change the end time, if necessary. This is the time that door ends its operation each day. Check the “Lock” box if you want to automatically lock the door 6) Click Save to save the change. M ANAGE H OLIDAYS S CHEDULES A Holiday/Vacation is a defined time period during which users will NOT be granted access to a door. 13 User Manual| Ritenergy International, LLC To manage holiday schedules, from the Tools drop down menu select Holidays Schedules. Note: You can define a maximum of 32 holiday/vacation periods in each lock, but unlimited number of schedules in the software. 1) From the Holidays Schedules window, click Add. The software will activate the Edit Holiday Schedule panel on the right. 2) In the Holiday/Vacation Name field, type the name of the holiday or vacation you are adding. 3) In the Start Date/Time field, change the start Date/time. This is the Date to start the holiday/vocation. 4) In the End Date/Time field, change the end Date/time. This is the Date to end the holiday/vocation 5) Click Save to save the change. RETRIEVE INFORMATION FROM THE LOCK Retrieve information from the lock to your computer is accomplished via iButton Programmer (yellow fob); this eliminates the need for direct physical or electronic connection between the lock and the PC. D OWNLOAD AUDIT T RAILS Audit trails can be downloaded by a small key fob without carry around the heavy equipment and cut the cost substantially. To manage download audit trails, from the Download drop down menu select Download Doors, or click on Download icon. 1) From Download window, click Audit Trail, input number of events 14 User Manual| Ritenergy International, LLC 2) Snap the Programmer (Yellow Fob) onto USB encoder reader and Click Upload. 3) The Upload information will write into the Programmer, and a successful massage will pop up. 4) Unplug the Programmer; and place it against the iButton reader on the lock keypad, green LED blinks with two beeps to confirm the job 5) Snap the Programmer back onto USB encode reader and click Read. The Audit Report will show. 15 User Manual| Ritenergy International, LLC 6) Click Save Data to save the audit trail records. D OWNLOAD L OCK S ETTING To manage download Lock Setting, from the Download drop down menu select Download Doors, or click on Download icon. 1) From Download window, click Lock Setting. 2) Snap the Programmer (Yellow Fob) onto USB encoder reader and Click Upload. 3) The Upload information will write into the Programmer, and a successful massage will pop up. 4) Unplug the Programmer; and place it against the iButton reader on the lock keypad, green LED blinks (last about 15-20 seconds) with two beeps to confirm the job. 5) Snap the Programmer back onto USB encode reader and click Read. The Setting of the lock will show: IKEY iKey is one of the unique features of Ritenergy Pro software. By using the special iButton key (ikey), making a guest key become much easier than ever before. Here are the steps to make your iKey, from the iKey drop down menu select iKey Maker, or click on iKey icon. 16 User Manual| Ritenergy International, LLC . 1) Input the person’s name and date/time 2) Select the locks from the list (Up to 3 locks or All) 3) Snap the iKey (Red Fob) onto USB encoder reader and Click “iKey” The iKey can be programmed today that will grant access years from now at the time and date required. ICODE iCode is a fully time generated keyless locking System; made up of a "stand-alone" door access control unit (Lock) combined with icode Generator. Here are the steps to generate your iCode, from the iCode drop down menu select iCode Generator, or click on iCode icon. 1) From iCode Generator window, click the field of the “Lock Name”. The “Select Door” window will open 2) Select the locks from the list 17 User Manual| Ritenergy International, LLC Click here to get the lock list 3) Click iCode to generate a eight digits code INSTRUCTIONS TO USE YOUR I C ODE Method 1: Open with iCode Enter the eight digits code and “#” 52349618# Method 2: Open with your own code (4-8 digits) Enter the eight digits code and “#” Within 10 seconds, enter your own code and # Enter the code again and # to confirm 52349618#1234#1234# VIEWS 18 User Manual| Ritenergy International, LLC O PERATOR L OG L OCK AUDIT H ISTORY Once Audit Trail data have been transferred from the lock to the PC, you can view and report on data from the lock. The Ritenergy Pro software allows you to Export audit report to Excel file. I C ODE / I K EY H ISTORY DATABASE M AINTENANCE Database Maintenance allows you save a backup database file. We highly recommend you backup your database once you complete the system. 19 User Manual| Ritenergy International, LLC TERMINOLOGY Facility Code Facility Code is a unique 8 digits code assigned to each lock, so your locks will be operated independently from others who had same system. All the locks come out of the box are identical. Factory Master Code Factory Master Code 12345 is used to initialize the lock for a new installation or full reset. This Code must be entered to set the LOCK ID and the MASTER CODE (MC). After the Master Code is set, the FACTORY MASTER CODE will no longer be valid and is only re-enabled after a full reset. Master Code Master Code is set for system administrator. The master Code has ultimate authority to control the system, this control include setting the lock parameters, editing users at all levels, setting time and date, setting up groups and controlling their access. Audit Code Audit Code is set strictly for download Audit log (requires program key and software kit). This Code does not operate the lock. Sub-Master Code The system can be programmed with up to 8 Sub-Master Codes. The Sub-Master Code can do everything except following limitations: Delete or modify Master Code Delete or modify sub-master Codes Modify system parameters Grant access when lock in lockout mode Each Sub-Master Code associate with one group of similar users, so a large number of users can be managed all together rather than individually—saving time and effort. User Group It is convenient for large numbers of similar Users to be grouped together. By placing Users into Groups (assigning them to a specific range of User Numbers), large numbers of Users can be controlled all at once rather than individually--saving time and effort. 20 User Manual| Ritenergy International, LLC Groups are controlled via schedules, and a typical example involves enabling or disabling a Group at a certain time. User Code User Codes are for the day-to-day users with certain restrictions, or access levels. Access level can be defined by its immediate sub-master Code. Service Code Service Codes are used for a special purpose such as maintenance personnel or vendors. Service Code grants from one time access to 9 hours unlimited access. Toggle code Toggle Code unlock the door indefinitely. When the same (or another) toggle code is entered, the door will immediately lock back. Master and Sub-master Code can override when the lock is in Toggle Mode. Anti-damper The system has an anti-tamper feature that helps frustrate any attempts to “guess” a valid code. If an invalid code is entered, the red light will flash. After four invalid codes are entered consecutively, the System enters the anti-tamper shutdown mode and the red light will stays on. The System will not accept any code for up to 99 seconds, after which time, the System resets and will allow a valid code to be entered. Each time the System enters the Anti-tamper mode, an entry is made in the Audit Log for later retrieval. Audit Trail Audit trail or audit log is a chronological sequence of audit records, each of which contains evidence directly pertaining to and resulting from the execution of access events. Lockout Lockout mode will freeze the lock at given state (Lock or unlock); temporarily disable all the users except master Code. Enter the function Code 93 to release the lockout, and resume back to normal operation. 21 User Manual| Ritenergy International, LLC