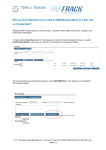
1
BOMBING BRAIN INTERACTIVE
User Manual
Introduction
Thank you for choosing Setlists, the ultimate lyric prompter and setlist
organizer for musicians. With just a few simple steps, you can easily manage
your band’s song catalog, create sets for live performance, and have the
whole band in sync with upcoming songs and lyrics.
In addition to its basic functions, Setlists includes numerous advanced
features, such as multi-device remote jam sessions, advanced gesture
shortcuts, wireless foot pedal control, mirrored text display for reflector
setups, and more.
At Bombing Brain, we strive to make our applications as simple and easy to
learn as possible. We’re quite confident that you’ll pick up the basics very
quickly and be up and running with Setlists integrated into your live
performances. At the same time, we also recognize that there are still many
people who like to “Read the Manual” to make sure they are getting as much
as possible out of their software purchases. So we’ve put together this guide
to describe all of Setlists’s functions in detail. Whether you like to read
manuals cover to cover, or if you want to just pop in and out of this book to
learn a particular feature, you’ll find the guide easy to navigate and explore.
We are constantly looking to improve our product. If Setlists is not meeting
your needs in some way, or if you have suggestions for improvement, please
contact us at [email protected]. Enjoy!
Gene Whitaker
CEO, Bombing Brain Interactive
i
Chapter 1
Getting
Started
Several years ago, I was playing in a 10-member
cover band. We had about 150 songs in our
repertoire, and multiple members of the band sang
lead on various different songs. Every gig, we’d
perform three sets of about 12-15 songs per set. In
order to keep things fresh, we liked to change the
sets up every night, so that we could avoid playing
the same songs in the same order over and over
again. Better for our fans, better for the members of
our band, right? But not better for the one who was
in charge of creating the setlists.
If I was smart enough to think ahead a day or two, I could make
just as easily use it during a recording session or at rehearsals).
new sets in a word processing program on my Mac, type them
Because of this focus on performance, you can accomplish most
out in big bold letters, and even print 10 copies to bring to the
of what you need with a few taps and swipes and a minimal
gig. More often than not, however, set construction ended up
amount of setup. Even getting lyrics to new songs into the app is
happening in the dressing room fifteen minutes before showtime.
a breeze.
Using my trusted old black Sharpie on scrap paper, cocktail
napkins, the backs of old sets—whatever I could find—I (or
whoever was on “set duty” that night) would scrawl out as many
copies of the sets as possible before we’d hit the stage. Often
we’d run out of napkins and have to share.
And then there was the issue of remembering all those lyrics.
Even though we spread the lead vocal duties over several of us,
each singer still had between 20 and 40 songs to remember. And
we were always adding and subtracting songs from the master
catalog. It’s safe to say that on more than one occasion, verse 2
became verse 1 a second time, words were made up on the spot
Setlists also conforms to your needs as a performer. Do you
—you get the idea.
improvise your sets from a giant master catalog rather than preselecting the order of songs you perform? No problem. Setlists
Setlists was designed to help that band I played in years ago. If
can be used to show lyrics directly from the master Song
you perform live, and you need a way to manage a master
Catalog. Need to make a quick change to a set because one of
catalog of lyrics sheets and chords, arrange songs into coherent
your singers has a cold and can’t hit the high notes tonight? Not
sets, and/or share those sets amongst all your band members
an issue. Take a song out of the set with a few taps. We make
with ease, then you’re in luck. Setlists is exactly the tool you
these actions easy so you can concentrate on your music and
need.
your audience.
One of the first things you’ll notice about Setlists is that it’s
When the app is first launched, you arrive in the Setlist Chooser.
designed to be used during a live performance (though you could
Here you will see all of the sets you create, with previews of each.
3
Since this is your first launch, and you haven’t had a chance to
This will launch you into Set View, in which you can see a full
add any songs of your own yet, we’ve provided a sample set for
screen listing of the songs in your set. From here, it’s easy to edit
you. (Special thanks to 7’s Fears for granting us permission to use
the order, add or subtract songs, have your other members join a
their lyrics). To choose the sample set, simply tap on it.
remote jam session, so you can share the set with the other
members of the band.
The Setlist Chooser on First Launch
Set View
4
For now, though, let’s take a look at the lyrics for one of the
verse, chorus, verse 2, etc. But how you divide the song is up to
songs. Tap on the name of the song “Little Things” to be taken
you. You can move to the next section of the song by simply
into Lyric View.
swiping across the screen from right to left. In the case of our
current song, “Little Things”, you’ll move from the 1st verse to the
bridge and chorus. Swipe again, and you’ll go to the second
verse. And so on. The small indicator dots at the bottom of the
screen let you know which page you are currently on, and how
many pages are left.
Note: You’ll notice this particular song, Little Things, has chords included inline with the lyrics. We’ll show you how to add and display those chords later
in this manual.
When you reach the end of the song, or if you just want to skip
ahead to the next song, you can tap the middle of the screen to
bring up the bottom console, and then tap on the Next button on
the bottom right. Alternatively, you can just swipe from right to left
with TWO fingers to jump to the next song. This “gesture” is a
shortcut—one of many contained within Setlists for easier access
to the most common functions of the program. You don’t need to
learn these gestures, but if you do, they will save you time and
make it easier when you are under the pressures of performing
live. (All of the gestures in Setlists are explained in detail in the
Gestures section of the Advanced Features chapter, later in this
Lyric View
In Lyric View, you get to see the song’s lyrics, divided into several
screens. Most people like to separate out the song by sections:
guide.)
If you want to see the set listing again, you can tap the screen to
bring up the console again, then tap the Exit button in the middle
5
of the console. (Or use the “pinch to close” gesture on the lyrics
instead.) Now you’re back to the Set View, and you can choose
another song, or go back to the Set Chooser.
View Icon
If you are on an iPad, and you want to see the upcoming songs in
the set, AND you want to see the lyrics of the current song at the
same time, you can change to the Split View. This is
accomplished by tapping on the view icon near the top right of
the Set View or Lyrics View screen. When you tap that view icon,
a popover will appear, allowing you to choose the Split View. Tap
the button labeled Split View, and you’ll see your lyrics, your set,
and any notes you made for the current song at the same time.
Split View
6
That’s the basic pattern for using Setlists during a live
performance. Choose a set, see the song lyrics for a song. Move
on to the next song, etc. until the set is over. Of course, there’s a
lot more to the app than just looking at sets and lyrics. You’re
going to want to add your own songs, make your own sets, and
share them with the band as well, among other things. We’ll talk
about those in more detail over the course of this guide.
7
About the Pro Upgrade
Purchasing the Pro Upgrade is easy. Simply attempt to create
Setlists is free to download. We made this choice in order to
more sets or songs than the Basic Edition allows, and a view will
provide our customers with a way to explore the app and
pop up, asking if you would like to purchase the upgrade. Tap on
discover all it has to offer without having to pay up front. Any
the Upgrade Setlists button, type in your Apple password (this
serious musician, however, is going to find quickly that the Basic
transaction happens over Apple’s servers, not ours, so we never
Edition that you download for free is not meant for permanent on-
see any of your payment information) and you are done. The Pro
stage use. It’s meant to test the waters and show you all you
Upgrade features will be unlocked, and you won’t have to
could be getting with the Pro Upgrade.
purchase them again.
In order to get everything you want out of Setlists, you should
Restoring your Purchase
purchase the one-time in-app Pro Upgrade, which will unlock the
If at any time you need to reinstall Setlists, or you want to put the
following:
Pro Upgrade on another device that you own, simply tap the
1. Unlimited songs in your Catalog. The Basic Edition limits your
Catalog to 20 songs (not including the sample songs we give
you).
2. Unlimited sets. The Basic Edition limits you to one set, in
addition to the sample set provided.
3. Unlimited Remote Jam Sessions. The Basic Edition will allow
Restore Purchases button on this upgrade screen, and the
upgrade will be unlocked without having to pay again.
Setlists 1.x users
Anyone who purchased Setlists 1, our original version, should
receive the Pro Upgrade for Setlists 2 automatically. When you
first launch Setlists 2, the app will check with Apple for your
receipt for Setlists 1, and if you have purchased Setlists 1, the Pro
Jam Sessions for ten minutes at a time. After that, all devices
Upgrade will unlock, and you will see a dialog thanking you for
will be disconnected.
your purchase. This is our way of saying thanks to all the people
who have been our customers for so long and have helped us
4. Sync and Backup over iCloud or Dropbox. Syncing your
make Setlists so successful.
Catalog and sets, and backing them up to one of these online
services is not available in Basic Edition.
The rest of this manual will assume that you have purchased the
Pro Upgrade, giving you instructions on the various features in
their unlimited form.
8
Chapter 2
Setlist
Chooser
The Setlist Chooser is similar to a document picker
in a word processing app. This is the screen where
you find all the sets that you’ve created to use in
performance. It’s also the place where you can
delete older sets you no longer need, create new
sets, duplicate sets, and arrange the sets into any
order you like.
Section 1
At a Glance: the Setlist Chooser
The Setlist Chooser consists of a top toolbar and a main viewing area. The toolbar
contains many buttons for selecting various functions within the application. The
buttons, in order from left to right:
IN THIS CHAPTER
1. At a Glance: The Setlist Chooser
2. Choosing a Set
• Song Catalog Button - takes you to the Song Catalog, where you manage
the entire song library within Setlists. See the chapter on the Song Catalog for
more details.
3. Arranging Sets
• Add Set Button - creates a new blank set.
4. Deleting a Set
• Remote Jam Session Button - allows you to join a remote jam session, so
5. Duplicating a Set
6. The Help Screen
you can see songs or complete sets of other members of your group. Several
devices can join in on the same session, so everyone in the band with a
compatible iOS device and a copy of Setlists can stay in sync.
• Tools Button - Allows you to change some global advanced settings for the
application.
• Help Button - takes you to the Help screen, where you can find links to this
manual, video tutorials, contact information for giving us feedback or reporting
issues, our latest blog articles, social media links, and more.
• Edit Button - use this to enter Edit Mode, where you can delete sets or
change the order of your sets.
10
Interactive 2.1 The Setlist Chooser at a Glance
Toolbar
Main Viewing Area
11
Section 2
Choosing a Set
The main viewing area of the Setlist Chooser is dedicated to your
sets, including a quick preview image of each set, the number of
songs in each set, and the date the set was created. (If you add
duration information to your songs, the total set duration will
appear here, too.) The sets are arranged in rows and columns,
and you can have more sets than fit on the screen at once (once
you have purchased the Pro upgrade). If you need to see a set
that is off screen, simply scroll the main viewing area.
Note: when you first launch Setlists, you will only have one set, the sample
set, in your Setlist Chooser. Before upgrading from the Basic Edition, you
will be able to create one additional set for your own purposes. In order to
create as many sets as you like, you can purchase the Pro upgrade within
the application, which will remove all limitations on the number of sets and
songs, and remove the limit on the length of Jam Sessions. In addition,
syncing via iCloud and Dropbox will be unlocked. See the section on Pro
upgrade in this manual for more information.
The preview images of the sets in your Setlist Chooser are
scrollable, so you can see all the songs in the set, even if there
are more songs than you can see at one time. Simply swipe up
on the list of songs in the preview to see the songs hidden below.
That way, you can be sure you are choosing the correct set
before launching into Set View.
12
To get back to the Setlist Chooser from Set View, you can
tap the Setlists button at the top left of the Set View, or
you can use the “pinch” gesture to close the set.
Setlists Button Takes you Back to the Setlist Chooser
Set Previews are Scrollable
Once you are ready to choose a set, simply tap on the set
you want to use. The set will immediately launch into Set
View, and you can start looking at lyrics and/or share via a
Remote session from there.
13
Section 3
Arranging Sets
Sets can be arranged in the Setlist Chooser in any order you
wish. By using simple drag and drop, you can move any set
forward or backward in the main viewing area.
Note: if you start dragging too soon, the set preview will not move. Be sure
to hold down for a full second before beginning your drag motion. The set
you are holding will come forward ever so slightly, indicating that it is ready
to be moved.
To change the order of the sets in your Setlist Chooser, start by
tapping on the Edit button on the toolbar.
The Edit Button will Start your Sets “Jiggling.”
The set previews will begin to “jiggle” (just like the icons do on
your home screen when you edit it.) Tap and hold on any set
preview for a second, then, while still holding down your finger,
drag your finger to move the set to a new spot. The other sets
will move out of your way as you slide your chosen set into its
new position.
14
Once you have that set in the correct place, you can move others
around while they are still jiggling. To end the sorting session,
simply tap the Done button on the titlebar.
The Done Button will End your Sorting Session
15
Section 4
Deleting a Set
Setlists lets you create as many sets as you like (once you’ve
The sets will continue to jiggle, allowing you to delete as many as
upgraded to the Pro version). But eventually, you may find
you like. Tap the Done button to exit Edit Mode and stop all the
yourself with old sets you wish to delete, or sets that were
jiggling.
created by mistake. No problem. Deleting is a breeze.
x
Tap this Circle to Delete a Set
To delete a set or multiple sets, start by tapping the Edit button,
just like you did for arranging the sets. Notice while the apps
“jiggle” they also have small “X” close buttons on their top left
corners. Tap the “X” button to delete the set. A dialog will appear,
asking if you are sure. If you are sure, tap Delete. if not, you can
cancel the delete with the Don’t Delete button.
16
Section 5
Duplicating a Set
Sometimes you may want to make a duplicate of one of your
exiting sets. Fortunately, Setlists makes this easy.
Just tap and hold on any set preview in the Setlist Chooser, and
a popover will appear. Choose the Duplicate button in the
popover, and a duplicate set will be added after you tapped.
Once duplicated, you can open the set and change the name, or
make any additional changes to the song order you wish.
17
Section 6
The Help Screen
The help screen is a place to get answers to your questions, or to
leave us feedback about the application. Here you’ll find a link to
this manual (so you always have a reference handy), as well as
links to some tutorial videos, our email address, our web site,
and our blog. You can replay the intro screens that appeared
when you first launched the application. You can also rate
Setlists in the App Store using the link provided here. (Positive
ratings help others find our apps and help us keep supporting
our products. If you like Setlists and wish to recommend it to
others, please consider taking the time to rate it on the App
Store.)
Also on the Help screen are links to our Facebook page and
Twitter timelines. Feel free to like or follow us to keep on top of all
the latest happenings with Setlists and our other products.
To see the help screen, tap on the help button.
18
Chapter 3
Set View
The Set View is a full screen listing of all the songs
you plan to perform in a single session. You can
add as many songs as you like to a set, though you
will have to scroll the view if you have more than
can fit on the screen at once.
Section 1
At a Glance: Set View
Set View consists of a toolbar of buttons at the top of the screen, a set title just
below that, and then the main viewing area, where all of the song titles are listed.
IN THIS CHAPTER
The toolbar buttons at the top of the screen, in order from left to right:
1. At a Glance: Set View
• Setlists Button - exits Set View and takes you back to the Setlist Chooser.
2. Entering Set View
• Add Song button - adds songs to the set. You can create a new song here
3. Choosing a Song
from scratch, add a text file or multiple files from your Google Docs, Box, or
4. Adding a Song
Dropbox account, pick a song or multiple songs from your Catalog of
5. Deleting a Song
6. Rearranging Songs
7. Renaming a Set
8. Sharing a Set
9. Printing a Set
10. Dark Mode
11. Returning to the Set Chooser
previously entered songs, or search the web for your song. Songs added here
will appear at the bottom of the current set.
• Remote Button - allows you to join another Remote Jam Session already in
progress.
• Tools Button - brings a popover up with some advanced preferences for the
application.
• Share Button - Allows you to share the set in a variety of ways to other
applications on your device, or to print the set.
• Edit Button - Allows you to make changes to the set, including renaming the
set, or reordering and deleting songs.
20
Interactive 3.1 Set View at a Glance
Toolbar
Set Title
Main Viewing Area
21
Section 2
Entering Set View
To Enter Set View from the Set Chooser, simply tap on the
the Catalog. (See the chapter on The Song Catalog for more
preview image of any set you wish to see. The set will
information about viewing lyrics directly from the catalog, rather
immediately be brought to full-screen view.
than from sets.)
Tap on a Set Preview to Launch Set View
Tap the View Menu Icon to Switch to Set View from Lyric or Split View
The Set View can also be accessed from the View menu on the
Lyrics View screen or Split View screen, if you are in a Jam
Session, and you are viewing from a set, rather than directly from
22
Section 3
Choosing a Song
To see the lyrics to a particular song in your set, tap the song title
on the Set View screen. This will launch Lyric View for the song
you selected. You can choose any song in the set at any time, so
you don’t need to follow your set precisely if you need to make a
quick change, or you like to mix things up in your sets.
When you select a particular song, a green highlight will appear
on that song title, so that even if you change views, you can still
see where you currently are in the set. The highlight also appears
in Split View to help you keep track of your progress.
The Green Highlight Indicates the Current Song
23
Section 4
Adding a Song
To add a song to the current set from within Set View, start by
tapping the Add Song button at the top left of the toolbar. A
popover will appear with several options for bringing songs into
your set.
Start by Tapping the Add Song Button
Create New Song
Use this option to create a new song from scratch. Tap the
Create New Song button, and the Song Edit View will appear on
screen. Here you can type in a title, an artist (if desired), and the
lyrics to your song. You can also copy and paste lyrics into the
lyrics area by using the standard iOS copy and paste
mechanism.
24
From Dropbox, Google Docs, or Box
Use one of these options to import text files from your Dropbox,
Google Drive, or Box into Setlists. If you already have all your
lyrics typed out on your computer, this is one of the easiest ways
to bring in all your songs at once. Simply put all the files you wish
to import somewhere within your online drive service, and they
will be accessible to import into your Setlists app.
The first time you do this, the Dropbox application will launch and
you will be asked to grant Setlists permission to access your
Note: Setlists only imports plain text files in .txt format, Rich text files in .rtf
format, and Word documents in .docx format. It will understand Chord Pro
formatting in your files if they conform to the ChordPro standard. If your files
are in some other format, such as Pages (.pages), you’ll need to save those
files into one of the other supported formats first before importing them into
Setlists. Just about every word processing program supports exporting to
other formats. See the instructions for your word processing program of
choice to find out how to do this.
Dropbox folder. If you had tapped Google Docs or Box instead,
the permission screen for that service would appear instead.
Follow the on-screen instructions for logging in.
Importing from any of these three services is very similar. For
purposes of this manual, we will show images importing from
Dropbox. The only major difference for Google Drive and Box is
the log in screen.
To add a new song or songs from Dropbox, first tap the Add
Song button on the left side of the top toolbar. Tap the Dropbox
button.
25
This login procedure should only happen once. This is for your
Once you’ve been authorized, you’ll see in the Add Song view a
security and protection. You may or may not have to type in your
listing of your file directory. Navigate to the file or files you wish to
username and password, depending on whether or not you’ve
import, tap the circle to the left of each file you wish to bring into
previously authorized the application on your device. Once you
Setlists, and then tap the Import button at the bottom of the view.
tap “Allow”, you will be taken back to Setlists, and you will now
You can import as many files as you like at a time from any single
have access to your files without needing to perform this step in
folder.
the future.
Once you’ve tapped the Import button the view will disappear
and you’ll see the new files listed at the end of your current
setlist. These files are simultaneously added to your Song Catalog
for use in other sets as well, so you won’t have to import again if
you want to place them into other sets.
Note: Because imported files are brought into the Song Catalog, if you delete them from a set, they will not be deleted from the Catalog. To completely
erase an imported file from Setlists, you will need to erase it from the Song
Catalog. See the chapter on the Song Catalog for more details.
To see the lyrics for any imported songs, just tap on the song title
to launch Lyric View. If you need to edit the title, add an artist
name, etc. you can edit the imported file the same way you edit
any other song in Setlists. See the chapter on Song Edit Mode
for more details.
From Catalog
Use this option to add a song or songs to your set that are
already in your Song Catalog. Any song you’ve previously added
to the Catalog will be available to you.
26
To add a song or songs from the Catalog, tap the Add Song
If you decide you didn’t wish to add songs from the Catalog after
button on the top toolbar. Tap the From Catalog button on the
all, you can cancel this action by tapping the Cancel button on
popover that appears.
the top toolbar.
Search Web
In addition to importing lyrics from your own text files, you can
also search the web from within Setlists to find the lyrics you
need.
The Song Catalog will appear on screen. Select the songs you
wish to add by tapping on the circles to the left of the song titles.
Any songs that already appear in the current set will be dimmed
and not available. (This is to prevent you from adding the same
song twice by accident.)
Note: Please respect the copyright of artists by using others’ lyrics in an
authorized manner. Bombing Brain assumes that you will use the Search
Web feature only to access lyrics in a legally permitted way.
To begin a web search, tap the Add Song button on the left side
of the top toolbar. Tap the Search Web button that appears in the
popover.
Once you’ve selected the songs you’d like to add, tap the Add
to… button on the bottom right of the screen. You will be returned
to the Set View, and you’ll notice the songs you’ve added are now
at the bottom of the set.
Your keyboard will appear, along with a text field and instructions
on how to use the Import from Web function.
The Add to… Button on the Bottom Adds your Selected
Songs to the Set.
Type the name of the song or the name of the group, or both, into
the text field and tap Search on the keyboard. You do not need to
add the word “lyrics” or “songs” or any other descriptors into the
27
field. Setlists will automatically add these to the query and search
A Google search results page will appear with options for sites
Google for the song you want.
that have the lyrics you wanted to import. Choose a site by
tapping on one of the links, and you will be taken to that web
page.
Find the lyrics on the page you selected and select the text using
the usual iOS selection method. (Tap and hold somewhere within
the text block with the lyrics. Let go when you see the
magnifying loupe appear. Drag the blue dots at the top and
bottom of the selected text until you have selected everything you
need.)
Type a Song Title, Artist, or Both into the Search Field.
28
Note: Some web sites are not formatted properly for iOS text selection. This
makes it difficult or sometimes impossible to get the exact selection you
need to import. This is a fault of the web site formatting, not the Setlists application. Kindly contact the lyric site and ask that they support selecting text in
iOS, or choose to get your lyrics from another site.
When you are finished with editing, tap the Done button on the
top toolbar, and you will be taken back to your set. Notice the
new song has been added to the bottom of your current setlist. It
has also been added to the Song Catalog for later use in other
sets.
If you need to select a different site to get the lyrics you want, you
can use the back and forward arrow buttons on the top toolbar to
navigate the web as you would with any browser.
Once you have the whole song selected, choose Paste into new
Song from the popup menu.
This will open Song Edit Mode, with all of your copied text placed
into the lyrics area automatically. Add the song title, the artist
name (if desired), and any other song info you like, and edit the
lyrics as you would any other song in Setlists. (See the chapter on
Song Edit Mode for more details.)
Remove any extra unwanted text that may have been copied in
accidentally along with the lyrics, and add page breaks, if
necessary.
29
Section 5
Deleting a Song
To delete a song from a set in Set View, tap the Edit button on
Alternatively, you can delete songs more quickly by simply
the top toolbar. This will enable the familiar iOS list Edit Mode.
swiping left to right or right to left on any song title and then
tapping the Delete button that appears (without having to hit the
Edit button and the minus (-) button first).
To the left of each song a red circle with a minus (-) sign will
appear. Tap the minus sign, and then tap the red Delete button
that appears to the right of the title.
Note: Deleting a song from a set does NOT delete it from the application.
The song will still be stored within the Song Catalog, so you can use it in
other sets. If you wish to delete a song entirely from the application, you
must delete it within the Song Catalog. See the Chapter on the Song Catalog for more information.
30
Section 6
Rearranging Songs
If you need to change the order of the songs in your set, you can
Tap and hold, then drag the sort icon for the song you wish to
do so very easily. Tap on the Edit button on the top toolbar of Set
move up or down. Repeat for other songs until all the songs are
View. To the right of each song title, you’ll notice sort icons,
in the order you wish. When you’re finished, tap the Done button
which look like three horizontal lines.
on the top Toolbar.
These Sort Icons are Common in iOS. Tap, Hold, and Drag
on This to Move an Item Up or Down the List.
31
Section 7
Renaming a Set
If you need to change the name of a set, you can do that easily
from within Set View. Start by tapping on the Edit button on the
top toolbar. This will enter into Set Edit Mode.
Tap on the set title, and it will become an editable field. Type in
your new name. When you are finished editing, tap the Done
button at the top right of the toolbar.
32
Section 8
Sharing a Set
Setlists allows you to share a set in a variety of ways, including
email, to any number of recipients. Send along your planned sets
to the other members of the band, so they can approve your
choices, make suggestions, or print out their own copies from
home.
You can email a set either from the Setlist Chooser or within Set
View. In Set View, start by tapping the Share button on the top
toolbar. A sharing popover will appear. Tap on the Mail button,
and a PDF of your set will be inserted into a new email message.
Type in your email recipient(s), change the subject line if you
wish, and tap send.
If you wish to share via Twitter, Facebook, or any other app that
offers sharing on your device, choose that app’s icon in the share
popover and follow the instructions.
33
Section 9
Printing a Set
Setlists allows you to print any set right from your iOS device.
Make paper copies of your sets for those in the band who don’t
yet have access to Setlists in app form.
Note: Printing requires a compatible wireless printer. Check with the manufacturer of your printer if you’re not sure whether your printer is compatible
with your iOS device.
Start by tapping the Share button on the top toolbar. In the
resulting popover, tap on the Print Button. A print preview will
appear, allowing you to make changes to the font size and the
paper type.
34
Tap the font size up and down buttons to make the font larger or
Once you’ve set your paper size and font size to the desired
smaller, if necessary. The preview will update, allowing you to see
settings, tap the print icon and choose your printer.
how your printed set will look on the page.
Tap the paper type button to change the paper size. US Letter,
US Legal, and A4 are available choices.
Print as many copies as you need from the print popover.
A Print Preview of your Set
35
Section 10
Dark Mode
If the standard white background of the set view is too bright for
Setlists will remember this preference, and use Dark Mode for all
your taste (or light show), Setlists offers a Dark Mode as an
sets once the switch has been turned on. You can always go
alternative. This mode reverses the screen to a dark background
back to the Tools menu later and switch it back off to return to
with light text, which will emit less light from your device screen.
the standard mode.
To use Dark Mode, start
by tapping the Tools
button on the top
toolbar. In the resulting
popover, tap on the
Dark Mode switch to
switch it to the “ON”
position.
Dark Set Mode
36
Section 11
Returning to the Setlist Chooser
When you are finished with a set and you wish to return to the
Setlist Chooser, you can tap the Setlists button on the left side of
the top toolbar. This will close the set. You can also accomplish
this by “pinching” the Set View closed with two fingers.
Setlists Button Takes you Back to the Setlist Chooser
37
Chapter 4
Lyric
Prompting
One of the core features of Setlists is prompting
lyrics (and optionally chords) so that they can be
easily read from across the stage. Songs can be
divided into as many pages as you like, so that you
can concentrate on one part at a time, and you can
switch to the next or previous part when you need
to very easily. The Lyric View can also be
customized to suit your visual tastes or needs.
(Some advanced customization will be covered in a
later chapter, Song Edit Mode.)
Section 1
At a Glance: Lyric View
Lyric View consists of three main components. A top toolbar that contains the
IN THIS CHAPTER
song title and artist names along with some buttons, the main lyrics area, and the
bottom console. When you first enter Lyric View, the bottom console will be hidden
1. At a Glance: Lyric View
from view, and will only appear when you tap on the screen. It will disappear again
2. Entering Lyric View
after a few seconds.
3. Advancing Pages
4. Bringing up the Console Controls
5. Changing Instruments
6. Viewing Song Information
Note: The song title and artist name can be hidden from this view as well, if desired. See the
Chapter on Song Edit Mode for more details. The top toolbar buttons, found on the right side of
Lyric View:
• Instrument Button - Allows you to adapt any included chord charts to a
7. Split View
different instrument, or to put the view into “Singer” mode, where no chords
8. Exiting Lyric View
will be shown.
• Info Button - Gives you a quick glance at the current song’s information, such
as Duration, BPM, Key Signature, Tags, or Notes.
• View Button - Use this button to switch between different viewing modes.
You can choose between Lyric and Split Views.
• Edit Button - Enters Song Edit mode. (See the chapter on Song Edit Mode
for more details.)
39
Interactive 4.1 Lyric View at a Glance
Title Bar
Main Viewing Area
Console
40
Section 2
Entering Lyric View
From Set View
From Song Catalog View
To begin prompting lyrics from the Set View, tap on the name of
To begin prompting lyrics from the Song Catalog, tap the name
the song you wish to prompt from the setlist. The song title will
of the song from the Catalog listing. The song title will highlight
highlight as you tap, and launch into Lyric View when you
as you tap, and launch into Lyric View when you release.
release.
Tap on a Song Title from the Catalog
Tap on a Song Title from a Set
41
Section 3
Advancing Pages
In the main area of Lyric View, the lyrics themselves will appear.
These lyrics are split up into “pages” based on your own
Scrolling
Songs can be set to advance via scrolling, instead of via swiping
preferences. This way, you can view just the first verse, or a
one part at a time. (See the chapter on Song Edit Mode for more
bridge, or the chorus, etc. in nice, big letters that are easy to read
details.) When this preference is set the lyrics will automatically
from a distance.
scroll at a steady pace, based on the duration you set on the
To navigate these different pages, simply swipe your finger
across the screen. To move forward one page, swipe from right
to left. To go back one page, swipe from left to right. On the
bottom of the main area you will find page indicator circles,
which will indicate to you how many pages there are in the
current song, which one you are currently on, and how many are
left.
Advancing can also be done via a connected Bluetooth device,
song. No interaction by you will be necessary.
Single Page
A third way to view your lyrics is all at once. If you set the song’s
preferences to Single mode, the text will shrink down to fit the
entire song on the screen at once. No advancing necessary,
although depending on song length, this could make the text of
your lyrics very small. (See the chapter on Song Edit Mode for
more details.)
so you won’t need to touch the device with your hands. For more
information, see the chapter on Advanced Features later in this
manual.
42
Section 4
Bringing up the console controls
To bring up the bottom console control buttons, tap anywhere in
the main Lyric View area. The console will animate up from the
bottom of the screen. After a few seconds, it will animate back
The Bottom Console Auto-Hides After a few Seconds
down to get out of the way.
The bottom console contains three buttons:
• Previous Song - Tap to go back to the previous song in the
set, or the previous song in the Catalog, if you are prompting
directly from the Song Catalog.
• Exit - Tap to exit Lyric View and go back to the Set View or
the Catalog View, depending on how you accessed Lyric
View.
• Next Song - Tap to go forward to the next song in the set, or
All three of the functions of the bottom console can be accessed
more quickly via shortcut gestures. See the section on shortcut
gestures in the Advanced Features chapter later in this guide.
Scrolling Mode
If your song is in scrolling mode, speed adjustment buttons will
appear in this console. Use them to speed up or slow down the
scrolling. (See the Song Edit Mode Chapter for more
information.)
the next song in the Catalog, if you are prompting directly
from the Song Catalog.
43
Section 5
Changing Instruments
If your song contains chord information, you can display chord
charts for those chords along with your lyrics. (See the section
on Chords later in this manual for more details on adding and
displaying chords in your songs.) Using the Instrument menu,
you can change the chord charts to represent many different
instruments, including Guitar, Guitar with Drop D tuning, Banjo,
5-string Banjo, Ukulele, Baritone Ukulele, and Mandolin.
Tap on the Instrument icon on the top toolbar, and a menu of
instruments will appear. Tap on the instrument you want, and the
chord charts will instantly update.
If you choose the microphone, or “singer” mode, the chord
charts will disappear entirely. Use this if you do not play an
instrument in your group, and instead just want to see the lyrics
with no distractions.
44
Section 6
Viewing Song Information
If you need a quick glance at the current song’s Duration, Tempo,
Key Signature, Tags, or Notes, you can tap the info icon. A
popover will appear, listing this information for you.
Once you are done, tap anywhere to dismiss the info popover. Or
tap the Edit Song button to make changes to the info for the
current song.
45
Section 7
Split View
Sometimes you may wish to see the lyrics to your song, and also
For this reason, Setlists contains a Split View, which splits the
see which songs are coming up next in the set, or notes you’ve
screen area to show you lyrics and the set and/or notes at once.
added to a song for reference.
Note: Split View is only available on iPad devices. The iPhone and iPod
touch screens are too small to present all of this information at once effectively.
Entering Split View
To enter Split View from Lyric View, tap the View button on the
top toolbar. A popover will appear, showing options for Lyric View
and Split View. Your current view will be highlighted. Tap the Split
View button to change over to Split View.
Tap Split View in the View Popover.
46
Your lyrics will appear, along with the set listing and notes.
Depending on the orientation of your device, the split areas will
be arranged with the lyrics on top and the set and/or notes on
bottom (portrait mode) or the lyrics on the left and the set and/or
notes on the right (landscape mode).
You can navigate the lyrics via the same swipes and gestures in
regular Lyric View. (See the chapter on Lyric View for details.) You
can also access the Song Edit Mode, jump to the next or previous
song, etc. directly from Split View.
For the set portion of the screen, the green highlight indicator will
still appear, showing you which song is the current song on the
See less of one area, more of another, by adjusting the split.
lyric side. If the setlist runs off your screen, you can scroll the list
vertically to see any additional songs.
Adjusting the Size of Each Area
Setlists will remember your preferred placement for future visits to
Split View.
You can adjust where the screen splits to make the lyrics larger or
smaller, or to see more or less of the set and notes. Drag the
adjustment icons up or down or left and right. Once you release
your finger from the screen, the lyrics will readjust in size to fit the
new measurements of your split.
Viewing Set, Notes, or Both in Split View
You can customize which information gets seen in the secondary
part of your Split View to show either the upcoming songs in your
set, custom notes that you have taken for the current song, or
both.
These adjustment icons can be dragged.
47
Notes only in Split View
Set showing in Split View without Notes
By tapping on the secondary adjustment icon between the set
and notes, you can toggle the notes or set off. By dragging this
icon, you can adjust how much of the view is dedicated to the set
vs. the notes. Setlists will remember where you last placed this
Exiting Split View
There are many ways to exit Split View. One way is to tap on the
View button on the top toolbar and select Lyrics View.
Alternatively, you can tap anywhere on the lyrics side of the
screen and tap the Exit button from the console that animates up
from the bottom of the screen. This will return you to Set View.
split, including whether or not you’ve hidden the notes or set, in
future visits.
For more information about how to add notes to your songs (for
extra information, such as stage directions, reminders, etc., see
the Other Song Information section in the Chapter on Song Edit
Mode later in this manual.
Switch to Lyrics View with the View Menu
You can also “pinch to close” on the lyrics portion of the screen
to go back to Set View.
48
Section 8
Exiting Lyric View
To Exit Lyric View, you can tap the main Lyric View area to bring
up the console, then tap the Exit Button. Alternatively, you can
change Views using the View button, or you can use the “pinch
to close” gesture to return to the Set View or Song Catalog,
depending on how you navigated to Lyric View.
Tap the Exit button on the bottom console to Exit to Set
View or the Song Catalog
49
Chapter 5
Song Edit
Mode
Editing a song is as easy as everything else in
Setlists. From one simple screen you can add an
artist name, change the title, add duration, tempo,
key signature, tags, or notes, add chords, change
the lyrics, change where the pages break, print your
lyrics, and alter the prompting settings. You can
even save default settings or apply your default
settings to any song.
Section 1
At a Glance: Song Edit Mode
Song Edit Mode consists of three main components. A toolbar at the top of the
IN THIS CHAPTER
screen which contains a Back Button (to return to the Lyric View or Catalog), a
1.
At a Glance: Song Edit Mode
Preview button, a Share button, and a Tools Button, the text editor area, which
2.
Entering Song Edit Mode
3.
Song Title
4.
Artist Name
5.
Other Song Information
6.
How Page Breaks are Determined
7.
Adding Chords
8.
Rich Text
9.
Preview Pane
contains fields for the song title, the artist name, other song info, and the song’s
lyrics and chords, and the settings area, where the custom settings for this song
are set.
10. Settings
11. Sharing Lyrics
12. Printing Lyrics
51
Interactive 5.1 Song Edit Mode at a Glance
Toolbar
Settings
Text Editor
52
Section 2
Entering Song Edit Mode
To edit a song from either the Set View or Catalog View, simply
double-tap on a song title. See the section on Gestures in the
Advanced Features chapter later in this guide for more details.
To enter Song Edit Mode from either Lyric or Split View, tap on
the Edit button on the right side of the top toolbar. The view will
“flip” over into Edit Mode.
The Edit Button
53
Section 3
Song Title
Edit the song title by tapping on it. A cursor will appear, and the
built-in keyboard will come up from the bottom of the screen.
When finished editing, you can tap the Return key on the
keyboard, or tap the keyboard dismiss key to make the keyboard
disappear.
The Keyboard Dismiss Key is on the Bottom Right of the
iPad’s On-screen Keyboard.
For imported songs, the song title will be auto-populated with the
file name from the text file you imported. If you name your files
well, you will not have to edit this field often.
Note: All songs in Setlists MUST have a song title. If you clear out the title
field and attempt to move on to another field or cancel editing, a dialog will
appear, informing you that you cannot proceed without supplying a title. The
Song Catalog depends on this title field to keep files organized.
54
Section 4
Artist Name
Use the artist name field to keep your songs better organized in
the Song Catalog. Filling this field is optional, but when you fill it
with the correct artist name, you will find sorting the Catalog by
artist more useful.
Tap on the artist name field to edit the artist. Once you have
added some artists in the Song Catalog, you will find on the iPad
that as you type, the artist field will offer some “auto”
suggestions for you. This is a great way not only to save time
typing but also to assure that your artist names stay organized.
Tap the suggested artist name, and the field will be populated
with the complete and correct name, reducing the likelihood of
typos, which lead to multiple different entries for the same artist.
When finished editing, you can tap the Done key, or tap the
keyboard dismiss key to make the keyboard disappear.
55
Section 5
Other Song Information
In addition to Song Title and Artist Name, Setlists allows you to
store additional information about your songs. All of this
Song Duration
This field is a simple time measurement of the length of the song,
information is optional, but taking the time to utilize these
measured in hours, minutes, and seconds. (Yes, hours—some of
additional data points may make constructing sets and
you prog rockers have songs that long!)
organizing your catalog more efficient.
All of this additional information can be entered from Song Edit
Mode by tapping on the individual details just below the Artist
Name. The resulting popovers will contain each of the following
fields. You can use as many or as few of these categories as you
like.
Tap the details beneath the artist name
Adding this duration information to your songs will make
constructing sets of a particular length much easier. When
selecting songs to be added to a set, if the selected songs have
a duration other than 00:00:00, Setlists will automatically
calculate the amount of time for all the selected songs combined.
56
Also, Setlists will track how long each of your sets are, so you will
To adjust BPM, use the slider in the popover to speed the tempo
know how much time to cut or add to your sets.
up or slow it down. Alternatively, you can use the numeric
keyboard to type a precise tempo. Lastly, you can use the “Tap
Note, accurate total duration calculations will only occur when all songs in
the set have non-zero durations in this field.
To set the duration of your song, simply turn the wheels of the
time picker to the desired hours, minutes, and seconds. (You can
get this information easily from your iTunes library if the song is in
your collection.)
Tempo (BPM)
Tempo is represented in Beats Per Minute (BPM). You can use
this information to add songs to a set that are in similar tempos,
Tempo” button at the bottom of the popover to tap out the tempo
of the song. Simply tap three or four times (or more) on the Tap
Tempo button while humming the song to yourself, or tap along to
it as it plays on your stereo. The BPM for the song will be set
according to the last two taps.
Key Signature
The Key Signature field allows you to set a key signature for your
songs, so you can choose songs in similar keys, or in relative
major/minor keys, when creating a set.
for smoother dance transitions.
57
Tap on the Key Signature icon, and a special keyboard will
Notes will appear in Split view if you elect to show them. See the
appear. This keyboard will look like a single octave of a piano. Tap
section on Split View for more information.
on the piano key of the key you wish to use as your dominant. If
you wish to switch to a minor key, rather than major, tap on the
“min” selector above the piano keys. If your key signature is on
one of the black keys, Setlists will assume the sharp (#) rather
than the flat value. You can change to a flat key (D-flat, rather
than C-sharp, for instance) by tapping on the flat selector above
the piano keys.
Tags
Tags are useful for adding additional categories for your songs. Is
the song a ballad, an up-tempo number, suitable for dancing,
etc? You can also use tags to mark certain songs as needing a
particular tuning, that are sung by a particular singer in your
group, that require an alto rather than a tenor sax—pretty much
whatever you like.
To create tags for a song, tap on the tags icon and begin typing.
Separate tags with commas if you wish to use multiple tags.
Notes
The last bit of additional info is a general notes field. Use this field
to add any extra notes you wish to your song. Stage directions,
capo positions, effects notes, choreography, etc.
To add notes, simply tap on the notes icon and begin typing. Your
notes will be saved to this particular song.
58
Section 6
How Page Breaks are Determined
The text field below the additional information icons is where
lyrics and chords are entered. Tap anywhere inside this field, and
you can make any necessary changes to your text. Correct
misspellings, remove unwanted repeating parts, add extra
repeating parts, etc.
For dividing your lyrics into separate “pages,” Setlists uses a
very simple method of placing a page break wherever there is a
blank line. This is incredibly convenient, considering that most
people (and most lyrics sites) tend to use blank lines to divide up
the sections of the song. It also makes it a very simple matter to
change where these page breaks occur. If you have a particularly
long verse, for example, you can force that verse to be split into
two pages by simply adding a blank line somewhere in the
middle.
Note: You can force Setlists to show the entire song on a single page by
turning on the Single Page or Scrolling option in the Advance setting. See
the section on Settings later in this chapter. When either of these options
are set, the editor will not show the page separators.
59
For particularly short sections of the song, one, two, or three line
You’ll find that most imported songs end up with the page breaks
passages, you can remove the page breaks to put a few of those
in their natural places. At the same time, when you do need to
sections together on the same page. This will reduce the need to
make adjustments, Setlists allows you to do this so quickly that
turn pages as often. To force Setlists NOT to break a blank line
you can make changes even just before a performance.
into a separate page, simply type a blank space on an empty line.
The page break will be removed, and the two sections will now
appear on the same page.
As an added bonus, you can see a visual preview of how any
page will look while prompting by tapping on the page number
that appears at the right of the page break indicator.
Type a space on an otherwise blank line, and the
page break will disappear.
The current page breaks are shown with dotted lines in Edit
Mode. These lines do not appear in Lyric View, and they can not
be dragged up or down. They are simply a visual indicator of
where your blank lines are.
60
Section 7
Adding Chords
Setlists has the ability to show chords during your lyric
prompting. If you are a singer who also plays an instrument, or
other members of the band need this additional information, you
can add it to the songs in your song catalog.
Chords can be either added manually, or they can be imported
via the ChordPro format. If your songs already contain chord
information in ChordPro, you don’t need to do anything. The
chords will appear here in Edit Mode and during performance in
Live View, unless you tell Setlists otherwise.
If you need to add your chords manually, you can do so easily as
well. Start by tapping on the word or letter or space where you
want the chord to appear. (Generally, you’ll want the chord to be
placed right above the word that is being sung when the chord
change is played.) Once the cursor is in the right place, either tap
again to bring up the contextual menu, or tap the Chord icon on
the keyboard’s toolbar. If you bring up the contextual menu, tap
Insert Chord…
A Chord selection popover will appear. From here, you can start
constructing a new chord, or choose from the most recent
chords you’ve created in the past. (This will make it easier for
repeat sections that have the same chord changes over and
over.)
61
Adding a New Chord
If the chord you need isn’t already on the recently used list, tap
the New… button at the top of the chord popover. You’ll start with
the root note of the chord. By default, sharps are listed, but you
can easily choose the flat equivalent by changing the sharp/flat
selector at the top of the view.
Note: If you already have the chord you need at any point in this process
(say, you just need a C major chord, and you’ve already chosen C as your
root) you can simply tap on the Set Chord button at the bottom of the popover and skip the more advanced chord steps.
After the type, you can choose an alternate bass note for your
chord, if needed.
Once you’ve selected your root note, you now can choose the
Once you have the exact chord you need, tap on the Set Chord
type of chord. Major, minor, +11, sus, dim—whatever you need,
button, and the chord will be inserted above the area you
it’ll appear on this scrolling list.
selected in your text.
62
Removing Chords
If you make a mistake, or just want to remove a chord from the
song, you can tap on the chord representation in your text, and
then tap Remove Chord on the bottom of the chord popover.
63
Section 8
Rich Text
Setlists offers rich text formatting, for those times when you need
You can also use the indent buttons to indent certain lines or
certain words in your lyrics to stand out. Maybe you have a line
passages. Again, this may be effective for distinguishing between
that is for background singers only, or you are doing a duet, and
parts intended for different singers.
want different lines sung by different lead singers. Or you just
need a quick way to remind yourself to emphasize a certain word
or phrase. Rich text can help you with this.
To apply rich text formatting to any part of your text, first select it
using the usual iOS selection method. Once you have the text
you wish to format, choose either Bold, Italic, Underline, or pick a
different color from the toolbar above the keyboard, and the text
will appear in the new format in your editor and while prompting
in Lyric view.
64
Section 9
Preview Pane
The Preview Button near the top right of the toolbar allows you to
preview the current song settings before exiting Song Edit Mode.
This is very convenient for making sure your color and size
settings are to your liking.
If the Advance setting is set to the “Paged” option (see Settings
below), you can also preview a specific page by tapping on the
page number at the right of each page break separator in the
editor.
65
Section 10
Settings
To the right of your lyrics in Song Edit Mode you’ll find the
settings area. (On an iPhone, tap the Settings button on the top
right of the toolbar.) These settings options determine how the
Text Options
Text Options includes a number of settings for your main lyric
text.
song will appear in lyric mode.
Display
Turn the Show Artist/Title switch to OFF if you’d like to remove
the song title and artist name from the top of the screen while
prompting. This will reduce distraction for some singers who
want to keep the screen as focused on the lyrics as possible.
Font
Tap the Font name, and a list of fonts will appear, allowing you to
Lyric View with Show Artist/Title Set to OFF
choose a font for your lyric text. Setlists includes a large
selection of different fonts to suit your preferences. Choose a
66
font by tapping on it, and the text area will automatically update
Justification
to reflect your choice.
Setlists can present your lyrics justified left, right, or center. Make
your selection and the text area will automatically update.
Justification can be different for each song.
Text Color
Tap the text color setting to change the color of your text. Several
choices of color are available to fit your color taste. When you
make a color selection, the text in the text area will auto-update
to reflect your choice.
Font Size
For font size, tap the plus button to increase the size and the
minus button to decrease the size.
Because Setlists will “auto fit” the text into a particular page, you
will find that sometimes the font size you choose here will be
overridden to make all the lyrics fit. For this reason, you should
think of the font size you set here as more of a guide to how big
the text can be at maximum. You can avoid the font getting
shrunk by adding more page breaks, or by setting your default
size to a smaller one, so that all the lyrics fit onto every page.
Note: This text color is for the default text in your song. If you make color
changes using the rich text toolbar, those areas that you have custom colored will remain that color, no matter which color you choose for the song
overall.
If you don’t mind some pages having smaller text to fit more lines,
the automatic settings will probably suit you just fine.
67
Background
This setting determines the color of the background behind your
screen), and Scrolling (where the text will be auto-scrolled at a
steady pace across the screen automatically).
lyrics text. Choose a color that offers good contrast with your text
color setting for maximum readability. If you like dark text, choose
a light background, or vice versa. Tap any color available to see
the choice reflected in the text area.
Experiment with colors to find the optimal choices for your needs.
Try to experiment in the places where you will be playing live, as
the lighting in your practice studio may be vastly different from
the venue where you perform.
Paged
Paged is the default method of advancing your lyrics. Swipes to
the left and right on the screen will take you to the previous or
next part of the song. Optionally, you can attach a Bluetooth
device to Setlists and advance with your feet, or with a handheld
device. This method offers the most precision and control over
what you see on the screen. The lyrics and chords are not in
perpetual motion, so they are easier to read, and you never have
to worry about the lyrics disappearing on you automatically, as
with scrolling. If one section of a song is longer than another, just
wait until you are ready to advance.
Single Page
When Single Page is ON, Setlists will ignore all empty lines as
Advance
The advance popover is where you set your preference for how
you’d like your lyrics to be advanced. You can choose between
Paged (the default, where you view one section of the song at a
time), Single (where all the text is shrunk down to fit onto a single
page breaks for this song and present all the lyrics on a single
screen. Font size will be reduced to fit, so if your song has a lot of
lyrics, the size may get quite small. This method offers the
convenience of never having to advance your lyrics at all, but the
downside is that if you have a lot of lyrics or chords, the text can
get too small to read effectively on your device’s screen.
68
Scrolling
Scrolling your text gives you the ability to advance your text
automatically, hand and foot free, but the tradeoff is you lose
precise control over which text is seen when. Because the scroll
is at a constant pace, long passages such as guitar solos, or a
drummer that is nervously playing faster than you rehearsed the
song can often lead you in a situation where your lyrics are
leaving the screen too quickly. You can swipe on the text area to
move back if the lyrics have moved off too quickly, or you can
readjust your scrolling speed using the bottom console buttons,
but then you are back to using your hands.
By default, your text will scroll according to the duration you set
for the song. The longer the duration, the slower the text will
Color
scroll. If you make speed adjustments using the bottom console,
The color setting controls what color the name and/or diagram of
those speed adjustments will be remembered for the next time
the chord appears. Use this in conjunction with the optional
you launch that song.
bubble color to make your chords appear the way you like.
Chords
Appearance
The Chord Options panel gives you many settings that affect how
your chords will appear in Lyric View.
Show Chords
Use this switch to turn chord display on or off. If you have chords
in the song but don’t wish to see them during performance,
simply turn them off. They will remain in your lyrics file, but you
won’t see them. In this way, you won’t need to erase the chords,
which you may need later for reference.
The appearance selector determines whether you want your
chords to appear standalone or inside bubbles. Bubbles take up
more space, but they can help chords stand out better in some
configurations
Bubble Color
If you choose Bubble for your Appearance, you can set the color
of the bubble here. Be careful not to set your bubble and chord
colors to similar colors, as it will make them hard to read.
69
Show Diagrams
Save Default
The Show Diagrams switch determines whether chords appear as
This button will take all the settings you’ve chosen for the current
simple text, or with chord fingering diagrams. The diagrams take
song and make them the “default” for all new songs and songs
up more room, but for players who need them, they can be very
that are currently set to the default mode. Any songs for which
valuable.
you’ve customized the settings will not be changed, but instead
Instrument
will obey the choices you’ve made on those individual songs.
Choose the instrument for which you wish the chord diagrams to
be displayed. You can choose from several stringed instruments,
including Guitar, Guitar in Drop D tuning, Banjo, 5-string Banjo,
Ukulele, Baritone Ukulele, and Mandolin. This will be the default
instrument whenever you launch the song. You can change
instruments during performance using the instrument menu in
Lyric View.
Diagram Size
You can view your chord diagrams in two sizes, large and small.
Select the one best suited for your eyes and screen size.
Use Default
Use this button to override any custom settings you’ve made on a
particular song and instead change them all to the default that
you’ve previously set. Using this button, you can set up a song to
your preferred font, size, title, and color choices, etc. with a single
tap.
70
Section 11
Sharing Lyrics
You can share the lyrics of your songs with other members of the
band or whoever you like via the Share button on the top toolbar
in Song Edit Mode.
Note: Please use lyrics in a legal and responsible manner. Publish and
share only lyrics you are legally permitted to share.
Tap the Share icon on the top toolbar, and a popover will appear
with several sharing options. If, for instance, you wish to email
your lyrics to a bandmate, tap on the Mail icon, and a new email
will appear with your lyrics embedded. Other apps that allow for
text sharing will also appear in this menu.
71
Section 12
Printing Lyrics
You can print the lyrics to any song in your Song Catalog. To
start, tap on the Share button on the top toolbar in Lyric View or
Song Edit Mode.
Note: Printing requires a compatible wireless printer. Check with the manufacturer of your printer if you’re not sure whether your printer is compatible
with your iPad.
In the resulting popover, tap on the Print Button. A print preview
will appear, allowing you to make changes to the font size and
the paper type.
A Print Preview of your Song
72
Once you’ve set your paper size and font size to the desired
settings, tap the print icon and choose your printer.
Print as many copies as you need from the print popover.
73
Chapter 6
The Song
Catalog
The Song Catalog is a database containing all the
songs you’ve placed into Setlists. Think of it as the
equivalent of your iTunes library, only for lyrics
rather than audio files. You can think of your Setlists
as being similar to Playlists.
Section 1
At a Glance: The Song Catalog
Just like with your iTunes Library and Playlists, you can put the same song from
IN THIS CHAPTER
1. At a Glance: The Song Catalog
the catalog into multiple sets. And you can remove songs from a set while still
retaining them for use in other sets.
2. Entering the Song Catalog
If you’re the kind of performer who doesn’t create pre-determined sets, but rather
3. Sorting Songs
improvises out of a large songbook, you can use the Song Catalog to prompt
4. Searching the Catalog
5. Choosing a Song
6. Adding Songs
7. Exporting Songs
8. Deleting Songs
9. Adding Songs to a Set
lyrics directly. You can take requests with ease, as the Catalog can easily be
browsed or searched to find the song you need quickly.
Once you switch over to Song Catalog View, you’ll notice that the screen is split
into four main components. A top toolbar with some buttons, a search bar (for
searching the songs within your catalog) the main area, which contains all your
song entries, and a bottom toolbar, which contains a sorting selector.
The buttons on the top toolbar, from left to right:
• Setlists Button - exits the Song Catalog and takes you back to the Setlist
Chooser.
• Add Song button - adds songs to the catalog. You can create a new song
here from scratch, add a text file or multiple files from your Google Docs,
Box, or Dropbox account, add files from your iTunes on your computer, or
75
search the web for your song. Songs added here will
appear in the Catalog and be available to add to sets.
• Remote Button - allows you to join a remote jam session,
so you can view songs prompted from the Catalog of
another member of your group. Several devices can join in
on the same session, so everyone in the band with an iOS
device and a copy of Setlists can join in and stay in sync.
• Tools Button - Allows you to change some global
advanced settings for the application.
• Help Button - takes you to the help screen, where you
can find links to this manual, video tutorials, contact
information for giving us feedback or reporting issues, our
latest blog articles, Social Media links, and more.
• Edit Button - use this to enter Edit Mode, where you can
delete songs or add songs to an existing set, multiple
existing sets, or a new set.
76
Interactive 6.1 The Song Catalog at a Glance
Toolbar
Search Bar
Main Area
Bottom Toolbar
77
Section 2
Entering the Song Catalog
You enter Song Catalog View from the Setlist Chooser by tapping
on the Song Catalog button on the Setlist Chooser’s top toolbar.
The Song Catalog Button
78
Section 3
Sorting Songs
The bottom toolbar contains a sorting selector, which allows you
When sorting by artist, songs will be listed in song title
to organize your songs by artist name, song title, duration,
alphabetical order within each artist grouping.
tempo, or key signature. Tap the sort icon, and then tap the
mode you’d like to use for sorting in the resulting popover, and
the main view will update, showing your songs in the correct
You can also choose ascending or descending order for your
sorting.
order. Switch to a different sort mode at any time by tapping
See the chapter on Song Edit Mode for more details about how
another option.
to add artist names and other additional info to your songs.
The Sort Icon on the Bottom Toolbar
Sorting by artist or any of the other additional information types
works much more effectively if you add this information to each
song in your Song Catalog. This takes a little extra work, but it
helps to be able to group songs by artist for song selection, or to
choose songs of a certain length, in a certain key, or in similar
tempos.
79
Section 4
Searching the Catalog
As your Catalog grows, you may end up with so many songs that
all non-matching songs will be eliminated. So even with just a
it becomes cumbersome to scroll through all of them. Searching
few taps, you can often get to the song you need very quickly in
for a particular song, therefore, can sometimes get you to the
a large Catalog.
right song much faster.
Note: If you can’t see your search field, scroll back to the top of your catalog
listing. The search bar will disappear from view as you scroll down the page.
Once you find the song you want, you can launch it by tapping
on the title, or edit it by double tapping.
If you are in Song Catalog Edit Mode you can use search to
delete and add songs to a set as well. See Deleting Songs and
Adding Songs to a Set later in this chapter for more details.
The Search Field Will Help with Large Catalogs
Tap in the search field box and begin typing the name of the
song, the artist, or any of the tags or notes you may have added
to your songs. Immediately, as you type, songs containing the
words you type, in any of these fields, will appear on the list, and
80
Section 5
Choosing a Song
Choosing a song is as simple as tapping on its name in the
listing. Tapping once will launch the song into Lyric View, making
it easy to prompt during a live performance directly from the
Catalog.
The Song Title Highlights When you Tap it
Using the double-tap gesture, you can launch a song
immediately into Song Edit Mode, allowing you to quickly make
changes to songs in your Catalog. See the Section on Gestures
in the Advanced Features Chapter for more Information.
81
Section 6
Adding Songs
To Add a new song to the Song Catalog, start by tapping the
Add Song button on the left side of the top toolbar. A popover
will appear, showing you four options.
The Add Songs Button
Create New Song
Use this option to create a new song from scratch. Tap the
Create New Song button in the Add Song popover. The Song
Edit View will appear on screen. Here you can type in a song title,
an artist (if desired), and the lyrics to your song. You can copy
and paste lyrics into the lyrics area by using the usual iOS copy
and paste mechanism.
82
From Dropbox, Google Docs, or Box
Use one of these options to import text files from your Dropbox,
Google Drive, or Box into Setlists. If you already have all your
lyrics typed out on your computer, this is one of the easiest ways
to bring in all your songs at once. Simply put all the files you wish
to import somewhere within your online drive service, and they
will be accessible to import into your Setlists app.
The first time you do this, the Dropbox application will launch and
you will be asked to grant Setlists permission to access your
Note: Setlists only imports plain text files in .txt format, Rich text files in .rtf
format, and Word documents in .docx format. It will understand Chord Pro
formatting in your files if they conform to the ChordPro standard. If your files
are in some other format, such as Pages (.pages), you’ll need to save those
files into one of the other supported formats first before importing them into
Setlists. Just about every word processing program supports exporting to
other formats. See the instructions for your word processing program of
choice to find out how to do this.
Dropbox folder. If you had tapped Google Docs or Box instead,
the permission screen for that service would appear instead.
Follow the on-screen instructions for logging in.
Importing from any of these three services is very similar. For
purposes of this manual, we will show images importing from
Dropbox. The only major difference for Google Drive and Box is
the log in screen.
To add a new song or songs from Dropbox, first tap the Add
Song button on the left side of the top toolbar. Tap the Dropbox
button.
83
This login procedure should only happen once. This is for your
Once you’ve been authorized, you’ll see in the Add Song view a
security and protection. You may or may not have to type in your
listing of your file directory. Navigate to the file or files you wish to
username and password, depending on whether or not you’ve
import, tap the circle to the left of each file you wish to bring into
previously authorized the application on your device. Once you
Setlists, and then tap the Import button at the bottom of the view.
tap “Allow”, you will be taken back to Setlists, and you will now
You can import as many files as you like at a time from any single
have access to your files without needing to perform this step in
folder.
the future.
Once you’ve tapped the Import button the view will disappear
and you’ll see the new files listed in your catalog. Depending on
how much information is included in the file, the songs may
appear in a different location than you are expecting. (If you don’t
have artist information in the file, for instance, the file will be listed
under UNKNOWN ARTIST if you are sorting by artist.) You can
add the necessary information later to make your catalog more
data rich and make creating sets easier.
To see the lyrics for any imported songs, just tap on the song title
to launch Lyric View. If you need to edit the title, add an artist
name, etc. you can edit the imported file the same way you edit
any other song in Setlists. See the chapter on Song Edit Mode
for more details.
Search Web
In addition to importing lyrics from your own text files, you can
also search the web from within Setlists to find the lyrics you
need.
84
Note: Please respect the copyright of artists by using others’ lyrics in an
authorized manner. Bombing Brain assumes that you will use the Search
Web feature only to access lyrics in a legally permitted way.
To begin a web search, tap the Search Web button that appears
in the Add Songs popover.
Your keyboard will appear, along with a text field and instructions
on how to use the Import from Web function.
Type a Song Title, Artist, or Both into the Search Field
Type the name of the song or the name of the group, or both, into
the text field and tap Search on the keyboard. You do not need to
add the word “lyrics” or “songs” or any other descriptors into the
field. Setlists will automatically add these to the query and search
Google for the song you want.
85
A Google search results page will appear with options for sites
that have the lyrics you wanted to import. Choose a site by
tapping on one of the links, and you will be taken to that web
page.
Find the lyrics on the page you selected and select the text using
the usual iOS selection method. (Tap and hold somewhere within
the text block with the lyrics. Let go when you see the magnifying
loupe appear. Drag the blue dots at the top and bottom of the
selected text until you have selected everything you need.)
Note: Some web sites are not formatted properly for iOS text selection. This
makes it difficult or sometimes impossible to get the exact selection you
need to import. This is a fault of the web site formatting, not the Setlists application. Kindly contact the lyric site and ask that they support selecting text in
iOS, or choose to get your lyrics from another site.
If you need to select a different site to get the lyrics you want, you
can use the back and forward arrows on the top toolbar to
This will open Song Edit Mode, with all of your copied text placed
navigate the web as you would with any browser.
into the lyrics area automatically. Add the Song Name, the artist
name (if desired), and edit the lyrics as you would any other song
Once you have the whole song selected, choose Paste into new
in Setlists. (See the chapter on Song Edit Mode for more details.)
Song from the popup menu.
Remove any extra unwanted text that may have been copied in
accidentally along with the lyrics, and add page breaks, if
necessary.
86
Paste Your Lyrics into a New Song with One Tap
When you are finished with editing, tap the Done button on the
top toolbar, and you will be taken back to the Catalog. Notice the
new song has been added under “Unknown Artist”, if you did not
add an artist name.
87
Section 7
Exporting Songs
Setlists is capable of exporting your songs to a variety of places,
including Dropbox, Google Drive, and Box. In addition, you can
export to iTunes File Sharing, in order to transfer the songs to
your computer running iTunes.
To export a song or a group of songs, first tap the Edit button to
place the Catalog into edit mode. Select all the songs you want
by tapping on the white circles to the left of their names. (Use the
search feature to find them if you like.)
If you need to log into the service, follow the on-screen
instructions for doing so. (Once you are logged in, it should not
ask you to log in again every time.) Next, navigate to the folder
on the service’s drive you wish to export to, and tap Export. The
song files (with all of their settings and formatting) will be sent to
The Export Button
the corresponding folder on your service of choice.
Next, tap the Export button on the bottom toolbar. Tap on the
service of choice. (In the pictures here, we’ll be using Dropbox,
but the process is similar for other services.)
88
Section 8
Deleting Songs
To Delete songs from your Song Catalog, start by tapping the
sure you want to delete the songs, tap Delete. The songs will be
Edit button on the right side of the top toolbar. This will place the
removed permanently from your Catalog.
Song Catalog into Edit Mode.
The Delete Button
Start by Tapping the Edit Button
You will see white circles next to the song titles in your Catalog’s
main view area. Select the song or songs you wish to delete by
tapping on the circles next to the corresponding titles. The circle
will be filled in white, with a checkbox to indicate which songs
have been selected. You can use the search field to find the
Note: Deleting songs from the Catalog will remove those songs from any
sets in which they were placed. This action is NOT undoable.
If you decide you don’t wish to delete any songs after all, you
can tap the Cancel button in the dialog box. Exit Edit Mode by
tapping the Done button on the top toolbar.
songs you need, if desired.
Once you’ve selected all the correct songs for deletion, tap the
Delete button on the bottom left. You will see a dialog box,
confirming that you wish to delete the selected songs. If you are
89
Section 9
Adding Songs to a Set
The Song Catalog can be used to quickly add a song or songs to
one or more existing sets. Or, you can choose a song or a group
of songs and create a new set directly from within the Song
Catalog.
Start by tapping the Edit button on the right side of the top
toolbar. This will place the Song Catalog into Edit Mode.
Start by Tapping the Edit Button
Tap the Corresponding Circles to the Left of Song Titles
You will see white circles to the left of all the song names in the
The circle will be filled in white, with a checkmark to indicate
main Catalog listing. Select the song or songs you wish to add
which songs have been selected. You can use the search field to
by tapping on a song’s corresponding circles.
find the songs you need, if desired.
Notice once you’ve selected some songs, if you’ve added
duration information to those songs, Setlists will automatically
90
calculate the total time of your selection, so you know how much
time you’re adding to your set (iPad only).
Once you have all the songs you want selected, tap the Add to
Setlist button on the right side of the bottom toolbar. A popover
will appear.
Add to an Existing Set
If you wish to add the selected songs to an existing set or
multiple existing sets, you can tap the circles next to the set
names in the popover. Scroll down if necessary to see the set or
sets you want. Once you’ve selected all the sets you want, tap
the Add Songs button, and the songs will be added to all of the
sets you’ve selected. The songs will appear at the bottom of
those sets. Reorder the songs as needed using the Set Edit
Mode. See Rearranging Songs in the Set View chapter for more
details.
The Add to Setlist Button
Create a New Set
If you wish to add the selected songs to a new set, tap the New
button on the top left of the popover. You will be asked to name
the Set. Once you’ve typed a name for the set, tap Add Setlist.
This creates the set, but it doesn’t add your selected songs yet.
Add more new set names if you want to add the selected songs
to multiple sets. When finished, tap on the names of any of the
sets you wish to add these selected songs, then tap the Add
Songs button.
Your newly created set will be available to you from the Set
Chooser when you are ready to use or edit it. A dialog will appear,
asking if you wish to switch directly to the Setlist Chooser. If you
want to stay in the Catalog, tap OK.
91
Chapter 7
Advanced
Features
Setlists offers numerous advanced features for
users who wish to get the most out of the
application. Some, like multi-touch gestures and
Foot Pedal control, help save you time or help you
focus on your live performance. Others, like Remote
Jam Sessions, allow you to use Setlists to keep all
the performers in your group in sync. Read on if
you’d like to take Setlists to its maximum potential.
Section 1
At a Glance: Advanced Features
Multi-Touch gestures are part of what make the iOS user interface special. Most of
us are familiar with the basic swipes, taps, and drags used in most applications,
IN THIS CHAPTER
1. At a Glance: Advanced Features
2. Gestures
3. Remote Jam Session
4. Wireless Device Control
but when you add in double-taps, pinches, and two-finger swipes, you can get a
lot more done with fewer interactions.
We believe that these advanced gestures should be optional, however. Everything
you learn about in the gesture section of this chapter can be accomplished in
other ways, albeit with more steps. But those of you who commit at least some of
the gestures to memory will find Setlists even more efficient to use.
5. External Displays
6. Apple Watch
7. The Tools Menu
Another advanced feature you’ll learn about in this chapter is the Remote Jam
Session functionality. If you perform with more than one person in your group,
you’ll find this indispensable. Keeping everyone in the group on the same page,
with lyrics and upcoming songs was one of the core reasons why we made
Setlists in the first place. If you’ve gotten this far in the manual and you’re pretty
comfortable with using Setlists solo, you’ll find that getting a Jam Session with
your group members will be very easy. It makes for a reasonably low-cost solution
to prompting lyrics to groups of various sizes.
If your stage set-up is bigger than the local bar, chances are you’re already using
some sort of professional display system for your band’s audio-visual needs.
93
Setlists taps into your existing reflector hardware with ease. Take
the power of Setlists and broadcast it across your giant arena
stage.
Now that so many of us are wearing watches again, we thought
we’d take advantage of it by building support for Apple Watch
right into Setlists. You’re not going to want to be reading lyrics
that way, of course, but for a quick glance at what song is coming
next, it’s very convenient.
Finally, the Tools menu is where you will find all of the global
settings that make Setlists perform just as you like. From Font
adjustments, to Dark Mode, to custom mapping for external
remotes, to syncing between your own personal iOS devices, the
Tools menu is the place where the most advanced users of
Setlists find power and customization.
94
Section 2
Gestures
Multi-touch gestures are a great way to get to features more
views, or to close a set and bring you back to the Setlist
quickly. While no gestures are required to learn, learning them
Chooser.
does save time, and it allows you to make adjustments with
fewer taps, so you can stay focused on what matters most: your
performance.
Two Finger Swipe Left/Right to
Change Songs
In Lyric View and Split View, if you swipe
Double Tap to Enter Edit Mode
with one finger from right to left or left to
Tapping once on any song title, either in Set or
right, you switch to the next or previous
Catalog Modes, launches the Lyric View. If you
of lyrics for that same song. If you instead swipe left or right with
double-tap (tap twice quickly) on any song title,
two fingers, you’ll switch to the next or previous song in the set,
you go directly to Song Edit Mode for that
if you are prompting from a set, or in the catalog, if you are
song, skipping the need to tap to load the song,
prompting directly from the Song Catalog. This eliminates the
then tap on the Edit Song button.
need to tap to bring up the console and then tap on the previous
page
or next buttons.
Pinch to Close Song/Set
Place two fingers, usually your thumb and
Note: If you learn the pinch-to-close gesture and the two-finger swipe in either direction on the lyrics area, you no longer need to use the bottom console at all.
forefinger, on the screen and move them
towards each other in a pinching motion. This
gesture allows you to close the lyric or split
95
Drag to Adjust Split View
In Split View, you can adjust the amount of space
available to your lyrics by tapping and holding
on the adjustment icon located on the divider
line, and then dragging the set right or left (in
landscape mode) or up and down (in portrait
mode). Once you let go of the screen, the lyrics will
adjust in size to fit within the chosen space. Setlists will
remember your preferred position of the split in both portrait and
landscape modes for later sessions.
In addition, you can drag the adjustment icon between the set
and notes views to resize those areas.
Double Tap on Adjustment Icon in
Split View to Toggle
If you don’t wish to see notes, or you only want to
see notes and not your set in Split View, you can
double tap on the Adjustment Icon between the
set and notes areas. Each time you double tap, it
will toggle between set only, notes only, and both.
96
Section 3
Remote Jam Session
One of the most powerful advanced features of Setlists is the
Remote Jam Session. With a group of iOS devices that all have
Master Device vs Connected Device(s)
The device that everyone connects to will be the master device.
Setlists installed, you can share a single set or catalog, so that
The songs and sets you wish to share must be contained on this
the entire performing group can stay in sync with the upcoming
one primary device. This device will also be in charge of granting
songs and lyrics. And every connected device can be set to
permission to other devices wishing to join the session, and it will
show the Lyric or Set View, and switch between views at will.
control the advancement of songs and lyrics. Choose the device
Instrumentalists who need to see chords can have the chords
that makes the most sense to be the master device.
displayed, while those who don’t need the chords can see only
lyrics. Any members who don’t need to sing at all can just see
Hardware and Software Requirements
the upcoming songs, while those who sing backup can see a
Remote Jam Session requires an iOS device with Setlists
Split View if they wish. The guitarist and ukulele player can see
installed. All additional devices wishing to participate in the Jam
the specific chord diagrams they need, while the lead singer sees
Session will also need to be a qualifying iOS device with Setlists
a full-screen lyric only View. You could also set up multiple iPads
installed.
in different locations on stage, so the lead singer can move
around freely and always see the lyrics from anywhere she
happens to go. All while being controlled by one band member
or an off-stage technician.
Note: The Pro upgrade must also be authorized for each participating device, if the devices wish to connect for more than ten minutes.
At this time, Setlists requires iOS version 8 or higher. It works
with iPad, iPhone, and iPod touch models.
97
To communicate with one another, all of the devices will also need
to use either the Bluetooth or WiFi protocols for wireless
Getting Connected
To begin a Jam Session, start by selecting the desired set or song
communication. WiFi is preferred, but if no WiFi network is
from the Setlist Chooser on your chosen master device. If you are
available in your performance area, you can use Bluetooth to
not prompting a set or a song on the master device when you
securely communicate between devices.
start connecting other devices, the other devices will show a
All devices capable of running Setlists contain both Bluetooth and
WiFi hardware capability. The devices will choose the correct
wireless protocol automatically.
standby screen until you select something to share with them on
the master device.
Nothing needs to be done on the master device to get the Jam
session going. Setlists will automatically broadcast this device’s
Note: We do recommend that if you are in an area where you know there
aren’t any good WiFi networks to use, switch off WiFi on every device participating in the Jam Session. Although the devices are very good at using the
appropriate protocols, we’ve found that it doesn’t hurt to turn off the one you
know you won’t need. Just make sure that at least one of the same protocol,
WiFi or Bluetooth, is turned on for all the devices involved.
A Note about Version Compatibility
presence to other devices running Setlists.
The Remote Button
Remote interaction between iOS devices running Setlists requires
that all of the devices involved are running the same version of
On the devices you wish to connect to your master device, tap on
Setlists. Please check before starting a session that all devices
the Remote button, which can be found on the toolbar in either
are running the latest version of Setlists from the App Store. You
the Setlist Chooser or the Catalog. It doesn’t matter which screen
can find your Setlists version number on the Help screen,
you are on when you tap on the Remote button.
accessible from the Setlist Chooser. To update your version of
Setlists, use the App Store application on your iOS device. See
the documentation that came with your iOS device for more
details on how to update applications.
When you tap the Remote button, a list of all available devices
will appear. Tap on the icon of the master device to connect to it.
The first time you connect to a particular master device, you will
be asked permission on the master device for the new device to
98
connect. If you tap Allow Once, permission will be granted for this
Changing the View on the master device will have no effect on
session only. If you tap Always Allow, you won’t see this dialog
other joined devices. Each device can set its View independently,
again for this device.
so that different group members can see what they prefer during
Once connected, whatever is prompting from the master device
will appear on the connected device. On the master device, you
can advance the lyrics, change sets or songs, or basically behave
as you normally would. All of the connected devices will follow
along. The connected devices will not be able to advance lyrics or
change sets or songs.
Changing Views
The master device and connected devices can change Views in
the usual manner. Use the View menu on the top toolbar to
change views on the devices as needed.
performance.
Note: iPhones and iPods touch can see either the set or the lyrics, but not
Split View. There simply isn’t enough screen real estate to make this practical. iPads can use Split View and adjust the Split View to the participant’s
preferences.
Changing Instruments
If your song contains chords, and you need to see them for a
specific instrument that is different from that on the master
device, you can view the instrument of your choice using the
Instrument menu.
If you are a singer who doesn’t play an instrument, or if you just
don’t need to see the chords during this set, you can choose the
microphone icon, and all chords will be hidden.
When you change instruments in this way, the particular
instrument you choose will be remembered for your device
throughout the set, but the default instruments will not change in
the master catalog. The master will remember its default
instrument, in other words, for each song.
99
Troubleshooting Tips
If you are having issues getting your Jam Session to work
correctly, try the following steps:
1. If you know you are no where near any known WiFi networks
that you can connect all devices to, turn off WiFi on all devices.
Be sure Bluetooth remains on, however. If there is a WiFi
network available, be sure all of the participating devices are
connected to the same one.
2. If you don’t see any devices listed in your Remote popover, or
you tap on a device and it won’t connect, try quitting out of the
app and returning. Double click the home button on your
device, then swipe up on the Setlists screen to force quit the
application. Click home again, and then relaunch Setlists.
Sometimes this will flush the network cache and help the
connection go through.
3. If no devices are connecting to your master properly, try
quitting the app on the master device as well, using the same
procedure outlined in step 2. Be sure the devices are within
Ending the Session
To disconnect your devices from the master, simply tap the Exit
button on the top right toolbar of the connected device or
devices. Those devices will return to their normal independent
mode.
range of each other, and reconfirm that either WiFi, Bluetooth,
or both are turned on for all devices.
4. Another method that can help is setting all devices into
Airplane Mode, waiting a few moments, then turning Airplane
Mode Off. This will reset the networking connections and
hopefully get you back on track.
100
Section 4
Wireless Device Control
Foot Pedal Control
The footpedal devices usually consist of a wireless remote
Because not all singers have their hands free during
transmitter and either one or more foot pedals, depending on
performance, we thought it important to give Setlists users a way
configuration. Once paired with your device, the device can be
to control the most critical aspects of the Setlists application
used to change to the next or previous page of your lyrics, and to
hands-free. Enter Bluetooth foot pedals like the BT-105 from
change to the next song in your set or the Song Catalog.
AirTurn. (Link will open in Web Browser.)
Setting up and Pairing the Bluetooth Device
The following steps must be followed once to pair your foot
pedal device with the iOS device. You should not need to repeat
these steps once paired. In this example, we’ll be pairing the
BT-105 from AirTurn, but similar instructions will work for most
Bluetooth devices. Be sure to read the manual that came with
your device for more information on how that particular device is
gets connected.
1. Plug one or two foot pedals into the AirTurn BT-105. If only
using one foot pedal you can plug the pedal into either jack.
2. Turn on the BT-105 by pressing the red power button and
The AirTurn BT-105 with two Pedals Attached
holding for one second. The LED will blink 3 times and
attempt to pair with your iOS device.
101
3. Go into the Settings app on your iOS device and tap the
“General” section on the left side.
Using the BT-105
Select a song from either a Set or the Song Catalog. From within
4. Tap the Bluetooth option.
Lyric or Split View (whichever you are using) you should now be
5. If Bluetooth is off, move the switch to “On.”
able to control with the pedal or pedals hands-free.
6. Under “Devices” you should see your AirTurn listed. The
device name will start with the word “AirTurn” followed by
Single Pedal
some alphanumeric characters. If you do not see the device
If only one pedal is connected to the BT-105, you will only be able
listed, make sure the AirTurn is on and the green light is
to advance to the next page of he lyrics. To change songs or go
blinking. Refer to the “Profiles” section of the AirTurn user
back to a previous page, you will need to use your hands on the
manual and make sure your AirTurn is set up for the iPad
iPad screen.
profile.
Two Pedals
If you have two pedals connected to the BT-105, you can use the
right pedal to advance to the next page in the song, and the left
pedal to go backward in the song. You can also press both
pedals at once to advance to the next song in the set or the Song
Catalog.
Pairing your AirTurn with your iPad
7. Once you see the AirTurn in the device list, the words “Not
Paired” will appear at the right. Tap on your device name
and your iPad and AirTurn should become paired. You will
see the words “Connected” at the right.
8. Start Setlists. You should now be connected and ready to
go.
Bluetooth Wireless Keyboard
In addition to foot pedal control, you can also pair your device
with a Bluetooth keyboard or some other handheld device to
control some features of Setlists. While in Edit Song Mode, the
Bluetooth keyboard will act like a standard editing keyboard. In
Lyric View and Split View, you can use certain keystrokes to
control Lyric View behavior.
102
Lyric Prompting with a Bluetooth Keyboard
During prompting, use the following keystrokes to control
prompting behavior:
• Previous Song in the Set or Catalog: ↓
• Next Song in the Set or Catalog: ↑
• Next Song: →
• Previous Song: ←
• Exit the Song: B
Setting up a Bluetooth Keyboard
1. Make sure your Bluetooth Keyboard is on and in pairing
mode. Please refer to the keyboard manual for instructions
on how to accomplish this.
2. Launch the “Settings” App on your device and tap the
“General” section on the left side. Tap the Bluetooth option.
Customizing Remote Mapping
If for some reason the device you are using doesn’t use the same
standard controls as the default ones in Setlists, or you just want
to use different mapping for some reason, you can customize the
commands using the Tools Menu.
3. If Bluetooth is off, move the switch to “On.”
4. In list under devices, you should see your keyboard listed.
5. Your keyboard should appear in the device list with the
words “Not Paired” at the right, tap on the device name and
your iPad and keyboard should be paired. When this is
finished, you will see the word “Connected” at the right.
6. Start up Setlists. You can now use the keyboard for Editing
Songs and controlling Lyric prompting.
The Tools Button
Tap on the Tools button, and find the Map Remote Buttons entry
in the resulting view. Tap on Map Remote Buttons, and you will
see all of the current mappings listed. Tap on any mapping you
wish to change, then press the corresponding button you’d like to
train on your control device. The mapping will change to that
103
desired button. When finished, tap the back arrow on the top left
and the mapping will be removed for that command. The words
to go back to the Tools menu.
“Not Mapped” will appear next to the command.
Removing a Command Mapping
Sometimes, you may want to remove a remote mapping entirely.
Perhaps you have a habit of accidentally pressing a certain
button, and you’d prefer that this function simply be removed
from the remote entirely. In that case, select the command you
wish to remove and tap the “X” to the right of the command
name. A dialog will appear, asking you if you are sure. Tap Yes,
Resetting Default Mappings
If for some reason you need to go back to the default remote
button mappings, you can do so at any time. Tap on the Tools
icon, tap Map Remote Buttons, then tap on Reset Device
Mappings on the bottom of the view. Your mappings will all be
returned to their original factory settings. You will lose any custom
mapping that you have done previously, so only do this if you are
sure.
104
Section 5
External Displays
Text Mirroring
Setlists supports text mirroring for split-glass reflector
hardware that is commonly used in film and broadcasting. If you
have turned on the Mirror Text switch in the Tools Menu, the text
area in prompting mode will invert the lyrics on screen. When the
device is placed in the camera reflector, the text will appear
correctly to the reader.
There are several excellent mounts available for the iPad that we
recommend. If you are interested in learning more about using
Setlists with one of these mounts, please visit the recommended
accessories page on our web site for Setlists:
Setlists Recommended Accessories (will launch in web
browser)
105
AirPlay
In addition to using a wired adapter, you can use Apple’s AirPlay
to send the display of your iOS device to an external display
wirelessly via a connected AppleTV. This will allow you to see
your sets and lyrics on an external display while still controlling
everything via the iOS device.
To use AirPlay with your iOS device and an AppleTV connected to
a display:
1. Make sure your AppleTV is plugged in, turned on, and
connected to the same WiFi network as your iOS device.
(WiFi is required for AirPlay.) Be sure the display is turned on
as well.
2. Swipe up from the bottom of the screen of your iOS device
to bring up the Command Center. Near the bottom on the
right, you will see the AirPlay button. Tap it.
3. Select your AppleTV from the list that appears in the
resulting view.
4. Turn the Mirroring Switch to ON. Your iOS device will now
show everything on its own screen as well as the external
display simultaneously.
5. Launch Setlists if it isn’t launched already, and use it as
normal. Everything you see on your iOS device screen will
appear on the external display, including your set, your
lyrics, etc.
106
Section 6
Apple Watch
If you own Apple Watch, your wrist is one more place where you
can see your current and upcoming song titles. Reading lyrics on
Installing Setlists on Apple Watch
First, we must be sure that Setlists is installed on your watch. In
your watch would not be practical on stage, but a quick glance
order to do this, start by launching the Apple Watch app on your
for a song title may be all you need to get by, if you are not a
iPhone (the app you used to configure and pair your Apple Watch
singer and only need to know which song is next.
when you first got it).
To use Setlists on your Apple Watch,
you’ll need to be using Setlists on
your iPhone. Apple Watch doesn’t
connect directly to an iPad,
although if you are using the Jam
Session feature, you can connect
your iPhone to your iPad, and then
the Watch will display the song
titles from your iPad. (See the
previous section on Remote Jam
Session for more details on how to
Scroll down to the bottom of the My Watch tab, and you should
see a listing of all the third party apps available to your Watch.
Find Setlists on this list and tap it.
set up a Remote Jam Session.)
107
The Glance only shows Upcoming Song Titles
In the resulting view, you will see two switches. Show App on
Apple Watch, and Show in Glances. Be sure that at least one or
both of these switches is turned on.
App vs Glance
The App is accessed by tapping on the Glance, or by clicking the
Digital Crown and launching the app from the app icon screen.
The App shows you the upcoming song as well as the current
song, and if your iPhone is the master device, it will also allow
you to jump to the next or previous songs from your wrist.
Setlists offers both an app and a Glance for your Apple Watch.
The Glance is simply a quick view, accessed from the clock face
of your watch, that shows the upcoming song title. There is no
interactivity available in this Glance. It is for informational
purposes only.
The App offers buttons for navigating to other songs
108
Note: the next and previous buttons will not appear if your iPad, or some
other device, is the master device in a Jam Session. Your iPhone, in this
case, is not controlling the prompting, so your Watch can’t either. If you want
to be able to jump songs with your Watch, you will need to make your
iPhone the master device.
Which one you use, the app or the Glance, depends on your
needs. One other advantage to using the app, beyond having the
buttons for jumping songs, is that you can configure your watch
to always return to the last used app, rather than your watch face.
General, then Activate on Wrist Raise. Tap on Resume Previous
Activity. Then launch Setlists on your watch. Now, every time you
raise your wrist, Setlists will still be on screen.
Once you are done with your performance, you may wish to
return to your watch to its previous behavior of showing the
watch face on wrist raise. Follow these steps again, but this time
choose Show Watch Face. You can change this setting at any
time from the Apple Watch app on your iPhone.
When you are on stage, the last thing you want is to have to be
fiddling with your watch just to see the upcoming song title. If you
set the watch to “Resume Previous Activity” rather than “Show
Watch Face”, the watch will stay in the Setlists app every time
you raise your wrist to have a look.
To set your Apple Watch to stay in Setlists on wrist raise, open
the Apple Watch app on your iPhone. (The one you used to
configure and pair your watch when you first got it.) Tap on
109
Section 7
The Tools Menu
The Tools Menu contains several global preference settings for
old-fashioned handwritten sets. If you’d prefer to change this
the app. If you are happy with Setlists in its default state, you
font to something else, you can do that here. Tap Setlist Font,
may never have reason to go into this menu. But as you get more
then choose a font from the resulting list. All sets will be shown in
comfortable, you may want to have a look and see which custom
this chosen font from then on.
configurations you can use to make Setlists even more powerful
and customizable to your needs.
The tools menu can be accessed from many different screens in
Setlists, including the Catalog and the Setlist Chooser. You can
find it wherever you see the Tools button.
The Tools Button
Setlist Font
By default, Setlists uses a font called Sean’s Other Hand for the
set listings. It’s a handwritten font meant to mimic the style of
110
Mirror Text
Dark Mode
Setlists supports text mirroring for split-glass reflector hardware
By default, sets will appear with a white background and black
that is commonly used in film and broadcasting. See the
text. If you find this too bright, or if this is interfering with your
previous section on External Displays for more information
light show, turn this switch to ON, and sets will appear as black
about how this switch effects the display of your prompted lyrics.
with white text. See the previous section on Dark Mode for
Chances are, if you don’t know why you’d want mirrored text, you
more details.
probably want to leave this switch set to OFF.
Show Status Bar
Synchronization
Setlists can be configured to back up and sync your catalog and
By default, Setlists shows the status bar on your iOS device in all
set information to either Dropbox or iCloud (Pro upgrade
views. You can see the time, signal strength, battery level, etc.
required). Choose the service you want to use, and Setlists will
from anywhere inside the app. If you find this distracting while
automatically keep a copy of your information on the selected
performing, you can turn this switch to OFF, and the status bar
service. If you use Setlists on multiple devices of your own, the
will be hidden in all of the performance views of the app,
information you place into your Catalog and sets will stay in sync.
including Set view, Lyric View, the Catalog, and the Setlist
And when you upgrade your device or devices, you can simply
Chooser.
turn on this switch, and all of your information will be restored to
the new device.
111
Map Remote Buttons
If you are connecting Setlists to a Bluetooth remote device, you
can use this section of the Tools Menu to customize which
commands get sent to your iOS device from the remote. See the
previous section on Wireless Device Control for more details
on how to do this.
112
Bluetooth
Bluetooth is a specification for the use of low-power radio communications to wirelessly
link phones, computers and other network devices over short distances. The name
Bluetooth is borrowed from Harald Bluetooth, a king in Denmark more than 1,000 years
ago.
Related Glossary Terms
Drag related terms here
Index
Find Term
Chapter 7 - Remote Jam Session
Dropbox
Web service that allows you to store files in the cloud to be accessed from any computer
with Internet access. Setlists can access your Dropbox file storage and import plain text
files that you store within your Dropbox area. To find out more about the Dropbox service,
you can visit www.dropbox.com.
Related Glossary Terms
Drag related terms here
Index
Find Term
Chapter 3 - At a Glance: Set View
Google Docs
A web service offered by Google. Share documents between computers and other people
easily for free using the Internet. Setlists can read the documents in your Google Docs
account, making for a great way to share your scripts between different computers, or
between your iOS and Mac OS devices.
You can find out more about Google Docs at docs.google.com.
Related Glossary Terms
Drag related terms here
Index
Find Term
Chapter 3 - At a Glance: Set View
iOS
The operating system software used on iPhones, iPads, and iPod touches. All of these
devices from Apple use some version of what’s known as iOS.
iOS shares much of the core functionality from the older OS X that runs on Macintosh
computers. But the user interface layer of iOS was designed for input from fingers, rather
than a mouse and keyboard.
Related Glossary Terms
Drag related terms here
Index
Find Term
Chapter 3 - Adding a Song
Landscape mode
Landscape mode, or landscape orientation, refers to an iOS device being used with its
longer side horizontal. (See image.) Setlists supports all functions in either landscape or
portrait orientation, so how you hold or set up your device on a stand is a matter of
preference.
Related Glossary Terms
Drag related terms here
Index
Find Term
Chapter 4 - Split View
Magnifying loupe
When selecting text in iOS, in order to assist in viewing the text that lies under your finder,
iOS provides small magnification device, enlarging some of the text to give you a better
chance of selecting the correct words. Tap and hold on the text to see this loupe appear.
Related Glossary Terms
Drag related terms here
Index
Find Term
Chapter 3 - Adding a Song
Portrait mode
Portrait mode, or portrait orientation, refers to an iOS device being used with its longer side
vertical. (See image.) Setlists supports all functions in either landscape or portrait
orientation, so how you hold or set up your device on a stand is a matter of preference.
Related Glossary Terms
Drag related terms here
Index
Find Term
Chapter 4 - Split View
Split-glass reflector hardware
A device designed to allow a speech giver or singer look directly into a camera while still
seeing words printed on a screen, via the aid of mirrors.
Related Glossary Terms
Drag related terms here
Index
Find Term
Chapter 7 - External Displays
Chapter 7 - The Tools Menu
WiFi
WiFi (short for Wireless Fidelity) is a protocol that allows electronic devices to exchange
data wirelessly over a computer network. It is commonly found in portable electronic
devices, such as the iPad, as well as laptop computers.
Related Glossary Terms
Drag related terms here
Index
Find Term
Chapter 7 - Remote Jam Session