Download 物料号:0730-T0690H22-03 尺寸:95*95mm 材质工艺: 钉装 封面彩色
Transcript
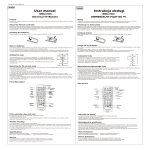
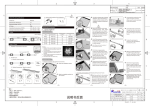
物料号:0730-T0690H22-03
尺寸:95*95mm
材质工艺:
钉装
封面彩色印刷 157g铜 过哑胶
内页黑白印刷 80g书纸
User Manual
Introduction
Thank you for purchasing the TouchPlus StarTab 769. We trust that it will meet
your satisfaction.
Please read the instructions in this manual prior to operating. TouchPlus does not
assume any liability from improper operation or accidental damage of the unit.
We will periodically refresh the content in this user manual in order to serve you
better. If the actual setup and usage of your unit differs from what is detailed in
this user manual, please visit the TouchPlus website (www.touch-la.com) for the
latest product information.
TABLE OF CONTENTS
I. Important Reminders
II. Specifications
III. Getting to Know Your StarTab 769
V. StarTab 769 Quick Guide
V. Operating Instructions
1. Getting Started
2. Settings
3. WIFI
4. Install, Uninstall and Run Applications
5. Connecting to the Internet
6. Audio and Video Playback
7. Picture Viewing
8. 3G USB Dongle
9. Camera
10. Connecting with External Devices
11. Your Gmail Account
12. Play Store
13. Data Reset
14. MicroSD Card
15. Email Settings
16. Taskbar
17. Troubleshooting
VI. Battery Information
1
2
4
5
6
6
7
8
12
14
15
17
17
18
18
19
22
24
24
25
26
27
28
I. Important Reminders
Handle your StarTab 769 with care. Dropping or vigorously shaking the
TouchPlus StarTab 769 may damage the display.
2. Your StarTab 769 is optimized for touchscreen operation. Do not use any
metal object as a makeshift stylus to prevent short-circuiting.
3. Take precaution against data loss by backing up your data, particularly
before upgrading your StarTab 769 firmware. TouchPlus is not
responsible for any malfunction or damage due to unauthorized software
upgrade or rooting of the device.
4. Direct hardware concerns/issues to TouchPlus-accredited service centers. Do
not attempt to disassemble the device on your own.
5. Clean your StarTab 769 using dry cloth. Do not use alcohol, thinner or
benzene to clean the surface of the StarTab 769.
6. Do not disconnect your StarTab 769 while in the middle of formatting or
uploading/downloading, as this may lead to errors in operation.
7. Operate your StarTab 769 as detailed in this manual to ensure proper
usage. TouchPlus is not responsible for flash damage caused by product
malfunction or repair.
8. Keep your StarTab 769 away from liquids or foreign objects that may
enter the unit and cause permanent damage.
9. Do not leave behind the StarTab 769 inside the car or use your StarTab 769
in extremely hot, cold, dusty, or humid conditions. This will affect tablet
performance and will likely damage the unit.
10. Device specifications are subject to change and improvement without prior
notice.
1.
1
II. Specifications
Processor
OS
Size & Weight
Memory
Display
Connectivity
Browser
Messaging
Camera
Multimedia
Audio
2
ARM Cortex A9 Dual Core 1.5GHz AML8726-MX
Android 4.1 Jelly Bean
Dimension: 206mm x 129mm x 11mm
Weight: 342g (inclusive of battery)
Internal Memory: NAND+SDRAM 16GB+1GB
Expandable Memory up to 32GB
Screen: 7.0” Capacitive 5-Point
Multi Touch Display with IPS Technology
1280x800 High Definition Display
WIFI: 802.11 b/g/n
Comes with USB On-The-Go cable for 3.5G Modems
Android Browser
Supports Multiple Email Accounts
Back Camera: 8.0MP with Flash
Front Camera: VGA
Video Call & Recording Supported
MP3 Player
Voice Recorder
Supports Flash Player (Version 11.1)
Audio formats supported: MP1, MP2, MP3,
WMA, WAV, OGG, OGA, APE, FLAC, AAC,
M4A, and 3GPP
Sound recorder file format: 3GPP or MP3
Photos
Battery
Image formats supported: JPEG, BMP, GIF,
PNG, JFIF etc. up to 8000x8000 pixel resolution
4000mAh
Up to 400 hours standby time
and 5 hours HD video playback
Note: Photos provided in this manual are provided for reference only. The actual design and
specifications of your StarTab 769 are subject to change without prior notice.
3
III. Getting To Know Your StarTab 769
1. Front Camera
2. Flash Bulb
3. Rear Camera
4. Power Key
5. Earphone Jack
6. HDMI
7. Mic
8. Home Key
9. Volume Control Button
10. MicroSD Card Slot
11. DC Charger Interface
12. Micro USB
13. Reset Key
1
9
5 6
4
10
12
2
4
7 8
3
13
IV. StarTab 769 Quick Guide
1. You will first need to sign up for a Gmail account to fully utilize Google
services in your StarTab 769, and download applications via
Play Store. If you already have a Gmail account, you will only need to
sign in to access the related Google features.
2. The TouchPlus StarTab 769 comes with a special screen backlight control
function that maximizes battery life. The screen backlight automatically powers
off when the device is idle or on standby mode for a certain period of time. You
can re-activate the screen by pressing the power on/off key.
3. In the event of an unresponsive touchscreen, you should shut down and
restart StarTab 769. You can also reset the device by pressing the reset
button located on the left side of the device, near the home key.
Note: Running many applications simultaneously on your device can slow down processing speed.
4. It is normal for your StarTab 769 to become warm during heavy use,
particularly in the event of non-stop data transmission, when playing
music, and activating WIFI
. In such conditions, your StarTab 769 is
utilizing a significant amount of power which then generates heat. Rest
your device after every three hours of heavy use to keep it running
optimally. It is possible that device will become warmer during heavy use.
5. To maximize your device’s battery life, follow these steps: reduce
screen brightness to 30-50%, switch off WIFI and data synchronization if
not in use, and adjust device volume.
5
V. Operating Instructions
1 Getting Started
1.1 Power on/Power off
Power on: Press and hold the power on/off key for three seconds, after
which StarTab 769 displays the start-up logo and goes to the home screen.
Power off: Press and hold the power on/off key for three seconds to switch
the device off.
Sleep: Deactivate your device’s screen when not in use to save on power.
You can do this by pressing the power on/off key and putting your StarTab
769 on sleep mode. To activate the screen from sleep mode, just press the
power on/off key again.
1.2 Charging
When your StarTab 769 prompts that battery level is low, charge it
immediately using the provided charger.
Note: Avoid leaving the charger on
for more than 15 minutes after your
StarTab 769 prompts you that the
battery has been fully charged.
Overcharging your battery will
significantly cut down battery life
and performance.
1.2
6
1.3 Main menu
Click the
icon in the home screen to view the main menu. Here you can access
settings, music and video playback, the web browser, and other applications you
have installed in your StarTab 769.
1.3.1
1.3.2
2 Settings
Click “Settings” in the main screen to enter the setting interface. Adjust settings
according to your preferences.
2.1 Date and Time Setting
Click “Date & Time” under “Settings” to adjust the device date and time. Under
this function, you will be able to set the date, time, time zone, and time and date
format, among others.
2.1.1
2.1.2
7
2.2 Brightness
Select “Display” under “Settings” and click “Brightness”. Drag the bar to adjust
desired screen brightness.
2.2.1
2.2.2
3 WIFI
3.1 Enter the “Settings” menu, as shown in the photo below:
3.1
3.2 Select WIFI to switch on the WIFI function. It will change from Off to On by
swiping across the button.
.
8
3.3 Once you’ve switched on WIFI, the right side of the screen will display the
available networks as seen below.
TouchPlus
TouchPlus tab
3.3
3.4 Select the network you want to connect to. If the network is open or free for
public use, you will automatically be connected. If the network is secure, a pop-up
window will then appear prompting you to type in the network password.
3.4
9
3.5 Click “Connect” after typing in the password. Your StarTab 769 will obtain the
network IP address automatically.
3.5.1
TouchPlus
TouchPlus tab
3.5.2
3.5.3
3.6 If your StarTab 769 does not automatically detect wireless networks to connect
to, click
to scan for networks manually.
3.6
10
3.7 To add a network, click
, input the network SSID, security type and
password, then click “Save”. Select the name of the network when you want your
StarTab 769 to connect to it.
TouchPlus
TouchPlus tab
3.7.1
3.7.2
3.8 Click
to access advanced WIFI options
. In this interface, you can
modify network notification and sleep mode, as well as check the tablet’s MAC
address and IP address.
TouchPlus
TouchPlus tab
3.8.1
3.8.2
3.8.3
11
4 Install, Run, and Uninstall Applications
4.1 Install Apps
There are several ways to install applications on StarTab 769. Options include
direct download, via USB connection, or by a third-party program (Apps
Installer).
To install an application through Apps Installer, click "File Manager" from the
main interface.
4.1.1
4.1.3
4.1.2
4.1.4
Select the APK file you want then click “Install” to install the application
automatically. Once installed, you can either click “Open” to run the application
or click “Finish” to exit the installation interface.
12
4.2 Uninstall Apps
You can uninstall applications by using a third-party software management tool
or the pre-installed application management software that came with your
StarTab 769. To uninstall an application, go to Settings > Device > Apps, and
select the application you would like to uninstall.
4.2.1
4.2.2
4.2.3
4.2.4
13
5 Connecting to the Internet
5.1 Once your StarTab 769 is connected to a WIFI network, you can open the
browser and input web addresses to access the Internet.
5.2 Click the
icon to access your bookmarked websites and browsing history.
Select the web page you would like to open from the list. To save a web page to
your bookmarks, click
and select "Add".
5.2
To save a web page from history to your bookmarks, click
5.2.1
14
5.2.2
and select "OK".
5.2.3
5.2.4
6 Audio and Video Playback
6.1 Audio Playback
Click "Music" in the main menu to enter the audio playback interface. You will be
shown a list of available audio files which can be played on your StarTab 769. Click
on the title of the audio file to play it. Click the icons in the audio playback
interface to play/pause/rewind/fast forward the audio file, and to increase/decrease
volume.
6.1.1
6.1.2
15
6.2 Video Playback
Click "Super HD player" in the main menu to enter the video playback interface.
You will be shown a list of available video files which can be played by your
StarTab 769. Click on a thumbnail to play your selected video. While in the video
playback interface, you can tap the screen to access icons which can play/pause
the video, increase/decrease volume, and skip to next/previous video file.
6.2.1
6.2.2
6.2.3
6.2.4
Note: Your StarTab 769 is equipped with a built-in HDMI output so you can view HD
movies from your tablet on your LCD TV. Refer to Section 10.4 for instructions on how
to use this function.
16
7 Viewing Your Photos
Click "Super HD player" in the main menu to view the list of available albums in
your StarTab 769. Select and click the album you want to view. The screen will
display thumbnails of the available photos, which you can then select to view
full-size.
While viewing the selected photo, you can tap the screen to access icons which will
let you zoom in/out, skip to next/previous picture, rotate picture, and delete picture.
7.0.1
7.0.2
8 3G USB DONGLE
Your StarTab 769 can be used with an external 3G USB dongle. Plug in USB dongle.
Wait 1-2 minutes for the modem to load. Make sure to set Display Time Out (found
in Settings) to 2 minutes or longer. Once detected, a signal bar will appear on the
lower right side of the screen beside the battery icon. Blue bar 3G signals that your
StarTab 769 has been connected; Gray bar 3G indicates insufficient load balance.
For a list of compatible modems for your StarTab 769, go to
Settings > Under Wireless & Internet > More > Supported Dongles List
or visit www.touch-la.com.
17
9 Camera
Click "Camera" in the main menu to activate.
9.1 Camera
If the cursor is positioned accordingly
, your StarTab 769 is in Camera mode.
Click
to take a picture.
Click
to set white balance.
Click
to select the rear or front camera.
9.2 Video
If the cursor is positioned accordingly
, your StarTab 769 is in Video mode.
Click
to start filming a video.
Click
to restore to default settings.
Click
to select the rear or front camera.
9.3 Panoramic Shots
If the cursor is positioned accordingly
, your StarTab 769 is in Panoramic mode.
Click
to start taking panoramic shots.
10 Connecting with External Devices
10.1 Connect with PC
Connect your StarTab 769 to a PC via USB cable. The PC will then read two separate
disks once StarTab 769 connected successfully. The first disk will be the microSD card
and the second disk will be the built-in memory.
10.2 Use of OTG port and USB host
The StarTab 769 supports devices in FAT32 format such as USB disks and MP3 players.
To use, connect the device to your StarTab 769 directly or via USB.
18
Note: The USB port can only support USB 2.0 high-speed devices. The OTG port can support USB
mouse and keyboard.
10.3 Applications
Your StarTab 769 comes pre-installed with third-party applications. Operating
instructions are provided with the software and may be accessed for correct usage.
Some applications may not be used in specific locations without network service.
10.4 HDMI
10.4.1 Prepare an HDMI cable
Prepare an HDMI cable with a copper core and gold-plated terminal. If you want
1080P HD output for your StarTab 769, the HDMI cable must comply with HDMI
1.4 standard.
10.4.2. Connection
Plug one end of the HDMI cable to the display or LCD TV, and the other side of the
cable to the HDMI port of your StarTab 769. The audio and video from your
StarTab 769 will then be played on the display. While playing, images will appear
on the screen of the external display, but not on the screen of your StarTab 769.
Your StarTab 769 will only display control icons and the progress bar which will
automatically be hidden after 10 seconds of inactivity.
11 Your Gmail Account
11.1 Select one of several Gmail-related applications in your StarTab 769 such as
Gmail, Play Store and Calendar. Alternatively, you can enter “Settings,” select
and then click
located at the top right corner of your screen.
A pop-up dialog box with several account options will appear. Select
to add a Gmail account.
19
11.2 You will be prompted to add a
Google account. Click
,
11.2.1
and then input your details. Once done,
click
.
11.2.2
11.3 Create your Gmail address, then click
. The system will verify if the
email address is available.
11.3
20
11.4 If the email address is not available,
you will be prompted for a new user
name.
11.4
11.5 If the user name is available, you
will be asked to create a password.
11.5
11.6 Once you’ve set the password, you will be prompted for account
recovery information. This will help you retrieve your account in the event
that you lose your password. Click
once done.
11.6.1
11.6.2
21
11.6.3
11.7 Click
Gmail account.
then type in the authentication text to finish registering your
11.7
12 Google Play Store
12.1 Enter Google Play Store and choose the Apps you want to download. If, for
example, you would like to install Basketball, you can search for it via Categories
or by keying in its name/title in the search box.
22
12.1
12.2 Open the page of your chosen App, then click “Download”. A dialog box will
appear. Once you click “Accept & download,” the App will be downloaded and
installed on your StarTab 769.
12.2
12.3 You can also access Google Play Store using your PC and the same Google
account used for your StarTab 769. Search for the App you want to download. The
App will automatically be synced to your StarTab 769 once it passes the
compatibility test. Your StarTab 769 must be connected to WIFI for the
downloaded App to sync and be installed.
23
13 Data Reset
13.1 If your StarTab 769 malfunctions
during use, you may select “Backup &
reset” under the “Settings” menu to
reset the data.
13.1
13.2 If you can’t access the disk or if
you want to erase all files in the device,
enter the “Storage” menu under
“Settings”, and click “Erase SD card”.
The flash disk of StarTab 769 will
appear as a dummy SD card.
13.2
14 MicroSD Card
14.1 Your StarTab 769 will automatically detect a microSD card up to 32GB
once installed and will prompt
at the bottom of your screen.
You can view the contents of the MicroSD card through File Manager.
24
14.1
15 Email Settings
15.1 Select “Email”, then input your email address and password.
15.1
15.2 Set the Email server POP3 and IMAP. Network ports of different email servers
will vary. The photos below are provided only for reference.
25
15.2.1
15.2.2
15.2.3
15.2.4
16 Task Bar
16.1 The Task Bar displays shortcuts and notifications from select applications, as
seen in the photo below. Click
on the shortcut or notification to launch the
corresponding widget.
16.2 Click the Settings icon in the Task Bar to open the Settings menu and make
changes as desired.
26
16.2.1
16.2.2
17 Troubleshooting
Concerns: StarTab 769 malfunctions during use
1) Reboot StarTab 769.
2) Charge the device using the provided charger to activate the battery. Make
sure EStarTab 769 has stored power prior to operation.
3) TouchPlus suggests that OS and firmware upgrades be carried out by experts.
Call our TouchPlus Service Center to check for updates or visit the nearest
TouchPlus Service Center for assistance.
Concerns: Short standby time
Battery life is dependent on ambient temperature and device usage. Avoid using
your StarTab 769 in extremely high and low temperatures as these significantly
affect battery performance. Loud volume settings and frequent usage of StarTab
769 will also use up battery life quickly.
27
VI. Battery Information
• The battery life is determined by various factors including the data or WIFI
network conditions, device settings, usage and environment. Battery
performance, meanwhile, is determined by charging, temperature, local radio
wave, and backlight use.
• Turning on the backlight and music player consumes battery life
more quickly than usual.
• To save on power, the backlight of your StarTab 769 switches off
automatically when idle after a certain time.
28


