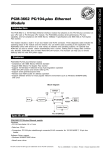
1
2600T Pressure Transmitter family User’s Manual 364DS, 364PS, 364DD, 364DR, 364PR Models ABB 364xS User’s Manual 2 Introduction and contacts This manual is a guide to the operation and maintenance of the 364 Model s of the 2600T Series of Differential Pressure Transmitter. It includes information relevant to the initial configur ation, calibration and troubleshooting. With the purpose to support the Users the manual structure has been organized as the instrument lifecycle: opening the box, installation, configuration, operation and maintenance . Furthermore for each setting, the guidance is divided according to the type of tools that are available in order to carry out these activities: the local keys, the Digital LCD Integral Display, the Hand Held terminal a nd the PC with a suitable software (like Smart Vision). In case of specia l applications, not covered by the examples, it is recommended first to get familiar with the functionality of the transmitter, as described in this manual. In case of calibration or of troubleshooting, go directly to the relevant chapters. In case of addi tional information needs please contact ABB at the address of last page of this manual or at the web site: http://www.abb.com/pressure. 364xS User’s Manual 3 Safety Notes Health and Safety To ensure that our products are safe and without risk to health, the following points must be noted: 1. The relevant sections of these instructions must be read carefully before proceeding. 2. Warning labels on containers and packages must be observed. 3. Installation, operation, maintenance and servicing must only be carried out by suitably trained personnel and in accordance with the information given. Any deviation from these instructions, will transfer the complete liability to the user. 4. Normal safety precautions must be taken to avoid the possibility of an accid pressure and/or temperature. 5. Chemicals must be stored away from heat, protected from temperature extremes and powders kept dry. Normal safe handling procedures must be used. 6. When disposing of chemicals ensure that no two chemicals are mixed. ent occurring when operating in conditions of high Safety advice concerning the use of the equipment described in this manual or any relevant hazard data sheets (where applicable) may be obtained from the Company address on the back cover, together with servicing and spares information. WARNING Explosions can result in death or serious injury. • Replace the electrical connection red plastic plugs delivered on the instrument with the appropriated plugs in the unused cable entry • Do not remove the transmitter cover in potentially explosive atmosphere when the circuit is live. • Fully engage transmitter cover to me et explosion-proof requirements and the degree of protection • Before connecting a communicator in a potentially explosive atmosphere, make sure that the instruments in the loop are installed in accordance with intrinsically safe or non-incendive field wiring practices. • Verify that the operating atmosphere of the transmitter is consistent with the appropriate hazardous locations certifications. WARNING Electrical shock can result in death or serious injury. Avoid contact with the leads and terminals. WARNING Process leaks could result in death or serious injury. • Be sure that the vents/drain valves are correctly installed and tighten before applying pressure. • Do not attempt to loosen or remove the vents/drain valves while the transmitter is in service. WARNING Replacement equipment or spare parts not approved by ABB for use as spare parts could reduce the pressure retaining capabilities of the transmitter and may render the instrument dangerous. Use only components supplied or sold by ABB as spare parts. Safety 364xS User’s Manual 4 Table of Contents Opening the box Identification Nameplate Tag plate Wired on plate (option I2) Handling Storage Installation Preparing for installation Mounting the transmitter Application related recommendation Pipe mounting Pipe mounting instruction Wall mounting Wall mounting instruction Digital LCD Integral Display positioning Wiring Wiring requirements Protective Earthing Electrical connection Remote Meter wiring Check the installation Apply power Start up Configuration Default configuration Easy Setup Hart Configuration Basic Configuration Functions Set the Pressure Polarity Set the Pressure Polarity by Digital LCD Integral Display Set the Pressure Polarity by HHT, Set the Damping configuration by PC Set the Damping Set the Damping configuration by Digital LCD Integral Display Set the Damping configuration by CoMeter Set the Damping configuration by HHT Set the Damping configuration by PC Set the Units Set the Units by Digital LCD Integral Display Set the Unit by CoMeter/ProMeter Set the Unit configuration by HHT Set the Unit configuration by PC Set the LRV Set the LRV by Local Keys Set the LRV by Digital LCD Integral Display Set the LRV by CoMeter Set the LRV by HHT Set the LRV by PC Set the URV Set the URV by Local Keys Set the URV by Digital LCD Integral Display Set the URV by CoMeter Set the URV by HHT Set the URV by PC Set the Totalizer Set the Totalizer by Digital LCD Integral Display Set the Totalizer by HHT Set the Totalizer by PC Special functions Transfer functions Transfer functions description 9 9 9 9 9 10 10 11 11 11 12 14 16 17 17 17 18 18 18 19 20 21 21 21 22 22 22 23 24 24 24 24 24 24 24 24 24 25 25 25 27 27 27 27 27 27 28 28 28 28 28 28 29 29 29 29 29 31 31 32 32 32 Table of contents 364xS User’s Manual Linear Square roots Bidirectional Polynomial nd Two Polynomial functions of 2 order Set the Transfer function on the transmitter Set the Transfer function on the transmitter by Digital LCD Integral Display Set the Transfer function on the transmitter by CoMeter Set the Transfer function on the transmitter by HHT Set the Transfer function on the transmitter by PC Set the Transfer function on the Meters Set the Transfer function on the Digital LCD Integral Display Set the Transfer function on the Digital LCD Integral Display by HHT Set the Transfer function on the Digital LCD Integral Display by PC Signal simulation (fixed output current) Fixed output current by Digital LCD Integral Display Fixed output current by CoMeter Fixed output current by HHT Fixed output current by PC Hardware settings Write protect mode Change the failsafe direction Software settings Write protect mode Change the failsafe direction Set the Current Output limits Set the Current Output limits on the Digital LCD Integral Display Set the Current Output limits by HHT Set the Current Output limits by PC Operation Digital LCD Integral Display Navigate the Digital LCD Integral Display Digital LCD Integral Display list of menu and submenu functions Digital LCD Integral Display view setting HART Transmitter Accessing Communication data Accessing Communication data by Digital LCD Integral Display Accessing Communication data by CoMeter Accessing Communication data by HHT Accessing Communication data by PC Accessing Operation data Accessing Operation data by Digital LCD Integral Display Accessing Operation data by CoMeter Accessing Operation data by HHT Accessing Operation data by PC Trimming and Calibration Set Up Sensor trim Sensor Zero Trim Sensor Zero trim by CoMeter Sensor Zero trim by HHT Sensor Zero trim by PC Sensor Low Trim Sensor Low trim by Digital LCD Integral Display Sensor Low trim by HHT Sensor Low trim by PC Sensor High trim Sensor High trim by Digital LCD Integral Display Sensor High trim by HHT Sensor High trim by PC Sensor Static trim Static trim by HHT Static trim by PC Calibration Output trimming (Digital to Analog trim) Output trimming by Digital LCD Integral Display Output trimming by CoMeter 5 32 32 34 34 35 35 35 36 36 36 36 36 36 36 36 37 37 37 37 37 37 37 38 38 38 38 38 39 39 40 40 40 40 44 46 46 46 47 47 47 47 47 47 47 47 48 48 48 48 49 49 49 49 49 49 49 49 49 50 50 50 50 50 50 50 50 Table of contents 364xS User’s Manual Output trimming by HHT Output trimming by PC Additional calibration procedures PV scaling PV scaling by Digital LCD Integral Display Set PV scaling by HHT Set PV scaling by PC Removing PV scaling Removing PV scaling by Digital LCD Integral Display Removing PV scaling by HHT Removing PV scaling by PC Zero suppression Zero elevation Totalizer Totalizer by Digital LCD Integral Display Totalizer operation by HHT Totalizer operation by PC Reset to Factory trim Reset to Factory Trim by Digital LCD Integral Display Reset to Factory trim by HHT Reset to Factory trimming by PC Software Write Protect Software Write Protect by Digital LCD Integral Display Software Write Protect by HHT Software Write Protect by PC Hart Multidrop mode Maintenance Exterior cleaning Field update Replacement and Troubleshooting Dismantling and reassembly Safety information for Dismantling and Reassembly Dismantling Replacement Electronics replacement Data saving in case of replacement Digital LCD Integral Display installation or replacement Troubleshooting Simple fault finding Transmitter diagnostics Diagnostic messages Diagnostics on the Digital LCD Integral Display (Hart version) Diagnostics on the CoMeter Hart version diagnostics on the HHT Hart version diagnostics on thePC Additional Safety Notes Hazardous Area Certificate groups Power supply operative limits PED information integration IP Protection Declarations 6 51 51 51 51 51 51 51 51 52 52 52 52 52 52 52 53 53 53 54 54 54 54 54 54 54 54 55 55 55 56 56 56 57 58 58 58 58 59 59 60 60 60 61 61 61 62 62 63 69 69 71 71 Table of contents 364xS User’s Manual 7 This page has been intentionally left blank 364xS User’s Manual 8 Transmitter components overview 7 2 2 3 1 6 3 9 11 14 10 8 15 12 15 13 15 5 16 15 4 15 16 16 16 1. 2. 3. 4. 5. 6. 7. 8. Transmitter Vents/Drain Plastic plug Blind cover Cover gasket Window cover Digital LCD Integral Display Terminal block with electronics 9. 10. 11. 12. 13. 14. 15. 16. Internal grounding screw Terminal block link Digital LCD Display connector Terminal block screws Cover locking screw Bracket Tool set for pipe mounting Tool set for wall mounting Tag DPT 364 Variable 1 PV Variable 2 mA 0.00290 12.006 psi units mA 50 % % Bar variable Menu start - Digital LCD display view Transmitter components overview 364xS User’s Manual 9 Opening the box Packaging content: § Standard Transmitters (364DS model or 364PS model) The transmitter package includes: § § § The transmitter An envelope including the instruction ma nual and the calibration report Optional content depending on the selected options: § Football adapter to ½” NPT-f and gaskets § Bracket kit § Electrical connection blind plug Identification The instrument is identified by the data plates. Nameplate The Nameplate provides information concerning the model code number, maximum working pressure, range and span limits, power supply and ou tput signal. See code/specification sheet for detailed information. This plate also shows: § § § the transmitter serial number (please refer to this number in making i nquiries) the specific details of the transducer (diaphragms material, fill fluid, range limit number) the Safety Hazardous Area details (see the specific paragraph in this manual) and identification Tag plate An additionally Tag plate, welded to the instrument, provides the customer tag number and the calibrated range. This plate includes also the code (s) of transmitter with relevant options and of seal(s) (if present), the special request code (if any) and the High Pressure side (P2 as default). Wired on plate (option I2) Whenever the transmitter h as been equipped with the option I2, a wired on SST plate with 4 lines, 32 characters per line will be supplied. The plate will be wired on the instrument with a SST wire. Opening the box 364xS User’s Manual 10 Handling The instrument does not require any special precautions should be observed. during handling although normal good practice Storage The instrument does not require any s pecial treatment if stored as di spatched and within the specified ambient conditions (Type 2 to ANSI/ASME N45.2.2 -1978). There is no limit to the storage period, although the terms of guarantee remain as agreed with the Company and as given in the order acknowledgement. Opening the box 364xS User’s Manual 11 Installation Study these installation instructions carefully before proceeding. Failure instructions may cause a malfunction or personal hazard. to observe the warnings and WARNING ! Before you begin read “Safety” on page 3. As already specified in the Safety Notes the installation must only be carried out by suitably trained personnel and in accordance with the information given. Any deviation from these instructions, will transfer the complete liability to the user. It is not recommended to install the transmitter and leave the cover open or the electica l input without the appropriate plugs. Water penetration can damage the electrical circuit. Preparing for installation Before installing the transmitter check its compatibility with the following measurement and safety requirements: § § § § § § Explosion protection Pressure rating (Maximum Working Pressure and measurement range) Operating voltage limits Process and ambient Temperature limits Environmental limits (EMC, vibration, others) Corrosion compatibility of transmitter wetted parts and process media Mounting the transmitter Position the process connection to enable process connections to be made. It is important to mount the transmitter and to lay the process piping so that gas bubbles, when measur ing liquids, or condensate when measuring gases, will flow back to the process and not enter the transmitter measuring chamber. Vent/drain valves on the transmitter are located on the body. The transmitter and these drain/vent valves have to be located higher than the taps on liquid service in order to allow the venting of entrapped gas or below the taps on gas service in order to allow the air vent off or condensate to drain off. Vent installation Drain installation . For safety reasons, take care of the drain/vent valves position so that when the process fluid is removed during the drain/vent operation it is directed down and away from technicians. It is rec ommended to mount the transmitter to prevent this possible source of damage for unskilled operators. NO! Installation 364xS User’s Manual 12 In addition, consider the need for a testing or calibration input, and provide space for the h ousing cover to be removed for electrical wiring and maintenance. WARNING ! Process leaks may cause harm or result in death. Install and tighten process connectors and all accessories (including manifolds) before applying pressure. In case of toxic or other dangerous process fluid, take all precautions as recommended in the relevant Material Safety Data Sheet when draining or venting. Use only a 12 mm (15/32 “) hexagonal spanner to tighten the bracket bolts Application related recommendation Flow measurement with clean liquids or steam (condensable vapor) gate valves Flow filling tees 1. Place taps to the side of the line. 2. Mount the drain/vent valve upward. 3. In case of steam application fill the vertical section of the connecting lines with a compatible fluid through the dedicated filling tees. 3-valve manifold Flow measurement with gas or liquids with solids in suspension 3-valve manifold 1. Place taps in the top of the li ne 2. Mount the transmitter above the taps line from the bottom of the manifold Flow 3-valve manifold 3-valve manifold line from the back of the manifold Flow line from the bottom of the manifold Flow Installation 364xS User’s Manual 13 Gate valve Level measurement with closed tanks and non condensable fluids (dry leg) 1. Mount the transmitter at the same height or below the lowest level to be measured. 2. Connect the High Pressure Side (P2 as default) of the transmitter to the bottom of the tank 3. Connect the Low Pressure Side (P1 as default) of the transmitter to the upper part of the tank, above the maximum level of the tank. maximum level Gate valve minimum level Condensate trap (optional) Gate valve Level measurement with condensable fluids (wet leg) closed tanks and 1. Mount the transmitter at the same height or below the lowest level to be measured. 2. Connect the High Pressure Side (P2 as default) of the transmitter to the bottom of the tank 3. Connect the Low Pressure Side (P1 as default) of the transmitter to the upper part of the tank. 4. Fill the vertical section of the connecting line to the upper part of the tank with a compatible liquid through the dedicated filling tee. Filling tee maximum level Wet leg Gate valve minimum level Drain Valve Installation 364xS User’s Manual 14 Pipe mounting In this chapter you can find some suggestions for pipe mounting. alternative solutions that the end user can define himself. These suggestions shall not limit Horizontal pipe Horizontal bracket Transmitter on the back Vent position Horizontal pipe Horizontal bracket Transmitter on the back Drain position Horizontal pipe Horizontal bracket Transmitter on the front Drain position Horizontal pipe Horizontal bracket Transmitter on the front Vent position Installation 364xS User’s Manual 15 Horizontal pipe Vertical bracket Transmitter on the front Vent position Horizontal pipe Vertical bracket Transmitter on the front Drain position Horizontal pipe Perpendicular bracket Vent position Vertical pipe Perpendicular bracket Transmitter on the front Vent position Vertical pipe Perpendicular bracket Transmitter on the back Vent position Installation 364xS User’s Manual 16 Vertical pipe Perpendicular bracket Transmitter on the front Drain position Vertical pipe Perpendicular bracket Transmitter on the back Drain position Pipe mounting instruction 1. Fix the bracket • in the defined position on the pipe using the tool ‚ and the adapter ƒ to guarantee the best mechanical performances of the assembly • † 2. Tight the nuts „ with the washers … below them in order to fix the bracket (the torque value shall be 10 Nm - 12 Nm) Fix the Pressure transmitter using the two screws † in the package; (the torque value shall be 1 Nm ± 0.2 Nm) ‚ † „ … … ƒ „ Installation 364xS User’s Manual 17 Wall mounting In this chapter you can find suggestions for wall mounting. The se suggestions shall not limit alternative solutions that the end user can define himself. Wall mounting Vertical bracket Drain position (left) Vent position (right) Wall mounting instruction 1. Fix the bracket • at the wall in the final position 2. Connect the instrument interface using the two long screws ‚ and bolts ƒ in the package (the torque value shall be between 10 Nm and 12 Nm) 3. Fix the Pressure transmitter „ using the two short screws … in the package (the torque value shall be between 10 Nm and 12 Nm) „ ‚ ‚ … ƒ … ƒ • The use of the washes as indicated in the picture is strongly reccomended Digital LCD Integral Display positioning In case the optional integral display meter is installed, it is possible to mount the display in four different positions rotated clockwise or counter clockwise with 90° ? steps. This is possible by using one of the four connections located on the back of the display at a 90° angle each from the other. Installation 364xS User’s Manual 18 Wiring HART hand-held communicator may be connected at any wiring termination point i n the loop, provided the minimum resistance is 250 ohm. If this is less than 250 ohm, additional resistance should be added to allow communications. Hazardous (Classified) Location Unclassified Hazardous Location Wiring requirements For signal / power connection use twisted, stranded pairs of wiring no 18 to 22 AWG / 0.8 to 0.35 mm 2 Ø up to 5,000 feet (1 500 meters). Longer loops require larger wire. If a shielded wire is used the shield should be grounded only at one end , not both ends. In case of wiring at transmitter end, use the terminal located inside the housing marked with the symbol: Protective Earthing Wire this ground connection marked with the symbol to a suitable earth gr ound. For a transmitter measuring loop an earth ground should maintain a resistance of 5 ohms or less. Use a heavy conductor, at least 15 AWG / 1,6 mm 2 Ø WARNING ! A protective grounding connection is absolutely necessary to insure personnel protec tion, to protect against surge and to prevent explosions in potentially explosive atmosphere. WARNING ! The surge protection is always present and if the transmitter is installed in a Hazardous classified location, it must be powered from a voltage source i solated from mains (galvanic separation). Furthermore the potential equalization for the entire powering cable must be guaranteed since the intrinsic safety circuit of the transmitter is grounded. Installation 364xS User’s Manual 19 Electrical connection WARNING ! Do NOT make electrical connections unless the electrical code designation stamped on the transmitter data plate agrees with the classification of the area in which the transmitter is to be installed. Failure to comply with this warning can result in fire or explosion. The 4 to 20 mA output signal and the dc power supply to the transmitter are carried from the same pairs of wires. The supply voltage at the transmitter terminals m ust be between the limits of 10. 5 and 42V dc. For intrinsically safe approval EEx ia supply must not exceed 30 Vdc. In some countries the maximum power supply voltage is limited to a lower value. WARNING ! Electrical shock can result in death or serious injury. Avoid contact with the leads and terminals. High voltage that may be present on leads can cause electrical shock. Follow these steps to wire the transmitter: 1. 2. 3. Remove the red temporary plastic plug from one of the two electrical connection ports located at both sides in the upper part of the transmitter housing These connection ports have a ½ inch internal NPT or CM20 x 1.5 mm threads. Various adaptors and bushings can be fitted to these t hreads to comply with plant wiring (conduit) standards. Remove the housing cover . WARNING ! In an Explosion-Proof/Flame-Proof installation, do not remove the transmitter covers when power is applied to the unit. Remove the power supply and continue the operation 4. 5. Run wiring through the open port Connect the positive lead to the + terminal, and the negative lead to the - terminal WARNING ! Note: Do not connect the power across the test terminals. Power could damage the diode in the test connection. Plug and seal the electrical ports. Make sure that when the installation has been completed, the electrical ports are properly sealed ag ainst entry of water and corrosive vapors and gases. WARNING ! Cables, cable gland and unused port plug must be in accordance with the intended type of protection (e.g. intrinsically safe, explosion proof, etc.) and degree of protection (e.g. IP6x or NEM A 4x). In particular, for explosion proof installation, plug the unused opening with a plug certified for explosion containment. Installation 364xS User’s Manual 6. 7. 8. 20 If applicable, install wiring with a drip loop. Arrange the drip loop so the bottom is lower than the conduit connections and the transmitter housing. Install the housing cover, turn it to seat O-ring into the housing and then continue to hand tighten until the cover contacts the housing metal -to-metal. In EEx d (Explosion Proof) installation, lock the cover rotation by turning the set nut (use the 2 mm Allen key supplied with the instrument). Replace the temporary red plastic plug on the se cond electrical connection port located in the upper part of the transmitter housing with the appropriate plug depending on the certification requirement or degree of protection (e.g. IP6x or NEMA 4x) For further information find the relevant instruction manuals www.abb.com or from local ABB representatives. searching for the keyword “IM/*36*” on Remote Meter wiring Before starting the Remote Meter wiring previous paragraph instructions. be sure that the transmitter has been wired according to the WARNING ! Electrical shock can result in death or serious injury. Avoid contact with the lead s and terminals. High voltage that may be present on leads can cause electrical shock. Follow these steps to wire the Remote Meter: 1. Remove the housing cover. WARNING ! In an Explosion-Proof/Flame-Proof installation, do not remove the transmitter covers when power is applied to the unit. Remove the power supply and continue the operation 2. Run wiring through the same port of the electrical connection or the other port removing the plug. 3. Connect the positive lead of the remote meter to the “EST METER +” terminal, and the negative lead to the “–“ terminal. Installation 364xS User’s Manual 21 4. Plug and seal the ports. Make sure that when the installation has been completed, the ports are properly sealed against entry of water and corrosive vapors and gases. WARNING ! Cables, cable gland and unused port plug must be in accordance with the intended type of protection (e.g. intrinsically safe, explosion proof, etc.) and degree of protection (e.g. IP6x or NEMA 4x). In particular, for explosion proof installation, plug the unused opening with a plug certified for explosion containment. 5. Install the housing cover, turn it to seat O-ring into the housing and then continue to hand tighten until the cover contacts the housing metal -to-metal. In EEx-d (Explosion Proof) installation, lock the cover rotation by turning the set nut (use the 2 mm Allen key supplied with the instrument). For further information find the relevant instruction manuals www.abb.com or from local ABB repr esentatives. searching for the keyword “IM/*36*” on Check the installation Before applying power and pressure, perform the following checks. √ Check Installation environment conforms to the transmitter specification for ambient conditions The transmitter is moun ted securely The transmitter is properly grounded The input power voltage matches the transmitter nominal input voltage The plugs/vents and process connections are tightened as specified The proper electrical adapter are installed and are tightened as specified The red plug on the electical input not used is replaced with a proper plug The cover is tightened up to metal to metal contact with the housing All the requirements are satisfied if the transmitter is working in hazardous area Apply power The transmitter will start up automatically at the power up. Start up The transmitter has default parameter settings that are sufficient for many situations and start up of the instrument. However, review the configuration chapter for the default parameter settings values and the parameter changes procedures. Installation 364xS User’s Manual 22 Configuration Default configuration The data default configuration at the product delivery is the following: Pressure Polarity: Damping: Units: LRV: URV: Totalizer: Transfer function: Hardware setting: Low saturation current: High saturation current: Low fail current: High fail current: P2 High pressure 1 second kPa 0 kPa equal to URL OFF linear Write protect mode in OFF, Failsafe direction High 3.8 mA 20.5 mA 3.7 mA 22 mA Easy Setup To facilitate commissioning the 364 Display has the capability to run a sequence of predefined setup steps with the main configuration settings. When you start the Easy Setup you must continue up to the end to exit. To start the Easy Setup: Navigate the Digital LCD Integral Display menu, select Easy Setup. F Digital LCD Integral Display Keys sequence to start the Easy Setup: 1 Define the language If the desired language is different from the indicated language select Edit then scroll the desired language (see the following table) with the up and down keys and confirm with OK. Select Next to continue. English German Spanish French Italian Define the Pressure Polarity If the desired High Pressure side is different from the indicated select Edit then scroll the desired High Pressure side (see the following table) with the up and down keys and confirm with OK. Select Next to continue. P2 = High pressure P1 = High pressure the high pressure side is the pressure chamber indicated as P2 on the transmitter body. The output pressure will be P2 – P1 the high pressure side is the pressure chamber indicated as P1 on the transmitter body. The output pressure will be P1 – P2 Define the Engineering Unit If the desired Engineering Unit is different from the indicated, select Edit then scroll the desired unit (see the following table) with the up and down keys and confirm with OK. Select Next to continue. mbar 2 g/cm 2 Kg/cm Pa kPa torr atm MPa inH2O°C millibar grams per square centimeter kilo grams per square centimeter pascal kilopascal torr atmosphere Megapascal inches of water at 4 degrees Celsius mmH2O°C inH2O°F inHg°C ftH2O°F mmH2O°F mmHg°C psi bar millimeter of water at 4 degrees Celsius inches of water at 68 degrees Fahrenheit (20°C) inches of mercury at 0 degrees Celsius feet of water at 68 degrees Fahrenheit (20°C) millimeter of water at 68 degrees Fahrenheit (20°C) millimeter of mercury at 0 degrees Celsius pounds per square inch bars Configuration 364xS User’s Manual 23 Define the Lower Range value (LRV) If the desired LRV is different from the indicated select Edit, scroll the desired value for the digit in reverse color with the up and down key s and confirm with Next. Repeat the operation for the seven digits and confirm with OK. Select Next to continue. Note: the minimum and the maximum allowed values are indicated on the display . Define the Upper Range Value (URV) If the desired URV is differe nt from the indicated select Edit, scroll the desired value for the digit in re verse color with the up and down keys and confirm with Next. Repeat the operation for the seven digits and confirm with OK. Select Next to continue. Note: the minimum and the ma ximum allowed values are indicated on the display . Define the Transfer Function Type If the desired Tranfer Function is different from the indicated select Edit then scroll the desired Transfer Function (see the following table) with the up and down keys and confirm with OK. Select Next to continue. Linear Square Root 3/2 5/2 Polynomial Double Poly Output = x Output = x 1/2 Output = x 3/2 Output = x 5/2 Output = A0 + A1 x + A2 x2 + A3 x3+ A4 x4 + A5 x5 Output = B0 + B1 x + B2 x2 if x ≤ k Output = C0 + C1 x + C2 x2 if x > k Bidirectional Flow Define the Linearization Point If the desired Linearization Point for the Square Root Transfer Function is different from the indicated select Edit, scroll the desired value for the digit in reverse colour with the up and down keys and confirm with Next. Repeat the operation for the five digits and confirm with OK. Select Next to continue. Note: the minimum and the maximum value s to introduce is indicated on the display . Define the Low Flow Cut Off If the desired Low Flow Cut Off for a Flow Transfer Function is different from the indicated select Edit, scroll the desired value for the digit in reverse colour with the up and down keys and confirm with Next. Repeat the operation for the five digits and confirm with OK. Select Next to continue. Note: the minimum and the maximum value s to introduce is indicated on the display . Run the Zero Scaling In case a Zero Scaling is required apply the pressure for the Zero and select (the bargraph will indicate the working progress). Select Next to continue. OK. Wait for the auto -set end Define the Damping If the desired Damping is different from the indicated value change it with the up and down keys and confirm with OK. Configuration 364xS User’s Manual 24 HART Configuration Basic Configuration Functions This chapter describes some additional function s provided by the 364xS models which are unique to the 2600T pressure transmitter family. Set the Pressure Polarity When a pressure polarity different from default value (P2 – P1) is needed, it is possible to change it following one of the methods described in the next paragraphs. Caution In case the Pressure Polarity is changed and the Range Value (LRV or URV) is different from the Range Limit (LRL or URL) it is recommended to trim the 364XS sensor with pressure to obtain the maximum accuracy (see the relevant paragraph in this User’s Manual) . Set the Pressure Polarity by Digital LCD Integral Display Navigate the Digital LCD Integral Display menu, select Device Config > Pressure Polarity, and the used High Pressure side is indicated. To change it select Edit then scroll the desired High Pressure side (see the following table) with the up and down keys and confirm with OK. P2 = High pressure P1 = High pressure the high pressure side is the pressure chamber indicated as P2 on the transmitter body. The output pressure will be P2 – P1 the high pressure side is the pressure chamber indicated as P1 on the transmitter body. The output pressure will be P1 – P2 F Digital LCD Integral Display Keys sequence to set the Pressure Polarity: 2 – 5 – Edit Set the Pressure Polarity by HHT Changing the Pressure Polarity by Hand Held Terminal (HHT) is available. Please refer to the device manual for the appropriated operations. Set the Pressure polarity by PC Changing the Pressure Polarity by PC is available using dedicated Software . ABB can provide the references and the Software. Please refer to the Software i nstructions for the appropriate operations. Set the Damping When damping different from default value is needed, it is possible to set its value in seconds following one of the methods described in the next paragraphs. Set the Damping configuration by Digital LCD Integral Display Navigate the Digital LCD Integral Display menu, select Device Config > Damping, set the desired value with the up and down keys and confirm with OK. F Digital LCD Integral Display Keys sequence to set the Damping: 2 – 3 Set the Damping configuration by CoMeter Damping configuration by CoMeter is available with the 695 Field Indicator manual for the appropriate operations. . Please refer to the de vice Set the Damping configuration by HHT Damping configuration by Hand Held Terminal is available appropriate operations. . Please refer to the de vice manual for the Configuration 364xS User’s Manual 25 Set the Damping configuration by PC Damping configuration by PC is available using dedicated Software . ABB can provide the references and the Software. Please refer to the Software i nstructions for the appropriate operations. Set the Units To monitor the proc ess using the appropriate units paragraphs. follow one of the methods described in the next Set the Units by Digital LCD Integral Display To change the unit in the Digital LCD Integral Display Navigate the Digital LCD Integral Display menu, select Display > Display Settings > Display Eng. Unit, and the possible Engineering variables will be available. To select the type, push Edit and scroll with a up and down keys; confirm with OK. Pressure Temperature Flow Mass & Volume Density Level Other Custom Unit The in-use unit for the type will be available. To modify select Edit then scroll the desired unit (see the following tables) with the up and down keys and confirm with OK. Units for Pressure variable mbar 2 g/cm 2 Kg/cm Pa kPa torr atm MPa inH2O°C millibar grams per square centimeter kilo grams per square centimeter pascal kilopascal torr atmosphere Megapascal inches of water at 4 degrees Celsius mmH2O°C inH2O°F inHg°C ftH2O°F mmH2O°F mmHg°C psi bar millimeter of water at 4 degrees Celsius inches of water at 68 degrees Fahrenheit (20°C) inches of mercury at 0 degrees Celsius feet of water at 68 degrees Fahrenheit (20°C) millimeter of water at 68 degrees Fahrenheit (20°C) millimeter of mercury at 0 degrees Celsius pounds per square inch bars Units for Temperature variable °C °F °R K degree Celsius degree Fahrenheit degree Rankine Kelvin Configuration 364xS User’s Manual 26 Units for Flow variable 3 m /h gal/s Mgal/d L/s ML/d CFS 3 ft /d 3 m /s 3 m /d ImGal/h ImGal/d g/s g/min g/h kg/s kg/min kg/h kg/d t/min t/h t/d lb/s lb/min lb/h cubic meter per hour US gallons per second mega US gallons per day liter per second megaliter per day cubic feet per second cubic feet per day cubic meter per second cubic meter per day Imperial Gallons per hour Imperial Gallons per day gram per second gram per minute gram per hour kilogram per second kilogram per minute kilogram per hour kilogram per day ton per minute ton per hour ton per day pound per second pound per minute pound per hour lb/d STon/min STon/h STon/d LTon/h LTon/d 3 Nm /h NL/h SCFM CFH 3 m /min bbl/s bbl/min bbl/h bbl/d gal/h ImGal/s L/h gal/d CFM GPM L/min ImGal/m pound per day short ton per minute short ton per hour short ton per day long ton per hour long ton per day Normal cubic meter per hour Normal liter per hour standard cube feet per minute cubic feet per hour cubic meter per minute barrel per second barrel per minute barrel per hour barrel per day US gallon per hour Imperial gallon per second liter per hour US gallon per day cubic feet per minute US gallon per minute liter per minute Imperial gallon per minute Units for Mass and Volume variable L hl 3 in 3 ft 3 yd gallon ImpGal bushel bbl bbl liq SCF liter hectoliter cubic inch cubic feet cubic yard US gallon Imperial gallon bushel barrel barrel liquid standard cubic feet 3 Normal cubic meter Normal liter gram kilogram ton pound short ton long ton ounce cubic meter lb/ft g/ml kg/L g/L 3 lb/in 3 STn/yd degTwad 3 pound per cubic feet grams per milliliter kilograms per Liter grams per Liter pound per cubic inch short ton per cubic yard degrees Twaddell meter centimeter millimiter ft in feet inch Newton milliamperes volts mV % millivolts percentage Nm NL g kg t lb STon LTon oz 3 m Units for Density degB hv degB lt degAPI SGU 3 g/cm 3 kg/m lb/gal degrees Baum heavy degrees Baum light degrees API specific gravity units gram per cubic meter kilogram per cubic meter pound per US gallon Units for Level m cm mm Other Units N mA V F Digital LCD Integral Display Keys sequence to change the unit on the Display : 3 – 7 – 1 To change the PV unit in the transmitter: Navigate the Digital LCD Integral Display menu, select Device Config > Rerange > Rerange no pressure > Engineering Unit, and the used unit will be available. To modify select Edit then scroll the desired unit (see the following table) with the up and down keys and confirm with OK. Configuration 364xS User’s Manual mbar 2 g/cm 2 Kg/cm Pa kPa torr atm MPa inH2O°C millibar grams per square centimeter kilo grams per square centimeter pascal kilopascal torr atmosphere Megapascal inches of water at 4 degrees Celsius 27 mmH2O°C inH2O°F inHg°C ftH2O°F mmH2O°F mmHg°C psi bar millimeter of water at 4 degrees Celsius inches of water at 68 degrees Fahrenheit (20°C) inches of mercury at 0 degrees Celsius feet of water at 68 degrees Fahrenheit (20°C) millimeter of water at 68 degrees Fahrenheit (20°C) millimeter of mercury at 0 degrees Celsius pounds per square inch bars F Digital LCD Integral Display Keys sequence to change the unit in the Transmitter : 2 – 1 – 2 – 1 – Edit Set the Unit by CoMeter/ProMeter Unit configuration by CoMeter/ProMeter is available with the 695 Field Indicator . Please refer to the device manual for the appropriate operations. Set the Unit configuration by HHT Unit configuration by Hand Held Terminal is available . Please refer to the de vice manual for the appropriate operations. Set the Unit configuration by PC Unit configuration by PC is available using dedicated Software . ABB can provide the references and the Software. Please refer to the Software i nstructions for the appropriate operations. Set the LRV When a LRV different from the selected is needed i t is possible to change it following one of the methods described in the next paragraphs. Set the LRV by Local Keys Set the transmitter applied pressure as for Lower Range Value (LRV). When the applied pressure is stable push the Zero local adjustment key (Z) located on the terminal block and release. After this operation the reading shall mo ve to 4 mA. If no changes occur repeat the operation. Set the LRV by Digital LCD Integral Display To set the LRV reading of the Digital LCD Integral Display (the engineering units have to be selected): Navigate the Digital LCD Integral Display menu, select Display > Display settings > Display LRV (0%), and the Zero values will be available. Select the desired value and confirm. F Digital LCD Integral Display Keys sequence to set the Display LRV : 3 – 7 – 2 - Edit To set the Transmitter LRV without reference pressure: Navigate the Digital LCD Integral Display menu, select Device Config > Rerange > Rerange no pressure > Set LRV, and the LRV values will be available. To modify select Edit then scroll the desired value for the digit in reverse color with the up and down keys and confirm with Next. Repeat the operation for the seven digits and confirm with OK. Note: the minimum and the maximum value s to select are indicated on the display . F Digital LCD Integral Display Keys sequence to set the LRV wihout pressure: 2 – 1 – 2 – 2 – Edit Configuration 364xS User’s Manual 28 To set the Transmitter LRV with reference pressure: Set the transmitter applied pressure as for Lower Range value (0%) . Navigate the Digital LCD Integral Display menu, select Device Config > Rerange > Rerange with pressure > Set LRV (0%). Select OK to start the autoadjust. F Digital LCD Integral Display Keys sequence to set the LRV wih pressure: 2 – 1 – 1 – 1 – OK Set the LRV by CoMeter LRV configuration by CoMeter is available with the 695 Field Indicator . Please refer to the device manual for the appropriate operations. Set the LRV by HHT LRV configuration by Hand Held Terminal is available . Please refer to the device manual for the appropriate operations. Set the LRV by PC LRV configuration by PC is available using dedicated Software . ABB can provide the references and the Software. Please refer to the Software i nstructions for the appropriate operations. Set the URV When a URV different from the selected is needed it is possible to change it following one of the methods described in the next paragraphs. Set the URV by Local Keys Set the transmitter applied pressure as for Upper Range Value. When the applied pressure is stable push the Span local adjustment key (S) located on the terminal block and release. After this operation the reading shall move to 20 mA. If no changes occur repeat the operation. Set the URV by Digital LCD Integral Display To set the URV reading of the Digital LCD Integral Display (the engineering units have to be selected): Navigate the Digital LC D Integral Display menu, select Display > Display settings > Display URV (100%), and the Span values may be available. Select the desired value and confirm. F Digital LCD Integral Display Keys sequence to set the Display URV : 3 – 7 – 3 - Edit To set the Transmitter URV without reference pressure: Navigate the Digital LCD Integral Display menu, select Device Config > Rerange > Rerange no pressure > Set URV, and the URV values may be available Select the desired value and confirm. F Digital LCD Integral Displa y Keys sequence to set the URV wihout pressure : 2 – 1 – 2 – 3 – Edit Configuration 364xS User’s Manual 29 To set the Transmitter URV with reference pressure: Set the transmitter applied pressure as for Upper Range value ( 100%). Navigate the Digital LCD Integral Display menu, select Device Config > Rerange > Rerange with pressure > Set URV (100%). Select OK to start the autoadjust. F Digital LCD Integral Display Keys sequence to set the URV wih pressure : 2 – 1 – 1 – 2 – OK Set the URV by CoMeter URV configuration by CoMeter is available with the 695 Field Indicator . Please refer to the de vice manual for the appropriate operations. Set the URV by HHT URV configuration by Hand Held Terminal is available . Please refer to the de vice manual for the appr opriate operations. Set the URV by PC URV configuration by PC is available using dedicated Software . ABB can provide the references and the Software. Please refer to the Software instructions for the appropriated operations. Set the Totalizer When a Totalizer setting different from the selected is needed it is possible to change it following one of the methods described in the next paragraphs. In case the Totalizer is used in Bidirectional Flow the Totalizer LRV (0%) and the Totalizer URV (100%) have to be equal in absolute value. Set the Totalizer by Digital LCD Integral Display Preliminary operations To set the Totalizer status: Totalizer > Totalizer status and the actual status will be available as "on" or "off". IMPORTANT: Before setting all the different parameters of the totalizer, be sure that it is turned off, in order you can change the totalizer data as required. After finishing totalizer setting o perations, please remember to switch it on. To modify the status select Edit and change the status with the up and down keys and confirm with Next Navigate the Digital LCD Integral Display menu, select F Digital LCD Integral Display Keys sequence to set the Totalizer Status: 4– 1 – 1 - Edit To set the Totalizer LRV (0%): Navigate the Digital LCD Integral Display menu, select Totalizer > Totalizer setting > Totalizer LRV (0%), and the value will be available. To modify select Edit then scroll the desired value for the digit in reverse color with the up and dow n keys and confirm with Next. Repeat the operation for the seven digits and confirm with OK. Note: the minimum and the maximum value s to introduce is indicated on the display . F Digital LCD Integral Display Keys sequence to set the Totalizer LRV : 4 – 3 – 1 – Edit To set the Totalizer URV (100%): Navigate the Digital LCD Integral Display menu, select Totalizer > Totalizer setting > Totalizer URV (100%), and the value will be available. To modify select Edit then scroll the desired value for the digit in re verse color with the up and down keys and confirm with Next. Repeat the operation for the seven digits and confirm with OK. Note: the minimum and the maximum value s to introduce are indicated on the display . F Digital LCD Integral Display Keys sequence to set the Totalizer URV : 4 – 3 – 2 – Edit To set the Input Totalizer Engineering Units: Navigate the Digital LCD Integral Display menu, select Totalizer > Totalizer setting > Input Eng. Units, and the used Totalizer Engineering Units will be available. To modify select Edit then scroll the desired unit (see the following table) with the up and down keys and confirm with OK. F Digital LCD Integral Display Keys sequence to set the Totalizer Input Engineering Units : 4 – 3 – 3 – Edit Configuration 364xS User’s Manual 3 m /h gal/s Mgal/d L/s ML/d CFS 3 ft /d 3 m /s 3 m /d ImGal/h ImGal/d g/s g/min g/h kg/s kg/min kg/h kg/d t/min t/h t/d lb/s lb/min lb/h cubic meter per hour US gallons per second mega US gallons per day liter per second megaliter per day cubic feet per second cubic feet per day cubic meter per second cubic meter per day Imperial Gallons per hour Imperial Gallons per day gram per second gram per minute gram per hour kilogram per second kilogram per minute kilogram per hour kilogram per day ton per minute ton per hour ton per day pound per second pound per minute pound per hour 30 lb/d STon/min STon/h STon/d LTon/h LTon/d 3 Nm /h NL/h SCFM CFH 3 m /min bbl/s bbl/min bbl/h bbl/d gal/h ImGal/s L/h gal/d CFM GPM L/min ImGal/m pound per day short ton per minute short ton per hour short ton per day long ton per hour long ton per day Normal cubic meter per hour Normal liter per hour standard cube feet per minute cubic feet per hour cubic meter per minute barrel per second barrel per minute barrel per hour barrel per day US gallon per hour Imperial gallon per second liter per hour US gallon per day cubic feet per min ute US gallon per minute liter per minute Imperial gallon per minute To set the Permanent Totalizer Engineering units: Navigate the Digital LCD Integral Display menu, select Totalizer > Totalizer setting > Permanent Eng. Unit > Engineering Unit, and the used Permanent Totalizer Engineering Units will be available. To modify select Edit then scroll the desired unit (see the following table) with the up and down keys and confirm with OK. L hl 3 in 3 ft 3 yd gallon ImpGal bushel bbl bbl liq SCF liter hectoliter cubic inch cubic feet cubic yard US gallon Imperial gallon bushel barrel barrel liquid standard cubic feet 3 Nm NL g kg t lb STon LTon oz 3 m Normal cubic meter Normal liter gram kilogram ton pound short ton long ton ounce cubic meter F Digital LCD Integral Display Keys sequence to set the Permanent Totalizer Engineering units: 4 – 3 – 4 – 1 – Edit To set the Permanent Totalizer Custom unit: Navigate the Digital LCD Integral Display menu, select Totalizer > Totalizer setting > Permanent Eng. Unit > Custom Unit, and the used Permanent Totalizer Custom Units will be available. To modify select Edit then scroll the desired alphanu meric symbol with the up and down keys and confirm with Next. Repeat the operation for the six digits and confirm with OK. F Digital LCD Integral Display Keys sequence to set the Permanent Totalizer Custom units: 4 – 3 – 4 – 2 – Edit To set the Permanent Totalizer Conversion Factor: Navigate the Digital LCD Integral Display menu, select Totalizer > Totalizer setting > Permanent Eng. Unit > Conversion Factor, and the used Permanent Totalizer Custom Units will be available. To modify select Edit then scroll the desired value with the up and down keys and confirm with Next. Repeat the operation for the seven digits and confirm with OK. Note: the minimum and the maximum value s to introduce are indicated on the display . F Digital LCD Integral Display Keys sequence to set the Permanent Totalizer Conversion Factor: 4 – 3 – 4 – 3 – Edit Configuration 364xS User’s Manual 31 To set the Batch Totalizer Engineering units: Navigate the Digital LCD Integral Display menu, select Totalizer > Totalizer setting > Batch Eng. Unit > Engineering Unit, and the used Batch Totalizer Engineering Units will be available. To modify select Edit then scroll the desired unit (see the following table) with the up and down keys and confirm with OK. L hl 3 in 3 ft 3 yd gallon ImpGal bushel bbl bbl liq SCF liter hectoliter cubic inch cubic feet cubic yard US gallon Imperial gallon bushel barrel barrel liquid standard cubic feet 3 Nm NL g kg t lb STon LTon oz 3 m Normal cubic meter Normal liter gram kilogram ton pound short ton long ton ounce cubic meter F Digital LCD Integral Display Keys sequence to set the Batch Totalizer Engineering units : 4 – 3 – 5 – 1 – Edit To set the Batch Totalizer Custom unit: Navigate the Digital LCD Integral Display menu, select Totalizer > Totalizer setting > Batch Eng. Unit > Custom Unit, and the used Batch Totalizer Custom Units will be available. To modify select Edit then scroll the desired alphanumeric symbol with the up and down keys and confirm with Next. Repeat the operation for the six digits and confirm with OK. F Digital LCD Integral Display Keys sequence to set the Batch Totalizer Custom units: 4 – 3 – 5 – 2 – Edit To set the Batch Totalizer Conversion Factor: Navigate the Digital LCD Integral Display menu, select Totalizer > Totalizer setting > Batch Eng. Unit > Conversion Factor, and the used Batch Totalizer Conversion Factor will be available. To modify select Edit then scroll the desired value with the up and down keys and confirm with Next. Repeat the operation for the seven digits and confirm with OK. Note: the minimum and the maximum value s to introduce are indicated on the display . F Digital LCD Integral Display Keys sequence to set the Batch Totalizer Conversion Factor: 4 – 3 – 5 – 3 – Edit To set the Bidirectional Flow mode: During this operation the Totalizer status has to be in “Off” mode and the Transmitter Transfer function has to be in Bidirectional Flow (see this ma nual for the appropriate procedure ). Navigate the Digital LCD Integral Display menu, select Totalizer > Totalizer setting > Bidirectional Flow >, and the used Totalizer Bidirectional Flow will be available. To modify select Edit then scroll the desired value with the up and down keys (see the following table) and confirm with OK. Add Subtract the positive and negative flows are added the total flow is the positive minus the negative F Digital LCD Integral Display Keys sequence to set the Bidirectional Flow mode: 4 – 3 – 6 – Edit Set the Totalizer by HHT Totalizer configuration by Hand Held Terminal appropriated operations. is available. Please refer to the device manual for the Set the Totalizer by PC Totalizer configuration by PC is available using dedicated Software. ABB can provide the references and the Software. Please refer to the Software i nstructions for the appropriate operations. Configuration 364xS User’s Manual 32 Special functions The transmitter has some functions to support the user in case of applications that require advance output configuration. Transfer functions The 2600T Pressure Transmitter Series provides a selection of output functions, as follows: Linear for differential, gauge and absolute pressure or level measurements Sq. Root (x) for flow measurements using restriction type primary element, like orifice plate, integral orifice, Venturi or Dall tube and similar. Sq. Root (x3) for open channel flow measurements using rectangular or trapezoidal weir Sq. Root (x5) for open channel flow measurements using V-notch (triangular) weir. Polynomial for input linearization using a 5th-order polynomial function for input linearization using 2 polynomial functions of 2nd order Costant current for loop or associated equipment test. Note: x and output are in the range 0 to 1 (0% to 100%) These output functions can be activated using a Configuration Tool (CoMeter, Digital LCD Integral Display, Hand Held Communicator and PC). The transfer function can be applied to the analog signal 4 to 20 mA or to the indication (in engineering units) on the CoMeter with the 695 Field Indicator and/or to the Digital LCD Integral Display. Transfer functions description Linear Using this function, the relationship between the input (measured value), e xpressed in % of the calibrated span and the output is linear (i.e.: at 0% input, corresponds 0% output - 4mA - at 50% input corresponds 50% output - 12mA - and at 100% input corresponds 100% output - 20mA). Square roots 25 20 15 % Using the Square Root function, the output (in % of the span) is proportional to the square root of the input signal in percentage of the calibrated span (i.e.: the instrument gives an analog output proportional to the rate of flow). The possibility to have the full Square Root function is given. 10 5 0 0 1 2 3 4 5 6 % Configuration 364xS User’s Manual 33 25 Theoretical Square Root Curve 20 programmable percentage value 15 % To avoid the extremely high gain error with the input approaching zero, the transmitter output is linear with the input up with a slope of 1 up to 0.5% and then still linear with the appropriated slope to a programmable percentage value between 10 % and 20%. This option is offer in order to ensure a more stable output near zero. This also allows an easier zero adjustment and performs a reduced zero error for ambient temperature variations. 10 5 0 0 1 2 3 4 5 6 5 6 % Slope = 1 25 20 Theoretical Square Root Curve 15 % To neglect the values with the input approaching zero, the transmitter output is zero with the input up to a programmable percentage value between 0 % and 20%. This option is offer in order to ensure a more stable flow measure. 10 This option is possible for all the list functions. ed output 5 programmable percentage value 0 0 1 2 3 4 % The x3 Square root Transfer function can be used for open channel (see figures on the right) flow measurement using ISO 1438 rectangular weirs (Hamilton Smith, Kindsvater -Carter, Rehbock formulas) or trapezoidal weirs (Cippolett i formulas) and ISO 1438 Venturi flumes. In these types of devices the relationship between the flow and the developed head h (the differential pressure mesured by the transmitter) is proportional to h 3/2 or square root of h3. Other types of Venturi or Par shall flume do not follow this relationship. Using this function, the output (in % of the span) is proportional to the square root of the third power of the input signal in % of the cali brated span: the instrument gives an output proportional to the rate of flow calculated using the above mentioned formulas . The x5 Square root Transfer function can be used for open channel flow measurement using ISO 1438 V notch (triangular) weirs (see figure on the right) where the relationship between the flow and the developed head h (the differential pressure measured by the transmitter) is proportional to h 5/2 or square root of h 5. Using this function, the output (in % of the span) is proportional to the square root of the fifth power of the input signal in % of the calibrated span: the instrument (it gives an output proportional to the rate of flow calculated using the Kingsvater -Shen formula). Configuration 364xS User’s Manual 34 Bidirectional The bidirectional function, applied to the transmitter input (x) expressed in percentage of the calibrated span, has the following form: 20 Theoretical Square 15 Root Curve I x I 1/2 10 where: x and Output should be normalized in the range -1 to 1 for calculation purpose, with following Output meaning: Output = 0 means Analog ou t 4 mA; Output = 1 means Analog out 20 mA. This function can be used for flow measurement purpose when the flow is in both the directions and the primary elements are designed to perform this type of measure. 5 m³/h Output = ½ + ½ sign (x) 25 20 mA 12 mA -5 -4 -3 -2 0 -1 0 1 2 3 4 5 -5 -10 -15 Cut off programmable percentage value 4 mA -20 Linear programmable percentage value -25 Polynomial The polynomial function, applied to the transmitter input (x) expressed in percentage of the calibrated span, has the following form: Output = A0 + A1 x + A 2 x2 + A3 x3 + A4 x4 + A 5 x5 where: x and Output should be normalized in the range 0 to 1 for calculation purpose, with following Output meaning: Output = 0 means Analog out 4 mA; Output = 1 means Analog out 20 mA This function can be used for linearization purpose: the user can plot the characteristic curve of the input and find, using a mathematical method, the parameters of the polynomium that better approximate the plotted curve. Check, after the calculation, if the maximum error is compatib le with the application. The following are some application examples. Cylindrical vessel with flat ends The following polynomium gives the area of the circular section in relation to the heigth of the liquid in the vessel (h): 2 3 4 Output = - 0.02 + 0.297 h + 2.83 h - 4.255 h + 3.5525 h -1.421 h 5 Volume = Output • (d/1.12838) 2• L where: d = vessel diameter, L = vessel length. Cylindrical vessel with hemispherical ends The following polynomium gives the area of the circular section in relation to the heigth of the liquid in the vessel (h): 2 3 4 Output = - 0.02 + 0.297 h + 2.83 h - 4.255 h + 3.5525 h -1.421 h 5 Volume = Output • (d/1.12838) 2• (L+ 2/3 d) where: d = vessel diameter, L = vessel length. Cylindrical vessel with elliptical or pseudoelliptical ends The following polynomium gives the area of the circular section in relation to the heigth of the liquid in the vessel (h): 2 3 4 Output = - 0.02 + 0.297 h + 2.83 h - 4.255 h + 3.5525 h -1.421 h 5 Volume = Output • (d/1.12838) 2• (L+ 2/3 m) where: d = vessel dia meter, L = vessel length, m = length of the minor ellipse axis Configuration 364xS User’s Manual 35 Spherical tank The following polynomium gives the area of the circular section in relation to the height of the liquid in the vessel (h): Output = 3 h2 - 2h3 Volume = Output • (d/1.2407) 3 where: d = sphere diameter Partial level measurement Two methods can be used: 1) Plot the changes in volume in relation to the level changes and using a mathematical method, find the relevant polynomium; 2) Use the above polynomium coefficients and cal ibrate the transmitter range to cover the full diameter of the vessel or tank: the changes in volume for the h changes between h 0 and hmax will be correct. Of course the transmitter will transmit, when the level is ≤h0, the volume corresponding to h0: the same apply for level ≥h max. Two Polynomial functions of 2nd order The Analog Output transfer function can also be defined as a two polynomial function. Both polynomials are of 2nd order. So two different polynomial functions are used: Output = A0 + A1 x + A2 x2 Output = B0 + B1 x + B2 x2 1 if x ≤ k if x > k Ax and Bx terms of the poly nomials have to be calculated according to the shape of the vessel. A PC based sof tware tool is available for poly nomial coefficients definition. K 0 Set the Transfer function on the transmitter Set the Transfer function on the transmitter by Digital LCD Integral Display Navigate the Digital LCD Integral Display menu, select Device Config > Transfer Function > Type, and the Transfer Function in use will be available. To modify select Edit then scroll the desired Transfer Function (see the following table) with the up and down keys and confirm with OK. Linear Square Root 3/2 5/2 Polynomial Double Poly Bidirectional Flow Output = x Output = x 1/2 Output = x 3/2 Output = x 5/2 Output = A0 + A1 x + A2 x2 + A3 x3+ A4 x4 + A5 x5 Output = B0 + B1 x + B2 x2 if x ≤ k Output = C0 + C1 x + C2 x2 if x > k Output = ½ + ½ sign (x) x 1/2 F Digital LCD Integral Display Keys sequence to set the Transfer Function: 2 – 6 – 1 – Edit Configuration 364xS User’s Manual 36 In case the Square root transfer function has been selected Navigate the Digital LCD Integral Display menu, select Device Config > Transfer Function > Linearization Point, and the percentage input value up to the Transfer function is anyway linear may be available. Select the desired value and confirm. In case a Flow transfer function has been selected Navigate the Digital LCD Integral Display menu, select Device Config > Transfer Function > Low Flow Cut Off, and the input value up to the Transfer function is anyway zero may be available. Select the desired value and confirm. In case one of the polynomial transfer function has been selected The existing polynomial coefficients in the transmitter will be used. The coefficients can be set or modified only by HHT and PC . Set the Transfer function on the transmitter by CoMeter The Transfer function setting by CoMeter is available with the 695 Field Indicator . Please refer to the device manual for the appropriate operations. Set the Transfer function on the transmitter by HHT The Transfer function setting by Hand Held Terminal is available . Please refer to the device manual for the appropriate operations. Set the Transfer function on the transmitter by PC The Transfer function setting by PC is available using dedicated Software . ABB can provide the references and the Software. Please refer to the Software instructions for the appropriate operations. Set the Transfer function on the Meters The Transfer function on the Meters works only on the meters reading and not on the trasmitter output. Set the Transfer function on the Digital LCD Integral Display On the Digital LCD Integral Display only the transfer function can be selected. The existing Square root parameter or polynomial coefficients in the transmitter will be used. The coefficients can be set or modified only by HHT and PC. Navigate the Digital LCD Integral Display menu, select Function, and the Transfer functions will be available. Select the desired value and confirm. Display > Display Settings > Display Transfer F Digital LCD Integral Display Keys sequence to set the Transfer Function on the Display : 3 – 7 – 4 – Edit Set the Transfer function on the Digital LCD Integral Display by HHT The Digital LCD Integral Display Transfer function setting by Hand Held Terminal is available. Please refer to the device manual for the right operations. Set the Transfer function on the Digital LCD Integral Display by PC The Digital LCD Integral Display Transfer function setting by PC is available using dedicated Software. ABB can provide the references and the Software. Please refer to the Software instr uctions for the right operations. Signal simulation (fixed output current) During the start up or for diagnostic purposes, it is useful to have the possibility to generate some reference signal to be sent to the receiver (Controll er, DCS, recorder, PLC, etc.). This is possible directly by means of the transmitter, without disconnect its electrical connection and without a 4 -20 mA generator or a pressure generator. Configuration 364xS User’s Manual 37 Fixed output current by Digital LCD Integral Display To set 4 mA fixed output current Navigate the Digital LCD Integral Display menu, select Diagnostics > Loop Test > Set 4 mA. Confirm. F Digital LCD Integral Display Keys sequence to set 4 mA fixed output current: 7 – 2 – 1 To set 20 mA fixed output current Navigate the Digital LCD Integral Display menu, select fixed output current. Confirm. F Diagnostics > Loop Test > Set 20 mA for 20 mA Digital LCD Integral Display Keys sequence to set 20 mA fixed output current: 7 – 2 – 2 To set any fixed output current Navigate the Digital LCD Integral Display menu, select Diagnostics > Loop Test > Set Custom Value and the fixed output current values will be available. Select the desired value and confirm. F Digital LCD Integral Display Keys sequence to set any fixed output current : 7 – 2 – 3 Fixed output current by CoMeter Set of the Fixed output current by CoMeter is available with the 695 Field Indicator device manual for the appropriate operations. . Please refer to the Fixed output current by HHT Set of the Fixed output current by Hand Held Terminal is available . Please refer to the device manual for the appropriate operations. Fixed output current by PC Set of the Fixed output current by PC is available using dedicated Software. ABB can provide the references and the Software. Please refer to the Software instructions for the appropriate operations. Hardware settings Write protect mode Changes can be prevented to the transmitter configuration data with the write protection electronics dip switch 2. If the transmitter write protection is activated the transmitter will not accept an y writes to its memory. Configuration changes, such as trim and reranging cannot take place. In case the Digital LCD Integral Display is installed (no access to switch), the Write protect mode can also be set by H ART command using the HHT and the PC. Pleas e refer to the device manual and Software instruction for the right operation. Position the right dip switch in ON to prevent accidental or deliberate change of configuration data. Position the right dip switch in OFF to change the configuration data. If data configuration is not allowed check the Software Write lock using the HHT or PC. ON OFF ON OFF Change the failsafe direction The transmitter alarm direction is set by repositio ning the electronics dip swit ch 1. The output value is in accordance with NE43 NAMUR recommendations. Configuration 364xS User’s Manual 38 Check the Software failsafe direction is set to Hardware before the operation. Position the left dip switch in L for fail low (i.e. output current: 3.7 mA) Check the Software failsafe directio n is set to Hardware before the operation. Position the left dip switch in H for fail high (i.e. output current: 22 mA) L H L H Software settings Write protect mode Changes can be prevented to the tra nsmitter configuration data with the write protection electronics dip switch 1. If the transmitter write protection is activated the transmitter will not accept any writes to its memory. Configuration changes, such as trim and reranging cannot take place. In case the Digital LCD Integral Display is installed the Write protect mode can also be set by H ART command using the HHT and the PC. Please refer to the device manual and Software instruction for the right operation. Change the failsafe direction The transmitter alarm direction is set selecting the Failure Mode in the transmitter software. The output value is in accordance with NE43 NAMUR recommendations. Navigate the Digital LCD Integral Display menu, select Device config > Output on alarm > Failure Mode and the Failure Mode in use will be visible. To modify select Edit then scroll the desired Failure Mode (see the following table) with the up and down keys and confirm with OK. As per Dip-Switch Fail High Fail Low F to give the Failure Mode control at the Hardware setting to set the Failure Mode in high current condition (the value can be set by the user following the appropriate procedure of this manual) to set the Failure Mode in low current condition (the value can be set by the user following the appropriate procedure of this manual) Digital LCD Integral Display Keys sequence to change the failsafe direction : 2 – 4 – 1 - Edit Set the Current Output limits When the Current Output limits on alarm and saturation different from the selected is needed it is possible to change it following one of the methods described in the next paragraphs. Set the Current Output limits on the Digital LCD Integral Display To set High Saturation current Navigate the Digital LCD Integral Display menu, select Device config > Output on alarm > Set Fail Current > High Saturation > Edit, and the value change will be possible. Select the desired value and con firm. F Digital LCD Integral Display Keys sequence to set the High saturation current : 2 – 4 – 2 – 1 – Edit To set Low Saturation current Navigate the Digital LCD Integral Display menu, select Device config > Output on alarm > Set Fail Current > Low Saturation> Edit, and the value change will be possible . Select the desired value and confirm. F Digital LCD Integral Display Keys sequence to set the Low saturation current : 2 – 4 – 2 – 2 – Edit To set Fail High current Navigate the Digital LCD Integral Displ ay menu, select Device config > Output on alarm > Set Fail Current > Fail High> Edit, and the value change will be possible . Select the desired value and confirm. F Digital LCD Integral Display Keys sequence to set the Fail High current : 2 – 4 – 2 – 3 - Edit Configuration 364xS User’s Manual 39 To set Fail Low current Navigate the Digital LCD Integral Display menu, select Device config > Output on alarm > Set Fail Current > Fail Low> Edit, and the value change will be possible . Select the desired value and confirm. F Digital LCD Integral Display Keys sequence to set the Fail Low current : 2 – 4 – 2 – 4 - Edit Set the Current Output limits by HHT The setting of the Current Output limits manual for the right operations. by Hand Held Terminal is available. Please refer to the device Set the Current Output limits by PC The setting of the Current Output limits by PC is available using dedicated Software . ABB can provide the references and the Software. Please refer to the Software instructions for the right operations. Configuration 364xS User’s Manual 40 Operation Digital LCD Integral Display The meter, " Digital LCD Integral Display" is connected on the electronics. It is of "digital" type microprocessor driven. It can be used for transmit ter configuration, as well as for display various type of information, from Process Variable to output percentage. In addition, diagnostic information highest priority message will appear message in order of priority. is provided. First, the , followed by the next Here is a list of self explanatory errors and warning messages: "Electronic Fail", "Sensor Elec. Fail", "Sensor Fail", "DAC Out of Range", "Sensor Invalid", "PV out of Limit", "Sensor T Out Limit", "Static P Out Limit", "Electr. T Out Limit", "Current Out Satur", "Current Out Fixed", "Config. Error", "Tot. Config Error", "Overrange", "Consistency Check" For additional details see the “Transmitter Diagnostics” section of this manual. Navigate the Digital LCD Integral Display The Digital LCD Integral Display offers you an extensive range of functions, which are grouped into menus: • • • • • to access the menu, press the key close to the display indication (the bottom right icons on the Display). to select the menu or submenus press the key close to the “Select” display indication (bottom right position on the Display) to exit the menu or submenus press the key close to the “Exit” display indication (bottom left position on the Display) to come back one step in the menu or submenus press the key close to the “ Back” display indication. to scroll through the menu (up and down in the list on the display) or submenus use two keys in the middle Digital LCD Integral Display list of menu and submenu functions The Digital LCD Integral Display menu has been design ed to offer self-diagnostics when used by a skilled operator. Operation 364xS User’s Manual 41 Note The Main Menu, the Sub Menu, the Sub Sub Menu and the Utility view are also indicated on the display with a number. The menu navigation can be desc ribed also as a sequence of the corresponding numbers that is called “Digital LCD Integral Display Keys sequence“ In any case the following table better details the available functions. The instructions of this manual further define the Digital LCD Integral Display menu sequence to run an operation. Display indication Description Level Type This function helps the end user to run the instrument basic configuration Main Menu Language Set the display language Utility Enumerated Pressure Polarity Set the pressure transmitter High pressure side Utility Enumerated Engineering Unit Set the Engineering Variable unit Utility Enumerated Set LRV Set the Lower Range Value Utility Numerical Set URV Set the Upper Range value Utility Numerical Transfer Function Type Set the transmitter output transfer function Utility Enumerated Lin Point Set the point up to the output is linear with input if the Square root is set Utility Numerical Low Flow Cut Off Utility Numerical Auto-Set Zero Scaling Set the point up to the output is zero for any input value, when square root is selected Set the Primary Variable at Zero Utility Auto Adjust Damping Set the damping value Utility Manual Adjust This function provides all the settings related to the device configuration Main Menu This function provides the transmitter rerange Sub Menu This function provides the transmitter rerange when a pressure source is available Sub Sub Menu Set LRV (0%) Set the Low Range Value at the applied pressure Utility Auto Adjust Set URV (100%) Set the Upper Range Value at the applied pressure Utility Auto Adjust This function provides the transmitter rerange when no pressure source is available Sub Sub Menu Engineering Unit Select the engineering units for the Engineering variable Utility Enumerated Set LRV Set the Lower Range Value at the defined value Utility Numerical Set URV Set the Upper Range Value at the defined value Utility Numerical This function provides the transmitter rerange when any pressure source is available related to the percentage value Sub Sub Menu Set LRV (0%) Set the Lower Range Value at the defined value in percentage Utility Numerical Set URV (100%) Set the Upper Range Value at the defined value in percentage Utility Numerical This function provides the Primary Variable Scaling Sub Menu Shift the primary variable to zero Utility Easy Setup Device Config Rerange Rerange with pressure Rerange no pressure Percentage Rerange PV Scaling Auto-Set Zero Scaling Auto Adjust Operation 364xS User’s Manual Display indication 42 Description Level Type PV Scaling Shift the primary variable to the defined pressure value Utility Numerical Reset PV Scaling Remove the existing Primary Variable Scaling Utility Auto Adjust Damping Set the damping value Utility Manual Adjust Output on Alarm This function provides the alarm settings Sub Menu Failure mode Set the failure mode in down scale or upscale Utility Set fail current This function provides the current values in case of output saturation or transmitter fail Sub Sub Menu High saturation Set the high saturation current at the desired value Utility Numerical Low saturation Set the low saturation current at the desired value Utility Numerical Fail high Set the high fail current at the desired value Utility Numerical Fail low Set the low fail current at the desired value Utility Numerical Pressure Polarity Set the pressure transmitter High pressure side Utility Enumerated Transfer Function This function provides the output transfer function setting Sub Menu Type Set the transmitter transfer function type Utility Enumerated Linearization Point Set the value up to the transfer function is linear when the square root is selected Utility Numerical Low Flow Cut Off Set the value up to the transfer function is zero when the square root is selected Utility Numerical Set the write protection of the device Utility Enumerated This function provides all the settings related to the display configuration Main Menu Language Set the display language Utility Enumerated Operator View Set the Operator view mode Utility Enumerated Display Variable 1 Set the display first line variable Utility Enumerated Display Variable 2 Set the display second line variable Utility Enumerated Display Bargraph Set the bargraph variable Utility Enumerated Contrast Set the display contrast Utility Manual Adjust Display Settings This function has all the settings related with the variable on the display Sub Menu This function set the display to show the Engineering unit Sub Sub Menu Pressure Set the display to show the Engineering unit of pressure Utility Enumerated Temperature Set the display to show the Engineering unit of temperature Utility Enumerated Flow Set the display to show the Engineering unit of flow Utility Enumerated Mass & Volume Set the display to show the Engineering unit of mass and volume Utility Enumerated Density Set the display to show the Engineering unit of density Utility Enumerated Level Set the display to show the Engineering unit of level Utility Enumerated Other Set the display to show the Engineering unit not in the main list Utility Enumerated Custom Unit Set the display to show the customized Engineering unit Utility ASCII String SW Write Protect Display Display Eng. unit Enumerated Operation 364xS User’s Manual Display indication 43 Description Level Type Set Display LRV (0%) Set the display to show 0% at the defined Lower Range Limit Utility Numerical Set Display URV (100%) Set the display to show 100% at the defined Upper Range Limit Utility Numerical Display Transfer Func Set the display transfer function (indipendent from the output transfer function) Utility Enumerated This function set the security features Sub Sub Menu Display Protection Set the protection or remove the protection Utility ASCII String Change Password Modify the password Utility ASCII String This function provides all the totalizer settings Main Menu Totalizer status Set the totalizer status Utility Reset Reset the totalizer value Sub Menu This function provides the setting of the permanent totalizer Sub Sub Menu Reset Reset the permanent totalizer Utility Auto Adjust Tot. Protection Set the permanent totalizer protection Utility ASCII String Change Password Modify the permanent totalizer password Utility ASCII String Set the batch totalizer parameter Utility Auto Adjust This function provides the totalizer setting Sub Menu Totalizer Status Set the Totalizer ON/OFF Utility Enumerated Totalizer LRV (0%) Set the Totalizer Lower Range Value Utility Numerical Totalizer URV (100% ) Set the Totalizer Upper Range Value Utility Numerical Input Eng. Units Set the Totalizer engineering unit Utility Enumerated Permanent Eng. Unit This function provides the Permanent Totalizer engineering unit Sub Sub Menu Engineering Unit Set the Permanent Totalizer engineering unit among a predifined list Utility Enumerated Custom Unit Set the Permanent Totalizer engineering unit in the custom version Utility ASCII String Conversion Factor Set the Permanent Totalizer Conversion Factor Utility Numerical This function provides the Batch Totalizer engineering unit Sub Sub Menu Engineering Unit Set the Batch Totalizer engineering unit using a predefined list Utility Enumerated Custom Unit Set the Batch Totalizer engineering unit in the custom version Utility ASCII String Conversion Factor Set the Batch Totalizer Conversion Factor Defines the sum or the subtraction of the positive and negative flow (the bidirectional transfer function has to be selected) Utility Numerical Utility Enumerated Security Totalizer Permanent Totalizer Batch Totalizer Totalizer Settings Batch Eng. Unit Bidirectional Flow Enumerated Communication This function provides all the Communication settings Main Menu HART Tag Set the Tag value in the transmitter database Utility ASCII String Descriptor Set the Descriptor value in the transmitter database Utility ASCII String Message Set the Message value in the transmitter database Utility ASCII String Operation 364xS User’s Manual 44 Display indication Description Level Type Set the Polling Address value in the transmitter database Utility This function provides all the Calibration settings Main Menu This function provides the trimming of the sensor Sub Menu Lower sensor trim Set the lower Sensor Trim point Utility Numerical Upper sensor trim Set the upper Sensor Trim point Utility Numerical This function provides all the trimming of the current output Sub Menu Set 4 mA Trim the output current to 4 mA when the action is performed Utility Numerical Set 20 mA Trim the output current to 20 mA when the action is performed Utility Numerical Set the output current Trim and the Sensor Trim at the Calibration performed in the factory during the trasmitter manufacturing Utility Enumerated This function provides all the Diagnostics information Main Menu This function provides all the Main Diagnostics information Sub Menu PV Monitor the PV value Utility Numerical HART Eng. Output Monitor the HART Engineering Output value Utility Numerical Output current Monitor the Current Output value Utility Numerical Output % Monitor the Percentage Output value Utility Numerical Permanent Totalizer Monitor the Permanent Totalizer value Utility Numerical Batch Totalizer Monitor the Batch Totalizer value Utility Numerical Static Pressure Monitor the Static Pressure value Utility Numerical Sensor temperature Monitor the Sensor temperature value Utility Numerical This function provides to force the output current at a specific value Sub Menu Set 4 mA Set the output to 4 mA Utility Auto Adjust Set 20 mA Set the output current to 20 mA Utility Auto Adjust Set custom value Set the output current to a defined value Utility Manual Adjust Polling Address Calibrate Sensor Trim Output Trim Reset to Factory Trim Diagnostics Diagnostics Loop Test Enumerated Digital LCD Integral Display view setting To view the menu in a specific language: Navi gate the Digital LCD Integral Display menu, select Display > Language, and the used language wil l be available. To modify select Edit then scroll the desired language with the up and down keys and confirm with OK. F Digital LCD Integral Display Keys sequence to set the language: 3 – 1 – Edit To modify the Operator view: Navigate the Digital LCD Integral Display menu, select Display > Operator View, and the used view will be available. To modify select Edit then scroll the desir ed Operator view (see the following table) with the up and down keys and confirm with OK. Operation 364xS User’s Manual One Line One Line + Bargraph Two Lines Two Lines + Bargraph 45 to view the Variable 1 as defined in the Display to view the Variable 1 as defined in the Display and the Bargraph proportional with the variable full scale to view the Variable 1 and the Variable 2 as defined in the Display to view the Variable 1 and the Variable 2 as defined in the Display and the Bargraph proportional with the variable full scale Digital LCD Integral Display Keys sequence to modify the Operator View: 3 – 2 – Edit F To define the Variable 1 in the Display: Navigate the Digital LCD Integral Display menu, select Display > Display Variable 1, and the used variable will be available. To modify select Edit then scroll the desired Variable 1 view (see the following table) with the up and down keys and confirm with OK. Pressure Output % Current Out Engineering Output Static Pressure Sensor Temperature to view the Primary Variable value to view th Primary Variable in percentage to view the current Output value in mA to view the Output value in Engineering Units to view the Static Pressure value to view the Sensor Temperature value Digital LCD Integral Display Keys sequence to modify the define the Variable 1: 3 – 3 – Edit F To define the Variable 2 in the Display: Navigate the Digital LCD Integral Display menu, select Display > Display Variable 2, and the used variable will be available. To modify select Edit then scroll the desired Varia ble 2 view (see the following table) with the up and down keys and confirm with OK. Pressure Output % Current Out Engineering Output Permanent Totalizer Batch Totalizer Static Pressure Sensor Temperature to view the Primary Variable value to view th Primary Variable in percentage to view the current Output value in mA to view the Output value in Engineering Units to view the Permanent totalizer value to view the Batch totalizer value to view the Static Pressure value to view the Sensor Temperature value Digital LCD Integral Display Keys sequence to modify the define the Variable 2: 3 – 4 – Edit F To define the Bargraph variable in the Display: Navigate the Digital LCD Integral Display menu, select Display > Display Bargraph, and the used variable in the Bargraph will be available. To modify select Edit then scroll the desired Variable with the up and down keys for the Bargraph view (see the following table) and confirm with OK. Pressure Output % Current Out Engineering Output Static Pressure Sensor Temperature to view the Primary Variable value to view th Primary Variable in percentage to view the current Output value in mA to view the Output value in Engineering Units to view the Static Pressure value to view the Sensor Temperature value Digital LCD Integral Display Keys sequence to modify the define the Bargraph variable : 3 – 5 – Edit F To regulate the Display Contrast: Navigate the Digital LCD Integral Display menu, select Display > Contrast, and the used contrast will be available. To modify the contrast use the up and down keys and confirm with OK. F Digital LCD Integral Display Keys sequence to modify the define the Bargraph variable : 3 – 6 Operation 364xS User’s Manual 46 To define the Variable Engineering Units in the display: Navigate the Digital LCD Integral Displ ay menu, select Display > Display Settings > Display Eng. Unit, and the possible engineering variables will be available. To select the type push Edit and select with up and down keys; confirm with OK. Pressure Temperature Flow Mass & Volume Density Level Other Custom Unit The in-use unit for the type will be available. To modify select Edit then scroll the desired Unit with the up and down keys and confirm with OK. Digital LCD Integral Display Keys sequence to modify the define the Variable Engineering Units in the display : 3 – 7 - 1 F To protect the Display from changes: Navigate the Digital LCD Integral Display menu, select Display > Security > Display Protection, and the actual protection will be available (Unlock and Lock). To modify select Edit then scroll the desired protection with the up and down keys and confirm with OK. Digital LCD Integral Display Keys sequence to protect the Display : 3 – 8 – 1 – Edit F To change the Display Password: The Display Password is a five digit string. The default value, at the transmitter delivery is ¬¬¬¬¬. This default password does not give the possibility to lock Navigate the Digital LCD Integral Display menu, select Display > Security > Change Password, and the actual password will be available . To modify select Edit then scroll the desired alphanumeric symbol with the up and down keys and confirm with Next. Repeat the operation for the five digit s and confirm with OK. Digital LCD Integral Display Keys sequence to change the Display password: 3 – 8 – 2 – Edit F HART Transmitter Accessing Communication data The Operation data access could be necessary to look or verify the transmitter configuration. Accessing Communication data by Digital LCD Integral Display To access the transmitter communication data: Navigate the Digital LCD Integral Display menu, select Communication, scroll the submenu with the up and down keys select one of the following submenu: Hart Tag Descriptor Message Polling Address to view e modify the transmitter Tag to view e modify the transmitter Descriptor to view e modify the transmitter Message to view the polling address To modify select Edit then scroll the des ired alphanumeric symbol with the up and down keys and confirm with Next. Repeat the operation for the necessary digits and confirm with OK F Digital LCD Integral Display Keys sequence to access the transmitter communication data: 5 Operation 364xS User’s Manual 47 Accessing Communication data by CoMeter Accessing Communication data by CoMeter is available with the 695 Field Indicator device manual for the appropriate operations. . Please refer to the Accessing Communication data by HHT Accessing Communication data by Hand Held Terminal is available . Please refer to the de vice manual for the appropriate operations. Accessing Communication data by PC Accessing Communication data by PC is available using dedicated Software . ABB can provide the references and the Software. Please refer to the Software instructions for the appropriate operations. Accessing Operation data The Operation data access could be necessary to look or verify the transmitter configuration. Accessing Operation data by Digital LCD Integral Display To access the transmitter measured variables: Navigate the Digital LCD Integral Display menu, select Diagnostics > Diagnostics, scroll the submenu with the up and down keys select one of the following submenu: PV Hart Eng. Output Output Current Output % Premanent Totalizer Batch Totalizer Static Pressur Sensor Temperature F to monitor the measured Primary Variable to access the Output value in Engineering Units to access the Output value in mA to access the Output value in percentage to monitor the Permanent Totalizer value to monitor the Batch Totalizer value to access the measured Static Pressure to access the measured sensor temperature Digital LCD Integral Display Keys sequence to access the transmitter measured variables : 7 – 1 Accessing Operation data by CoMeter Accessing Operation data by CoMeter is available with the 695 Field Indicator manual for the appropriate operations. . Please refer to the de vice Accessing Operation data by HHT Accessing Operation data by Hand Held Term inal is available . Please refer to the de vice manual for the appropriate operations. Accessing Operation data by PC Accessing Operation data by PC is available using dedicated Software . ABB can provide the references and the Software. Please refer to the Software instructions for the appropriate operations. Operation 364xS User’s Manual 48 Trimming and Calibration Set Up The calibration requires a stable Pressure Generator and a Reference Pressure Indicator with the appropriate accuracy (at least 4 times better than the required accuracy of the transmitter/measuring-chain). The pneumatic circuit shall be verif ied to exclude connection leakage problem or plugged lines. The picture on the right show the complete test rigs that can be selectively used to suit the calibration for the Pressure (gauge) and the Differential transmitters. Before the calibration ensure that: • the required span, the upper and lower range value (URV and LRV) are within the span and range limits (URL and LRL) indicated on the nameplate • the transmitter is properly powered and the electrical connections correctly made. • the write protect switch, located on the electronics module is in position OFF (write allowed) . Power Supply 10.5 to 42 V dc Make the electrical connections as indicated in the picture. Connect a precision milliammeter as shown and remove the short circuit link. Precision Milliameter Sensor trim The Sensor trim is a “set of operations, which establishes, by refe rence to standards, the relationship which exists, under specified conditions, between a reference indication and a result of a measurement” (International Vocabulary on Metrology). In case the detected errors exceed the required accuracy, it is possible t o correct the transmitter settings to compensate these errors. If the PV scaling has been performed the sensor trim is not available. Reset the PV scaling before continuing the Sensor trim. NOTE: If this cannot be accomplished, the instrument may require a factory calibration or even its substitution. Sensor Zero Trim The Sensor Zero trim provide the correct offset of the factory characterization. The transmitter shall be within five percent of the true zero. If the PV scaling has been performed the sensor trim is not available. Reset the PV scaling before continuing the Sensor trim. Sensor Zero trim by CoMeter Sensor Zero trim by CoMeter is available with the 695 Field Indicator . Please refer to the device manual for the appropriated operations. Operation 364xS User’s Manual 49 Sensor Zero trim by HHT Sensor Zero trim by Hand Held Terminal is available operations. . Please refer to the device manual for the right Sensor Zero trim by PC Sensor Zero trim by PC is available using dedicated Software . ABB can provide the references and the Software. Please refer to the Software instructions for the right operations. Sensor Low Trim The Sensor Low trim provide the correct offset of the factory characterization. The transmitter shall be within five percent of the true value. If the PV scaling has been performed the sensor trim is not available. Reset the PV scaling before continuing the Sensor trim. Sensor Low trim by Digital LCD Integral Display Set the transmitter applied pressure as for Low trim value and wait for a stable value. Navigate the Digital LCD Integral Display menu, select Calibrate > Sensor Trim > Lower Sensor Trim and the Sensor Low trim values is available. To modify select Edit then scroll the desired value with the up and down keys and confirm with Next. Repeat the operation for the seven digits and confirm with OK. The first digit is the sign ( - or space for +) and one digit can be the dot. The Maximum and Minimum values are indicated on the Display as reference. F Digital LCD Integral Display Keys sequence to Low Trim the sensor: 6 – 1 – 1 – Edit Sensor Low trim by HHT Sensor Low trim by Hand Held Terminal is available operations. . Please refer to the device manual for the right Sensor Low trim by PC Sensor Low trim by PC is available using dedicated Software . ABB can provide the refer ences and the Software. Please refer to the Software instructions for the right operations. Sensor High trim Adjustment of the Sensor high trim value provides a slope correction to the characterization curve based on the low trim value. If the PV scaling has been performed the sensor trim is not available. Reset the PV scaling before continue the Sensor trim. Sensor High trim by Digital LCD Integral Display Set the transmitter applied pressure as for High trim value and wait for a stable value. Navigate the Digital LCD Integral Display menu, select Calibrate > Sensor Trim > Upper Sensor Trim and the Sensor High trim values is available. To modify select Edit then scroll the desired value with the up a nd down keys and confirm with Next. Repeat the operation for the seven digits and confirm with OK. The first digit is the sign ( - or space for +) and one digit can be the dot. Note: the Maximum and Minimum values are indicated on the Display as reference. F Digital LCD Integral Display Keys sequence to High Trim the sensor: 6 – 1 – 2 – Edit Sensor High trim by HHT Sensor High trim by Hand Held Terminal is available operations. . Please refer to the device manual for the right Operation 364xS User’s Manual 50 Sensor High trim by PC Sensor High trim by PC is available using dedicated Software . ABB can provide the references and the Software. Sensor Static trim The purpose of this procedure is to optimi ze transmitter performance by reducing the effect of static line pressure in these applications. 2600T Pressure transmitter Series does not normally require this procedure because optimization based on factory characterization occurs in the sensor. In any case this trim can be performed if required. Static trim by HHT Sensor Static trim by Hand Held Terminal is available operations. . Please refer to the device manual for the right Static trim by PC Sensor Static trim by PC is available using dedicated Software . ABB can provide the references and the Software. Calibration The Calibration is an operation by which the LRV and URV are adjusted. It sets the 4 and 20 mA points required pressures. See Basic Configuration Function, Set the LRV and Set the URV for the procedures. at Output trimming (Digital to Analog trim) The Analog Output Trim allows the adjustment of the transmitter’s current output at the 4 and 20 mA points to match the plant standards. This command adjusts the digital to analog signal conversion. Output trimming by Digital LCD Integral Display To set the 4 mA output current Connect the pressure transmitte r as defined in the Trimming and Calibration Set Up. Using a precison milliamperometer read the current output. Navigate the Digital LCD Integral Display menu, select Calibrate > Output Trim > Set 4 mA and the value will be available. To modify select Edit then scroll the desired value with the up and down keys and confirm with Next. Repeat the operation for the seven digits to have the same reading of the milliamperometer and confirm with OK. Note: the Maximum and Minimum values are indicated on the Displa y as reference. F Digital LCD Integral Display Keys sequence to set the 4 mA output current : 6 – 2 – 1 – Edit To set the 20 mA output current Connect the pressure transmitter as defined in the Trimming and Calibration Set Up. Using a precison milliamperometer read the current at the output. Navigate the Digital LCD Integral Display menu, select Calibrate > Output Trim > Set 20 mA and the value will be available. To modify select Edit then scroll the desired value with the up and down keys and confirm with Next. Repeat the operation for the seven digits to have the same reading of the milliamperometer and confirm with OK. Note: the Maximum and Minimum values are indicated on the Display as reference. F Digital LCD Integral Display Keys sequence to set the 20 mA output current : 6 – 2 – 2 – Edit Output trimming by CoMeter Output trimming by CoMeter is available with the 695 Field Indicator . Please refer to the device manual for the appropriate operations. Operation 364xS User’s Manual 51 Output trimming by HHT Output trimming by Hand Held Terminal is available . Please refer to the de vice manual for the appropriate operations. Output trimming by PC Output trimming by PC is available using dedicated Software. ABB can provide the references and the Software. Please refer to the Software i nstructions for the appropriate operations. Additional calibration procedures The 364 pressure transmitter models allow some useful procedures below described. PV scaling The PV scaling operation can be used to alig n the "zero" of the process (e.g .: the minimum tank level) with the "zero" reading of the transmitter. A configuration tool shall be use to perfor m this operation through digital communication. After the PV scaling all the Sensor trimming operation are disabled. There are two different ways to perform a PV scaling: Method 1: apply to the transmitter a pressure that corresponds to the scaling value ( offset) and perform the operation using the configuration tools (Digital LCD Integral Display, Hand Held Terminal and PC). Method 2: calculate the scaling value (offset) and apply it to the transmitter following the operation available on the configuration tool (Hand Held Terminal and PC). With this method it is possible to perform a scaling operation even for a value different then zero. PV scaling by Digital LCD Integral Display As for method 1 Apply to the transmitter a pressur e that corresponds to the scaling value, wait for a stable value. Navigate the Digital LCD Integral Display menu, select Device Config > PV Scaling > Auto-Set Zero Scaling. To accept the operation select OK and wait for the end (a bargraph will indicate th e working progress). F Digital LCD Integral Display Keys sequence to Auto-Set Zero Scaling: 2 – 2 – 1 – OK As for method 2 Navigate the Digital LCD Integral Display menu, select Device Config > PV Scaling > PV Scaling. To modify select Edit then scroll the desired value with the up and down keys and confirm with Next. Repeat the operation for the seven digits and confirm with OK. Note: the Maximum (+ 80% of URL) and Minimum (- 80% of URL) usable values are indicated on the Display as reference. F Digital LCD Integral Display Keys sequence to Set the PV Scaling: 2 – 2 – 2 – Edit Set PV scaling by HHT PV scaling by Hand Held Terminal is available operations. . Please refer to the de vice manual for the appropriate Set PV scaling by PC PV scaling by PC is available using dedicated Software . ABB can provide the references and the Software. Please refer to the Software i nstructions for the appropriate operations. Removing PV scaling In case the Sensor trimming operation is necessary the PV scaling (Sensor Offset) has to be removed. Operation 364xS User’s Manual 52 Removing PV scaling by Digital LCD Integral Display Navigate the Digital LCD Integral Display menu, select Device Config > PV Scaling > Reset PV Scaling. To accept the remove select OK and wait for the end (a bargraph will indicate the working progress). F Digital LCD Integral Display Keys sequence to Remove the PV Scaling: 2 – 2 – 3 – OK Removing PV scaling by HHT PV scaling removing by Hand Held Terminal is available appropriate operations. . Please refer to the de vice manual for the Removing PV scaling by PC PV scaling removing by PC is available using dedicated Software. ABB can provide the references and the Software. Please refer to the Software i nstructions for the appropriate operations. Zero suppression Two different methods can be used for Zero suppression: Method 1: after completion of the zero and span trim procedures, apply to the High Side connection (P2 as default) a pressure equal to the pressure to be suppressed. Allow time for pressure stabilization and then press the Zero local adjustment key (Z) located behind the terminal block for at least 2 second and release. After this operation the digital milliammeter reading should be 4mA and the Upper Range Value automatically moved to a value equal to the sum of the pressure to be suppressed and the previous calibrated span. Method 2: use the zero and span procedure above but apply pressures equal to the Lower Range Value (LRV) and then to Upper Range Value (URV), press for at least 2 second and release, the Zero local adjustment key (Z) and Span local adjustment key (S) respectively. Zero elevation Two different methods can be used for Zero elevation: Method 1: after completion of the zero and span procedure above apply to the Low Side connection (P1 as default) a pressure equal to the pressur e to be elevated. Allow time for pressure stabilization and then the Zero local adjustment key (Z) located behind the cover for at least 2 second and release After this operation the digital milliammeter reading should be 4mA and the Upper Range Value (URV ) is automatically moved to a value equal to the sum of the pressure to be elevated and the previous calibrated span. Method 2: use the zero and span procedure above but apply pressures equal to the Lower Range Value (LRV) and then equal to the Upper Range Value (URV) press for at least 2 second and release the Zero local adjustment key (Z) and Span local adjustment key (S) respectively. The LRV pressure will be applied to the L ow Side connection (P1 as default) whereas the URV will be applied to the Low Side (P1 as default) or to the High Side (P2 as default) connection depending upon the whether the range is all negative or crosses zero. Totalizer The transmitter provides the possibility of a totalizer function when used for fl ow measurements. Two Totalizer will be available: Permanent and Batch. The Permanent Totalizer can be protected by a password . The Batch Totalizer is not protected and its reset is always possible. Totalizer by Digital LCD Integral Display To operate the Totalizer status Navigate the Digital LCD Integral Display menu, select Totalizer > Totalizer status. and the used Totalizer Status will be available. To modify select Edit then scroll the desired value with the up and do wn keys (see the following table) and confirm with OK. Operation 364xS User’s Manual On Off 53 to start the Totalizer to stop the Totalizer NOTE In case the Totalizer is used in Bidirectional Flow mode the Totalizer LRV (0%) and the Totalizer URV (100%) have to be equal in absolute valu e. If different the Totalizer Status remains OFF. The max integration time selectable is 54 mins. F Digital LCD Integral Display Keys sequence to operate the Totalizer Status: 4 - 1 - Edit To reset the Permanent Totalizer Navigate the Digital LCD Integral Display menu, select Totalizer > Reset > Permanent Totalizer > Reset. To reset select OK. F Digital LCD Integral Display Keys sequence to reset the Permanent Totalizer: 4 – 2 – 1 - OK To reset the Batch Totalizer Navigate the Digital LCD Integral Display menu, select Totalizer > Reset > Batch Totalizer > Reset. To reset select OK. F Digital LCD Integral Display Keys sequence to reset the Batch Totalizer: 4 – 2 – 2 - OK To protect the Permanent Totalizer Navigate the Digital LCD Integral Display menu, select Totalizer > Reset > Permanent Totalizer > Tot. Protection, and the actual protection will be available (Unlock and Lock). To modify select Edit then scroll the desired protection with the up and down keys and confirm with OK. F Digital LCD Integral Displa y Keys sequence to protect the Permanent Totalizer: 4 – 2 – 1 – 2 - Edit To change the Permanent Totalizer protection Password: The Permanent Totalizer Password is a five digit string. The default value, at the transmitter deli very is ¬¬¬¬¬. When this default password is set the protection does not work. Navigate the Digital LCD Integral Display menu, select Totalizer > Reset > Permanent Totalizer > Change Password, and the actual password will be available. To modify select Edit then scroll the desired alphanumeric symbol with the up and down keys and confirm with Next. Repeat the operation for the five digits and confirm with OK. F Digital LCD Integral Display Keys sequence to change the Permanent Totalizer Password: 4 – 2 – 1 – 3 – Edit Totalizer operation by HHT Totalizer operation by Hand Held Terminal is available appropriated operations. . Please refer to the device manual for the Totalizer operation by PC Totalizer operation by PC is available using dedicated Software . ABB can provide the references and the Software. Please refer to the Software instructions for the appropriated operations. Reset to Factory trim The transmitter has in the memory the Sensor Low trim, the Sensor High trim and the Output trimming (Digital to analog trim) defined or calculated during the transmitter assembly. These data have been defined as Factory trim. The Reset to Factory trim allow the restoration of the as -shipped factory settings of the sensor trim and analog output trim. The Reset to Factory trim is suggested in case wrong trim operations are performed and the transmitter is in an undefined condition (i.e.: inadvertent zero trim of an abs olute pressure unit or inaccurate pressure source). Operation 364xS User’s Manual 54 Reset to Factory Trim by Digital LCD Integral Display Navigate the Digital LCD Integral Display menu, select Calibrate > Reset to Factory Trim. To modify select Edit then scroll the desired Factory Trim (see the following table) with the up and down keys and confirm with OK. Sensor Trim DAC Trim Full Trim Provides the Sensor Low Trim and Sensor High Trim as defined during the factory transmitter assembly Provides the Output Current Trimming as during the factory electronics characterization Provides the Sensor Low Trim and the Sensor High Trim as during the factory transmitter assembly and the Output Current Trimming as during the factory electronics characterization F Digital LCD Integral Display Keys sequence to Reset to Factory Trim : 6 – 3 – Edit Reset to Factory trim by HHT Reset to Factory trim (Sensor and Output trim) by Hand Held Terminal is available . Please refer to the device manual for the right operations. Reset to Factory trimming by PC Reset to Factory trim (Sensor and Output trim) by PC is available using dedicated Software . ABB can provide the references and the Software. Pleas e refer to the Software instructions for the right operations. Software Write Protect Changes can be prevented to the transmitter configuration data with the Software write protection. If the transmitter Sofware write protect ion is activated the transmitter will not accept any writes to its memory. Configuration changes, such as trim and reranging cannot take place. Software Write Protect by Digital LCD Integral Display Navigate the Digital LCD Integral Display menu, select Device Config > SW Write Protect. To change the status of the Software write protection select Edit then Unlock and OK to remove the protection or Lock and OK to insert the protection. F Digital LCD Integral Display Keys sequence to Software Write Protect: 2 – 7 – Edit Software Write Protect by HHT Software write protection by Hand Held Terminal is available . Please refer to the de vice manual for the appropriate operations. Software Write Protect by PC Software write protection by PC is available using dedicated Software . ABB can provide the references and the Software. Please refer to the Software instructions for the appropriate operation s. HART Multidrop mode The transmitter can work in the HART Multidrop mode with other transmitters on the same line. HHT and PC, using the dedicated Software (ABB can supply the references and the Software), can set th is operative mode. Please refer to the device manual and the Software instructions for the right operations . Operation 364xS User’s Manual 55 Maintenance No specific maintenance actions are required on the 2600T Pressure transmitter Series. Exterior cleaning Please note the following points when cleaning the device: § The cleaning agents used should not attack the surface and the seals (gasket and threads). § Mechanical damage to the diaphragm (i.e.: due to pointed objects) must be avoided. Field update Each transmitter is labeled individually, so it is imperative that the approval codes on each label match exactly during upgrade. The label on the transmitter reflects the replacement model code for reordering an assembled unit with the required communication protocol. The 2600T Pressure transmitter Series allows for electronics board upgrades. Two provided screws guide and secure the boards into place. Maintenance 364xS User’s Manual 56 Replacement and Troubleshooting WARNING ! Before you begin read “Safety” on page 3. The display, secondary electronic, and transducer assemblies are not user -serviceable; however, they may be replaced. This section describes the dismantle, the replacement and the troubleshooting of these assemblies. Other components are not replaceable except at the factory. As an example the housing covers viewing glass. This because regulations do not permit field replacement of a broken or damaged glass as this would invalidate the enclosure’s explosion pr oof rating. Therefore it is necessary to replace the entire damaged enclosure cap assembly. Dismantling and reassembly Dismantling and reassembly should not be carried out on site because of the risk of damage to comp onents and printed circuits as a result of adverse environmental conditions such as humidity, dust, etc. The dismantling and reassembly procedures given below should be carried out in the listed order to avoid instrument damage. See the pictures at the end of the instructions for better understanding. Operation required tools § § § 3 mm Allen key (in the transmitter box) Small Phillips screwdriver Small flat-bladed screwdriver Safety information for Dismantling and Reassembly Read the following Safety information before to start any operation. WARNING ! Only specialist personnel or ABB may undertake dismantling and reassembly of certified devices. WARNING ! Process fluids and/or pressure retained in the transmitter primary unit can cause severe injury and death or damage to the equipment. It is the user responsibility to make sure that no pressure is applied before removing the instrument from service or when draining or venting. WARNING ! For Hazardous classified Location installations, at least seven (7) threads on the cover must be engaged in order to meet the flameproof (explosion -proof) requirements. Replacement and troubleshooting 364xS User’s Manual 57 DANGEROUS FLUIDS In case of toxic or otherwise dangerous process fluid, take any precautions a s recommended in the relevant Material Safety Data Sheet. Dismantling The Digital LCD Integral Display and Electronics dismantling are allowed. See the Sectional view as reference. Transmitter Sectional View for the 364 models without Digital LCD Integral Display Transmitter Sectional View for the 364 models with Digital LCD Integral Display Replacement and troubleshooting 364xS User’s Manual 58 Replacement Electronics replacement For electronics replacement or update apply the following procedure: 1. 2. 3. 4. 5. 6. 7. Screw down comp letely the cover locking screw using the 3 mm Allen key Unscrew and remove the cover Unscrew the two fixing screws and remove the secondary electronic assembly Unplug the sensor cable Plug the sensor cable to th e new secondary electronics. Fix the electronic circuit by its screws. Refit the covers and tighten securely. Unscrew the cover locking screw to secure the covers. This is mandatory to meet "Flameproof requirements" for Hazardous Areas installation. Data saving in case of replacement In case it is necessary to repl ace the secondary electronic ( e.g.: fault, HART electronic release update) the configuration of the new electronics is automatically updated, via the primary elect ronics, when the 364XS is power cycled. Digital LCD Integral Display installation or replacement To install the integral display: 1. Look at the indication on the nameplate. WARNING In an Explosion-Proof/Flame-Proof installation, do not remove the transmitter covers when power is applied to the unit 2. Remove the housing cover. 3. Fit the Integral display onto the secondary electronic. At this purpose use the 6 pin insert, supplied with the meter, it should be positioned in order to co nnect the two female connectors with the indicator in the required position Note that it is possible to select the rotation angle by selecting one of the four different connections rotated clockwise or counterclockwise with 90° ? steps. 4. Fit the windowed housing cover, turn it to seat the O-ring into the housing and then continue to hand tighten until the cover contacts the housing metal-to-metal WARNING In EEx d (Explosion Proof) installation, lock the cover rotation by turning the locking screws (use the 3 mm Allen key supplied with the instrument) Replacement and troubleshooting 364xS User’s Manual 59 Troubleshooting Suggestions for the most common operating problems are given in this User’s Manual. If you suspect malfunction despite the absence of any diagnostic messages on the display, follow the procedures described here to verify that transmitter hardware and process connections are in good working order. Simple fault finding In case the transmitter is not working properly, carry out the following fault finding checks before contacting your nearest Service Center. WARNING If the transmitter is working in a control loop, the loop must be placed under local manual control while the instrument is examined or taken out of service. Take all precautions to avoid damages caused by pressure or dangerous fluids release. Symptom No output current Corrective actions § § Check the transmitter power supply Verify terminal voltage is 10.5 to 42 V dc applications) § § § Check power wires for reversed polarity Clean the electrical connections Replace the Electronics module High, low or irregular output current § § § § § § § § § Check the transmitter power supply Verify applied pressure Verify 4 and 20 mA range points Verify output is not in alarm condition Verify if 4 – 20 mA output trim is required Check for trapped gas in liquid lines and liquid in dry lines Check for sediment in process flanges Clear the electronics module connectors contact Replace the Electronics module Transmitter Not Communicating with HART Communicator § § Verify the output is between 4 and 20 mA or saturation levels Verify clean DC Power to tra nsmitter (Max AC noise 0.2 volts peak to peak Check loop resistance, 250 ohm minimum Check if unit is addressed properly § § Transmitter will not respond to changes in applied pressure § § § § § Digital Pressure Variable reading is erratic § § § Milliamp reading is erratic § § § § (or 30Vdc in EE x ia Check the test equipment Check impulse piping or manifold for blockage Verify applied pressure is between the Lower Range Limit and the Upper Range Limit Verify output is not in alarm condition Verify transmitter is not in Loop Test mode Check application for faulty equipment in pressure line Verify transmitter is not reacting directly to equipment turning on/off Verify damping is set properly for application Verify power source to transmitter has adequate voltage and current Check for external electrical interference Verify transmitter is properly grounded Verify shield for twisted pair is only grounded at one end Replacement and troubleshooting 364xS User’s Manual 60 Transmitter diagnostics The transmitter provides some diagnostics messages to the user in case of fa specification. ults or conditions out of the Diagnostic messages Diagnostics messages are provided by Digital LCD Integral Display or proper external tools. by Hart communication using the Diagnostics on the Digital LCD Integral Display (Hart version) The diagnostics messages below listed can appear on the Digital LCD Integral Display. The corrective actions are also suggested (see the common corrective actions description at the end of the message lis t). Electronic Fail There are internal inconsistencies in the data base of the HART (secondary) electronic Corrective actions: 1, 2, 3 Sensor Invalid There are internal inconsistencies in the data base of the transducer (primary) electronic performed at the start up. Corrective actions: 1, 2, 4 . This test is Sensor Fail The reading from the sensor is wrong Corrective actions: 1, 2, 4 PV out of Limit The calculated PV is above 110% or below –110% of sensor limit (LRL/URL on the instrument nameplate). Corrective actions: 5. Static P Out Lim The detected static pressure is above the maximum static pressure ( MWP on the instrument nameplate). Corrective actions: 5. Overrange The detected pressure is above the maximum static pressure (MWP on the instrument namepla te). Corrective actions: 5. Sensor T Out Lim The sensor temperature is above + 90 °C or below – 50°C. Corrective actions: 5. Current Out Satur The output is limited to the saturation limits, but the measurement is beyond these limits. The measured variable could be outside the configured span. Corrective actions: 5 Current Out Fixed The output is fixed to a value set by a HART command for simulation purposes Corrective actions: Use the HART command to exit the simulation mode. If the transmitter is not in simulation mode see 1, 2, 3. DAC Out of Range The Digital to Analog Converter (DAC) is out of range Corrective actions: It is necessary to carry out an Output Trimming operation specified in this manual. If the error persists see 1, 2, 3 or 4. Electr. T Out Lim The temperature of the HART electronic is above 90 °C or below –50°C. Replacement and troubleshooting 364xS User’s Manual 61 Corrective actions: Check the ambient temperature. If it is within the limits see 1, 2, 3. Consistency Check The secondary electronic and the primary electronics have not been working together before. Corrective actions: If this message appears during a replacement, please follow the replacement instruction in the relevant section of this manual. If the error persists see 1, 2, 3 or 4 Config. Error Bad configuration of range and/or transfer function. Corrective actions: Please follow the setting configuration instruction in the relevant section of the this manual. If the error persists see 1, 2, 3 or 4 Sensor Elec. Fail There are internal inconsistencies in the memory of the primary electronic. This test is performed at the start up. Corrective actions: 1, 2, 4 Tot. Config Error The configuration of the totalizer is not correct Corrective actions: Please follow the totalizer instruction in the relevant section of the this manual. If the error persists see 1, 2, 3 or 4 Common corrective actions: 1. Switch the transmitter off and on to verify if the message appears again 2. With the HART command 48 it is possible to obtain additional information on the failed component 3. If the message persist s the secondary electronic is suspected to have a failure. If the output is in a failure status (high or low) the fault is severe and it is necessary to substitute the secondary electronic. Otherwise the failure is minor, the signal is still valid but with a lower accuracy. The secondary electronic can be substituted when convenient. 4. If the message persists, the primary electronic could be damaged. If the output is in a failure status (high or low) the fault is severe and it is necessary to substitute the t ransducer. Otherwise the failure is minor, the signal is still valid but with a lower accuracy. The transducer can be substituted when convenient. 5. Check the process and ambient conditions (e.g.: pressure, process temperature, ambient temperature static pressure, etc.) against the sensor and electronics limits. If the conditions are close or outside the limits, these improper instrument utilization can have seriously compromised the instrument functionality. If the conditions are well inside the limits see t he corrective actions of point 4 or 3. Diagnostics on the CoMeter The diagnostics messages on the Cometer and Prometer when installed on the 695 Field Indicator are available. Please refer to the device manual for the right operations. Hart version diagnostics on the HHT Hart version diagnostics on the Hand Held Terminal are available. Please refer to the device manual for the right operations. Hart version diagnostics on thePC Hart version diagnostics on the PC are available using dedicated Software. ABB can provide the references and the Software. Please refer to the Software instructions for the right operations. Replacement and troubleshooting 364xS User’s Manual 62 Additional Safety Notes Hazardous Area According to ATEX Directive (European Directive 94/9/EC of 23 March 1994) and relative European Standards which can assure compliance with Essential Safety Requirements, i.e., EN 60079-0 (General requirements) EN 60079-1 (Flameproof enclosures “d”) EN 50020 (Intrinsic safety “i”) EN 50284 (Equipments, group II, category 1G) EN 50281 (Apparatus for use with combustible dusts), EN 60079-15 (Construction test and marking of type of protection "n" electrical apparatus ), EN 60079-26 (Construction test and marking of group II zone 0 electrical apparatus ). The 364 pressure transmitter models (2600T series) have been certified for the below indicated groups, categories, media of dangerous atmosphere, temperature classes, types of protection. Additional Safety 364xS User’s Manual 63 Certificate groups Certificate ATEX II 1G Ex ia IIC T6 and II 1D Ex iaD 20 T85°C Application with Gas ZELM certificate number ZELM 06 ATEX 0302 X The meaning of ATEX code is as follows: II : 1: G: D: T85°C: Group for surface areas (not mines) Category Gas (dangerous media) Dust (dangerous media) Maximum surface temperature of the transmitter enclosure with Ta (ambient temperature) +75°C for Dust (not Gas) with a dust layer up to 5mm. For application with dust layer betwe en 5 and 50 mm, maximum surface temperature must be consider according to IEC 61241 -14 chapter 6.3.3.3. Note: the number close to the CE marking of the transmitter safety label identifies the Notified Body which has responsibility for the surveillance of the production The other marking refers to the protection type used according to relevant EN standards: Note: the transmitter must be connected to a supply (associated apparatus) certified [Ex ia] Application with Dust Ex ia : Intrinsic safety, protection level “a” Ex iaD 20: Construction with inside intrinsic safety electronics suitable for Dust Zone20 IIC : Gas group T6 : Temperature class of the transmitter (which corresponds to 85°C max) with a Ta (ambient temperature) +40°C About the applications, this transmitter can be used in “Zone 0” (Gas) and "Zone 20" (Dust) classified areas (continuous hazard) as it is shown on the picture on the right. Certificate ATEX II 1/2G Ex ia IIC T6 and II 1/2D Ex iaD 21 T85°C Note: the protection is mainly assured by the "IP degree" associated to the low power from the supply certified [Ex ia] Application with Gas ZELM certificate number ZELM 06 ATEX 0302 X Note: this ATEX Category depends on the application (see below) and also on the intrinsic safety level of the transmitter supply (associated apparatus) which can sometimes suitably be [ib] instead of [ia]. As it is well known, the level of an intrinsic safety system is determined by the lowest level of the various apparatus used, i.e., in the case of [ib] supply, the system takes over this level of protection. The meaning of ATEX code is as follows: II : 1/2 : G: D: T85°C: Group for surface ar eas (not mines) Category - It means that only a part of the transmitter complies with category 1 and a second part complies with category 2 (see picture on the right) Gas (dangerous media) Dust (dangerous media) Maximum surface tempera ture of the transmitter enclosure with Ta (ambient temperature) +75°C for Dust (not Gas) with a dust layer up to 5mm. For application with dust layer between 5 and 50 mm, maximum surface temperature must be consider according to IEC 61241 -14 chapter 6.3.3.3. Note: the transmitter can be connected to either [ib] or [ia] supply (associated apparatus) Application with Dust Note: the number close to the CE marking of the transmitter safety label identifies the Notified Body which has responsibility for the surveillance of the production The other marking refers to the protection type used according to relevant EN standards: Ex ia : Intrinsic safety, protection level “a” Ex iaD 21: Construction with inside intrinsic safety electronics suitable for Dust Zone21 IIC : Gas group T6 : Temperature class of the transmitter ( which corresponds to 85°C max) with a Ta (ambient temperature) +40°C About the applications, this transmitter can be used in Zone “0” (Gas) classified areas (continuous hazard) with its “process part” only, whereas the remaining part of the transmitter, i.e. its enclosure, can be used in Zone 1 (Gas), only (see pictures on the right). Reason of this is the process part of the transmitter (normally called primary transducer) that provides inside separation elements to seal off the electrical sensor from the continuously hazardous process, according to the EN50284 and EN50018. About Dust application, the transmitter is suitable for "Zone 21" according to the EN 50281 as it is shown on the relevant part of the pictures on the right. Note: the protection is mainly assured by the "IP degree" associated to the low power from the supply. This can either be [ib] or [ia] Additional Safety 364xS User’s Manual Certificate ATEX II 1/2G Ex d IIC T6 64 and II 1/2D Ex tD A21 IP67 T85°C Application with Gas ZELM certificate number ZELM 06 ATEX 0302 X The meaning of ATEX code is as follows: II : 1/2 : G: D: T85°C: Group for surface areas (not mines) Category - It means that only a part of the transmitter complies with category 1 and a second part complies with category 2 (see the picture on the right) Gas (dangerous media) Dust (dangerous media) Maximum surface temperature of the transmitter enclosure with Ta (ambient temperature) +75°C for Dust (not Gas) with a dust layer up to 5mm. For application with dust layer between 5 and 50 mm, maximum surface temperature must be consider according to IEC 61241 -14 chapter 6.3.3.3. Note: the number close to the CE marking of the transmitter safety label identifies the Notified Body which has responsibility for the Surveillance of the production. The other marking refers to the protection type used according to relevant EN Standards: Ex d: Ex tD A21: IIC : T6 : Explosion proof/Flameproof Construction with flam eproof of protection method suitable for Dust Zone21 Gas group Temperature class of the transmitter (which corresponds to 85°C max) with a Ta (ambient temperature) +75°C. About the applications, this transmitter can be used in Zone “0” (Gas) cla ssified areas (continuous hazard) with its “process part” only, whereas the remaining part of the transmitter, i.e. its enclosure, can be used in Zone 1 (Gas), only (see sketch below). Reason of this is the process part of the transmitter (normally called primary transducer) that provides inside separation elements to seal off the electrical sensor from the continuously hazardous process, according to the EN50284 and EN50018. About Dust application, the transmitter is suitable for "Zone 21" according to the EN 50281 as it is shown on the relevant part of pictures on the right. Certificate ATEX II 3G Ex nL IIC T6 and II 3D Ex tD A22 IP67 T85°C Application with Dust Note: the protection is mainly assured by the "IP degree" associated to the low power from the supply Application with Gas ZELM certificate number ZELM 06 ATEX 0302 X The meaning of ATEX code is as follows: II : 3: G: D: T85°C: Group for surface areas (not mines) Category Gas (dangerous media) Dust (dangerous media) Maximum surface tem perature of the transmitter enclosure with Ta (ambient temperature) +75°C for Dust (not Gas) with a dust layer up to 5mm. For application with dust layer between 5 and 50 mm, maximum surface temperature must be consider according to IEC 61241 -14 chapter 6.3.3.3. The other marking refers to the protection type used according to the standards: Ex nL : Ex tD A22: IIC : T6 : Type of protection "n" with "energy limitation" technique Construction with flameproof of protection method suitable for Dust Zone22 Gas group Temperature class of the transmitter (which corresponds to 85°C max) with a Ta (ambient temperature) +40°C Note: the transmitter must be connected to a supply with 42 V d.c. max output voltage as above indicated. The current of the transmitter is less than 25 mA. Application with Dust Note: when installed this transmitter must be supplied by a voltage limiting device which will prevent the rated voltage of 42 V d.c. being exceeded. About the applications, this transmitter can be used in “Zone 2” (Gas) and "Zone 22" (Dust) classified areas (unlikely/infrequent hazard) as it is shown on the picture on the right. Note: the protection is mainly assured by the "IP degree" associated to the low power from the supply. Additional Safety 364xS User’s Manual Certificate 65 ATEX II 1G Ex ia IIC T6 and II 1/2G Ex ia IIC T6 and II 3G Ex nL IIC T6 and II 1D Ex iaD 20 T85°C and II 1/2D Ex iaD 21 T85°C respectively II 1/2G Ex d IIC T6 and II 1/2D Ex tD A21 IP67 T85°C and II 3D Ex tD A22 IP67 T85°C ZELM certificate number ZELM 06 ATEX 0302 X For special conditions for safe use see certificate The meaning of ATEX code is as follows: II : Group for surface areas (not mines) 1: Category 1/2 : Category - It means that only a part of the transmitter complie s with category 1 and a second part complies with category 2 (see on application sketch) G: Gas (dangerous media) D: Dust (dangerous media) T85°C: Maximum surface temperature of the transmitter enclosure with Ta (ambient temperature) +75°C for Dust (no t Gas) with a dust layer up to 5 mm. For application with dust layer between 5 and 50 mm, maximum surface temperature must be consider according to IEC 61241-14 chapter 6.3.3.3. (Note: the number close to the CE marking of the transmitter safety label identifies the Notified Body which has responsibility for the surveillance of the production) The other marking refers to the Intrinsic safety protection type used according to relevant EN standards: Ex ia : Intrinsic safety, protection level “a” Ex iaD 20 : Construction with inside intrinsic safety electronics suitable for Dust – Zone 20 Ex iaD 21 : Construction with inside intrinsic safety electronics suitable for Dust – Zone 21 IIC : Gas group T6 : Temperature class of the transmitter (which corresponds to 85°C max) with Ta (ambient temperature) +40°C The other marking refers to the Flameproof protection type used according to relevant EN standards: Ex d: Flameproof Ex tD A21 : Construction with flameproof of protection method suitable for Dust – Zone 21 Ex tD A22 : Construction with flameproof of protection method suitable for Dust – Zone 22 IIC : Gas group T6 : Temperature class of the transmitter (which corresponds to 85 °C max) with Ta (ambient temperature) +75°C. About the applications of the transmi tter see the relevant sketch. Additional Safety 364xS User’s Manual 66 "Ex Safety" Aspects for North America According to Factory Mutual Standards which can assure compliance with Essential Safety Requirements FM 3600 : Electrical Equipment for use in Hazardous (Classified) Locations, General Re quirements. FM 3610 : Intrinsically Safe Apparatus and Associated Apparatus for Use in Class I, II, III, Division 1, and Class I, Zone 0 & 1 Hazardous (Classified) Locations. FM 3611 : Nonincendive Electrical Equipment for Use in Class I and II, Division 2 and Class III Division 1 and 2 Hazardous (Classified) Locations. FM 3615 : Explosionproof Electrical Equipment. FM 3810 : Electrical and Electronic Test, Measuring and Process Control Equipment. NEMA 250 : Enclosure for Electrical Equipment (1000 Volts Ma ximum) The 364 pressure transmitter models have been certified by Factory Mutual for the following Class, Divisions and Gas groups, hazardous classified locations, temperature class and types of protection. § § § § § § § § § § § Explosionproof for Class I, Division 1, Groups A, B, C and D, hazardous (classified) locations. Dust Ignition proof for Class II, III Division 1, Groups E, F and G, hazardous (classified) locations. Suitable for Class II, III, Division 2, Groups F and G, hazardous (classified) locations. NonIncendive for Class I, Division 2, Groups A, B, C and D, in accordance with Nonincendive field wiring requirements for hazardous (classified) locations. Intrinsically Safe for use in Class I, II and III, Division 1, Groups A, B, C, D, E, F, and G in accordance with Entity requirements for hazardous (classified) locations. Temperature class T4 to T6 (dependent on the maximum input current and the maximum ambient temperature). Ambient Temperature range -50°C to +85°C (dependent on the maximum input current and the maximum temperature class). Electrical Supply range Minimum 10.5 Volts, Maximum 42 Volts (dependent on the type of protection, maximum ambient Temperature, maximum temperature class and communication protocol). Type 4X applications Indoors/Outdoors. NOTE The 364 pressure transmitter models installed in Explosionproof Class 1 Division 1 Group A, B, C and D hazardous (classified) location does not require conduit sealing as per FM 3615 sect 4.3 / NEC 501.15. For a correct installation in field of the 364 pressure transmitter models please see the related control drawing. Note that the associated apparatus must be FM approved. Additional Safety 364xS User’s Manual 67 According to CSA International Standards which can assure compliance with Essential Safety Requirements C22.2 0-M1991 : 0.4-M1982 : 0.5-M1982 : 25-M1966 : 30-M1986 : 94-M1991 : 213-M1987 : 157-M1992 : General Requirements – Canadian Electrical Code Part II. Bounding and Grounding of Electrical Equipment (Protective Grounding) Threaded Conduit Entries Enclosures for use in Class II Groups E, F and G Hazardous Locations. Explosion-proof Enclosures for use in Class I Hazardous Locations. Special Purpose Enclosures. Non-Incendive Electrical Equipment for use in Class I Division 2 Hazardous Locations. Intrinsically Safe and Non-Incendive Equipment for use in Hazardous Locations. CAN/CSA C22.2 No.1010.1-92 Safety Requirements for Electrical Equipment for Measurement, Control, and Laboratory Use, Part 1 : General Requirements (includes Amendment 1) CAN/CSA C22.2 No.1010.1B-97 Amendment 2 to CAN/CSA C22.2 No 1010.1-92 CAN/CSA E60079-0-00 Electrical apparatus for explosive gas atmosphere. Part 0 : General Requirements. CAN/CSA E60079-1-01 Electrical apparatus for explosive gas atmosphere. Part 1 : Construction and verification test of flameproof enclosure of electrical apparatus. CAN/CSA E60079-11-02 Electrical apparatus for explosive gas atmosphere. Part 11 : Intrinsic Safety “i” The 2600T Series pressure transmitters have been certified by CSA International for the following Class, Divisions and Gas groups, hazardous classified locations, temperature class and types of protection. § § § § § § § § § § § § Explosionproof for Class I, Division 1 and 2, Groups A, B, C and D; Class II Groups E, F and G; Class III; Enclosure Type 4X Ex d IIC. Non incendive for Class I, Division 2, Grou ps A, B, C and D; Class II Groups E, F and G; Class III; Enclosure Type 4X Ex nL IIC. Intrinsically Safe for Class I, Division 1 and 2, Groups A, B, C and D; Class II Groups E, F and G; Class III; Enclosure Type 4X Ex ia IIC. Temperature class T4 to T6 (de pendent on the maximum input current and the maximum ambient temperature). Ambient Temperature range -50°C to +85°C (dependent on the maximum input current and the maximum temperature class). Electrical Supply range Minimum 10.5 Volts, Maximum 42 Volts (de pendent on the type of protection, maximum ambient temperature, maximum temperature class and communication protocol). Type 4X applications Indoors & Outdoors. Pollution Degree I Installation Category II Altitude 2000 m Humidity 0 to 80% For a correct installation in field of the 364 pressure transmitter models please see the related control drawing. Note that the associated apparatus must be CSA approved. Additional Safety 364xS User’s Manual 68 Note for pressure transmitter with combined approval WARNING Before installing the Transmitter, the end user has to permanent mark on the nameplate his choosen Protection Concept (including general purpose in an unclassified location). The Transmitter can only be used according to this Protection Concept for the life of the product. If more then one type of protection box (on safety label) are permanent marked, the Pressure Transmitter must be removed from hazardous classified locations. The selected Type of Protection is allowed to be changed only by manufacture r after a new satisfactory assessment. Additional Safety 364xS User’s Manual 69 Power supply operative limits The transmitter operates on a minimum voltage of 10.5 Vdc to a maximum of 42 Vdc and is protected against polarity inversion. Note The transmitter operates from 10.5 to 42 Vdc with no load (additional load allows operation over 42 Vdc). For EEx ia and intrinsically safe (FM, CSA and SAA) approval power supply must not exceed 30 Vdc. In some countries the maximum power supply voltage is limited to a lower v alue. Minimum operating voltage is 15.3 Vdc if on terminals for external meter neither link nor remote indicator is present. The total loop resistance is indicated in the expression below. R (kohm) = (Supply voltage - Minimum operating voltage) / 22.5 The total loop resistance is the sum of the resistance of all elements of the loop, including wiring, conditioning resistor, safety barriers and additional indicators (excluding the equivalent resistance of the transmitter). Where a configuration device (HART) , such as the Hand Held Communicator or a Modem is likely to be used, a resistance of 250 ohm minimum should be present between the power supply and the point of insertion of these devices, to allow communication. Several types of safety barriers, either p assive or active, can be satisfactorily used in conjunction with the 364 pressure transmitter model s. Nevertheless, in case of use of active barriers, check with the supplier if the model is suitable for use with smart transmitters allowing the connection of the configuration devices in the "safe" or non-hazardous area. PED information integration The transmitter may be used in compliance with the Pressure Equipment Directive 97/23/EC in compliance with article 3 comma 3. It is recommended to se lect the correct fail safe mode for the 4 -20 mA signal (as per Namur NE43 recommendation). See also the relevant instructions about the failsafe direction in this manual For Safety reason the use of the transmitter is limited as following described. Ambient Temperature limits °C (°F): Transmitters with Silicone oil filling: between –40°C and +85°C (between -58°F and +185°F) Lower ambient limit for LCD indicators: –20°C (–4°F) Upper ambient limit for LCD indicators: +70°C (+158°F) Process Temperature limits °C (°F): Transmitters with Silicone oil filling: between -40°C and +121°C (between -58°F and +250°F) Storage Temperature limits °C (°F): Lower limit –50°C (–58°F); –40°C (–40°F) for Digital LCD Integral Display Upper limit +85°C (+185°F) Overpressure limits (without damage to the transmitter) Lower limit 0.067kPa abs, 0.67mbar abs, 0.01psia Upper limit 16MPa, 160bar, 2320psi for sensor code E 20MPa, 200bar, 3045psi for sensor codes F to S Static pressure Lower limit 1.3kPa abs, 13mbar abs, 0.2psia Upper limit 16MPa, 160bar 2320psi for sensor code E 20MPa, 200bar, 2900psi for sensor code F to S Additional Safety 364xS User’s Manual 70 Proof pressure The transmitter can be exposed without leaking (meet ANSI/ISA –S 82.03 hydrostatic test requirements and SAMA PMC 27.1) to line pressu re of up to 38.5 MPa, 385 bar, 5585 psi. Electromagnetic compatibility (EMC) Emission: Comply with EN 61000-6-3 Immunity: Comply with EN 61000-6-2 Radiated electromagnetic immunity level: 30V/m (according to IEC 1000–4–3, EN61000–4–3) Conducted electromagnetic immunity level: 30V (according to IEC 1000–4-6, EN 61000–4–6) Surge immunity level 4kV (according to IEC 1000-4–5 EN 61000–4–5) Fast transient (Burst) immunity level: 4kV (according to IEC 1000–4–4 EN 61000–4–4) Humidity Relative humidity: up to 100% annual average Condensing, icing: admissible Vibration resistance (according to IEC 60068–2–6) Accelerations: up to 2g at frequency up to 1000Hz Shock resistance (according to IEC 60068–2–27) Acceleration: 50g Duration: 11ms Wet and dust-laden atmospheres The transmitter is dust and sand tight and protected against immersion effects as defined by IEC 60529 (1989) to IP 67 (IP 68 on request) or by NEMA to 4X. Fill fluid warning Be sure that the fill fluid can mix safely with the process fluid in case of rupture of the sensor membrane. Corrosion A fluid/material compatibility table is available at www.abb.com searching for “CORROSION.pdf” or from local ABB representatives Data of the table are based on information from manufacturers. All data is based on a temperature of 20°C (70°F) unless noted otherwise. Since corrosion involves many more variables than this table considers, such as trace contaminants, aeration or temperature-concentration profile, stress corrosion cracking and pitting, the table should be used only as a reference in narrowing the choice of materials that merit further investigation. Suitability of a particular material is best determined by field test. For this purpose, please contact the local ABB representatives. WARNING ! For safety purpose the design corrosion allowance of differential pressure instrument flanges is approximately 1.5 mm (0.04 in). Therefore from the safe containment of liquids compatible with a specific material according to the above mentioned table, the expected instrument lifetime is more than 10 years (the previous statement on the corrosion influence variables apply). Additional Safety 364xS User’s Manual 71 IP Protection The 364 pressure transmitter model s have been certified for a degree of protection IP67 according to EN 60529 standard. This protection is provided by the pressure transmitter enclosure. The first characteristic numeral indicates the protection of the inside electronics against ingress of solid forein objects including dusts. The assigned “6” means an enclosure dust -tight (no ingress of dust). The second characteristic numeral indicates the protection of the inside electronics against ingress of water. The assigned “7” means an enclosure water -protected against a temporary immersion in water under standardized conditions of pressure and time. Declarations The 364 pressure transmitter models declarations are attached to this manual Additional Safety 364xS User’s Manual 72 Additional Safety 364xS User’s Manual 73 Additional Safety 364xS User’s Manual 74 Additional Safety 364xS User’s Manual 75 Annex I Digital LCD Integral Display Menu Flow Chart Digital LCD Display Keys sequences 364xS User’s Manual 76 Process display up Exit select Easy Setup down up Exit select Device Config down up select Exit Display down up select Exit Totalizer down up Exit select Communication down up select Exit Calibrate down up Exit select Diagnostics down Digital LCD Display Keys sequences 364xS User’s Manual 77 Easy Setup select edit Language enumerated next Pressure Polarity edit enumerated next Engineering Unit edit enumerated next Set LRV edit numerical next Set URV edit numerical next Transfer Function Type edit enumerated next Lin Point edit numerical next Low Flow Cut Off edit numerical next Auto -Set Zero Scaling edit auto adjust next next Damping edit manual adjust Digital LCD Display Keys sequences 364xS User’s Manual 78 Device Config Select Back Select Rerange down Select up down Rerange with Pressure Back Back up Select Set LRV (0%) Rerange no Pressure Select Back Back down Select Back Select enumerated Back numerical Set LRV (0%) down up down up Select Back down Percentage Rerange Select Engineering Unit auto adjust up down Set URV (100%) up Select auto adjust Back Select numerical Set LRV Back down Set URV (100%) numerical up Select Back up Back PV Scaling down Select Back up down Auto-Set Zero Scaling up Select up down PV Scaling Select Reset PV Scaling down Select numerical auto adjust up auto adjust manual adjust Damping Back up Output on Alarm numerical Set URV Back Select up Back down up Failure Mode Select down Set Fail Current Select up enumerated back High Saturation down Low Saturation up numerical back up down Select Select numerical back Select Fail High down up numerical back Select Fail Low Select Pressure Polarity Back Transfer Function Back up Select Type Select down up Linearization Point Select enumerated numerical down enumerated numerical Back down up Low Flow Cut Off down Select numerical Select SW Write Protect enumerated Digital LCD Display Keys sequences 364xS User’s Manual 79 Display Select Select Back Language down Back up Select up Select up Select enumerated Display Variable 2 down Back enumerated Display Variable 1 down Back enumerated Operator View down Back enumerated up Select enumerated Display Bargraph down up Select Back manual adjust Contrast down up Back back up back Select Display Eng. Unit Display Settings down Select Display LRV (0%) Select back up back down up Display URV (100%) Select back down Display Transfer Func down up Select Select numerical enumerated Pressure down numerical enumerated back up Select Temperature down up enumerated back Select Flow down numerical up back Select Mass & Volume down up numerical back Select Density down numerical back up Select Level down numerical back up Select Other down numerical back up Custom Unit down up Back Select numerical Back Back Display Protection Security Select ASCII string down/up Change Password Select ASCII string Digital LCD Display Keys sequences 364xS User’s Manual 80 Totalizer Select up Back Totalizer status manual adjust down Reset down up up Back Select down Permanent totalizer down Select Back Select Select auto adjust Reset down up down up Select ASCII string Back Select Change Password down auto adjust Back Tot. Protection Totalizer Setting Batch Totalizer Back up up up ASCII string up down Select Select Totalizer LRV (0%) down back numerical up Totalizer URV (100%) down back Select numerical up Input Eng. Units Select enumerated down up back back Permanent Eng. Unit Select down Engineering Unit up back down up Select back back Batch Eng. Unit down Engineering Unit Select enumerated up Select enumerated Select Custom Unit back down numerical back down up Custom Unit Select ASCII string down Select ASCII string up Conversion Factor back down up Conversion Factor down Select numerical up back Bidirectional Flow Select enumerated down Digital LCD Display Keys sequences 364xS User’s Manual 81 Communication Select up Back Select Hart Tag ASCII string down up Back Select Descriptor ASCII string down up Back Select ASCII string Message down up Back Select Polling Address enumerated down Digital LCD Display Keys sequences 364xS User’s Manual 82 Calibrate Select up Back Sensor Trim Back Select down up Lower Sensor Trim Back down up Select Back Back Select Output Trim Set 4 mA numerical up Back down Select down down Select numerical up Upper Sensor Trim numerical up down Set 20 mA Select numerical up Back Reset To Factory Trim Select enumerated down Digital LCD Display Keys sequences 364xS User’s Manual 83 Diagnostics Select up Back up Select Back Diagnostics PV enumerated down down up Back Hart Eng. Output Select numerical RO down up Back Select Output Current numerical RO down up Select Back numerical RO Output % down up Back Permanent Totalizer Select numerical RO down up Back Batch Totalizer Select numerical RO down up Back Static Pressure Select numerical RO down up Back Sensor Temperature Select numerical RO down up Back Set 4 mA Loop Test down Back Back Select down/up Set 20 mA Select auto adjust auto adjust Back down/up Set Custom Value Select manual adjust Digital LCD Display Keys sequences 364xS User’s Manual 84 Main Digital LCD Integral Display Keys sequences: to start the Easy Setup: to set the Pressure Polarity: to set the Damping: to change the unit on the Display: to change the unit in the Transmitter: to set the Display LRV : to set the LRV wihout pressure: to set the LRV wihout pressure: to set the Display URV: to set the URV wihout pressure: to set the URV wih pressure: to set the Totalizer Status: to set the Totalizer LRV: to set the Totalizer URV: to set the Totalizer Input Engineering Units : to set the Permanent Totalizer Engineering units: to set the Permanent Totalizer Custom units: to set the Permanent Totalizer Conversion Factor: to set the Batch Totalizer Engineering units: to set the Batch Totalizer Custom units: to set the Batch Totalizer Conversion Factor: to set the Bidirectional Flow mode: to set the Transfer Function: to set the Transfer Function on the Display: to set 4 mA fixed output current: to set 20 mA fixed output current: to set any fixed output current:: to change the failsafe direction: to set the High saturation current: to set the Low saturation current:: to set the Fail High current: to set the Fail Low current:: to set the language: to modify the Operator View: to modify the define the Variable 1: to modify the define the Variable 2: to modify the define the Bargraph variable: to modify the define the Variable Engineering Units in the display: to protect the Display: to change the Display password: to access the transmitter communication data: to access the transmitter measured variab les: to Low Trim the sensor: to High Trim the sensor: to set the 4 mA output current: to set the 20 mA output current: to Auto-Set Zero Scaling: to Set the PV Scaling: to Remove the PV Scaling: to operate the Totalizer Status: to reset the Permanent Totalizer: to reset the Batch Totalizer: to protect the Permanent Totalizer: to change the Permanent Totalizer Password: to Reset to Factory Trim: to Software Write Protect: 1 2 – 5 – Edit 2–3 3–7–1 2 – 1 – 2 – 1 – Edit 3 – 7 – 2 - Edit 2 – 1 – 2 – 2 – Edit 2 – 1 – 1 – 1 – OK 3 – 7 – 3 - Edit 2 – 1 – 2 – 3 – Edit 2 – 1 – 1 – 2 – OK 4 – 1 – 1 – Edit 4 – 3 – 1 – Edit 4 – 3 – 2 – Edit 4 – 3 – 3 – Edit 4 – 3 – 4 – 1 – Edit 4 – 3 – 4 – 2 – Edit 4 – 3 – 4 – 3 – Edit 4 – 3 – 5 – 1 – Edit 4 – 3 – 5 – 2 – Edit 4 – 3 – 5 – 3 – Edit 4 – 3 – 6 – Edit 2 – 6 – 1 – Edit 3 – 7 – 4 – Edit 7–2–1 7–2–2 7–2–3 2 – 4 – 1 - Edit 2 – 4 – 2 – 1 – Edit 2 – 4 – 2 – 2 – Edit 2 – 4 – 2 – 3 - Edit 2 – 4 – 2 – 4 - Edit 3 – 1 – Edit 3 – 2 – Edit 3 – 3 – Edit 3 – 4 – Edit 3–6 3–7 -1 3 – 8 – 1 – Edit 3 – 8 – 2 – Edit 5 7–1 6 – 1 – 1 – Edit 6 – 1 – 2 – Edit 6 – 2 – 1 – Edit 6 – 2 – 2 – Edit 2 – 2 – 1 – OK 2 – 2 – 2 – Edit 2 – 2 – 3 – OK 4 - 1 - Edit 4 – 2 – 1 - OK 4 – 2 – 2 - OK 4 – 2 – 1 – 2 - Edit 4 – 2 – 1 – 3 - Edit 6 – 3 – Edit 2 – 7 – Edit Digital LCD Display Keys sequences 364xS User’s Manual 85 Acronyms The acronyms currently used to define the various parameters are as follows: URL : Upper Range Limit of a specific sensor. The highest value of the measured value that the transmitter can be adjusted to measure. LRL : Lower Range Limit of a specific sensor. The lowest value of the measured value that the transmitter can be adjusted to measure. URV : Upper Range Value. The highest value of the measured value to which the transmitter is calibrated. LRV : Lower Range Value. The lowest value of the measured value to which the transmitter is calibrated. SPAN : The algebric difference between the Upper and Lower Range Values. The minimum span is the minimum value that can be used without degradation of the specified performance. LCD Liquid Crystal Display CPU Control Process Unit DSP Digital Signal Processing DD Device Description IS Intrinsically Safety Definitions The terminology currently used to define the various parameters is as follows: Totalizer LRV: the totalizer LRV is defined as the value in engineering unit that gives 4 mA at the output Totalizer URV: the totalizer LRV is defined as the value in engineering unit that gives 20 mA at the output Index 364xS User’s Manual 86 Index A accessing communication data, 45 accessing communication data, by cometer, 46 accessing communication data, by hht, 46 accessing communication data, by lcd, 46 accessing communication data, by pc, 46 accessing operation data, 46 accessing operation data, by cometer, 46 accessing operation data, by hht, 46 accessing operation data, by lcd, 46 accessing operation data, by pc, 47 acronyms, 85 application, recommendation, 12 B box, opening, 9 C calibration, 49 calibration, additional procedures, 50 calibration, set up, 47 certification, combined approval, 67 certification, group, 62 cleaning, 54 configuration, 22 configuration, default data, 22 corrosion, 69 current output limits, set by hht, 38 current output limits, set by lcd, 37 current output limits, set by pc, 38 current output limits, set the limits, 37 D damping, 24 damping by cometer, 24 damping, by hht, 24 damping, by lcd, 24 damping, by pc, 24 declaration, 70 definitions, 85 diagnostic, 59 diagnostic messages, 59 diagnostics, on cometer, 60 diagnostics, on hht, 60 diagnostics, on lcd, 59 diagnostics, on the pc, 60 dismantling, 55 dismantling, safety, 55 dismantling, transmitter, 56 E easy setup, 22 electrical connections, 18 electromagnetic compatibility, 69 F failsafe direction, change, 37 fault, simple finding, 58 field update, 54 fixed output current, by cometer, 36 fixed output current, by hht, 36 fixed output current, by lcd, 36 fixed output current, by pc, 36 function, basic configuration, 23 H handling, 10 hardware settings, 36 hazardous area, 61 I installation, 11 installation, apply power, 21 installation, check, 21 installation, mounting the transmitter, 11 installation, preparing for, 11 installation, start up, 21 ip protection, 70 L lcd, 39 lcd, keys sequence, 84 lcd, language, 44 lcd, menu list, 39 lcd, navigate, 39 lcd, operator view, 44 lcd, password, 45 lcd, positioning, 17 lcd, protection, 45 lcd, transfer function, 35 lcd, transfer function by hht, 35 lcd, transfer function by pc, 36 lcd, view setting, 44 lrv, 27 lrv, by cometer, 27 lrv, by hht, 27 lrv, by lcd, 27 lrv, by local keys, 27 lrv, by pc, 27 M maintenance, 54 menu, flowchart, 75 meter, transfer function, 35 mounting, 11 mounting, on pipe, 13 mounting, on pipe, instruction, 16 mounting, on wall, 16 mounting, on wall, instruction, 17 Index 364xS User’s Manual multidrop, hart communication, 53 O ouput trimming, by cometer, 50 ouput trimming, by hht, 50 ouput trimming, by lc d, 49 ouput trimming, by pc, 50 P ped, 68 plate, nameplate, 9 plate, tag, 9 plate, wired on, 9 power supply, limits, 68 pressure polarity, 23 pressure polarity, by hht, 24 pressure polarity, by lcd, 24 pressure polarity, by pc, 24 protective earthing, 18 pv scaling, 50 pv scaling, by hht, 50 pv scaling, by lcd, 50 pv scaling, by PC, 50 pv scaling, removing, 51 pv scaling, removing by hht, 51 pv scaling, removing by lcd, 51 pv scaling, removing by PC, 51 R reassembly, 55 reassembly, safety, 55 remote meter, 20 replacement, 55, 57 replacement , electronics, 57 replacement, data saving, 57 replacement, lcd, 57 reset to factory trim, 52 reset to factory trim, by hht, 53 reset to factory trim, by lcd, 53 reset to factory trim, by PC, 53 S safety notes, 3 safety, additional notes, 61 sensor high trim, 48 sensor high trim, by hht, 49 sensor high trim, by lcd, 48 sensor high trim, by pc, 49 sensor low trim, 48 sensor low trim, by hht, 48 sensor low trim, by lcd, 48 sensor low trim, by pc, 48 sensor static trim, 49 sensor static trim, by hht, 49 sensor static trim, by pc, 49 sensor trim, 47 sensor trim, zero, 47 sensor trim, zero by cometer, 48 87 sensor trim, zero by hht, 48 sensor trim, zero by pc, 48 signal simulation, 36 software settings, 37 software write protect, 53 software write protect, by hht, 53 software write protect, by lcd, 53 software write protect, by PC, 53 storage, 10 T totalizer, by lcd, 28 totalizer, configuration by hht, 31 totalizer, configuration by PC, 31 totalizer, operation, 51 totalizer, operation by hht, 52 totalizer, operation by lcd, 52 totalizer, operation by PC, 52 totalizer, password, 52 totalizer, setting, 28 tranfer function, bidirectional, 33 tranfer function, linear, 31 tranfer function, polynomial, 33 tranfer function, square roots, 32 tranfer function, two polynomial, 34 transfer function, set, 34 transfer functions, 31 transfer functions, description, 31 transmitter tranfer function, by cometer, 35 transmitter tranfer function, by hht, 35 transmitter tranfer function, by lcd, 34 transmitter tranfer function, by pc, 35 transmitter, identification, 9 trimming, output, 49 trimming, set up, 47 troubleshooting, 55, 58 U unit, by cometer and prometer, 26 unit, by hht, 26 unit, by pc, 26 units, 24 units, by lcd, 25 urv, 27 urv, by cometer, 28 urv, by hht, 28 urv, by lcd, 28 urv, by local keys, 28 urv, by pc, 28 W wiring, 17 write protect mode, HW, 36 write protect mode, SW, 37 Z zero elevation, 51 zero suppression, 51 Index ABB has Sales & Customer Support expertise in over 100 countries worldwide The Company's policy is one of continuous product improvement and the right is reserved to modify the information contained herein without notice Printed in Italy (04.2012) www.abb.com/instrumentation ABB ABB Ltd Howard Road, St. Neots Cambridgeshire, PE19 3EU UK Tel: +44(0)1480 475321 Fax: +44(0)1480 217948 IM/364 Rev 2 ABB 2012 ABB Inc. 125 E. County Line Road Warminster, PA 18974 USA Tel: +1 215 674 6000 Fax: +1 215 674 7183 ABB S.p.A. Via Statale 113 22016 Lenno (CO) Italy Tel: +39 0344 58111 Fax: +39 0344 56278 ABB Automation Products GmbH Schillerstrasse 72 D-32425 Minden Germany Tel: +49 (0) 571 830 1691 Fax: +49 (0) 571 830 1368