1
NetPBX
Product Documentation
Last Updated: August 2013
Table of Contents
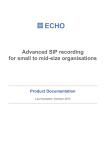
1. Home . . . . . . . . . . . . . . . . . . . . . . . . . . . . . . . . . . . . . . . . . . . . . . . . . . . . . . . . . . . . . . . . . . . . . . . . . . . . . . . . . . . . . . . . . . . . . . . . .
1.1 Legal & copyright notices . . . . . . . . . . . . . . . . . . . . . . . . . . . . . . . . . . . . . . . . . . . . . . . . . . . . . . . . . . . . . . . . . . . . . . . . . . . . . .
1.2 System requirements . . . . . . . . . . . . . . . . . . . . . . . . . . . . . . . . . . . . . . . . . . . . . . . . . . . . . . . . . . . . . . . . . . . . . . . . . . . . . . . . .
1.3 What is NetPBX? . . . . . . . . . . . . . . . . . . . . . . . . . . . . . . . . . . . . . . . . . . . . . . . . . . . . . . . . . . . . . . . . . . . . . . . . . . . . . . . . . . . .
1.4 Installing NetPBX . . . . . . . . . . . . . . . . . . . . . . . . . . . . . . . . . . . . . . . . . . . . . . . . . . . . . . . . . . . . . . . . . . . . . . . . . . . . . . . . . . . .
1.5 Accessing the system . . . . . . . . . . . . . . . . . . . . . . . . . . . . . . . . . . . . . . . . . . . . . . . . . . . . . . . . . . . . . . . . . . . . . . . . . . . . . . . .
1.6 Controllers . . . . . . . . . . . . . . . . . . . . . . . . . . . . . . . . . . . . . . . . . . . . . . . . . . . . . . . . . . . . . . . . . . . . . . . . . . . . . . . . . . . . . . . . .
1.6.1 What is a controller? . . . . . . . . . . . . . . . . . . . . . . . . . . . . . . . . . . . . . . . . . . . . . . . . . . . . . . . . . . . . . . . . . . . . . . . . . . . .
1.6.2 Adding a controller . . . . . . . . . . . . . . . . . . . . . . . . . . . . . . . . . . . . . . . . . . . . . . . . . . . . . . . . . . . . . . . . . . . . . . . . . . . . . .
1.6.3 Configuring a controller . . . . . . . . . . . . . . . . . . . . . . . . . . . . . . . . . . . . . . . . . . . . . . . . . . . . . . . . . . . . . . . . . . . . . . . . . .
1.6.3.1 Overview . . . . . . . . . . . . . . . . . . . . . . . . . . . . . . . . . . . . . . . . . . . . . . . . . . . . . . . . . . . . . . . . . . . . . . . . . . . . . . . .
1.6.3.2 Summary . . . . . . . . . . . . . . . . . . . . . . . . . . . . . . . . . . . . . . . . . . . . . . . . . . . . . . . . . . . . . . . . . . . . . . . . . . . . . . . .
1.6.3.3 Inputs . . . . . . . . . . . . . . . . . . . . . . . . . . . . . . . . . . . . . . . . . . . . . . . . . . . . . . . . . . . . . . . . . . . . . . . . . . . . . . . . . . .
1.6.3.4 Outputs . . . . . . . . . . . . . . . . . . . . . . . . . . . . . . . . . . . . . . . . . . . . . . . . . . . . . . . . . . . . . . . . . . . . . . . . . . . . . . . . . .
1.6.3.5 Settings . . . . . . . . . . . . . . . . . . . . . . . . . . . . . . . . . . . . . . . . . . . . . . . . . . . . . . . . . . . . . . . . . . . . . . . . . . . . . . . . .
1.6.4 Deleting a controller . . . . . . . . . . . . . . . . . . . . . . . . . . . . . . . . . . . . . . . . . . . . . . . . . . . . . . . . . . . . . . . . . . . . . . . . . . . . .
1.7 NetPBX settings . . . . . . . . . . . . . . . . . . . . . . . . . . . . . . . . . . . . . . . . . . . . . . . . . . . . . . . . . . . . . . . . . . . . . . . . . . . . . . . . . . . . .
1.8 Knowledgebase . . . . . . . . . . . . . . . . . . . . . . . . . . . . . . . . . . . . . . . . . . . . . . . . . . . . . . . . . . . . . . . . . . . . . . . . . . . . . . . . . . . . .
1.8.1 Connecting BCM v3.7 or below with NetPBX . . . . . . . . . . . . . . . . . . . . . . . . . . . . . . . . . . . . . . . . . . . . . . . . . . . . . . . . .
3
3
4
4
4
5
6
7
8
10
10
11
12
22
30
33
34
35
35
NetPBX User Manual
Home
Legal & copyright notices
Software license
When you purchase this software, you are actually purchasing a license to use it.
One license covers one installation, although one installation may cover multiple sites.
Your support contract, if applicable, will cover all sites covered by this installation.
Disclaimer
Tri-Line Network Telephony Ltd (hereafter named "Tri-Line") makes no warranties nor representations (neither expressed nor implied) with
respect to the contents or performance of the product or this documentation. It particularly disclaims any warranty of fitness or merchantability
for any particular purpose.
The product is sold "as is" with any faults. Any claims made by sales literature or salespersons do not constitute warranties.
Because of the diversity of hardware, software and conditions under which the system may be used, Tri-Line cannot make any warranty of
fitness for a particular purpose. The entire risk of using the product must be assumed by the user. Accordingly, the user is recommended to
thoroughly test the product before relying on it. In any event, any liability of Tri-Line is limited exclusively to a refund of the purchase price of
the product.
It is the user's responsibility to ensure that the product or its use conforms to any laws concerning the provision of data protection in their
organisation.
Tri-Line reserves the right to revise and make changes to the software and/or the hardware and/or this documentation without incurring any
obligation to notify any person of such changes and/or revisions.
By purchasing and using the software you agree to be bound by these terms and conditions.
Copyright notice
NetPBX ® is a registered trademark of and copyright © Tri-Line Network Telephony Limited, London, England, 2013.
All rights of the manufacturer are reserved. Any unauthorised lending, copying, hiring, or any other form of distribution, electronically or
otherwise, without the consent of the copyright holders is strictly prohibited.
The contact details of the copyright holders are:
Tri-Line Network Telephony Limited
9-10 Telfords Yard
The Highway
London
E1W 2BS
Switchboard: +44 20 7265 2600
Technical Support: +44 20 7265 2626
Website: http://www.tri-line.com/
Free upgrades
We operate a free upgrade scheme for customers who purchase maintenance at the same time as purchasing a license; whilst a
maintenance contract is in place, minor software updates and enhancements are made available free of charge.
Free upgrades are solely at the discretion of Tri-Line and are usually delivered by electronic means over the internet. It is the customer's
responsibility to ensure that these updates can be received.
© Copyright Tri-Line Network Telephony Limited, London, England, 2013
3
NetPBX User Manual
Customers without a maintenance contract will be charged for any software upgrades they require, as well as for any technical assistance
needed during the upgrade procedure.
System requirements
Hardware
Any modern standalone PC will comfortably run a copy of NetPBX. The following specification are preferred:
2 GHz Dual-Core x86/x86-64 CPU
1 GB memory
40 GB hard disk
Ethernet TCP/IP network
Serial RS232-C where required by PBX
Software
NetPBX can be installed on any PC with a Microsoft Windows 2000 - Windows 7 (Server editions up to 2003).
A web browser is required to operate the software and, whilst any standards-compliant browser should be compatible, we have extensively
tested the following ones:
Microsoft Internet Explorer 6+
Mozilla Firefox 2+
Apple Safari
Google Chrome
Opera
What is NetPBX?
Overview
NetPBX is a stand-alone software utility that can be used to replace or extend the in-built data collection methods in our TIM Professional,
TIM Plus and TIM Enterprise call logging products.
Its main purpose is to acquire
call records from PBXs, routers and other telecom signalling equipment and send
these across to a specified output location - the call logging software - using any of the following methods:
Serial (RS232) connections
Client socket connections
Server socket connections
When and where you should use NetPBX
NetPBX is always required for serial connections to PBX equipment, since this ensures a separate data buffer between the PBX and the call
logging software.
Additionally, where your infrastructure spans multiple geographical locations, NetPBX can be installed at each one to provide remote
buffering and delivery of data back to the central site, where your call logging software is installed.
© Copyright Tri-Line Network Telephony Limited, London, England, 2013
4
NetPBX User Manual
Installing NetPBX
To obtain a copy of the NetPBX software, contact our Technical Support team.
To install the software, double-click on the setup package and follow the setup wizard in order to complete the installation:
Once installed, you can access NetPBX via any standard web browser. To configure your controllers to collect and deliver your call logging
data, refer to the Controllers section below.
Accessing the system
NetPBX can be accessed via a standard web browser from any PC on your network.
To access NetPBX, open a web browser, go to the IP address or host name of the PC running NetPBX and log in using the following
credentials:
username: netpbx
password: netpbx
© Copyright Tri-Line Network Telephony Limited, London, England, 2013
5
NetPBX User Manual
The main interface of NetPBX will be displayed, where you can view a list of the currently-configured controllers, as shown below:
When you first install the software, the All controllers list will be empty. To add a controller, refer to the Adding a
controller section.
Controllers
© Copyright Tri-Line Network Telephony Limited, London, England, 2013
6
NetPBX User Manual
What is a controller?
A controller is the system object that allows you to collect and deliver your call logging data from a data source to an output location. The
controller can encompass one or more inputs or outputs, and each input/output instance can invoke a different type of connection.
To see a list with all the controllers configured in the system, click on the All controllers button, as shown below:
To view or edit the settings of a controller, refer to the Configuring a controller section.
© Copyright Tri-Line Network Telephony Limited, London, England, 2013
7
NetPBX User Manual
To add a new controller to the system, refer to the Adding a controller section.
Adding a controller
To add a controller to the system, click on the
New controller
© Copyright Tri-Line Network Telephony Limited, London, England, 2013
tab at the bottom-left corner of the screen, as shown below:
8
NetPBX User Manual
A new window will appear, allowing you to name your controller. Click on the
shown below:
Add
button to add the new controller to the system, as
The Summary screen will be displayed, allowing you to enter the details of your controller. For information on how to configure these details,
check the Configuring a controller section.
© Copyright Tri-Line Network Telephony Limited, London, England, 2013
9
NetPBX User Manual
Configuring a controller
Overview
To configure a controller, select it from the All controllers list, as shown below:
© Copyright Tri-Line Network Telephony Limited, London, England, 2013
10
NetPBX User Manual
The Summary screen will be displayed, allowing you to configure the inputs and outputs of the selected controller.
Summary
The Summary screen gives you an overview of all the inputs and outputs configured for the selected controller. From here you can add new
inputs/outputs to the controller or navigate to the configuration section of each particular input/output and modify their settings.
© Copyright Tri-Line Network Telephony Limited, London, England, 2013
11
NetPBX User Manual
When you first set up the system, the Summary screen will be empty. For information on how to add an input or output to a controller, refer to
the Inputs or Outputs sections below.
Inputs
An Input is the system object that connects to a data source, such as PBXs, routers and other telecom signalling equipment, in order to
collect the call logging data.
Inputs
Adding an input
Configuring an input
Input types
Deleting an input
Adding an input
To add a data input, click on the
Add new
button from either the Summary or the Inputs screen, as shown below:
© Copyright Tri-Line Network Telephony Limited, London, England, 2013
12
NetPBX User Manual
A new window will open, allowing you to name the input. Click on the
Add
button to add the input to the system, as shown below:
The input-configuration screen will be displayed. For information on how to configure these settings, refer to the Configuring an input section
below.
© Copyright Tri-Line Network Telephony Limited, London, England, 2013
13
NetPBX User Manual
Configuring an input
To configure a data input, select it from the All inputs list, as shown below:
© Copyright Tri-Line Network Telephony Limited, London, England, 2013
14
NetPBX User Manual
A new window will open on the right-hand side panel, allowing you to configure the settings of your data input:
The settings displayed in this window will be described below:
© Copyright Tri-Line Network Telephony Limited, London, England, 2013
15
NetPBX User Manual
Name
The Name field allows you to view or edit the name of the selected input. To rename, overtype the current entry.
Type
The Type field allows you to specify the connection method you want to use to collect the data from the phone system. The following
connection methods are supported in NetPBX:
Listener
Serial port
Client socket
Pipe server
BCM SSH
XML file
File reader
BCM DCOM
Input types
Listener
This method creates a socket and binds it to a specific port, accepting any data received on the connection without challenge.
Field
Description
Connection
message
An optional greeting message which is sent to any connecting socket. This message can include one or more of the
following variables:
{remoteip} - the IP address of the remote party
{remoteport} - the remote party's source port
Port
The port that the listener should bind to
Address family
The address family of the socket
Socket type
The type of data flow the socket expects
Protocol type
The type of protocol the listener will use
Serial port
This method allows the connection of a serial (RS-232) device.
© Copyright Tri-Line Network Telephony Limited, London, England, 2013
16
NetPBX User Manual
Field
Description
Port name
The name of the serial port device, e.g. COM 1, COM 2
Baud rate
The serial port's speed
Parity
The parity check regime
none - no parity checking is performed
odd - odd bits parity checking is performed
even - even bits parity checking is performed
Data bits
The number of data bits, between 5 and 8
Handshake
The type of handshake the serial port requires:
none - no handshake required
rts - request to Send
xonxoff - X-On/X-Off
rtsxonxoff - either RTS or X-On/X-Off is used
Buffer size
The size of the data buffer of the serial port
Buffer threshold
The size that the buffer must first reach before being empty
Stop bits
The number of stop bits used
Client socket
This method creates a TCP socket and connects to a remote host.
© Copyright Tri-Line Network Telephony Limited, London, England, 2013
17
NetPBX User Manual
Field
Description
Address
The IP address or hostname to which the socket should connect
Address
family
The address family of the socket
Port
The port that the listener should bind to
Username
The username required by the data source, if applicable
Password
An optional password which is sent upon successful connection
IP script
The script file used by NetPBX to check for new data
Trickle
frequency
When the system becomes inactive, NetPBX sends a string of data back to the remote host in order to test the connection.
Sending the trickle back data will emit a detectable error in case a disconnection has occurred and, thus, will cause the
connection to reset.
The Trickle frequency option allows you to configure the amount of inactivity that must occur (in miliseconds) before a
trickle back is performed.
Trickle
data
A string containing the data to be sent back
Pipe server
This method opens a global named pipe and accepts any data that is sent to it.
© Copyright Tri-Line Network Telephony Limited, London, England, 2013
18
NetPBX User Manual
Field
Description
Pipe name
The name of the pipe that is created
Buffer size
The size of the buffer, in bytes, that is allocated to the pipe
BCM SSH
This method registers a connection with the Nortel CDRClient.dll library and receives data-callbacks whenever the PBX produces
data.
Field
Description
Host
The IP address or hostname of the BCM PBX
Username
The username required to access the CDR events
Password
The password required to access the CDR events
App ID
The unique ID number given to each source of data.
© Copyright Tri-Line Network Telephony Limited, London, England, 2013
19
NetPBX User Manual
XML file
This method monitors an XML file for new nodes. To specify which nodes to monitor, an XPath query is used; to identify which nodes are
new, a unique element is required. Default properties are designed to work with the ticketcollector.xml file produces by an Alcatel
OmniPCX Enterprise PBX.
Field
Description
Location
The full filename of the XML file to be monitored. The {app} variable can be used to specify the program data location
of the running service
X-Path query
The XPath query to use when testing for new nodes
Checksum
node
The unique node(element) to be used to track which nodes have been added since the last check
Outer
element
The name of the outer XML element to be used to contain any new nodes when the new XML document is created for
output
Check
interval
The time interval the system is checking for a new node.
Delay
A value, in milliseconds, that specifies the artificial delay that is waited when a change in the source XML file is
discovered.
File reader
This method opens a connection to an actual file.
© Copyright Tri-Line Network Telephony Limited, London, England, 2013
20
NetPBX User Manual
Field
Description
Location
The path of the folder where the file is located
BCM DCOM
Field
Description
Host
The IP address or hostname of the BCM PBX
Deleting an input
To delete a data input, select it from the All inputs list, as shown below:
© Copyright Tri-Line Network Telephony Limited, London, England, 2013
21
NetPBX User Manual
A new window will open on the right-hand side panel. Click on the
© Copyright Tri-Line Network Telephony Limited, London, England, 2013
Delete
button to remove the input from the system, as shown below:
22
NetPBX User Manual
Outputs
An Output is the system object that delivers the collected call logging data to a specified location.
Outputs
Adding an output
Configuring an output
Output types
Deleting an output
Adding an output
To add a data output, click on the
Add new
button from either the Summary or the Inputs screen, as shown below:
A new window will open, allowing you to name the data output. Click on the
© Copyright Tri-Line Network Telephony Limited, London, England, 2013
Add
button to add the output to the system, as shown below:
23
NetPBX User Manual
The output-configuration screen will be displayed. For information on how to configure these settings, refer to the Configuring an output secti
on below.
© Copyright Tri-Line Network Telephony Limited, London, England, 2013
24
NetPBX User Manual
Configuring an output
To configure a data output, select it from the All outputs list, as shown below:
A new window will open on the right-hand side panel, allowing you to configure the settings of your data output:
© Copyright Tri-Line Network Telephony Limited, London, England, 2013
25
NetPBX User Manual
The settings displayed in this window will be described below:
Name
The Name field allows you to view or edit the name of the selected output. To rename, overtype the current entry.
Type
The Type field allows you to select the method you want to use when delivering the call logging data to an output location. The following
methods are supported:
File
HTTP Post
Serial port
Client socket
Output types
File
This method opens a file and creates or appends buffered data.
© Copyright Tri-Line Network Telephony Limited, London, England, 2013
26
NetPBX User Manual
Field
Description
Location
The name of the file to output data to. If the location doesn't exist, an attempt is made to create it, including the path. The
following variables are replaced:
{app} - The path to the location of the application's data folder, e.g. C:\ProgramData\Tri-Line\NetPBX.
HTTP Post
This method allows you to deliver data to a running instance of TIM Plus or TIM Enterprise by way of an HTTP POST. The HTTP headers
include the datasource information required for the receiving application to identify the source of the data.
Field
Description
Protocol
The protocol to use when constructing the URL of the target server to send data to
Host
The IP address or hostname where the receiving HTTP server is listening
© Copyright Tri-Line Network Telephony Limited, London, England, 2013
27
NetPBX User Manual
Port
The port number to which the target HTTP server is bound
Username
The username required to access the target server
Password
The password required to access the target server
Data source
The UIV of the PBX datasource object in the target application, which will be deemed to have created the source data
Serial port
This method opens a serial (RS-232) port and sends any received data to it.
Field
Description
Port name
The name of the serial port device, e.g. COM 1, COM 2
Baud rate
The serial port's speed
Parity
The parity check regime
none - no parity checking is performed
odd - odd bits parity checking is performed
even - even bits parity checking is performed
Data bits
The number of data bits, between 5 and 8
Handshake
The type of handshake the serial port requires:
none - no handshake required
rts - Request to Send
xonxoff - X-On/X-Off
rtsxonxoff - either RTS or X-On/X-Off is used
Buffer size
The size of the serial port's data buffer
Buffer threshold
The size that the buffer must first reach before being empty
Stop bits
The number of stop bits used
Client socket
Creates a momentary TCP client socket connection to a remote TCP server.
© Copyright Tri-Line Network Telephony Limited, London, England, 2013
28
NetPBX User Manual
Field
Description
Host
The IP address or hostname of the remote TCP server
Port
The TCP port number to which the remote TCP server is bound
Connection
Determines the behaviour of the connection:
close - creates and closes the connection every time data is sent
keepalive - creates a connection at startup, then sends any data over the existing (up) connection, each time
some is received
Deleting an output
To delete a data input, select it from the All outputs list, as shown below:
© Copyright Tri-Line Network Telephony Limited, London, England, 2013
29
NetPBX User Manual
A new window will open on the right-hand side panel. Click on the
© Copyright Tri-Line Network Telephony Limited, London, England, 2013
Delete
button to remove the output from the system, as shown below:
30
NetPBX User Manual
Settings
To configure the general properties of a controller, select it from the list of controllers and click on the
corner of the screen, as shown below:
Settings
tab at the bottom-left
A new window will open, allowing you to edit the properties of the controller, as shown below:
© Copyright Tri-Line Network Telephony Limited, London, England, 2013
31
NetPBX User Manual
Each field in this section is described in the table below:
Field
Description
Name
The name of the controller
Dequeue time
The frequency (in milliseconds) that the controller's dequeue timer checks the data buffer
Dequeue linger
Determines whether or not the dequeue timer is reset whenever any input receives data
Timestamp format
Defines a string to place before every line of data when it is dequeued. The string can contain any or all of the
following variables:
Timestamp in
UTC
{year}
The current year, formatted as "yyyy"
{month}
The current month, formatted as "mm"
{day}
The current day, formatted as "dd"
{hour}
The current hour, formmated as "hh"
{minute}
The current minute, formatted as "mm"
{second}
The current second, formatted as "ss"
\r
Carriage return
\n
Line feed
Indicates that the UTC time should be used as the time stamp, rather than the local time (default)
© Copyright Tri-Line Network Telephony Limited, London, England, 2013
32
NetPBX User Manual
Timestamp
encoding
Selects the type of encoding to use during conversion of byte array data to strings (and viceversa) when
timestamping.
The following values are accepted:
default
Use the operating system default
ascii
Use plain (7-bit) ASCII
unicode
Use Unicode double-byte encoding
utf8
Use UTF8 versatible encoding
Deleting a controller
To delete a controller, select it from the list of controllers and click on the
below:
A new window will open on the right-hand side panel. Click on the
below:
© Copyright Tri-Line Network Telephony Limited, London, England, 2013
Delete
Settings
tab at the bottom-left corner of the screen, as shown
button to remove the controller from the system, as shown
33
NetPBX User Manual
NetPBX settings
To configure the general properties of NetPBX, click on the
Settings
© Copyright Tri-Line Network Telephony Limited, London, England, 2013
button from the main NetPBX screen, as shown below:
34
NetPBX User Manual
The NetPBX settings window will open, where you can configure its properties, such as IP address, port number or login credentials, as
shown below:
Field
Description
Bind
If the PC running NetPBX has more than one IP address, you can bind the web service to the IP address you want NetPBX
to use.
Port
By default, NetPBX is running on port 8090. To change the port number, overtype the current entry.
Realm
name
If your network uses realm names for routing and authentication, enter the realm name of the NetPBX service user account
in the box provided.
Username
Enter a username that will used to login to NetPBX
Password
Enter a password that will be used to login to NetPBX
Knowledgebase
Connecting BCM v3.7 or below with NetPBX
Follow the instructions below to connect a BCM v3.7 or below with NetPBX:
1. Make sure the CDRServer.EXE and Interop.CDRSERVERLib.dll files are placed in the same folder as NetPBX.EXE, usually
located in {pf}\Tri-Line\NetPBX.
© Copyright Tri-Line Network Telephony Limited, London, England, 2013
35
NetPBX User Manual
2. Register CDRServer.EXE by running the command line with administrator privileges and typing the following command under the
directory path of the NetPBX folder: CDRServer.EXE/regserver.
3. Open the computer's local security policies: Start -> Control Panel -> Administrative Tools -> Local Security
Policy.
4. Within the Security Settings\Local Policies\Security Options tree, change the following items as highlighted in the
screenshot below:
a. Network Access: Let Everyone permissions apply to anonymous users. Set this to Enabled.
b. Network Access: Sharing security model for local accounts. Set this to Classic.
c. DCOM: Machine Access Restrictions: Click on
Edit Security
and add the following user accounts: Anonymous,
Everyone, Interactive, Network, System. Set each one to have full access rights.
© Copyright Tri-Line Network Telephony Limited, London, England, 2013
36
NetPBX User Manual
5. Next step is to modify the way DCOM behaves on the computer by executing the DCOM configuration program: Start -> Run ->
DCOMCNFG [enter]. Browse the tree to the following location: Console Root -> Component Services -> Computers ->
My Computer. Righ-click on My Computer for
a. On the
Default Properties
Properties
and amend or update the following options:
tab:
Enable Distributed COM on this computer: tick the box for his option
Default Authentication Level: set this to Connect
© Copyright Tri-Line Network Telephony Limited, London, England, 2013
37
NetPBX User Manual
Default Impersonation Level: set this to Identify
b. On the
COM Security
tab:
Go to the Access Permissions section and select
Edit default
.
Add the following accounts and set both local and remote access permissions: Anonymous, Everyone, Interactive,
Network, Local Service and System.
Go to the Launch and Activation Permissions section and click on
Edit default
tab.
Add or update the following accounts to give them all local and remote access permissions: Anonymous, Everyone,
© Copyright Tri-Line Network Telephony Limited, London, England, 2013
38
NetPBX User Manual
Interactive, Network, Local Service and System.
© Copyright Tri-Line Network Telephony Limited, London, England, 2013
39