1
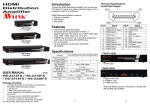
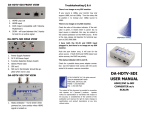
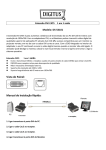
Installation Before the installation, making sure the selector and monitor (projector) are turning off. 1. Making sure all equipments are turned off. 2. Plug the monitor cable into the HDMI OUT port connector. 3. Plug the extension cables from HDMI port of DVD player/TV receiver into the HDMI IN port connectors. 4. Plug the power adapter into the wall socket. 5. Connect the power adapter with the HDMI selector. 6. Turn on the monitor first. 7. All red LEDs will flash back and forth, otherwise, go back to check the step 4 and 5. 8. Turn on the DVD player/TV receiver. 9. The LEDs green light turn on while the DVD player/TV receiver have well been connected and maintaining the activation. Operation 1. Port selection Press the button of “port selection switch” for accessing the wanted DVD player/TV receiver. The selected corresponding port will light on for the red LEDs which indicating the port is actived. 2. IR remote control Use “1”, ”2” key to select DVD player/TV receiver that wanted DVD player/TV receiver. Use▲“ ”,▼“ ” key to select another DVD player/TV receiver. Use ” ” key to power on/off selector. Technical Specifications Input/Output Signal Pin # Signal 1 TMDS Data 2+ 2 TMDS Data 2 Shield 3 TMDS Data 24 5 6 7 8 9 10 Pin # Signal 11 TMDS Clock Shield 12 TMDS Clock 13 CEC TMDS Data 1+ 14 TMDS Data 1 Shield TMDS Data 1TMDS Data 0+ TMDS Data 0 Shield TMDS Data 0TMDS Clock+ 15 16 17 18 19 Reserved (N.C. on device) SCL SDA DDC/CEC Ground +5 Power Hot Plug Detect © C&C TECHNIC TAIWAN CO., LTD. All rights reserved. Trademarks: All the companies, brand names, and product names referred to this manual are the trademarks or registered trademarks belonging to their respective companies. -3- -4-