1
Compiler
Reference Manual
Release 3.13.2
Catalina C Compiler
Reference Manual
Table of Contents
WHAT IS CATALINA? .......................................................................................................................................5
STATUS............................................................................................................................................... 5
FEATURES............................................................................................................................................ 5
CATALINA IS ANSI C COMPLIANT ........................................................................................................... 5
CATALINA RUNS ON WINDOWS, LINUX AND OSX....................................................................................... 6
CATALINA SUPPORTS MULTIPLE PROPELLER PLATFORMS ............................................................................ 6
CATALINA SUPPORTS C PROGRAMS UP TO 16MB...................................................................................... 9
CATALINA IS FREE!.............................................................................................................................. 10
But what does all this really mean? ............................................................................................................ 12
INSTALLING CATALINA.................................................................................................................................13
OVERVIEW......................................................................................................................................... 13
CATALINA DIRECTORY STRUCTURE........................................................................................................ 13
USING CATALINA.............................................................................................................................................15
USING THE CATALINA COMPILER........................................................................................................... 15
CATALINA ENVIRONMENT VARIABLES..................................................................................................... 17
USING LCC DIRECTLY........................................................................................................................... 19
USING THE CATALINA BINDER............................................................................................................... 20
USING THE PAYLOAD LOADER............................................................................................................... 21
BUILDING THE PAYLOAD LOADER UTILITIES............................................................................................. 28
CATALINA SUPPORT FOR THE PROPELLER...........................................................................................30
SPIN/PASM ASSEMBLER SUPPORT..................................................................................................... 30
FLOATING POINT SUPPORT................................................................................................................... 30
HMI SUPPORT................................................................................................................................... 31
Keyboard functions.......................................................................................................................................32
Mouse functions............................................................................................................................................33
Screen functions........................................................................................................................................... 34
Utility functions............................................................................................................................................36
CGI (COMPUTER GRAPHICS INTERFACE) SUPPORT ................................................................................. 37
VGI (VIRTUAL GRAPHICS INTERFACE) SUPPORT..................................................................................... 42
MULTI-THREAD AND MULTI-COG SUPPORT............................................................................................. 43
Fundamental Thread Functions...................................................................................................................44
Additional Thread Utility Functions............................................................................................................ 46
PLUGIN SUPPORT................................................................................................................................ 47
Cog functions................................................................................................................................................48
Special Register Access................................................................................................................................52
Registry, Plugin and Service functions.........................................................................................................53
DEBUGGER SUPPORT.......................................................................................................................... 58
BlackCat and BlackBox Support..................................................................................................................58
POD Support ...............................................................................................................................................58
Compiling programs for debugging with POD........................................................................................................ 58
Using POD.............................................................................................................................................................. 60
SD CARD SUPPORT............................................................................................................................ 61
FILE SYSTEM SUPPORT....................................................................................................................... 62
SERIAL DEVICE SUPPORT..................................................................................................................... 66
The tty library (libtty)...................................................................................................................................67
The tty256 library (libtty256).......................................................................................................................69
The 4 port Serial library (libserial4)............................................................................................................69
SOUND SUPPORT................................................................................................................................ 71
SPI/I2C SUPPORT.............................................................................................................................. 73
SUPPORT FOR OTHER OUTPUT FORMATS............................................................................................... 76
Copyright 2013 Ross Higson
Page 2 of 158
Catalina C Compiler
Reference Manual
SPI FLASH AND CACHE SUPPORT ......................................................................................................... 76
CATALINA TARGETS.......................................................................................................................................78
DEFAULT TARGET CONFIGURATION OPTIONS.......................................................................................... 79
LMM SUPPORT ................................................................................................................................. 83
CMM SUPPORT ................................................................................................................................. 84
XMM SUPPORT.................................................................................................................................. 84
SPECIFYING THE MEMORY MODEL......................................................................................................... 85
EMM SUPPORT.................................................................................................................................. 89
SMM SUPPORT.................................................................................................................................. 90
CATALINA COG USAGE........................................................................................................................ 90
SUPPORTING MULTIPLE PROPELLER PLATFORMS...................................................................................... 91
TARGET PACKAGES............................................................................................................................. 91
The standard target package (target)...........................................................................................................91
The basic target package..............................................................................................................................92
The minimal target package.........................................................................................................................93
USING PASM WITH CATALINA.................................................................................................................... 94
USING THE PASM FUNCTION............................................................................................................... 94
LOAD THE PASM PROGRAM AT INITIALIZATION TIME................................................................................. 95
CONVERT THE PASM PROGRAM INTO A CATALINA PLUGIN....................................................................... 95
LOAD A COMPILED PASM PROGRAM INTO A COG.................................................................................... 95
WRITING AN LMM PASM FUNCTION THAT CAN BE CALLED DIRECTLY FROM C............................................ 96
PRECAUTIONS WHEN USING LMM PASM WITH THE CATALINA OPTIMIZER.................................................. 97
MULTI-COG SUPPORT....................................................................................................................................97
MULTI-CPU SUPPORT.....................................................................................................................................99
PROXY DEVICES............................................................................................................................... 100
Generic_Proxy_Server...............................................................................................................................100
RESETTING AND/OR LOADING ANOTHER PROP....................................................................................... 102
Catalina_XMM_SD_Loader...................................................................................................................... 102
Generic_SIO_Loader................................................................................................................................. 103
CPU_n_Boot.............................................................................................................................................. 103
CPU_n_Reset............................................................................................................................................. 103
Multi-CPU Examples................................................................................................................................. 103
CUSTOMIZING CATALINA.......................................................................................................................... 104
CUSTOMIZED PLATFORMS................................................................................................................... 104
CUSTOMIZED TARGETS AND TARGET PACKAGES................................................................................... 105
USING EXISTING PARALLAX DRIVERS................................................................................................... 106
Use a Spin object unmodified.....................................................................................................................106
Use only the PASM portion of the driver................................................................................................... 107
BUILDING CATALINA................................................................................................................................... 109
BUILDING CATALINA UNDER WINDOWS................................................................................................. 109
BUILDING CATALINA UNDER LINUX....................................................................................................... 110
BUILDING CATALINA UNDER OSX....................................................................................................... 110
CATALINA TECHNICAL NOTES.................................................................................................................111
A NOTE ABOUT BINDING AND LIBRARY MANAGEMENT............................................................................ 111
A NOTE ABOUT THE CATALINA LIBRARIES............................................................................................. 113
A NOTE ABOUT LMM STARTUP & MEMORY MANAGEMENT.................................................................... 115
A NOTE ABOUT POD AND EMM/XMM............................................................................................... 117
A NOTE ABOUT CATALINA CODE SIZES................................................................................................ 118
Copyright 2013 Ross Higson
Page 3 of 158
Catalina C Compiler
Reference Manual
A NOTE ABOUT CATALINA SYMBOLS VS C SYMBOLS ............................................................................... 121
A NOTE ABOUT THE CATALINA LOADER PROTOCOL............................................................................... 123
CATALINA DEVELOPMENT........................................................................................................................ 125
REPORTING BUGS............................................................................................................................. 125
IF YOU WANT TO HELP DEVELOP CATALINA............................................................................................ 125
OKAY, BUT WHY IS IT CALLED “CATALINA”?........................................................................................... 125
ACKNOWLEDGMENTS......................................................................................................................... 126
THE CURRENT CATALINA RELEASE.......................................................................................................128
WHAT’S NEW IN THIS RELEASE?.......................................................................................................... 128
Release 3.13.2:...........................................................................................................................................128
Release 3.13:..............................................................................................................................................128
Previous Releases:..................................................................................................................................... 129
WHAT’S DUE IN THE NEXT RELEASE?................................................................................................... 129
CATALINA INTERNALS................................................................................................................................ 131
A DESCRIPTION OF THE LMM AND XMM KERNELS............................................................................... 131
A DESCRIPTION OF THE CATALINA VIRTUAL MACHINE............................................................................ 133
Registers.....................................................................................................................................................133
Primitives....................................................................................................................................................135
Kernel Memory Models..............................................................................................................................138
Unsupported PASM....................................................................................................................................139
Object and Image Formats.........................................................................................................................139
Catalina Calling Conventions....................................................................................................................141
A DESCRIPTION OF THE STANDARD CATALINA XMM API ....................................................................... 142
The XMM API cache access functions....................................................................................................... 142
The XMM API direct access functions....................................................................................................... 143
The XMM API flash access functions.........................................................................................................145
A DESCRIPTION OF THE CATALINA ADDRESSING MODES........................................................................ 147
A DESCRIPTION OF THE CATALINA IMAGE FORMAT................................................................................ 149
A DESCRIPTION OF THE GENERIC SD LOADER..................................................................................... 153
A DESCRIPTION OF THE PROXY DEVICE PROTOCOL............................................................................... 156
SD_Init – enable (initialize) the SD card...................................................................................................157
SD_Read – read a sector from the SD card...............................................................................................157
SD_Write – write a sector to the SD card..................................................................................................157
SD_ByteIO – write a byte to the SD card...................................................................................................157
SD_StopIO – disable (tristate) the SD card...............................................................................................158
KB_Reset – reset the keyboard (clear any buffered keys)..........................................................................158
KB_Data – read a character of keyboard data..........................................................................................158
MS_Data – read mouse data......................................................................................................................158
TV_Data – write screen data......................................................................................................................158
Copyright 2013 Ross Higson
Page 4 of 158
Catalina C Compiler
Reference Manual
What is Catalina?
Catalina is a FREE ANSI C compiler for the Parallax Propeller. It can be downloaded
from SourceForge at http://catalina-c.sourceforge.net/
Status
Release 3.13.2 is a complete release of Catalina. It contains significant new features
over previous releases. For a complete list of enhancements since the least release,
see the section later in this document titled What’s new in this release?
Catalina is fairly light on documentation. There is this document (which contains
technical details about Catalina) and also several tutorial documents which describe
how to use various parts of Catalina – but all the documents currently assume a fair
degree of familiarity with the Propeller, and also some degree of familiarity with the C
language. There are also README files in various directories.
However, since Catalina is an ANSI compliant C compiler, most existing
documentation on the C language and the standard C libraries is applicable to
Catalina – this document therefore concentrates on those aspects of Catalina that
are unique, such as its Propeller-specific features.
This means you can begin programming in C without reading this manual at all –
start with the tutorial guides, such as Getting Started with Catalina, or Getting
Started with CodeBlocks, and come back to this guide to find out more about
Catalina.
Features
ANSI C compliant (C89, with some C99 features);
Floating point support (32 bit IEEE 754);
Complete C89 library including file system support (with some C99 functions);
Full debugger support (source code and/or assembly level debugging);
Multiple platform support – supports ANY Propeller platform;
Multiple OS support - Win32 and Linux binaries are provided. OSX is also
supported, but Catalina has to be compiled from source;
Support for C programs larger than 32k;
Support for the Code::Blocks Integrated Development Environment.
FREE!
Catalina is ANSI C compliant
Catalina is based on the widely used, ANSI compliant “Little C Compiler” (lcc).
Catalina adds a new code generator back-end to lcc specifically to generate code for
the Parallax Propeller.
Copyright 2013 Ross Higson
Page 5 of 158
Catalina C Compiler
Reference Manual
Catalina is C89 compliant, with some C99 features (such as supporting // for
comments).
A C89 compatible C library is provided. This library is based on the venerable
Amsterdam Compiler Kit library. Some C99 compliant components (e.g. stdint.h and
sdtype.h) are included, and various other portable C99 libraries are available if
additional C99 support is required1.
Catalina supports full 32 bit floating point, compliant with both ANSI C and IEEE 754.
For further details on lcc see http://www.cs.princeton.edu/software/lcc/.
For further details on the Parallax Propeller see http://www.parallax.com.
For further details on the Amsterdam Compiler Kit see http://tack.sourceforge.net/.
For further details on the Code::Blocks IDE see http://www.codeblocks.org/
Catalina runs on Windows, Linux and OSX
lcc has been ported to many platforms, and any platform that supports lcc can also
support Catalina, since the remaining portions of Catalina can themselves be
compiled with lcc.
Binary releases are supplied for both Windows and Linux platforms. All Catalina
source code is supplied, to simplify porting Catalina to other platforms – e.g. Catalina
can be built from source to run on OSX.
Catalina supports multiple Propeller platforms
Catalina uses the concepts of platforms, targets and target packages to define the C
program execution environment. Each target package supports one or more targets
on one or more Propeller hardware platforms (or one or more different configurations
of the same platform).
Each target defines the memory model and load option to be used for the program,
and also initializes the hardware and software environment in which the program is
to execute (e.g. to specify that real-time clock support, SD card drivers, or floating
point packages need to be loaded).
Each target typically supports a set of options that can be specified at compile time
to include or exclude various components, or to configure them (e.g. to tell the TV
driver whether to use NTSC or PAL mode).
The targets essentially provide Catalina C programs with a hardware abstraction
layer, which means the programs can often be made entirely independent of the
environment in which they execute.
Catalina compiles C programs into LMM PASM (i.e. Large Memory Model Propeller
Assembler) files which are not target-specific. Then the Catalina kernel, the
necessary device drivers, and any other platform specific code required for the target
1
For example, and implementation of the C99
http://www.ijs.si/software/snprintf/
Copyright 2013 Ross Higson
snprintf functions is available here:
Page 6 of 158
Catalina C Compiler
Reference Manual
are bundled into a single target-specific file, which is also compiled and finally
combined with the compiled C program.
Catalina provides several target packages, each in a separate sub-directory:
target
This is the default Catalina target package. It supports many
Propeller platforms, all memory models, all load options, and all
plugins2.
basic
This is a smaller target package. It supports only one Propeller
platform (which must be configured by the user) and a limited
set of plugins. However, it supports all memory models and all
load options.
minimal
This is a very trivial target package. It supports only one
Propeller platform (which must be configured by the user), one
plugin, one memory model and one load option. The purpose of
this package is mainly to provide a very simple environment to
illustrate how to create new Catalina plugins.
The default target package (i.e. target) is flexible enough to accommodate nearly all
the possible hardware configurations of all the supported Propeller platforms.
The base platforms currently supported are:
The Parallax DEMO board
The Parallax QUICKSTART board (including the Human Interface Board add-on)
The HYDRA
The HYBRID
The TRIBLADEPROP (all CPUs)
The RAMBLADE
The RAMBLADE3
The MORPHEUS (all CPUs)
The DRACBLADE
The ASC (Arduino Shield Compatible)
The C3 (Credit Card Computer)
The PP (Propeller Platform)
CUSTOM boards (by default configured for the Parallax QuickStart board)
Catalina also supports various XMM “add-on” boards that can be added to any base
platform. The add-on boards currently supported are:
2
The HX512
Plugins are described later in this document. For the present, just think of them like drivers for
particular devices – e.g. to communicate with a screen or keyboard.
Copyright 2013 Ross Higson
Page 7 of 158
Catalina C Compiler
The SUPERQUAD
The RAMPAGE
The RP2 (RamPage 2)
The Parallax PMC (Propeller Memory Card)
Reference Manual
Each platform or add-on board supported by the package has a corresponding
symbol reserved for it (e.g. HYDRA) that can be specified on the command line via
the -C option (command line options are described later in this document). More
details on the standard targets and their configuration options are given in the
Catalina Targets section later in this document.
New symbols can be created for other Propeller-based platforms, or for unusual
configurations of the above platforms - see the HMI Support and Customized
Targets sections later in this document.
The CUSTOM platform is the default platform, used unless another platform is
specified on the command line (more on how to do this later). The CUSTOM platform
comes preconfigured to be suitable for a Propeller with a 5Mhz clock, and with serial
input and output available. This makes the CUSTOM platform suitable for many
Propeller boards, including the Parallax QuickStart board and the various Gadget
Gangster boards. The CUSTOM target is easily modified if none of the predefined
platforms is suitable.
Unless otherwise specified, the remainder of document assumes that the default
Catalina target package (i.e. target) and the CUSTOM platform are in use.
Copyright 2013 Ross Higson
Page 8 of 158
Catalina C Compiler
Reference Manual
Catalina supports C programs up to 16Mb
Catalina uses the Large Memory Model (LMM) mode of the Parallax Propeller to
support programs up to 32Kb on any Propeller platform.
Catalina also introduces a new Compact Memory Model (CMM), which can also be
used on any propeller platform, and typically halves code sizes when compared with
LMM mode.
It is sometimes said that C – or in fact any LMM-based compiler - generates code
sizes too large to be useful on the propeller – but not with Catalina, and especially
not with Catalina and CMM. For more details (and an example) of just how useful
CMM can be in reducing program code sizes, see the section later in this document
called A Note about Catalina Code Sizes. This section demonstrates how a C
“hello, world” type program can take as few as 125 bytes.
However, no matter how efficient the compiler, sometimes a program is just too
large to fit in 32Kb – so Catalina also provides External Memory Model (XMM)
support for programs larger than 32Kb on suitable platforms. XMM support allows
Catalina to support program sizes up to 16Mb on Propellers equipped with suitable
hardware.
The main advantage of LMM programs is that they execute many times faster than
Spin programs. CMM programs tend to execute more slowly than LMM programs,
but are still faster than Spin programs. XMM programs may also execute faster than
Spin – it depends on the memory architecture used.
LMM C programs are not executed directly on a “bare metal” Propeller – instead, an
LMM kernel is first loaded into one or more of the Propeller cogs and these cogs can
then execute LMM programs. However, LMM is not “interpreted” in the same way as
SPIN – the LMM binary opcodes are true Propeller opcodes – the main difference
between an LMM program and a PASM program is that for PASM programs the
program code is stored in cog RAM, while for LMM programs the program code is
stored in Hub RAM. This means LMM programs are somewhat slower than cog
programs - but they are significantly faster than SPIN programs, and can be
significantly larger than pure PASM programs (which are limited to 496 instructions).
CMM programs are executed using a kernel that is a hybrid between an interpreted
Spin-type kernel and an LMM kernel.
XMM programs are similar to LMM programs except that the program code is stored
in external RAM – i.e. RAM provided by additional hardware external to the Propeller
chip. This may be Parallel SRAM or Serial Peripheral Interface (SPI) RAM or Flash.
Catalina provides a Standard Target Package which includes support for CMM and
LMM programs on all platforms 3, and also support for XMM programs on platforms
with suitable external memory hardware.
3
Note that there are other implementations of LMM for the Propeller, but they are not compatible
with the Catalina LMM Kernel.
Copyright 2013 Ross Higson
Page 9 of 158
Catalina C Compiler
Reference Manual
Currently, Catalina supports using the HYDRA XTREME HX512 SRAM card 4 for
XMM programs on both the HYDRA and the HYBRID platforms. Catalina also
supports using SRAM installed on the RAMBLADE, the RAMBLADE3. the
TRIBLADEPROP (both on CPU #1 and CPU #2), MORPHEUS (CPU #1 and #2), or
the DRACBLADE for XMM programs. Finally, Catalina also supports using SRAM
and FLASH on the MORPHEUS (CPU #1), HX512, C3, SUPERQUAD, RAMPAGE,
RAMPAGE2 and PMC XMM add-on boards for XMM programs. Other XMM
hardware may be supported in future releases.
Catalina is Free!
Catalina is derived from various sources, and so various license conditions apply to
different parts of it. However, all components are essentially “free” in that they can be
used for any purpose, modified in any way, and re-released - provided such releases
comply with the appropriate license conditions.
For example, some parts of Catalina incorporate (or are derived from) Parallax
software (e.g. the Catalina Human Machine Interface device drivers) and are
distributed under the MIT license (for details, see the individual source files).
lcc itself (apart from the Catalina Code Generator) is covered by a separate “fair
use” license. See the file CPYRIGHT in the directory source\lcc included in each
source distribution of Catalina. One of the terms of that license is that developers of
products that use lcc must request that all bug reports on their product be reported
to them – so see the Reporting Bugs section later in this document.
The Catalina Target Package (i.e. the components of Catalina that end up
incorporated into applications compiled with Catalina, such as the kernel) is
distributed under the terms of the GNU Lesser General Public License (GLPGL),
plus the following special exceptions:
Use of the Catalina Binder (or any other tool) to combine application
components with Catalina Target Package (CTP) components does not
constitute a derivative work and does not require the author to provide source
code for the application, or provide the ability for users to link their
applications against a user-supplied version of the CTP.
However, if you link the application to a modified version of the CTP, then the
changes to the CTP must be provided under the terms of the LGPL in
sections 1, 2, and 4.
4
You do not have to provide a copy of the CTP license with applications that
incorporate the CTP, nor do you have to identify the CTP license in your
program or documentation as required by section 6 of the LGPL. However,
applications must still identify their use of the CTP. The following example
statement can be included in user documentation to satisfy this requirement:
To use the full 512Kb of RAM available on the HX512 SRAM card requires the installation of Eric
Moyer’s firmware modifications. A copy of the firmware is included in the Catalina utilities
directory, and is also available at http://forums.parallax.com/forums/default.aspx?f=33&m=196587
Copyright 2013 Ross Higson
Page 10 of 158
Catalina C Compiler
Reference Manual
[application] incorporates components provided as part of the Catalina C
Compiler for the Parallax Propeller.
Each of the affected CTP components contains the following license details:
'------------------------------------------------------------------------'
'
Copyright 2009 Ross Higson
'
'
The portion of this file identified as the LMM Kernel is part of the
'
Catalina Target Package.
'
'
The Catalina Target Package is free software: you can redistribute
'
it and/or modify it under the terms of the GNU Lesser General Public
'
License as published by the Free Software Foundation, either version
'
3 of the License, or (at your option) any later version.
'
'
The Catalina Target Package is distributed in the hope that it will
'
be useful, but WITHOUT ANY WARRANTY; without even the implied warranty
'
of MERCHANTABILITY or FITNESS FOR A PARTICULAR PURPOSE.
'
See the GNU Lesser General Public License for more details.
'
'
You should have received a copy of the GNU Lesser General Public
'
License along with the Catalina Target Package. If not, see
'
<http://www.gnu.org/licenses/>.
'
'-------------------------------------------------------------------------
The exceptions are stated in the README file included in each CTP. A full copy of
the LGPL is in the file called COPYING.LESSER, included with each of the target
packages distributed with Catalina.
The other significant parts of Catalina – i.e. the Catalina Code Generator and the
Catalina Binder - are distributed under the terms of the GNU General Public License
(GPL).
Each of these components contains the following license details:
'------------------------------------------------------------------------'
'
Copyright 2009 Ross Higson
'
'
This file is part of Catalina.
'
'
Catalina is free software: you can redistribute it and/or modify
'
it under the terms of the GNU General Public License as published by
'
the Free Software Foundation, either version 3 of the License, or
'
(at your option) any later version.
'
'
Catalina is distributed in the hope that it will be useful,
'
but WITHOUT ANY WARRANTY; without even the implied warranty of
'
MERCHANTABILITY or FITNESS FOR A PARTICULAR PURPOSE. See the
'
GNU General Public License for more details.
'
'
You should have received a copy of the GNU General Public License
'
along with Catalina. If not, see <http://www.gnu.org/licenses/>.
'
'-------------------------------------------------------------------------
A full copy of the GPL is included with all distributions, in the file called COPYING.
Copyright 2013 Ross Higson
Page 11 of 158
Catalina C Compiler
Reference Manual
For more information about the GPL or the LGPL, refer to that file or visit
http://www.gnu.org/licenses.
But what does all this really mean?
All that stuff in the previous section basically means you can use Catalina - for any
purpose - completely free of charge.
It also means that Catalina can be used to create commercial applications for which
you can charge, without those applications having to be released under the GPL.
Acknowledging the use of the Catalina Target Package is usually as much as you
will need to do.
However, anyone intending to create such an application should read the previous
section in detail, and (particularly if you use the C89 library), you should also check
the licenses of each component of that library to make sure they are compatible with
the license under which your application is to be released.
Of course, an application that incorporates (in whole or part, modified or unmodified)
those parts of Catalina which are covered by the GPL (such as the Catalina Binder
or the Catalina Code Generator) must still itself be released under the GPL. This just
means you can’t take Catalina – either in whole or part – and sell it (or a derivative of
it) as your own work.
Copyright 2013 Ross Higson
Page 12 of 158
Catalina C Compiler
Reference Manual
Installing Catalina
Overview
On Windows, Catalina now comes with a “one touch” installer that installs both the
sources and binaries. It also installs both a command line shortcut to allow easy use
of Catalina from the command line, and Code::Blocks for those who prefer to use
an integrated development environment.
If you are using this installer, simply follow the instructions in the installer itself –
however, it is recommended that you read this section anyway, as it contains useful
information (e.g. on the directory structure that will be installed).
On Linux, you must use gzip/tar5 to extract the entire distribution into the folder in
which Catalina is to be installed – the standard location is /usr/local/lib/catalina.
Installing to a directory other then the standard location is possible, but it means that
some additional setup or options will need to be specified when using Catalina.
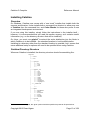
Catalina Directory Structure
Wherever Catalina is installed, the directory structure should be something like:
Catalina
|
+--- basic
|
+--- bin
|
+--- catalyst
|
|
|
+--- bin
|
+--- core
|
+--- demo
|
+--- ...
|
+--- compact_lib
|
|
|
+--- libc
|
+--- libci
|
+--- libcx
|
+--- libcix
|
+--- libm
|
+--- libma
|
+--- libmb
|
+--- libtiny
|
+--- libserial4
|
+--- libgraphics
|
| +--- codeblocks
|
|
|
+--- ...
|
+--- demos
|
|
|
+--- benchmarks
|
+--- debug
|
+--- multicore
|
+--- spinc
|
+--- minimal
|
+--- serial4
|
+--- include
|
|
|
+--- sys
5
Note that when using tar, the –p tar option should be specified to preserve file permissions.
Copyright 2013 Ross Higson
Page 13 of 158
Catalina C Compiler
Reference Manual
|
+--|
|
|
|
|
|
|
|
|
|
|
|
+--|
|
|
|
|
|
|
|
|
|
|
|
+--|
+--|
|
|
|
|
|
+--|
+---
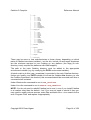
lib
|
+--+--+--+--+--+--+--+--+--+---
libc
libci
libcx
libcix
libm
libma
libmb
libtiny
libserial4
libgraphics
large_lib
|
+--- libc
+--- libci
+--- libcx
+--- libcix
+--- libm
+--- libma
+--- libmb
+--- libtiny
+--- libserial4
+--- libgraphics
minimal
source
|
+--- catalina
+--- lcc
+--- lib
+--- srecord
target
utilities
There may be more or less sub-directories to those shown, depending on which
parts of Catalina have been installed – but the bin, include, lib and target directories
are the minimum required to use Catalina on any platform (the large_lib subdirectory is only required for platforms with XMM support).
The path to the main Catalina directory must be added to the appropriate
environment variable (e.g. by modifying the PATH environment variable).
A batch script to do this (use_catalina) is provided in the main Catalina directory.
Unless you modify your PATH variable to include the Catalina bin directory (or use
the Catalina Command Line shortcut) this command should be executed each time a
command shell is started.
Under Windows the command to use is use_catalina.
Under Linux the command to use is source use_catalina.
NOTE: You do not need to rebuild Catalina just to use it, even if you install Catalina
to a location other than the default - but if you ever do need to rebuild it then you
may need to modify various sources, make files and batch files – do a search for the
term “Program Files” and replace it appropriately.
Copyright 2013 Ross Higson
Page 14 of 158
Catalina C Compiler
Reference Manual
Using Catalina
Even though Catalina now supports the Code::Blocks Integrated Development
Environment (IDE), Catalina – like most compilers – is still primarily a command line
compiler, and it is recommended that you become at least slightly familiar with using
Catalina from the command line even if you intend to mostly use it from the
Code::Blocks IDE.
This section contains a brief introduction to using Catalina – for a fuller tutorial-style
introduction to Catalina, see the document Getting Started with Catalina. This
tutorial concentrates on the command line use of Catalina. A tutorial on using the
Code::Blocks IDE with Catalina is also provided, called Getting Started with
CodeBlocks.
Using the Catalina Compiler
The Catalina Compiler is invoked using the command catalina from within a
command shell – this command is a front end for the Little C Compiler (lcc), the Spin
Compiler (spinakker), and the Catalina Binder (catbind) – under most
circumstances those programs don’t need to be invoked separately.
If you have installed Catalina to a non-standard location (C:\Program Files\Catalina
under Windows, or /usr/local/lib/Catalina under Linux) then you will need to set the
LCCDIR environment variable to that location (this is described in more detail in the
section titled Catalina Environment Variables).
For example, under Windows you would say:
set LCCDIR=<path to Catalina>
Under Linux (if using the bash shell) you would say:
LCCDIR=<path to Catalina>; export LCCDIR
Then you can execute the use_catalina batch file, which will do the rest of the
setup. Under Windows the command to use is:
use_catalina
Under Linux (if using the bash shell) the command to use is:
source use_catalina
Assuming this batch file has been executed, or another mechanism has been used
to include the Catalina bin directory in the current path, a C program can be
compiled using a command similar to:
catalina [files | options] …
For example:
catalina hello_world.c -lc
By default, Catalina compiles each C file specified on the command line to an LMM
PASM file, then includes additional files for any required library functions, combines
the results into a single file and then invokes spinakker to assemble this file and
produce a binary file. Catalina then combines this compiled program with the
Copyright 2013 Ross Higson
Page 15 of 158
Catalina C Compiler
Reference Manual
necessary target files to produce the final binary executable. Catalina can also
reformat the final executable (e.g. to convert it to Intel hex records).
The following list describes all the command line options supported by the Catalina
Compiler:
6
7
-? or –h
print this help (and exit)
-ah
assemble using homespun
-as
assemble using spinakker (this is the default)
-b
generate a binary output file (this is the default)
-B width
byte swap (used with -F, width = 2, 4, 8)
-c
compile only (do not bind)
-d
output diagnostic messages
-C symbol
define Catalina symbol (e.g. -C HYDRA)
-D symbol
define symbol (e.g. -D printf=tiny_printf)
-e
generate an eeprom output file
-F format
convert output to another format (e.g. -F Intel)
-g[level]
generate debugging information (default level = 1) 6
-I path
path to include files (e.g. C:\Program Files\Catalina\include)
-l lib
search library lib when binding
-k
kill (suppress) the output of compilation statistics
-L pat
path to libraries (e.g. C:\Program Files\Catalina\lib)
-M size
maximum memory size (use with -x)
-o name
name of output file (default is first file name)
-O[level]
optimize code (default level = 1)7
-P addr
address for Read-Write segments
-R addr
address for Read-Only segments
-R size
size of Read/Write segments
-S
compile to assembly code (do not bind)
-t name
name of dedicated target to use
When using the –g option a space cannot be included between the option and the parameter. For
example –g is valid, and –g3 is valid – but –g 3 is not valid. See the BlackBox Reference
Manual for more information on using –g and –g3
When using the –O option a space cannot be included between the option and the parameter. For
example –O is valid, and –O2 is valid – but –O 2 is not valid. The Catalina Code Optimizer is not
included with the free version of Catalina. If you have purchased it separately, refer to the
Catalina Optimizer Reference Manual for details.
Copyright 2013 Ross Higson
Page 16 of 158
Catalina C Compiler
Reference Manual
-T path
path to target files (e.g. C:\Program Files\Catalina\target)
-U symbol
undefine symbol (e.g. -U DEFAULT)
-v
verbose (output information messages)
-v -v
very verbose (more information messages)
-W option
option to pass directly to lcc
-x layout
use specified segment layout (layout = 0 .. 6, 8 .. 10)
-y
generate listing file
Anything not recognized as one of the above options is passed directly to lcc.
Typically, these are the names of one or more C files to be compiled – but they may
also be lcc options.
The exit code from the command is zero on a successful compile, non-zero on error.
As an example, a Catalina command to link with the standard C library, and generate
an eeprom output file and a listing might look like:
catalina hello_world.c –lc –e –y
More examples are given in the document Getting Started with Catalina.
In addition to the options described above, Catalina allows for customization of the
target package on the command line by allowing the definition of symbols. A
complete list of symbols recognized by the default target package is given in the
section titled Default Target Configuration Options. These symbols are defined
using the -C option. For example, to select the high-resolution VGA driver from the
target package, you might use a command like:
catalina hello_world.c –lc -C HIRES_VGA
If Catalina is not installed into the expected directory, then either command line
options or environment variables can be used to tell Catalina where to find various
files and programs it needs.
NOTE: A common problem is to use the incorrect case for options. Case is
significant for all options to the Catalina Compiler, so –t is not the same as –T.
Catalina accepts long file names, but where used on the command line any file or
path names that contains spaces need to be quoted. For example:
catalina "C:\Program Files\Catalina\demos\hello_world.c" –lc –e –y
Catalina Environment Variables
The Catalina Compiler can also use the following environment variables:
CATALINA_DEFINE
a list of symbols to define before the compilation
CATALINA_INCLUDE
a list of paths to search for include files
CATALINA_LIBRARY
the directory where libraries are located
CATALINA_TARGET
the directory where target files are located
Copyright 2013 Ross Higson
Page 17 of 158
Catalina C Compiler
Reference Manual
CATALINA_TEMPDIR
the directory lcc will use for temporary files
CATALINA_LCCOPT
any options to be passed directly to lcc
LCCDIR
the directory various programs (not just lcc) expect to
find other files needed during compilation
These variables are set using normal Windows or Linux commands. For example in
Windows, environment variables can be set using a command like:
set LCCDIR=C:\Program Files\my_catalina
and cleared using a command like:
set LCCDIR=
or
unset LCCDIR
In Linux, the appropriate commands (if using the bash shell) to set an environment
variable would be a command like:
LCCDIR=/usr/me/my_catalina; export LCCDIR
and to clear it would be a command like:
unset LCCDIR
Catalina also provides a convenient command (catalina_env) to display the
current value of the above environment variables.
In environment variables, path names do not usually need to be quoted even if they
contain spaces.
The CATALINA_DEFINE environment variable can be used to specify a list of symbols
that will be defined before invoking the compiler and/or binder. Multiple symbols can
be separated by a space, comma, semicolon or colon. The main purpose of this is to
define symbols that tell the target about the platform on which the programs are to
be run – this allows the target to correctly select the platform-specific features (such
as the pin definitions to use) and also the appropriate plugins and drivers to load. For
example, this variable might be set to TRIBLADEPROP:CPU_1 or to HYDRA or HYBRID
The CATALINA_INCLUDE environment variable can use used to specify where the
compiler should look for include files. This may be a list of paths - on cygwin or linux
the entries in this list must be separated by a colon (':') while on Windows they must
be separated by a semicolon (';'). Any include paths specified on the command line
(i.e. via the -I option) are added to the beginning of this list (which means they will be
searched first - this can be used to effectively override any default paths, or paths set
using the environment variable).
the CATALINA_LIBRARY environment variable tells the compiler where to look for
libraries. This variable should contain a single path or directory name. Note that
Catalina always looks in two locations for libraries - in the current directory, and in
the specified library directory. If the -L option is specified on the command line it will
override this environment variable. The compiler will automatically add \lib to the
library path for TINY and SMALL programs, \compact_lib for COMPACT programs,
and \large_lib for LARGE programs.
Copyright 2013 Ross Higson
Page 18 of 158
Catalina C Compiler
Reference Manual
The CATALINA_TARGET environment variable tells the compiler where to look for the
target package. It should contain a single path or directory name. If the –T option is
specified on the command line it will override this environment variable.
The CATALINA_TEMPDIR environment variable tells all programs where to create any
temporary files needed during compilation. It should contain a single path or
directory name.
The LCCDIR environment variable tells all programs (not just lcc!) where to find files
which are needed during the compilation process. It should contain a single path or
directory (e.g. C:\Program Files\Catalina) which has at least the following subdirectories:
bin
sub-directory for executable files
lib
default sub-directory for library files when using TINY or
SMALL mode
compact_lib default sub-directory for library files when using COMPACT
mode
large_lib
default sub-directory for library files when using LARGE mode
include
default sub-directory for include files
target
default sub-directory for target files
Note that the default library and target paths can be overridden by the
CATALINA_LIBRARY and CATALINA_TARGET environment variables. The default include
path can effectively be overridden by the CATALINA_INLCUDE environment variable
since any paths specified there are searched before the default include path.
The CATALINA_LCCOPT environment variable can be used to specify options to be
passed straight to lcc. The entire contents of this environment variable are simply
added to the lcc command - before any options generated by Catalina command.
Remember that the options must be lcc options (i.e. they are neither catalina
options nor catbind options) - but also remember that that it is possible to specify
binder options to lcc by prefixing them with –Wl - i.e. the lcc option –Wl–XXX
actually gets passed to the binder as option –XXX.
NOTE: Use the CATALINA_LCCOPT feature with care. It is possible to specify lcc
options which will cause Catalina to generate incorrect code, or have other
unexpected results.
If in doubt about what lcc options are in effect, use the -v option to catalina to print
out the actual lcc command that will be executed.
Using lcc directly
Normally, lcc is invoked automatically as required by Catalina – but lcc can also be
called directly. lcc itself is quite well documented elsewhere – e.g. see the lcc Unix
man page located at http://www.cs.princeton.edu/software/lcc/doc/lcc.1.html.
Copyright 2013 Ross Higson
Page 19 of 158
Catalina C Compiler
Reference Manual
Also remember that you can use the –v flag to Catalina to see what options Catalina
itself uses when invoking lcc.
Note that the version of lcc provided with Catalina is intended specifically for use as
part of the Catalina Propeller cross-compiler. If you need a version of lcc for
compiling native C programs you should download the original lcc sources from
http://www.cs.princeton.edu/software/lcc/ and compile them yourself (make sure to
use a separate directory to the one used by Catalina).
Windows users could also try lcc-win32 (http://www.cs.virginia.edu/~lcc-win32).
Using the Catalina Binder
Normally, the Catalina Binder (catbind) is invoked automatically as required by
catalina. However, there are occasions when it may be useful to use the binder
separately. For example:
To bind a Catalina LMM PASM program (e.g. if catalina was used with the –S
option, or to rebind a previously compiled program to a new target). For
example, to bind the LMM PASM file file.s with the math library and then
generate an eeprom image containing the result named test, use the
following command:
catbind file.s –lm -e –o test
To index a set of library files (which are just LMM PASM files that have been
compiled using Catalina but not yet bound). For example, to index all symbols
imported and exported by all LMM PASM files in the current directory, and
then put the result in a file called catalina.index use the following command:
catbind –i –e *.s –o catalina.index
More examples are given in the document Getting Started with Catalina.
The following list describes all the command line options supported by the Catalina
Binder:
-? or –h
print this helpful message (and exit)
-a
no assembly (output bound source files only)
-ah
assemble using homespun
-as
assemble using spinakker (this is the default)
-B width
endian byte swap 'width' bytes in output format (e.g. -S4)
-d
output diagnostic messages (-d -d for even more messages)
-C symbol
#define 'symbol' before assembling the code
-e
generate export list from input files
-f
force (continue even if errors occur)
-F format
use 'format' as the output format (e.g. -FIntel_Hex_16)
-i
generate import list from input files
Copyright 2013 Ross Higson
Page 20 of 158
Catalina C Compiler
Reference Manual
-k
kill (suppress) the output of compilation statistics
-L path
path to libraries (default is 'C:\Program Files\Catalina\lib\')
-l name
search library named 'libname' when binding
-M size
memory size to use (used with -x, default is 16M)
-o name
output results (generate, bind or assemble) to file 'name'
-O[level]
optimize code (default level = 1)8
-R size
size of Read/Write segments
-T path
path to target files (default is 'C:\Program Files\Catalina\target')
-t name
use target 'name'
-u
untidy mode – do not delete intermediate files
-U symbol
do not #define 'symbol' before assembling the code
-v
verbose (output information messages)
-v -v
very verbose (more information messages)
-w opt
pass option 'opt' to the assembler (e.g. -w-l, -w-b, -w-e)
-x layout
use specified segment layout (layout = 0 .. 6)
-z ch
specify separator char for path names (default is '\')
The exit code from the command is number of undefined/redefined symbols (-1 for
other errors).
NOTE: A common problem is to use the incorrect case for options. Case is
significant for options to the Catalina Binder, so –t is not the same as –T.
Using the Payload Loader
Catalina provides a loader program (called payload) that can be used to load
Catalina binaries into the Propeller from a PC. The Catalina payload loader is
somewhat similar to the Parallax propellant program, but with the following Catalinaspecific features:
It runs under both Linux and Windows;
It can load Catalina XMM binaries9.
It includes a built-in terminal emulator.
It can load multiple files in succession, through multiple ports.
8
When using the –O option a space cannot be included between the option and the parameter. For
example –O is valid, and –O2 is valid – but –O 2 is not valid. The Catalina Code Optimizer is not
included with the free version of Catalina. If you have purchased it separately, refer to the
Catalina Optimizer Reference Manual for details.
Catalina LMM binaries are indistinguishable from normal Propeller binaries, and can be loaded
using any loader program. But Catalina XMM binaries can only be loaded using a Catalina
specific loader
9
Copyright 2013 Ross Higson
Page 21 of 158
Catalina C Compiler
Reference Manual
It can load programs on platforms where the normal serial port (on pins 30 & 31)
cannot be used when XMM is installed (such as the HYBRID or HYDRA).
At its simplest, payload is quite trivial to use. For example, to load program.binary,
the payload command might be as follows:
payload program
The above command will cause payload to search all the available serial ports for
the first one with a Propeller attached (by default it starts at port 1 and tries each
consecutive port in turn) and then load the specified program binary using the first
such port it finds.
Note: if a .binary or .eeprom extension is not specified, .binary is assumed.
Note: under Linux it is important that the user using the loader has read/write access
to the port to be used – otherwise the loader will be unable to open the port and will
probably report that no propeller is connected.
Payload commands can get more complex, because payload can be used to load
multiple files in succession. To see why this is desirable, first consider the Propeller
built-in loader capability – i.e. after reset, the Propeller will respond to a program
being loaded via a serial port on pins 30 and 31. However, this built-in loader can
only be used to load programs into Hub RAM or EEPROM – it knows nothing about
any external XMM SRAM or FLASH that may be connected to the Propeller. To load
a program into XMM memory, payload must first load another loader – one that
knows how to use the XMM memory. A payload command to do this might look as
follows:
payload XMM my_xmm_program
The above command first loads XMM.binary, which is itself a loader that knows how
to load other files. This first binary is loaded using the built-in Propeller loader. When
this program is started, it expects a second file (in this case
my_xmm_program.binary) to be loaded using a Catalina-specific protocol and it
loads that program into XMM memory (and then starts it executing). Payload handles
both protocols seamlessly – in this case using the same serial port for both loads.
Even more complex payload commands may be required when the same port
cannot be used to do both loads – e.g. when loading programs on platforms such as
the HYDRA or HYBRID (this is because the XMM RAM cannot be used at the same
time as the normal serial port).
In such cases, the two-step load process is required, and the second load must also
use a different port. For example, to load an XMM program on a HYBRID, a
command similar to the following might be used:
payload –p 2 Hybrid_Mouse –s 9 my_xmm_program
The above command will first load the Hybrid_Mouse.binary program into the
Propeller using port 2, and second will load the program my_xmm_program.binary
into the Propeller using port 9.
If the ports are not specified, Payload will attempt to find them automatically.
However, this may take a long time, and if you have multiple propellers connected
Copyright 2013 Ross Higson
Page 22 of 158
Catalina C Compiler
Reference Manual
this process may find the wrong propeller. Also, some serial or USB devices may
cause the auto-detection process to fail. In such cases the ports should be specified
manually. This may also speed up the load process, since the auto-detection
process must interrogate each port in turn until it finds the one that responds
correctly.
The Hybrid_Mouse.binary program used in the example above is similar to the
XMM.binary program used previously, except it expects to load a program using the
Propeller pins normally used for communicating with a serial mouse. To use this
loader requires a simple cable to be constructed that plugs into the mouse port on
one end, and into a Prop Plug on the other, as follows:
This cable can be used in either a mouse or keyboard port, and is used in addition to
the normal serial connection to the Propeller via pins 30 and 31. This cable can be
used to load any program, but is specifically intended to be used to load XMM
programs, once a suitable loader (i.e. the Mouse Loader) has been loaded via the
normal serial connection. After the XMM program has been loaded, the normal
keyboard or mouse can be replaced for normal program use.
One generic and one specific loader are provided in the utilities directory for use with
the payload program:
Payload_Loader.spin
This program can be used on any platform that allows the
use of the normal serial port to load XMM platforms (e.g.
the DracBlade, RamBlade, Ramblade3, TriBladeProp,
Morpheus, C3, SuperQuad, RamPage, RamPage2 or
Propeller Memory Card). It is compiled automatically by
the build_all batch file in the utilities directory, and
named as XMM.binary. If the compiled binary is specific
to a CPU in a multi-CPU system, it is named
XMM_n.binary, where n is the CPU number. This loader
expects the second file to be loaded through the normal
serial port, and does not require the use of a special
cable.
Mouse_Loader.spin
This program can be used on the Hydra and Hybrid to
load XMM programs. It is compiled automatically by the
build_all batch file in the utilities directory, and named as
either Hydra_Mouse.binary or Hybrid_Mouse.binary. Note
that these two platforms use different pins for the mouse
Copyright 2013 Ross Higson
Page 23 of 158
Catalina C Compiler
Reference Manual
port, and therefore the binaries are different – the
program uses the pin definitions specified in the file
Catalina_Common.spin, and could also be compiled for
other platforms if required. A keyboard version could also
be created if required. This loader expects the second file
to be loaded using the mouse port, and requires the use
of a special cable like the one shown above.
The loader program binary must always be specified as the first program to be
loaded. The normal LMM or XMM program to be loaded is then specified as the
second file.
Note that on multi-CPU platforms it may be desirable to do a three step load in order
to load multiple CPUs – e.g. the initial file might be a boot loader loaded into CPU 1
that (in turn) loads an embedded boot loader into CPU 2, and then configures itself
to act as a relay. The second file would be a program that CPU 1 simply relays to
CPU 2. After that load is complete, the CPU 1 loader reconfigures itself to accept a
third file which it loads into its own CPU. Payload can support this kind of multi-step
load process, although a suitable intermediate “relay” loader is not provided for any
platform.
Compiling the utilities for a platform can be done using the interactive batch file
build_utilities. This batch file accepts no parameters – it prompts for all
required information (including the platform), and then compiles all the utilities
appropriate for the specified platform. See the section Building the Payload Loader
utilities (below).
Once the utilities directory has been compiled, the loaders can be copied to any
working directory for use with the payload loader, or into the Catalina bin directory to
save having to specify the path to the utility each time (this is done automatically by
the build_utilities script ). This means that to load an XMM program, the
command can be as simple as:
payload XMM program
If it is necessary to use a particular loader (e.g. if you work with multiple Propeller
platforms), a script or batch file can be created that specifies the loader to use. For
example, to use the particular mouse port XMM loader designed for the Hydra, a file
called hydraload.bat might be created to contain the line:
payload Hydra_Mouse.binary $1 $2 $3 $4 $5
If the same port is always used, this parameter could also be included in the
command. Example scripts to simplify loading of XMM programs are provided in the
utilities directory (e.g. xmm_payload) – modify them to suit your needs, and then
copy them to the bin directory - then you can load XMM programs as easily as nonXMM programs.
The following list shows the options supported by Catalina Payload:
-? or -h
print a help message and exit (–v –h prints more help, such as a
list of supported serial port numbers)
Copyright 2013 Ross Higson
Page 24 of 158
Catalina C Compiler
Reference Manual
-a port
find the ports to use automatically, starting at the specified port
(the default if no –a option is specified is to start at port 1)
-b baud
use the specified baudrate (the default is 115200, which is
suitable for both RS232 and USB ports)
-c cpu
cpu destination for the catalina upload (default is 1)
-d
diagnostic mode (-d again for more diagnostics)
-e
program the EEPROM with the loaded program and then start it
(otherwise the program is just loaded into RAM and started).
-i
start an interactive terminal emulator once the program is
loaded.
-f msec
set interfile delay in milliseconds (default is 100)
-m max
set maximum retry attempts (default is 5)
-n msec
set sync timeout in milliseconds (default is 100)
-p port
use the specified port for uploads (or just the first upload if -s is
also specified)
-q mode
line mode (1=ignore CR,2=ignore LF,4=LF to CR,8=CR to LF)
-r msec
set reset delay in milliseconds (default is 0)
-s port
switch to the specified port for the second and subsequent
uploads
-t msec
set read timeout in milliseconds (default is 250)
-v
verbose mode (also includes port numbers in the help message)
-w
wait for a key press between each load – useful if you only have
one Prop Plug and need to swap it to the mouse port cable
before proceeding with the second load
-x
do catalina upload only (i.e. assume the boot loader has already
been loaded – e.g. it may be permanently loaded into EEPROM)
-z
do two resets before the initial load (may be required on some
platforms)
Use the –p and –s options to force payload to use a particular port if the autodetection is not working correctly (or if you have multiple Props connected and need
to force payload to use a particular port).
The -q option allows programs compiled for a particular line termination style (e.g
Windows style, which terminates all lines with both a CR and an LF) to be used in
the built-in interactive terminal (which assumes Linux style, which terminates all lines
with an LF only).
Copyright 2013 Ross Higson
Page 25 of 158
Catalina C Compiler
Reference Manual
NOTE: The –s option will always be required when loading XMM programs on the
Hydra and Hybrid, otherwise the second load will be done using the same port as the
first load.
The various timing-related options are sometimes required (mostly under Linux) to
get the timing right when loading programs. For example, if you cannot get the first
file to load correctly, try using the –r option to force a delay between resetting the
propeller and beginning the load. If the first file loads correctly but not the second, try
pausing between loads using the –w option. If that works, use the –f option to find a
suitable delay time between loads.
Note that under Linux, it may be necessary on some platforms to adjust the read
timeout using the -t command line option. For example:
payload hello_world –t 2000
The interactive terminal mode of payload is useful for programs that use the PC HMI
option. For example:
catalina othello.c -lc -C PC
payload -i othello
While the program is loading, payload will display its normal messages – i.e.
something like the following:
Since -i is specifed, once the program has finished loading, payload will enter
interactive terminal mode:
Copyright 2013 Ross Higson
Page 26 of 158
Catalina C Compiler
Reference Manual
The terminal emulation is quite simple, and supports a simple subset of VT100 style
terminal primitives.
The following key sequences are accepted:
Reset
ESC c
Home
ESC [ H
Erase Line
ESC [ K
Clear Screen
ESC [ 2 J
Invisible Curs
ESC [ 2 5 h
Visible Curs
ESC [ 2 5 l
Invisible Curs
ESC [ ? 2 5 h
Visible Curs
ESC [ ? 2 5 l
Goto Row Col ESC [ <r> ; <c> H
The following key sequences are sent when the corresponding keys are pressed:
↑
ESC O A
↓
ESC O B
→
ESC O C
←
ESC O D
HOME
ESC O w
END
ESC O q
HELP
ESC O p
PREV
ESC O y
NEXT
ESC O s
These primitives are sufficient to use the payload terminal emulator to load and run
the vi text editor if that program is compiled to use the PC HMI option – vi is a full
screen text editor which is provided as one of the catalyst demo programs – see the
Catalyst User Manual for more details.
Copyright 2013 Ross Higson
Page 27 of 158
Catalina C Compiler
Reference Manual
Building the Payload Loader utilities
Payload is a very flexible loader, and is made even more flexible by it's multi-file load
capability. To build the load utilities to be used in multi-file loads, a build_utilities
batch file is provided, which will interactively ask for details of your platform, and then
build some or all of the following utilities:
EEPROM.binary
SRAM.binary
FLASH.binary
MOUSE.binary
On Multi-CPU platforms, each will be appended by an _n to indicate the CPU it is
compiled for (e.g. SRAM_1.binary, SRAM_2.binary etc).
For historical reasons, one of the SRAM.binary or FLASH.binary files will also be
copied to XMM.binary – depending on which CPU and which type of load you
specified as the default (i.e. SRAM or FLASH).
These utilities allows payload to be used to load programs as follows (the following
assumes you have run the build_utilities batch file for your platform):
EEPROM.binary – TINY or CMM programs can be loaded to any 32kb EEPROM –
they do not need any special compile commands. XMM programs (SMALL or
LARGE) can be loaded to EEPROMs of 64Kb or larger, provided they are compiled
with the -C EEPROM option. For example:
catalina othello.c -lci -C C3
payload EEPROM othello
Note that for TINY or CMM programs, the above command has the same effect as:
catalina othello.c -lci -C C3
payload -e othello
XMM programs (SMALL or LARGE) can be loaded into EEPROM if compiled with
the EEPROM command line option:
catalina othello.c -lci -C C3 -C SMALL -C EEPROM
payload EEPROM othello
SRAM.binary – XMM programs (SMALL or LARGE) can be loaded directly into
SRAM. For example:
catalina othello.c -lci -C C3 -C SMALL
payload SRAM othello
MOUSE.binary – on the Hydra or Hybrid, loading XMM programs (SMALL or
LARGE) must be loaded via the mouse port, using the special mouse loader. For
example:
catalina othello.c -lci -C HYDRA -C SMALL
payload MOUSE othello
FLASH.binary – on platforms with Flash RAM, SMALL XMM programs can be
loaded directly into Flash (LARGE programs can only be loaded into Flash if the
platform also has some SRAM):
Copyright 2013 Ross Higson
Page 28 of 158
Catalina C Compiler
Reference Manual
catalina othello.c -lci -C C3 -C SMALL
payload FLASH othello
On platforms with Flash RAM, the build_utilities batch file also builds the
Flash_Boot.binary utility. This utility can be loaded to execute a program already
loaded into Flash RAM. If you want this program to execute automatically on
Propeller reboot, you can program it into EEPROM.
Finally, to retain compatibility with previous versions of Catalina, the build_utilities
batch file also creates XMM.binary – but this will now simply be a copy of the default
XMM loader (i.e. either SRAM.binary, FLASH.binary, MOUSE.binary). Similarly,
on the Hydra or Hybrid, it will also create Hydra_Mouse.binary or
Hybrid_Mouse.binary – but the use of these files is deprecated.
Copyright 2013 Ross Higson
Page 29 of 158
Catalina C Compiler
Reference Manual
Catalina Support for the Propeller
SPIN/PASM Assembler Support
Catalina currently uses spinakker as its default SPIN/PASM assembler. Sources for
this are included. However, A binary copy of homespun is also included in the
binary release of Catalina. Both spinakker and homespun allow a C program to be
turned into a binary or eeprom file using a single command.
The -as and -ah Catalina command line options can be used to select spinakker or
himespun (respectively).
The version of homespun used must be 0.30 or greater.
Floating Point Support
Catalina provides several options for 32 bit IEEE 754 floating point support.
The fundamental 32 bit floating point operations (i.e. addition, subtraction,
multiplication, division, comparison and conversion between floats and other data
types) are built into the default Catalina LMM Kernel, and incur no additional
overhead during execution. This means that the fundamental floating point
operations are as fast as the equivalent PASM operations (in fact they are the
equivalent PASM operations).
For support of the standard C89 math library functions (sin, cos, tan, exp, pow etc),
Catalina provides options similar to those provided by the Parallax Float32 libraries:
Float32_B and Float32_A. All the math functions supported by Float32Full
are implemented using two cogs, with software emulation of other required
functions not implemented in Float32Full (e.g. sinh, cosh tanh). This is the
best solution for programs that can spare two cogs. Requires that the libmb
library be used (i.e. use command line option –lmb).
Float32_A. All the math functions supported by Float32A are implemented
using one cog, with software emulation of other required functions not
implemented by Float32A (e.g. log, exp, pow, sinh, cosh, tanh). This is a good
solution for programs that can only spare one cog. Requires that the libma
library be used (i.e. use command line option –lma).
Software. All the math functions are emulated in software. This is a good
solution for programs that cannot spare any cogs, but it may require more
RAM, and is also 3 to 4 times slower. Requires that the libm library be used
(i.e. use command line option –lm).
All options are transparent to the C program that uses them. The choice depends
mainly on how much RAM and how many spare cogs are available.
Custom combinations can also be created as a plugin and used in a specific Catalina
target.
Copyright 2013 Ross Higson
Page 30 of 158
Catalina C Compiler
Reference Manual
HMI Support
For platforms with keyboard and mouse inputs, and a VGA or TV output, various
HMI (Human Machine Interface) configurations are provided:
Built-in device support:
Display
o High-resolution VGA (40x24 to 125x64 chars);
o Low resolution VGA (32x16 chars);
o High resolution TV (40x30 chars);
o Low resolution TV (40x13 chars);
Keyboard;
Mouse.
Terminal emulator support 10:
PC terminal emulator (supports using the PC display and keyboard);
TTY terminal emulator (similar to PC, but uses one less cog and doesn't
support proxy drivers on multi-CPU systems);
PROPTERMINAL 11 (supports using the PC display, keyboard and mouse
via the PropTerminal program).
The HMI configuration used by a Catalina program is determined by the target
selected when building the program, as well as by command line options. Note that
not all configurations are supported on all platforms. For example the Hybrid
supports only TV configurations, and Morpheus supports only high-resolution VGA
configurations. As far as possible, Catalina attempts to detect if an unsupported HMI
configuration is specified.
In this version of Catalina, all the different HMI options are ANSI complaint (by
default) regarding how they handle characters on input and output. If it is necessary
to change this behavior, the following command line options can be used:
CR_ON_LF
Translate CR to CR LF on output
NO_CR_TO_LF
Disable translation of CR to LF on input
NON_ANSI_HMI
Disable ANSI compliance in HMI (revert to previous Catalina
behavior)
More information on the HMI options supported by the standard targets is provided in
the Catalina Targets section later in this document.
10
11
On some platforms, such as the Hybrid and Hydra, the serial or USB port cannot be used at the
same time as the SRAM or SD card. This means that on these platforms, terminal emulator
support is only available to LMM programs that do not use the SD card.
For more information on PropTerminal, and to download a binary version, see the Insonix web
site http://www.insonix.ch/propeller/ (press the English flag for an English translation of the site!)
Copyright 2013 Ross Higson
Page 31 of 158
Catalina C Compiler
Reference Manual
Catalina also provides proxy HMI drivers, which on multi-CPU systems allows one
CPU to use the HMI devices physically connected to another CPU. This is further
described in the Multi-CPU System Support section later in this document.
Each Catalina target defines a default HMI for each supported platform, with a
standard set of options, and there are various command line options that can be
used to select or configure the HMI for a particular program if the default is not
appropriate. See the section Default Target Configuration Options for more detail.
The choice of HMI options depends largely on the hardware available on the
Propeller platform, and how much RAM is required for the C program. Additional
customized HMI configurations can be created if required.
If a particular platform does not have some of the HMI devices (or a particular C
program does not need them) then HMI configuration options can be used to specify
that unnecessary drivers are not started. However, the RAM used by drivers is
reclaimed anyway once they are loaded, and made available as heap and stack
space for the Catalina program (see the Startup and Memory Management section
later in this document) – so doing this may save cogs, but may not actually save any
RAM.
Most of the HMI functions are straightforward, and are typically very similar to the
equivalent functions provided by the individual underlying screen, keyboard or
mouse drivers – which are often the Parallax standard drivers. See the individual
drivers for details. However, a few of the screen functions are added by the HMI
plugin itself, and may require a little more explanation:
All the different HMI options provide exactly the same interface to Catalina C
programs, using the standard C streams – i.e. stdin, stdout & stderr. C functions
are also provided for using the underlying HMI drivers more directly – these will be
familiar to many Propeller users.
Keyboard functions
int k_present();
This function returns one if a keyboard is detected, or zero otherwise.
Not supported (always returns one) on the PC, TTY, PROPTERMINAL
or proxy HMI drivers.
int k_get();
This function returns the next key from the keyboard, or zero if no key
is available. To check if a key is available before calling, use k_ready.
To wait for a key, use k_wait or k_new instead.
int k_wait();
This function returns the next key from the keyboard. If no key is
currently available, it waits for the next key.
Copyright 2013 Ross Higson
Page 32 of 158
Catalina C Compiler
Reference Manual
int k_new();
This function deletes any keys stored in the keyboard buffer, then waits
for the next key.
int k_ready();
This function returns one if a key is available, or zero otherwise.
int k_clear();
This function clears any keys stored in the keyboard buffer but not yet
read.
int k_state(int key);
This function returns the state of the specified key (one if pressed, zero
if not). Not supported (always returns zero) on the PC, TTY,
PROPTERMINAL and proxy HMI drivers.
Mouse functions
int m_present();
This function returns one if a mouse is detected, or zero otherwise.
Always returns one on the PROPTERMINAL HMI drivers, and not
supported (returns zero) on the TTY and PC HMI drivers.
int m_button (unsigned long b);
This function returns the current state of mouse button b (0, 1 or 2).
int m_buttons();
This function returns the current state of all mouse buttons as a set of
bits.
int m_abs_x();
This function returns the current absolute x value of the mouse.
int m_abs_y();
This function returns the current absolute y value of the mouse.
int m_abs_z();
This function returns the current absolute z value of the mouse.
int m_delta_x();
This function returns the current delta x value of the mouse.
int m_delta_y();
This function returns the current delta y value of the mouse.
int m_delta_z();
This function returns the current delta z value of the mouse.
int m_reset();
This function resets the mouse, and sets the x,y,z values to zero.
Copyright 2013 Ross Higson
Page 33 of 158
Catalina C Compiler
Reference Manual
void m_bound_limits(int xmin, int ymin, int zmin,
int xmax, int ymax, int zmax);
This function sets the minimum and maximum bounding limits for each
of the x, y and z axes.
void m_bound_scales (int xscale, int yscale, int zscale);
This function sets the bounding scales for each of the x, y and z axes.
void m_bound_preset (int xpreset, int ypreset, int zpreset);
This function sets the preset bound coordinates of the x, y and z axes.
int m_abs (int value);
This function is used internally. It is made visible only because it is
visible in the standard Parallax mouse drivers, and therefore some
users of those drivers may have written programs that depend on it.
int m_limit (int i, int value);
This function is used internally. It is made visible only because it is
visible in the standard Parallax mouse drivers, and therefore some
users of those drivers may have written programs that depend on it.
int m_bound (int i, int delta);
This function is used internally. It is made visible only because it is
visible in the standard Parallax mouse drivers, and therefore some
users of those drivers may have written programs that depend on it.
int m_bound_x();
This function returns the current x bound of the mouse.
int m_bound_y();
This function returns the current y bound of the mouse.
int m_bound_z();
This function returns the current z bound of the mouse.
Screen functions
int t_geometry();
This function returns the screen geometry (as columns * 256 + rows).
Not supported (returns zero) for the TTY HMI driver.
int t_char(unsigned curs, unsigned ch);
This function writes a character to the current cursor location. Cursor 0
or 1 can be used.
int t_string(unsigned curs, char *str);
This function writes a zero terminated string to the current cursor
location. Cursor 0 or 1 can be used.
int t_integer(unsigned curs, int val);
Copyright 2013 Ross Higson
Page 34 of 158
Catalina C Compiler
Reference Manual
This function converts its signed integer argument to a string and writes
it to the current cursor location. Cursor 0 or 1 can be used.
int t_unsigned(unsigned curs, unsigned val);
This function converts its unsigned integer argument to a string and
writes it to the current cursor location. Cursor 0 or 1 can be used.
int t_float(unsigned curs, float val, int digits);
This function converts its floating point argument to a string and writes
it to the current cursor location. Cursor 0 or 1 can be used. Not
supported when using libci or libcix
int t_hex(unsigned curs, unsigned val);
12
This function converts its unsigned integer argument to a hexadecimal
string (containing characters ‘0’ to ‘9’ and ‘A’ to ‘F’) and writes it to the
current cursor location. Cursor 0 or 1 can be used.
int t_bin(unsigned curs, unsigned val);
13
This function converts its unsigned integer argument to a binary string
(containing only characters ‘0’ and ‘1’) and writes it to the current
cursor location. Cursor 0 or 1 can be used.
int t_setpos(unsigned curs, unsigned cols, unsigned rows);
This function sets the position of a cursor – either cursor 0 or cursor 1.
The selected cursor is moved to the position specified (as column * 256
+ row).
int t_getpos(unsigned curs);
This function gets the position of a cursor – either cursor 0 or cursor 1.
Returns the current position of the selected cursor (as column * 256 +
row).
int t_mode(unsigned curs, unsigned mode);
This function sets the wrap/scroll and cursor modes of a cursor – either
cursor 0 or cursor 1. All the HMI drivers implement two independent
cursors. For all drivers except the high resolution VGA driver, the mode
of each cursor is a byte with bit values as follows:
bit 0:
0 – cursor invisible (cursor 1 only)
1 – cursor is a visible block (cursor 1 only)
bit 3:
0 – cursor wraps at end of screen
1 – screen scrolls end of screen
For these drivers cursor 0 is always invisible. For a visible cursor, use
cursor 1. Cursor 1 (when visible) is always a blinking block.
12
13
Currently not supported in all drivers due to space limitations.
Ditto.
Copyright 2013 Ross Higson
Page 35 of 158
Catalina C Compiler
Reference Manual
For the high resolution VGA driver, the mode of each cursor is a byte
with bit values as follows:
bits 0,1: 00 – cursor invisible
01 – cursor visible (unblinking)
10 – cursor visible (slow blink)
11 – cursor visible (fast blink)
bit 2:
0 – cursor is a block
1 – cursor is an underscore
bit 3:
0 – cursor wraps at end of screen
1 – screen scrolls end of screen
int t_scroll(unsigned count, unsigned first, unsigned last);
This function scrolls the screen up a specified number of lines. The
parameter is the number of lines to scroll * 65536 + the first row to
scroll * 256 + the last row to scroll.
int t_color(unsigned curs, unsigned color);
This function sets the screen color. For all HMI drivers except the high
resolution VGA driver, color is a number 0 to 7 that refers to an entry in
a color palette built in to the driver, and each character cell can have its
color set independently of the others. The new color is applied to any
new characters output to the screen – to apply the specified color to
the whole screen, you can clear the screen.
For the high resolution VGA driver, color works differently – it is
specified as a 16 bit number (as bg * 256 + fg) with each color being
specified as 8 bits with the bit values RRGGBB00 – i.e. 2 bits each for
red, green and blue. The color is applied to the whole row indicated by
the specified cursor (and only to that row – i.e. it does not apply if the
cursor is then moved to a new row).
Utility functions
int t_printf (char *fmt, ...);
This function works very much like the standard C function printf. It
requires significantly less space, but it supports only a few formatting
options:
%c
print a character
%d
print an integer as a decimal number
%f
print a floating point value. The f can be preceded by an
optional “precision” which is a single number from 0 to 9
indicating the number of digits to follow the decimal point – for
Copyright 2013 Ross Higson
Page 36 of 158
Catalina C Compiler
Reference Manual
example %3f prints 3 digits after the decimal point. Not
supported when using libci.
%s
print a string
%x
print an integer as a hexadecimal number
Any other character is printed as it appears. For example:
t_printf("char = %c\nstr = %s\nfloat = %3f\n", c, str, f);
CGI (Computer Graphics Interface) Support
Catalina provides a computer graphics plugin and C library equivalent to the Parallax
standard Graphics object.
All that is required to use the computer graphics plugin is to link with the libgraphics
library. The appropriate drivers will be loaded automatically if a Catalina program
uses this library.
For an example, go to the demos\graphics sub-directory and execute the build_all
script, specifying your platform. It will execute commands similar to:
catalina -lci -lgraphics graphics_demo.c -C NO_HMI
The NO_HMI option is generally required when using the graphics plugin because
some of the normal HMI drivers conflict with the corresponding graphics drivers.
However, if your program uses HMI drivers that do not conflict with the graphics
drivers (such as the PC HMI drivers) then these can be included along with the
graphics drivers - provided there are enough free cogs.
The graphics plugin can be used in both LMM and XMM modes.
The basic parameters of the graphics plugin, such as the resolution, are set in
Catalina_Common.spin:
X_TILES
= 16
' Tiles are 16 by 16, so default X resolution is 256
Y_TILES
= 12
' Tiles are 16 by 16, so default Y resolution is 192
The following symbols can be defined on the command line to modify the behavior of
the graphics plugin:
NO_INTERLACE
Set the TV driver to NO_INTERLACE mode. In the
current release, only the TV driver is supported.
VGA driver support will be added in a subsequent
release.
NTSC
Sets the TV driver to NTSC (rather than PAL) mode.
DOUBLE_BUFFER
Allocates two graphics buffers. All updates are
performed on one graphics buffer, which is then
copied to the display graphics buffer. This results in
smoother (but slower) video. However, double
buffering requires significantly more Hub RAM than
single buffering.
Copyright 2013 Ross Higson
Page 37 of 158
Catalina C Compiler
Reference Manual
NO_HMI
CGI drivers cannot generally be used in conjunction
with the equivalent HMI drivers (e.g. for mouse or
keyboard). To avoid this conflict, specify NO_HMI.
NO_KEYBOARD
do not load the CGI keyboard driver.
NO_MOUSE
do not load the CGI mouse driver.
For example:
catalina -lci -lgraphics graphics_demo.c -C NO_HMI -C DOUBLE_BUFFER
The graphics_demo.c program in the demos\graphics folder is a faithful copy of the
standard Parallax demo program, and includes examples of the use of most graphics
functions.
Many of the graphics functions take a pointer to a g_var structure. This structure
should be allocated as a local variable to ensure that all variables are allocated in
Hub RAM, even when we are using the XMM memory model. Normally, programs do
not need to know the internal details of this structure – they simply allocate a local
instance (which ensures it is in Hub RAM) and then call the g_setup function to
initialize it. For example:
main() {
g_var gv;
g_setup(&gv, 120, 80, 0);
...
}
Some of the graphics library functions are used to retrieve information about the
underlying CGI driver. These functions do not require a pointer to a g_var structure:
int cgi_x_tiles();
Get the value of X_TILES (X resolution in tiles of 16 pixels).
int cgi_y_tiles();
Get the value of Y_TILES (Y resolution in tiles of 16 pixels)
void *cgi_display_base();
Get address of underlying CGI display. Note that this is always a Hub
RAM address. The bitmap data will be:
(x_tiles * y_tiles) tiles, or
((x_tiles * y_tiles) * 16 * 16 * 2) / 8) bytes.
void *cgi_bitmap_base(int double_buffer);
Get address of underlying CGI bitmap to draw on. We must tell this
function if we are double buffering. Note that this is always a Hub RAM
address. The bitmap data will be:
(x_tiles * y_tiles) tiles, or
((x_tiles * y_tiles) * 16 * 16 * 2) / 8) bytes.
void *cgi_screen_data(int double_buffer);
Copyright 2013 Ross Higson
Page 38 of 158
Catalina C Compiler
Reference Manual
Get address of underlying CGI screen data. We must tell this function if
we are double buffering. Note that this is always a Hub RAM address.
You must provide x and y size. The screen data will be (x_tiles *
y_tiles) words.
void *cgi_color_data(int double_buffer);
Get address of underlying CGI color data. We must tell this function if
we are double buffering. Note that this is always a Hub RAM address.
You must provide x and y size. The colors data will always be 64 longs
The remaining graphics library functions emulate the operations of the standard
Parallax graphics object. These functions all require a pointer to a g_var structure:
void g_setup(g_var *gv, int x_org, int y_org, int double_buffer);
Set bitmap parameters:
x_org
relative-x center pixel
y_org
relative-y center pixel
double_buffer
true if double buffering
void g_clear(g_var *gv);
Clear ether the display (if not double buffering), or the double buffer
bitmap (if double buffering).
void g_copy(g_var *gv, void *bitmap_base);
Copy either the specified bitmap, or (if NULL) the double buffer bitmap
to the display (use for flicker-free display).
void g_color(g_var *gv, int color);
Set pixel color to two-bit pattern:
color
color code in bits[1..0]
void g_width(g_var *gv, int width);
Set pixel width. Actual width is w[3..0] + 1:
width
0..15 for round pixels, 16..31 for square pixels
void g_colorwidth(g_var *gv, int color, int width);
Set pixel color and width.
color
color code in bits[1..0]
width
0..15 for round pixels, 16..31 for square pixels
void g_plot(g_var *gv, int x, int y);
Plot point:
x, y
endpoint
void g_line(g_var *gv, int x, int y);
Draw a line to point:
x, y
Copyright 2013 Ross Higson
endpoint
Page 39 of 158
Catalina C Compiler
Reference Manual
void g_arc(g_var *gv, int x, int y, int xr, int yr, int angle, int
anglestep, int steps, int arcmode);
Draw an arc:
x, y
center of arc
xr, yr
radii of arc
angle
initial angle in bits[12..0] (0..$1FFF =
0°..359.956°)
anglestep
angle step in bits[12..0]
steps
number of steps (0 just leaves (x,y) at initial arc
position)
arcmode
0: plot point(s)
1: line to point(s)
2: line between points
3: line from point(s) to center
void g_vec(g_var *gv, int x, int y, int vecscale, int vecanglevoid *
vecdef_ptr);
Draw a vector sprite:
x, y
center of vector sprite
vecscale
scale of vector sprite ($100 = 1x)
vecangle
rotation angle of vector sprite in bits[12..0]
vecdef_ptr
address of vector sprite definition
The Vector sprite layout in memory is as follows:
word
$8000|$4000+angle
word length
...
...
word 0
'vector mode + 13-bit angle
'(mode: $4000=plot, $8000=line)
'vector length
'more vectors
'end of definition
void g_vecarc(g_var *gv, int x, int y, int xr, int yr, int angle, int
vecscale, int vecangle, void * vecdef_ptr);
Draw a vector sprite at an arc position:
x, y
center of arc
xr, yr
radii of arc
angle
angle in bits[12..0] (0..$1FFF = 0°..359.956°)
vecscale
scale of vector sprite ($100 = 1x)
vecangle
rotation angle of vector sprite in bits[12..0]
vecdef_ptr
address of vector sprite definition
Copyright 2013 Ross Higson
Page 40 of 158
Catalina C Compiler
Reference Manual
void g_pix(g_var *gv, int x, int y, int pixrot, void *pixdef_ptr);
Draw a pixel sprite:
x, y
center of vector sprite
pixrot
0: 0°, 1: 90°, 2: 180°, 3: 270°, +4: mirror
pixdef_ptr
address of pixel sprite definition
The Pixel sprite layout in memory is as follows:
word
byte
word
word
word
...
'word align, express dimensions and center, define pixels
xwords, ywords, xorigin, yorigin
%%xxxxxxxx,%%xxxxxxxx
%%xxxxxxxx,%%xxxxxxxx
%%xxxxxxxx,%%xxxxxxxx
void g_pixarc(g_var *gv, int x, int y, int xr, int yr, int angle, int
pixrot, void *pixdef_ptr);
Draw a pixel sprite at an arc position:
x, y
center of arc
xr, yr
radii of arc
angle
angle in bits[12..0] (0..$1FFF = 0°..359.956°)
pixrot
0: 0°, 1: 90°, 2: 180°, 3: 270°, +4: mirror
pixdef_ptr
address of pixel sprite definition
void g_text(g_var *gv, int x, int y, void *string_ptr);
Draw text:
x, y
text position (see g_textmode() for sizing and
justification)
string_ptr
address of zero-terminated string (it may be
necessary to call finish immediately afterwards to
prevent subsequent code from clobbering the
string as it is being drawn
void g_textarc(g_var *gv, int x, int y, int xr, int yr, int angle,
void *string_ptr);
Draw text at an arc position:
x, y
center of arc
xr, yr
radii of arc
angle
angle in bits[12..0] (0..$1FFF = 0°..359.956°)
string_ptr
address of zero-terminated string (it may be
necessary to call finish immediately afterwards to
prevent subsequent code from clobbering the
string as it is being drawn
Copyright 2013 Ross Higson
Page 41 of 158
Catalina C Compiler
Reference Manual
void g_textmode(g_var *gv, int x_scale, int y_scale, int spacing, int
justification);
Set text size and justification:
x_scale
x character scale, should be 1+
y_scale
y character scale, should be 1+
spacing
character spacing, 6 is normal
justification
bits[1..0]: 0..3 = left, center, right, left
bits[3..2]: 0..3 = bottom, center, top, bottom
void g_box(g_var *gv, int x, int y, int box_width, int box_height);
Draw a box with round/square corners, according to pixel width
x,y
box left, box bottom
void g_quad(g_var *gv, int x1, int y1, int x2, int y2, int x3, int y3,
int x4, int y4);
Draw a solid quadrilateral. Vertices must be ordered clockwise or
counter-clockwise.
x1, y1 .. x4, y4
vertices of the quadrilateral
void g_tri(g_var *gv, int x1, int y1, int x2, int y2, int x3, int y3);
Draw a solid triangle.
x1, y1 .. x3, y3
vertices of the triangle
void g_finish();
Wait for any current graphics command to finish. Use this to insure that
it is safe to manually manipulate the bitmap
There are also a full set of mouse functions in this library - these are functionally
equivalent to the normal Catalina (or Parallax) mouse functions already described (in
the section title Mouse functions) except they are prefixed by gm_ instead of m_
(e.g. gm_abs_x()). Note that programs MUST use the graphics versions of the
mouse functions if you use the graphics library, not the HMI versions. Also, programs
must be sure to call one of the two functions gm_reset() or gm_present() before
calling any other mouse function, since they automatically initialize the driver (and
the other functions do not).
Read the README.Graphics file in the demos\graphics directory for more details.
VGI (Virtual Graphics Interface) Support
Catalina provides a virtual graphics plugin and C library that is largely compatible
with the graphics library described in the previous section. The Virtual (or VGA or
Vector) Graphics plugin is intended for use on high resolution VGA displays.
All that is required to use the plugin is to link with the libvgraphics library. The
appropriate drivers will be loaded automatically if a Catalina program uses this
library.
Copyright 2013 Ross Higson
Page 42 of 158
Catalina C Compiler
Reference Manual
For an example, go to the demos\vgraphics sub-directory and execute the build_all
script, specifying your platform. It will execute commands similar to:
catalina -lci -lvgraphics graphics_demo.c -C NO_HMI
The NO_HMI option is generally required when using the virtual graphics library
because some of the normal HMI drivers conflict with the graphics drivers. However,
if your program uses HMI drivers that do not conflict with the graphics drivers (such
as the PC HMI drivers) then these can be included along with the graphics drivers provided there are enough free cogs.
The virtual graphics library can be used in LMM, CMM and XMM modes (although
the performance in XMM mode is very slow!).
The main differences between the virtual graphics library and the graphics library is
in the way the library is initialized – the g_setup, g_copy and g_move functions are
different, and there is an additional g_db_setup function to set up double buffering.
Refer to the header file catalina_vgraphics.h for more details, or study the
differences in the graphics_demo.c program given in the demos\vgraphics folder.
The following command line options can be used to modify the behavior of the virtual
graphics plugin:
NO_KEYBOARD
do not load the vgraphics keyboard driver
NO_MOUSE
do not load the vgraphics mouse driver
VGA_640
resolution is 640 x 480. This is the default.
VGA_800
resolution is 800 x 600.
VGA_1024
resolution is 1024 x 768.
VGA_1152
resolution is 1152 x 864.
VGA_2_COLOR
color depth is 1 bit (2 colors).
VGA_4_COLOR
color depth is 2 bits (4 colors).
DOUBLE_BUFFER
enable double buffering (smoother graphics).
For example:
catalina -lci -lvgraphics graphics_demo.c -C NO_HMI -C VGA_800
Read the README.graphics file in the demos\vgraphics directory for more details.
Multi-Thread and Multi-Cog Support
Catalina provides a multithreading library, similar to the POSIX pthreads library. To
use this library, simply compile your program with the libthreads library. The
multithreading version of the kernel will be included automatically.
For an example, go to the demos\multithread sub-directory and execute the
build_all script, specifying your platform. It will execute commands similar to:
catalina -lci -lthreads dining_philosophers.c
In the current release, multithreading is only supported in the special “threaded”
version of the CMM and LMM kernels (which are selected automatically when a
Copyright 2013 Ross Higson
Page 43 of 158
Catalina C Compiler
Reference Manual
program is linked with the libthreads library). Multithreading may be added to the
XMM kernel in a later release.
Each thread is simply a C function with a prototype that looks like a C main function
- i.e.:
int function(int argc, char *argv[]);
When the thread is started, the argc and argv parameters can be provided, and
when the thread terminates, it can return an int value. A typedef for a pointer to such
a function is also provided:
typedef int (* _thread)(int argc, char *argv[]);
This typedef is used in the _thread_init function. It is defined in the header file
catalina_threads.h
In addition to multiple threads executing on the same cog, Catalina also provides the
ability to run C programs (including multi-threaded C programs) on multiple cogs.
See the section on Multi-Cog Support for more details.
Fundamental Thread Functions
The fundamental thread library functions are defined in catalina_threads.h. They are
as follows:
int _thread_get_lock();
Get the cog lock allocated to the kernel for context switching. See the
explanation of _thread_set_lock for details on when this function is
required.
void _thread_set_lock(int lock);
Set the cog lock the multi-threading kernel will use for context
switching. If there are multiple multi-threading kernels started, it is
important that they all use the same cog lock to prevent context
switching contention.
Initially, each multi-threading kernel will use cog lock 7 - but the kernel
does not reserve this lock via _locknew, so a new cog lock should
usually be reserved using _locknew and then set
using
_thread_lock_set before the kernel starts any threads).
This can be done very simply by:
_thread_set_lock(_locknew());
Because the initial cog lock is not reserved, it does not need to be
returned using _lockret - but if another lock is used and it
subsequently needs to be changed, the following sequence must be
used:
1.
get the current cog lock via _thread_get_lock
2.
reserve a new cog lock via _locknew
3.
set the new cog lock in all multi-threading kernels via
_thread_set_lock
Copyright 2013 Ross Higson
Page 44 of 158
Catalina C Compiler
4.
Reference Manual
release the current cog lock via _lockret
int _thread_ticks(void * thread_id, int ticks);
Update the tick count of the specified thread. Each tick is
approximately 100 microseconds, and the thread will execute for this
many ticks before a context switch (unless something occurs - such as
a call to _thread_yield - which makes the thread switch earlier.
A thread can update its own tick count, but the change will not take
effect until the next context switch.
void * _thread_id();
Return the unique non-zero thread id of the current thread.
void * _thread_start(_thread PC, void * SP, int argc, char *argv);
Start a new thread. The SP must point to the top of at least
THREAD_BLOCK_SIZE longs. These longs are used as the thread
block. The RAM below this is then used as the stack of the thread.
Returns the (non-zero) thread id on success, or 0 on failure.
void * _thread_stop(void * thread_id);
Stop a thread executing.
Returns the non-zero thread id if the thread was found and stopped, or
0 if not.
void * _thread_join(void * thread_id, int * result);
Wait for a thread to complete and fetch its return value. Note that this
function does not return until the thread has stopped.
Returns the non-zero thread id if the thread was found, or 0 if not. Also
returns zero if you attempt to join your own thread, or the thread you
are trying to join gets terminated.
void * _thread_check(void * thread_id);
Check if the specified thread is currently executing.
Returns the non-zero thread id if the thread is executing, or 0 if not.
void _thread_yield();
Yield the cog to another thread. This is typically called instead of "busy
waiting" when a thread discovers it has no more work to do, and must
wait for another thread, or for an external event.
int _thread_init_lock_pool (void * pool, int size, int lock);
Initialize a block of Hub RAM as a pool of locks. This function should
be called once (and only once) for each pool. The pool must be (size +
5) bytes of Hub RAM, and must be long aligned.
If the initialization succeeds, 0 is returned.
int _thread_locknew(void * pool);
Allocate a free lock from a lock pool. Note that the pool must have
previously been initialized using _thread_init_lock_pool. The id
Copyright 2013 Ross Higson
Page 45 of 158
Catalina C Compiler
Reference Manual
of the next unused lock in the pool is returned on success (1 .. size),
and the lock is cleared.
If no more locks are available, -1 is returned.
int _thread_lockclr(void * pool, int lockid);
Clear the specified lock (1 .. size) in the specified lock pool. The lock
pool must have been initialized using _thread_init_lock_pool,
and the lock must have previously been allocated using
_thread_locknew or an error is returned.
The previous value of the lock (0 or 1) is returned. On error, -1 is
returned.
int _thread_lockret(void * pool, int lockid);
Return a lock (1 .. size) to the specified lock pool. The lock pool must
have been initialized using _thread_init_lock_pool, and the lock
must have previously been allocated using _thread_locknew or an
error is returned.
On success, 0 is returned. On error, -1 is returned.
int _thread_lockset(void * pool, int lockid);
Set the specified lock (1 .. size) in the specified lock pool. The lock pool
must have been initialized using _thread_init_lock_pool, and the
lock must have previously been allocated using _thread_locknew or
an error is returned.
The previous value of the lock (0 or 1) is returned. On error, -1 is
returned. To check that the lock was not already set, test for a return
value of 0.
int _thread_affinity(void *thread_id)
Return the affinity status of the specified thread (can be used to
determine both the current affinity, and also the current state of any
outstanding affinity request).
int _thread_affinity_stop(void *thread_id)
Stop the specified thread, which may have a different affinity from the
calling thread.
Returns an error if an affinity command is already set for the specified
thread.
int _thread_affinity_change(void *thread_id, int affinity)
Request a change of affinity for the specified thread. Check the affinity
of the thread later to see if the change has taken effect.
Additional Thread Utility Functions
Some additional thread library functions are defined in thread_utilities.h They are as
follows:
int _thread_cog(_thread func, unsigned long *stack, int argc, char
*argv[]);
Copyright 2013 Ross Higson
Page 46 of 158
Catalina C Compiler
Reference Manual
Start a new multi-threaded kernel on a new cog, and have it initially run
the specified thread.
int _thread_integer(int lock, int num);
This function is just the equivalent of the HMI function t_integer, but it
uses a lock to ensure that only one such function can access the HMI
plugin at once - this makes these functions more suitable for use when
multiple threads are executing.
int _thread_unsigned(int lock, unsigned num);
As above, for t_unsigned.
int _thread_string(int lock, char *str);
As above, for t_string.
int _thread_char(int lock, char ch);
As above, for t_char.
int _thread_hex(int lock, unsigned num);
As above, for t_hex.
int _thread_bin(int lock, unsigned num);
As above, for t_bin.
int _thread_printf(int lock, char *str, ...);
As above, for t_printf.
void randomize();
While not specific to threads, this function is useful - it initializes the
random number generator (using srand) based on the current clock
value.
int
random(int max);
While not specific to threads, this function is useful - it returns a
random number from 0 to MAX - 1.
Read the README file in the demo\multithread directory for more details.
Plugin Support
Catalina was designed to be open and extendable. It provides a standard interface to
PASM programs running in a cog by defining a common “plugin” interface to these
programs.
A “plugin” is just a SPIN object that contains a PASM program which runs on a cog –
and which is registered with the Catalina Kernel. Once registered, the functions
provided by the plugin can be invoked from within a Catalina C program.
A plugin is typically a device driver, but is not limited to that. Catalina uses plugins
internally in various ways. For example:
All keyboard/mouse/screen access is via various HMI plugins. These plugins
acts as wrappers for other drivers. The wrapper not only provides a uniform
means of accessing different Parallax drivers, it adds many functions that do
not exist in the underlying drivers – such as screen scrolling and cursor
support;
Copyright 2013 Ross Higson
Page 47 of 158
Catalina C Compiler
Reference Manual
The Float32Full and Float32A functions are accessed by turning the standard
Float32A and Float32Full cog programs into the plugins Float32_A and
Float32_B.
Real-Time Clock support is implemented as an CLOCK plugin.
Gamepad support is implemented as a GAMEPAD plugin.
Existing cog programs can often be used “as is” in conjunction with Catalina if no
access is required to them from the Catalina program – just add the appropriate
SPIN objects into a new customized target (see the Customized Targets section
later in this document) and then build the Catalina program for that target.
Cog functions
Catalina provides C functions that mimic the Parallax operations used for managing
cogs, interacting with locks, waiting for various conditions, or interacting with the
special cog registers. Catalina also provides direct access to the Propeller special
registers, which is described in the next section (and which may be more familiar to
existing Spin programmers).
The following functions are defined in the include file catalina_cog.h:
unsigned _clockfreq();
This function returns the current clock frequency, as found in the long
at hub RAM address 0.
unsigned _clockmode();
This function returns the current clock mode, as found in the byte at
hub RAM address 4. To assist in decoding the returned values, see the
symbols defined in the include file.
unsigned _clockinit(unsigned mode, unsigned freq);
This function can be used to set both the current clock mode and
frequency. To assist in specifying clock mode values, see the symbols
defined in the include file.
int _cogid();
This function returns the cog id (0 .. 7) of the cog in which this C
program is executing.
int _coginit(int par, int addr, int cogid);
This function starts an arbitrary PASM program in a new cog. The par
and addr parameters must be given as long addresses (which can
easily be done by dividing the normal byte addresses by 4). The cogid
parameter can be a specific cog, or the special value ANY_COG. The
addr parameter must be in Hub RAM.
int _coginit_C(void func(void), unsigned long *stack);
This function starts a C void function in a new cog. The stack
parameter must point to the end of an array of longs that will be used
Copyright 2013 Ross Higson
Page 48 of 158
Catalina C Compiler
Reference Manual
for the function's program stack. The C function and the stack must be
in Hub RAM. The C function will be started in a new cog.
int _coginit_Spin(void *code, void *data, void *stack, int start, int
offs);
This function starts a Spin program in a new cog. The code, data, and
stack parameters point to arrays containing the compiled Spin object
code, the Spin programs var segment, and sufficient stack space to
execute the Spin program. The content of these arrays, and the start
and offs parameters are typically populated using the output of the
Catalina spinc utility when it is invoked with the -c flag. The code, data
and stack arrays must be in Hub RAM. The Spin program will be
executed in a new cog.
int _cogstop(int cogid);
This function stops the specified cog.
int _locknew();
This function checks out and returns the next available lock (0 .. 7), or
returns -1 if no locks are available.
int _lockclr(int lockid);
This function clears the lock, and returns the previous value of the lock.
int _lockret(int lockid);
This function returns the specified lock to the pool of available locks.
int _lockset(int lockid);
This function sets the lock, and returns the previous value of the lock.
int _waitcnt(unsigned count);
This function performs a waitcnt instruction, waiting for the system
counter to reach the specified count.
int _waitvid(unsigned colors, unsigned pixels);
This function performs a waitvid instruction, sending the specified data
to the video circuitry. Note that while this is supported, it is very unlikely
that a C program could execute waitvid instructions fast enough to
implement a video driver. However, the waitvid instruction is
sometimes used for other purposes.
int _waitpeq(unsigned mask, unsigned result, int a_or_b);
This function executes a waitpeq instruction, waiting for the specified
register (a or b) to not equal the specified result. Use the values INA or
INB to specify the register.
int _waitpne(unsigned mask, unsigned result, int a_or_b);
Copyright 2013 Ross Higson
Page 49 of 158
Catalina C Compiler
Reference Manual
This function executes a waitpne instruction, waiting for the specified
register (a or b) to not equal the specified result. Use the values INA or
INB to specify the register.
unsigned _cnt()
This function returns the current value of the system counter.
unsigned _ina()
This function returns the current value of the INA register.
unsigned _inb()
This function returns the current value of the INB register.
unsigned _dira(unsigned mask, unsigned direction);
This function sets the current value of the DIRA register. The mask can
be used to specify the bits in the register that will be affected.
The function returns the original value of DIRA, so to determine its
current value without changing it, specify both a mask and direction of
zero.
unsigned _dirb(unsigned mask, unsigned direction);
This function sets the current value of the DIRB register. The mask can
be used to specify the bits in the register that will be affected.
The function returns the original value of DIRB, so to determine its
current value without changing it, specify both a mask and direction of
zero.
unsigned _outa(unsigned mask, unsigned output);
This function sets the current value of the OUTA register. The mask
can be used to specify the bits in the register that will be affected.
The function returns the original value of OUTA, so to determine its
current value without changing it, specify both a mask and output of
zero.
unsigned _outb(unsigned mask, unsigned output);
This function sets the current value of the OUTB register. The mask
can be used to specify the bits in the register that will be affected.
The function returns the original value of OUTB, so to determine its
current value without changing it, specify both a mask and output of
zero.
unsigned _ctra(unsigned mask, unsigned control);
This function sets the current value of the CTRA register. The mask
can be used to specify the bits in the register that will be affected.
There are definitions and macros to help set the values of the the
counter control bits in the file catalina_cog.h
Copyright 2013 Ross Higson
Page 50 of 158
Catalina C Compiler
Reference Manual
The function returns the original value of CTRA, so to determine its
current value without changing it, specify both a mask and output of
zero.
unsigned _ctrb(unsigned mask, unsigned control);
This function sets the current value of the CTRB register. The mask
can be used to specify the bits in the register that will be affected.
There are definitions and macros to help set the values of the the
counter control bits in the file catalina_cog.h
The function returns the original value of CTRB, so to determine its
current value without changing it, specify both a mask and output of
zero.
unsigned _frqa(unsigned mask, unsigned frequency);
This function sets the current value of the FRQA register. The mask
can be used to specify the bits in the register that will be affected. The
meaning of the frequency bits depends on the setting of the CTRA
register.
The function returns the original value of FRQA, so to determine its
current value without changing it, specify both a mask and output of
zero.
unsigned _frqb(unsigned mask, unsigned frequency);
This function sets the current value of the FRQB register. The mask
can be used to specify the bits in the register that will be affected. The
meaning of the frequency bits depends on the setting of the CTRB
register.
The function returns the original value of FRQB, so to determine its
current value without changing it, specify both a mask and output of
zero.
unsigned _phsa(unsigned mask, unsigned phase);
This function sets the current value of the PHSA register. The mask
can be used to specify the bits in the register that will be affected.
The function returns the original value of PHSA, so to determine its
current value without changing it, specify both a mask and output of
zero.
unsigned _phsb(unsigned mask, unsigned phase);
This function sets the current value of the PHSB register. The mask
can be used to specify the bits in the register that will be affected.
The function returns the original value of PHSB, so to determine its
current value without changing it, specify both a mask and output of
zero.
Copyright 2013 Ross Higson
Page 51 of 158
Catalina C Compiler
Reference Manual
unsigned _vcfg(unsigned mask, unsigned config);
This function sets the current value of the VCFG register. The mask
can be used to specify the bits in the register that will be affected.
The function returns the original value of VCFG, so to determine its
current value without changing it, specify both a mask and output of
zero.
unsigned _vscl(unsigned mask, unsigned scale);
This function sets the current value of the VSCL register. The mask
can be used to specify the bits in the register that will be affected.
The function returns the original value of VSCL, so to determine its
current value without changing it, specify both a mask and output of
zero.
Catalina also provides two macros that can simplify the use of locks. Once a lock
has been allocated – e.g. via a statement such as lock = _locknew() then the
following macros can be used:
ACQUIRE(lock)
This macro causes the program to loop until it successfully acquires
the specified lock.
RELEASE(lock)
This macro causes the program release the specified lock.
Note that for users who intend porting code between Catalina and other Propeller C
compilers, there is a header file called catalina_icc.h which “wraps” the Catalina
specific cog function syntax within macros that can be easily redefined. This allows
portable C code to be written. This file currently supports the Catalina and the ICC
compilers, and may support other future compilers – see the file for more details.
Special Register Access
Some of the functions described in the previous section provide access to the
Propeller's special registers (INA, DIRA etc). However, direct access is also provided
simply by declaring the register names as extern volatile. This can be conveniently
done by include the file propeller.h, which contains (among other things) the
following definitions:
extern
extern
extern
extern
extern
extern
extern
extern
extern
extern
extern
volatile
volatile
volatile
volatile
volatile
volatile
volatile
volatile
volatile
volatile
volatile
const unsigned
const unsigned
const unsigned
const unsigned
unsigned OUTA;
unsigned OUTB;
unsigned DIRA;
unsigned DIRB;
unsigned CTRA;
unsigned CTRB;
unsigned FRQA;
Copyright 2013 Ross Higson
PAR;
CNT;
INA;
INB;
Page 52 of 158
Catalina C Compiler
extern
extern
extern
extern
extern
volatile
volatile
volatile
volatile
volatile
Reference Manual
unsigned
unsigned
unsigned
unsigned
unsigned
FRQB;
PHSA;
PHSB;
VCFG;
VSCL;
Once these names are declared as shown above (or propeller.h is included) the
register names can be used like any other C variable in any C expression, without
being further defined, and they will represent the appropriate special propeller
register. For example:
DIRA = 0xff000000 | INA;
OUTA |= 1
if (CNT == 0) ...
while ((INA & 0x00100000) == 0) ...
... etc ...
Note that if the special register names are not declared as external volatile, the
names can be used as normal C variable names (of course, they will need to be
declared the same way as any other C variable).
In addition to making the special propeller registers directly accessible, the file
propeller.h also includes catalina_cog.h, and then provides the following definitions
which redefine the functions declared in that file to make them more closely emulate
the equivalent functions found in Spin:
#define COGID
#define COGSTOP(cog)
#define COGINIT(val)
#define
#define
#define
#define
#define
#define
#define
#define
#define
#define
#define
_cogid()
_cogstop(cog)
_coginit(((val) & 0xFFFC0000)>>18,
((val) & 0x3FFF0)>>4, (val) & 0xF)
LOCKNEW
_locknew(lock)
LOCKCLR(lock)
_lockclr(lock)
LOCKSET(lock)
_lockset(lock)
LOCKRET(lock)
_lockret(lock)
WAITCNT(count,ticks)
{_waitcnt(count);count += (ticks);}
WAITVID(colors, pixels) _waitvid(colors, pixels)
WAITPNE(mask, pins)
_waitpne(mask, pins, 0)
WAITPEQ(mask, pins)
_waitpeq(mask, pins, 0)
CLKFREQ
_clockfreq()
CLKMODE
_clockmode()
CLKSET(mode, frequency) _clockinit(mode, frequency)
Finally, propeller.h also defines the following convenient macros:
#define WAIT(ticks)
#define msleep(millisecs)
#define sleep(seconds)
_waitcnt((ticks) + _cnt())
WAIT((millisecs)*(_clockfreq()/1000))
WAIT((seconds)*_clockfreq())
Registry, Plugin and Service functions
Catalina provides functions for interacting with the registry that is used to record
which plugins are currently loaded, to provide default communications blocks for
each plugin, and to invoke the functions implemented by those plugins.
These functions are defined in the include file catalina_plugin.h. The functions are
divided into three logical layers:
•
Layer 1 – basic registry setup
Copyright 2013 Ross Higson
Page 53 of 158
Catalina C Compiler
•
Layer 2 – plugin-based requests
•
Layer 3 – service-based requests
Reference Manual
The following Layer 1 functions are provided:
unsigned _registry();
This function returns the address of the registry. This is required to be
passed to a cog when starting a dynamic kernel to execute C code on
that cog.
void _register_plugin(int cog_id, int plugin_type);
This function can be used to register that a plugin of a specified type is
running on a particular cog. Plugins must be registered before requests
can be sent to them.
void _unregister_plugin(int cog_id);
This function can be used to unregister a plugin.
Plugin types 0 to 127 are reserved for various basic Catalina plugins (see the file
catalina_plugin.h for a complete list of those currently allocated), but plugin types
128 to 254 are free for users to define for their own purposes.
The following Layer 1 macros are provided to simplify access to the registry:
REGISTRY_ENTRY(c)
This macro returns the registry entry for cog c. The parameter should
be from 0 and 7 – any other value will return an undefined result. The
result is an unsigned value.
REGISTERED_TYPE(c)
This macro returns the registered type for cog c. The parameter
should be from 0 and 7 – any other value will return an undefined
result. The result is an unsigned value.
REQUEST_BLOCK(c)
This macro returns a pointer to the request block reserved for cog c.
The parameter should be from 0 and 7 – any other value will return an
undefined result. The request block structure pointed to is defined as:
typedef struct {
unsigned int request;
unsigned int response;
} request_t;
The following Layer 2 functions are provided:
int _locate_plugin(int plugin_type);
This function can be used to find a cog on which a plugin type is
executing. Note that if there is more than one plugin of a specified type
executing, only the first will be found.
int _short_plugin_request (long plugin_type, long code, long param);
Copyright 2013 Ross Higson
Page 54 of 158
Catalina C Compiler
Reference Manual
This function can be used to send a “short” request to a plugin
specified by type (e.g. LMM_HMI). See the include file for a list of
plugin types. Short requests have a code and up to 24 bits of
parameter. Note that the meaning of the code and the parameters is
plugin-dependent, and also that different plugin types may require short
or long requests to be used for specific request codes.
int _long_plugin_request (long plugin_type, long code, long param);
This function can be used to send a “long” request to a plugin specified
by type (e.g. LMM_HMI). See the include file for a list of plugin types.
This type of long request has a code and one 32 bit of parameter. Note
that the meaning of the code and the parameter is plugin-dependent,
and also that different plugin types may require short or long requests
to be used for specific request codes.
int _long_plugin_request_2 (long
long
long
long
plugin_type,
code,
par1,
par2);
This function can be used to send a “long” request to a plugin specified
by type (e.g. LMM_HMI). See the include file for a list of plugin types.
This type or long request has a code and two 32 bit parameters. Note
that the meaning of the code and the parameters is plugin-dependent,
and also that different plugin types may require short or long requests
to be used to for specific request codes.
float _float_request(long plugin_type, long code, float a, float b);
This function can be used to send a “long” request to a plugin specified
by type (e.g. LMM_HMI). See the include file for a list of plugin types.
This type of long request has a code and two 32 bit floating point
values as parameters. Note that the meaning of the code and the
parameters is plugin-dependent, and also that different plugin types
may require short or long requests to be used to for specific request
codes.
The following Layer 3 functions are provided:
int _short_service (long svc, long param);
This function can be used to send a “short” request for a specific
service (e.g. SVC_T_CHAR). See the include file for a list of services.
Short requests have a code and up to 24 bits of parameter. Note that
the meaning of the parameter is service-dependent, and also that
different services may require short or long requests to be used.
int _long_service (long svc, long param);
This function can be used to send a “long” request for a specific service
(e.g. SVC_RTC_SETFREQ). See the include file for a list of services.
Long requests have a code and up to 32 bits of parameter. Note that
Copyright 2013 Ross Higson
Page 55 of 158
Catalina C Compiler
Reference Manual
the meaning of the parameter is service-dependent, and also that
different services may require short or long requests to be used.
int _long_service_2 (long svc, long par1, long par2);
This function can be used to send a “long” request for a specific service
(e.g. SVC_SD_READ). See the include file for a list of services. This
type or long request has a code and two 32 bit parameters. Note that
the meaning of the parameters is service-dependent.
float _float_service(long svc, float a, float b);
This function can be used to send a “long” request for a specific service
by type (e.g. SVC_FLOAT_ADD). See the include file for a list of
plugin types. This type of long request has a code and two 32 bit
floating point values as parameters. Note that the meaning of the
parameters is service-dependent.
The following Layer 3 macros are provided to simplify access to the service registry:
SERVICE_ENTRY(s)
This macro returns the registry entry for service s. The parameter
should be from 1 to SVC_MAX – any other value will return an
undefined result. The result is an unsigned short value.
SERVICE_COG(s)
This macro returns the cog containing the plugin which implements
service s. The parameter should be from 1 to SVC_MAX – any other
value will return an undefined result. The result is an unsigned value. A
value of 0xF indicates the service is not currently implemented by any
loaded plugin.
SERVIC_LOCK(s)
This macro returns the lock that must be successfully set to gain
access to service s. The parameter should be from 1 to SVC_MAX –
any other value will return an undefined result. The result is an
unsigned value. A value of 0xF indicates the service is not currently
implemented by any loaded plugin.
SERVICE_CODE(s)
This macro returns the request that will be sent to the plugin to request
service s. The parameter should be from 1 to SVC_MAX – any other
value will return an undefined result. The result is an unsigned value. A
value of 0x00 indicates the service is not currently implemented by any
loaded plugin.
The following miscellaneous utility function are provided:
char *_plugin_name(int type)
This function returns a pointer to a human-readable name for the
plugin type. For example “Real-Time Clock” or “Gamepad”.
Copyright 2013 Ross Higson
Page 56 of 158
Catalina C Compiler
Reference Manual
Note that the same basic plugin functions can generally be requested using either
layer 2 or layer 3 requests. The advantage of using layer 3 requests is that layer 3
implements contention control (necessary if you have multiple threads or multiple
cogs executing C programs), that you do not need to know the plugin type to request
a service (i.e. allowing the same service to be implemented by different plugins in
different targets), and also that layer 3 access is slightly faster.
Services 1 to 64 are predefined to to mean various basic Catalina services (see the
file catalina_plugin.h for a complete list), but services 65 .. 96 are free for users to
define for their own purposes.
AN IMPORTANT NOTE ABOUT REGISTRY ACCESS: When accessing
the registry, any addresses used in the registry, or in a plugin or service
request, must be HUB RAM addresses. This is because plugins are
normally implemented as Spin/PASM programs that have no access to
XMM RAM. For example, if a service requires a parameter that represents
an address where the plugin expects to find data to process, the address
must be in Hub RAM. If the data is actually located in XMM RAM, it must
be copied to Hub RAM before the service request.
Copyright 2013 Ross Higson
Page 57 of 158
Catalina C Compiler
Reference Manual
Debugger Support
Catalina now provides support for three different debuggers:
BlackCat – a source level debugger with a Graphical User Interface. Currently,
BlackCat runs only under Windows. BlackCat was separately developed by Bob
Anderson. BlackBox is not open source, but a binary version (Windows only) is
included with Catalina.
BlackBox – a source level debugger with a command Iine interface. BlackBox
runs under both Linux or Windows, and is included with Catalina.
POD – an assembly language debugger. Runs under both Linux or Windows
Note that POD is an assembly level debugger, while the others are source level
debuggers. POD can be used to disassemble programs, and also examine the
execution of programs within the Catalina kernel, while the others can only be used
to view the C code being executed. While it is technically possible to use POD in
conjunction with one of the other debuggers, this is not recommended since each
debugger consumes a cog and also some RAM space – which means there wouldn’t
be much left for the actual program!
BlackCat and BlackBox Support
Both BlackCat and BlackBox support are enabled using the –g (or –g3) commandline option, or by using the Debug target in Code::Blocks.
For information about BlackBox, see the document BlackBox Reference Manual,
and the tutorial document Getting Started with BlackBox.
For information about BlackCat, see the help file in the program itself, and the
tutorial document Getting Started with BlackCat.
POD Support
Catalina comes with special debug targets intended to be used with the Propeller
On-chip Debugger (POD). For information about POD, see the Parallax discussion
forums – e.g.
http://forums.parallax.com/showthread.php?92924-UPDATEDPropeller-On-chip-Debugger).
Compiling programs for debugging with POD
To build a debugging version of your program, simply use the pod target. For
example:
catalina file.c -t pod
The debug targets add the POD runtime components to the Catalina Kernel. To
access POD, the PropTerminal program must be used. PropTerminal can be
downloaded from http://insonix.ch/propeller/). Binary files produced by Catalina can
be loaded directly from the PropTerminal program. Set the size of the screen to 30
rows by 40 columns (by editing the PropTerminal.ini file).
Copyright 2013 Ross Higson
Page 58 of 158
Catalina C Compiler
Reference Manual
PropTerminal is a Windows executable, but be used under Linux with the Wine
Windows emulator (see http://www.winehq.org/). However, configuring Wine under
Linux is very system-dependent, and is beyond the scope of this document
Some limitations apply when using POD, which is quite resource hungry:
POD requires some space in the Catalina Kernel, so the debug target makes
space by moving the basic floating point operations out to the Float32_A
plugin – this means floating point programs will execute somewhat slower
when using POD.
POD requires a cog, so the standard debug target loads the Fload32A plugin.
If floating point support is not required, use a target that does not load any
floating point, or use the target configuration options to disable floating point.
POD is a SPIN program, and requires quite a lot of Hub RAM (about 12Kb) so
large Catalina programs may have to be broken into parts when debugging.
POD cannot be used to debug Catalina programs that use malloc – this is
because the Catalina implementation of malloc assumes it will have access to
all RAM space not used by Catalina itself – and this includes the VAR space
used by POD.
POD cannot use used with XMM programs - use BlackCat or BlackBox
instead. See the section XMM Support for more details on XMM programs, or
the document Getting Started with BlackCat or the BlackBox Reference
Manual.
Since it has to be embedded within the Catalina Kernel, a special version of POD is
included – this is a customized version which is “aware” of the Catalina Kernel, the
special Kernel registers, and also has support for LMM programs. This can simplify
debugging Catalina programs.
POD is automatically included with a Catalina program when one of the debug
targets is specified (e.g. using the option -t pod to Catalina). Note that POD is not a
source level debugger, so when debugging a Catalina program, it will usually be
necessary to produce a listing of the actual LMM PASM code (which can be
generated by using the Catalina command-line option –y 14
The debug targets use a special version of the Catalina Kernel that makes space for
POD by moving the "native" support for the basic floating point operations (normally
included in the Kernel) out to be handled by a plugin. This means that when
debugging programs that use ANY floating point operations (not just the math library
functions) your Catalina programs MUST be compiled with the -lma option to Catalina
rather than the -lm option.
To save space (and also because the program being debugged often needs the HMI
devices itself) all the pod target assumes the use of serial communications for all
14
Note that the addresses used in POD are the actual addresses, which may not match the
addresses given in the listing – the listing shows address in the binary image, which is not
necessarily the same as the address at which the Catalina program will load and execute.
Copyright 2013 Ross Higson
Page 59 of 158
Catalina C Compiler
Reference Manual
communications between the user and POD. This is why it is necessary to use an
external serial application (i.e. PropTerminal) when debugging.
Using POD
This document is not intended to be either a POD tutorial or a debugging tutorial. It
only describes the features that have been added to POD specifically support
Catalina LMM PASM programs. These are:
When displaying memory, CTRL+PAGEUP and CTRL+PAGEDOWN have
been implemented to move through memory a section at a time. When
displaying hub RAM as longs, a section is 1024 longs, (or 4096 bytes). When
displaying cog RAM, or hub RAM as bytes, a section is 64 longs (256 bytes).
When displaying an assembly view, CTRL+L is used to toggle POD between
LMM mode and COG mode. The two modes are as follows:
COG mode : In COG mode POD displays the cog RAM, with individual PASM
instructions disassembled. You can set breakpoints and/or single step through
individual kernel operations, including the fetching of each LMM instruction
from hub RAM. The only difference between this mode and standard POD is
that the LMM entry points in the kernel and the LMM registers are labeled
(this is for convenience only, since the disassembled PASM code does not
use these labels). For example, you may see code like:
000 Z
001
002 NZ
mov
$001, #$001
rdlong $002, $001 WZ
add
$003, $002
LMM mode : In LMM mode POD displays the hub RAM, with individual
Catalina LMM PASM instructions disassembled. You can set breakpoints
ad/or single step through individual LMM functions, including the special LMM
instructions. Instructions that represent LMM instructions are shown using
their LMM names. Parameters to these instructions are shown as simply 'long
<value>'. Each LMM instruction is disassembled to show the LMM registers it
uses (i.e. r0 … r23 and the special registers PC, SP, FP, RI, BC, BA, BZ). For
example, you may see code like:
0000
0004
000C
0010
0014
0018
001C
NEWF
sub
LODL
long
adds
mov
RETF
SP, #4
$00001000
r2, RI
r0, r2
POD always starts in COG mode, at the program entry point (which is COG
address 1). When you first switch to LMM mode, POD will display the Catalina
program entry point (C_main). In both COG and LMM modes you can single
step into (F5) or single step over (F6) individual instructions, set breakpoints
(SPACE or F9) and continue execution (F8). But note that single stepping
Copyright 2013 Ross Higson
Page 60 of 158
Catalina C Compiler
Reference Manual
into a special LMM instruction does not mean to enter COG mode - it means
enter an LMM subroutine if the LMM instruction is a CALL or CALI.
Note that in LMM mode, it is possible to align the start of the assembly
language display with one of the LMM instruction parameters, and not with the
actual LMM instruction itself (e.g. the long $00001000 shown in the
example above, rather than the proceeding LODL). This can cause the
assembly language to be decoded incorrectly.
Whenever the program execution is paused, you can switch between LMM
and COG modes. However, the results of single stepping in both modes
during the same debug session are sometimes unpredictable (a bug I have
yet to find!). Switching between LMM and COG mode to view memory or
registers is fine, but it is better to avoid single stepping in both modes in the
same debug session. Where possible single step in only one of the modes i.e. only in LMM or only in COG mode, but not both.
SD Card Support
If you have a Propeller platform that has an SD Card (such as the Hybrid), you can
use the SD Card in two ways:
As a way of loading programs into the Propeller. Catalina provides a Generic
SD Card Loader that can be used for this purpose.
As a file system for Catalina programs to use 15. Catalina provides targets
specifically for this purpose. A description of the file system functions are
given below in File System Support.
Note that the two uses are completely independent – a program may be loaded from
an SD Card but not thereafter access the SD Card at all, or a program may be
loaded from EEPROM or via serial I/O but then access the SD Card as a file system.
Of course, a single program may also do both.
Also, note that if you remove and re-insert the SD Card at any time, you will
need to restart any program that is using it.
More details and examples on using the SD Card are provided in the document
Getting Started with Catalina.
Catalina also provides proxy SD drivers, which on multi-CPU systems allows one
CPU to use an SD device physically connected to another CPU. This is further
described in the Multi-CPU System Support section later in this document.
15
Note that some platforms (such as the Hydra) cannot use the SD Card at the same time as other
hardware such as the SRAM card – this limits the usefulness of the SD Card as it can only be
used to load and execute LMM programs, not XMM programs (which require the Hydra Xtreme
SRAM card) - and LMM programs typically do not have enough space to load the SD Card file
system support.
Copyright 2013 Ross Higson
Page 61 of 158
Catalina C Compiler
Reference Manual
File System Support
If you have a Propeller platform that has an SD or Card (such as the Hybrid),
Catalina provides full support for accessing FAT16 or FAT32 file systems on the SD
Card16.
To enable full file system support, simply compile a program with one of the
“extended” versions of the standard C library – i.e. libcx or libcix. The default
version of the C library (libc) only supports I/O on stdin, stdout and stderr, whereas
the extended versions allows I/O on files as well.
Catalina provides two sets of functions that can be used to access the file system:
1. The standard C library I/O functions described in the include file stdio.h (i.e.
fopen, fprintf, fscanf etc).
Refer to any ANSI C language reference for details on the stdio functions –
Catalina provides a full implementation of all functions documented in the
ANSI C standard.
2. The Catalina file system functions described in the include file catalina_fs.h.
These functions are designed to be more space efficient than the standard C
functions, and make it possible to write programs that can access the file
system on a Propeller that has only the standard 32k of Hub RAM. Using the
stdio functions generally requires XMM RAM.
The Catalina file system functions provide both managed and unmanaged
functions for file I/O. The difference is how memory required for file control
blocks is managed. The “managed” calls are simpler to use, because they
allocate and manage internally the memory required for file control blocks –
the downside is that these programs also pull in the malloc functions from the
C library. This can incur a significant code size overhead on Propellers where
the only RAM available is the internal 32kb of Hub RAM. For programs that do
not want to incur this overhead, equivalent “unamanaged” functions are
provided, which allow the use of statically allocated memory for file control
blocks (note that if there is no “unmanaged” equivalent for a particular
function, the function can be for both managed and unmanaged files).
The functions provided are as follows:
int _mount(int unit, int pnum)
mount must be called (once) before any file system access. (unit and
pnum are normally left as zero). Note that only SD cards WITH AN
MBR are supported.
int _unmount()
unmount must be called (once) before another SD card can be
mounted.
16
FAT12 file systems can also be supported, but this is disabled in the libraries provided to save
space (since FAT12 is rarely used any more). Support for FAT12 can be re-enabled, but this
requires the Catalina library to be recompiled from source.
Copyright 2013 Ross Higson
Page 62 of 158
Catalina C Compiler
Reference Manual
int _create(const char *path, int mode)
create and open a new managed file (managed files have the
FILEINFO structure allocated and managed internally). The file must
be closed using the managed close function (i.e. _close). The mode
can be:
0 - read only
1 - write only
2 - read and write
int _open(const char *path, int flags)
open a managed file and return the file number (managed files have
the FILEINFO structure allocated and managed internally - which
requires that malloc be used by the program). The file must be closed
using the managed close function (i.e. _close). The mode can be:
0 - read only
1 - write only
2 - read and write
int _close(int d)
close a managed file (managed files have the FILEINFO structure
allocated and managed internally). The file must have been opened
using the managed open function (i.e. _open).
int _read(int d, char *buf, int nbytes)
read from a file.
int _write(int d, const char *buf, int nbytes)
write to a file.
off_t _lseek(int d, off_t offset, int whence)
seek (move) within a file. Whence can be:
0 – SEEK_SET (absolute position within the file)
1 – SEEK_CUR (relative to the current position within the file)
2 – SEEK_END (relative to the end of the file)
int _create_directory(const char *path)
create a new directory. The path to the new directory must already
exist (i.e. only the last element of the path name is created) and a
directory must not already exist with that name.
Copyright 2013 Ross Higson
Page 63 of 158
Catalina C Compiler
Reference Manual
int _rename(const char *path, const char *newname)
rename a file from path to newname. The path is the complete path the
the original file, but the new name is only the file name component –
i.e. it should not contain the path again.
int _unlink(const char *path)
unlink (delete) a file.
int _create_unmanaged(const char *path, int mode, PFILEINFO fd)
create and open a new unmanaged file and return the file number
(unmanaged files require a pointer to a FILEINFO structure to be
provided). The file must be closed using the unmanaged close function
(i.e. _close_unmanaged). The mode can be:
0 - read only
1 - write only
2 - read and write
int _open_unmanaged(const char *path, int flags, PFILEINFO fd)
open an unmanaged file and return the file number (unmanaged files
require a pointer to a FILEINFO structure to be provided). The file must
be
closed
using
the
unmanaged
close
function
(i.e.
_close_unmanaged). The mode can be:
0 - read only
1 - write only
2 - read and write
int _close_unmanaged(int d)
close an unmanaged file using the file number. Files that were opened
unmanaged must be closed using the unmanaged close function (i.e.
_close_unamanged).
Note that it is possible to mix the various file access functions – in fact sometimes it
is necessary to do so. For example, the stdio functions provide no means of
unmounting a file system if it becomes necessary to change SD cards – so the
_unmount function provided can be used for this purpose. Similarly, the stdio
functions provide no way of creating a new directory – so the Catalina file system
library provides a _create_directory function that can be used.
Some important things to note about Catalina file system support:
•
Catalina only supports DOS 8.3 style file names (i.e. not long file names).
Also, when specifying file names in the file functions, the 8 character name,
the “.”, and the extension should all be specified, but some of the functions
make accessible the raw FAT directory entries where 11 characters are
always stored in each entry, with each of the 8 character name and 3
Copyright 2013 Ross Higson
Page 64 of 158
Catalina C Compiler
Reference Manual
character extension components padded with trailing blanks and with no “.”
inserted between them and no terminating character. To display a more
“friendly” file name, it would be necessary to remove any trailing blanks and
insert the “.” character.
•
Only FAT file systems with sector sizes of 512 bytes are supported. Some
FAT file systems use larger sector sizes to increase the supported disk
capacity – such file systems (which can be created under some versions of
DOS and Windows) will be unusable under Catalina.
•
The path separator is “/” (even though FAT it is fundamentally a DOS file
system where it might be more common to use “\” as a path separator) – so
the following are valid directory names:
/
/dir
/dir1/dir2
The following are valid file names:
/my_file
/dir/xxx.txt
/dir1/dir2/xxx.bas
•
When creating files or directories, the path must already exist up to the final
element – only the final element of the file or path name can actually be
created in each call. Of course, repeated calls can be used to create deeper
path names – e.g to create a file with path “/a/b/c/xxx.txt” in a blank file
system:
first create directory “/a”
then create directory “/a/b”
then create directory “/a/b/c”
then create file “/a/b/c/xxx.txt”
•
There is no concept of “current directory”. If you want to refer to a file in a subdirectory, you must always specify the path all the way from the root directory
(e.g. “/dir1/dir2/dir3/xxx.xxx”). There is a limit of 64 characters in any path
name – this can be increased by recompiling the Catalina library from source,
but this is not recommended as it increases the stack space required for all
file access functions..
•
The line terminator is the UNIX line feed character, or “\n”. To create a file
with DOS style line termination, it would be necessary to explicitly write a
carriage return (“\r”) before each line terminator.
•
No checking is done in file names for characters that may be invalid in FAT
file systems. This means it is possible to create files that would not be valid if
Copyright 2013 Ross Higson
Page 65 of 158
Catalina C Compiler
Reference Manual
the SD Card were to subsequently be used in a DOS or Windows system. For
instance, “\” is mistakenly used as the path separator to try and create a file
“xxx” in directory “dir1” by calling the file creation function with the path
“dir1\xxx”, then the file system will instead create a file with the name
“dir1\xxx” in the root directory - and this file may not be valid under MS-DOS
or Windows since it will include the character “\” (which is invalid in FAT file
systems).
•
When renaming files, no check is made to see if a file with the new name
already exists – so it is possible to end up with two files of the same name in a
directory. If this is possible, check that the new name does not already exist
before renaming.
Serial Device Support
Catalina has many options for support for serial devices:
1. Use the PC HMI plugin, which configures a single serial port, normally on pins
30 & 31 and at 115200 baud. You use this option by adding -C PC on the
command line, or selecting this HMI option in Code::Blocks. Access to this
single serial port is via the standard C stdio functions (e.g. getc, putc, scanf,
printf etc). To configure this port, you can edit the details in the appropriate
<platform>_DEF.inc file for your platform (e.g. HYDRA_DEF.inc).
Because it is specifically designed to implement various HMI specific
capabilities, using the PC HMI plugin as a serial option requires 3 cogs for 1
port, so it is mainly worthwhile if you want to access the serial port via stdio
(or you have a program that does so and do not want to change it).
2. Use the TTY HMI plugin, , which configures a single serial port, normally on
pins 30 & 31 and at 115200 baud. You use this option by adding -C TTY on
the command line, or selecting this HMI option in Code::Blocks. Access to this
single serial port is via the standard C stdio functions (e.g. getc, putc, scanf,
printf etc). To configure this port, you can edit the details in the appropriate
<platform>_DEF.inc file for your platform (e.g. HYDRA_DEF.inc).
The TTY HMI option uses one less cog than the PC HMI option, but still
requires two cogs – it is worthwhile if you want to access the serial port via
stdio (or you have a program that does so and do not want to change it).
3. Use the 4 port Serial library, which allows up to 4 serial ports using one cog,
on any pins. You use this option by adding -lserial4 on the command line, or
adding this library in Code::Blocks. This loads the 4 port serial plugin, and
links your program with the libserial4 library. Access to these serial ports are
via a special library functions, described below. To configure these ports, you
can edit the details in Extras.spin. This is the recommended way if you only
have one spare cog, or if you need multiple serial ports.
Note that by default, the file Extras.spin file configures only one serial port
(port 0) on pins 30 & 31 at 115200 baud. These are the same pins as the PC
HMI normally uses, so if your propeller platform enables the PC HMI plugin by
Copyright 2013 Ross Higson
Page 66 of 158
Catalina C Compiler
Reference Manual
default, you will need to add the -C NO_HMI flag to use the serial port (or edit
Extras.spin to move the port to other pins).
4. Use the tty serial library, which allows access to a single high speed serial
port using one cog, on any pins. You use this option by adding -ltty on the
command line, or adding this library in Code::Blocks. This loads the tty plugin,
and links your program with the libtty library. Access to the serial ports are via
a special library functions, described below. To configure this port, you can
edit the details in Extras.spin. This is the recommended way if you only have
one spare cog, and need access to a high speed serial port.
Note that by default, the file Extras.spin file configures the tty serial port on
pins 30 & 31 at 115200 baud. These are the same pins as the PC HMI
normally uses, so if your propeller platform enables the PC HMI plugin by
default, you will need to add the -C NO_HMI flag to use the tty serial port (or
edit Extras.spin to move the port to other pins).
5. Use the tty256 serial library, which allows access to a single high speed serial
port using one cog, on any pins. The tty256 library is similar to the tty library,
except the serial plugin used supports 256 byte buffers for Tx and Rx, which
may be required for some serial applications. You use this option by adding
-ltty256 on the command line, or adding this library in Code::Blocks. This
loads the tty256 plugin, and links your program with the libtty256 library.
Access to the serial ports are via a special library functions, described below.
To configure this port, you can edit the details in Extras.spin. This is the
recommended way if you only have one spare cog, and need access to a high
speed serial port that supports Tx and Rx buffers of 256 bytes.
Note that by default, the file Extras.spin file configures the tty256 serial port
on pins 30 & 31 at 115200 baud. These are the same pins as the PC HMI
normally uses, so if your propeller platform enables the PC HMI plugin by
default, you will need to add the -C NO_HMI flag to use the tty256 serial port
(or edit Extras.spin to move the port to other pins).
You can combine several methods of adding serial capabilities, provided you have
sufficient cogs and the pin configurations used by the various serial ports don't
conflict. Or you can use another HMI option (e.g. TV, VGA) and the serial plugins
together.
The tty library (libtty)
Here are the functions implemented in libtty (also described in the include file
catalina_tty.h). They are designed to be equivalent to the Spin functions defined in
the original Full Duplex Serial driver:
int tty_rxflush()
Flush the receive buffer until empty (discard any characters received).
int tty_rxcheck()
Copyright 2013 Ross Higson
Page 67 of 158
Catalina C Compiler
Reference Manual
Check if there are characters in the receive buffer – returns the byte, or
-1 if no characters are available. Does not wait.
int tty_rxtime(unsigned ms)
Wait up to ms milliseconds, or until a character is received. Returns -1
if no character was received in the specified time.
int tty_rx()
Read a byte from the receive buffer. If there are no character, wait until
a character is received.
int tty_tx(char txbyte)
Put a byte in the transmit buffer. If there is no space, in the buffer wait
until there is space.
int tty_txflush()
Wait until there are no characters in the transmit buffer (i.e. all bytes
have been sent).
void tty_str(char *stringptr)
Send a null-terminated string to the transmit buffer.
void tty_decl(int value, int digits, int flag)
Send a signed decimal number. This function is not usually called
directly – instead, call dec, decf or decx (see below). The flag has the
following meaning:
0
print only required characters (plus sign if necessary). Note that
digits should always be specified as 10 in this case.
1
right justify and space pad up number using digits characters (plus
sign if necessary).
2
right justify and zero pad number using digits characters (plus sign
if necessary).
void tty_hex(unsigned value, int digits)
Send the rightmost digits characters of the value in hexadecimal.
void tty_ihex(unsigned value, int digits)
Send the rightmost digits characters of the value in hexadecimal,
prefixed by a '$' character.
void tty_bin(unsigned value, int digits)
Send the rightmost digits characters of the value in binary.
void tty_ibin(unsigned value, int digits)
Send the rightmost digits characters of the value in binary, prefixed by
a '%' character.
Copyright 2013 Ross Higson
Page 68 of 158
Catalina C Compiler
Reference Manual
void tty_padchar(unsigned count, char txbyte)
Send count instances of the character txbyte.
The following useful macros are defined to assist in the use of the above functions:
tty_dec(value)
Send a signed decimal string, up to 10 digits, plus a sign character if
required.
tty_decf(value, width)
Send a space-padded fixed width decimal string, in width digits, plus a
sign character if required. The width can be up to 10.
tty_decx(value, width)
Send a zero-padded fixed width decimal string, in width digits, plus a
sign character if required. The width can be up to 10.
tty_putc( txbyte)
Same as tty_tx
tty_newline(port)
Send a newline character. By default, the newline is ASCII 10. If the C
symbol TTY_CR_NEWLINE is defined, then the newline is ASCII 13.
The purpose of defining this symbol is to make this function work like
the Spin equivalent.
tty_strln(port, stringptr)
Send a zero terminated string newline character. By default, the
newline is ASCII 10. If the C symbol TTY_CR_NEWLINE is defined,
then the newline is ASCII 13. The purpose of defining this symbol is to
make this function work like the Spin equivalent.
tty_cls(port)
Send a Form Feed character (ASCII 12).
tty_getc(port)
Same as tty_rx.
The tty256 library (libtty256)
The functions implemented in libtty256 are identical to those described above in
libtty (also described in the include file catalina_tty.h).
The 4 port Serial library (libserial4)
Here are the functions implemented in libserial4 (also described in the include file
catalina_serial4.h). They are designed to be equivalent to the Spin functions defined
in the original Spin version of the 4 port serial driver, and also to the libtty functions
described above. In all cases, the port number is a number in the range 0 .. 3:
Copyright 2013 Ross Higson
Page 69 of 158
Catalina C Compiler
Reference Manual
int s4_rxflush(unsigned port)
Flush the receive buffer until empty (discard any characters received).
int s4_rxcheck(unsigned port)
Check if there are characters in the receive buffer – returns the byte, or
-1 if no characters are available. Does not wait.
int s4_rxtime(unsigned port, unsigned ms)
Wait up to ms milliseconds, or until a character is received. Returns -1
if no character was received in the specified time.
int s4_rx(unsigned port)
Read a byte from the receive buffer. If there are no character, wait until
a character is received.
int s4_tx(unsigned port, char txbyte)
Put a byte in the transmit buffer. If there is no space, in the buffer wait
until there is space.
int s4_txflush(unsigned port)
Wait until there are no characters in the transmit buffer (i.e. all bytes
have been sent).
void s4_str(unsigned port, char *stringptr)
Send a null-terminated string to the transmit buffer.
void s4_decl(unsigned port, int value, int digits, int flag)
Send a signed decimal number. This function is not usually called
directly – instead, call dec, decf or decx (see below). The flag has the
following meaning:
0
print only required characters (plus sign if necessary). Note that
digits should always be specified as 10 in this case.
1
right justify and space pad up number using digits characters (plus
sign if necessary).
2
right justify and zero pad number using digits characters (plus sign
if necessary).
void s4_hex(unsigned port, unsigned value, int digits)
Send the rightmost digits characters of the value in hexadecimal.
void s4_ihex(unsigned port, unsigned value, int digits)
Send the rightmost digits characters of the value in hexadecimal,
prefixed by a '$' character.
void s4_bin(unsigned port, unsigned value, int digits)
Send the rightmost digits characters of the value in binary.
Copyright 2013 Ross Higson
Page 70 of 158
Catalina C Compiler
Reference Manual
void s4_ibin(unsigned port, unsigned value, int digits)
Send the rightmost digits characters of the value in binary, prefixed by
a '%' character.
void s4_padchar(unsigned port, unsigned count, char txbyte)
Send count instances of the character txbyte.
The following useful macros are defined to assist in the use of the above functions:
s4_dec(port, value)
Send a signed decimal string, up to 10 digits, plus a sign character if
required.
s4_decf(port, value, width)
Send a space-padded fixed width decimal string, in width digits, plus a
sign character if required. The width can be up to 10.
s4_decx(port, value, width)
Send a zero-padded fixed width decimal string, in width digits, plus a
sign character if required. The width can be up to 10.
s4_putc(port, txbyte)
Same as s4_tx
s4_newline(port)
Send a newline character. By default, the newline is ASCII 10. If the C
symbol S4_CR_NEWLINE is defined, then the newline is ASCII 13.
The purpose of defining this symbol is to make this function work like
the Spin equivalent.
s4_strln(port, stringptr)
Send a zero terminated string newline character. By default, the
newline is ASCII 10. If the C symbol S4_CR_NEWLINE is defined,
then the newline is ASCII 13. The purpose of defining this symbol is to
make this function work like the Spin equivalent.
s4_cls(port)
Send a Form Feed character (ASCII 12).
s4_getc(port)
Same as s4_rx.
Sound Support
Sound support is provided by a plugin based on Based on Nick Sabalausky's 22KHz,
16-bit, 6 Channels Sound Driver. This sound driver works on many platforms,
includeing the Hydra and C3. It is configured by setting the SOUND_PIN in the
platform definition file (e.g. C3_DEF.inc)
Copyright 2013 Ross Higson
Page 71 of 158
Catalina C Compiler
Reference Manual
Here are the functions implemented in the libsound library (also described in the
include file catalina_sound.h):
extern void PlaySoundFM (int channel,
unsigned int shape,
unsigned int freq,
unsigned int duration,
unsigned int volume,
unsigned int amp_env)
Starts playing a frequency modulation sound. If a sound is already
playing, then the old sound stops and the new sound is played.
channel:
The channel on which to play the sound (0-5)
shape:
The desired shape of the sound. Use any of the following
constants:
SHAPE_SINE,
SHAPE_SAWTOOTH,
SHAPE_SQUARE, SHAPE_TRIANGLE, SHAPE_NOISE
(see catalina_sound.h). Do NOT send a SHAPE_PCM_*
constant, use PlaySoundPCM() instead.
freq:
The desired sound frequency. Can be a number or a
NOTE_* constant (see catalina_sound.h). A value of 0
leaves the frequency unchanged.
duration:
Either a 31-bit duration to play sound for a specific length
of time, or (DURATION_INFINITE | "31-bit duration of
amplitude envelope") to play until StopSound,
ReleaseSound or another call to PlaySound is called.
See "Explanation of Envelopes and Duration" in
catalina_sound.h for important details.
volume:
The desired volume (1-255). A value of 0 leaves the
volume unchanged.
amp_env:
The amplitude envelope, specified as eight 4-bit nybbles
from $0 (0% of arg_volume, no sound) to $F (100% of
arg_volume, full volume), to be applied least significant
nybble first and most significant nybble last. Or, use
NO_ENVELOPE to not use an envelope. See
"Explanation
of
Envelopes
and
Duration"
in
catalina_sound.h for important details.
extern void PlaySoundPCM(int channel,
void *pcm_start,
void *pcm_end,
unsigned int volume)
Plays a signed 8-bit 11KHz PCM sound once. If a sound is already
playing, then the old sound stops and the new sound is played.
channel:
The channel on which to play the sound (0-8)
Copyright 2013 Ross Higson
Page 72 of 158
Catalina C Compiler
Reference Manual
pcm_start:
The address of the PCM buffer
pcm_end:
The address of the end of the PCM buffer
volume:
The desired volume (1-255)
amp_env:
The amplitude envelope, specified as eight 4-bit nybbles
from $0 (0% of arg_volume, no sound) to $F (100% of
arg_volume, full volume), to be applied least significant
nybble first and most significant nybble last. Or, use
NO_ENVELOPE to not use an envelope. See
"Explanation
of
Envelopes
and
Duration"
in
catalina_sound.h for Important details.
extern void StopSound(int channel)
Stops playing a sound.
channel: The channel to stop.
extern void ReleaseSound(int channel)
"Releases" an infinite duration sound - .i.e. starts the release portion of
the sound's amplitude envelope.
channel:
The channel to "release".
extern void SetFreq(int channel, unsigned int freq)
Changes the frequency of the playing sound. If called repeatedly, it can
be used to create a frequency sweep.
channel:
The channel to set the frequency of.
freq:
The desired sound frequency. Can be a number or a
NOTE_* constant (see catalina_sound.h). A value of 0
leaves the frequency unchanged.
extern void SetVolume(int channel, unsigned int volume)
Changes the volume of the playing sound. If called repeatedly, it can
be used to manually create an envelope.
channel:
The channel to set the volume of.
volume:
The desired volume (1-255). A value of 0 leaves the
volume unchanged.
SPI/I2C Support
Simple SPI & I2C bus support is provided by a plugin is based on Mike Green's
sdspiFemto Spin object. It supports both an I2C and SPI Bus. The I2C bus is
intended for use in communicating with an EEPROM, and the SPI bus is intended for
use communicating with an SD Card.
The EEPROM functions should work on all Propellers, and the SD Card functions
should work with the SD Cards on all Propellers except the C3 (which requires
Copyright 2013 Ross Higson
Page 73 of 158
Catalina C Compiler
Reference Manual
additional select logic to select amongst various devices that share the SPI bus however, the existing Catalina SD Plugin supports the C3).
The library provides functions to read and write EEPROMs or SD Cards, and to boot
a program from and address in EEPROM, or from a sector on SD Card.
The following library routines are provided in libspi. These library routines allocate a
lock to prevent contention, so they are safe for use with a multithreading kernel:
extern int spi_bootEEPROM(unsigned int addr)
Load and run a program from EEPROM.
addr
the address in EEPROM (use the EEPROM_ADDR
macro to encode the address – see catalina_spi.h)
NOTE: This function will return any lock allocated by the SPI code to
the pool of unused locks, but it is the caller's responsibility to ensure
that any OTHER locks checked out are returned before calling the boot
function – otherwise if the program being booted uses locks, it might
not be able to allocate one!
extern int spi_readEEPROM(unsigned int addr, void *buffer, int count)
Read from EEPROM To buffer
addr
address in EEPROM (use the EEPROM_ADDR macro to
encode the address – see catalina_spi.h)
buffer
buffer to read
count
count of bytes to read
extern int spi_writeEEPROM(unsigned int addr, void *buffer, int count)
Write from buffer to EEPROM
addr
address in EEPROM (use the EEPROM_ADDR macro to
encode the address – see catalina_spi.h)
buffer
buffer to write
count
count of bytes to write
extern int spi_checkPresence(unsigned int addr)
Check there is an I2C bus and EEPROM at the specified address. Note
that this routine cannot distinguish between a 32Kx8 and a 64Kx8
EEPROM since the 16th address bit is a "don't care" for the 32Kx8
devices.
Return true if EEPROM present, false otherwise.
addr
address in EEPROM to check (use the EEPROM_ADDR
macro to encode the address – see catalina_spi.h)
extern int spi_writeWait(unsigned int addr)
Copyright 2013 Ross Higson
Page 74 of 158
Catalina C Compiler
Reference Manual
Wait for EEPROM Write to finish.
addr
address to check
Return true if EEPROM present, false otherwise.
extern int spi_initSDCard(int DO, int Clk, int DI, int CS)
Initialize SD Card
DO, Clk, DI, CS Pin numbers to use
extern int spi_stopSDCard(void)
Stop SD Card access
extern int spi_bootSDCard(unsigned int addr, int count)
Boot from an SD Card
addr
the address on the SDCard.
count
the count of bytes to load (must be at least 16)
NOTE: This function will return any lock allocated by the SPI code to
the pool of unused locks, but it is the caller's responsibility to ensure
that any OTHER locks checked out are returned before calling the boot
function – otherwise if the program being booted uses locks, it might
not be able to allocate one!
extern int spi_readSDCard(unsigned int addr, void *buffer, int count)
Read from SDCard to buffer
addr
address on SDCard
buffer
buffer to read
count
count of bytes to read
extern int spi_writeSDCard(unsigned int addr, void *buffer, int count)
write from buffer to SDCard
addr : address on SDCard
buffer : buffer to write
count : count of bytes to write
extern unsigned int spi_getControl(int i)
Get an unsigned int from the control block
i
control block index
extern void spi_setControl(int i, unsigned int value)
Set a value in the control block
i
control block index
Copyright 2013 Ross Higson
Page 75 of 158
Catalina C Compiler
value
Reference Manual
value to set
The following macros are provided in catalina_spi.h to assist in constructing
EEPROM addresses:
EEPROM_ADDR(SCL_PIN, ADDR)
Format an EEPROM address for use in the EEPROM functions such
as spi_readEEPROM() or spi_writeEEPROM()
SCL_PIN
the number of the I2C bus SCL pin (the SDA pin is
assumed to be SCL_PIN + 1)
ADDR
The address (up to 19 bits) within the EEPROM.
Support for other Output Formats
Catalina normally generates either binary or eeprom output files – the same as are
produced by other Propeller compilers, including the Parallax Propeller tool.
Typically, these formats are then loaded into EEPROM or onto an SD Card.
However, to support applications where neither EEPROM nor SD Cards are an
option for loading Catalina programs, Catalina supports generating other output
formats – such as Motorola S records or Intel Hex records – that can be used in
conjunction with other program loaders.
More details and examples on generating other output formats are provided in the
document Getting Started with Catalina.
SPI Flash and Cache Support
This version of Catalina supports loading and executing XMM programs from SPI
RAM and SPI Flash.
When using serial RAM such as SPI RAM or SPI Flash (which is the only XMM RAM
available on the C3, SuperQuad, RamPage, RamPage2 and Propeller Memory
Card boards) executing programs can be very slow. To speed this up, Catalina now
provides a caching XMM driver. This driver dedicates a portion of Hub RAM to
“cache” the contents of the XMM RAM, so that the XMM RAM need only be
consulted if the data is not already available in the much faster Hub RAM.
Although the caching driver can be used in conjunction with any supported XMM
platform, it is mainly intended for platforms that use SPI RAM or SPI Flash. On those
platforms, it can speed up program execution by a factor of 10. While it can also
speed up program execution on other platforms with slow XMM RAM (such as the
DracBlade), the performance improvement is less dramatic. On some XMM
platforms (such as the Hydra or Hybrid) it results in only a small improvement, and
on platforms with very fast XMM (such as the RamBlade) using the caching driver
can actually slow down performance.
On platforms with both SPI RAM and SPI Flash, the caching driver does not need to
be used to use only the SPI RAM – but it must be used in order to use the SPI
Flash.
Copyright 2013 Ross Higson
Page 76 of 158
Catalina C Compiler
Reference Manual
The caching XMM driver can be enabled by defining one of the following symbols on
the command line:
CACHED_1K
use a 1k cache
CACHED_2K
use a 2k cache
CACHED_4K
use a 4k cache
CACHED_8K
use a 8k cache
CACHED
use a default size (8K) cache
For example:
catalina hello_world.c -lc -C CACHED
Note that the caching XMM driver requires sufficient free hub memory according to
the size of the cache, and also an extra cog.
Since SPI Flash is non-volatile, it is possible to execute programs loaded into SPI
Flash without having to reload them. To facilitate this, Catalina provides a
Flash_Boot utility, specifically designed to boot programs already loaded into SPI
Flash. Note that when compiling the Flash_Boot utility, need to specify ALL the
plugins you want - only plugins specified will be loaded. For example, if you want the
Flash_Boot program to load an SD driver, a CLOCK driver and use the
HIRES_vGA HMI but not load a mouse, you would compile the utilities using a
command like:
build_all C3 CACHED SD CLOCK HIRES_VGA NO_MOUSE
To run a program loaded into SPI Flash on Propeller reset, you can program the
Flash_Boot binary into EEPROM.
You can also recompile the Flash_Boot program with different drivers - this might
(for example) enable you to run the program in SPI Flash with either a TV driver or a
VGA driver.
Note that the program in Flash will NOT be aware of whether or not the caching
driver is in use, or of the size of the cache. This means that the same program can
be easily executed with different cache sizes using different versions of Flash_Boot.
Copyright 2013 Ross Higson
Page 77 of 158
Catalina C Compiler
Reference Manual
Catalina Targets
A Catalina target is a SPIN program responsible for establishing the execution
environment for Catalina programs. The precise details of the target are often
unknown to the Catalina program, and may depend on the underlying Propeller
platform. For example, the same C program can be executed using different targets
– one target may use a TV as its display device, and another – even on the same
platform – may use the VGA display for the same purpose. Wrapping such details up
in a target gives Catalina programs an effective hardware abstraction layer.
This section describes the targets provided in the standard Catalina Target Package.
Nine such targets are provided – three for LMM programs, and two each for EMM,
SMM and XMM programs:
The default LMM target (lmm_default). Any program compiled with the –x0
command line option (or without any –x option) will use this target unless
another target is explicitly specified using the –t command line option.
The POD debugger LMM target (lmm_debug). This target supports the POD
debugger. This target must be explicitly specified on the command line using
the –tdebug option.
The BlackBox and BlackCat debugger LMM target (lmm_blackcat). This target
supports both the BlackBox and BlackCat debuggers. This target is used
whenever the –g or –g3 command line options are specified.
The default EMM target (emm_default). Any TINY LMM program compiled
with the -C EEPROM command line symbol (or –x1) will use this target unless
another target is explicitly specified using the –t command line option. More
detail on EMM is given in the section EMM support below.
The BlackBox and BlackCat debugger EMM target (emm_blackcat). This
target supports both the BlackBox and BlackCat debuggers. This target is
used whenever the –g or –g3 command line options are specified (in
conjunction with -C EEPROM or the –x1 option).
The default SMM target (smm_default). Any program compiled with the -C
SDCARD command line symbol (or –x6) will use this target unless another
target is explicitly specified using the –t command line option. More detail on
SMM is given in the section SMM support below.
The BlackBox and BlackCat debugger SMM target (smm_blackcat). This
target supports both the BlackBox and BlackCat debuggers. This target is
used whenever the –g or –g3 command line options are specified (in
conjunction with with -C EEPROM or the –x6 option).
The default XMM target (xmm_default). Any program compiled with the -C
SMALL or -C LARGE command line symbol (or the –x2 or –x5 options) will
use this target unless another target is explicitly specified using the –t
Copyright 2013 Ross Higson
Page 78 of 158
Catalina C Compiler
Reference Manual
command line option. More detail on XMM is given in the section XMM
Support below.
The BlackBox and BlackCat debugger XMM target (xmm_blackcat). This
target supports both the BlackBox and BlackCat debuggers. This target is
used whenever the –g or –g3 command line options are specified (in
conjunction with -C SMALL or -C LARGE (or the –x2 or –x5 options).
Each target is a SPIN program loaded from the target directory, and compiled along
with the C program by Catalina.
The configuration options supported by the targets in the standard Catalina Target
Package are given in the following section.
Default Target Configuration Options
The standard Catalina Target Package supports the HYDRA, the HYBRID, the
Parallax DEMO board, MORPHEUS, the RAMBLADE, the RAMBLADE3. the
TRIBLADEPROP, the DRACBLADE, ASC, C3, PP and QUICKSTART boards. It
also supports XMM add-on board such as the SUPERQUAD, RAMPAGE, RP2 and
PMC boards.
The following symbols can be defined on the command line to affect the
configuration of the default target package (note that some symbols only apply to
specific targets or memory modes):
HYDRA
use HYDRA pin definitions, drivers and XMM functions
HYBRID
use HYBRID pin definitions, drivers and XMM functions
DEMO
use DEMO board pin definitions and drivers (this platform
has no XMM support)
DRACBLADE
use DRACBLADE pin definitions, drivers and XMM functions
RAMBLADE
use RAMBLADE pin definitions, drivers and XMM functions
TRIBLADEPROP
use TRIBLADEPROP pin definitions, drivers and XMM
functions
MORPHEUS
use MORPHEUS pin definitions, drivers and XMM functions
ASC
use ASC board pin definitions and drivers (this platform has
no XMM support)
C3
use C3 pin definitions, drivers and XMM functions
PP
use PROPELLER PLATFORM pin definitions, drivers and
XMM functions
QUICKSTART
use QUICKSTART pin definitions, drivers and XMM
functions
CUSTOM
use a user-customized set of pin definitions, drivers and
XMM functions (if applicable)
Copyright 2013 Ross Higson
Page 79 of 158
Catalina C Compiler
Reference Manual
HX512
use HX512 pin definitions, drivers and XMM functions
SUPERQUAD
use SUPERQUAD pin definitions, drivers and XMM functions
RAMPAGE
use RAMPAGE pin definitions, drivers and XMM functions
RP2
use RAMPAGE 2 pin definitions, drivers and XMM functions
PMC
use PROPELLER MEMORY CARD pin definitions, drivers
and XMM functions
CPU_1
on the TRIBLADEPROP, this means to use CPU #1 pin
definitions and XMM functions – if not specified, CPU #2
XMM functions are used by default
CPU_2
on the TRIBLADEPROP or MORPHEUS, this means to use
CPU #2 pin definitions and XMM functions (this is also the
default)
CPU_3
on the TRIBLADEPROP, this means to use CPU #3 pin
definitions and devices.
COMPACT
compile a CMM program (COMPACT memory model)
TINY
compile an LMM program to use the TINY memory model
SMALL
compile an XMM program to use the SMALL memory model
LARGE
compile an XMM program to use the LARGE memory model
ALTERNATE
use the alternate LMM Kernel (the alternate kernel is slightly
smaller in size but does not include any floating point
support).
SDCARD
use the SDCARD two-phase loader
EEPROM
use the EEPROM two-phase loader
FLASH
use an SPI FLASH loader
HIRES_VGA
load a High Resolution VGA driver (not supported on the
HYBRID, RAMBLADE or RAMBLADE3)
LORES_VGA
load a Low Resolution VGA driver (not supported on the
HYDRA, RAMBLADE, RAMBLADE3 or MORPHEUS)
VGA
(same as LORES_VGA)
HIRES_TV
load a High Resolution TV driver (not supported on
MORPHEUS, RAMBLADE or RAMBLADE3)
LORES_TV
load a Low Resolution TV driver (not supported on
MORPHEUS, RAMBLADE or RAMBLADE3)
TV
(same as LORES_TV)
NTSC
use NTSC mode (TV drivers only)
Copyright 2013 Ross Higson
Page 80 of 158
Catalina C Compiler
Reference Manual
NO_INTERLACE
use non-interlace mode (TV drivers only)
PC
load a PC terminal emulator HMI plugin with screen and
keyboard support
PROPTERMINAL
load a PropTerminal HMI plugin with screen, keyboard and
mouse support.
TTY
load a simple serial HMI plugin with screen and keyboard
support (no proxy support).
CR_ON_LF
Translate CR to CR LF on output
NO_CR_TO_LF
Disable translation of CR to LF on input
NON_ANSI_HMI
Disable ANSI compliance in HMI (revert to prior behavior)
CLOCK
load a Real-Time Clock plugin (or enable the RTC
functionality in the SD plugin if it is loaded)
SD
load the SD plugin (this is not usually required, since it is
implied by the –lcx and –lcix options)
NO_FP
do not load any Floating Point plugins (even if implied by
other options)
NO_FLOAT
same as NO_FP
NO_HMI
do not load any HMI plugin (even if implied by other options)
NO_MOUSE
do not start a mouse driver (even if one is loaded)
NO_KEYBOARD
do not start a keyboard driver (even if one is loaded)
NO_SCREEN
do not start a screen driver (even if one is loaded)
PROXY_SD
See the Proxy Devices section later in this document
PROXY_SCREEN
See the Proxy Devices section later in this document
PROXY_MOUSE
See the Proxy Devices section later in this document
PROXY_KEYBOARD See the Proxy Devices section later in this document
CACHED_1K
Use a 1K cache for XMM access
CACHED_2K
Use a 2K cache for XMM access
CACHED_4K
Use a 4K cache for XMM access
CACHED_8K
Use a 8K cache for XMM access
CACHED
Same as CACHED_8K
GAMEPAD
Include the Gamepad driver
DISABLE_REBOOT Disable the automatic reboot if the program exits from the
main() function – useful if you are using the TV or VGA driver
Copyright 2013 Ross Higson
Page 81 of 158
Catalina C Compiler
Reference Manual
and want the screen output to remain when the program
exits.
Symbols are defined on the command line using the -C option. Multiple symbols can
be defined, but -C must be specified before each one. For example, to compile a
program for the Hybrid using a high-resolution TV driver in NTSC mode with clock
support you might use a command like:
catalina test_time.c –lc -C HYBRID -C HIRES_TV -C NTSC -C CLOCK
Because using multiple symbols to specify the configuration of the target is so
common, there is a better way to specify them if you intend using the same
configuration for many compilations – set the CATALINA_DEFINE environment variable,
as follows (under Windows):
set CATALINA_DEFINE=HYBRID HIRES_TV NTSC CLOCK
or as follows (under Linux if using the bash shell):
CATALINA_DEFINE=”HYBRID HIRES_TV NTSC CLOCK”; export CATALINA_DEFINE
Then a command such as:
catalina test_time.c –lc
has the same effect as specifying all the symbols using -C on the command line
(note that the -C option should not be specified for symbols defined using the
environment variable).
Note that you cannot specify the same symbol both in an environment variable and
on the command line – doing so will result in an error message to the effect that the
symbol is already defined.
Knowing what the current setting of the various Catalina environment variables is
can be very important. To display the current settings, use the command
catalina_env – in the above case you might see output like:
CATALINA_DEFINE
CATALINA_INCLUDE
CATALINA_LIBRARY
CATALINA_TARGET
CATALINA_LCCOPT
CATALINA_TEMPDIR
LCCDIR
=
=
=
=
=
=
=
HYBRID HIRES_TV NTSC CLOCK
[default]
[default]
[default]
[default]
[default]
[default]
To unset an environment variable, use a command such as:
unset CATALINA_TARGET
or (Windows only):
set CATALINA_TARGET=
Copyright 2013 Ross Higson
Page 82 of 158
Catalina C Compiler
Reference Manual
LMM Support
All Propeller platforms are capable of using the Propeller in LMM (Large Memory
Model) mode to support C programs of up to 32kb. Catalina provides an LMM Kernel
for executing such programs.
The memory model used for LMM support is fairly simple, with all program code and
data held in Hub RAM, and no real need to differentiate between code and data. To
support XMM programs is more complex. To do this, Catalina divides each program
into 4 program segments:
Code
Cnst
Init
Data
: a read-only segment containing program code
: a read-only segment containing constant data
: a read/write segment containing static data
: a read/write segment containing dynamic data
This type of segmentation is fairly standard to all compilers (although for historical
reasons some use different segment names, such as Text instead of Cnst, or BSS
instead of Data). The Catalina Binder separates out and groups together all the
different items of code and data according to the segments they belong to.
By default (i.e. if no specific command line options specify the contrary), Catalina
compiles programs as LMM program with the Catalina LMM Kernel and all segments
combined into 32k (this is the TINY memory model). These programs can run on any
Propeller.
Copyright 2013 Ross Higson
Page 83 of 158
Catalina C Compiler
Reference Manual
CMM Support
All Propeller platforms are capable of using the Propeller in CMM (Compact Memory
Model) mode to support C programs of up to 32kb. Catalina provides a CMM Kernel
for executing such programs.
The memory model used for CMM support is fairly simple, with all program code and
data held in Hub RAM, and no real need to differentiate between code and data. To
do this, Catalina divides each program into 4 program segments:
Code
Cnst
Init
Data
: a read-only segment containing program code
: a read-only segment containing constant data
: a read/write segment containing static data
: a read/write segment containing dynamic data
The Compact Memory Model is a hybrid kernel – it uses some LMM techniques, and
some techniques that make it more like the Parallax Spin kernel – this is what allows
it to generate code sizes that are often less than half the equivalent LMM code
sizes. The tradeoff is that CMM programs are slower than LMM programs (although
still faster than Spin).
XMM Support
Catalina also provides XMM (eXternal Memory Model) support for executing C
programs larger than 32kb – but this requires a Propeller equipped with additional
RAM hardware.
XMM programs use the same program segment definitions as LMM programs - i.e:
Code
Cnst
Init
Data
: a read-only segment containing program code
: a read-only segment containing constant data
: a read/write segment containing static data
: a read/write segment containing dynamic data
Catalina provides an XMM Kernel for executing such programs, which knows how to
make use of the external RAM. The Catalina XMM Kernel supports programs where
the Code segment is located in (and executed from) external RAM but the other
segments are located in Hub RAM (this is the SMALL memory model) as well
programs where the Code, Cnst, Init and Data segments are all located in external
RAM (this is the LARGE memory model). The Catalina XMM Loader arranges the
segments in Hub RAM and XMM RAM before the program execution commences.
To load a Catalina XMM program, the XMM loader has to know where to get to the
program segments from in the first place. One version of the XMM Loader supports
loading from EEPROM – i.e. it knows how to move segments from EEPROM to HUB
RAM, and from HUB RAM to XMM RAM. There is another version of the XMM
Loader that supports loading from XMM to Hub RAM (this is used when loading an
XMM program from SD Card, or via a serial connection to another Propeller).
Copyright 2013 Ross Higson
Page 84 of 158
Catalina C Compiler
Reference Manual
Specifying the Memory Model
There are several Catalina command-line options that affect the layout of memory
segments, the memory model, and the kernel to be used.
Early versions of Catalina used a single option (-x) to specify the memory layout, the
memory model and the loader to be used:
-x
XMM memory layout, kernel addressing mode, and loader. This option is
used to specify how the four program segments are arranged in memory,
which kernel to use, the addressing mode the kernel should use, and also
determine which loader must be used to load the program. While there are
many possible arrangements of the four program segments, only a few
currently have any use. These are:
-x0 segments are arranged as Code, Cnst, Init, Data and the LMM kernel
is used with the TINY addressing mode. This is the default mode.
-x1 segments are arranged as Code, Cnst, Init, Data and the LMM kernel
is used with the TINY addressing mode. This mode is used for EMM
programs (see the section on EMM Support below).
-x2 segments are arranged as Cnst, Init, Data, Code and the XMM Kernel
is used with the SMALL address mode.
-x3 segments are arranged as Init, Data, Code, Cnst and the XMM Kernel
is used with the LARGE address mode. This mode is intended to be
used when the Init and Data segments are to be placed in SPI RAM,
and the Code and Cnst segment are to be placed in SPI Flash.
-x4 segments are arranged as Cnst, Init, Data, Code and the XMM Kernel
is used with the SMALL address mode. This mode is intended to be
used when the Code segment is to be placed in SPI Flash.
-x5 segments are arranged as Code, Cnst, Init, Data and the XMM Kernel
is used with the LARGE address mode.
-x6 segments are arranged as Code, Cnst, Init, Data and the LMM kernel
is used with the TINY addressing mode. This mode is used for SMM
programs (see the section on SMM Support below).
-x8 segments are arranged as Code, Cnst, Init, Data and the CMM kernel
is used with the COMPACT addressing mode. This mode is used for
CMM programs (see the section on CMM Support above).
The Catalina Binder chooses a target (including the memory model and loader to
use, and also the kernel to use) based on the selected layout.
The -x option is still supported, but the kernel and addressing mode can now be
specified more easily by defining the symbols COMPACT, TINY, SMALL or LARGE,
and the memory layout and loader to use can be specified by defining the symbols
SDCARD, FLASH or EEPROM on the command line (using the -C command line
option).
Copyright 2013 Ross Higson
Page 85 of 158
Catalina C Compiler
Reference Manual
The meaning of each of these symbols is as follows:
TINY
The default for Catalina is to produce TINY LMM programs. These
programs can be up to 32kb in size. This model corresponds to the
normal Parallax mode used for SPIN or PASM programs.
TINY programs can be programmed into EEPROM, or loaded using
any program loader, including the Parallax Propeller Tool, the Parallax
Propellant loader, Catalina’s Catalyst SD card loader, or Catalina’s
Payload serial loader.
SMALL
On platforms that have external memory available, Catalina can produce
SMALL XMM programs. These programs can have code segments up to
16Mb in XMM RAM, but all data segments, the stack and the heap space
must fit into the normal Propeller 32kb of Hub RAM.
SMALL programs can be loaded into EEPROM, or they can be loaded
with Catalyst or Payload.
LARGE
On platforms that have external memory available, Catalina can produce
LARGE XMM programs. These programs can have code and data
segments and heap space up to a total of 16Mb in XMM RAM – the 32kb
Hub RAM is used only for stack space.
LARGE programs can be loaded into EEPROM, or they can be loaded
with Catalyst or Payload.
COMPACT Produce a CMM program. These programs can be up to 32kb in size.
Currently COMPACT programs can only be loaded serially.
See the section A Description of the Catalina Addressing Modes later in this
document for more details on the TINY, COMPACT. SMALL and LARGE
addressing modes.
EEPROM TINY programs do not need any special processing to be executed from
EEPROM, but there is a special Catalina target that allows them to be
loaded in two phases, allowing such program to make more effective use
of the Propeller Hub RAM. For SMALL or LARGE programs to be
executed from EEPROM, they must be compiled with a special Catalina
target that knows how to load the XMM portion of the program from
EEPROM to XMM RAM. The “special” Catalina targets are loaded into
the first 32K of the EEPROM. The program is then loaded into the
EEPROM starting at 32kb. The target loads all the plugins and drivers,
and then loads the Catalina C program for execution – the advantage of
using the special target (even for TINY programs) is that provided you
have an EEPROM of at least 64Kb connected to your propeller, the C
program code does not need to share the same 32kb space as the target
code – allowing for larger C programs to be loaded and executed (see
the section entitled EMM Support for more details).
SDCARD TINY, SMALL and LARGE programs do not need any special processing
to be able to be loaded by Catalyst – but for TINY programs there is a
Copyright 2013 Ross Higson
Page 86 of 158
Catalina C Compiler
Reference Manual
special target that that allows them to be loaded in two phases, allowing
such program to make more effective use of the Propeller Hub RAM.
Like the special EEPROM loader, the SDCARD loader divides programs
into several sections – the first 32kb contains the target, which sets up
the execution environment for the program (by loading all the plugins and
drivers etc). Then the second 32kb of the file contains the application
program. Finally, the actual kernel is loaded from the last 2kb of the file.
This means all program files compiled with the SDCARD loader option
are exactly 66kb in size (see the section entitled SMM Support for more
details).
FLASH
SMALL and LARGE programs that are to be executed out of SPI Flash
RAM require a special load process, and so they must also use a special
Catalina target. Both the Catalyst and the Payload loaders know how to
load and run FLASH programs. Note that using FLASH requires the use
of the caching SPI driver, so one of the cache options must also be
specified (see the section titled SPI Flash and Cache Support).
The following command-line options can also affect the memory layout, and can be
used with either method of specifying the memory layout (the -x method or the
symbol definition method):
-M
XMM image size. This option is used to specify the maximum size of the
resulting program image. If not specified, the default is 64Gb.
-P
Read/Write Segment Address. This option is used in conjunction with the –
x3 and –x4 options to specify the address to start the Read/Write segments
(e.g. the data segment). This option is useful on platforms (such as the
MORPHEUS CPU 1 or the C3) which support the use of a combination of
SPI RAM (read/write) and SPI Flash (read-only) as XMM RAM. Note that on
all currently supported platforms that use SPI Flash, this is set automatically
to the starting address of the SPI Flash, so there is usually no need to set
this.
-R
Read-Only Segment Address. This option is used in conjunction with the –
x3 and –x4 options to specify the address to start the Read-Only segments
(e.g. the code segments). This option is useful on platforms (such as the
MORPHEUS CPU 1 or the C3) which support the use of a combination of
SPI RAM (read/write) and SPI Flash (read-only) as XMM RAM. Note that on
all currently supported platforms that use SPI RAM, this is set automatically
to the starting address of the SPI RAM so there is usually no need to set
this.
The following examples show both the –x method and the symbol definition method
for specifying the memory mode/layout/kernel/loader. The following commands are
equivalent:
catalina test.c –x1
catalina test.c -C EEPROM
catalina test.c -C TINY -C EEPROM
Copyright 2013 Ross Higson
Page 87 of 158
Catalina C Compiler
Reference Manual
Note that in general you shouldn’t mix the two methods – i.e. specifying –x1 and -C
EEPROM in the same command will result in a compilation error, since the symbol
EEPROM will end up being defined twice.
Similarly, are following commands are equivalent:
catalina test.c –x6
catalina test.c -C SDCARD
catalina test.c -C TINY -C SDCARD
Again, note that you shouldn’t mix the two methods – i.e. specifying –x6 and -C
SDCARD in the same command will result in a compilation error, since the symbol
SDCARD will end up being defined twice.
Similarly, are following commands are equivalent:
catalina test.c –x4
catalina test.c -C SMALL -C FLASH
as are the following:
catalina test.c –x2
catalina test.c -C SMALL
and the following (note that EEPROM is supported by both methods when specifying
XMM programs – this is a special case):
catalina test.c –x5 -C EEPROM
catalina test.c -C LARGE -C EEPROM
The following is a summary of the relationship between the two methods of
specifying the memory modes, kernel and loader (you don't need to know this unless
you need to migrate from using one method to using the other):
The –x0, –x1 and –x6 layouts all use the TINY mode, and can be executed
by the Catalina LMM Kernel. –x0 and –x1 layouts are supported all on
platforms (with or without XMM hardware), and –x6 is supported on all
platforms with an SD card. -x1 means use the EEPROM loader, and -x6
means to use the SDCARD loader.
The –x2 layout uses the SMALL memory model, and the –x5 layout uses the
LARGE memory model. These layouts can only be executed by the Catalina
XMM Kernel, and require platforms with XMM hardware. These layouts
require Read/Write XMM RAM, and use the XMM LMM Loader unless
EEPROM is defined, in which case they use the XMM EEPROM Loader.
The–x3, layout uses the LARGE mode, and the –x4 layout uses the SMALL
mode. These layouts can only be executed by the Catalina XMM Kernel, and
require platforms with XMM hardware. These layouts are intended for
platforms with Read-Only XMM RAM, such as the SPI Flash on the C3,
SuperQuad, RamPage or RamPage 2. These layouts use the FLASH Loader,
and are equivalent to defining the symbol FLASH in conjunction with the
LARGE and SMALL symbol. The Flash XMM Loader is used in these cases.
Copyright 2013 Ross Higson
Page 88 of 158
Catalina C Compiler
Reference Manual
EMM Support
EMM programs are similar to TINY LMM programs, but use a special EMM Loader.
The EMM Loader is designed to load TINY LMM programs from above address
$8000 in an external EEPROM into Hub RAM. Other than this, EMM is very similar
to LMM, and uses the same Kernel. EMM programs use their own set of target files.
Note that there is also a special EEPROM loader option for SMALL and
LARGE XMM programs – this is not quite the same as an EMM program
even though both are enabled by defining the EEPROM symbol – if the
program is a TINY LMM program this means it will use the emm target and
the LMM EEPROM loader, whereas if the program is an XMM program it
uses the xmm target and the XMM EEPROM loader option.
To understand the advantage of compiling C programs as EMM programs, consider
the hello_world.c program. When compiled using the default LMM target (and using
the libci library), this simple program occupies around 15Kb of Hub RAM. Most of
this RAM space is occupied by the C library code required to support the program,
but a significant portion is also occupied by the LMM target and various plugins
required to run it. Even so, this would appear to make the Propeller almost unusable
for real C programs. However, when the same program is compiled as an EMM
program, the C program code occupies only 7Kb – this means that if we compile it as
an EMM program, then even after loading the stdio printf functions (which are quite
memory hungry) there is still another 25Kb available for C programs.
In summary, the advantage of EMM over the normal LMM mode is that larger C
programs can be constructed - even without requiring XMM RAM. While the program
can still only be 32k, it does not have to share that 32k space with the target and
plugin code. However, EMM programs require an external EEPROM of 64Kb (or
larger).
To request Catalina use the EMM loader for a TINY LMM program, specify the -x1
option to the Catalina Compiler or Binder, or define the symbol EEPROM on the
command line when compiling a normal TINY LMM program. When this option is
specified, the Catalina Binder uses a new set of targets, prefixed by emm_. Currently
one default EMM target (called emm_default) and one debug target, (called
emm_debug) are provided.
Note that XMM programs can also be compiled with the symbol EEPROM
defined . This uses the normal xmm targets (called xmm_default and
xmm_debug) but specifies the XMM EEPROM loader option be used.
Further advantages for EMM mode are expected to be achieved in subsequent
Catalina releases, due to the replacement of some of the basic C library functions
with ‘plugin’ based equivalents – now that the EMM loader is available, these
functions will no longer need to consume Hub RAM at run time.
Copyright 2013 Ross Higson
Page 89 of 158
Catalina C Compiler
Reference Manual
SMM Support
SMM programs are similar to TINY LMM programs, but use a special SMM Loader.
The SMM Loader is designed to load TINY LMM programs from an SD Card Hub
RAM. Other than this, SMM is very similar to LMM, and uses the same Kernel.
The advantage of compiling C programs as SMM programs is similar to the
advantage of compiling them as EMM programs – i.e. the SMM Loader is a twophase loader, which allows more of the Hub RAM (up to 31kb) to be used for C
program code.
SMM programs must be loaded from an SD Card, using the Catalyst program
loader.
To request Catalina use the SMM loader, specify the –x6 option to the Catalina
Compiler or Binder, or define the symbol SDCARD on the command line. When this
option is specified, the Catalina Binder uses a new set of targets, prefixed by smm_.
Currently one default SMM target (called smm_default) and one debug target, (called
smm_debug) are provided.
Catalina Cog Usage
The number of cogs used by a Catalina program depends on the target, and the
plugins and drivers loaded by that target.
To figure out how many cogs are required, the following table is provided:
Plugin/Driver Name
Any HMI plugin
LoRes TV driver
HiRes TV driver
LoRes VGA driver
HiRes VGA driver
Mouse driver
Keyboard driver
Float32_A
Float32_B (and Float32_A)
Real-Time Clock
SD Card
Caching SPI XMM driver
Gamepad plugin
Sound plugin
SPI plugin
CGI Graphics plugin
17
18
Cogs
+1
+1
+1
+1
+ 2 / + 3 17
+1
+1
+1
+2
+ 0 / + 1 18
+1
+1
+1
+1
+1
+2
Currently +3 on Morpheus, which requires a special version of the Hi-Resolution VGA driver
(provided)
The Real-Time Clock does only uses an extra cog if the SD Card plugin is not enabled – if both
the SD and CLOCK plugins are both loaded, then the SD plugin is used for both functions, so the
clock does not occupy an extra cog.
Copyright 2013 Ross Higson
Page 90 of 158
Catalina C Compiler
Reference Manual
VGI Graphics plugin
Kernel (CMM, LMM, or XMM)
+5
+1
Examination of the table above will show that it is relatively easy to specify options to
the standard targets that would exceed the 8 cog limit – doing so will cause one or
more plugins or drivers to fail to load - and most likely “hang” the C program when it
attempts to use the plugin that failed to load.
The Kernel cog is always used to execute Catalina C code, but Catalina can also run
C code on any cog not used for other purposes - for more details, see the Multi-Cog
Support section (below).
It is of course possible to create new dedicated targets that load different drivers,
such as a combined keyboard/mouse driver that takes only one cog. The standard
set of targets, drivers and plugins provided are intended to be functionally rich, but
they do not necessarily make the most efficient use of the available cogs.
Supporting multiple Propeller platforms
A single target package can provide support for multiple Catalina platforms. This is
done by using conditional compilation in the various target files.
To support a new platform there are two options:
Create a new target directory specifically for the new platform.
Add the new platform into the existing target directory by including appropriate
conditionally compiled sections to the existing target files.
In practice, it may be best to do both – i,e. to start out with a copy of the existing
target files in a new target directory, modifying them as required to get the new
platform working – and then integrate the results into the standard target directory
using appropriate conditional compilation flags.
The Catalina compiler expects the default target package to be called target, but a
target directory can be called anything, and referenced by using the -T option to
Catalina.
Compiling for a platform supported in the standard target directory uses commands
such as:
catalina hello_world.c –lc
When compiling for a platform supported in a different target directory, the equivalent
command would be something like:
catalina hello_world.c -lc –T”C:\Program Files\Catalina\My_Target”
Target Packages
The standard target package (target)
The default Target Package (in sub-directory target) can be used with any of the
supported Propeller base platforms (i.e. HYDRA, HYBRID, C3 etc). It also includes
Copyright 2013 Ross Higson
Page 91 of 158
Catalina C Compiler
Reference Manual
the default CUSTOM platform, which is suitable for nearly any Propeller equipped
with a 5Mhz crystal.
The default target platform also supports XMM add-on cards, such as the
RAMPAGE and RAMPAGE2, SUPERQUAD or PMC (Propeller Memory Card),
Note that the user configurable parts are separated out into “include” files, depending
on whether the files are for a base platform board, or an add-on board:
For a base platform (XXX) that has no XMM RAM, there are three files:
XXX_DEF.inc
general pin and clock definitions for the platform
XXX_CFG.inc
plugin configuration options for the platform
XXX_HMI.inc
HMI options supported by the platform
For an XMM RAM add-on board (YYY), there are three different files:
YYY_XMM.inc
XMM API functions for the add-on board
YYY_XMM_DEF.inc
XMM pin and memory definitions for the add-on board
YYY_XMM_CFG.inc
XMM plugin configuration options for the add-on board
For a base platform (ZZZ) that also has built-in XMM RAM, there will be six files:
ZZZ_DEF.inc
general pin and clock definitions for the platform
ZZZ_CFG.inc
plugin configuration options for the platform
ZZZ_HMI.inc
HMI options supported by the platform
ZZZ_XMM.inc
XMM API functions
ZZZ_XMM_DEF.inc
XMM pin and memory definitions
ZZZ_XMM_CFG.inc
XMM plugin configuration options
This package includes targets for LMM and XMM programs. It includes support for
the alternate, threaded and dynamically loadable LMM kernels.
This package supports the normal Parallax Serial loader, as well as the SDCARD,
EEPROM and FLASH program loaders.
This package supports the BlackCat/BlackBox debuggers, plus the POD debugger.
This package supports all Catalina plugins. For each target, it automatically includes
the SD card and floating point plugins as required to support the library options
selected, as well as various other plugins that can be manually specified (such as
the Clock or various HMI plugins).
This target package is intended for general-purpose use.
The basic target package
The basic Catalina Target Package (in sub-directory basic) provides support for only
one single Propeller platform. However, the user configurable parts are separated
out into the following “include” files for convenience:
Copyright 2013 Ross Higson
Page 92 of 158
Catalina C Compiler
Reference Manual
Custom_DEF.inc
general pin and clock definitions for the platform
Custom_CFG.inc
plugin configuration options for the platform
Custom_XMM.inc
XMM support functions for the platform (if applicable)
This package includes targets for LMM and XMM programs. It includes support for
the alternate, threaded and dynamically loadable LMM kernels.
This package supports the normal Parallax Serial loader, as well as the SDCARD,
EEPROM and FLASH program loaders.
This package supports the BlackCat/BlackBox debuggers, but not the POD
debugger.
This package supports a subset of the Catalina plugins. For each target, it
automatically includes the SD card and floating point plugins as required to support
the library options selected, but no other plugins (specifically, it does not support any
HMI plugins for keyboard, screen or mouse support). If these or other plugins are
required, they can be added manually.
This target package is intended for users to create a dedicated target for a specific
application or platform.
The minimal target package
The minimal Catalina Target Package (in sub-directory minimal) is an intentionally
“minimalist” target package. It provides support for only one single Propeller
platform. However, the user configurable parts are separated out into the following
“include” file for convenience:
Custom_DEF.inc
general pin and clock definitions for the platform
Custom_CFG.inc
plugin configuration options for the platform
This package supports only LMM programs.
This package supports only the normal Parallax Serial loader.
This package does not support any debuggers.
This package supports only one custom plugin.
The purpose of this package is primarily educational. For more information on its
use, refer to the document Getting Started with Plugins.
Copyright 2013 Ross Higson
Page 93 of 158
Catalina C Compiler
Reference Manual
Using PASM with Catalina
The Catalina compiler conforms to the ANSI C standard. This standard does not
define a specific keyword (or function, or technique) for the inclusion of code written
in assembly language in a C program.
However, it is possible to incorporate PASM assembly language code into Catalina
C programs, using at least four different techniques:
1. Using the PASM function to include PASM instructions 'inline' with C code.
2. Write a target that loads the PASM program during initialization.
3. Convert the PASM program into a Catalina plugin and load it during
initialization (as is done for the various HMI drivers, the floating point libraries,
and the SD card and clock drivers).
4. Load the compiled binary version of a PASM program into a spare cog from
within the C program (using the _coginit function).
5. Write a subroutine in LMM PASM and call it from the C program in the same
way that any C function is called.
Each of these techniques is described in more detail below.
Using the PASM function
Catalina defines a PASM function that can be used for including PASM instructions
inline with C code. The prototype for this function (defined in propeller.h) is:
extern void PASM(const char *code);
However, there is no actual PASM function body. Instead, when it sees a call to this
function, the compiler inserts the string literal given as argument (it cannot be a
variable) into the assembly language output, to be compiled by the PASM compiler.
For example, the following program will toggle the Propeller's P0 output every 500
milliseconds:
#include <propeller.h>
void main() {
PASM("or dira, #1");
while(1) {
msleep(500);
PASM("xor outa, #1");
}
}
// set bit 0 as output
// toggle bit 0
For more details and examples, examine the file test_inline_pasm.c in the demos
folder. Note that there are constraints on the PASM that can be used in conjunction
with C via this technique, since both the C code and the 'inline' PASM is executed
within an LMM virtual machine. For details on these constraints, see the section later
in this document entitled A Description of the Catalina Virtual Machine.
Copyright 2013 Ross Higson
Page 94 of 158
Catalina C Compiler
Reference Manual
Load the PASM program at initialization time
Each Catalina target is a normal SPIN program whose job is to establish the
execution environment for the Catalina C program. However, this program can
execute any PASM or SPIN code, including loading PASM programs into cogs to be
run in parallel with the C program. Of course, the PASM program must not read or
write to Hub RAM except under well defined circumstances - e.g. by only writing to
an area of high RAM that Catalina reserves for this purpose.
For an example of this technique, see the Catalina_Cogstore.spin program.
This is a normal PASM program started by various Catalina targets to assist in
decoding command-line arguments passed to the program. In this particular case the
PASM program is stopped again once its work is completed - but it could be left
running if necessary. Examples of the latter include the various blackcat targets
(e.g. lmm_blackcat.spin).
This technique is not discussed any further in this document.
Convert the PASM program into a Catalina plugin
Plugins are a very versatile solution since they can interact with the Catalina C
program at run time - but they can be complex to develop and can also be expensive
in resources (since they cannot be loaded and unloaded on demand - they are
expected to be loaded once and then remain running for the duration of the C
program).
However, plugins are the best solution when the PASM program and the C program
are required to interact since there is a well-defined interface that supports
communication between a C program and any plugins that have been loaded to
support it.
There are many examples provided in the Catalina target directory. Most standard
Parallax drivers can be easily converted into plugins.
This technique is not discussed any further in this document.
Load a compiled PASM program into a cog
Catalina provides a _coginit function that works in a very similar manner to the
corresponding SPIN or PASM coginit operations - i.e. it is used to load a binary
PASM program into a cog for execution.
A tool to assist in converting a PASM binary into a form suitable for loading from C is
provided - this tool is called spinc. It is provided in both source and executable form.
Thanks go to Steve Densen for developing this useful tool!
A specific example of using spinc is provided, called test_spinc.c. To build it, use the
build_all batch file provided. E.g:
build_all HYDRA
This batch file does the following commands:
a) compiles the flash_led.spin PASM program (to produce flash_led.binary):
Copyright 2013 Ross Higson
Page 95 of 158
Catalina C Compiler
Reference Manual
spinakker -p -a flash_led.spin -b
b) converts the flash_led.binary to a C include file:
spinc flash_led.binary > flash_led_array.h
c) compiles a C program which loads the resulting binary using _coginit:
catalina -lc -I. test_spinc.c
Examine each of the files mentioned above for more detail.
NOTE: Even though you specify your platform when
building, you may still need to modify the clock speed
and pin numbers defined in the file flash_led.spin to
make it work correctly on your platform.
To load and execute the resulting program, simply type:
payload test_spinc
Writing an LMM PASM function that can be called directly from C
A Catalina C program can call a PASM function directly. However, the PASM must
be specially written to allow it to be executed by the LMM Kernel.
LMM PASM (i.e. PASM intended to be executed by the LMM Kernel) is slightly
different to pure PASM (i.e. PASM intended to be executed directly by a cog). While
many LMM PASM instructions are identical to pure PASM, some pure PASM
instructions cannot be executed within the kernel. Instead, they must be replaced by
LMM equivalents known as primitives.
A good example of this is the PASM jmp instruction. If this instruction were executed
within the LMM kernel, the program would jump to the corresponding location within
the kernel itself, not the desired location in the PASM program. So Instead of using
jmp, a new LMM PASM primitive (called JMPA) is provided.
In pure PASM, a jmp instruction might look as follows:
loop jmp #loop
' loop forever
In LMM PASM, this would have to be replaced by the following:
loop jmp #JMPA
long @loop
' loop ...
' ... forever
More information on the pure PASM instructions that need to be replaced by LMM
PASM primitives are given in A Description of the Catalina Virtual Machine (later
in this document).
A full working example of this technique is provided in the demos/spinc directory. It is
called test_pasm. To build it, use the build_all batch file provided - e.g:
build_all HYDRA
This batch file executes the following command:
catalina -lc test_pasm.c flash_led.obj
The file flash_led.obj is the LMM PASM program - giving it the .obj extension tells
Catalina that it is not a C file that needs to be compiled - it is a PASM file that is
ready to be bound. In fact, all Catalina obj files are LMM PASM programs and can
Copyright 2013 Ross Higson
Page 96 of 158
Catalina C Compiler
Reference Manual
be viewed with any text editor. Examine both flash_led.obj and test_pasm.c for more
details.
NOTE: Even though you specify your platform when
building, you may still need to modify the clock
speed and pin numbers defined in the file
flash_led.obj to make it work correctly on your
platform.
To load and execute the resulting program, simply type:
payload test_pasm
Precautions when using LMM PASM with the Catalina Optimizer
If you plan to write LMM PASM functions that are called from C, and also use the
Catalina Optimizer, be aware that there are some additional precautions that must
be taken in the hand-written LMM PASM. This is because of the inlining function of
the optimizer:
1. Every subroutine must contain exactly one, RETN or RETF instruction, and it
must be at the end of the function. If you need to exit earlier, instead use a
jump to the common exit point at the end of the function. This technique will
be familiar to most PASM programmers because of the way the PASM CALL
instruction works) For example:
my_pasm_routine
cmp r0, #0 wz
jmp #BR_Z
long @my_common_exit
sub r0, #1
my_common_exit
jmp #RETN
‘
‘
‘
‘
if r0 = 0
... then ...
... exit
otherwise decrement r0
2. Do not use “local” symbol names (i.e. symbols that start with ‘:’) within an
LMM PASM function unless you are sure that the resulting code will not end
up with two identical local symbol names within the same function if the
function is inlined. If in doubt, simply avoid local symbols altogether and use
global symbols instead.
Multi-Cog Support
Catalina supports running C code on all available cogs. When a C program is
started, it is being executed within the cog running the kernel. However, a new kernel
can be loaded and run on any available cog, executing a C function.
The C function to be executed should meet the following criteria:
It must be executed by the CMM or LMM kernel. Executing XMM code on
multiple cogs is not currently supported due to the limitations of XMM hardware
on most platforms. Also, combining the execution of XMM and LMM code in the
one Propeller is not currently supported, so executing C programs on multiple
cogs is only possible for CMM or LMM programs.
Copyright 2013 Ross Higson
Page 97 of 158
Catalina C Compiler
Reference Manual
It must be declared as a void function with no arguments. All communication
between C functions running on different cogs must be done via global variables.
It must be allocated a dedicated stack.
It should use locks (where necessary) to prevent contention when accessing
global variables, or library functions. The nature of the Propeller means that
accesses to basic data types (char, int, long, float, pointers, etc) are atomic and
do not require locks – but access to more complex data types (e.g. structures,
linked lists etc) may need to be protected. Also, calls to library functions which
access such complex data types (e.g. malloc) will also need to be protected.
It should never return. If the function needs to terminate it should use _cogstop
function. To determine its own cog id to stop, it can use the _cogid function.
For example:
void cog_function(void) {
int me = _cogid();
...
_cogstop(me);
}
Starting the program is done using the _coginit function to start a a special LMM
kernel, with initialization data that specifies the C function to be executed.
Since this process can be complex, the details are often wrapped up in a utility
function. An example of such a utility function is provided in the demos\multicog subdirectory. This directory contains complete working examples of various multi-cog
programs, but the most useful function it provided is defined in utilities.h:
int C_coginit(void func(), unsigned long *stack);
To use this function, define sufficient stack space, then pass the address of the
function to be started, and the address of the TOP of the stack space allocated for it.
The function returns the cog allocated to the function or -1 if there is any error
starting it. For example, to start the example cog_function defined above:
int cog
long cog_stack[100];
cog = C_coginit(&cog_function, &cog_stack[100]);
For more details on this process, see the implementation of C_coginit in utilities.c.
For more details on the spinc utility used by the examples, refer to the previous
section which described using PASM with Catalina.
Copyright 2013 Ross Higson
Page 98 of 158
Catalina C Compiler
Reference Manual
Multi-CPU Support
Catalina fully supports all CPUs in multi-CPU systems. Currently, there are two such
systems supported by Catalina:
TriBladeProp – this platform has 3 ‘blades’, each with one CPU:
CPU #1 can have XMM RAM and keyboard, mouse and screen (TV or VGA)
devices attached.
CPU #2 can have XMM RAM and an SD card attached.
CPU #3 has no specific devices attached, and is intended for adding other
I/O.
CPU #2 can communicate serially with (and load programs into, or reset) CPU #1
and CPU #3.
Note that CPU #1 and CPU #2 use slightly different
implementations for their XMM RAM.
Morpheus – this platform has 2 CPUs:
CPU #1 can have XMM RAM and a keyboard, mouse devices attached, as
well as an SD card.
CPU #2 can have XMM RAM and a VGA screen attached.
CPU #1 can communicate serially with (and load programs into, or reset) CPU
#2.
Note that CPU #1 and CPU #2 use slightly different
implementations for their XMM RAM.
These systems can be complex to configure – not least of which because the normal
set of devices is often distributed amongst the various CPUs. Another complicating
factor is that not all CPUs may have boot EEPROMs attached – they may be
expecting to be loaded from another CPU.
Catalina supports multi-CPU systems in two ways:
1. Providing a set of drivers for “proxy” devices. These drivers allow programs
running on one CPU to have access to a device (HMI or SD) physically
connected to another CPU. The client CPU runs the proxy drivers and the
server CPU (i.e. the one with the actual physical devices) runs a special proxy
server program which services device requests from the client. The
communication between the client and the server uses serial communications
between the Props. The proxy drivers are as close as possible in functionality
to the ordinary drivers, and can usually be used without any C code changes.
The main difference is that their performance will typically be slower because
the proxy driver has to communicate serially with the real driver running on
the other CPU to perform each driver function.
Copyright 2013 Ross Higson
Page 99 of 158
Catalina C Compiler
Reference Manual
2. Providing a set of utilities that allows one CPU to control another CPU – i.e. to
reset or load programs into that CPU. Programs can be loaded into RAM or
EEPROM (if the target CPU has a boot EEPROM attached).
Proxy Devices
Using proxy devices always requires the execution of a server program on the CPU
that is physically connected to the actual devices. The devices that can be “proxied”
are:
The SD Card
The Screen
The Keyboard
The Mouse
Generic_Proxy_Server
A Generic_Proxy_Server program is provided that can be reconfigured to suit any
combination of proxy devices. Only one instance of the program needs to be
executed on a CPU – it acts as proxy for all the devices for which it is configured.
To use the proxy devices from a client CPU, all the normal Catalina command line
options should be specified (i.e. as if all the devices were local) but there are
additional options that can be specified to indicate that some devices are not local,
but will be provided via a proxy server:
PROXY_SD
PROXY_SCREEN
PROXY_MOUSE
PROXY_KEYBOARD
Foe example, suppose we have a multi-prop system where CPU #1 has a keyboard
and mouse (but no screen or SD card), and CPU #2 has a TV output and an SD
Card (but no keyboard or mouse).
Then we might use commands similar to the following to compile a program intended
to run on CPU #1:
catalina prog_1.c –lcx -C CPU_1 -C TV -C PROXY_SD -C PROXY_SCREEN
This command tells Catalina to compile prog_1.c for execution on CPU #1 using real
drivers to access the local keyboard and mouse, but to use proxy drivers to access
the SD card and screen (since they are on another CPU).
On CPU #2 we then run an instance of the Generic_Proxy_Server program,
configured to act as proxy for the screen (using the TV output) and the SD card
devices.
However, the Generic_Proxy_Server program is not a Catalina program – it is a
SPIN/PASM program that is compiled using spinakker:
spinakker -p -a Generic_Proxy_Server –o my_proxy –I..\target –b -C
CPU_2 -C TV -C NO_KEYBOARD -C NO_MOUSE
Copyright 2013 Ross Higson
Page 100 of 158
Catalina C Compiler
Reference Manual
These commands tell spinakker to generate a proxy server binary (called
my_proxy.binary) suitable for use on CPU #2. It will include a TV screen driver and
an SD card driver, but no keyboard and no mouse driver (since those devices are
not present on this CPU).
The only ‘special’ option required when configuring the proxy server is a new NO_SD
option, which must be specified to exclude the SD card driver on CPUs that do not
have this device (there is no equivalent Catalina command line option – the SD
driver is always included if you link with the –lcx library versus the –lc library). Other
than this, the configuration options used to configure the proxy server are the same
as those used for Catalina program (e.g. in the above case we used the TV and
CPU_2 options).
There are normally only one or two different proxy server configurations required in a
multi-CPU system, so the proxy server does not usually need to be recompiled for
each client –the same proxy server binary may be used for many clients. In some
cases, it is worthwhile including actual drivers in the proxy server even though they
are not often used. For example, if one CPU in a multi-CPU system only has an SD
card, we may choose to configure a proxy server for that CPU that also includes PC
drivers – that way, the same proxy could be used by any program requiring either a
PC connection, or just the SD Card.
Proxying PC and PROPTERMINAL devices is also supported – but this at first may
appear a little confusing, since these devices are already a type of proxy device (i.e.
the actual devices are not directly connected to the CPU that uses them). When you
proxy a PC or PROPTERMINAL device from one CPU to another, what actually
happens is that serial request from the client to the PC (e.g. to output a character) is
proxied from the client CPU to the server CPU, and the server CPU then forwards
the request to the PC (and vice versa for the response). The most common reason
for re-proxying these devices is that by doing so you only need to have one serial
connection from the PC to the multi-CPU system – i.e. a proxy running on the CPU
with the serial connection to the PC can be used to allow another CPU in the multiCPU system to communicate with the PC as if it had its own serial connection. This
is particularly useful in systems where the CPUs use serial pins other than the
normal Propeller SI and SO pins (which would otherwise necessitate special
hardware to communicate with the PC).
There are so many possible ways to proxy devices even in a simple 2-CPU system
that the best way to understand proxy devices is to try out a few cases – see the
document Getting Started with Catalina for a tutorial containing some examples.
Note that the behavior of programs that use proxy devices is undefined if the
configuration specified for the proxy server does not match the configuration
specified for the client programs – e.g. in the example given above, if the
Generic_Proxy_Server program was actually connected to a local VGA display, but
the client was compiled expecting to use a TV display, then some of the screen
features may work while others may not – the results are unpredictable as they
depends on the capabilities of each of the drivers involved.
Copyright 2013 Ross Higson
Page 101 of 158
Catalina C Compiler
Reference Manual
Resetting and/or Loading another Prop
Since some CPUs in a multi-CPU system may not even have EEPROMs installed,
utility programs are provided that can be used to load a program into either the RAM
or EEPROM of another CPU, or to remotely reset another CPU. These programs
takes advantage of the built-in boot load capabilities of the Propeller CPU, which are
sufficient to allow one blade to load a small SPIN (or LMM program) into another
CPU. However such utilities can only load programs that have been previously
embedded into the loader program itself, and can only load programs into Hub RAM
- to load programs from the SD card, or to load programs into XMM RAM requires a
more sophisticated loader to be running on the 'master' CPU, and also requires a
companion loader program to be running on the 'slave' (destination) CPU.
Catalina therefore provides the Catalyst SD Loader program. Catalyst can be used in
conjunction with an SD Card adaptor to load either SPIN programs, or Catalina LMM
or XMM programs from the SD Card to the local CPU. It can also load programs via
serial I/O to other CPUs. Programs that fit into 31k (such as SPIN programs or
Catalina LMM programs) require no special handling to be loaded using this Loader,
but Catalina XMM programs have to be compiled differently depending on whether
they are intended to be loaded from the SD card - either directly or via Serial I/O to
another CPU - or from an EEPROM. The default is to compile programs ready to be
loaded from the SD Card or serial I/O. Loading from EEPROM requires the -C
EEPROM command line option to be specified.
To support the serial capabilities of the Catalyst Loader, a Generic SIO Loader
program is also provided - this is a 'companion' loader that must be run on the
destination CPU to support the serial load process. There are several ways to
accomplish this - if the destination CPU has an EEPROM installed, the Generic SIO
Loader can be programmed into the EEPROM to always start on boot. If not, the
Generic SIO Loader can be downloaded from the PC. But the usual method if the
destination CPU has no EEPROM is to first use Catalyst Loader program to load a
special program that has the Generic SIO Loader embedded within it using the
Propeller's built in boot capabilities. Once the companion loader is running, any other
program can be downloaded to the CPU.
Catalina provides the following utility programs to support loading programs into
various CPUs (in the Catalina\utilities sub-directory):
Catalina_XMM_SD_Loader
This program is used by the Catalyst SD Program Loader. Catalyst is designed to
run on a CPU with direct access to an SD card, and allows SPIN, LMM or XMM
programs to be loaded from the SD Card into either the local CPU, or into another
CPU. This program is a normal SPIN/PASM program, but it can use any of the
Catalina HMI plugins for the user interface – including being used remotely using a
PC terminal emulator such as the Parallax Serial Terminal.
Catalyst knows how to load SPIN, LMM or XMM programs. SPIN and LMM
programs require no special treatment to be loaded this way but XMM programs
have to be compiled using special command line options. Also, the companion load
Copyright 2013 Ross Higson
Page 102 of 158
Catalina C Compiler
Reference Manual
program Generic_SIO_Loader must be running on the target CPU - see below for
more details on this.
Refer to the Catalyst Reference Manual for more details on compiling, installing
and using Catalyst.
Generic_SIO_Loader
This is the companion loader program that must be running on a CPU for the
Generic SD Loader program to be able to load programs to that CPU. The easiest
way to make sure this program is running on the target CPU is to program it into the
EEPROM of the CPU - but if the CPU has no EEPROM, this program can also be
downloaded from a PC. Or it can be downloaded from another CPU using the
Generic SD Load program, by using the CPU_Boot programs (described below).
There will usually be a separate Generic_SIO_Loader_n.spin program (where n = 1,
2 or 3) for each CPU in a multi-CPU system that might need to be loaded from the
Prop with the SD card
CPU_n_Boot
This is a self contained boot load program that can be used to load the companion
loader onto the CPU. This program does not itself need to beloaded into the other
CPU (that would be a chicken and egg problem!) instead, it is loaded and executed
on the local CPU using the Catalyst SD Loader - when executed, this program
reboots the other CPU and then uses the Propeller's built-in boot loading process to
load the Generic_SIO_Loader program into that CPU - after that, the Catalyst
program can be used again to load any arbitrary program into the remote CPU.
There will usually be a separate CPU_n_Boot_m.spin program (where n, m = 1, 2 or
3) for each CPU in a multi-CPU system that might need to be loaded from the Prop
with the SD card (which would normally run Catalyst).
CPU_n_Reset
This is a utility program that can be loaded into local CPU. When executed it simply
resets the remote CPU - this is a useful alternative to power-cycling the whole multiCPU system just because one CPU is not responding.
There will usually be a separate CPU_n_Reset_m.spin program (where n, m = 1, 2
or 3) for each CPU in a multi-CPU system that might need to be reset from the Prop
with the SD card (which would normally run Catalyst).
Multi-CPU Examples
The best way to understand loading CPUs in a multi-Prop system is to try out a few
cases – see the document Getting Started with Catalina for a tutorial containing
some examples.
Copyright 2013 Ross Higson
Page 103 of 158
Catalina C Compiler
Reference Manual
Customizing Catalina
Customized Platforms
Catalina allows new platforms to be supported very easily. Creating a new platform
gives you the opportunity to specify the pin and clock configurations, and also the
HMI options that the platform supports (e.g. whether it supports both TV and VGA
output, or only one of these, or neither).
Each platform has a symbol reserved for it (e.g. HYDRA). One symbol (CUSTOM) is
the default, and is intended to be suitable for nearly any Propeller with a 5Mhz clock.
To modify the details of a CUSTOM platform, the following files in the Catalina
standard target package (in the target sub-directory) need to be modified:
Custom_DEF.inc
- specifies pin and clock configuration
Custom_CFG.inc
- specifies plugin configuration options
Custom_HMI.inc
- specifies the HMI supported option
Custom_XMM.inc
- specifies the XMM API
To use any platform except he CUSTOM platform, you define the symbol on the
command line. While not necessary, it does no harm to define the symbol CUSTOM.
For example, the following two commands are equivalent:
catalina hello_world.c -lc
catalina hello_world.c -lc -C CUSTOM
If you want to add your own symbol (i.e. instead of CUSTOM) to support a new
platforms (or a variations of a platform – e.g. to support a different clock speed, I/O
configuration or XMM API) then the files DEF.inc, CFG.inc, HMI.inc and XMM.inc
can be modified to include the new platform name.
For example, here is the relevant code from HMI.inc:
#ifdef HYDRA
#include "Hydra_HMI.inc"
#elseifdef HYBRID
#include "Hybrid_HMI.inc"
#elseifdef C3
#include "C3_HMI.inc"
#elseifdef TRIBLADEPROP
#include "TriBladeProp_HMI.inc"
#elseifdef RAMBLADE
#include "RamBlade_HMI.inc"
#elseifdef RAMBLADE3
#include "RamBlade3_HMI.inc"
#elseifdef MORPHEUS
#include "Morpheus_HMI.inc"
#elseifdef DEMO
#include "Demo_HMI.inc"
#elseifdef DRACBLADE
#include "DracBlade_HMI.inc"
Copyright 2013 Ross Higson
Page 104 of 158
Catalina C Compiler
Reference Manual
#elseifdef ASC
#include "ASC_HMI.inc"
#elseifdef PP
#include "PP_HMI.inc"
#elseifdef QUICSTART
#include "QuickStart_HMI.inc"
#elseifdef CUSTOM
#include "Custom_HMI.inc"
#else
' default is CUSTOM
#include "Custom_HMI.inc"
#endif
Simply add a new clause to the if statement in each of the four files. Your new
platform will automatically be supported by all the targets in the target package.
The document Getting Started with Catalina has more details.
Customized Targets and Target Packages
Catalina also allows the creation of customized targets, and also entire target
packages. Creating a customized target package for Catalina is fairly easy. To
create a new target package, simply copy and rename a whole existing target
directory, then make any changes you want.
New targets within a target package can be created by copying and modifying the
files of an existing target. Note that new targets are normally required only if you
need to define a new memory model, or perhaps need to support a very unusual
plugin, driver or initialization code (for instance, the POD debugger is supported by
defining a new target called pod). Normally, a new target is not required just to
support a new propeller platform (as described in the previous section).
Each targets is normally part of a target package, located in a specific directory
under the Catalina base directory. The target is specified when binding or compiling
by using the –t option to the Catalina Binder, or the Catalina Compiler. For example,
to use a target called my_target the commands might be:
catbind my_file.s –t my_target [other_options]
or
catalina my_file.c –t mytarget [other_options]
To use targets in a different package, also use the –Tpath option to specify the path
to the target package. For example:
catalina my_file.c -T mypackage –t mytarget [other_options]
Each Catalina target consists of several files:
lmm_<name>.spin
- and -
emm_<name>.spin
- and -
smm_<name>.spin
- and -
xmm_<name>.spin
These Spin files are the first file executed when the
Catalina program is run. There is one for each of the
Copyright 2013 Ross Higson
Page 105 of 158
Catalina C Compiler
Reference Manual
memory models/load options currently supported by
Catalina. These files load the program and any plugins
required, and can be customized to load other cog
programs if required. Then they invoke the required
loader and/or kernel.
catalina_<name>.s
This LMM PASM file can be used to include targetspecific PASM functions that need to be made available
to the Catalina program. Note that any such functions
must adopt the Catalina calling conventions.
Note that the default target and standard target package do not need to be specified
when compiling or binding – they are used if no other target or package is specified.
Note that all targets get their hardware specific configuration data (such as the clock
frequency and I/O pin definitions) from the file called Catalina_Common.spin in the
appropriate target sub-directory. This file in turn includes various platform specific
files. This means that there is often only one file that needs to be modified to add
support for a new Propeller platform to all targets.
Catalina now comes with three target packages. These are described in the section
called Catalina Targets. If you need to create a new customized target package for
a specific application or a specific Propeller platform, the basic target package would
usually be the best choice to start from. It omits much of the complex and esoteric
functionality, such as the many different types of HMI drivers, and the proxy drivers.
It would generally be easier to take the basic package and add a specific HMI driver,
than take the standard target package (i.e. target) and remove all the unnecessary
ones.
Using existing Parallax Drivers
If there is an existing Parallax driver for a particular device or platform, chances are
that it can be used with Catalina without much trouble.
There are now two different ways of doing this, described in the sections below.
Use a Spin object unmodified
You can use a Spin object (such as one from the Parallax Object Exchange, or
OBEX) as a Catalina plugin completely unmodified in many cases. If the driver does
not require any interaction with C, then it is simply a matter of loading and starting it.
If it requires interaction, it is normally quite simple to write a “wrapper” object (also in
Spin) that is responsible for the interaction – e.g. communicating via the registry.
To use such objects, you compile them to an object format using any normal Spin
compiler, then use the Catalina spinc utility to turn the objects into a form that can
be loaded by Catalina at run-time. For examples of using the spinc utility, see the
programs in the demos\spinc directory. That directory also contains a complete
example of replacing the normal Catalina HMI plugin with two Spin objects taken
direct from the OBEX (a TV driver and a keyboard driver).
Copyright 2013 Ross Higson
Page 106 of 158
Catalina C Compiler
Reference Manual
The main restriction on the Spin objects that can be used is that it should not
overwrite any fixed areas of memory outside the areas defined by its VAR blocks.
Some objects also write to their DAT blocks – this is fine provided it is only done
during initialization.
The cost of using a Spin object as a plugin (rather than a PASM object, as described
in the next section) is that Spin objects will generally exhibit slower performance and
consume more hub RAM. However, if the driver is implemented largely, or entirely in
Spin then this is the only available option.
Use only the PASM portion of the driver
Existing Spin drivers that are implemented mostly in PASM (usually with just a few
Spin interface routines) can be turned into a Catalina PASM plugin with fairly minor
code changes.
PASM plugins generally consume less resources, are faster, and are also easier to
interact with from C than the original Spin/PASM objects.
Catalina itself uses PASM only versions of the standard Parallax drivers for many of
its own plugins (e.g. the HMI plugins).
Normally, the PASM code does not need to be modified very much - the
modifications required are mostly to the Spin code, and consists of:
Removing the unused Spin methods (usually everything except the Start
method) – these are then generally replaced with C equivalents;
Replacing any use of VAR blocks with a configurable data block (allocated by
Catalina) which is passed to the PASM code on initialization;
Using the registry for any necessary interaction with Catalina.
The Catalina HMI, Floating point, and SD card plugins give examples of the types of
modifications required.
A fully-worked example is the game pad driver (new with release 3.0). This driver
was derived from Spin/PASM driver provided for the Hydra. The code modifications
required to convert the original Hydra driver (i.e. gamepad_drv_001.spin) to a
Catalina Plugin (i.e. Catalina_Gamepad.spin) have been highlighted in the modified
version to make it easy to understand.
In this case, the standard C library also contains a couple of functions to simplify the
use of the driver (these are defined in catalina_gamepad.h) but these are completely
trivial functions that just “wrap” the standard C function used to access the registry
(e.g. _short_plugin_request).
Copyright 2013 Ross Higson
Page 107 of 158
Catalina C Compiler
Reference Manual
Loading and starting such additional plugins has been made much simpler since all
target files in the Catalina standard target package now include a Spin file called
Extras.spin – this means that you only need to modify a single file to add a new
plugin to all targets in the package. Examine Extras.spin to see how the game pad
plugin was added, and also how it has been associated with the GAMEPAD
command line symbol.
The game pad plugin can be demonstrated by the program test_gamepad.c (note –
this program has only been tested on the Hydra!):
catalina -lci test_gamepad.c -C GAMEPAD
Copyright 2013 Ross Higson
Page 108 of 158
Catalina C Compiler
Reference Manual
Building Catalina
There are currently no detailed instructions on how to do this, but there are various
README and NOTES files in the source sub-directories.
To build Catalina you will require (at least) a working ANSI compliant C compiler –
gcc is the recommended compiler on all platforms because it is the one used to build
the binary releases (although theoretically other compilers, such as lcc itself, can be
used).
The binary distributions of Catalina are built using gcc 3.4.5 under Win32 (Windows
XP), and gcc 4.1.2 under Linux (Debian 4.2.1 or Fedora 12). Most other versions of
gcc should also work.
Under Linux, you will also need the bison and flex utilities.
Under Windows, the MinGW installation of gcc is recommended (see
http://www.mingw.org/). You will also need to install the bison and flex utilities (also
available in the MingW site) as well as the MSYS package (to get various command
line tools such as cp and rm). If you use the automated installer for MinGW, please
be sure to install make - this is an optional component you can select during the
installation process.
Building Catalina under Windows
Here is a brief summary of the steps that are needed to build Catalina from the
Windows source distribution (note that the order of the steps is important). These
instructions assume Catalina is installed in the default location for Windows systems
(i.e. C:\Program Files\Catalina\source\catalina):
1. Log in as a user with Adminstrator privilege, and open a command-line
window.
2. Install MinGW, MSYS, bison and flex. This will install gcc – make sure it is
version 4.4 or later – to check, open a command window and type:
gcc --version
This should show gcc (GCC) 4.4.0 (or later).
3. Make sure MinGW is in your path (see MinGW documentation for details).
4. Go to the main directory of your Catalina installation, set the LCCDIR
environment variable (if not already set), execute use_catalina, then go to the
source subdirectory, and execute the build_all command:
cd C:\Program Files\Catalina
set LCCDIR=%CD%
use_catalina
cd source
build_all
Note that all the binaries end up in the bin sub-directory, and the libraries will be put
in lib, large_lib and compact_lib.
Copyright 2013 Ross Higson
Page 109 of 158
Catalina C Compiler
Reference Manual
Building Catalina under Linux
These instructions assume you have installed Catalina in the default location for
Linux systems (i.e. /usr/local/lib/catalina).
1. Become root. It is easiest to rebuild Catalina when logged in as root:
su root
2. Install the necessary utilities (note you may already have some of these
installed, and that gcc must be version 4.4 or later):
yum
yum
yum
yum
yum
install
install
install
install
install
gcc-c++
bison
flex
libtool
unzip
3. If you also plan to build the srecord utilities (optional), you also need the
BOOST libraries:
yum install boost-devel
4. Download and untar/unzip the Catalina distribution – e.g:
tar -xvf Catalina_3.13.2_Linux32.tgz
5. Go to the directory that was just created, set the LCCDIR environment
variable (and export it), execute source use_catalina, go to the source
subdirectory and execute the build_all command:
cd Catalina_3.13.2
LCCDIR=$PWD
export LCCDIR
source use_catalina
cd source
./build_all
Note that the above commands are for the bash shell – if you use another shell,
some of the commands (e.g. to set LCCDIR) may need to be modified.
Note that all the binaries end up in the bin sub-directory, and the libraries will be put
in lib, large_lib and compact_lib.
Building Catalina under OSX
Building Catalina under Macintosh OSX is similar to building under Linux (use pax
instead of tar). Note that you must have gcc installed, and it must be version 4.4 or
later. An easy way to install gcc under OSX is to use MacPorts (see
www.macports.org). You can also use MacPorts to install the other tools and
libraries required (i.e. instead of using yum).
Copyright 2013 Ross Higson
Page 110 of 158
Catalina C Compiler
Reference Manual
Catalina Technical Notes
This section contains technical notes about various aspects of Catalina.
A Note about Binding and Library Management
Catalina uses lcc as its C compiler, providing a custom code generator specific to
the Parallax Propeller. Catalina also replaces the normal linker that lcc expects with
a binder. A binder does a similar job to a linker, but works at the source code level
instead of at the object code level – i.e. instead of the usual compile-assemble-link
sequence, Catalina uses a compile-bind-assemble sequence.
The Catalina Binder is called catbind.
To understand the relationship between catalina, lcc and catbind, consider the
following steps involved in generating a binary file from a C source file using
Catalina:
The catalina program processes the command line and parses the command
line options and the environment variables to determine a set of options to be
passed to lcc. It then invokes lcc.
lcc preprocesses the C source file (which has a .c extension) to expand all
macros and include files, parses the resulting C source file for validity, and
produces a syntax tree of the C program.
lcc traverses the syntax tree, invoking the Catalina code generator on each
node as required to produce LMM PASM statements that are the logical
equivalent of the original C program – the result is written to an LMM PASM
source file (with a .s extension).
Because Catalina binds at the source level, but lcc expects to invoke a linker
that binds at an object level, the Catalina version of lcc simply renames the
LMM PASM file (.s extension) to appear to be an “object” file (.obj extension
under Windows).
lcc invokes catbind on the “object” file (actually an LMM PASM source file) to
combine this source file with other source files from various libraries – the
binder recursively resolves all the source symbols by including library files
until all symbols in all the included files have been resolved – the result is then
output as a single SPIN/PASM file (with a .spin extension).
For LMM programs, the catbind program in turn then invokes the spinakker
(or homespun) SPIN compiler on the nominated target SPIN file (not directly
on the binder output). LMM target SPIN files are normal Propeller SPIN
program that refers out to the following objects in other files 19:
o The SPIN file created by the binder (i.e. the user program);
19
EMM and XMM targets work slightly differently. Refer to the sections on EMM Support and
XMM Support.
Copyright 2013 Ross Higson
Page 111 of 158
Catalina C Compiler
Reference Manual
o The Catalina Kernel;
o Any plugins required by the target;
spinakker (or homespun) assembles the target SPIN/PASM file, and
typically produces either a binary file (with a .binary extension) or an eeprom
file (with a .eeprom extension). A listing file can also be produced (with a .lst
or .list extension).
Part of the job of catbind is to resolve any references in the original C program to
functions provided by external libraries. Catalina libraries are simply collections of
PASM source files produced by using lcc – but without binding or compiling the
resulting output (this is done by using the –S option to lcc). The standard C89
libraries provided (e.g. libc, libm) are generated using lcc in this way.
To enable libraries to be efficiently searched when the binder needs to resolve
symbols, each library must have an index. catbind is itself used to produce these
indexes. This means that user libraries must be created using catalina, and then
indexed using catbind.
The catbind program can also be used to provide diagnostic help for determining
how a symbol has been resolved, or in determining where an unresolved symbol is
referenced.
Copyright 2013 Ross Higson
Page 112 of 158
Catalina C Compiler
Reference Manual
A Note about the Catalina Libraries
Catalina provides a complete set of ANSI compliant C89 libraries, with some C99
additions. There are several different versions of each of the libraries provided:
libc
the standard C library. This version of the library supports only stdin,
stdout and stderr – it does not support full file system access, and is
appropriate for platforms with no SD Card file system (or for
programs that do not need to use the file system).
libci
the standard C library without floating point support in stdio (e.g. in
routines such as printf and scanf). Like libc, this version of the library
supports only stdin, stdout and stderr – it does not support full file
system access, and is appropriate for platforms with no SD Card file
system (or for programs that do not need to use the file system) and
which do not need to do input or output on floating point numbers.
This library is significantly smaller than libc.
libcx
the standard C library with extended file system support. This version
of the library is appropriate for programs which need to use an SD
Card file system. This library is significantly larger than libc, and
should only be used where SD card file system access is required.
libcix
the standard C library with extended file system support, but without
floating point support in stdio (e.g. in routines such as printf and
scanf). This version of the library is appropriate for programs which
need to use an SD Card file system, but which do not need to do
input or output on floating point numbers. This library is significantly
smaller than libcx.
libm
the standard maths library, emulated in software. This version of the
maths library does not require any extra cogs, but is larger and
slower than the other versions.
libma
the standard maths library, with some functions emulated on a
separate cog. This library is smaller and faster than libm, but requires
a free cog (this is transparent to the user of the library - the
management of the cog is handled automatically by Catalina).
libmb
the standard maths library, with more functions emulated on two
separate cogs. This library is smaller and faster than libma, but
requires two free cogs (this is transparent to the user of the library –
the management of the cogs is handled automatically by Catalina).
Note that as well as all the standard C functions, libc, libci, libcix and libcx also
provide the standard Catalina HMI functions described in the HMI Support section.
Note that there are two complete sets of the above libraries provided with Catalina –
one is contained within the lib sub-directory, and the other is contained in the
large_lib sub-directory. The reason for this is that programs built using the LARGE
addressing model (i.e. with the –x5 command line option) also require the library
Copyright 2013 Ross Higson
Page 113 of 158
Catalina C Compiler
Reference Manual
code to be generated with this option. The large address model actually uses a
completely different code generator to the tiny and small memory models. Catalina
automatically selects the correct set of libraries based on the command line options
(e.g. the –x5 option). Note that this means you cannot combine user-created
libraries and programs compiled using different addressing modes, except as
follows:
programs built with –x3 can use libraries built with –x5
programs built with –x4 can use libraries built with –x2 or –x0
Copyright 2013 Ross Higson
Page 114 of 158
Catalina C Compiler
Reference Manual
A Note about LMM Startup & Memory Management
For LMM programs Catalina memory management is reasonably simple. When a
Catalina program is loaded into Propeller RAM it consists of a collection of SPIN
objects, the same as any other Propeller program. The SPIN objects in the Catalina
program always end up being loaded in the following order:
The compiled Catalina C program (LMM PASM)
The Catalina Kernel (SPIN/PASM)
Any plugins specified by the Target program (SPIN/PASM)
The specified Target program (SPIN)
VAR space for all SPIN objects
After this comes unallocated space, up to the top of RAM (on the current Propeller
this is 32Kb or $8000).
On startup, it is the SPIN target program that executes first. This program is
responsible for loading the Catalina Kernel into cog RAM and starting it. It then loads
each of the required plugins into cog RAM and starts each one. Then it starts the
Kernel. Finally, it terminates its own cog, shutting down the SPIN interpreter. From
this point on only the Kernel and the plugins are executing. Theoretically, either the
Catalina program, or one of the plugins could then (but currently do not) re-use the
terminated cog for other purposes.
Catalina uses the upper end of RAM as data space for plugins. The SPIN objects
that represent plugins may use VAR space while they are being initialized by the
target program, but once the Kernel has been started a plugin must no longer use
any VAR space. To make this possible, the Target program allocates each plugin a
data block at the upper end of RAM, and passes the plugin its data block address as
part of the startup process. This is the main reasons that a standard Parallax driver
typically needs to be modified for use with Catalina.
The stack used by a Catalina LMM program starts just below the plugin data and
grows downwards in memory. The heap used by a Catalina LMM program starts just
above the Catalina program itself and grows upwards in memory. This means that
the heap and the stack may both include space that was originally occupied by the
Kernel, a plugin or a driver. This is fine because once they are loaded and executing,
each plugin only uses the data block assigned to it by Catalina – this means neither
the Kernel nor the plugins require this space any longer, and it can be reallocated for
use by the Catalina program.
This also explains why trying to save RAM space by eliminating unused drivers is
often not required – such space is reclaimed automatically to be used as Catalina
heap and stack space anyway. The only time it can be useful to eliminate unused
drivers is when leaving them in makes the final program too large to load in the first
place, or to large to use with the POD debugger.
Copyright 2013 Ross Higson
Page 115 of 158
Catalina C Compiler
Reference Manual
Note that the malloc “GRABSIZE” (the minimum size that malloc is configured to
grab whenever it needs more RAM space) has been set to 512 – but this is easy to
change in the malloc source in the supplied C89 library if required.
Copyright 2013 Ross Higson
Page 116 of 158
Catalina C Compiler
Reference Manual
A Note about POD and EMM/XMM
There are currently no EMM or XMM ‘debug’ targets. POD cannot be used to debug
EMM or XMM programs. POD is partially implemented in SPIN, and because the
EMM and XMM Loaders rearrange the Propeller memory in order to make the entire
32K of onboard RAM available to Catalina programs, SPIN programs can no longer
be executed in conjunction with Catalina EMM or XMM programs (although SPIN is
still used to load and initialize Catalina plugins before the EMM or XMM Loader takes
over).
POD targets for EMM and XMM may be included in a subsequent of Catalina – now
that the LARGE memory model allows C program data segments to be moved out of
HUB RAM, it may in future be possible to have some part of the HUB RAM reserved
exclusively for use by SPIN programs.
In the meantime, for source level debugging, BlackCat and BlackBox can both
debug LMM, EMM or XMM programs. Alternatively, programs can initially be
developed and debugged as LMM programs, with only the final version compiled as
an EMM or XMM program.
Copyright 2013 Ross Higson
Page 117 of 158
Catalina C Compiler
Reference Manual
A Note about Catalina Code Sizes
Given the limited amount of RAM on the Propeller (32kb) it is easy to generate
programs where the binary may initially seem to end up too large to be useful.
Having the ability to run Catalina programs from external memory (XMM) is one
option, but not all platforms support XMM RAM. On platforms with only the in-built
32kb of Hub RAM Catalina offers many alternatives to reduce the final program size.
First, consider the program below – it is the traditional C “Hello, world” program:
#include <stdio.h>
void main() {
printf("Hello, world (from Catalina!)\n");
}
To compile this program (a version of it is actually included in the Catalina\demos
folder), we might initially use a simple command such as:
catalina hello_world.c -lc
This compiles the program, links it with the libc version of C89 library and uses the
default target and drivers, and the LMM kernel. Here are the statistics actually
produced by the above command:
code
cnst
init
data
file
=
=
=
=
=
13308 bytes
144 bytes
208 bytes
940 bytes
19724 bytes
At first sight, it appears that this trivial program consumes nearly 20Kb of our
precious 32kb of inbuilt Hub RAM! DON’T PANIC! - this can be substantially
reduced in various simple ways.
For example, by using the libci library (in place of libc) for programs that do not
require support for i/o of floating point numbers (they can still use floating point
internally – they just can’t scan or print them) the program size immediately reduces
from 20Kb to around 12Kb. To see this, compile the same program using this
command instead:
catalina hello_world.c -lci
Here are the statistics:
code
cnst
init
data
file
=
=
=
=
=
6240 bytes
103 bytes
208 bytes
772 bytes
12448 bytes
The big difference in code size is due to how much code is required in the standard
C library to perform I/O of floating point numbers.
If you don't need the full capabilities of the Standard C I/O libraries, Catalina also
provides smaller alternatives. In this case, we can use the “tiny” library, which
provides smaller (but more limited) versions of the standard C I/O functions. We
specify those in addition to the standard library:
Copyright 2013 Ross Higson
Page 118 of 158
Catalina C Compiler
Reference Manual
catalina hello_world.c -lci -ltiny
Here are the statistics:
code
cnst
init
data
file
=
=
=
=
=
2964 bytes
15 bytes
224 bytes
772 bytes
9324 bytes
For this program, several other optimizations are also possible, and can be selected
on the command line. For example, try the following command:
catalina hello_world.c -lci -ltiny -C NO_FLOAT -C NO_ARGS -C NO_EXIT
Here are the statistics:
code
cnst
init
data
file
=
=
=
=
=
2912 bytes
15 bytes
220 bytes
772 bytes
8116 bytes
Our program size is now around 8kb. But that’s not the end of the story. Notice that
the sum of the segments (code, cnst, init & data) is actually only around 4kb?
The other 4kb of the final file size is taken up by plugins and the kernel itself. But we
don’t need to waste even this space - Catalina provides EMM (EEPROM) and SMM
(SDCARD) loaders which can make this space available as code space. So in
reality, the program requires only 4kb of Hub RAM even though it includes a
substantial portion of the stdio library (which of course only ever needs to be
included once). This leaves us around 28kb of Hub RAM for more C code (or for
other purposes). And that code does not need to include the stdio library code again!
To make the significance of this last point plainer, consider the following program,
very similar to the traditional C “hello, world” program:
#include <catalina_hmi.h>
void main () {
t_string(1, "Hello, world (from Catalina!)\n");
}
Let’s compile this program with our next command (this program is also in the
Catalina\demos folder, called hello_world_3.c):
catalina hello_world_3.c -lci -C NO_FLOAT -C NO_ARGS -C NO_EXIT
Here are the statistics:
code
cnst
init
data
file
=
=
=
=
=
208 bytes
31 bytes
4 bytes
4 bytes
4444 bytes
Excluding the “one off” Catalina runtime overheads (i.e. the Catalina kernel, the HMI
plugin and various support functions) this program actually compiles to only around
250 bytes, even though when compiled and bound with a suitable target, it occupies
about 4.5Kb of RAM - this is because (in this case) Catalina must also include at
least the following:
the Catalina Kernel (~2Kb);
Copyright 2013 Ross Higson
Page 119 of 158
Catalina C Compiler
Reference Manual
a Catalina HMI plugin and drivers (~2.5Kb);
But if we were to load this program using an SMM or EMM two-phase loader, it
requires only the 250 bytes of Hub RAM - leaving over 31Kb for more code!
The difference between the two “hello world” programs is that the first version uses
the printf function from the C89 library, whereas the second uses a t_string function
which is built into the Catalina HMI plugin. This small change means that Catalina
does not need to load a significant part of the C library (i.e. printf and its associated
support functions). In reality, this small difference between the two programs
amounts to over a thousand lines of library C code. But many programs do not
require the full functionality provided by libc, and some do not need to load it at all.
EMM targets can be used on any Propeller with a 64Kb EEPPROM attached, and
SMM targets can be used on any Propeller with an SD Card attached. While these
techniques do not reduce the program size, they do mean that more of the available
32Kb of RAM can actually be used by the C program.
As if this is not enough, there is also the Catalina Compact Memory Model (CMM).
This dramatically reduces the size of any Propeller programs – typically by over
50% - but at a cost in reduced speed. The resulting programs will still execute faster
than Spin, but slower than the equivalent LMM program.
Let’s compile the same program in COMPACT mode:
catalina hello_world_3.c -lci -C NO_FLOAT -C NO_ARGS -C NO_EXIT -C COMPACT
Here are the statistics:
code
cnst
init
data
file
=
=
=
=
=
104 bytes
31 bytes
4 bytes
4 bytes
4416 bytes
Finally, there is also the Catalina Code Optimizer that can reduce code sizes even
further – typically 15 – 20% for LMM programs (slightly less for CMM programs). The
Catalina Optimizer works on any size program. For example, here are the statistics
when both CMM and the Optimizer are used on the above program:
catalina hello_world_3.c -lci -C NO_FLOAT -C NO_ARGS C NO_EXIT -C COMPACT -O4
Here are the statistics:
code
cnst
init
data
file
=
=
=
=
=
92 bytes
31 bytes
0 bytes
4 bytes
4400 bytes
Our final Catalina C program now uses only 125 bytes of Hub
RAM at run time - less than the equivalent SPIN program!
Who says C can’t be an effective language for the Propeller?
Copyright 2013 Ross Higson
Page 120 of 158
Catalina C Compiler
Reference Manual
A Note about Catalina symbols vs C symbols
Both Catalina and lcc make use of symbols. Catalina uses symbols to pass
configuration options to the various targets compiled by the spinakker or homespun
Spin compilers (remember, Catalina targets are really just SPIN programs). lcc uses
symbols to pass configuration options to the C program it is compiling.
Is there a relationship between these symbols? Obviously you can access Catalina
symbols from within the targets (that’s what they’re intended for!) but can you also
access such symbols from within a C program? The answer is ‘yes’ – but with a few
minor complications.
The Catalina front-end accepts symbols defined on the command line using the -C
command line option, or specified in the CATALINA_DEFINE environment variable.
When a symbol is defined two things happen:
1. The symbol is passed to the Catalina Binder, and is then passed on to
Homespun to conditionally compile based on the symbol defined on the
Catalina command line.
2. The symbol is passed to lcc, but with the prefix __CATALINA_ added. This is
done to avoid name collision with names commonly used in C programs. This
symbol will be available to C programs like any other.
So when compiling a program using a command like this:
catalina hello_world.c –lc -C HYDRA -C VGA
Then the following happens:
1. The following symbols will be passed through lcc to the Catalina Binder, and
can be used in targets to conditionally include or exclude sections of Spin or
PASM code:
HYDRA
VGA
2. The following symbols will be passed to lcc, and can be used in C programs
like any other C symbol:
__CATALINA_HYDRA
__CATALINA_VGA
Note that to define symbols from within either Homespun or C and then have them
available to programs written in the other language is not currently supported.
It is possible to pass symbols directly to C programs (i.e. without Catalina adding in
the __CATALINA_ prefix) by using the appropriate Catalina command line option
(e.g. -DXXXX), or using the CATALINA_LCCOPT environment variable (e.g. set
CATALINA_LCCOPT= -DXXXX). This environment variable is used to pass options
directly to lcc. However, it is important to note the difference between this
environment variable and the CATALINA_DEFINE environment variable – i.e.:
Symbols defined using the CATALINA_LCCOPT environment variable must
be preceded by -C – this is because this environment variable can contain
Copyright 2013 Ross Higson
Page 121 of 158
Catalina C Compiler
Reference Manual
any lcc option, not just symbol definitions. Within C program, these symbols
will appear “as is” (i.e. without any Catalina prefix added).
Symbols defined in the CATALINA_DEFINE environment variable must not
be preceded by -C because this environment variable is processed by
Catalina and can contain only symbol definitions. Within Homespun programs
these symbols will appear “as is” but within C programs these symbols will
appear with the standard Catalina prefix added.
Finally, note that Catalina always defines the symbol __CATALINA__ - this symbol
can therefore always be used within C programs to determine if they are being
compiled with Catalina.
Copyright 2013 Ross Higson
Page 122 of 158
Catalina C Compiler
Reference Manual
A Note about the Catalina Loader Protocol
Catalina uses both the normal Parallax load protocol (e.g. to load an LMM program
from a PC) as well as its own internal protocol (e.g. to load an XMM program from a
PC, or to load programs between CPUs).
The loader protocol is a single-master, multi-slave protocol, where the master
can be either a PC, or one of the on-board CPUs (usually the one with direct
access to the SD card). All the slave CPUs in the system are expected to
monitor the serial line and read all packets - but ignore them until they
see their specific sync signal. They respond to the master using the same
sync signal.
Note that CPU numbers always start from 1 (e.g. 1, 2 & 3 on a TriBladeProp, or
1 & 2 on Morpheus) – there is no CPU 0.
All file loads starts with the “sync” signal. The sync signal is always two
bytes - $FF $nn, where $nn is the number of the CPU for which the data
is intended (if requesting) or the CPU from which it is sent (if responding).
For example, to alert CPU #2 to receive a file, the sync signal $FF $02 is
sent. During the transfer, whenever CPU #2 needs to respond, it sends $FF $02
back again (before each response).
Byte stuffing is used to prevent sync signals being interpreted accidentally
(e.g. within a stream of binary data). This means that other than within the
sync signal itself, any transmission of a single byte $FF is "stuffed" to send
two bytes - $FF $00. Any such sequence seen by the receiver must be "unstuffed"
back to a single $FF (note that $FF $00 can never represent a sync signal, as
there is no CPU 0).
To send a file, a “sync” is first sent to the destination CPU. Then the file is
sent in packets. Each packet has the following format:
<address> 4 bytes, with address $00FFFFFE reserved as an EOT marker
<size>
4 bytes specifying the size of the following binary data
<data>
up to <size> bytes of data (usually one sector)
Note that each packet should NOT begin with another sync signal - this would
initiate a new transfer.
The CPU receiving the packets responds to each packet with:
<sync>
a sync signal containing its own CPU #
<LRC>
single byte LRC of the <size> data bytes it just received.
If the sender fails to receive this response to each packet, or the LRC does
not match, or a timeout expires, then the packet is retransmitted. Otherwise
the next packet is transmitted. To complete the transmission, a special
"empty" data packet is sent - i.e.:
Copyright 2013 Ross Higson
Page 123 of 158
Catalina C Compiler
Reference Manual
$00FFFFFE the special address marker that means EOT
$00000000
zero bytes follow
At any time, a transmission can be aborted simply by not sending any more
packets. All receivers start the process all over again whenever they see
another sync signal - even if it is in the middle of a packet transmission.
Copyright 2013 Ross Higson
Page 124 of 158
Catalina C Compiler
Reference Manual
Catalina Development
Reporting Bugs
Please report all Catalina bugs to [email protected].
Where possible, please include a brief source code example that demonstrates the
problem.
If you want to help develop Catalina
Anyone who has ideas or wants to assist in the development of Catalina should
contact Ross Higson at [email protected]
Okay, but why is it called “Catalina”?
Why? Because it’s a big, slow, “C”-going contraption … powered by Propellers!
See http://en.wikipedia.org/wiki/PBY_Catalina
Copyright 2013 Ross Higson
Page 125 of 158
Catalina C Compiler
Reference Manual
Acknowledgments
Parallax – for creating the Propeller chip in the first place
Chris Fraser and David Hanson – for lcc
André LaMothe – for the Hydra platform, and also the C3 platform
Cluso99 – for the TriBladeProp and RamBlade platforms
Coley – for the Hybrid Propeller board
Dr_Acula – for the DracBlade platform
Bill Henning – for his original work on the Large Memory Model for the
Propeller, and also for the Morpheus platform.
Mike Green – for the keyboard driver that supports both Hydra and Demo
boards, and also for his basic I2C driver
Cam Thompson – for the Float32 libraries for the Propeller
Kaio – for the POD debugger
Insonix – for Prop Terminal
Brad Campbell – for bstc
Baggers – for the high resolution TV text driver
Michael Park – for Homespun
Lewin Edwards – for the DOSFS SD Card file system
Radical Eye Software – for the fsrw SD Card file system
Eric Moyer – for the modified firmware for the Hydra Xtreme HX512 SRAM
card
Bob Anderson – for his work on the BlackCat debugger
Kye – for the FATEngine file system
Various contributors – for the C89 C library (see the source files)
Pullmoll – for the improved signed integer division routine
Hanno Sander – for his work on Catalina support in ViewPort
Steve Densen – for the spinc utility, and his work on the caching SPI driver
David Betz – for his work on the caching SPI driver
Microcontrolled – for the Catalina logo
Rayman – for the FlashPoint
RamPage 2)
XMM boards (SuperQuad, RamPage and
Ted Stefanik – for procedures to manipulating the Propeller special registers,
and for the libtiny library.
Nick Sabalausky - for the 22KHz, 16-bit, 6 Channels Sound Driver
Copyright 2013 Ross Higson
Page 126 of 158
Catalina C Compiler
Reference Manual
Roy Eltham – for openspin, the open source version of the Parallax Spin
compiler, from which spinnaker is derived.
Copyright 2013 Ross Higson
Page 127 of 158
Catalina C Compiler
Reference Manual
The Current Catalina Release
What’s new in this release?
If you have been using a previous Catalina releases, the following list summarizes
the changes have been made since the previous release:
Release 3.13.2:
1. Updated Code::Blocks to release 13.12. Updated the Catalina Code::Blocks
documentation and quick start guide to match.
2. Improved Code::Blocks compiler support for Catalina - now more compiler
options are automatically checked for consistency (e.g. you can only select
one HMI option, or only select a caching option for a SMALL or LARGE
program).
3. Improved Catalina Project Wizard. Now more options can be selected using
the wizard. Also, fixed a problem that did not allow selecting the LARGE
memory model using the Wizard. One improvement is that it is now possible
to specify the output format (.binary or .eeprom). This means Code::Blocks
can now correctly tell whether a target needs rebuilding or not.
4. Made it possible to create a single default target using the Wizard. This
simplifies things, and is now the recommended way to create projects. The
previous method (creating a separate debug and release target) is still
supported. The release target (if created) is also now optimized by default.
5. Improved the build scripts to depend only on the LCCDIR environment
variable, which allows Catalina to be rebuilt with a single command with no
editing of scripts etc required.
6. Added more Code::Blocks example workspaces and projects (using existing
C programs from the demos folder) - these are in the workspaces
sound_demos : sound_spacewar, sound_demo
more_demos : globbing, sumeria, chimaera, test_spi, test_tty
7. Fixed some problems with some of the Code::Blocks projects, such as the
pre- and post- build command in the spinc_demo projects.
Release 3.13:
1. Fixed a problem with the graphics library that caused it to not compile if
spinnaker (openspin) was used. It compiled correctly if Homespun was
used.
2. Modified the CMM kernel to include relative jumps, and various other minor
performance improvements. These can both improve the speed and reduce
the size of CMM programs significantly.
3. Add a new Optimizer level (level 5) which optimizes loads. This can improve
the speed and reduce the size of both CMM and LMM programs
significantly.
Copyright 2013 Ross Higson
Page 128 of 158
Catalina C Compiler
Reference Manual
4. Improved the performance of the PSHM primitive - this can improve the
speed of both CMM and LMM programs that make intensive use of procedure
calls significantly.
5. The ALTERNATE LMM kernel is now deprecated, since the improvements in
the standard LMM kernel have made it redundant. It will be removed from
future releases.
6. The combined result of the the CMM and LMM changes can reduce program
size and improve program speed as follows:
CMM: up to 20% size reduction, and up to 15% speed improvement
LMM: up to 5% size reduction, and up to 20% speed improvement.
Not all programs will achieve these reductions, but all non-trivial programs will
achieve SOME improvement.
In addition, the following issues were fixed in a 3.12 Errata release, and are also
fixed in this release:
1. Modified the sumeria.c and chimaera.c demo programs to seed the random
number generator on each execution.
2. Fixed a bug in the CMM kernel in the PSHB primitive. However, this primitive
is not currently used by Catalina, so this bug would not have affected any
existing Catalina programs.
3. Included a new demos for the SD card file system - a "globbing" demo that
allows pattern matching of file names - see demos\globbing for more details.
4. Fixed some script issues in the build_utilities and Set_Linux_Permissions
that only affected Linux or OSX platforms.
5. Fixed some compilation issues in the source\catalina directory that were
preventing Catalina compiling with the clang compiler under OSX.
6. Added the ability to specify the port by name to the blackbox program (via
the -p parameter). This is required only under OSX, where ports must always
be specified by name.
7. Fixed a problem with the CMM thread libraries that prevented programs from
compiling when the spinnaker Spin compiler was used (programs compiled ok
using the Homespun compiler). Only affected COMPACT mode programs.
8. Fixed a problem with the CMM optimizer that may have resulted in programs
not executing correctly if the Catalina Optimizer was used (programs would
execute correctly without the optimizer).
Previous Releases:
The details of changes made in all earlier releases was getting to large to keep
including in this reference manual, so it has been moved to a new document. See
the Catalina Release History for details on earlier releases.
What’s due in the next release?
Other than additional plugin support, only bug fix releases and minor enhancements
are expected for the immediate future - at least until the Prop II becomes available.
The Prop II will require some (hopefully minimal) code generator changes, and a
Copyright 2013 Ross Higson
Page 129 of 158
Catalina C Compiler
Reference Manual
new version of Catalina will be released to support it when that chip becomes
available (or when sufficient details of its modified code set become available).
While Catalina will always remain a completely free and open source compiler, it is
expected that at some point there will be one or more enhancement packages
offered for purchase by Catalina users.
The enhancements are expected to include:
Debugger support for C running on multiple cogs (the free version can only
debug the cog running the C main function);
Cog safe versions of the standard C libraries (the free version will require that
you use locks around some library calls - such as malloc - which are not reentrant);
New device drivers, plugins and libraries;
Additional supported platforms.
Copyright 2013 Ross Higson
Page 130 of 158
Catalina C Compiler
Reference Manual
Catalina Internals
This section contains technical descriptions about various Catalina internals.
A normal user of Catalina who just wants to compile C programs does not need to
know anything contained in these sections – they are provided for users who may
want to know more about how Catalina works, or who may want to modify Catalina.
A Description of the LMM and XMM Kernels
The Propeller chip is a wonderful thing – eight 32 bit RISC processors sharing 64Kb
of RAM, with all eight processors also sharing 32 general purpose I/O pins! But a
significant limitation of the design is that each of the processors (or cogs, to use the
Parallax terminology) only has direct, full-time access to 2048 bytes of cog RAM for
the direct execution of Propeller Assembly (PASM) programs. The remaining 32kb of
RAM (referred to as hub RAM) is shared amongst all the cogs on a round-robin
basis, with each cog only being able to access this RAM 1/8 th of the time. Also, the
RAM dedicated to each cog is organized as 512 longs – of which only 496 can be
used to hold instructions or general purpose registers.
To execute programs larger than 496 instructions, one (or more) of the cogs is
typically allocated to running a built-in SPIN language interpreter, which executes
byte-coded SPIN programs out of the shared 32Kb of hub RAM.
However, while a SPIN program can access the full 32kb of hub RAM, SPIN is an
interpreted language, and it is literally dozens of times slower to execute an
instruction in SPIN than it is to execute the equivalent instruction in PASM.
The Large Memory Model (LMM) mode for the Propeller chip was originally
proposed by Bill Henning as a means of allowing PASM programs to be larger than
496 instructions. Bill realized that a cog could be used to first fetch, and then execute
PASM instructions from hub RAM using a few simple cog-based instructions –
allowing arbitrary sized PASM programs to be executed. Essentially, LMM mode
uses a cog to simulate a cog – and even though the simulated cog runs (at best)
only ¼ the speed of a real cog, it had access to the full 32Kb of hub RAM for the
storage of PASM instructions.
LMM mode is essential in enabling traditional high-level compiled languages to be
run on the Propeller, since there are few compilers that can compile useful high-level
language program into only 496 instructions. Also, even though hub-based LMM
programs are at least four times slower to execute than cog-based native programs
(due to the fact that each instruction can only be fetched for execution while the cog
has access to hub RAM), LMM programs are typically still many times faster than
SPIN.
The basic code to implement LMM consists of a loop of only 4 PASM instructions for more details see Bill Henning’s original thread on the Parallax forums at
http://forums.parallax.com/forums/default.aspx?f=25&p=1&m=154421. The program
that executes these four instructions (in a simple loop) is referred to as an LMM
kernel. Since it would be very wasteful to use an entire cog to execute only 4
Copyright 2013 Ross Higson
Page 131 of 158
Catalina C Compiler
Reference Manual
instructions, most kernels use the remainder of the cog RAM to implement useful
primitive operations designed to simplify whatever job the LMM kernel is designed
for. For example, most modern procedural computer languages make extensive use
of both a call stack and a stack frame – so it is useful for an LMM kernel intended to
support high level languages to implement both call/return and stack frame
manipulation primitives – this not only simplifies the job of the language compiler, it
also reduces the code size and improves the overall execution speed of the resulting
program.
This is exactly what both the Catalina LMM Kernel does.
The Catalina LMM kernel can execute PASM programs up to 8192 instructions long
– i.e. the number of instructions that can fit into the 32Kb of hub RAM built into the
Propeller. While this is sufficient to enable many useful programs to be written in a
high-level compiled language, it is still somewhat limiting. So the next step was to
use some of the I/O pins on the Propeller to implement a general purpose external
memory bus. When supported by appropriate external hardware, this allows PASM
instructions to be stored ‘off-chip’, yet still be fetched fast enough to be useful. This is
the so-called eXternal Memory Model (XMM).
There are many different varieties of XMM, depending on the type of external
hardware, how many I/O pins are dedicated to memory access, how the external
memory must be addressed, and whether this access is ‘latched’ or not. Typical of
XMM implementations is the Hydra Xtreme card – this card provides 512Kb of
external SRAM, and uses 12 of the Propeller’s I/O pins - 8 pins are used to provide
an 8 bit parallel bus, with 4 additional control lines necessary to control the access of
data via this bus. The Xtreme was originally developed specifically for the Hydra
games console, but is also now supported on several other Propeller platforms.
For the kernel, accessing external memory via XMM is even slower than accessing
hub memory via LMM. For example, in the case of the Hydra Xtreme (with its 8 bit
bus) it takes 4 separate byte-sized accesses to fetch each long PASM instruction for
execution. But even so, executing PASM instructions from XMM can still be done
fast enough to be useful. The architecture of the Propeller is such that anything that
really needs to be done fast – such as a device driver – can have a cog completely
dedicated to the job which runs a program direct from cog RAM. For most programs,
the fact that the top-level program logic is executed more slowly – i.e. as LMM
executing from hub either RAM or XMM RAM – is not usually an issue.
So the main difference between the LMM and XMM kernels is that the LMM Kernel is
designed to execute LMM programs stored in hub RAM, while the XMM Kernel is
designed to execute LMM programs stored in XMM RAM. The set of primitives
supported by both Kernels is identical, although the means they use to implement
these primitives sometimes differs.
Copyright 2013 Ross Higson
Page 132 of 158
Catalina C Compiler
Reference Manual
The remainder of this document describes the XMM and LMM Kernels used to
execute Catalina programs, by describing the common virtual machine registers, and
the LMM primitives that both kernels implement.20
Note that this document describes the Catalina beta LMM and XMM kernels. These
kernels (like the rest of Catalina) are still in beta release, and may change before the
first ‘official’ release.
A Description of the Catalina Virtual Machine
The Catalina LMM and XMM Kernels both implement a 32 bit ‘virtual cog’, with
various general purpose and dedicated registers which (unsurprisingly) is otherwise
very similar to the 32 bit processor implemented by each physical cog.
This virtual cog supports a subset of existing PASM instructions, but this is extended
by adding various LMM primitives to those instructions intended specifically to
support Catalina C programs.
Registers
r0 - r23
The kernel supports 24 General Purpose Registers. Each register is 32
bits, and each can hold a signed or unsigned integer, or a floating point
value. Some of the kernel primitive operations make specific use of
registers r0 and r1 to accept or return arguments (e.g. MULT, DIVS,
DIVU). Additional conventions are imposed by the Catalina C compiler –
e.g. the compiler always uses some of these registers as integer
registers, and others as floating point registers. The compiler also uses
r2 .. r5 to pass the first 4 arguments to functions instead of passing them
on the stack - this can make function calls much more efficient. However,
these compiler conventions have nothing to do with the kernel itself, and
may vary between compilers, or even between different versions of the
same compiler.
PC
The Program Counter holds a 32 bit pointer to the next instruction to
be executed. Note that this is a byte address in either hub RAM (for the
LMM kernel) or external RAM (for the XMM kernel). It is not a long
address in cog RAM as it would be for a cog executing normal PASM.
This means the PC must be incremented by 4 after each instruction, not
by 1.
SP
The Stack Pointer holds a 32 bit pointer to the top of the stack. The
stack holds long values, and the SP points to the long that is currently on
the top of the stack. The stack is implemented in hub RAM for both LMM
and XMM programs. It is initialized on startup to point to the upper RAM
20
In this documentation, you may also see references to the EEPROM Memory Model (or EMM)
mode. However, in EMM mode the Kernel used is still the LMM Kernel. The difference between
LMM mode and EMM mode is that in LMM mode both the cog initialization code and the program
to be executed must be stored within the first 32Kb of external EEPROM, whereas in EEM mode
only the cog initialization code is stored from the first 32Kb of the external EEPROM – the
program to be executed is loaded from the second 32Kb - this allows EMM programs to be larger
than LMM programs – although when executed, both execute from the Propeller’s hub RAM.
Copyright 2013 Ross Higson
Page 133 of 158
Catalina C Compiler
Reference Manual
area just below the configuration data blocks of various kernel plugins,
and grows downwards in hub memory.
FP
The Frame Pointer is a 32 bit pointer to the current execution frame,
which is held on the stack. For a discussion of stack pointers and frame
pointers, and the relationship and difference between them, see
http://en.wikipedia.org/wiki/Call_stack. For specific details on the calling
conventions used by Catalina, see the section on Catalina Calling
Conventions below.
RI
The Intermediate Register is a 32 bit register specifically used to pass
or return a single 32 bit value to or from various LMM primitives. It is also
used internally by many of the LMM primitives as a temporary register
when calculating the absolute address of a Relative Index value, so
programs should not expect RI to be preserved by any primitive.
BC
The Byte Count register is a 32 bit register used internally by various
primitives that move or copy structures – it represents the size of the
structure (in bytes) to be moved or copied. It is also used to pass the size
(in bytes) required by a function when creating a new frame, and to
return the SP associated with the caller once the new stack frame has
been established. However, when not being used for these purposes, it
is available for use as a general purpose register – the Catalina Compiler
makes use of it to perform various address calculations.
BA
The Base Address is a 32 bit pointer initialized by the Catalina startup
code to point to the base address of all other addresses in the image.
This is used to locate the Catalina program in the binary image.
BZ
The Base End is a 32 bit pointer initialized by the Catalina startup code
to point to the end of all the static segments in the image, and the
beginning of the dynamic data segment that is used for the stack and the
heap.
CS
The Code Segment is a 32 bit pointer containing the address of the
static code segment when that segment is relocated to XMM RAM. The
code segment can end up anywhere in XMM, and (once relocated) the
BA (Base Address) is no longer sufficient to correct the internal memory
references. This register is not used by the LMM Kernel.
Copyright 2013 Ross Higson
Page 134 of 158
Catalina C Compiler
Reference Manual
Primitives
Each Kernel primitive is implemented as a JMP instruction to a low (and fixed)
address inside the cog that is executing the kernel. Therefore, like all normal PASM
instructions, each LMM primitive occupies a 32 bit long. However, unlike normal
PASM instructions, many of the LMM primitives actually occupy two 32 bit longs,
with a 32 bit long parameter following immediately after the JMP instruction.
The following table describes each primitive (in alphabetical order). The primitives
marked with * require the immediately following long to contain the parameter value
described in the text:
Note that unless otherwise specified, the primitives do not affect the Propeller C or Z
flags.
BR_A *
This instruction (Branch if Above) loads the PC with the value of its 32 bit
address parameter if and only if the Propeller’s Z flag is not set and C
flag is not set. BR_A automatically performs any necessary address
translation.
BR_B *
This instruction (Branch if Below) loads the PC with the value of its 32 bit
address parameter if and only if the Propeller’s C flag is set. BR_B
automatically performs any necessary address translation.
BR_Z *
This instruction (Branch if Zero) loads the PC with the value of its 32 bit
address parameter if and only if the Propeller’s Z flag is set. BR_Z
automatically performs any necessary address translation.
BRAE *
This instruction (Branch if Above or Equal) loads the PC with the value of
its 32 bit address parameter if and only if the Propeller’s C flag is not
set. BRAE automatically performs any necessary address translation.
BRBE *
This instruction (Branch if Below or Equal) loads the PC with the value of
its 32 bit address parameter if and only if the Propeller’s Z flag is set or
C flag is set. BRBE automatically performs any necessary address
translation.
BRNZ *
This instruction (Branch if Non-Zero) loads the PC with the value of its 32
bit address parameter if and only if the Propeller’s Z flag is not set.
BRNZ automatically performs any necessary address translation.
CALA *
This instruction (Call Address) saves the address of the next instruction
following CALA on top of the stack (decrementing SP by 4), then loads
its parameter into PC. CALA automatically performs any necessary
address translation on this parameter.
CALI
This instruction (Call Indirect) saves the address of the next instruction
following CALI on top of the stack (decrementing SP by 4), then loads RI
into PC.
CPYB *
This instruction (Copy Bytes) copies a multi-byte structure from the
address specified in r1 to the address specified in r0. The parameter
following this instruction contains the number of bytes to be copied. Note
Copyright 2013 Ross Higson
Page 135 of 158
Catalina C Compiler
Reference Manual
that r0 and r1 are not preserved. Note that CPYB destroys the Propeller
Z flag.
DIVS
This instruction (Division - Signed) performs signed division. The 32 bit
dividend must be in r0 and the 32 bit divisor must be in r1. On return, the
32 bit quotient is in r0 and the 32 bit remainder is in r1. Note that DIVS
destroys the Propeller C and Z flags.
DIVU
This instruction (Division - Unsigned) performs unsigned division. The
32 bit dividend must be in r0 and the 32 bit divisor must be in r1. On
return, the 32 bit quotient is in r0 and the 32 bit remainder is in r1. Note
that DIVU destroys the Propeller C and Z flags.
FADD
This instruction (Floating Point Addition) performs 32 bit floating point
addition. On entry, r0 and r1 contain the 32 bit numbers to be added. On
return, r0 contains the result (i.e. r0 + r1).
FCMP
This instruction (Floating Point Comparison) performs 32 bit floating point
comparison. On entry, r0 and r1 contain the 32 bit numbers to be
compared. On return, the Propeller’s Z flag and C flag are set.
FDIV
This instruction (Floating Point Division) performs 32 bit floating point
division. On entry, r0 and r1 contain the 32 bit numbers to be divided. On
return, r0 contains the result (i.e. r0 / r1).
FMUL
This instruction (Floating Point Multiplication) performs 32 bit floating
point multiplication. On entry, r0 and r1 contain the 32 bit numbers to be
multiplied. On return, r0 contains the result (i.e. r0 * r1).
FSUB
This instruction (Floating Point Subtraction) performs 32 bit floating point
subtraction. On entry, r0 and r1 contain the 32 bit numbers to be
subtracted. On return, r0 contains the result (i.e. r0 - r1).
FLIN
This instruction (Floating Point from Integer) converts the integer in r0
to a floating point value. On return, the result is in r0.
INFL
This instruction (Integer from Floating Point) converts the floating point
value in r0 to an integer. On return, the result is in r0.
INIT
This instruction (Initialization) is the main entry point for the kernel. It is
called only once, on startup.
JMPA *
This instruction (Jump Address) loads the PC with the value of its 32 bit
parameter. JMPA automatically performs any necessary address
translation.
JMPI
LODA *
This instruction (Jump Indirect) loads the PC with the value of RI.
This instruction (Load Address) loads its 32 bit address parameter into
RI. The difference between LODA and LODL is that LODA treats its
parameter as an address, and automatically performs any necessary
address translation.
Copyright 2013 Ross Higson
Page 136 of 158
Catalina C Compiler
Reference Manual
LODF *
This instruction (Load Frame Reference) loads its 32 bit signed offset
parameter into RI, then adds FP to it. When executed within a function,
this means that RI will contain either the address of a local variable
(negative offset) or one of the arguments to the function (positive offset).
LODL *
This instruction (Load Long) loads its 32 bit parameter into RI. The
difference between LODL and LODA is that LODL does not perform any
address translation.
MULT
This instruction (Multiplication) performs multiplication. The 32 bit
multiplicand must be in r0 and the 32 bit multiplier must be in r1. On
return, the 32 bit result is in r0. Note that MULT destroys the Propeller C
and Z flags.
POPM *
This instruction (Pop Many Registers) treats its 32 bit parameter as a
bitmap specifying which of the general purpose registers to pop from the
stack. E.g. if bit 23 is set, r23 is popped (decrementing SP by 4), then
r22 etc … down to r0. Note that POPM destroys the Propeller C flag.
PSHA *
This instruction (Push Address) pushes its 32 bit address parameter into
the stack (decrementing SP by 4). PSHA automatically performs any
necessary address translation.
PSHB *
This instruction (Push Bytes) pushes a multi-byte structure onto the
stack. The structure to be pushed must be pointed to by r0. The
parameter following this instruction contains the number of bytes to be
pushed. SP is decremented by the number of bytes, rounded up to the
next multiple of 4. Note that r1 is not preserved. Note that PSHB
destroys the Propeller C and Z flags.
PSHF
This instruction (Push Frame Reference) loads its 32 bit signed offset
parameter into RI, then adds FP to it. It then uses that value as an
address, and pushes the value found at that address onto the stack
(decrementing SP by 4). The result is that the top of the stack ends up
with the value of either a local variable (negative offset) or one of the
arguments to the function (positive offset).
PSHL
This instruction (Push Long) pushes the 32 bit contents of RI onto the
stack (decrementing SP by 4).
PSHM *
This instruction (Push Many Registers) treats its 32 bit parameter as a
bitmap specifying which of the general purpose registers to push on the
stack. E.g. if bit 0 is set, r0 is pushed (incrementing SP by 4), then r1 etc
… up to r24. Note that PSHM destroys the Propeller C flag.
NEWF
This instruction (New Frame) saves the current value of FP on the stack
(decrementing SP by 4), and sets up a new frame pointer in FP,
allocating BC bytes for local storage. If this instruction is executed as the
fist instruction of a function, then on exit BC contains the value of SP
before the function was called – this assists in accessing arguments to
the function that have been pushed onto the stack.
Copyright 2013 Ross Higson
Page 137 of 158
Catalina C Compiler
Reference Manual
RETF
This instruction (Return from Frame) discards the current frame pointer
by loading FP with the value on the top of the stack (incrementing SP by
4). It then loads the PC with the value on the top of the stack
(incrementing SP by 4).
RBYT
This instruction (Read Byte) loads the low order byte of the BC register
with the value of the byte in memory pointed to by RI. The remainder of
the BC register will be zero. See the note below on Kernel Memory
Models for details on which memory is accessed by this instruction.
RLNG
This instruction (Read Long) loads the low order word of the BC register
with the value of the long in memory pointed to by RI. The remainder of
the BC register will be zero. See the note below on Kernel Memory
Models for details on which memory is accessed by this instruction.
RWRD
This instruction (Read Word) loads the BC register with the value of the
word in memory pointed to by RI. See the note below on Kernel Memory
Models for details on which memory is accessed by this instruction.
RETN
This instruction (Return) loads the PC with the value on the top of the
stack (incrementing SP by 4). This is only used by trivial functions that do
not use NEWF – if NEWF has been called, RETF should be used
instead.
SYSP
This instruction (System Plugin) invokes an external plugin. On entry,
r2 contains either the cog that contains the plugin (bit 7 set) or the type
of plugin to be called (bit 7 not set), and r3 contains the data to send to
the plugin. On return, r0 will contain the result of the call, or -1 if the
plugin could not be located. Note that SYSP destroys the Propeller C
and Z flags.
WBYT
This instruction (Write Byte) writes the low order byte of the BC register
to the byte of memory byte pointed to by RI. See the note below on
Kernel Memory Models for details on which memory is accessed by this
instruction.
WLNG
This instruction (Write Long) writes the BC register to the long of memory
pointed to by RI. See the note below on Kernel Memory Models for
details on which memory is accessed by this instruction.
WWRD
This instruction (Write Long) writes the low order word of the BC register
to the word of memory pointed to by RI. See the note below on Kernel
Memory Models for details on which memory is accessed by this
instruction.
Kernel Memory Models
The RLNG, RWRD, RBYT, WLNG, WWRD and WBYT primitives are used to write to
Hub RAM and/or XMM RAM, depending on the kernel and memory model in use:
LMM Kernel:
Copyright 2013 Ross Higson
These instructions only access Hub RAM.
Page 138 of 158
Catalina C Compiler
Reference Manual
XMM Kernel (small):
These instructions only access XMM RAM.
XMM Kernel (large):
These instructions can be used to access both XMM
RAM and Hub RAM.
Unsupported PASM
The LMM and XMM Kernels cannot be used to execute arbitrary PASM instructions.
Attempting to execute some PASM instructions would disrupt the operation of the
kernel itself. The Catalina Code Generator never generates such instructions –
instead, where necessary, it generates the code required to invoke the equivalent
LMM primitive instead.
The following table summarizes the PASM instructions that should not be used
within programs intended to be executed by the Catalina Kernel, and also (where
appropriate) the LMM equivalent that should be substituted instead:
PASM
LMM Equivalent
Conditional JMP
BR_Z, BRNZ, BR_A, BRAE, BR_B, BRBE
Unconditional JMP
JMPA (or load the address in RI and use JMPI)
RET
RETN (or RETF if NEWF has been called)
JMPRET or CALL
CALA (or load the address in RI and use CALI)
DJNZ
SUB and then BRNZ
TJZ
CMP and then BR_Z
TJNZ
CMP and then BRNZ
Object and Image Formats
By default, Catalina executables use the same binary or eeprom executable image
format as other Propeller executables (although note that other formats are available
– see the Catalina documentation).
However, only Catalina programs compiled as LMM programs (i.e. using layout 0,
specified using the -x0 option, or when no other layout is specified) can be easily
loaded and run on a Propeller, since only those are of size 32kb or less.
EMM executables (using layout 1, specified using the -x1 option) will always be
between 32kb and 64kb, and “small” XMM executables (using layout 2, specified
using the -x2 option) or “large” XMM executables (using layout 5, specified using the
–x5 option) will always be larger than 32k – and can in fact be any size.
We will deal with Catalina LMM images first, as they are the simplest. In an LMM
executable image, the compiled Catalina C program is contained within a normal
chain of SPIN objects – which will include the Catalina Target, the various plugins
that target is responsible for loading, and the LMM Kernel. The compiled Catalina C
program object hence has a base address in the same way that every SPIN object
has a base address.
Copyright 2013 Ross Higson
Page 139 of 158
Catalina C Compiler
Reference Manual
In addition, the Catalina C program object has two key items of internal structure, at
the offsets specified in the file Catalina_Common.spin:
LMM_INIT_BZ_OFF = $4b
LMM_INIT_PC_OFF = $4c
As the names imply, these are the offsets (in longs) from the base address (+8)
within each object of the initial values of BZ, and the initial values of the PC (which in
C will always be the address of the main function). These values must be extracted
from within the object itself.
The initial value of BA is the object’s base address, and the initial value of the SP is
always the top of memory just below any RAM space allocated to the plugins.
Catalina expects to be able to use the memory following BZ as dynamic data (i.e.
heap or stack space). But the initial BZ offset is not only the pointer to the start of the
dynamic data segment - it also points to the end of a special structure consisting of 5
longs, as follows:
CODE
CNST
INIT
DATA
ENDS
Start of static code segment
Start of static constant data segment
Start of static initialized data segment
Start of static uninitialized data segment
End of all static segments
This structure contains values that would need to be used by the kernel when
relocating the various program segments. In fact, the LMM Kernel does not relocate
any segments, and therefore does need to use any of these extra values - they are
only needed by the XMM Kernel.
The EMM targets differ from the LMM targets in that they don’t include the compiled
Catalina C program objects – but these targets don’t need to relocate individual
segments either. The EMM targets are self contained SPIN programs that occupy
the first 32kb of external EEPROM. Instead of containing the Catalina C program
object, the EMM targets expect to load this object from address $8000 in the external
EEPROM (i.e. in the second 32kb). Once all the target plugins have been loaded,
the EMM loader simply overwrites the whole of hub RAM with the Catalina C
program object found at that address – and in the process, overwrites itself with the
Catalina LMM Kernel. The only value the EMM targets therefore have to manipulate
is the overall Base Address (BA).
The situation is slightly more complex for XMM targets. The current XMM targets are
also self-contained SPIN programs that expect to load the compiled Catalina C
program object stored at location $8000 in the external EEPROM – but the XMM
targets must use the 5 long structure described above to decompose the compiled
Catalina C program object – currently the static code segments are moved to XMM
RAM and the static data segments are moved to hub RAM. Thus the XMM targets
currently need to set up the CS register, and (in future, when the static and dynamic
data segment may also moved to XMM RAM) they may also need to set up the SD
and DD registers.
Copyright 2013 Ross Higson
Page 140 of 158
Catalina C Compiler
Reference Manual
Catalina Calling Conventions
Although only indirectly related to the LMM or XMM kernels themselves, it is worth
spending some time discussing the function calling conventions adopted by the
Catalina Code Generator, since the primitives implemented by the Catalina kernels
have been optimized to support this particular type of calling convention.
The most complex part of the Code Generator is concerned with the set up of the
arguments (and the local variables) on the stack when calling a function. These
conventions must be understood and adopted by any PASM function intended to be
directly callable from Catalina.
In order to make most effective use of the scarce Propeller resources, such as the
limited cog RAM (in the form of the general purpose registers) as well as the limited
hub RAM, and also to minimize the overhead of performing each function call,
Catalina adopts the following calling conventions:
The result of a function is always returned in r0.
The caller must clean up the stack. This means that if a function expects
parameters, the caller must not only push the parameters onto the stack
before making the call, it must adjust the stack again afterwards when the call
is complete. The called procedure simply uses the parameters provided and
then returns its result in r0.
The parameters are always passed in reverse order. For example, when
calling function(a,b,c,d,e) – and assuming all the parameters are passed on
the stack – they must be pushed onto the stack in order: e, d, c, b, a.
Up to 4 of the formal parameter to a function can be passed in registers r2, r3,
r4, and r5. Given that parameters are processed in reverse order, this is
actually the last four parameters. For example, when calling a function such
as function(a,b,c,d,e) it would mean e is passed in r2, d is passed in r3, c is
passed in r4, and b is passed in r5. Parameter a in such cases would need to
be pushed onto the stack – which would also have space allocated for
parameters b, c, d and e even though it is not used unless the argument is
actually a structure, or the function is variadic, or the function takes the
address of the argument – in such cases the register passing is not possible,
and the corresponding register is not used.
These calling conventions may seem (and in fact are) quite complex to implement.
But they have the advantage that probably 75% (or more) of all function calls –
especially so-called “leaf” functions that do not themselves make any further function
calls – can simply be made by loading the arguments into the appropriate registers
and then calling the function – without having to first push each argument onto the
stack. Similarly, in most cases the function itself can simply use the arguments it
finds in the registers – without needing to load them from the stack.
In a recursive program, or one that consists of a large number of relatively trivial
function calls, this calling convention saves large amounts of program code – and
also make the resulting program much faster to execute.
Copyright 2013 Ross Higson
Page 141 of 158
Catalina C Compiler
Reference Manual
A Description of the Standard Catalina XMM API
Supporting new XMM hardware is quite simple with Catalina – the XMM Kernel can
be customized to include new XMM hardware access routines, or (if those routines
will not fit in the Kernel) then the cache support option can be used instead.
All newly developed XMM access routines must conform to the following general
XMM API, so that the core parts of the Catalina Kernel remains identical on all
supported platforms.
Note that it is important that (unless otherwise specified) no XMM API routine
affects the processor flags, such as the Z or C flags. If these flags must be used,
they should be saved and restored by the XMM API functions.
The XMM API now consists of three distinct parts:
•
The cache access functions – these are mandatory in all cases. If only these
functions are implemented, they must fit in the space available in the cache
cog – about 355 longs.
•
The direct access functions – these are optional. However, without these
functions, only cached access will be supported. If implemented, these
functions must fit in the available space in the kernel cog - about 96 longs.
•
The flash access functions – these are mandatory for FLASH support. FLASH
always requires the use of the cache. If only these are implemented, they and
the cache access functions must fit in the space available in the cache cog –
about 355 longs.
The XMM API cache access functions
The cache access functions are the minimum XMM functions required. These
functions are used by the Caching XMM driver (enabled when one of the CACHED
symbols is defined). The advantage of the caching XMM driver is that it only requires
four functions to be implemented:
XMM_Activate - This routine is called during XMM Kernel initialization to
initialize the XMM Hardware. It may also be called (if configured for the
platform by defining the symbol XMM_SHARED) at the conclusion of the
execution of any system plugin call – see also XMM_Tristate.
On entry:
None.
On exit:
None.
XMM_Tristate - This routine can be called ((if configured for the platform by
defining the symbol XMM_SHARED) ) at the beginning of any system plugin
call – this is needed if a plugin may need to use hardware that cannot be used
while the XMM memory hardware is active. If this is the case, the XMM
Copyright 2013 Ross Higson
Page 142 of 158
Catalina C Compiler
Reference Manual
hardware will be reactivated by calling XMM_Activate at the conclusion of the
system plugin call.
On entry:
None.
On exit:
None.
XMM_ReadPage - Read multiple bytes from XMM RAM to Hub RAM.
On entry:
XMM_Addr destination address in XMM RAM
Hub_Addr
Destination address in main memory (16-bits used)
XMM_Len
number of bytes to read.
On exit:
XMM_Addr incremented by number of bytes read.
XMM_WritePage - Write multiple bytes from Hub RAM to XMM RAM.
On entry:
XMM_Addr destination address in XMM RAM
Hub_Addr
source address in main memory (16-bits used)
XMM_Len
number of bytes to write.
On exit:
XMM_Addr incremented by number of bytes written.
The XMM API direct access functions
The direct access functions are additional functions required to support direct XMM
access from within the XMM kernel. They are optimized to provide they type of
access the Kernel needs, and generally provide the best performance. However, it is
sometimes not possible to fit the direct functions in the Kernel. In that case, the
cache has to be used to access the XMM RAM.
Direct access requires the cache access functions, plus four additional functions:
XMM_ReadLong - Read a long from XMM RAM to Cog RAM. Note that this
function is used for all instruction fetches, and should be optimized for speed
if possible.
On entry:
XMM_Addr XMM address to read (the number of bits used depends
on the platform)
XMM_Dst
The destination of this instruction must be set to the
destination address in Cog RAM.
Copyright 2013 Ross Higson
Page 143 of 158
Catalina C Compiler
Reference Manual
On exit:
XMM_Addr incremented by 4.
Destination Cog RAM location that will contain the long read from
XMM.
XMM_ReadMult - Read multiple bytes from XMM RAM to Cog RAM. Bytes
are read into the destination location least significant byte first, so this routine
can be used to read byte, word or long values.
On entry:
XMM_Addr XMM address to read (the number of bits used depends
on the platform)
XMM_Dst
Cog RAM.
destination of this instruction set to destination address in
XMM_Len
number of bytes to read (1, 2 or 4).
On exit:
XMM_Addr incremented by number of bytes read.
Destination Cog RAM location that will contain the bytes read from
XMM.
XMM_WriteLong - Write a long from XMM RAM to Cog RAM.
On entry:
XMM_Addr XMM address to write (the number of bits used depends
on the platform)
XMM_Src
The source of this instruction must be set to the source
address in Cog RAM.
On exit:
XMM_Addr incremented by 4.
Source
to XMM.
Cog RAM location that contains a long value to be written
XMM_WriteMult - Write multiple bytes from Cog RAM to XMM. Bytes are
written from the source location least significant byte first, so this routine can
be used to write byte, word or long values.
On entry:
XMM_Addr XMM address to write (the number of bits used depends
on the platform).
XMM_Src
The source of this instruction must be set to the source
address in Cog RAM.
XMM_Len
number of bytes to write (1, 2 or 4).
Copyright 2013 Ross Higson
Page 144 of 158
Catalina C Compiler
Reference Manual
On exit:
XMM_Addr incremented by number of bytes read.
Source
XMM.
Cog RAM location that contains the bytes to be written to
The XMM API flash access functions
Some platforms implement XMM RAM using FLASH, or a combination of FLASH
and SRAM. If any FLASH RAM is used, the cache must be used, and following
additional 11 functions are required:
XMM_FlashActivate - Called to initialize the Flash hardware (if required).
Similar to XMM_Activate.
On entry:
None.
On exit:
None.
XMM_FlashTristate - Called to disable the Flash hardware (if required).
Similar to XMM_Tristate.
On entry:
None.
On exit:
None.
XMM_FlashWritePage - Write multiple bytes of Hum RAM to FLASH. For
some flash RAM, writes are limited to a maximum of 256 bytes.
On entry:
XMM_Addr destination address in FLASH RAM.
Hub_Addr
Source address in main memory (16-bits used).
XMM_Len
number of bytes to write (up to 256).
On exit:
XMM_Addr incremented by number of bytes written.
XMM_FlashReadPage - Read multiple bytes from FLASH to Hub RAM.
On entry:
XMM_Addr destination address in FLASH RAM
Hub_Addr
Destination address in main memory (16-bits used)
XMM_Len
number of bytes to read.
On exit:
Copyright 2013 Ross Higson
Page 145 of 158
Catalina C Compiler
Reference Manual
XMM_Addr incremented by number of bytes read.
XMM_FlashComparePage - Compare multiple bytes of Hub RAM with
FLASH. Used if the symbol WRITE_CHECK is defined.
On entry:
XMM_Addr address in FLASH RAM
Hub_Addr
address in main memory (16-bits used)
XMM_Len
number of bytes to compare.
On exit:
Z Flag
set if equal, cleared if not equal.
XMM_Addr incremented by number of bytes equal.
Hub_Addr
incremented by number of bytes equal.
outx
Value of last main memory (Hub) byte compared.
XMM_FlashCheckEmpty - Check that a section of FLASH is empty (all
0xFF). Used if the symbol ERASE_CHECK is defined.
On entry:
XMM_Addr address in FLASH RAM
XMM_Len
number of bytes to check.
On exit:
Z Flag
set if all empty, cleared if not empty.
XMM_Addr incremented by number of bytes compared.
outx
Value of last FLASH byte checked.
XMM_FlashEraseChip - Erase the entire FLASH. Used by loaders if the
CHIP_ERASE symbol is defined.
On entry:
None.
On exit:
None.
XMM_FlashEraseBlock - Erase a 4k block of FLASH. Used by loaders if the
CHIP_ERASE symbol is not defined (the default). If the FLASH chip cannot
erase 4k blocks, this may be a null routine (and CHIP_ERASE must be
defined).
On entry:
XMM_Addr address in FLASH RAM of 4k block to erase.
On exit:
Copyright 2013 Ross Higson
Page 146 of 158
Catalina C Compiler
Reference Manual
None.
XMM_FlashUnprotect - Unprotect the entire FLASH. Some FLASH chips
require the chip be unprotected before any Write operations (and sometimes
before any Read operations). If this is not required, this may be a null routine.
On entry:
None.
On exit:
None.
XMM_FlashWriteEnable - Enable Writing to the FLASH. Some FLASH chips
require a write enable to be performed before each Write operation. If this is
not required, this may be a null routine.
On entry:
None.
On exit:
None.
XMM_FlashWaitUntilDone - Loop until a Write or Erase operation
completes.
On entry:
None.
On exit:
outx
Contents of the FLASH status register.
Other XMM support routines may be required, especially if the XMM platform uses
memory paging – a typical implementation might (for example) also store a current
page register, and provide routines to set up and/or increment XMM addresses that
takes the current page into account. However, such routines are platform dependent
and do not form part of the standard XMM API.
A Description of the Catalina Addressing Modes
Catalina supports four different addressing modes:
TINY
In this mode, all addresses are Hub RAM addresses – this means
that all code and data addresses must be less than 32k (at least on
the Prop I - on the Prop II this is expected to be extended to at least
256k). This is the mode used by the LMM Kernel for all programs
compiled using the –x0 or –x1 or -C TINY command line option.
SMALL
In this mode, all data addresses are Hub RAM addresses, but all
code addresses are XMM RAM addresses. Hub RAM addresses
Copyright 2013 Ross Higson
Page 147 of 158
Catalina C Compiler
Reference Manual
must be less than 32k (Prop I) or 256k (Prop II), but code
addresses can be up to 16Mb. This mode is used by the XMM
Kernel, for programs compiled using the –x2 or -C SMALL
command line option.
LARGE
In this mode, all data and code addresses are XMM addresses, and
can be up to 16Mb. But at run time, all stack and frame addresses
are Hub addresses, and must be less than 32k (Prop I) or 256k
(Prop II). This includes the addresses of all local variables, which
are constructed “on the fly” on the stack. This mode is used by the
XMM Kernel, for programs compiled using the –x5 or -C LARGE
command line option.
COMPACT In this mode, all addresses are Hub RAM addresses – however, all
code and data addresses are specified using 24 bits, making this
mode potentially suitable for the Prop 1. This is the mode used by
the CMM Kernel for all programs compiled using the –x8 or -C
COMPACT command line option.
The TINY memory model is conceptually the simplest, since all addresses are Hub
RAM addresses. However, it can only be used for programs where everything (i.e.
the program code, data, heap and stack) can fit into Hub RAM.
The SMALL memory model is more complex. The Kernel has to accommodate the
differences between Hub RAM and XMM RAM. However, passing data around
between different plugins is still relatively simple, since all data addresses are Hub
RAM addresses.
The LARGE memory model is actually simpler internally than the Small model, but
there is one complication – in this mode data addresses can be either an XMM RAM
address (e.g. a heap address) or a Hub RAM address (e.g. a local variable address).
Both are equally valid at the program level, but XMM RAM addresses cannot be
used to pass data between plugins. This means, for example, that it is not possible
to pass the address of a static string (which will be an XMM RAM address) directly to
a plugin (such as a HMI plugin). Catalina works around this limitation by copying
data from XMM RAM to Hub RAM whenever it must be passed to a plugin. At the
program level, this is invisible to the user, but it has implications when writing plugins
or other PASM code to be executed in conjunction with Catalina programs.
The COMPACT memory model is similar to the TINY memory model – but the code
itself is completely different, being a hybrid of LMM code and interpreted code.
Copyright 2013 Ross Higson
Page 148 of 158
Catalina C Compiler
Reference Manual
A Description of the Catalina Image Format
All Catalina program images consist of 2 parts – a SPIN program that establishes the
environment for the program by loading the plugins, the drivers and the Kernel itself,
and then the compiled program that the Kernel will execute once loaded.
The compiled program image executed by the Kernel code always starts with the
same ‘prologue’, as follows:
' Catalina programs all start at offset 0
org
0
' the first 2 longs are reserved (one of them is required by the POD
' POD debugger when it is used to debug LMM programs)
long
0
'$00
long
0
'$01
' the next 41 longs contain JMP instructions for each Kernel primitive
' (the actual values not significant in the program image – only the
' address of each jump instruction is important)
INIT
jmp
0
'$02
LODL
jmp
0
'$03
LODA
jmp
0
'$04
LODF
jmp
0
'$05
PSHL
jmp
0
'$06
PSHB
jmp
0
'$07
CPYB
jmp
0
'$08
NEWF
jmp
0
'$09
RETF
jmp
0
'$0a
CALA
jmp
0
'$0b
RETN
jmp
0
'$0c
CALI
jmp
0
'$0d
JMPA
jmp
0
'$0e
JMPI
jmp
0
'$0f
DIVS
jmp
0
'$10
DIVU
jmp
0
'$11
MULT
jmp
0
'$12
BR_Z
jmp
0
'$13
BRNZ
jmp
0
'$14
BRAE
jmp
0
'$15
BR_A
jmp
0
'$16
BRBE
jmp
0
'$17
BR_B
jmp
0
'$18
SYSP
jmp
0
'$19
PSHA
jmp
0
'$1a
FADD
jmp
0
'$1b
FSUB
jmp
0
'$1c
FMUL
jmp
0
'$1d
FDIV
jmp
0
'$1e
FCMP
jmp
0
'$1f
FLIN
jmp
0
'$20
INFL
jmp
0
'$21
PSHM
jmp
0
'$22
POPM
jmp
0
'$23
PSHF
jmp
0
'$24
RLNG
jmp
0
'$25
RWRD
jmp
0
'$26
Copyright 2013 Ross Higson
Page 149 of 158
Catalina C Compiler
Reference Manual
RBYT
jmp
0
'$27
WLNG
jmp
0
'$28
WWRD
jmp
0
'$29
WBYT
jmp
0
'$2a
' the next 8 longs contain the internal Kernel registers
PC
long
0
'$2b
SP
long
0
'$2c
FP
long
0
'$2d
RI
long
0
'$2e
BC
long
0
'$2f
BA
long
0
'$30
BZ
long
0
'$31
CS
long
0
'$32
' the next 24 longs contain the general purpose registers
r0
long
0
'$33
r1
long
0
'$34
r2
long
0
'$35
r3
long
0
'$36
r4
long
0
'$37
r5
long
0
'$38
r6
long
0
'$39
r7
long
0
'$3a
r8
long
0
'$3b
r9
long
0
'$3c
r10
long
0
'$3d
r11
long
0
'$3e
r12
long
0
'$3f
r13
long
0
'$40
r14
long
0
'$41
r15
long
0
'$42
r16
long
0
'$43
r17
long
0
'$44
r18
long
0
'$45
r19
long
0
'$46
r20
long
0
'$47
r21
long
0
'$48
r22
long
0
'$49
r23
long
0
'$4a
' the next 6 longs contain some constants that are required either in
' the Kernel or in the compiled program – while there are many others
' that could have been included here, these ones are specifically
' required for various purposes
Bit31
long
$80000000
'$4b
all_1s
long
$ffffffff
'$4c
cviu_m1
long
$000000ff
'$4d
cviu_m2
long
$0000ffff
'$4e
top8
long
$ff000000
'$4f ' top 8 bits bitmask
low24
long
$00ffffff
'$50 ' low 24 bits bitmask
' the next 2 longs contain initial program values
init_BZ
long
@sbrkinit
'$51 ' end of code / start of heap
init_PC
long
@C_main
'$52 ' the initial PC
' the next long contains the segment layout (i.e. 0, 1, 2, 3, 4 or 5)
seglayout
long
SEGMENT_LAYOUT
' the next 4 longs contains the start address of each of the segments,
' followed by a long containing the address of the first byte after
' all the segments
Copyright 2013 Ross Higson
Page 150 of 158
Catalina C Compiler
segtable
long
long
long
long
long
long
long
Reference Manual
@Catalina_Code
@Catalina_Cnst
@Catalina_Init
@Catalina_Data
@Catalina_Ends
@Catalina_RO_Base
@Catalina_RW_Base
In the program image, this prologue is then followed by each of the segments
themselves (i.e. the Code, Cnst, Init and Data segments). The address of each
segment is given in segtable, and the segment layout and address mode is
specified in the seglayout.
It is important to note that the first 83 longs (i.e. longs $00 to $52) are identical
between the program image and the Kernel – i.e. longs with the same names are
present within both the compiled program image and within the Kernel. In most
cases, the actual values contained in these longs in the program image are not
significant – the exceptions are the init_BZ, init_PC, seglayout and segtable
values - the kernel must retrieve these from the program image before program
execution can begin.
Beyond the first 83 longs (i.e. beyond longs $00 to $52) the values in the prologue
above are present in the image, but equivalent long values do not exist within the
Kernel. Additional longs beyond those shown (i.e. after the segtable entries, but
before any actual program segments) may be present in the program image, but the
prologue is guaranteed never to exceed 512 bytes (i.e. 128 longs, or longs $00 to
$7F).
The remaining details of the image format used by a Catalina program depends on
both the memory model (i.e. LMM, EMM or XMM) and the addressing mode (i.e.
TINY, SMALL, LARGE or COMPACT) selected during compilation – these are
controlled by the –x command line parameter. The following are the main differences
in the image format for each supported value of this parameter:
-x0
The image is a normal Propeller format image (binary or eeprom). The
total size of the image (i.e. the Kernel, plus all the required plugins and
drivers, plus the compiled program) must be 32k or less. The compiled
program embedded in the image must be executed by an LMM Kernel
that uses the TINY addressing mode – this means that all code and data
addresses are Hub addresses. This image format can be loaded by any
means supported for normal SPIN programs, as well as by the Catalina
Generic SD Loader.
-x1
The image consists of two sections – the first 32k is a normal SPIN
program that contains an LMM kernel, plus all the required plugins and
drivers, and also a loader that knows how to loads a compiled program
from the second 32k stored in an external EEPROM. The compiled
program embedded in the image must be executed by an LMM mode
Kernel that uses the TINY addressing mode – this means that all code
and data addresses are Hub addresses. This image format cannot be
Copyright 2013 Ross Higson
Page 151 of 158
Catalina C Compiler
Reference Manual
loaded by normal SPIN tools, and is specifically intended to be
programmed into a 64kb EEPROM.
-x2
The image consists of two sections – the first 32k is a normal SPIN
program that contains a SMALL mode XMM kernel plus all the required
plugins and drivers, and also a loader that knows how to load a compiled
program from XMM – which is where the Catalina Generic Program
Loader puts anything after the first 32k when it loads such programs. The
compiled program embedded in the image must be executed by an XMM
Kernel that uses the “Small” addressing mode – this means that all code
addresses are XMM addresses, but all data addresses are Hub
addresses. This image format cannot be loaded by normal SPIN tools,
but can be loaded using the Catalina Generic SD Loader.
-x5
The image consists of two sections – the first 32k is a normal SPIN
program that contains a LARGE mode XMM kernel plus all the required
plugins and drivers, and also a loader that knows how to load a compiled
program from XMM – which is where the Catalina SD Program Loader
puts anything after the first 32k when it loads a program. The compiled
program embedded in the image must be executed by an XMM Kernel
that uses the LARGE addressing mode – this means that all code, data
and heap addresses are XMM addresses, but all stack and frame
addresses are Hub addresses. This image format cannot be loaded by
normal SPIN tools, but can be loaded using the Catalina Generic SD
Loader.
-x8
Similar to -x0, except the code is not LMM code – it is a hybrid of LMM
and interpreted code.
As implied above, there are several ways to load Catalina program images,
depending on the image format:
-x0
These programs can be loaded using any standard Propeller tool, and
can also be loaded using the Catalina Generic SD Loader, or the
Catalina Payload utility.
-x1
These programs cannot be “loaded” as such – they must be
programmed into an EEPROM. The mechanism for doing this is platform
dependent – Catalina provides the ability to generate various file formats
(such as Motorola S Records, or Intel Hex records) that can be used by
various EEPROM programmers, but does not provide any specific
mechanism for actually programming an EEPROM.
-x2
These programs must be loaded using the Catalina Generic SD Loader,
or the Catalina Payload program.
-x5
These programs must be loaded using the Catalina Generic SD Loader
or the Catalina Payload program.
-x8
These programs must be loaded using the Catalina Payload program.
A description of the Generic SD Loader is given in the next section.
Copyright 2013 Ross Higson
Page 152 of 158
Catalina C Compiler
Reference Manual
A Description of the Generic SD Loader
Now that Catalina has SD Card file system support, it made sense to include an SD
Loader that can be used to load Catalina programs from an SD Card.
However, the file system support mandated by ANSI C (and as implemented by
Catalina) is quite complex and is really intended for Propeller platforms that also
have XMM memory support. Even simple programs that use the Catalina SD file
system will be larger than 32k - this means the ANSI C file system is not suitable for
use by an SD Loader that has to fit into 32k.
But while the SD Loader has to be small, it does not need to be particularly fast - so
instead of using C, the Catalina Loader is implemented as a SPIN program which
uses the FATEngine file system module. This means that the SD Loader is
essentially independent of Catalina and can be used to load normal SPIN programs
from the SD Card as well as Catalina C programs.
The major feature of the Catalina SD Loader is that in addition to being able to load
normal SPIN or LMM C programs (or any other program which fit within the
Propeller's 32k of Hub RAM) the Loader also knows how to load programs and/or
data into XMM RAM. This allows programs with code segments up to 16Mb to be
compiled on a PC, and then loaded into the Propeller via an SD Card.
The SD Loader currently load programs based only on the size of the file being
loaded. Files of 32kb or less (actually 31k, since the loader requires 1k for its internal
SD card buffers) are loaded into Hub RAM. Files larger than 32k are assumed to
consist of two parts - the first 31k is loaded into Hub RAM, while anything beyond the
32k boundary is loaded into XMM RAM.
Other than requiring the use of 1kb during the load process, the SD Loader imposes
no other limitations or overheads - i.e. it does not consume any cogs or RAM space
once the program has been loaded and begins executing.
Although this sounds simple enough, the details of the whole process of booting a
program from an SD Card are quite complex.
Here is an overview of the process:
Phase I:
The SD Loader loads the file sector list of the selected file into Hub
RAM, and then starts the Sector Loader.
Phase II:
The Sector Loader loads the file sectors themselves into both Hub
RAM and XMM RAM, then starts the Target program in Hub RAM.
In multi-CPU systems where the program is to be loaded into
another CPU, the SD loader does not load the sectors into local RAM
– instead, it sends each sector via serial I/O to the target CPU, and
the subsequent phases are executed on the target CPU.
For SPIN or LMM C programs, the process ends here. For XMM C
programs the process then carries on ....
Copyright 2013 Ross Higson
Page 153 of 158
Catalina C Compiler
Reference Manual
Phase III:
The Target program loads the Catalina Plugins into Cog RAM, and
then starts the Hub Loader.
Phase IV:
The Hub Loader copies the XMM Kernel from Hub RAM to XMM
RAM, then loads the Catalina data segments from XMM RAM to Hub
RAM, then copies the XMM Kernel back to Hub RAM from XMM
RAM. Finally, the Hub Loader starts the XMM Kernel.
And here are all the details:
Phase I:
1. The SD Loader uses FATEngine to mount the SD card, determine the sector
geometry of the card, and also to load the root directory of the card.
2. The SD Loader can be configured to either load a specific file, or display the
root directory of the SD Card and allow the user to select one. If it is
configured for the latter, the SD Loader loads and starts an instance of a tv
and keyboard driver, and displays the root directory of the SD Card, allowing
the user to select the name of a file to be loaded.
3. The cluster list of the selected file is loaded into RAM (at fixed address of
$7F00). This is required because FATEngine (which is a normal SPIN
program running from Hub RAM) must be terminated before the selected file
can be loaded - but once FATEngine is terminated the SD Card can only be
interrogated using "low level" sector-based I/O - not "high level" file-based I/O.
4. If the SD Loader started a keyboard and tv driver, these are terminated once
the cluster list has been successfully loaded.
5. The SD Loader then starts the Sector Loader - this is a PASM program that
uses the cluster list and the sector geometry of the SD Card to load the
sectors that make up the selected file.
Phase II:
1. In single CPU systems, or in multi-CPU systems where a program is to be
loaded into the local CPU, the Sector Loader loads the first 31kb of the file
into Hub RAM - and anything after the first 32k into XMM RAM. Note that
neither the SD Loader nor the Sector Loader know how to interpret any of the
data they load - they simply cooperate to load the data into Hub RAM or XMM
RAM based on where it was in the file. This is why the Catalina Loader is
referred to as a "Generic" Loader - there is nothing Catalina specific in any of
these operations, and the Loader can be used to load anything - either
program or data - into Hub RAM and XMM RAM. Of course, it assumes that
the start of Hub RAM is a valid Propeller program and executes it - but the
rest of the Hub RAM or the XMM RAM could contain anything.
2. In multi-CPU systems where the program is to be loaded into another CPU,
the SD loader instead sends each sector via serial I/O to a Generic SIO
Loader executing on the target CPU, which does the same job as described
in the previous step. The subsequent phases are then executed on the target
Copyright 2013 Ross Higson
Page 154 of 158
Catalina C Compiler
Reference Manual
CPU. Note that this loader must already be executing on the target CPU – this
can be accomplished by loading it into EEPROM and having it always start on
boot, or by first executing a separate CPU boot loader, which uses the built-in
Parallax load capabilities to load a program from one CPU to another (the
built-in Parallax loader is only suitable for loading programs up to 32k in size,
which is why we need a two-step load for Catalina programs – which may be
larger than 32k). The use of these utilities is fully described in the Multi-CPU
system Support section of the Catalina Reference Manual
3. If it loaded a program locally, the Sector Loader then performs a "soft reset"
by shutting down any other cogs and then restarting its own cog using the
normal Propeller boot code - essentially, this starts the cog as a SPIN
interpreter, which will begin executing whatever program was just loaded into
Hub RAM - i.e. whatever program was in the first 31kb of the selected file. If it
loaded a program into another CPU, the Sector Loader instead does a “hard
reset” of the Propeller – which normally restarts the SD Loader.
If the program loaded is either a normal SPIN program, or a Catalina LMM C target,
that's the end of the process - the loaded program just executes normally. But if the
program that has just been loaded into Hub RAM (and started) is in fact a Catalina
XMM target, there is still more work to do before the Catalina program can be
started.
Phase III:
1. To be successfully booted from an SD Card, the Target program must know
that the program to be executed has already been loaded into XMM RAM by
the Sector Loader. This is why programs to be loaded from SD Card typically
require a different target to programs intended to be loaded from EEPROM.
Note that there is no need for a specific LMM target to use the Loader - LMM
programs exist entirely within Hub RAM, and do not need to do any memory
re-organization - it is irrelevant to the LMM program how it got loaded into Hub
RAM.
2. Like any other target, a Target loaded from the SD Card must load into Cog
RAM all the plugins required by the Catalina program to be executed including an SD Card plugin if the Catalina program itself requires access to
the SD file system.
3. The Target must also contain the XMM Kernel needed to execute the Catalina
program - but this Kernel cannot be started just yet. First, the Kernel itself
must be temporarily copied from Hub RAM to XMM RAM so that the Hub
RAM can be re-organized. To do this, the target loads a Hub Loader, which is
yet another low-level loader program that specifically know how to find the
Kernel code in the target, and also how to find the data and code segments of
the Catalina program that the Sector Loader has loaded into XMM RAM.
Copyright 2013 Ross Higson
Page 155 of 158
Catalina C Compiler
Reference Manual
Phase IV:
1. The XMM Hub Loader moves the Kernel to XMM RAM, after the data the
Sector Loader loaded from the SD Card.
2. The XMM Hub Loader moves the data segments of the Catalina Program in
XXM RAM to Hub RAM.
3. The XMM Hub Loader relocates the code segment in XMM RAM so that it is
where the Kernel expects to find it. While it is possible to define a new
memory segment layout that would avoid the need for this step, doing so
would further complicate the Catalina compilation process, so instead the
XMM Hub Loader uses SD-specific targets that know how to relocate a
normal Catalina x2 XMM layout.
4. The XMM Hub Loader moves the Kernel from XMM RAM to Hub RAM. It is
copied into the space which (once the program is started) will be used as
heap and stack space - Note that this means that all Catalina XMM programs
must limit their constant data segments to 28kb.
5. Finally, the Hub XMM Loader restarts itself as the XMM Kernel, and begins
executing the Catalina program in XMM.
This load process is so complex mainly because the Propeller is so resource limited
– but there are also some design decisions that have led to further complications,
such as the decision to use a Generic Loader that does not decode the Catalina
image, instead requiring the loaded program to do this job itself. These decisions
may be revisited in a later release.
A Description of the Proxy Device Protocol
The proxy devices use one or more client drivers, and one server program, in place
of the usual drivers. Catalina has two client drivers – one replaces the local SD card
plugin when the PROXY_SD symbol is defined (e.g. on the command line), and the
other replaces up to three HMI drivers when the PROXY_SCREEN,
PROXY_MOUSE or PROXY_KEYBOARD symbols are defined (e.g. on the
command line). It is possible to mix and match any combination of local and proxy
devices. Usually, the server program is compiled to support all devices - the client
can then choose to use a real driver to access the local device, or a proxy driver to
access a remote device.
The two proxy drivers (i.e. the one for the SD device and the one for all HMI devices)
share a single serial connection to the proxy server running on a remote CPU, and
coordinate their operation using a Propeller lock – this ensures that requests from
the two drivers do not conflict even though they are running independently on
separate cogs.
There is only one server program, which services all the proxy device requests. It
does not need to use a lock – since only one request is sent at a time, it simply
services each request as it arrives.
Copyright 2013 Ross Higson
Page 156 of 158
Catalina C Compiler
Reference Manual
The server is a pure server – it does not ever initiate requests. However, to avoid
having to have the client poll the server (e.g. to see if there is a key available) the
server does send a signal byte (currently a null byte) to the client continuously
whenever it has information waiting to be retrieved – the client does not know from
this whether it is mouse, keyboard or some other data, so when it sees the signal
byte it must poll for all possible types of data.
The serial protocol is quite simple, but does employ byte stuffing to avoid
accidentally interpreting arbitrary binary data (e.g. SD sector data) as a proxy
request or response, and also employs LRC checks on long packets to detect data
errors – on some systems the inter-CPU serial communications is a bit noise-prone –
possibly due to interaction with the USB Prop Plug on systems that use the Propeller
SI/SO pins for serial communications between CPUs. LRC checking is a way to
avoid data corruptions on noisy communications channels.
Byte stuffing is done on all (hex) FF bytes – they are stuffed to FF 00. This is to
avoid any possible conflict with the ‘sync’ signal, which is always FF nn, where nn is
the CPU number of the proxy server.
The protocol messages are as follows:
SD_Init – enable (initialize) the SD card
Request:
FF nn 01
Response:
FF nn 01
SD_Read – read a sector from the SD card
Request:
FF nn 02 ss ss ss ss
Response:
FF nn 02 <512 bytes> cc
(or)
FF nn 00
Note:
ss ss ss ss is the sector number
cc is the LRC of the sector data
Note:
The short response indicates an error condition.
SD_Write – write a sector to the SD card
Request:
FF nn 03 ss ss ss ss <512 bytes> cc
Response:
FF nn 03
Note:
ss ss ss ss is the sector number
cc is the LRC of the sector data
SD_ByteIO – write a byte to the SD card
Request:
FF nn 04 bb
Response:
FF nn 04
Note:
bb is the byte to write.
Copyright 2013 Ross Higson
Page 157 of 158
Catalina C Compiler
Reference Manual
SD_StopIO – disable (tristate) the SD card
Request:
FF nn 05
Response:
FF nn 05
KB_Reset – reset the keyboard (clear any buffered keys)
Request:
FF nn 06
Response:
FF nn 06
KB_Data – read a character of keyboard data
Request:
FF nn 07
Response:
FF nn 07 kk
(or)
FF nn 00
Note:
The short response indicates no keyboard data available.
Note:
kk is the keyboard character.
MS_Data – read mouse data
Request:
FF nn 08
Response:
(or)
FF nn 08 xx xx xx xx yy yy yy yy zz zz zz zz bb
FF nn 00
Note:
The full response is sent if the server detects any change in
mouse data, otherwise the short response is sent.
Note:
xx xx xx xx is the abs_x value
yy yy yy yy is the abs_y value
zz zz zz zz is the abs_z value
bb is the button states
TV_Data – write screen data
Request:
FF nn 09
Response:
FF nn
Request:
bb <up to MAX_TEXT bytes> FF nn
Response:
FF nn
This protocol will be expanded over time to include new proxy devices, and also to
add currently unsupported capabilities to existing proxy devices (such as screen
cursor, scroll and color functions).
Copyright 2013 Ross Higson
Page 158 of 158