1
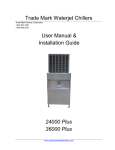
Hensley Thermodynamics 1.830.370.2362 1.800.259.2720 HT Chillers Recirculating 36000 Plus User Manual & Installation Guide www.HTChillers.com UM-R36000 Rev 1 Manufacturer Information About Hensley Thermodynamics Hensley Thermodynamics, Inc. is chiller manufacturer focused on the design and manufacture of affordable, efficient, easy to use and easy to maintain chiller units for everyone from major industry to the individual hobbyist that have machines that require chilled coolant less than 65°F for optimal operation. Hensley Thermodynamics 1.830.370.2362 1.800.259.2720 Hours: 8:00 a.m. to 5:00 p.m. Central Time, Monday - Friday Email anytime: [email protected] Shipping Address: Hensley Thermodynamics 454 Cade Loop Ingram, TX 78025 Mailing Address: Hensley Thermodynamics P.O. Box 318 Ingram, TX 78025 Visit us Online: www.HTChillers.com This document contains subject matter protected by United States copyright law and to which Hensley Thermodynamics Corporation has proprietary rights. Recipients of this document shall not reproduce, distribute, transmit, display, publish, broadcast or use information contained herein, in whole or in part, for any use other than the purpose for which this manual was provided. The following are trademarks of Hensley Thermodynamics, Inc.: Hensley Thermodynamics™ and the Hensley Thermodynamics logo. HT is used herein as shorthand notation to refer to Hensley Thermodynamics. HT Chiller is used herein as shorthand notation to refer to the Hensley Thermodynamics Chiller. All other products and brand names mentioned in this document are trademarks of their respective companies. Instructions in English © 2013-2014 Hensley Thermodynamics Corporation Doc #: UM-R36000 All Rights Reserved www.HTChillers.com Recirculating Chiller i HT Chiller User Manual & Installation Guide UM-R36000 Rev 1 This User Manual & Installation Guide applies to the following units: Recirculating Chiller Model R32301 Model R32303 www.HTChillers.com Recirculating Chiller ii HT Chiller User Manual & Installation Guide UM-R36000 Rev 1 Table of Contents 1. Manufacturer Information ----------------------------------------------------------------------------- i About Hensley Thermodynamics ...........................................................................i 2. Important Information ---------------------------------------------------------------------------------- 1 Abbreviations and Definitions .................................................................................1 3. Safety ------------------------------------------------------------------------------------------------------ 1 Recognizing Safety Information in this Manual........................................................1 Equipment Labels, Symbols and Meanings............................................................2 Access by Qualified Personnel Only .......................................................................2 Electrical Precautions .............................................................................................2 Emergency Shutdown ............................................................................................3 Structural Support ..................................................................................................3 Mechanical Strength...............................................................................................3 4. Product Description------------------------------------------------------------------------------------- 4 Purpose .................................................................................................................4 Recirculating 36000 Model Configurations .............................................................4 Equipment Usage...................................................................................................4 Approved Recirculating Coolants .....................................................................4 Decibel Levels........................................................................................................4 Dimensions and Weight .........................................................................................5 Product Components .............................................................................................6 Condensing Unit...............................................................................................6 Recirculating Coolant Reservoir .......................................................................6 Pressure Regulating Valve ...............................................................................6 Inline Strainer ...................................................................................................6 Make-up Coolant Float Valve ...........................................................................6 Chiller Barrel Energy Storage Tank ..................................................................6 Relief Valve ......................................................................................................6 Chiller Functions ....................................................................................................7 Refrigeration ....................................................................................................7 Recirculation ....................................................................................................7 5. Installation Instructions -------------------------------------------------------------------------------- 8 Location Checklist ..................................................................................................8 How to Access the Chiller Barrel Energy Storage Tank ..........................................9 How to Fill the Chiller Barrel Energy Storage Tank .................................................11 Attaching Coolant Make-up, Coolant In and Coolant Out Lines....................................12 Wiring Electrical Power to the HT Chiller .................................................................13 Wiring Instructions ............................................................................................13 6. HT Chiller Operation ----------------------------------------------------------------------------------- 14 How to Turn On the HT Chiller ...............................................................................14 How to Turn Off the HT Chiller ...............................................................................14 www.HTChillers.com Recirculating Chiller iii HT Chiller User Manual & Installation Guide UM-R36000 Rev 1 7. Maintenance, Repairs and Storage ----------------------------------------------------------------- 15 General Maintenance .............................................................................................15 Repairing Components ............................................................................................15 Draining Coolant Reservoir Tank ...........................................................................16 Unscrew Brass Disconnect ....................................................................................16 Attach Hose ...........................................................................................................16 Cleaning Pump Strainer and Reservoir Tank .........................................................17 Replacing Make-up Coolant Float Valve ................................................................17 Storing the HT Chiller while Not in Service .............................................................19 How to Remove Water from the Chiller Barrel Energy Storage Tank ................19 How to Remove Coolant from Recirculating Coolant Reservoir Tank ...............20 How to Remove Coolant from the Recirculating Lines ......................................20 Freeze Thermostat .................................................................................................20 8. Field Splitting the HT Chiller -------------------------------------------------------------------------- 21 How to Field Split the HT Chiller .............................................................................21 9. Refrigeration Technician Section: Installing the Condensing Unit ---------------------------- 24 10. Trouble Shooting ---------------------------------------------------------------------------------------- 30 Wiring Diagram (3-Phase Units Only) ....................................................................31 11. Receiving and Unpacking Instructions ------------------------------------------------------------- 32 12. Repair Authorization ------------------------------------------------------------------------------------ 32 13. Limited Warranty ---------------------------------------------------------------------------------------- 32 Purchase and Installation Records .........................................................................34 www.HTChillers.com Recirculating Chiller iv HT Chiller User Manual & Installation Guide UM-R36000 Rev 1 Important Information Read this User Manual & Installation Guide carefully before you begin chiller installation, operation, or service. This manual contains important information. Failure to read this manual can result in personal injury or damage to your chiller. Abbreviations and Definitions Abbreviation CBEST gpm HT HT Chiller psi Definition Chiller Barrel Energy Storage Tank. gallons per minute Hensley Thermodynamics Hensley Thermodynamics Chiller pounds per square inch Safety Safety instructions must be followed when you install, operate, inspect, or perform maintenance or service on this equipment. If ignored, physical injury or death may follow, or damage may occur to the equipment. Always observe applicable safety precautions when using this equipment. Recognizing Safety Information in this Manual This is the safety-alert symbol When you see this symbol on the unit and in this manual, be alert to the potential for personal injury or equipment damage. Understand these signal words; DANGER, WARNING, and CAUTION. These words are used with the safety-alert symbol. DANGER Identifies the most serious hazards that will result in severe personal injury or death. WARNING Identifies hazards that could result in personal injury or death. CAUTION Identifies unsafe practices, which would result in minor personal injury or product and property damage. NOTE, TIP and IMPORTANT Used to highlight suggestions, which will result in enhanced installation, reliability, or operation. www.HTChillers.com Recirculating Chiller Page 1 HT Chiller User Manual & Installation Guide UM-R36000 Rev 1 Equipment Labels, Symbols and Meanings The following labels and symbols are used in/on the Hensley Thermodynamics Chiller. Symbol / Label Purpose / Meaning Location Hazardous voltage may cause severe injury or death. Only Qualified and Authorized Personnel may access areas marked with this label. Condensing Unit Hazardous voltage may cause severe injury or death. Only Qualified and Authorized Personnel may access areas marked with this label. Recirculating Pump Indicates the Make-up Coolant valve. Front panel to the right of the Make-up Coolant Valve. Indicates the Coolant Out valve. Front panel to the right of the Coolant Out valve. Indicates the Coolant Return valve. Front panel to the right of the Coolant Return valve. Access by Qualified Personnel Only Access to the HT Chiller shall be restricted to properly trained and qualified personnel who are familiar with the potential hazards of equipment that uses high voltages, high temperatures, low temperature, refrigerant and components under pressure. Electrical Precautions Only properly trained and qualified personnel are authorized to perform work on an energized system. WARNING To prevent electrical shock: • The HT Chiller must be grounded through your electrical power source. • The HT Chiller must be powered off and disconnected from the main power supply prior to installation, maintenance, moving, and decommissioning. www.HTChillers.com Recirculating Chiller Page 2 HT Chiller User Manual & Installation Guide UM-R36000 Rev 1 Emergency Shutdown In case of emergency, disconnect power to the HT Chiller at your electrical power source. Structural Support The HT Chiller is mounted on steel legs; however, underlying, level and structurally sound support must be provided. WARNING Failure to provide proper support may result in personal injury and / or damage to the Chiller Unit. Mechanical Strength Do not stack, mount or lean anything on the HT Chiller. WARNING External loads or stresses placed on or against the chiller unit may result in personal injury and / or damage to the HT Chiller. www.HTChillers.com Recirculating Chiller Page 3 HT Chiller User Manual & Installation Guide UM-R36000 Rev 1 Product Description Purpose The Hensley Thermodynamics Chiller (HT Chiller) provides chilled recirculating coolant to equipment that requires coolant below 65 degrees with a flow rate of up to 5 gallons per minute at 50 psi. Recirculating 36000 Model Configurations HT Recirculating Chillers are available in the following configurations: Model R32301 – 3 Ton, 230 Volt, Single-Phase Model R32303 – 3 Ton, 230 Volt, Three-Phase Equipment Usage The HT Chiller is designed to chill recirculating coolant, as specified in this manual, for equipment requiring: Up to 5 gallons per minute 50 psi or less, and Temperatures below 65 degrees Fahrenheit Note: The HT Chiller is not intended for use other than described in this manual. To prevent damage to the HT Chiller and voiding the warranty, call the Hensley Thermodynamics Engineering Department at 1-830-370-2362 or 1-800-259-2720 before using the HT Chiller beyond the scope of this manual. Approved Recirculating Coolants The HT Recirculating Chiller is currently designed to use the following recirculating coolants: Water Glycol CAUTION To prevent damage to the chiller and voiding the warranty, only use the approved coolants. For questions about using other coolants, call the Hensley Thermodynamics Engineering Department at 1-830-370-2362 or 1-800-259-2720. Decibel Levels The HT Chiller is quiet with a maximum decibel level of 74. This low decibel level does not overwhelm normal conversation so the unit can be placed in the work environment. www.HTChillers.com Recirculating Chiller Page 4 HT Chiller User Manual & Installation Guide UM-R36000 Rev 1 Dimensions and Weight Recirculating HT Chiller Empty Barrel filled with water Weight 525 Pounds 985 Pounds Width 31 ½ inches HT Chiller Side View www.HTChillers.com Length 31 ½ inches Height 73 ¼ inches HT Chiller Front View Recirculating Chiller Page 5 HT Chiller User Manual & Installation Guide UM-R36000 Rev 1 Product Components The HT Recirculating Chiller is comprised of the following major components: Condensing Unit A 13 SEER unit manufactured by Ruud and contains the environmentally friendly 410A refrigerant. Recirculating Coolant Reservoir Holds 7.3 gallons of coolant for the recirculating coolant circuit. Pressure Regulating Valve Maintains the recirculating coolant circuit at 50 psi and 0-5 gpm flow. Inline Strainer Protects recirculating pump from debris. Make-up Coolant Float Valve Maintains the correct level in the recirculating coolant reservoir tank. Chiller Barrel Energy Storage Tank The Chiller Barrel Energy Storage Tank (CBEST) located within the Chiller Barrel Compartment, holds approximately 55 gallons of water that is utilized for two specific purposes: 1. The thermo-conductive property of water enables efficient heat transfer, and 2. The water stores excess energy to be used when the refrigeration system cycles off. The recirculating flow-through coolant lines are submerged within this R-10 insulated Chiller Barrel Energy Storage Tank and the recirculating coolant is efficiently chilled on the way to the equipment. Fill the Chiller Barrel with clean water upon installation and secure the lid. The water in the barrel stays in the barrel and you will only need to check the water level during periodic inspections. Relief Valve Relieves excessive water or pressure CBEST should there ever be a leak in the CBEST. www.HTChillers.com Recirculating Chiller Page 6 HT Chiller User Manual & Installation Guide UM-R36000 Rev 1 Chiller Functions The HT Recirculating Chiller performs 2 essential functions: Refrigeration of coolant Recirculation of chilled coolant Refrigeration The HT Chiller uses coil technology to chill your equipment recirculating coolant. Immersed inside the 55 gallon CBEST are separate copper lines containing recirculating coolant and refrigerant. As the refrigerant system runs, heat is removed from the recirculating coolant lines and the water contained within the CBEST. When the water within the CBEST reaches approximately 45 degrees, the refrigerant system cycles off. At this time, there is approximately 11,000 BTUs of energy stored within the 55 gallons of water in the CBEST. When the water in the CBEST reaches 52 degrees, the refrigeration unit cycles on to again start cooling the recirculating coolant and the water in the CBEST; thus completing the refrigeration cycle. Thermostats Within the CBEST, a thermostat ensures that the 55 gallons of water is maintained within the range of 45-52°F. Within the recirculating coolant reservoir tank, another thermostat ensures that the recirculating coolant is also maintained between 45-52°F degrees. A freezestat located in the recirculating coolant reservoir tank protects the recirculating coolant from freezing in case of thermostat failure. Recirculation The recirculating coolant pump draws suction from the make-up coolant reservoir tank, pressurizes it to 50 psi, and sends it to the recirculating coolant lines. The recirculating coolant flows through a pressure regulating valve that maintains 50 psi at 0-5 gpm flow. The recirculating coolant flows to the equipment requiring chilled coolant, and then returns to the coolant reservoir tank; thus completing the coolant recirculating system. The recirculating coolant system consists of 5 parts: 1. 2. 3. 4. 5. Coolant reservoir tank located in the base of the HT Chiller Refrigerant and recirculating coolant lines submerged in water within the CBEST Coolant recirculation pump Strainer that protects the recirculation pump from debris Equipment requiring the chilled coolant A low coolant level switch located in the recirculating coolant reservoir tank will interrupt power to the recirculation pump in the event of low coolant conditions. www.HTChillers.com Recirculating Chiller Page 7 HT Chiller User Manual & Installation Guide UM-R36000 Rev 1 Installation Instructions The HT Chiller is typically delivered on a pallet. 1. 2. 3. 4. Review the Location Checklist below before installing the HT Chiller. Use a pallet jack or forklift to safely move the HT Chiller to the selected location. Carefully remove any protectant wrapping or crating material. Use a pallet jack to lift the HT Chiller off of the pallet and set into position. Location Checklist Review the following items to help determine the best location for the HT Chiller: The HT Chiller must be installed on a level surface and indoors. The HT Chiller can be separated (field split) with the condensing unit located in one area and the Chiller Barrel Compartment (lower half of the HT Chiller) located in another area. To separate the unit, refer to the section “How to Field Split the HT Chiller”. The Chiller Barrel Compartment (lower half of the HT Chiller) is designed for indoor installation only where ambient temperatures do not fall below 32F. The Condensing Unit is designed for use with ambient temperatures of 55°F or more. If you are field splitting the HT Chiller and the condensing unit will be required to operate in conditions below 55°F, contact us or your authorized Ruud representative to install low ambient controls and/or accessories. The maximum ambient temperature for the Condensing Unit is 125°F. Allow sufficient airflow around and vertical discharge above the Condensing Unit for proper operation. Proper Clearance Measurement Around all sides of chiller 18 inches Above top of condensing unit 4 feet Access to required electrical source as follows: Model Number Phase Freq. (Hz) Voltage (Volts) Rated Load Amperes (RLA) R32301 1 60 230 16.7 R34303 3 60 230 10.4 Minimum Circuit Amperes Fuse/HACR Breaker Min Amps Max Amps 15 30 35 15 20 20 Contact a licensed electrician and your local power company to ensure that installation wiring complies with local fire, safety and electrical codes. Access to a clean water source if water is your recirculating coolant of choice. To prevent heat gain to the Coolant Out line, place the HT Chiller near your equipment and insulate the coolant line. (Insulating the line also protects surrounding surfaces from condensation or sweating from the chilled coolant.) www.HTChillers.com Recirculating Chiller Page 8 HT Chiller User Manual & Installation Guide UM-R36000 Rev 1 How to Access the Chiller Barrel Energy Storage Tank 1. If the HT Chiller is powered on, press the ON/OFF push button power switch to turn the HT Chiller off. The light will extinguish to indicate that the chiller is powered off. Push Button Power Switch ON OFF 2. Disconnect electrical power from the HT Chiller. www.HTChillers.com Recirculating Chiller Page 9 HT Chiller User Manual & Installation Guide UM-R36000 Rev 1 3. Remove the left side panel of the Chiller Barrel Energy Storage Tank Compartment by unscrewing the 7 screws around the perimeter. 4. Loosen and remove the clamp ring on the Chiller Barrel Energy Storage Tank. 5. Lift off and remove the Chiller Barrel Energy Storage Tank lid. www.HTChillers.com Recirculating Chiller Page 10 HT Chiller User Manual & Installation Guide UM-R36000 Rev 1 How to Fill the Chiller Barrel Energy Storage Tank CAUTION Do not add any chemicals to the Chiller Barrel Energy Storage Tank; possible damage to the HT Chiller may occur. Adding chemicals to the Chiller Barrel Energy Storage Tank will void the warranty. 1. If necessary, follow the instructions to “How to Access the Chiller Barrel Energy Storage Tank”. 2. Fill the Chiller Barrel with clean water to the water line indicator located on the inside of the tank. (Approximately 55 gallons.) 3. Replace the Chiller Barrel lid securely. 4. Replace and fasten the Chiller Barrel ring onto the Chiller Barrel. 5. Replace the side panel by securing all 7 screws. www.HTChillers.com Recirculating Chiller Page 11 HT Chiller User Manual & Installation Guide UM-R36000 Rev 1 Attaching Coolant Make-up, Coolant In and Coolant Out Lines Note: The Coolant Make-up, Coolant In, and Coolant Out valves are all ½” NPT valves. Note: Use a backup wrench to secure coolant valves while installing connections to prevent damage to the lines. 1. Attach the coolant return line from your equipment to the bottom valve. 2. Attach the coolant out line going to your equipment, to the middle valve. 3. Attach the line from your make-up coolant source (coolant tank or water hose) to the top valve. Valves Shown in Closed Position TIP: To maintain the chilled coolant temperature and to prevent heat gain of the chilled coolant line, the HT Chiller either needs to be close to the equipment or the coolant out line needs to be properly insulated. This is especially important if the coolant line is exposed to high temperatures or hot surfaces. TIP: The chilled coolant leaving the HT Chiller will be typically below the dew point so condensation may occur. Properly insulate the coolant out line to prevent nearby surfaces from condensation damage. Reminder about the Water in the Chiller Barrel This HT Chiller is a recirculating system with recirculating coolant flowing through a pipe that is submerged in the Chiller Barrel Energy Storage Tank. This recirculating coolant pipe is chilled by refrigerant lines and the cold water within the Chiller Barrel Energy Storage Tank. The purpose of the water in the Chiller Barrel is to store cooling energy only, in other words, the water in the barrel stays in the barrel. www.HTChillers.com Recirculating Chiller Page 12 HT Chiller User Manual & Installation Guide UM-R36000 Rev 1 Wiring Electrical Power to the HT Chiller DANGER ELECTRICAL SHOCK HAZARD – Disconnect Main Power! Before installing, modifying, or servicing the HT Chiller, your main electrical disconnect switch must be in the OFF position. Your setup may have more than 1 (one) disconnect switch. Lock out and tag switch(es) with a suitable warning label(s). All Electrical Work Must Be Completed By a Qualified Person Wire according to all national, state and city electrical codes. Failure to follow this warning could result in personal injury or death. CAUTION Prevent Reverse Wiring of 3-Phase As with all typical 3-phase systems, you can accidentally wire the HT Chiller incorrectly to cause the compressor motor to run backwards. This is evident by excessive compressor noise, no heat being exhausted by the condenser fan within 1 minute, and recirculating coolant not cooling. Reverse any two leads to change the phase for proper rotation. Not correcting the wiring will cause the compressor to overheat, turn off, and stay off until the compressor protector has sufficiently cooled. CAUTION Prevent Breakage of Lines - Fill Chiller Barrel Before Applying Power To prevent freezing and breakage of recirculating coolant lines, the Chiller Barrel Energy Storage Tank MUST be filled with water before power is applied to the HT Chiller. CAUTION Prevent Skin Damage – Do not Touch Refrigerant Lines in Chiller Barrel Refrigerant lines in the Chiller Barrel Energy Storage Tank can operate at temperatures below freezing. Touching these lines can freeze skin. Note: Operating the HT Chiller on improper line voltage will void the warranty. Note: Do not connect the HT Chiller to an electrical source that has power fluctuations beyond approved limits. Wiring Instructions 1. Connect proper voltage to condensing unit. See applicable data plate on condensing unit. 2. Install proper size wire to the “Line In” connections in the condensing unit electrical compartment. 3. Attach proper ground. 4. Reinstall cover on condensing unit. www.HTChillers.com Recirculating Chiller Page 13 HT Chiller User Manual & Installation Guide UM-R36000 Rev 1 HT Chiller Operation Your HT Chiller arrives pre-set and ready to use as soon as: Proper electrical connections are made, Chiller Barrel Energy Storage Tank is filled with water, and Coolant line connections attached. TIP: If the condensing unit does not come on upon initial installation, the freezestat may have tripped due to unit being exposed to below 35°F during shipping or storage. See section “Freeze Thermostat” for instructions on how to reset the freezestat. CAUTION Prevent damage to your equipment and/or the HT Chiller by confirming the following: 1. Chiller Barrel Energy Storage Tank has been properly filled. 2. Your equipment recirculating pump is turned on. 3. Your make-up coolant source is turned on. How to Turn On the HT Chiller 1. Press the HT Chiller ON/OFF push button power switch located on the front panel. 2. Verify the power indicator light in the switch is illuminated. Power Light Illuminated How to Turn Off the HT Chiller 1. Press the HT Chiller ON/OFF push button power switch. 2. Verify the indicator light in the switch goes out. Power Light Off www.HTChillers.com Recirculating Chiller Page 14 HT Chiller User Manual & Installation Guide UM-R36000 Rev 1 Maintenance, Repairs and Storage WARNING To prevent electrical shock, the HT Chiller (condenser and Chiller Barrel Compartment) must be disconnected from all electrical sources during maintenance and repair. General Maintenance The HT Chiller is designed to be virtually maintenance free when operated under normal working conditions. As long as the Chiller Barrel Energy Storage Tank is securely sealed, water will not escape. If you move the HT Chiller after the tank has been filled, it is recommended that you visually inspect the water level. The condensing unit requires only routine maintenance as required with a standard air conditioning condensing unit. If you have a yearly contract with an air conditioning service company, ask them to inspect your HT Chiller condensing unit during your yearly inspection. Repairing Components Other than the general maintenance outlined in the sections below, do NOT attempt to repair any HT Chiller components unless previously authorized in writing by Hensley Thermodynamics. Unauthorized repairs will VOID warranty. Contact Technical Support: Telephone: 1-830-370-2362 or 1-800-259-2720 toll-free 8:00 a.m. to 5:00 p.m. Central Time, Monday - Friday Email: [email protected] www.HTChillers.com Recirculating Chiller Page 15 HT Chiller User Manual & Installation Guide UM-R36000 Rev 1 Draining Coolant Reservoir Tank Drain the Reservoir Tank when you want clean and inspect the pump strainer and reservoir tank. Clean debris from the recirculating pump strainer and coolant reservoir tank as needed. For example, if the flow is restricted or noisy, check to see if cleaning is necessary. Tip: Some spilling of coolant will occur. A drain pan placed under the front of the HT Chiller is recommended to catch the leakage of coolant while attaching a drain hose. Note: The recirculating coolant reservoir tank holds approximately 7.3 gallons. How to Drain the Coolant Reservoir Tank 1. Close the Make Up coolant valve . 2. Remove both side panels of the HT Chiller. 3. Remove the lower section of the front panel. 4. Disconnect the strainer hose on the coolant reservoir side by unscrewing the brass disconnect and then quickly attach a garden hose or appropriate drain hose to allow draining of the reservoir tank into an appropriate container. Unscrew Brass Disconnect www.HTChillers.com Attach Hose Recirculating Chiller Page 16 HT Chiller User Manual & Installation Guide UM-R36000 Rev 1 Cleaning Pump Strainer and Reservoir Tank 1. Follow the instructions for “Draining Coolant Reservoir Tank”. 2. Unscrew and remove the clear bowl from the strainer body. 3. Remove mesh screen and rinse screen and clear bowl with clean water to remove all debris. 4. Reinsert mesh filter into clear bowl; reattach bowl to strainer body and hand tighten. 5. Visually inspect bottom of the coolant reservoir tank and remove any debris by using an appropriate wet/dry vacuum or clean cloth. 6. Disconnect garden/drain hose. 7. Reconnect strainer hose at brass disconnect. 8. Open the Make-up coolant valve to refill the coolant reservoir and check for leaks around the pump strainer. 9. Attach front panel of HT Chiller, and then attach side panels. Replacing Make-up Coolant Float Valve Over time, age and exposure to coolant liquid will naturally degrade the rubber washer on the float valve. If the rubber washer fails, the coolant tank will overflow. To Replace the Float Valve Rubber Washer 1. Close Make-up Coolant valve . 2. Remove both side panels of the HT Chiller. 3. Remove lower section of front panel. 4. Remove recirculating coolant reservoir tank lid. www.HTChillers.com Recirculating Chiller Page 17 HT Chiller User Manual & Installation Guide UM-R36000 Rev 1 5. Disconnect float valve assembly from coolant line brass connection. 6. Remove brass ¼” 20 screw from front of the coolant reservoir tank and remove float valve assembly. 7. Remove cotter pin. www.HTChillers.com Recirculating Chiller Page 18 HT Chiller User Manual & Installation Guide UM-R36000 Rev 1 8. Remove float. 9. Replace rubber washer. 10. Reassemble in reverse order. 11. Attach front panel of HT Chiller, and then attach side panels. Storing the HT Chiller while Not in Service To prolong the life of the HT Chiller when taking the unit out of service, it is recommended that all water is removed from the Chiller Barrel Energy Storage Tank, coolant removed from the coolant reservoir tank, the pump strainer, and purged from all associated piping; especially if the HT Chiller will be stored in a location that could potentially freeze. CAUTION Prevent component damage/rupture by removing/purging all water and coolant from the HT Chiller if the unit is taken out of service. How to Remove Water from the Chiller Barrel Energy Storage Tank 1. Turn off the HT Chiller by pushing the ON/OFF push button switch located on the front panel. The light in the switch will go out. 2. Disconnect the HT Chiller from your electrical power source. 3. Access the Chiller Barrel Energy Storage Tank by removing the left side panel. 4. Remove the tank ring and the tank lid. 5. Either siphon or pump the water out of the tank. www.HTChillers.com Recirculating Chiller Page 19 HT Chiller User Manual & Installation Guide UM-R36000 Rev 1 How to Remove Coolant from Recirculating Coolant Reservoir Tank 1. Remove left side panel of HT Chiller, and then remove front panel. 2. Drain coolant reservoir tank by following instructions in section “Draining Coolant Reservoir Tank”. 3. Remove excess coolant in the bottom of the reservoir by using a clean rag or wet-dry vac. How to Remove Coolant from the Recirculating Lines 1. Turn off your equipment that requires the recirculating coolant. 2. Turn off the HT Chiller by pressing the ON/OFF push button power switch located on the front panel. 3. Close Make-up, Coolant In and Coolant Out valves. 4. Disconnect Make-up line, Coolant In and Coolant Out lines being sure to drain coolant in an appropriate container. 5. Open Coolant In and Coolant Out valves. 6. Apply no more than 60 psi of pressure to one of the valves so that when under pressure the coolant escapes from the other valve. (Alternatively, a wet-dry vac can be used if you seal off the vacuum head to create sufficient suction. There isn’t that much coolant in the line but it must be removed. Freeze Thermostat If the HT Chiller has been stored or shipped in temperatures less than 35° F, the freeze thermostat (freezestat) will trip. This thermostat, by design, requires a manual reset. Indications of a tripped freezestat are the recirculating pump is running, but the condensing unit on top is not running and the chiller is not cooling. Note: If the freezestat trips during operation, turn the chiller off and troubleshoot the Chiller Barrel and recirculating tank thermostats. How to Reset the Freezestat 1. Remove the right side panel of the Chiller Barrel Energy Storage Tank compartment by unscrewing the 7 screws around the perimeter. 2. Remove the 2 screws that hold the control box cover. 3. Press (push down) the reset button. (The freezestat is the larger of the 3 thermostats.) www.HTChillers.com Recirculating Chiller Page 20 HT Chiller User Manual & Installation Guide UM-R36000 Rev 1 Field Splitting the HT Chiller Note: Field Splitting the HT Chiller is optional and not required. The HT Chiller is “Field Splitable” allowing you to place the condensing unit away from the Chiller Barrel Compartment. For example, split the HT Chiller if you prefer that the condensing unit be located away from the work area to eliminate noise and heat exhaust. How to Field Split the HT Chiller IMPORTANT: These instructions are a general guide to be used in conjunction with the “Refrigeration Technician Section: Installing the Condensing Unit” located near the end of this manual. Step 1: Empty the Chiller Barrel Energy Storage Tank (Optional) WARNING The weight of the HT Chiller when filled with water is 985 pounds. If you are moving the HT Chiller for the splitting process, it is highly recommended that you drain the Chiller Barrel Energy Storage Tank. 1. Gain access to the internal Chiller Barrel by following the instructions “How to Access the Chiller Barrel Energy Storage Tank”. 2. Empty the Chiller Barrel by following the instructions “How to Remove Water from the Chiller Barrel Energy Storage Tank”. Step 2: Pump Down Refrigerant WARNING To prevent personal injury and/or damage to equipment, only qualified refrigeration technicians are authorized to make the modifications outlined below. The condensing unit uses 410A refrigerant. 1. Using the proper high pressure gauges for 410A, connect the High and Low side hoses to the appropriate pump-down valves at condensing unit. 2. On Chiller Barrel Cabinet front panel, press the ON/OFF push button power switch to apply power to the condenser. 3. Close the High side pump-down valve and pump refrigerant into the condenser until suction pressure reaches approximately 5 psi. 4. Turn off the condenser by pushing ON/OFF push button power switch. The light in the switch will go out. 5. Disconnect the electrical power from the HT Chiller. 6. Close the Low side pump-down valve. www.HTChillers.com Recirculating Chiller Page 21 HT Chiller User Manual & Installation Guide UM-R36000 Rev 1 Step 3: Remove Internal Wiring DANGER To prevent electrical shock, only qualified electricians are authorized to make the modifications outlined below. 1. Completely remove all electrical power from the HT Chiller by using the breaker on your fuse box, or pulling the fuse in your electrical panel, as is appropriate for your electrical connections. 2. Remove the HT Chiller right side panel. 3. Disconnect the 24 Volt control wiring from the Control Box. Step 4: Cut Refrigeration Lines 1. With all electrical lines removed, proceed to unsweat copper connection at the base of the condensing unit after following proper refrigeration techniques for removing remaining refrigerant. Be sure that the brass pump-down valves stay cool while unsweating the connections. 2. Seal refrigerant lines to prevent contamination. Step 5: Separate Chiller Barrel Compartment from Condensing Unit The condensing unit is attached to the Chiller Barrel Compartment top by 2 bolts accessible from the inside of the condensing unit under the fan housing. 1. Separate the condensing unit from the Chiller Barrel Compartment top by removing these 2 bolts. 2. Provide a pad for the condensing unit at its new location. Step 6: Connect New Refrigerant Lines and Electrical Wires 1. Install the condensing unit at the new location according to all city and state codes. 2. Install new refrigerant lines in accordance to the instructions by following section “Refrigeration Technician Section: Installing the Condensing Unit” following proper refrigeration techniques and referring to the long line application chart. 3. Install new liquid line filter dryer. 4. Run new 24-volt control wiring from the condensing unit to the Control Panel in the Chiller Barrel Compartment. 5. Replace the Control Box cover in the Chiller Barrel Compartment. 6. Replace the electrical panel on the condensing unit. CAUTION The Chiller Barrel Energy Storage Tank MUST be filled with water before power is applied. Follow the instructions below. www.HTChillers.com Recirculating Chiller Page 22 HT Chiller User Manual & Installation Guide UM-R36000 Rev 1 Step 7: Position the Chiller Barrel Compartment in the new location. Step 8: Refill the Chiller Barrel Energy Storage Tank 1. Fill the Chiller Barrel Energy Storage Tank to the waterline indicated on the inside of the tank. Refer to the instructions “How to Fill the Chiller Barrel Energy Storage Tank”. 2. Replace the Chiller Barrel Energy Storage Tank cover and secure the ring. 3. Replace the Chiller Barrel Compartment front panel, and then the side panels. Step 9: Evacuate Refrigerant System CAUTION The Chiller Barrel Energy Storage Tank must be filled with water BEFORE powering on the condensing unit to prevent damage to the HT Chiller. 1. Pull proper evacuation of the condensing unit system and release refrigerant accordingly. 2. Deliver power to the HT Chiller by energizing the breakers or fuses depending on your electrical setup. 3. Power up the system by pressing the ON/OFF push button power switch located on the Chiller Barrel Cabinet front panel. The system will begin cooling the water in the Chiller Barrel if the water is above 58°F. 4. Adjust refrigerant to 9° subcooling. www.HTChillers.com Recirculating Chiller Page 23 HT Chiller User Manual & Installation Guide UM-R36000 Rev 1 Refrigeration Technician Section: Installing the Condensing Unit WARNING The following steps must be performed by a qualified refrigerant technician. SAFETY CONSIDERATIONS Improper installation, adjustment, alteration, service, maintenance, or use can cause explosion, fire, electrical shock, or other conditions, which may cause death, personal injury, or property damage. The qualified installer or agency must use factory-authorized kits or accessories when modifying this product. Refer to the individual instructions packaged with the kits or accessories when installing. Follow all safety codes. Wear safety glasses, protective clothing, and work gloves. Use quenching cloth for brazing operations. Have fire extinguisher available. Read these instructions thoroughly and follow all warnings or cautions included in literature and attached to the unit. Consult local building codes and current editions of the National Electrical Code (NEC) NFPA 70. In Canada, refer to current editions of the Canadian electrical code CSA 22.1. Recognize safety information. This is the safety-alert symbol When you see this symbol on the unit and in instructions or manuals, be alert to the potential for personal injury. Understand these signal words; DANGER, WARNING, and CAUTION. These words are used with the safety-alert symbol. DANGER identifies the most serious hazards, which will result in severe personal injury or death. WARNING signifies hazards, which could result in personal injury or death. CAUTION is used to identify unsafe practices, which would result in minor personal injury or product and property damage. NOTE is used to highlight suggestions, which will result in enhanced installation, reliability, or operation. WARNING ELECTRICAL SHOCK HAZARD Failure to follow this warning could result in personal injury or death. Before installing, modifying, or servicing system, main electrical disconnect switch must be in the OFF position. There may be more than 1 disconnect switch. Lock out and tag switch with a suitable warning label. www.HTChillers.com CAUTION CUT HAZARD Failure to follow this caution may result in personal injury. Sheet metal parts may have sharp edges or burrs. Use care and wear appropriate protective clothing and gloves when handling parts. The condensing unit contains system refrigerant charge for operation with the HT Chiller. For proper unit operation, check refrigerant charge using charging information located inside condenser electrical cover and/or in the Check Charge section of this instruction. IMPORTANT: Maximum liquid-line size is 3/8-in. OD for all applications including long line. Refer to Piping and Longline Guideline for further information. IMPORTANT: Always install the factory-supplied liquid-line filter drier. If replacing the filter drier, refer to Product Data Digest for appropriate part number. Obtain replacement filter driers from your HVAC distributor or branch. INSTALLATION Check Equipment and Job Site Install on a Solid, Level Mounting Pad If conditions or local codes require the unit be attached to pad, tie down bolts should be used and fastened through knockouts provided in unit base pan. Refer to unit mounting pattern in Fig. 2 to determine base pan size and knockout hole location. For hurricane tie downs, contact local distributor for details and PE (Professional Engineer) certification, if required by local authorities. On rooftop applications, mount on level platform or frame. Place unit above a load-bearing wall and isolate unit and tubing set from structure. Arrange supporting members to adequately support unit and minimize transmission of vibration to building. Consult local codes governing rooftop applications. Roof mounted units exposed to winds may require wind baffles. Consult the Ruud Application Guideline and Service Manual - Residential Split System Air Conditioners for wind baffle construction. NOTE: Unit must be level to within ±2 ° (±3/8 in./ft., ±9.5 mm/m) per compressor manufacturer specifications. Recirulating Chiller Page 24 HT Chiller User Manual & Installation Guide UM-R36000 Rev 1 Clearance Requirements When installing, allow sufficient space for airflow clearance, wiring, refrigerant piping, and service. Allow 24 in. (609.6 mm) clearance to service end of unit and 60 in. (1219.2 mm) (above unit. For proper airflow, a 6-in. (152.4 mm) clearance on 1 side of unit and 12-in. (304.8 mm) on all remaining sides must be maintained. Maintain a distance of 24 in. (609.6 mm) between units or 18 in. (457.2 mm) if no overhang within 12 ft. (3.66 m) Position so water, snow, or ice from roof or eaves cannot fall directly on unit. NOTE: 18” (457.2 mm) clearance option described above is approved for outdoor units with wire grille coil guard only. Units with louver panels require 24” (609.6 mm) between units. On rooftop applications, locate unit at least 6 in. (152.4 mm) above roof surface. Operating Ambient The minimum outdoor operating ambient in cooling mode without accessory is 55 °F (12.78 °C), and the maximum outdoor operating ambient in cooling mode is 125°F (51.67 °C). Sweat Connection Length), refer to the Ruud Residential Piping and Longline Guide line - Air Conditioners and Heat Pumps using 410 A refrigerant. 3. For alternate liquid line options on 18-42 size units, see Product Data or Piping and Application Guideline. Change Liquid-Line Filter Drier Inside Chiller Barrel Compartment CAUTION UNIT DAMAGE HAZARD Failure to follow this caution may result in equipment damage or improper operation. 1. Installation of a new filter drier in liquid line is required. 2. Filter drier must be wrapped in a heat-sinking material such as a wet cloth while brazing. 3. Flow arrow must point towards Chiller Barrel heat exchanger. Refer to Fig. 3. Liquid Line Dryer CAUTION UNIT DAMAGE HAZARD Failure to follow this caution may result in equipment damage or improper operation. Service valves must be wrapped in a heat-sinking material such as a wet cloth while brazing. Use refrigeration grade tubing. After wrapping service valve with a wet cloth, braze sweat connections using industry accepted methods and materials. Consult local code requirements. Refrigerant tubing and Chiller Barrel heat exchanger are now ready for leak testing. This check should include all field and factory joints. 24ABB3 UNIT SIZE LIQUID Connection & Max. Tube Diameter 36 3/8 RATED VAPOR Connection Tube Diameter Diameter 3/4 3/4 Notes: 1. Do not apply capillary tube or fixed orifice coils to these units. 2. For Tubing Set lengths between 50 and 200 ft. (24.38 and 60.96 m) horizontal or 35 ft. (10.7 m) vertical differential 250 ft. (76.2 m) Total Equivalent www.HTChillers.com Fig. 3 Refrigerant tubes and Chiller Barrel heat exchanger should be evacuated using the recommended deep vacuum method of 500 microns. The alternate triple CAUTION UNIT DAMAGE HAZARD Failure to follow this caution may result in equipment damage or improper operation. Never use the system compressor as a vacuum pump. Recirulating Chiller Page 25 HT Chiller User Manual & Installation Guide UM-R36000 Rev 1 evacuation method may be used (see triple evacuation procedure in service manual). Always break a vacuum with dry nitrogen. Deep Vacuum Method The deep vacuum method requires a vacuum pump capable of pulling a vacuum of 500 microns and a vacuum gage capable of accurately measuring this vacuum depth. The deep vacuum method is the most positive way of assuring a system is free of air and liquid water. A tight dry system will hold a vacuum of 1000 microns after approximately 7 minutes. See Fig. 4. NOTE: Install branch circuit disconnect of adequate size per NEC to handle unit starting current. Locate disconnect within sight from and readily accessible from unit, per Section 440-14 of NEC. Route Ground and Power Wires Remove access panel to gain access to unit wiring. Extend wires from disconnect through power wiring hole provided and into unit control box. WARNING ELECTRICAL SHOCK HAZARD Failure to follow this warning could result in personal injury or death. The unit cabinet must have an uninterrupted or unbroken ground to minimize personal injury if an electrical fault should occur. The ground may consist of electrical wire or metal conduit when installed in accordance with existing electrical codes. Connect Ground and Power Wires Connect ground wire to ground connection in control box for safety. Connect power wiring to contactor as shown in Fig. 5. Final Tubing Check IMPORTANT: Check to be certain factory tubing on both Chiller Barrel heat exchanger and outdoor unit has not shifted during shipment. Ensure tubes are not rubbing against each other or any sheet metal or wires. Pay close attention to feeder tubes, making sure wire ties on feeder tubes are secure and tight. Make Electrical Connections Be sure field wiring complies with local and national fire, safety, and electrical codes, and voltage to system is within limits shown on unit rating plate. Contact local power company for correction of improper voltage. See unit rating plate for recommended circuit protection device. NOTE: Operation of unit on improper line voltage constitutes abuse and could affect unit reliability. See unit rating plate. Do not install unit in system where voltage may fluctuate above or below permissible limits. NOTE: Use copper wire only between disconnect switch and unit. www.HTChillers.com Connect Control Wiring Route 24-v control wires through control wiring grommet and connect leads to control wiring. Refer to HT Chiller Wiring Diagram. Use No. 18 AWG color-coded, insulated (35°C minimum) wire. If condensing unit is located more than 100 ft. (30.48 m) from Chiller Barrel Cabinet, as measured along the control voltage wires, use No. 16 AWG color-coded wire to avoid excessive voltage drop. All wiring must be NEC Class 1 and must be separated from incoming power leads. Recirulating Chiller Page 26 HT Chiller User Manual & Installation Guide UM-R36000 Rev 1 Final Wiring Check IMPORTANT: Check factory wiring and field wire connections to ensure terminations are secured properly. Check wire routing to ensure wires are not in contact with tubing, sheet metal, etc. Start-Up CAUTION UNIT OPERATION AND SAFETY HAZARD Failure to follow this caution may result in personal injury, equipment damage or improper operation. Do not overcharge system with refrigerant. Do not operate unit in a vacuum or at negative pressure. Compressor dome temperatures may be hot. CAUTION PERSONAL INJURY HAZARD Failure to follow this caution may result in personal injury. Wear safety glasses, protective clothing, and gloves when handling refrigerant and observe the following: Front seating service valves are equipped with Schrader valves. Follow these steps to properly start up system: 1. After system is evacuated, fully open liquid and vapor service valves. 2. Replace stem caps after system is opened to refrigerant flow. Replace caps finger-tight and tighten with wrench an additional 1/12 turn. 3. Close electrical disconnects to energize system. 4. If the Chiller Barrel Energy Storage Tank was emptied, confirm that it was refilled. 5. If Water In / Water Out lines were cut, confirm that they were reconnected and purged of air. 6. Confirm that Water In / Water Out lines are open and flowing. 5. Turn on the HT Chiller by pushing the ON/OFF switch located on the front of the chiller. Light in the switch will illuminate. Note: If the unit is noisy and/or cooling not be achieved, the compressor is probably running in reverse direction. Remedy is to change any 2 Incoming power leads. 6. Operate unit for 15 minutes. Check Charge Factory charge amount is 90.6 oz. and desired subcooling is 9 °F and is shown on unit rating plate. Charging method is shown on information plate inside condensing unit. To www.HTChillers.com properly check or adjust charge, conditions must be favorable for subcooling charging. Favorable conditions exist when the outdoor temperature is between 70°F and100°F (21.11°C and 37.78°C), and the Chiller water is between 70°F and 90°F (7.22°C and 26.67°C). Follow the procedure below: Unit is factory charged for 15ft of lineset. Adjust charge by adding or removing 0.6 oz/ft of 3/8 liquid line above or below 8ft (2.44 m) respectively. For standard refrigerant line lengths (50 ft/24.38 m or less), allow system to operate in cooling mode at least 15 minutes. If conditions are favorable, check system charge by subcooling method. If any adjustment is necessary, adjust charge slowly and allow system to operate for 15 minutes to stabilize before declaring a properly charged system. If the Chiller water temperature is above 80°F (26.67°C), and the outdoor temperature is in the favorable range, adjust system charge by weight based on line length and allow the Chiller water temperature to drop to 80°F (26.67°C) before attempting to check system charge by subcooling method as described above. NOTE: If line length is beyond 50 ft (24.38 m) or greater than 20 ft (6.10 m) vertical separation, See Long Line Guideline for special charging requirements. Final Checks IMPORTANT: Before leaving job, be sure to do the following: 1. Ensure that all wiring is routed away from tubing and sheet metal edges to prevent rub-through or wire pinching. 2. Ensure that all wiring and tubing is secure in unit before adding panels and covers. Securely fasten all panels and covers. 3. Tighten service valve stem caps to 1/12-turn past finger tight. 4. Leave this User Manual & Installation Guide including Wiring Diagram with owner. CARE AND MAINTENANCE For continuing high performance and to minimize possible equipment failure, periodic maintenance must be performed on this equipment. Frequency of maintenance may vary depending upon geographic areas, such as coastal applications. See Owner’s Manual for information. Recirulating Chiller Page 27 HT Chiller User Manual & Installation Guide UM-R36000 Rev 1 REFRIGERANT PIPING LENGTH LIMITATIONS Liquid Line Sizing and Maximum Total Equivalent Lengths† for Cooling Only Systems with Puron® Refrigerant: The maximum allowable length of a split system depends on the liquid line diameter and vertical separation between Chiller Barrel heat exchanger and condensing unit. See Table below for liquid line sizing and maximum lengths: Maximum Total Equivalent Length Outdoor Unit BELOW Indoor Unit Size Liquid Line Connection Liquid Line Diam. w/ TXV 036 AC with 410A 3/8 3/8 AC with 410A Refrigerant Maximum Total Equivalent Length†: Outdoor unit BELOW Indoor Vertical Separation ft (m) 0-5 6-10 11-20 21-30 31-40 41-50 51-60 61-70 71-80 (0-1.5) (1.8-3.0) (3.4-6.1) (6.4-9.1) (9.4-12.2) (12.5-15.2) (15.5-18.3) (18.6-21.3) (21.6-24.4) 250* 250* 250* 250* 250* 250* 250* 250* 250* * Maximum actual length not to exceed 200 ft (61 m) † Total equivalent length accounts for losses due to elbows or fitting. Maximum Total Equivalent Length Outdoor Unit ABOVE Indoor Unit Size 036 AC with 410A Liquid Line Connection Liquid Line Diam. w/ TXV 3/8 3/8 AC with 410A Refrigerant Maximum Total Equivalent Length†: Outdoor unit BELOW Indoor Vertical Separation ft (m) 25 26-50 51-75 76-100 101-125 126-150 151-175 176-200 (7.6) (7.9-15.2) (15.5-22.9) (23.2-30.5) (30.8-38.1) (38.4-45.7) (46.0-53.3) (53.6-61.0) 250* 250* 250* 250* 250* 250* 250* 250* * Maximum actual length not to exceed 200 ft (61 m) † Total equivalent length accounts for losses due to elbows or fitting. REFRIGERANT CHARGE ADJUSTMENTS Liquid Line 3/8 0.5 oz./ft (Factory charge for lineset = 3 oz / 85.05 g) Charging Formula: [(Lineset oz/ft x total length) – (factory charge for lineset)] = charge adjustment Example: System has 20 ft of line set. Formula: (.50 oz/ft x 20ft) – (3 oz.) = 7 oz. Net result is to add 7 oz. of refrigerant to the system. www.HTChillers.com Recirulating Chiller Page 28 HT Chiller User Manual & Installation Guide UM-R36000 Rev 1 LONG LINE APPLICATIONS An application is considered Long Line, when the refrigerant level in the system requires the use of accessories to maintain acceptable refrigerant management for systems reliability. See Accessory Usage Guideline table for required accessories. Defining a system as long line depends on the liquid line diameter, actual length of the tubing, and vertical separation between the indoor and outdoor units. For Air Conditioner systems, the chart below shows when an application is considered Long Line. Liquid Line Size AC WITH 410A REFRIGERANT LONG LINE DESCRIPTION ft (m) Beyond these lengths, long line accessories are required Units On Same Level Outdoor Below Indoor 3/8 80 (24.4) Outdoor Above Indoor 35 (10.7) vertical or 80 (24.4) total 80 (24.4) ELECTRICAL DATA UNIT SIZEVOLTAGE, SERIES V/PH OPER VOLTS* MAX MIN COMPR FAN LRA RLA FLA MCA MAX FUSE** or CKT BRK AMPS 036 230/1 Ø 79.0 16.7 0.8 35 036 230/3 Ø 73.0 10.4 0.8 20 * Permissible limits of the voltage range at which the unit will operate satisfactorily † If wire is applied at ambient greater than 30°C, consult table 310-16 of the NEC (NFPA 70). The ampacity of non-metallic-sheathed cable (NM), trade name ROMEX, shall be that of 60°C conditions, per the NEC (NFPA 70) Article 336-26. If other than uncoated (no-plated), 60 or 75°C insulation, copper wire (solid wire for 10 AWG or smaller, stranded wire for larger than 10 AWG) is used, consult applicable tables of the NEC (NFPA 70). ‡ Length shown is as measured one way along wire path between unit and service panel for voltage drop not to exceed 2%. ** Time -Delay fuse. FLA - Full Load Amps LRA - Locked Rotor Amps MCA - Minimum Circuit Amps RLA - Rated Load Amps NOTE: Control circuit is 24-V on all units and requires external power source. Copper wire must be used from service disconnect to unit. All motors/compressors contain internal overload protection. Complies with 2007 requirements of ASHRAE Standards 90.1 CHARGING SUBCOOLING (TXV-TYPE EXPANSION DEVICE) REQUIRED SUBCOOLING °F 9° UNIT SIZE-VOLTAGE, SERIES 36,000 www.HTChillers.com Recirulating Chiller Page 29 HT Chiller User Manual & Installation Guide UM-R36000 Rev 1 Trouble Shooting The following chart is included to help guide you as you approach a troubleshooting course of action. For assistance, please feel free to call Technical Support at 1-830-370-2362 or 1-800-259-2720 toll-free. WARNING To prevent electrical shock, disconnect all power to unit before servicing. Symptom Possible Cause Actions to Try System not cooling (Recirculating pump running, condensing unit off) If upon initial startup from receipt of chiller, or if unit coming out of storage, the freeze stat may be tripped if unit was exposed to temperatures below 35° System not cooling Freeze stat trips while unit operating Replace both thermostats Improper voltage to unit Confirm supply voltage Compressor running backwards as indicated by noise in the compressor 3-phase only: Switch any 2 power leads Faulty thermostat Replace thermostat. Use ohm meter to determine which thermostat is bad. Dirty condenser coil Clean coil Condenser fan not operating Improper charge Circulating pump noisy Circulating pump not running Coolant leaking from chiller Water leaking from check valve from CBEST Coolant leaking from rotary seal on pump Reset freeze thermostat 1. Check voltage to the fan 2. Check run capacitor 3. Replace fan motor Check and adjust to 9 degrees subcooling Coolant filter dirty Restriction in coolant lines Make up feed valve closed Low coolant in tank Check coolant filter Check for restrictions in the lines Open Make up feed valve Fill coolant tank Insufficient coolant in tank Faulty coolant level switch Faulty circulating pump contactor Faulty pump Fill coolant in tank Replace coolant level switch Replace circulating pump contactor Replace pump Faulty float valve in coolant tank Line failure (connections or fittings) Replace coolant tank float valve Tighten or replace connections Tighten or replace fittings Ruptured heat exchanger Replace heat exchanger, replace the two thermostats, and replace the freeze thermostat. Faulty pump Replace pump www.HTChillers.com Recirulating Chiller Page 30 HT Chiller User Manual & Installation Guide UM-R36000 Rev 1 Wiring Diagram (3-Phase Units Only) www.HTChillers.com Recirulating Chiller Page 31 HT Chiller User Manual & Installation Guide UM-R36000 Rev 1 Receiving and Unpacking Instructions IMPORTANT: Inspect the shipping crate immediately upon receipt and file a claim with the delivery driver if any obvious damage is present. Upon delivery, carefully remove the crating and inspect the HT Chiller for damage. Call HT Chiller Support at 1-830-370-2362 or 1-800-259-2720 toll-free within 72 hours of receipt if you have any questions or concerns. Repair Authorization All HT Chiller warranty repairs must be first authorized by calling Hensley Thermodynamics technical support: 1-830-370-2362 or 1-800-259-2720. Any repairs performed without prior authorization will be at owner’s expense and may void the warranty. Proof of purchase and delivery date are required before service can be authorized. Only qualified personnel shall be allowed to unpack, install, use and perform maintenance on this unit. Only a qualified HVAC technician is authorized to repair the condensing unit under warranty. This warranty will be null and void if unauthorized personnel perform any modifications or repairs on this unit. Misuse of the product will void the warranty. Hensley Thermodynamics Corporation is not liable for any injury or damaged cause by incorrect installation, maintenance, or operation of this HT Chiller resulting from failure to follow instructions and guidelines outlined in this manual. Replacement of parts or subassemblies will be provided under warranty when they have failed due to faulty manufacturing. Misuse will void warranty. Limited Warranty The Limited Warranty for the HT Chiller is 2 years parts and labor starting the date of delivery. This warranty is non-transferable. You will need the chiller unit serial number for all correspondence. The unit’s serial number is located on the back of the condenser. www.HTChillers.com Recirulating Chiller Page 32 HT Chiller User Manual & Installation Guide UM-R36000 Rev 1 Limited Warranty – Parts and Labor – 2 years SCOPE OF WARRANTY AND EQUIPMENT COVERED: The products covered by this Limited Warranty. Hensley Thermodynamics (Manufacturer) warrants the Covered Equipment to be free from defects in materials and workmanship, and will repair or replace, at its option, ANY PART of Covered Equipment which fails in normal use and service within the Applicable Warranty Periods in accordance with the terms, including, but not limited to, the specific exclusions set forth below, of this Limited Warranty and subject to the Manufacturer’s right to inspect and validate the warranty claim as set forth below. If an exact replacement is not available, an equivalent unit or credit will be provided. The replacement will be warranted for only the unexpired portion of the original Applicable Warranty Period. If government regulations, industry certification or similar standards require the replacement unit to have features not found in the defective unit, you will be charged for the difference for those required features. If you pay the difference, you will also receive a completely new Limited Warranty for the new replacement unit. The Manufacturer does not authorize or warranty any online/Internet sale of equipment through auction or any other method of unapproved online sales direct to the consumer, nor the sale of equipment by liquidators. The ONLY approved online sales are through the Manufacture’s websites: www.HTChillers.com and www.HensleyThermodynamics.com EFFECTIVE DATE AND APPLICABLE WARRANTY PERIODS: The Effective Date of warranty coverage is the date of sale plus 2 years. EXCLUSIONS – In addition to the specific exclusions set forth in the other sections of this Limited Warranty document, THIS Limited Warranty WILL NOT APPLY TO: A) damages, malfunctions, or failures resulting from failure to properly install, operate or maintain Covered Equipment in accordance with the Manufacturer’s instructions B) damages, malfunctions, or failures caused by misuse, accident, contaminated or corrosive atmosphere, vandalism, freight damage, fire, flood, freeze, lightning, acts of war, acts of God and the like C) Covered Equipment which is not installed by qualified, trained personnel in accordance with applicable codes, ordinance, and good trade practices; or D) damages, malfunctions, or failures caused by the use of any attachment, accessory or component not authorized by the Manufacture: E) Covered equipment when operated with system components or accessories which do not match or meet the specifications recommended by the Manufacturer; F) any Covered Equipment manufactured by the Manufacturer that has been sold to the consumer via the Internet from an unapproved website or auction website. Online sales are only authorized through www.HTChillers.com and www.HensleyThermodynamics.com SHIPPING COSTS: This Limited Warranty does NOT cover shipping costs. You are responsible for the cost of shipping warranty replacement parts from our factory to the location of your Covered Equipment. You also are responsible for the cost of shipping failed parts and for incidental costs incurred locally, including handling charges. (You also must pay the shipping costs of returning the failed part to the port of entry into the continental United States.) LABOR COSTS: This Limited Warranty covers any labor costs or expenses for repair that has been authorized by the Manufacturer. HOW TO OBTAIN WARRANTY CLAIMS ASSISTANCE: You must promptly report any failure covered by this Warranty to the Manufacturer. Normally, your local HVAC air conditioning contractor will be able to take the necessary corrective action by obtaining replacement parts through the Manufacturer. The name and location of local HVAC contractors can be usually found in your telephone directory in the HVAC contractor section. HOWEVER, ANY PART REPLACEMENTS ARE MADE SUBJECT TO VALIDATION BY THE MANUFACTURER OF IN-WARRANTY COVERAGE. Any part to be replaced must be made available in exchange for the replacement. ECLUSIVE WARRANTY- LIMITATION OF LIABILITY: This Limited Warranty is the ONLY warranty given by the Manufacturer. This warranty is non-transferable. No one is authorized to make any warranties on behalf of the Manufacturer. ANY IMPLIED WARRANTIES, INCLUDING MERCHANTABILITY OR FITNESS FOR A PARTICULAR PURPOSE, SHALL NOT EXTEND BEYOND THE APPLICABLE WARRANTY PERIODS SPECIFIED IN THIS LIMITED WARRANTY. THE MANUFACTURER’S SOLE LIABILITY WITH RESPECT TO DEFECTIVE PARTS OR FAILURE SHALL BE AS SET FORTH IN THIS LIMITED WARRANTY, AND ANY CLAIMS FOR INCIDENTAL OR CONSEQUENTIAL DAMAGES ARE EXPRESSLY EXCLUDED. Some states do not allow limitations on how long an implied warranty lasts or for the exclusion of incidental or consequential damages, so the above limitation or exclusion may not apply to you. This Limited Warranty gives you specific legal rights, and you may also have other rights which vary from state to state. The Manufacture suggests that you immediately complete the Purchase and Installation Records section and retain this Limited Warranty Certificate in the event warranty service is needed and that you keep proper documentation. www.HTChillers.com Recirulating Chiller Page 33 HT Chiller User Manual & Installation Guide UM-R36000 Rev 1 Purchase and Installation Records COMPLETE THE FOLLOWING INFORMATION FOR YOUR RECORDS – DO NOT MAIL Date of Purchase: Date of Delivery: Model Number: Serial Number: Date of Original Installation: Installing Contractor Name: Contractor’s address/phone: Owner Name: Address: City/State/Zip: Manufactured by Hensley Thermodynamics P.O. Box 318, Ingram, Texas 78025 (mailing address) 454 Cade Loop, Ingram, Texas 78025 (shipping address) 1-830-370-2362 1-800-259-2720 www.HTChillers.com www.HTChillers.com Recirulating Chiller Page 34