Download Model:IPcall-200 User Manual
Transcript
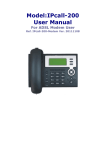
Model:IPcall-200
User Manual
For DHCP Router User
Ref. IPcall-200-DHCP Ver. 20110603
Safety Notices
Please read the following safety notices before installing or using this phone. They are
crucial for the safe and reliable operation of the device.
l Please use the attached external power supply in the package. Other power
adapter may cause damage to the phone if it’s rating may out of the specification.
l Before using Power Adapter, please check with your local power voltage. Any
inaccurate power voltage may cause fire and damage.
l Please be careful to the power cord. If the power cord or plug is impaired, do not
use it to avoid fire or electric shock.
l Do not drop, knock or shake it. Rough handling can break internal circuit boards.
l Do not put the device in places where there is direct sunlight. Also do not put the
device on carpets or cushions. It may cause electro-leakage or breakdown.
l Avoid exposure the phone to high temperature, below 0℃ or high humidity.
Avoid the unit with any liquid or in wet environment .
l Do not attempt to open it. Non-expert handling to the device could damage it.
Consult your authorized dealer for help
l Do not use harsh chemicals, cleaning solvents, or strong detergents to clean it.
Wipe it with a soft cloth that has been slightly dampened in a mild soap and
water solution.
l When lightning, It is recommended to disconnect the power plug and the internet
cable to avoid a damage by a electric-shock.
Products Advantage
l
l
l
l
Unlimited free toll calls to any fixed line (PSTN) Home phones or mobile
phones of more than 40 countries and cities in the world. (Referred to our
countries service coverage list) Now you will save much expensive IDD
expenses every year since having this unique FREECall-Phone.
It is convenient to be used, simply like to use an ordinary telephone every days.
The appearance looks fashionable, LCD display screen and blue backlight.
High-quality conversation effect, performing the intelligent human-computer
interaction function operation.
It needs to know before usage
l
This machine is guaranteed for free toll unlimited calls within one year. It will be
2
l
l
valid within 365 days since it is activated which 10 calls have been made
successfully. If you satisfy for this FREECall-Phone, you can continue to use the
service by paying an annual fee for our server maintenance yearly. So that, there
will be a pop up ALERT Warning before 30 days of the expired date to remind
you. Please call your local agent whom you bought the IPcall-200 from to pay
for and tell him what your unique S/N which printed on the back of your device
is.
In your current network, if someone is carrying on BT for downloading or
large-scale game, may have certain influence on conversation quality of this
machine at the same time. Try to counter-change their usage period.
If there is a network exchanger after the router, please be sure the network
exchanger and router to be in the same address pool. To avoid a problem, a best
way is that connect the IPcall-200 to the router directly.
Table of Content
1. INTRODUCTION……………………………………………………………………
1.2. PACKING CONTENT...............................................................................................................
1.3. KEYPAD ................................................................................................................................
1.4. PORT FOR CONNECTING...........................................................................................................
2.INITIAL CONNECTING AND SETTING ................................................................................
2.1. CONNECT THE PHONE ..............................................................................................................
2.2. INITIAL SETTING .....................................................................................................................
2.2.3. DHCP mode ....................................................................................................................
3. BASIC FUNCTIONS ...................................................................................................................
3.1. BASIC OPERATION ..................................................................................................................
3.1.1. Dial Rules
3.1.2. Making a call & Phonebook...........................................................................................
3.1.3. Ending a call ...................................................................................................................
3.1.4. Calling Hold & Conference............................................................................................
3.1.5. Call Records ....................................................................................................................
3.1.6. FREE COUNTRY & DISTRICT LIST
4. SETTING................................................................................................................................
4.1. INTRODUCTION OF CONFIGURATION .......................................................................................
4.4. SETTINGS VIA PHONE’S KEYBOARD..........................................................................................
3
4.4.1. How to set via the phone’s keyboard..........................................................................................
4.4.2. Phone menu................................................................................................................................
5. APPENDIX ................................................................................................................................
5.1. SPECIFICATION .......................................................................................................................
5.1.1. Device specification....................................................................................................................
5.1.2. Voice Features............................................................................................................................
5.1.3. Network Features .......................................................................................................................
5.2. DIGIT-CHARACTER MAP TABLE................................................................................................
Introduction for IPcall-200
1.2. Packing Content
The original packing contains the following parts:
1. Main unit x1
2. Handset x1
3. Handset cord x1
4. Power supply x1
5. Cat-5 Ethernet cable x1
6. Instruction manual x1
1.3. Keypad
The numeric keypad with the keys 0 to
9, *, and # are used for dialing
Quick View for Keys Mapping:
Key
Key name
Menu
Function Description
Press the MENU key to enter for setup menu in ON-HOOK.
4
Phone Book
Callers
LED
SysInfo
Enter
Exit
Navigation
Keys
Press the Phone Book key to check the record list and add a
new record as well as modify a record in ON-HOOK.
Press the Callers key to short cut for checking the Missed call
log either at ON.OFF-HOOK modes.
LED blinks to alert for a new Voicemail.
These three Soft keys below the LCD to realize the various
functions in either setup or dialing mode. You will see what
function will be in the bottom line of LCD when performing in
difference modes.
In ON-HOOK mode:
Press UP key to scroll for Outgoing> Incoming> Miss Call log.
Then use LEFT/RIGHT key to find Detail inside of each log.
Press RIGHT once to view the Internet Sever Register status
Press DOWN once to view the current IP address of this
Device.
In OFF-HOOK mode
Touch LEFT /RIGHT key once to adjust the Receiver volume
and able to adjust the Ringing level when a call is coming.
Function reserved for an Advance service later
MWI
SMS
Function reserved for an Advance service later
Transfer
Function reserved for an Advance service later
Release
Hold
Mute
R/send
Press Release key to escape from any modes and back to idle.
You can also use this KEY to interrupt a dialing when need.
Temporarily hold an active call during conversation. Press the
key again to resume the call. In the idle state, it is a toggle
button to enable / disable your voice transferred
Press this key once to avoid your private talk to other side
temporarily. It is a toggle button to enable / disable your voice
transferred
Redial the last call. Also use this key to make a quick dial from
phone book. In the idle state, use the key to browse the
outgoing call log.
5
Hands-free
Push to talk without pick-up Handset .
1.4. Port for connecting
POWER
DC
LAN
WAN
Power switch
Power port
PC port
Router port
Select ON/OFF (Slide to ON normally)
Output: 5V/1.0A (Always connected with adapter)
To PC (Let it free if using a Router)
From Router /ADSL Modem
There are two Network ports in the real: The WAN and the LAN port. Before you
connect the power source, please carefully read Safety Notices of this user manual.
2.Initial connecting and Setting
2.1. Connect the Phone
Step 1:
Connect the handset to the handset port by the handset cable in the package.
Step 2:
Connect the DC plug to the Power port on the real of the phone. The attached AC
adapter will be suitable for either 110V or 240V AC outlet in your country.
Step 3:
Before you connect the phone to the network, please check and consult an experience
people or your internet service provider for what kind of your network is using. In this
manual, we assume you are using a standard router which already working as a
DHCP server in office or home to access to the internet as the picture below.
.
6
Step 4: Slide the Power switch on the real of the phone to ON, LCD screen will
displays “Initializing…Wait Log On…”.until the real time clock to show the current
date, time and the Banner of “COMPUTEC IPCALL”. Now your phone is ready to be
used for any global calls.
If your LCD screen displays different information other than the above like
“WAN Disconnected” or “Initializing Failed”, you need to check the network
connection or if the Cat-5 plugged in the proper port correctly as well as what is the
current broadband protocol. You may check the following paragraph to compare the
current setting. If you are sure that a DHCP router is not in-use, you may need to
download other Instruction Manual for either Fixed static IP or PPPoE dial up users
from our website : www.computechnic.com.
2.2. Initial Setting
In fact, this Phone supports DHCP from your router by default. The CPU in the
phone does able to configure all of necessary setting automatically for you since
power-up. In case you notice the Initializing failed, you can try to adjust the setting
according to the following steps to resolve the problem.
2.2.3. Setting for DHCP mode
1. Press the MENU key, and press the DOWN key twice, the LCD screen will display
“3 Network”. Then press the Enter key, the LCD screen will display “1 WAN”.
2. Press Enter to show “1 Net Mode”. Press Enter again to see if DHCP displaying.
Otherwise, push the same key which showing “Edit” once, then press the LEFT /
RIGHT of navigator keys to find until screen shows “<>DHCP”. Press the same
key that showing “Save”,LCD responds “Saved” and now the net mode is
changed for DHCP.
3. Press QUIT key four times to exit for ON-HOOK mode. Press DOWN key to see if
“DHCP” appear correctly. If LCD still show “Negotiating…”, means that phone
is still trying to search a DHCP server and does not find it yet. The phone will not
work at this status. If there is IP address displayed finally, means DHCP server
(Your router provided) has been detected and is ready to work.
7
3. Basic Functions
3.1. Basic operation
3.1.1 Dial rules:
Call for a Mobile Phone:
‘900’+Country code + Cellphone / Mobile number +
SEND
Dial for a Fixed line Phone:
‘900’+Country code + Area code + Tel No. +
SEND
3.1.2. Making a call
l
Hand-free Quick-dialing
In On-Hook mode, push your desired number, and press SEND button, phone
will dial the call with hands-free mode immediately.
l
Pick up handset to Dial
Off-Hook by pick up handset, input your desired number, then press SEND
button, the call is sent immediately.
l
Dial from PHONEBOOK
Press PHONE BOOK any time to activate the Phonebook, press Enter to the
List,push UP/DOWN to search the person which you want to contact. Press
to dial the displayed number on the screen.
SEND
Add a Record to PHONEBOOK
In either ON /OFF-HOOK mode, press “PHONEBOOK” and then push “Add”,
LCD will show two Rows for Name and Tel. Now you can input Caller’s Name
according to Digit-character map table below. After done for the Name input,
move the cursor to the Tel. by pressing DOWN key, then you can enter the Caller’s
phone digits one by one plus 2s pause between each. An instant touch will affect to a
difference letter or symbol changed immediately.
l
Dial from CALLER List
Press the CALLER key in On-Hook mode, then select the either caller band by
the UP/DOWN key. The press RIGHT key to display the list of the current band.
Brows the desired phone number with UP/DOWN key and press SEND to dial the
8
displayed number.
3.1.3. Ending a call
l
Simply hangs up by left handset on cradle.
l
Hangs up by press hands-free button once.
l
Press “Release” key at any time when you want to re-make a call immediately.
3.1.4. Calling Hold / Call Conferencing
You can hold the current call by pressing HOLD to hold the line temporary without
interrupt the current call. Press again to resume your conversation. This feature is also
available in 3-way conference call in the internet if all parties are using IPcall-200.
You can make another call to the third party who also is using an IPcall-200 during a
Hold period. Then press Hold again to start conference.
.
3.1.5. Call Records
The phone memory capacity are enough for 100 missed calls, and 100 outgoing calls.
If the memory is full, the newest will overwrite the oldest repeatedly. In case AC
power is disconnected or phone system may reboot, all call records will be discarded.
l
Missed Call (Incoming calls are allowed from other IPcall-200)
Press CALLER key to short-cut to “Missed Call” list . You see how many number
of total missed calls that you did not pick up yet from other IPcall-200 in the world.
Press the “Enter” key to access to the List and use UP/ DOWN keys to browse the
entire records. If there is no missed call, screen will show “List Is Empty”.
l
Incoming call (Incoming calls are allowed from other IPcall-200)
Press CALLER and use UP/DOWN keys to select to “Incoming Call”. Press the
“Enter” key to access to the List and use UP/ DOWN keys to browse the entire
records. If there is no Incoming call, screen will show “List Is Empty”.
l
Outgoing call
Press CALLER and use UP/DOWN keys to select to “Outgoing Call”. Press the
“Enter” key to access to the List and use UP/ DOWN keys to browse the entire
records. If there is no Outgoing call, screen will show “List Is Empty”.
9
3.1.6 Free Country And District List
Both Cell Phone and PSTN Fixed line Phone are available for the following
countries:
North America:USA / Canada
Asia: China / Hong Kong / Singapore / Malaysia / Thailand / India / Philippine
/Pakistan (If you had bought the phone that specially for Philippine as well as
Pakistan)
Other countries and cities for PSTN Fixed line Phone in the World such as:
Asia: Taiwan, Japan, Korea, Australia,
Euro: England (U.K.), France, New Zealand, Denmark, Germany, Spain, Sweden,
Portugal, Russia, Romania, Kazakhstan, Austria, Irish, San Marino, Poland, Hungary,
Switzerland, Greece, Luxembourg, Belgium, Norway,
Middle East: Cyprus, Israel,
South America: Colombia, Mexico, Argentina (Buenos Aires), Brazil, Venezuela,
Peurto- Rico,
More countries will be added into the list monthly. Please bookmark the link for
update the information in our website
4. System Setup
4.4.1. How to access to SETUP via the phone’s keyboard.
In case you want to resolve a problem or you already be an experience user, you
can access to the setup mode by using MENU. Other keys like the UP / DOWN /
LEFT / RIGHT / SysInfo / Enter / Exit keys that are used to complete the proper
setting.
l Use UP/ DOWN and SysInfo to access to the sub-menu.
l Use LEFT / RIGHT to adjust screen brightness, contrast, ring level and voice
volume.
l Use Enter and Exit to modify or exit during setting.
10
4.4.2. Phone System Menu
Phone Setup Menu is displayed when the Menu key is pushed. It will be scrolled up
or down in a circle.
Note:
1. The System Config in this phone is not allowed to access. It is protected by the
password.
2. Even you are allowed to access into user’s config menu, but if the Phone display
correctly with the current time, there is no need to access the Menu which may
occurred a problem by an improper operation. Important: Don’t try to change
anything by pressing the MENU attempt to modify any existing parameter.
The CPU in the phone has done for you since Power up.
5. Appendix
5.1. Specification
5.1.1. Device specification
Item
AC
Adapter(Input/Output)
WAN
Port
LAN
Power Consumption
LCD size
Operation Temperature
Relative Humidity
Main Chipset
SDRAM
Flash
Size(W x H x D)
Weight
Details
Input:100-240VAC 50-60Hz Output:DC 5V/1A
10/100Base- T RJ-45 for LAN from Router/ ADSL Modem
10/100Base- T RJ-45 for PC Extension
Idle:1.5W/Active:1.8W
74 x 28mm dot-matrix LCD
0~40℃
10~65%
BCM 1190
16Mbits
4Mbits
11.6×8×3 in.(295×205×75mm)
2.07lb.(0.94kg)
5.1.2. Voice Features
l
l
l
l
l
Echo cancellation
Supports full duplex.
Storage for phonebook, outgoing calls / missing calls / Incoming calls up to 500
records. 100 records of each band.
Options for 12/24 time format.
All Calls with time stamp
11
5.1.3. Network Features
l
l
l
l
l
l
WAN/LAN: Support Bridge and Router mode.
Support basic NAT and NAPT
PPPoE for xDSL modem
VLAN compatible
Support DHCP, getting IP on WAN port automatically
Support DHCP distribute IP on LAN port
5.2. Digit-character map table
Button
Character
1@
Button
Character
7PQRSpqrs
2ABCabc
8TUVtuv
3DEFdef
9WXYZwxyz
4GHIghi
.
5JKLjkl
0
6MNOmno
#
12


