1
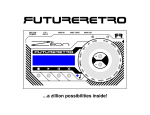
Written by Jered Flickinger
Copyright 2013
Future Retro
www.future-retro.com
TABLE OF CONTENTS
1
INTRODUCTION
- Overview
- Precautions
- Disclaimer
- Warranty
2
CONNECTIONS
- MIDI In
- MIDI Thru
- MIDI Out A
- MIDI Out B
- MIDI Out C
- MIDI Out D
- Power
3
MODES
- Selecting Modes
- Setting Input MIDI Channel
- Unison Bend
- Detune Overview
- Detune Down
4
- Detune Up/Down
- Detune Up
- Unison Poly
- Don’t Panic!
- Poly Random
5
- Poly Chase
- Poly First
- Chord Memory
- Define Voices
6
- Define Routing
- Routing 1
- Routing 2
- Routing 3
7
- MIDI clock
INITIALIZING THE UNIT
TROUBLESHOOTING
SPECIFICATIONS
8
ROUTING DIAGRAM 1
9
ROUTING DIAGRAM 2
INTRODUCTION
Thank you for choosing the Mondovox MIDI processor. Please take the time to read through this manual for
a full understanding of the features, tips, and precautions.
OVERVIEW
The Mondovox provides new ways to play, control, and breathe new life into your MIDI sound modules.
Although primarily designed as a way to play up to 16 monophonic MIDI synthesizers polyphonically, there
are various other ways that this device can be used to produce unique results. The key is experimentation.
PRECAUTIONS
The Mondovox is powered by a 9V DC output power supply. Never use AC output power supplies with this
unit. Should your power supply become lost or damaged, replacements can be purchased directly from
Future Retro.
Never open the unit. There are no user-serviceable parts inside. Should your unit ever need repairs, please
contact Future Retro for all servicing.
Never expose this device to rain or moisture. If liquids are spilled into the unit, unplug the power supply
immediately, and let the unit sit in a dry warm environment until all moisture has evaporated.
Avoid exposing the unit to smoke or to dusty or extreme hot and cold environments, as these things may
cause premature component failure.
Clean the exterior with a soft dry cloth. Never use abrasive cleaners that may harm the surface and finish of
the unit.
DISCLAIMER
All information represented in this manual is believed to be accurate at the time of publication. Any
addendums to the manual and further product support may be found on our web site:
www.future-retro.com
Product specifications may be subject to change at any time.
Future Retro assumes no responsibility for inaccuracies, errors, omissions, or liability for any loss or damage
resulting directly or indirectly from the use, misuse, or abuse of this product.
Information in this manual may not be copied, reproduced, or distributed in any form without permission from
Future Retro.
WARRANTY
All of our products are hand-built using only the finest quality components. We take pride in hand soldering,
assembling, inspecting, and testing each unit in-house to meet our high-quality standards and provide troublefree use.
This product comes with a 1-year warranty covering all parts and labor.
Please register your product at www.future-retro.com within 30 days of your purchase.
1
CONNECTIONS
MIDI IN
The MIDI IN jack on the front panel is where you will connect the MIDI Out of your MIDI controller or
sequencer to. Note that the LED in this section can be used to monitor when data is being sent to the
MIDI IN port.
MIDI THRU
The MIDI THRU jack on the front panel will transmit all data that is received at the MIDI IN jack without
latency. Use this when you need to daisy-chain multiple devices together.
MIDI OUT A
MIDI OUT A is the MIDI output of processor A. Connect this output to the MIDI In of a sound module.
Notice there is one jack located on the front panel and three more located on the back panel. The LED to the
left of this front-panel jack can be used to monitor when data is being sent to the MIDI OUT A port.
MIDI OUT B
Connect MIDI OUT B, which is the MIDI output of processor B, to the MIDI In of a sound module. Notice
there is one jack located on the front panel and three more located on the back panel. The LED to the left of
this front panel jack can be used to monitor when data is being sent to the MIDI OUT B port.
MIDI OUT C
MIDI OUT C is the MIDI output of processor C, and you connect this output to the MIDI In of a sound
module. One jack is located on the front panel and three more are located on the back panel. The LED to the
left of this front-panel jack can be used to monitor when data is being sent to the MIDI OUT C port.
MIDI OUT D
Lastly, MIDI OUT D is the MIDI output of processor D. Connect this output to the MIDI In of a sound
module. One jack is located on the front panel and three more are located on the back panel. The LED to the
left of this front-panel jack can be used to monitor when data is being sent to the MIDI OUT D port.
POWER
The Mondovox comes with a universal 9V DC output power supply capable of being used with power mains
ranging from 100-240V AC, which allows the unit to be used anywhere in the world simply by using the
correct power plug type with the adapter.
The power jack is located on the rear of the unit. Connect the power adapter to the power jack and the AC
outlet.
To turn the unit on, simply press the Power switch located on the front panel. If the unit is receiving power,
one of the three LEDs located just to the left of the Power switch should be turned on.
2
MODES
SELECTING MODES
You can changes modes by rotating the 12-position rotary switch on the front panel. Note that modes will
only be recognized as changed to the new mode once all currently playing notes have been released.
Therefore it is a good idea to change modes only when no notes are being sent from your MIDI controller or
sequencer. The exception to this rule is you do need to play/hold notes while in Poly First mode, and then
switch to Chord Mem to latch the held notes.
SETTING THE INPUT MIDI CHANNEL
To set the input MIDI channel, turn the unit on and send it a Note-On message on the desired MIDI channel.
This will be the only MIDI channel the Mondovox will respond to until the MIDI channel is changed. To
change the MIDI channel turn the unit off, then back on, and send a new MIDI Note-On message on the
desired MIDI channel.
UNISON BEND
Note-On/Off, Velocity, Pitch Bend, and Mod Wheel messages received on the input MIDI channel will be
sent out of all enabled MIDI Out channels simultaneously. Unlike Unison modes found on traditional poly
synthesizers that allow you to play only 1 note at a time while in unison, the Mondovox allows you to play up
to 16 notes and have these transmitted out of all enabled MIDI channels.
When controlling analog monophonic synthesizers, playing more than one note will typically allow you to
trigger their internal glide circuitry. And when controlling something like a digital multi-timbral sound
module, it allows you to play massive chord sounds.
DETUNE OVERVIEW
Detune modes are similar to Unison Bend, in that Note-On/Off, Velocity, and Mod Wheel messages received
on the input MIDI channel will be sent out of all enabled MIDI Out channels simultaneously.
In the Detune modes, however, Pitch Bend messages are now used to detune all enabled MIDI channels.
Detuning voices in this way can create all sorts of useful results, from flanging, chorusing, super saw-like
thickening, buzzing swarms, or even dissonant sound effects—perfect for a horror film.
NOTE: The amount you detune all voices will remain even when you select other modes, which can be useful
when wanting to play weird out-of-tune melodies or chords. If this type of effect is not desired, simply move
the Pitch Bend in the negative direction to clear out the current setting before selecting other modes.
In addition, this detuned amount will also be cleared and overwritten when Pitch Bend messages are used in
the various other modes, but are only cleared for the voices currently playing.
DETUNE DOWN
As you move the Pitch Bend in the positive direction on your controller, all enabled MIDI channels will be
increasingly detuned downward in pitch. When you release the Pitch Bend control to its middle position, the
detune amount stays the same, allowing you to adjust it, set it, release it, and then play parts without
constantly having to maintain your Pitch Bend location. If the current detune amount is not the max setting,
higher detune amounts can be set by moving the Pitch Bend to a value greater than was last used. To clear out
the current detuned amount, move your Pitch Bend in the negative direction.
3
DETUNE UP / DOWN
As you move the Pitch Bend in the positive direction on your controller, all enabled MIDI channels will be
increasingly detuned both upwards and downwards in pitch. When you release the Pitch Bend control to its
middle position, the detune amount stays the same, so you can adjust it, set it, release it, and then play parts
without constantly having to maintain your Pitch Bend location. If the current detune amount is not the max
setting, higher detune amounts can be set by moving the Pitch Bend to a value greater than was last used. To
clear out the current detuned amount, move your Pitch Bend in the negative direction.
DETUNE UP
As you move the Pitch Bend in the positive direction on your controller, all enabled MIDI channels will be
increasingly detuned upward in pitch. When you release the Pitch Bend control to its middle position, the
detune amount stays the same, allowing you to adjust it, set it, release it, and then play parts without
constantly having to maintain your Pitch Bend location. If the current detune amount is not the max setting,
higher detune amounts can be set by moving the Pitch Bend to a value greater than was last used. To clear out
the current detuned amount, move your Pitch Bend in the negative direction.
UNISON POLY
Note-On/Off, Velocity, Pitch Bend, and Mod Wheel messages received on the input MIDI channel will be
sent out of all enabled MIDI Out channels simultaneously. If only a single note is played, all enabled voices
will play that note. As you play more notes simultaneously, the processor voice allocation will intelligently
turn off voices it needs to steal so other notes/voices can play.
DON’T PANIC!
Seriously, don’t panic! This feature is simply an All-Notes-Off MIDI feature that can be used, should notes
ever become latched-on in the MIDI sound module you are playing. Please note that not all MIDI devices
support the All-Notes-Off MIDI messages. In fact, many of our own products do not support these. In such
cases, should notes become latched in those devices, turning them off and back on will clear any latched
notes.
To send an All-Notes-Off MIDI message, select this mode, and then play a note on your MIDI controller. The
All-Notes-Off message will be sent out all MIDI outputs.
In general latched notes may occur when a MIDI sound module receives more MIDI information than its
internal buffer can handle, and the device is then unable to carry out the proper Note-Off message. You
should be especially aware of this when using the Unison Bend and Unison Poly modes, as each of these is
capable of generating a lot of MIDI data.
If you find that notes become latched repeatedly in the sound module you are controlling, try using a different
MIDI voice routing mode as described later in this manual.
POLY RANDOM
Note-On/Off, Velocity, Pitch Bend, and Mod Wheel messages received on the input MIDI channel will be
sent to random MIDI Out channels that are currently enabled. Only one note can play per each enabled MIDI
channel, and up to 16 channels can be played in all.
You can use this feature when controlling multiple monophonic synthesizers to randomly select which voice
plays at any time to add more variation and humanization to your music.
As an effect, you could also select each sound module to play a completely different sound, which will result
in these various sounds playing at random times in your music. You could further use the Define Voices
setting to set the number of random possibilities that can occur.
4
POLY CHASE
Note-On/Off, Velocity, Pitch Bend, and Mod Wheel messages received on the input MIDI channel will be
sent to the next available MIDI Out channel that is currently enabled. When this mode is first selected, the
first voice to play will always be MIDI channel 1, the next note will play on channel 2. If these notes are
released and new notes are played they will play on channel 3, then 4, and on and on until the highest enabled
voice location is reached. Then it will wrap around and begin playing channel 1 again.
When controlling multiple monophonic synthesizers, Poly Chase will add some variation and humanization to
your music. As an effect, you could also select each sound module to play a completely different sound, then
by simply playing notes, you are essentially stepping through or sequencing the order of sound modules that
will play. When using this technique, use the Define Voices feature to determine how many steps/sound
modules will play in your sequence before returning to channel 1. To reset to the first step/channel simply
select another mode, then return to the Poly Chase mode.
POLY FIRST
Note-On/Off, Velocity, Pitch Bend, and Mod Wheel messages received on the input MIDI channel will be
sent to the first or lowest available MIDI Out channel that is currently enabled. For instance, if you play a
three-note chord, channels 1, 2, and 3 will be used. If this chord is released and only two notes are played,
only channels 1 and 2 will be used.
Use Poly First mode when you need predictable results when playing multiple sound modules to play chords.
CHORD MEM
Chord Memory allows you to latch a chord of up to 16 notes in memory, so you can then play and transpose
this latched chord simply by playing single notes on your MIDI controller.
To latch a chord to memory you must first be in the Poly First mode. Play and hold the desired chord, then
switch the Mode control to Chord Mem. You can then release the chord, and then playing a note on your
controller will reproduce that chord at various transpositions.
NOTE: The first note of the chord you played will be the reference pitch for the latched chord to play back at.
Unlike the chord memory feature found in most other synthesizers—where once a chord is latched, it can be
played only at a single transposition at any time—the Mondovox allows you to play up to 16 transpositions
simultaneously of the latched chord for very big sounds.
When controlling analog monophonic synthesizers, Chord Mem will typically allow you to trigger their
internal glide circuitry, producing gliding chords. As a tip, you might experiment with setting the glide time of
each synthesizer to a different value for those classic Oberheim-type glides.
And when controlling something like a digital multi-timbral sound module, Chord Mem allows you to play
massive chord sounds. Note that the number of voices that can play will be determined by the polyphony of
the sound modules you are controlling.
DEFINE VOICES
In this mode we can set the number of sound modules we have connected or the number of MIDI channels we
want to enable.
To change the number of voices, select this mode, then play a note on your MIDI controller once for each
voice you want to enable. So if you need five voices, select this mode, play five notes on your MIDI
controller, and then exit this mode. The number of voices enabled will be stored in memory even when the
unit is turned off.
DEFINE ROUTING
In the Define Routing mode, you can determine how MIDI is handled by each of the four internal MIDI
processors.
There are three routings to choose from, and each will give different and possibly better results depending on
your particular situation.
The current Routing setting is indicated by the three LEDs located to the left of the power switch. Each is
labeled 1, 2, or 3 and will light to show the current setting.
To change the setting select the Define Routing mode, then play a key on your MIDI controller. Every time a
new Note-On is received, the setting will advance to the next selection.
ROUTING 1
In setting 1, each of the four internal processors will send all MIDI data out. So for instance, if you play a note
in Unison Bend mode, every MIDI output (MIDI OUT A, B, C, and D) will send a Note-On for all the
enabled voices.
This functionality is most useful if you are controlling a single multi-timbral sound module, as it eliminates
the need for additional MIDI mergers to combine all the various outputs into a single MIDI input.
Keep in mind that although you can send up to 16 channels of Note On/Off, Pitch Bend, and Mod Wheel
messages simultaneously to a single MIDI module, the results may not always be desirable due to the amount
of MIDI that that module will have to buffer and respond to. Pitch Bend messages in particular generate twice
as many bits of MIDI data for each value than typical Note On/Off messages do, and since these values are
constantly changing as you perform a pitch bend. This then generates a large amount of data when you are
sending on all 16 channels simultaneously.
ROUTING 2
Setting 2 can be thought of as a “convenience” mode. With this setting MIDI channels 1-4 are handled by
processor A sending this data to the MIDI OUT A ports. Channels 5 through 8 are then handled by processor
B sending this data to the MIDI OUT B ports. Channels 9 through 12 are then handled by processor C sending
this data to the MIDI OUT C ports. And channels 13 to 16 are then handled by processor D sending this data
to the MIDI OUT D ports.
This mode is most useful when you want a nice balance of processing speed plus a streamlined use of outputs.
If you are playing monophonic synthesizers such as the Future Retro XS that has a MIDI THRU port, you can
simply daisy-chain four synthesizers per MIDI OUT port. Or if using a multi-timbral sound module, you can
send four voices to each sound module using only a single MIDI cable to that device.
ROUTING 3
You can think of Setting 3 as “fast” mode. With this setting each processor handles every forth note, so if
you’re playing a four-note chord, all processors can send this MIDI data out to each sound module
simultaneously, where all previous modes discussed technically have to send one note, then the next, then the
next—one after another, which can add up to some amount of latency.
With this setting MIDI channels 1, 5, 9, and 13 are sent out MIDI OUT A ports. MIDI channels 2, 6, 10, and
14 are sent out MIDI OUT B ports. MIDI channels 3, 7, 11, and 15 are sent out MIDI OUT C ports. MIDI
channels 4, 8, 12, and 16 are sent out MIDI OUT D ports.
6
The Routing setting is saved even when the unit is turned off.
NOTE: Some interesting results occur when controlling multi-timbral sound modules and using any of the
Detune modes. Try connecting these multi-timbral modules up to the different MIDI OUT ports to get
different combinations of detuning within those four voices played by each module.
MIDI CLOCK
Any time MIDI Clock, MIDI Start, and MIDI Stop commands are received at the MIDI IN jack, these
messages will be transmitted to all MIDI OUT jacks. In this way you could use the Mondovox as a
1-in/16-out MIDI Thru box for MIDI clock messages.
INTIALIZING THE UNIT
Should the unit ever behave in an unusual way, or should you wish to start fresh from a known point of
settings, you can initialize the unit so that all 16 MIDI channels are enabled, and MIDI Routing 2 is selected
by default.
To initialize your unit, start with the power off. Rotate the Mode control to the Define Routing setting, and
turn the power on. Wait a few seconds after power up, and the unit will be initialized. These default values
will be automatically written to the internal memory and remain at these settings until you change them.
TROUBLESHOOTING
If your unit is behaving in an unexpected way, turn the unit off, then back on again. Also check to see that you
are using the correct power supply with this unit. If the power supply is correct, then test the voltage output of
the supply to verify that the power supply is working.
The LED indicators by the MIDI IN and OUT jacks on the front panel will help you troubleshoot when MIDI
is being sent and received. If an LED is not lighting when expected, try using a different MIDI cable, as they
do go bad occasionally. For further diagnosis you may want to monitor what MIDI messages are being sent
out via a software program such as MIDI-OX.
If you have other questions or you experience problems not addressed in this manual, please check the
Support page of our web site:
www.future-retro.com/support.html
SPECIFICATIONS
Dimensions: 19" (W) x 1.75" (H) x 4.25" (D)
Unit Weight: 2.75 lbs.
Universal Power Supply: 100-240V AC input, 9V DC, 670mA current
Power In: 9V DC (center positive)
Current Draw: 75mA
MIDI In: x1
MIDI Thru: x1
MIDI Out: x16
7
ROUTING DIAGRAM 1
The diagram on this page shows how you
can connect a MIDI controller and four
sound modules to the Mondovox, when
using routing modes 1 or 2.
Connect the MIDI OUT of the MIDI
controller to the MIDI IN of the Mondovox.
Connect the MIDI OUT A port of the
Mondovox to the MIDI IN of the sound
module 1. The remaining three sound
modules all get daisy-chained to the first.
Connect the MIDI THRU of sound module 1
to the MIDI IN of sound module 2.
Connect the MIDI THRU of sound module 2
to the MIDI IN of sound module 3.
Connect the MIDI THRU of sound module 3
to the MIDI IN of sound module 4.
Should the sound modules you are
controlling not have MIDI THRU ports,
please use routing mode 2 or 3 as shown in
diagram 2 on the following page.
Set sound module 1 to MIDI channel 1,
sound module 2 to MIDI channel 2,
sound module 3 to MIDI channel 3,
and sound module 4 to MIDI channel 4.
8
ROUTING DIAGRAM 2
The diagram on this page shows
how you can connect a MIDI
controller and four sound
modules to the Mondovox, when
using routing modes 2 or 3.
Connect the MIDI OUT of the
MIDI controller to the MIDI IN
of the Mondovox.
Connect the MIDI OUT A port
of the Mondovox to the MIDI IN
of sound module 1.
Set the sound module to MIDI
channel 1.
Connect the MIDI OUT B port
of the Mondovox to the MIDI IN
of sound module 2.
Set the sound module to MIDI
channel 2.
Connect the MIDI OUT C port
of the Mondovox to the MIDI IN
of sound module 3.
Set the sound module to MIDI
channel 3.
Connect the MIDI OUT D port
of the Mondovox to the MIDI IN
of sound module 4.
Set the sound module to MIDI
channel 4.