1
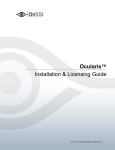
Getting Started Guide
For Existing Ocularis Legacy Users
Smarter Surveillance
for a Safer World
Ocularis 5 - Getting Started Guide
Ocularis 5 Getting Started
This quick reference is for customers who have a legacy version of Ocularis and need to add new camera licenses. You must first
upgrade Ocularis Base and Client(s) to v5, then install an Ocularis 5 recorder and add the new cameras to that recorder. Keep your
existing recorder(s) in place.
Use these steps when installing Ocularis Professional, Enterprise or Ultimate on a single computer. Refer to the Ocularis Installation and
Licensing Guide or the Upgrading to Ocularis document for more detailed installation instructions. A recommended process flow to add
a v5 recorder to an existing system is listed below. Each numbered step is described in detail following this list.
1. Download and Extract the Ocularis 5 installation file.
2. Upgrade and license the Ocularis Base software.
3. Access the Ocularis Component Downloads web page.
4. Upgrade Ocularis Administrator.
5. Upgrade Ocularis Client.
6. Verify the success of the upgrade.
7. Install the Ocularis 5 recording component software.
8. Add Cameras to the Recorder.
9. Apply Basic Configuration of Ocularis Base using Ocularis Administrator.
10. License the Ocularis 5 Recording Component.
See the Release Notes for the current Ocularis version for known issues, feature changes and fixes.
1. Download and Extract the Ocularis Installation File
1.
2.
3.
4.
5.
Download the Ocularis file for the desired model from http://onssi.com/software-downloads/.
On the Ocularis Base machine, launch the file downloaded in the prior step.
An Installer Extraction wizard appears. Click Next throughout this wizard to extract the installation files (making changes where
you deem necessary).
At the end of the wizard, you are given the option to ‘Install Ocularis Base’. Make sure this checkbox is selected and click Finish.
Proceed to step 2 Upgrade and License Ocularis Base below.
2. Upgrade and License Ocularis Base
Be sure you have your new Ocularis 5 SLC handy when installing or upgrading Ocularis Base.
1. (continued from prior section). If a previous version is detected, you'll be asked to install as an upgrade. Click Yes.
2. For upgrades from Ocularis 4.x or earlier, a message stating that the SLC is not supported will appear. Deactivate the old SLC and
insert the new one. Click the Deactivate button in the Ocularis License Activation application.
3. At the warning message, click Yes to confirm the deactivation. Click OK to close the 'License successfully deactivated' pop-up.
4. Enter the new SLC starting with '905' (found in the email you received with your purchase) into the Step 1: Enter SLC box (or
paste it from Windows clipboard). Click Activate License.
5. Click OK at the 'License activation successful' pop-up.
6. Click Close to continue with the installation of Ocularis Base.
7. Follow the wizard prompts for the remainder of Ocularis Base installation.
8. Read and accept the EULA. Click Next.
9. Choose Typical or Custom installation and click Next. ‘Typical’ installs files in default locations for new installations. ‘Custom’
allows you to modify file locations and database settings. ‘Typical’ is the recommended selection.
The Ocularis Base files are installed to the specified directory. Accept defaults if prompted.
10. An informational message regarding the installation of dependencies may appear. Click OK. Dependencies are installed including
SQL Express 2008. This may take several minutes. A new installer website is also created.
11. A Setup Wizard Complete screen appears. Click Finish.
3. Access the Ocularis Component Downloads Webpage from the Base
During the installation of Ocularis Base, the files required to install other Ocularis components were also installed on the Base
computer. These installation files may be accessed from other computers on the network via a local webpage. On each satellite PC,
access the webpage on the Base to download and install Ocularis components.
1. Access the Ocularis installation webpage through a browser using the following URL:
http://[Base_IP]:[port]/OcularisService
On-Net Surveillance Systems, Inc.
1
Ocularis 5 - Getting Started Guide
2.
where [Base_IP] is either the IP Address or computer name of the Ocularis Base machine and [port] is the IIS port number. In
most cases, the default port 80 is used and it is not necessary to enter it here. If you are located at the Base machine use:
http://localhost/OcularisService
Click ‘Download’ next to each component you wish to install locally.
4. Upgrade Ocularis Administrator
If you haven't already upgraded Ocularis Administrator to v5, use these steps. Install the Ocularis Administrator on the Base or any PC
with connectivity to the Base. This component may be installed in as many places as you like.
1. From the 'Ocularis Component Downloads' webpage, click the Download button adjacent to Ocularis Administrator.
2. The file ‘Ocularis Admin.exe’ is downloaded. Click the file to run the installation wizard.
3. Follow the on-screen prompts in the wizard. It is recommended to use all defaults. The system will detect an existing installation
and prompt you to uninstall the old and reinstall the new. Click Yes.
4. Click Finish when Setup Wizard is complete.
5. Continue with step 5 Upgrade Ocularis Client below.
5. Upgrade Ocularis Client
If you haven't already upgraded Ocularis Client(s) to v5, use these steps on each client PC. Ocularis Client may be installed in as many
places as you like.
1. From the 'Ocularis Component Downloads' webpage, click the Download button adjacent to Ocularis Client.
2. The file ‘Ocularis Client.exe’ is downloaded. Click the file to run the installation wizard. The system will detect an existing
installation and prompt you to uninstall the old and reinstall the new. Click Yes.
3. Follow the on-screen prompts. Click Yes to save your existing Ocularis Client settings and accept the EULA. It is recommended to
use all defaults. Click Finish at the completion of the wizard.
4. Continue with step 6 Verify the Upgrade before Proceeding below.
6. Verify the Upgrade before Proceeding
1.
2.
Log into Ocularis Base with your new Ocularis Client and confirm that you can view video from cameras on your existing 4.x
recorders.
If everything is working correctly, continue with step 7 Install Recording Component Software below.
7. Install Ocularis 5 Recording Component Software
The v5 recorder may be installed on the same computer as your existing recorder (pending hardware resources) or on any computer
with access to Ocularis Base. If you are unsure, please contact OnSSI Technical Support.
1. From the 'Ocularis Component Downloads' webpage, click the Download button adjacent to Ocularis Recorder.
2. The executable file for this component is downloaded. Click the file to launch the installation wrapper to extract files.
3. Click Next throughout the wizard screens and when the Extraction Complete screen appears, ensure that the checkbox for
'Install Ocularis Recorder' is checked. Click Finish.
4. Select the language you wish to use for the installation and click OK.
5. A Welcome to the InstallShield Wizard for Ocularis 5 screen appears. Click Next.
6. On the End User License Agreement screen, click ‘I accept…’ and then Next.
7. On the Setup Type selection screen, select the option for what you’d like to install. If you are installing all components on the
current computer (recommended), select the option Manager & Server and click Next. For alternate installation options, refer to
the Ocularis Installation and Licensing Guide or contact OnSSI Technical Support.
8.
8.
9.
10.
11.
12.
13.
NOTE: with Ocularis Professional ONLY you must install a Master Core along with a DM on each recorder. This requires a
recorder SLC for each server, available from OnSSI. With Ocularis Enterprise or Ultimate there should be only one Master
Core and optionally one or more Slave Cores in the entire environment. Only one SLC is needed in these models.
On the Server Services screen, click the drop-down for IP Addresses/host names found and select the IP address for the current
computer. DO NOT SKIP THIS STEP. Keep default values for the Update Service section.
On the Multimedia Setting screen, do not add any paths for storage at this time. Keep default values. Storage locations can
always be added later. Click Next.
Click Install.
When prompted to accept the EULA for Microsoft DirectX, click Yes. Note that this window may be behind the regular
installation window.
When installation is complete, click Finish. A desktop icon, 'Ocularis Recorder Manager', appears on the desktop.
Continue with step 7 Add Cameras to the Recorder below.
On-Net Surveillance Systems, Inc.
2
Ocularis 5 - Getting Started Guide
7. Add Cameras to the Recorder
These are the bare minimum steps required to get Ocularis Recorder up and running. Additional configuration such as configuring
storage, motion detection and other camera settings can be done at a later time.
1. Launch the Ocularis Recorder Manager from the desktop icon from step 12 above.
2. On the login screen, enter the IP Address of the PC where the recorder is installed in the Server field. (If it is on the same
machine you may use localhost.)
3. Enter the username admin in the User field.
4. Enter the password admin in the Password field.
5. The very first time you launch this application, you will be forced to change the 'admin' password. You may change it to anything
you like and if you select ‘secure password’ you must follow the rules of a secure password. It is not necessary nor
recommended to use a second password for this application.
6. If the computer you are on is also on the same network as your cameras, click Find Devices to add cameras using this tool. If not,
click Create Camera to add each camera manually.
a. Find Devices will present you with a list of cameras found. You may modify several fields including the camera’s username
and password in this list if you have changed them from the default. When ready, click Add.
b. Create camera presents you with a dialog for you to enter a name for the camera, the manufacturer, the device driver,
the username and password, and the IP address and port number. Leave the DeviceManager field as is for now. Click OK
to add the camera.
For more information on configuring camera settings, refer to the Ocularis Recorder Configuration Manual.
7. Close the Ocularis Recorder Manager.
8. Continue with step 8 Basic Configuration of Ocularis below.
8. Basic Configuration of Ocularis
These are the bare minimum steps used to get the new cameras up and running in Ocularis. Additional configuration such as
configuring alerts, maps and other behavior can be done at a later time.
1. Launch the Ocularis Administrator application.
a. Enter User name:
admin
b. Enter Password:
admin (or whatever password you have configured for the 'admin' account)
c. Use the IP address of the Base computer in the ‘Server’ field
d. Select ‘Authentication’ type Basic
e. Check the box to ‘Remember Login’
f. Click Login.
2. Import the Recording Component.
a. On the left of the ‘Servers / Events’ tab, click Add.
b. Enter the IP Address of the recorder computer in the Host field.
c. Select ‘Login Type’ of Basic
d. Enter the user name for the recorder account: admin
e. Enter the password for the recorder's admin user account.
f. Click Add.
3. Select the ‘Users / Privileges’ tab and assign Camera Privileges for the newly configured cameras.
a. In the left panel, expand a user group name and select ‘Camera Privileges’.
b. New cameras appear in the group titled 'Unprivileged'. Assign cameras to one or more camera groups as needed.
Either drag-and-drop the camera name from the ‘Unprivileged Cameras’ group to another camera group or right-click the
camera and assign to a camera group. Multi-select is supported (use SHIFT or CTRL to select multiple)
4. Select the ‘Views’ tab.
Either create a new view for the new cameras or populate existing views with the new cameras.
a. New View:
i. Select the Group name for which you will create a view.
ii. Click the New Group button at the top left toolbar.
iii. Click the New View button to create a basic view.
iv. Select the layout for the view (1x1, 2x2, 3x3, etc).
b. Populate view panes with cameras.
i. Select the ‘Cameras’ tab in the lower left panel.
ii. Expand the folder labeled ‘All’ to see a list of all privileged cameras for this group.
iii. Drag and drop camera names from the left pane directly onto the desired pane displayed on the right.
5. Close Ocularis Administrator and continue with step 9.
On-Net Surveillance Systems, Inc.
3
Ocularis 5 - Getting Started Guide
9. License the new Recording Component
When the Ocularis 5 recording components are installed, the software defaults to a 30-day free trial mode. You must license the
software within the 30 day period. There is no need to register camera licenses or MAC addresses. Once the software is licensed, no
further licensing steps are required (unless you purchase additional camera licenses). Use the SLC you receive when you purchased
the product. Licensing can be done online or offline.
Licensing Online
Use these steps if the PC with Ocularis Recorder Manager has internet connectivity.
1. Launch the Ocularis Recorder Manager.
2. Select the Info menu and click Activate License.
3. Click OK to confirm that you have an internet connection.
4. Verify that the Personalize License radio button is selected (this is the default selection).
5. Enter the recorder SLC in the first field. This SLC should contain seven digits starting with '500'.
6. Fill out the remainder of the form.
7. Click OK.
The software connects to the OnSSI registration server, obtains and downloads the license. You are done! To view your licensing
information, select Show License from the Info menu.
Licensing Offline
Use these steps if the PC with Ocularis Recorder Manager does not have internet connectivity.
1. Launch the Ocularis Recorder Manager.
2. From the Info menu, select Request Product ID.
3. Click Copy to copy the Product ID to the Windows clipboard.
4. Click OK to close the Product ID pop-up.
5. Paste the contents of the clipboard into a Notepad or other text file. Save the file to portable media and bring it to a PC that
does have internet connectivity.
6. From a browser, go to the URL: http://onssi.com/ocularis-recorder-licensing/
7. At the top of the page in the section Initial installation: New license code, you'll see a form. Enter your SLC (i.e. the 7 digit SLC
with the prefix '500') and fill out the remainder of the form. In the Product-ID, field, paste the contents of the text file that you
created from the Ocularis Recorder Manager in step 2.
8. When done, click Submit.
The SLC is verified with the OnSSI licensing server. A license key file is emailed as an attachment to the email account specified
on the form. There may be a delay of up to ten minutes to receive the email from the licensing server.
9. Detach the license key file from the email and bring the file back to the offline computer running the Ocularis Recorder
Manager.
10. In the Ocularis Recorder Manager, select Import license file from the Info menu.
11. Click Select to navigate to the license file. Select the file and then click Open.
12. Click Import to apply the license key. You are done! To view your licensing information, select Show License from the Info menu.
Other Configuration for Ocularis Recorders
If you use events with Ocularis, you will need to install and configure the new recorder's event proxy. To configure individual events,
refer to the Ocularis Administrator User Manual.
For additional help using Ocularis, refer to the library documentation on the OnSSI.com website.
Legal Notice
This product manual is intended for general information purposes only,
and due care has been taken in its preparation.
Any risk arising from the use of this information rests with the recipient, and nothing herein should be construed as constituting any
kind of warranty.
© 2002-2015 On-Net Surveillance Systems, Inc. All rights reserved. OnSSI and the ‘Eye’ logo are registered trademarks of On-Net
Surveillance Systems, Inc. Ocularis, Ocularis Client, Ocularis Client Lite, Ocularis Video Synopsis, NetEVS, NetDVMS, NetDVR,
ProSight, NetGuard, NetGuard-EVS, NetSwitcher, NetMatrix, NetCentral, NetTransact, NetPDA and NetCell are trademarks of OnNet Surveillance Systems, Inc. All other trademarks are property of their respective owners.
On-Net Surveillance Systems, Inc. reserves the right to change
product specifications without prior notice.
US patent # 8,390.684 B2 for Ocularis Client
Patents Applied For in the U.S. and Abroad
0010262015-1648-5.1.1.183
On-Net Surveillance Systems, Inc.
4