1
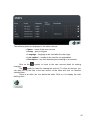
® 2N Omega Lite Ethernet Module User Manual Version 1.4.0 www.2n.cz The 2N TELEKOMUNIKACE a.s. joint-stock company is a Czech manufacturer and supplier of telecommunications equipment. The product family developed by 2N TELEKOMUNIKACE a.s. includes GSM gateways, private branch exchanges (PBX), and door and lift communicators. 2N TELEKOMUNIKACE a.s. has been ranked among the Czech top companies for years and represented a symbol of stability and prosperity on the telecommunications market for almost two decades. At present, we export our products into over 120 countries worldwide and have exclusive distributors on all continents. 2N® is a registered trademark of 2N TELEKOMUNIKACE a.s.. Any product and/or other names mentioned herein are registered trademarks and/or trademarks or brands protected by law. Declaration of Conformity 2N TELEKOMUNIKACE a.s. hereby declares that the 2N® Omega Lite product complies with all basic requirements and other relevant provisions of the 1999/5/EC directive. For the full wording of the Declaration of Conformity see the CD-ROM enclosed and at www.2n.cz. The 2N TELEKOMUNIKACE company is a holder of the ISO 9001:2000 certificate. All development, production and distribution processes of the company are managed by this standard and guarantee a high quality and advanced technical level of and a professional approach to all of our products. Dear customer, let us congratulate you on having purchased the 2N OMEGA Lite system. This new product has been developed and produced in order to provide the maximum utility value, quality and reliability to the user. We hope you will be fully satisfied with 2N OMEGA Lite for a long time. 3 CONTENTS 1. 2. Packing List ....................................................................................................... 6 Ethernet Module ................................................................................................ 7 2.1. Ethernet Module ........................................................................................................................ 8 3. Ethernet Module Installation ............................................................................ 9 4. Ethernet Module Configuration...................................................................... 17 4.1. USB Cable Connection ............................................................................................................ 18 4.1.1. Submenus ................................................................................................................................... 19 4.1.2. Commands and Values .............................................................................................................. 19 4.1.3. About Menus … ........................................................................................................................ 20 4.1.4. DTR Signal Monitoring ............................................................................................................. 20 4.2. Web Browser Access ............................................................................................................... 22 4.2.1. Overview of Group Tags and Menus ......................................................................................... 24 4.3. Network Parameter Setting ...................................................................................................... 27 4.3.1. Serial Console Setting ................................................................................................................ 27 4.3.2. Web Browser Setting ................................................................................................................. 28 4.4. Administration .......................................................................................................................... 30 4.4.1. General Module Parameters ....................................................................................................... 30 4.4.2. User Accounts ............................................................................................................................ 31 4.4.3. Right Groups .............................................................................................................................. 35 4.4.4. Ring groups ................................................................................................................................ 36 4.4.5. Emergency Change of Administrator Password ........................................................................ 38 4.4.6. SIP / H.323 Switching ............................................................................................................... 39 4.5. Communication Line Setting .................................................................................................... 39 4.5.1. SIP ............................................................................................................................................. 39 4.5.2. SIP Line Parameters................................................................................................................... 40 4.5.3. H.323 ......................................................................................................................................... 42 4.5.4. H.323 Line Parameters .............................................................................................................. 43 4.6. Least Cost Router .................................................................................................................... 46 4.6.1. Routing Rules ............................................................................................................................ 47 4.6.2. Add Rule .................................................................................................................................... 47 4.6.3. Modify Rule ............................................................................................................................... 49 4.6.4. Remove Rule ............................................................................................................................. 51 4.6.5. Change Sequence ....................................................................................................................... 51 4.6.6. Disable/Enable Rule .................................................................................................................. 51 4.7. LCR Routes ............................................................................................................................. 51 4.7.1. List of Routes ............................................................................................................................. 52 4.7.2. Add Route .................................................................................................................................. 52 4.7.3. Modify Route ............................................................................................................................. 54 4.7.4. Remove Route ........................................................................................................................... 54 4.8. LCR Number Normalising ........................................................................................................ 54 4.9. LCR Barred Numbers .............................................................................................................. 56 4.10. LCR Testing ............................................................................................................................. 56 4.11. SIP Proxy ................................................................................................................................. 58 4.11.1. Overview of Registrations .................................................................................................... 61 4.11.2. Switching ON/OFF ............................................................................................................... 61 4.12. Mobility Extension .................................................................................................................... 62 4.12.1. User Settings ......................................................................................................................... 62 4.12.2. DISA Line for ME ................................................................................................................ 63 4.12.3. Mobility Extension ................................................................................................................ 64 4.12.4. LCR – Least Cost Router ...................................................................................................... 66 4 4.12.5. PBX Settings ......................................................................................................................... 73 4.13. PPPoE ..................................................................................................................................... 76 4.13.1. Main configuration ................................................................................................................ 76 4.13.2. DHCP server settings ............................................................................................................ 78 4.13.3. DNS proxy ............................................................................................................................ 80 4.14. Licence File .............................................................................................................................. 83 4.15. Firmware Updating .................................................................................................................. 84 4.16. Configuration Downloading ...................................................................................................... 85 4.17. Configuration Uploading .......................................................................................................... 86 5. Ethernet Module Parameter Setting by PBX Configuring Tool ................... 87 5.1. 5.2. 5.3. 5.4. 5.5. 6. ® 2N OMEGA PBX Firmware Upgrade ..................................................................................... 87 Hardware Configuration ........................................................................................................... 87 VoIP Line Setting ..................................................................................................................... 89 Outgoing Calling ...................................................................................................................... 89 Incoming Ringing ..................................................................................................................... 90 2N® XAPI Server............................................................................................... 91 ® 6.1. 2N XAPI Server Console ........................................................................................................ 91 6.1.1. Installation ................................................................................................................................. 92 6.1.2. Communication Setting ............................................................................................................. 96 6.1.3. Connection Establishing ............................................................................................................ 98 6.1.4. Connection Closing.................................................................................................................... 98 6.1.5. PBX Module .............................................................................................................................. 99 6.1.6. User Module ............................................................................................................................ 102 6.1.7. Licence Module ....................................................................................................................... 105 6.1.8. Database Module ..................................................................................................................... 108 6.1.9. XML Module ........................................................................................................................... 110 5 1. Packing List Item Ethernet module USB cable PC LAN cable Connector M3x30 spacer Warranty Certificate Compliance Certificate CD Pieces 1 1 1 2 2 1 1 1 6 2. Ethernet Module The Ethernet module is designed exclusively for the 2N® OMEGA Lite PBXs to provide remote control, connection of external applications (PBX Assistant, SMS server) and LAN and Internet voice services. The Ethernet module is installed to the left of the power supply unit, above the main board. To connect the module, use two connecting cables (insert them on the J15/J26 main board connectors) and two spacers (all are included in the delivery). Fit the Ethernet module to the spacers using the two M3 screws included. Remove the two J8/J9 jumpers on the PBX main board to make the system work properly. Use the USB cable and HyperTerminal for the initial settings of the IP address and network mask, and the available web configuration for further settings. To connect the system into the 10/100BASE-T (Twisted Pair Ethernet) computer network, use a standard straight cable terminated with RJ 45 connectors. See the Ethernet Module User Manual on the enclosed CD for detailed installation information. 7 2.1. Ethernet Module The following is located on the Ethernet module: J1 - RJ45 connector - 8/8 for LAN connection; J2 - USB connector for IP configuration; J4,J8 - serial connector for interconnection with the main board; J3 - connector for an external USB device adapter (UMTS/3G module, e.g.); J5-J7 - connector for services and maintenance; J9 - connector for an extender board; SW2 - RESET button - push the button to reset the CPU board; SW1 - RESET button - push the button to reset the default values (keep the button pushed for approximately 20s after the PBX power on until LINUX starts); D1 - green LED – operation status indication (module ready for operation); D2 - red LED – operation status indication (module inactive); D3-D10 - yellow LED – speech channels busy indicators. * under development 8 3. Ethernet Module Installation Unscrew the 2 screws on the chassis to remove the display holder. Remove (by turning) the blind flanges on the left-hand side of the chassis to make space for J1 and J2 connectors. 9 Remove the J8 and J9 jumpers from the main board. Unscrew the two M3 screws in the left-hand and right-hand main board corners (to be used later) and replace them with the spacers attached. 10 11 Insert the two connectors included in the delivery on the J26 and J15 jumpers on the main board. 12 Place the module onto the connectors and fix it with the two screws removed earlier. ! Place the module onto the connectors carefully to match the pin positions. 13 14 Connect the USB cable inserted to the J2 connector to make connection with your PC. ! While connecting the system for the first time, remember to install the USBCOM driver (refer to the “data/OMEGA Lite/Cz/Software/VoIP/DriverUSB/” CD attached). A new COM PORT is added after installation. After that you may establish the HyperTerminal connection and perform the necessary settings. Used for network parameter setting (IP address, network mask, etc.). After the network parameters have been set up you may disconnect the cable. 15 ! Always reset the module using the SW1 button after disconnecting the USB cable. Connect a standard straight Ethernet cable into the J1 connector. This cable connects the Ethernet module with your Ethernet network. After turning the PBX on you may start configuring the Ethernet module. 16 4. Ethernet Module Configuration The 2N® OMEGA PBX Ethernet module has the following factory settings: Serial console communication port: Bits per second: 115200 Data bits: 8 Parity: none Flow control: none Use the same values for the COM port to be created. Network parameters: IP address: 192.168.1.1 Network mask: 255.255.255.0 The module may be configured in two ways: 1) Connect the module to the PC using a USB cable and set the basic network parameters by means of some communication software, e.g. the HyperTerminal. Then use a web browser to complete the setting. 17 2) Connect the module with the PC using a crossed Ethernet cable, assign any IP address from the network 192.168.1.x differing from 192.168.1.1 to the PC and assign the required IP address to the module by means of a web browser. Having changed the IP address, connect the PC and the module to the LAN in a standard way and use a web browser to complete the configuration. 4.1. USB Cable Connection For configuration, connect the Ethernet module (J2 connector) with the PC using the available USB cable. Install the driver from the enclosed CD to create a virtual COM port (COM4). Launch the HyperTerminal, e.g., configure it for receiving on the COM port created for the new USB connection and set the network parameters. The console system is arranged as a set of nested menus. Selecting an item results either in entering a submenu, executing an operation, or setting a parameter. The main menu should appear after terminal connection if the module is connected. In some cases it is necessary to push . Each menu consists of the following sections: Header - contains (from left): product name, firmware version, menu name and network name assigned to the equipment. Option - displays the numbers and names of available options. Value - if displayed, the [menu] includes a submenu. Otherwise, the current value of the option is displayed. Description - briefly describes the meaning of each option in the menu. Enter an option number… >: invites you to enter the option number. 18 To select a menu option, enter the option number and push confirmation. for 4.1.1. Submenus If you click on an item containing a submenu, the submenu will be displayed. Select any of the submenu items or push for return. 4.1.2. Commands and Values Having selected an item, you may be asked to enter any of the following data: Key word - a list of one or more fixed strings. All you have to do to select a key word is enter the number of characters that distinguishes it unambiguously from the other key words. Enter one of [ansi,color,teletype] : a In above stated example, enter „a‟, or „c‟, or „t‟ and push select a word. to Chain - any number of characters. The range of the available value length may be displayed. Enter a hostname VoiceBlue from 1 to 32 characters: Integer number - a decimal integer number. The range of the available value length may be displayed. Enter a size between 1 and 100: 99 A hexadecimal integer number – a number entered in the hexadecimal format using the 0†9 and a†f or A†F characters. Enter a hex number between 1h and ffh: 1a 19 Network address - up to 12 hexadecimal digits of the physical address. Zeros at the beginning may be omitted. Enter the remote network address: 50C229C4E2 IP address - an Internet address consisting of four numbers (0†255) separated by dots. Enter an IP address: 192.168.22.30 As soon as the required information is entered, the relevant operation is executed. If such operation changes the settings, new values will be displayed in the updated menu. Some of the configuration parameters may take just one of two fixed values. By selecting such an item you reverse the value as compared to the state before selection. ON/OFF parameters are a typical example. If the value is ON, then it is switched to OFF when selected and vice versa. Some commands perform operations that significantly influence the behaviour of entire system (restart, e.g.). Before executing them, the system usually requests confirmation. Are you sure [y/n]: If you answer anything else than “y“ or “Y“, the command will be aborted. To cancel this information prompt any time, push the button. 4.1.3. About Menus … Main menu - is displayed whenever the terminal is started. You can get to the configuration menu, change the administrator password or display the help from the main menu. Configuration menu - contains two submenus, Network configuration and Serial console configuration. Network configuration - helps you set the IP address, network mask, default router, DNS addresses, network name and domain. Serial console configuration - enables you to set the terminal type and change the default parameters of the serial link – rate, data bits/stop bits, parity and flow control type. 4.1.4. DTR Signal Monitoring The program continuously monitors the Data Terminal Ready (DTR) signal. This signal is used for detection of connection/disconnection of the terminal to the serial console port. The following activities are executed whenever the terminal disconnection is detected: 20 Initiated operations are aborted. The main menu is displayed. 21 4.2. Web Browser Access While the serial console interface enables you to change of the basic parameters only, the web browser gives you access to all Ethernet module parameters and services. To establish connection with the module, enter the module IP address into the Internet address line in the web browser, e.g.: http://192.168.1.1 If you have connected the system and set the module and PC IP addresses correctly, the user name and password entering prompt will be displayed. The manufacturer supplies the Ethernet modules with an integrated user account Admin without the password. While entering the user name and password mind the Lower/Upper Case. Remember to change the administrator password as soon as you put your new module in operation for safety reasons. 22 After a successful login, the basic screen of the web application is displayed. The window is divided into four major parts. Header - contains a pull-down menu for the user session language selection, the name of the currently logged-in user and the user logout button. Menu tag ears - the module settings are grouped in tags. Clicking on a tag ear you access the selected setting group and get the group menu options. Group menu - the tag settings are arranged in two-level menus. Clicking on a firstlevel menu item you display the second-level submenus. If you click on a first level item without submenus or a submenu, the appropriate application form will be displayed on the remaining window area. 23 Application form - is the key part of the module user interface. It contains specific control elements for the group menu item selected. 4.2.1. Overview of Group Tags and Menus Network - here you can find all you need for your LAN connection: Basic configuration – common module settings. Filtering – port and IP address filter. Port mapping – connection to internal equipment with UMTS module. DHCP server –DHCP server settings. DNS proxy – DNS settings. VRRP – VRRP settings. Dynamic DNS –dynamic DNS settings. Data connection – UMTS module connection settings. User management - here you can find all you need for user account administration: Users – administration of own accounts. Groups – administration of account groups. Ring groups – administration of Ring Groups. 24 Telephony services - here you can find all voice service settings: Devices – common module settings. Fax – fax settings. LCR – LCR rule settings. SIP proxy –SIP Express Router settings (SIP proxy). Administration - here you can find all basic module settings: Basic configuration – common module settings. Update firmware – module firmware updating. Upload licence – module licence updating. Configuration backup – module configuration backup. SNMP – SNMP settings. Reboot – module reset. States & Logs - activity records are generated during module operation. For the records, their settings and current states refer to the States & Logs tag menu. States – information of current calls. 25 Call accounting – call billing records and settings. Logs – firmware operation records. Download logs – operation record packing and downloading. 26 4.3. Network Parameter Setting Remember to set the module network parameters before you start using it for calling. There are two setting options. If the gateway has factory settings or you know its IP address, you can connect a PC to it using a crossed Ethernet cable and set the appropriate parameters via a web browser. In other cases, you will surely appreciate the serial port access via a character terminal, e.g. the HyperTerminal. 4.3.1. Serial Console Setting Connect the module to a PC as described in the Serial console configuration section. The main menu gets displayed on the terminal. Here select the Configuration item and then the Network item and get the following menu: The menu contains the following items: Address – is the module IP address. If the dynamic address assignment by the DHCP is activated, the value may not be changed manually. Network mask – is the network mask. If the dynamic address assignment by the DHCP is activated, the value may not be changed manually. Gateway – is the default router IP address. It is used for routing data beyond the network limits. If the dynamic address assignment by DHCP is activated, the value may not be changed manually. DNS 1 – first DNS IP address. 27 DNS 2 – second DNS IP address. Hostname – Ethernet module network name. Domain – domain name. Location – any text describing the module location. This value is published by means of the SNMP. Contact – information on the module administrator. This value is published by means of the SNMP. DHCP – indicates the dynamic IP address assignment. If it is activated, the module gets its network settings from the DHCP. Otherwise, the data must be entered manually. Class – device class name as included in the network-setting sending request. It helps the DHCP to distinguish various types of devices and assign them configuration parameters accordingly. The DHCP and Address/Network mask parameters at least must be set correctly to enable the TCP/IP module communication. You are also recommended to set the address of one DNS at least. 4.3.2. Web Browser Setting If you use a web browser for module connection and know the Administrator password, you can set the network parameters in the Basic configuration menu in the Network tag. After opening of the menu, the current network setting is displayed. To open the form for changes, click on the Change item located to the right, below the network parameter tables. The following form gets displayed: 28 The form contains the following fields: Enable DHCP – indicates whether the network parameters can be obtained from the DHCP, or have to be entered manually. IP address – module IP address. If the dynamic address assignment by the DHCP is activated, the value may not be changed manually. Network mask – network mask. If the dynamic address assignment by the DHCP is activated, the value may not be changed manually. Gateway – default router IP address. It is used for routing data beyond the network limits. If the dynamic address assignment by the DHCP is activated, the value may not be changed manually. 29 DNS 1 – first DNS IP address. DNS 2 – second DNS IP address. Domain – domain name. Click on the Change item to confirm the changes. It takes some time to set the values. Please wait for the web browser response. To restore the state before form opening, push the Default item. 4.4. Administration This chapter describes the setting of general parameters of the 2N® OMEGA Lite Ethernet module and creating of user accounts and right groups. 4.4.1. General Module Parameters Click on the Basic configuration item in the Administration tag to open the page with the general module parameters. You cannot change the parameter values in this form. To enter the change mode, click on the Change item. 30 The form contains the following fields: Confirm remove – select this item to display the confirmation window before any deletion. Enable SIP session progress – select this option to enable the SIP stack to send the session progress messages during call establishing. Advanced config of regular expressions – here enable the use of advanced regular expressions in the LCR/Normalization section. It changes format of Add LCR Normalization menu !!! Default language – select the language for the web interface login page. Maximum user session time – set the inactivity timeout after which the web interface relation will be disconnected automatically. Simple login page – if you select this option, the login page will be displayed without the graphic mode. 4.4.2. User Accounts To define user accounts for the web interface login or SIP telephone authentication to the integrated SIP proxy, select the Users menu in the User management tag. After selection, the list of user accounts will be displayed. 31 The following items are displayed in the table columns: Name – name of the user account. Group – group of rights. Language – language to be used after the user login. Line number – number to be used for line registration. Description – any text describing the meaning of an account. Click on the changes. symbol to move to the user account detail for making The symbol is used for clearing the account. To clear an account, you can also tick off the field in the last column of the table and click on Remove selected item. There is an Add user icon below the table. Click on it to display the user defining form. 32 The form contains the following fields: User name – user account name. It must be unique, contain alphanumeric characters only and respect the Upper/Lower Case. New password – user login password. Dots are displayed instead of characters for safety reasons. Confirm new password – Since dots are displayed instead of characters, re-enter the password to avoid typing errors. Group – right group. You can create different right groups for different user groups. To define the range of user rights effectively, simply choose a certain right group. In addition to this, you can tailor the safety rules to a specific user. Refer to the descriptions of the Rights and Rights denied fields below. Language – web interface language to be used after the user login. Default application – the default group tag that is active in the instant of login. Rights – access rights beyond the selected right group. Rights denied – rights to be barred to a user although the user should have them because of the selected rights group. 33 Line number – define the line number under which the IP telephone may be registered to the internal SIP proxy server. Description – any text that describes the meaning of an account. VoiceMail enabled – here enable/disable VoiceMail. PIN - 1111 (default value that can be changed by the user in the voice menu any time later) – used for entering the VoiceMail box from a line other than the user‟s line. SMS notification number – GSM number for sending SMS messages notifying that a voice message has been received if the PBX is equipped with a GSM module with a valid SIM card. 34 4.4.3. Right Groups The right groups are created for simplification as they eliminate the need to specify the user access rights whenever you create a user account. Upon the system login, the resulting set of assigned and denied rights is composed of the assigned right group settings and, if necessary, corrections made during the user account creation. To define the right groups, select the Groups menu in the User management tag. After selection, the list of created groups will be displayed. The following items are displayed in the table columns: Name – right group name. Description – any text describing the meaning of a group. Click on the symbol to move to the group detail for making changes. The symbol is used for clearing a right group. To clear a group, you can also tick off the field in the last column of the table and click on Remove selected item. There is an Add user icon under the table. Click on it to display the group defining form. 35 The form contains the following fields: Group name – unique identification. Rights – system parts to be made accessible. Rights denied – system parts to be made inaccessible. Description – any text describing the meaning of a group. The web interface is divided into parts where access rights may be assigned or denied. One pair of checkboxes corresponds to each group in the above described right group and user account setting forms. They are as follows: ALL – whole system. USERS – user accounts and groups. LINES – communication lines. LCR – Least Cost Router configuration. 4.4.4. Ring groups The Ring groups menu helps you create VoIP user groups for incoming call routing. Use the User management tag in the Ring groups menu to define ring groups. Open the menu to display the list of available groups. 36 The table columns include: Ring group – define the group number to enable group ringing. Extensions – select VoIP users. Description – type a text to describe the ringing group. Click on the (pencil) symbol to open the group details for changes. To delete a ring group click on the cross table column and click on Remove selected. Find the group adding form. , or select the field in the last link below the table. Click on it to display a ring The form includes the following items: Ring group – define the group number to enable group ringing. Extensions – a list of all VoIP users that are available for ring group assignment. Select the VoIP users to be assigned to the given group. 37 Click on to save the ring group added. 4.4.5. Emergency Change of Administrator Password If you have forgotten the Admin account password, do not despair. Just connect yourself to the module by means of a serial cable and select item 2, Set Admin password, in the main terminal console menu. Then, enter a new password and push . 38 4.4.6. SIP / H.323 Switching If you are not licensed to use the SIP and H.323 protocols simultaneously, you have to choose one. The default module protocol is H.323. To toggle the protocols, use the Switch to SIP/Switch to H.323 option in the following menu. Doing this you also initiate the module restart. 4.5. Communication Line Setting To define line parameters, use the Devices menu in the Telephony services tag. You can add and modify the VoIP lines (SIP, H.323 and DISA). To set a line type, select the appropriate Devices menu item. Be sure to establish one SIP or H.323 line at least to make your 2N® OMEGA Lite Ethernet module work properly. 4.5.1. SIP A clearly arranged table of available SIP lines is displayed on the initial SIP line setting screen: 39 The following items are displayed in the table columns: Line ID – internal line identification used by the module firmware. Click on the number to display the line detail. SIP server – IP address of the SIP proxy to which the line is being registered. Phone number – line calling number. Description – any text describing the meaning of a line. Click on the changes. symbol to move to the line setting detail for making The symbol is used for clearing a line. To clear a line, you can also tick off the checkbox in the last column of the table and click on Remove selected item . There is an Add SIP line icon below the table display the line defining form. . Click on it to 4.5.2. SIP Line Parameters lick on the Add icon below the form to add a new line. To modify an existing line, click on Change, thus confirming the entered data and requesting the execution of the selected operation. There are also Default and Back icons below the form. The first one restores the default value of all fields and the second one returns you to the previous screen. 40 The form contains the following fields: SIP server address – IP address or fully qualified network name of the SIP proxy to which the line is to be registered. SIP name – line calling number. Displayed name – text to be displayed to the called person. Listen port – UDP port on which the line receives calls. 41 User name – line identification for the SIP proxy registration. Password – authentication password for the SIP proxy registration. Dots are displayed instead of characters for security reasons. Codecs – list of codecs to be provided by the gateway during voice channel negotiation. Description – any text describing the meaning of a line. 4.5.3. H.323 A clearly arranged table of available H.323 lines is displayed on the initial H.323 configuration screen: The following items are displayed in the table columns: Line ID – internal line identification used by the module firmware. Click on the number to display the line detail. Call method – call initiation method. Displayed name – text to be displayed to the called person. Numbers – line calling numbers. Listen port – port on which the line receives calls. Description – text entered by the Administrator used for describing multiple lines. Click on the changes. symbol to move to the line setting detail for making 42 The symbol is used for clearing a line. To clear a line, you can also tick off the checkbox in the last column of the table and click on Remove selected item. There is an Add H.323 line icon below the table display the line defining form. . Click on it to 4.5.4. H.323 Line Parameters To add a new line, use the Add icon below the form. To modify an existing line, click on Change, thus confirming the entered data and requesting the execution of the selected operation. There are also Default and Back icons below the form. The first one restores the default value of all fields and the second one returns you to the previous screen 43 The form contains the following fields: Call method – call initiation method. There are three options: 1) Direct – enter the fully qualified network name of the called person, 2) Gatekeeper – a selected Gatekeeper finds the relevant path and establishes the connection; 3) Gateway – calls are made via a selected module. 44 Gatekeeper finding method – determines how to find an available Gatekeeper. Either enter a static address or search the network for the address. Gatekeeper IP address – here enter the Gatekeeper IP address if the Gatekeeper address is not network-searched. Gatekeeper name – here enter the Gatekeeper name for line login. This parameter is optional. Gateway address – here enter the gateway address if you have selected the Gateway calling method. Gateway prefix(es) – prefixes for the gateway login to the Gatekeeper. Endpoint type – the gateway can login to the Gatekeeper either as a Gateway with a prefix (all calls starting with the prefix are routed through the module) or as a Terminal (virtual telephone). Displayed name – text to be displayed to the called line. Numbers – numbers of the line working in the Terminal mode. Listen port – TCP port on which the line receives H.323 calls. Disable Fast start – select this item to disable the Fast start method. This method provides a faster speech channel start where the H.323 protocol is used. Disable Early media start – select this item to disable the Early media start method. This method establishes the speech channels before the call has been set up completely by signalling. It is useful for transmission of GSM progress tones. DTMF type – choose the DTMF tones to be supported; either numbers only (select Signal), or alphanumeric characters (select Alphanum). Transfer method – select either Call forwarding or H.452.2 call transfer. Codecs – a list of codecs to be provided by the gateway for voice channel negotiations. Description – any text that describes the meaning of a line. 45 4.6. Least Cost Router This section deals with the purpose and operation of the gateway cost saving machine - the Least Cost Router (LCR). Let us explain how it works and can be configured. Here is a survey of what you will find in this section: Least cost routing process; Routing rules – destinations, routes, lines and time intervals; Number normalising; List of barred numbers (Blacklist); LCR configuration testing. The purpose of the Least Cost Router is to find the optimum output line for the called number. The LCR process has several stages: Input normalising - the calling and called line numbers are transformed into a normalised format before entering the LCR. Destination searching - a destination means the target party to the call. The destination includes a group and type of line searching in the group. The group is searched according to the prefix of the normalised called number. Group searching - a group means a logical set of lines. The group definition includes a route time limit within a week. Line searching - a route can consist of one or more lines. The final line is determined according to the selected line selection algorithm. Three ways of searching are available: 1) First free line – finds the first free line, 2) Cycle – selects the free line with the earliest time of the last call, and 3) Free minutes – uses the free line with the highest number of free minutes. Correct call rates must be selected for the lines for the method to work effectively. Output normalising - the calling and called line numbers are transformed into a normalised format before the call is transferred to the output line. 46 Check for barred numbers - the Barred numbers table is searched for match after normalising and before transfer to the successfully found output line, and, if a match is found, the call is rejected. By default, the LCR connects all VoIP calls to the Ethernet module without modifying the called number. 4.6.1. Routing Rules Routing rules are the core of the LCR system. They consist of a relatively high number of parameters, which make the routing process highly flexible. A guide is available to make your configuration steps as convenient as possible. Start with clicking on the Least Cost Router (LCR) item in the Telephony services group tag menu. A table gets displayed with predefined routing rules and buttons that help you change the sequence, add new items and modify and/or delete the existing rules. All the above-mentioned buttons except for Add are inactive in the default status (greyish). They will not become active until one routing rule at least is selected by ticking off the checkbox in the second column of the respective row. Push the button activated in this way to execute the operation stated above the selected routing rules. 4.6.2. Add Rule Click on Add or Add after or Insert before to run the LCR adding guide. The guide will be displayed in a new window. 47 The first step is to define the destination. Basically, the destination is a set of prefixes. Looking for the appropriate routing rule, the LCR searches the allowed routing rules from top to bottom for a match of the normalised called number prefix and the destination number prefix. The first matching prefix stops the searching process and the call is routed according to the respective destination rule. The form contains the following fields: Enabled – A routing rule can be defined yet may keep unused in the routing process. Enabled rules are used only. Destination name – The destination must be named briefly and clearly, e.g. according to the mobile network provider or any other distinctive feature. The name may contain alphanumerical characters only. Prefix n – is the destination prefix where n is a serial number. The prefix is a beginning of the target telephone number. If you leave the first prefix blank and do not enter any other, then the particular destination includes all called numbers. To add new prefixes, push the Add others key. 48 Description – any text describing the meaning of a destination. Push the Default button to restore the values available in the instant of form opening. Click on the Close key to close the guide window. Push Next to proceed to the second part of creation. The Previous and Add keys are inactive in the first step as they cannot initiate a meaningful operation. In the second step select the group whose lines are to be used for this rule. To do this, you can either use a list of earlier-defined groups from the pop-up menu or create a new group. Moreover, define how to select the lines included in the group. 4.6.3. Modify Rule Click on the destination name in the survey of routing rules to display an LCR setting guide, which is similar to that introduced above. The only difference is that the Add key is replaced with the Modify key. 49 All the LCR changes influence the gateway behaviour the moment they are executed. Therefore, it is unnecessary to restart the whole system. 50 4.6.4. Remove Rule Tick off the checkbox in the second column of the respective row and push the Remove button to delete a routing rule. 4.6.5. Change Sequence The rule sequence changing procedure is similar to that of the rule removal. Check off the respective row and click on the Shift up or Shift down key. 4.6.6. Disable/Enable Rule We already know that only an enabled routing rule may affect the routing process. You can change the Enabled status while setting and/or changing a rule. Or, just by clicking on the checkbox in the third column of the respective row in the survey of routing rules too. 4.7. LCR Routes LCR routes are part of the LCR rules as we mentioned in the section above. 51 4.7.1. List of Routes Click on the Routes item in the Least Cost Router submenu to display a list of routes. 4.7.2. Add Route Click on the Add icon to add a route. A form gets displayed in the browser for you to complete the following data: 52 Route name – The route name may contain any alphanumerical characters. The LCR rules refer to this name as mentioned in the section above. Route lines – a list of available lines that form a route. Click on the respective item with the left-hand mouse button to select/remove a line. You can select more list items at the same time by pushing the key along with the mouse click. The selected items are illuminated blue. Push the Add SIP line or Add H.323 line key to create new lines. Time intervals – define the routing rule time validity. There are three time groups by default: weekdays – whole days, Monday till Friday, workdays – from 7 a.m. to 5 p.m., Monday till Friday, weekend – Saturdays and Sundays. Click on the Add day group or Add time range key to create new time intervals. Description – any text that describes the meaning of a route. 53 4.7.3. Modify Route Click on the symbol of the respective route to display a route setup modifying guide, which is similar to that introduced above. The only difference is that the Add key is replaced with the Modify key . 4.7.4. Remove Route Click on the symbol to delete a route. Or, you can also tick off the checkbox in the last table column and click on Remove selected items to delete all selected routes at the same time. 4.8. LCR Number Normalising Speaking of the LCR operations, we also mentioned number modifications before and after the routing process – the so-called normalising. Normalising means conditioned transformations of the called and/or calling numbers into a unified format, which facilitates definition of the routing rules. The normalising rule is determined by the following three parameters: 1) Normalising type – defines at which process stage (input/output) and for which numbers (called/calling) normalising should be used. 2) Condition – transformation is only applied to numbers that meet a condition. The condition is specified by a prefix – a string that the number starts with. The prefix is separated automatically and the remaining part of the number is transformed only. 3) Transformation rule – enables to modify a number by removing a certain number of characters from the number beginning, or adding a new prefix. To set the normalising rules, use the Normalising item in the Least Cost Router (LCR) menu in the Telephony services group tag. The initial screen is a list of created normalising rules. Click on the symbol to enter the form and make changes. 54 To delete a normalising rule, click on the symbol. To delete all rules, select them by checking the last table column and click on Remove selected items below the table. There is an Add LCR normalising icon below the table. Click on it to display the rule defining form. The meanings of the form fields are identical with the following columns of the normalising table: Prefix – a prefix that a number must start with to meet the transformation rule. Remove count – a count of characters to be removed from the number beginning behind the prefix. Add number – a number to be added before the number part after removal of the prefix and a defined count of digits. Type – defines the stage at which the normalising rule should be applied. There are four options: Incoming calling – on the calling number input, Incoming called – on the called number input, Outgoing calling – on the calling number output, Outgoing called – on the called number output. Description – any text that describes the meaning of a normalising rule. 55 4.9. LCR Barred Numbers The Barred numbers table (Blacklist) is searched for match after output normalising and before call forwarding to the successfully found output line. If the normalised number starts with a string included in the table, the call is rejected. This means that we can enter both whole telephone numbers and prefixes into the list to eliminate, e.g., all international calls or special high-rate calls (erotic lines, etc.). To define the barred numbers, use the Blacklist item in the Least Cost Router (LCR) menu in the Telephony services group tag. A list of barred numbers gets displayed. The columns include: Regular expression – the barred number beginning (or the whole barred number). Description - any text that describes the meaning of an item. Click on the symbol to move to the detail and change the settings. The above-mentioned two fields are the only two items to be completed in the modifying form. To delete a barred number, use the symbol. Or, tick off the last table column and click on Remove selected items. There is an Add barred number icon below the table. Click on it to display the number defining form. 4.10. LCR Testing The LCR test item in the Least Cost Router (LCR) menu in the Telephony services group tag is used for testing changes in the LCR settings. Enter the 56 caller's and called numbers and click on the LCR test or Repeat LCR test icon located below the form to initiate the LCR process simulation. After simulation, the normalised calling and called numbers plus the name of the successfully found output line, or the reason why the line search was unsuccessful are displayed. 57 4.11. SIP Proxy The 2N® OMEGA Lite Ethernet module is delivered with an integrated SIP proxy, which is able to work as a private branch exchange for SIP telephones. It is easy to configure; all you have to do is fill in the routing table. Above is an example of a filled-in routing table, which gets displayed after you open the SIP proxy menu in the Telephony services group tag. Each row represents one rule. After obtaining the call-establishing request, the SIP proxy searches the table from top to bottom for the relevant routing rule. The relevant rule is based on a comparison of the called destination and the value in the first table column. If the called party‟s ID starts with the prefix stated in the If prefix column of the routing rule, the search is terminated and the call is routed according to the found rule. The last column in the table represents the default routing rule. It cannot be deleted. it governs all calls for which no explicit routing rule has been found. The routing rule determines what the SIP proxy should do with a call. A call may be rejected, forwarded to another host and/or port, forwarded to a VoIP line of the module, or routed via the database of available SIP telephones. Before any of the above mentioned operations is executed, the called party‟s identification may be modified by removing a certain number of characters from the left, or adding a new string to the ID beginning as the case may be (refer to the Remove and Add columns). Click on the changes. symbol to move to the routing rule detail for making 58 To delete a routing rule, use the symbol. Or, tick off the last table column checkbox and click on Remove selected items . There is an Add rule icon below the table. Click on it to display the rule defining form. The figure below shows the SIP proxy routing rule setting form. The form fields correspond to the headers of the above-displayed table. The form and the table contain the following fields: If prefix – if the called subscriber's URI (Uniform Resource Identifier) starts with this string, this rule is used for routing. In the SIP environment, the URI is introduced with the „sip:‟ prefix, which has to be included in the value in this field. Remove – the number of characters following the „sip:‟ prefix to be removed from the URI before processing. Add – the string to be inserted in the URI behind the „sip:‟ prefix. 59 Perform action – there are six possible call actions in the pop-up menu but, basically, three of them are applied only – call rejection, forwarding and interconnection within SIP proxy registrations. Nevertheless, let us mention all of them for completeness: 1) Reject – the called line gets the busy tone; 2) Overwrite host – forwards the call to the same port of the selected host; 3) Overwrite port – forwards the call to the selected port of the same host (the same effect as with option 5); 4) Overwrite host and port – forwards the call to any port of the selected host, 5) Connect to VoIP module – connects the call to the selected module SIP line, and finally 6) Search registration – tries to search the SIP proxy registered users for the required URI and forward the call to the appropriate host. With parameter – the above actions, except for the first and last ones, require a parameter to be set. This parameter is a new destination for call forwarding and the SIP line name for the Connect to VoIP module action. The call forwarding parameter may be: the host address (2) entered either as an IP address or a fully qualified network name, or the port number (3), or a combination thereof (4) with the host address being separated from the port number by a colon (:). 60 4.11.1. Overview of Registrations Use the module web interface to see which units have been registered to the SIP proxy. To do this, click on the Registration item in the SIP proxy menu in the Telephony services tag. 4.11.2. Switching ON/OFF If you are using an external SIP proxy server and do not wish to use the integrated SIP proxy, you can switch the integrated proxy server off. If ON, the integrated SIP proxy server can be switched off by clicking on the Switch SIP Proxy off menu item. If OFF, the integrated SIP proxy server can be switched on by clicking on the Switch SIP Proxy on menu item. 61 4.12. Mobility Extension Here the Mobility Extension settings for VoIP phones are described. An authorised Mobility Extension user can make calls as from a VoIP extension. Use the FLASH = 7* command during a call for call transfer. Press 9# to exit the current call, remaining connected to the VoIP and capable of further dialling. 4.12.1. User Settings Enable the Mobility Extension function and enter the telephone number for the user. Enter: Outgoing ME enabled – enable the use of outgoing Mobility Extension, in the case of call to this VoIP user (extension) Outgoing ME number – the telephone number (including a prefix ) to be called in case of an outgoing Mobility Extension call (rings simultaneously with the VoIP extension) 62 Incoming ME enabled – enable the use of Mobility Extension in incoming ME calls from the user number. The calling user shall be played the “Mobility Extension” voice message and be allowed to dial in the required extension or make an outgoing call from the PBX. Incoming ME number – the telephone number authorised to use Mobility Extension to call local extensions or external numbers SMS at no answer enabled – enable sending SMS on missed calls. SMS at no answer number – enter the telephone number to which SMS on missed calls shall be sent. Push the for confirmation. 4.12.2. DISA Line for ME Create a DISA line for the users that do not meet the Mobility Extension conditions. Push to create a DISA line. 63 Type of DISA – select one of the available DISA types. Basic DISA = DISA welcome note is played to the calling user. Maximum allowed count of digits – enter the count of digits to be dialled within the DISA service. Operator number – enter the telephone number to be called if the calling user makes no dialling. Description – an optional brief description. Push for confirmation. 4.12.3. Mobility Extension Here define the Mobility Extension conditions. 64 Push to set the conditions. Outgoing ME enabled – tick off to enable a ME outgoing call. Incoming ME enabled – tick off to enable ME in an incoming call. Allow sending SMS – tick off to enable sending SMS on missed calls (via the first GSM port). SMS at no answer text (%n for number) – type the SMS text to be sent after a missed call. %n stands for the calling number. ME SIP route – enter the IP address including the port on the device that “controls” the ME function. As a rule, the own Ethernet module IP address is used. ME DISA line – select the DISA line to be used for ME. Push for confirmation. 65 4.12.4. LCR – Least Cost Router Here define the calling conditions for the Mobility Extension function. 4.12.4.1. Routes Create routes for Mobility Extension. Push to create a line in LCR Routes. 66 Route name – enter the name of the route to be presented in other LCR sections. Route lines – select the DISA line to be used for the ME function. Time intervals – specify when the route may be used. CLIP/CLIR – select Default. Description - an optional brief description. Push for confirmation. 67 4.12.4.2. Normalising Normalising has to be made for incoming calls to the Ethernet module to adjust the called number to the Mobility Extension conditions (if the calling party number doesn‟t match to an incoming ME number of any user). In fact, to set correctly the ME function, called number that comes from the basic part (e.g. from GSM) has to be empty (see 4.12.5.1). Here it has to be changed to a number that could be use in LCR rule. This new number will be used ONLY if the caller (calling party) number doesn‟t match to any incoming ME number. Push to create a LCR normalising condition. 68 This format of Add LCR normalization menu is set by parameter “Advanced config of regular expressions” (see 4.4.1). Line – select the incoming line to which normalising shall apply. Regular expression – set a normalising condition to match to incoming calls with an empty called number (no called number was passed to the Ethernet module). The correct syntax of the regular expression is ^$ in this case. Rule – enter which number shall be “dialled” after the condition is met. In LCR this called number will be routed to DISA. Type – define the call type for the condition. Select Called incoming. Description - an optional brief description. Push for confirmation. If the call is recognized as an incoming ME call, the empty called number is automatically replaced with string #mobext#. No normalising rule is needed. 69 4.12.4.3. LCR Prefix Here define the Least Cost Router (LCR) conditions for the ME function. Push to create a LCR condition. 70 Destination name – name of the destination to be displayed. Prefix 1 – enter the prefix for the calls that do not meet the ME condition i.e. the calling number does not match any of the incoming ME numbers set for the users. It should correspond to the number set in the “Rule” parameter (see 4.12.4.2) Prefix 2 - enter the prefix for the calls that meet the incoming ME condition. The correct syntax is #mobext#. Description - an optional brief description. Route name – select the earlier created route for the ME function. Line selection – select the line type (Default). Description - an optional brief description. Push for confirmation. 71 4.12.4.4. SIP Proxy Here assign prefixes to the SIP Proxy. Push to create a SIP Proxy rule. If prefix – select which prefix shall affect this rule. Here the rule applies to prefix „0‟. Strip – define how many digits are to be removed. Here none is removed. Add – define which numbers are to be added. Do action – define which action is to be performed. Select „connect to LCR‟. With parameter – define which line is to be used. Take the same steps to create the condition for prefix „4‟. Push for confirmation. 72 Now the rules for ME application in the Ethernet module configuration tool have been created. The next step is to configure the PBX using the PBX configuration tool. 4.12.5. PBX Settings You are advised to use the GSM ports in the TDM (digital) section of the PBX to make the VoIP phone execute the ME function reliably. Use the 2N® OMEGA Lite PBX configuration tool to set the required parameters. 4.12.5.1. Incoming Calls to VoIP from PBX TDM Define that an “empty” number is dialled to VoIP to enable incoming calls from the TDM section of the PBX. To do this, use the „I am calling short dialling‟ function in the ringing table. Set the short dialling as follows: Short dials/Common tag 73 Text – enter the name of short dialling item to be presented to the user and in the ringing tables. Number – enter the „comma‟ character “,“, which represents a pause, to make sure that a pause with no further dialling will be dialled into the trunk specified in the Call type. It will be decided in the VoIP section (Ethernet module) according to the CLIP whether the calling user will be assigned ME. If CLIP shouldn‟t match to defined incoming ME numbers , the call will be routed to DISA. In that case, caller would have two options to dial in the required VoIP phone or wait for the VoIP phone designated as the operator. Call type – select the bundle (trunk) of VoIP lines (voice channels). Create a ringing table and add it to the incoming line. Use the External lines/Ringing menu to create a ringing table. Assign the port of the internal/virtual line to which the calls are to be accounted to the incoming lines in the External lines/Transit call identification menu. 74 75 4.13. PPPoE Provides to connect Omega Lite to Internet over ADSL modem. Ethernet modul could be connected to ADSL modem or ADSL router set to the bridge mode (without router functions). In that case Ethernet module is set as a router. It could be used just to connect Omega Lite to Internet or could play a role of the LAN gateway. In the next chapters you can found the procedure how to set Ethernet module as a LAN gateway (ADSL router). 4.13.1. Main configuration The PPPoE setting has to be done in the basic network settings. It is supposed that the default network setting is used and LAN PCs are set to get IP address from DHCP and DNS servers IP addresses automatically. Push to set the conditions. The default setting is : 76 Set PPPoE items: PPPoE enabled: enable PPPoE (Point to Point over Ethernet). Username: - user name (provided by ADSL provider). Password: - password (provided by ADSL provider). 77 Push for confirmation. 4.13.2. DHCP server settings DHCP server will be enabled in order to provide IP addresses to LAN PCs. The folowing settings are requested. Push to set the conditions. 78 DHCP server enabled: - enables DHCP server i.e.activate settings of the other parameters in this menu. Lease time: - validity of a leased IP adress in seconds. Start adress: - start of an IP address pool. End address: - end of an IP address pool. Subnet option: - subnet mask for an internal network (LAN) Router option: - the default gateway of the subnet (typically the Ethernet module IP address, for VRRP it is the IP address of the virtual router). Primary / Secondary DNS option: - the IP address of DNS server that will be used in LAN PCs (device). Typically it is the IP address od Ethernet module. Other options are IP address of the local DNS server or IP address of DNS server recommended by IP operator. Domain option: - domain name of ethernet module. It could be any, but it is requested. Empty field could make problem to PCs running some OSs. 79 Push for confirmation. 4.13.3. DNS proxy Used for caching DNS records in case Ethernet module works as a UMTS/ADSL router. The DSN proxy can receive DNS queries from the local network and forward them to an Internet Domain Name Server. If the DNS Proxy is disabled, the gateway forwards all requests to the servers assigned by the UMTS/ADSL provider. The Ethernet module can use the DNSs from the Network settings or you can forward the DNS queries to specified servers. 80 Push Push to set the conditions. for confirmation. Thiis was the last step in setting Ethernet module as an ADSL router. 81 82 4.14. Licence File The licence file is used for activating the services provided by the 2N OMEGA Lite Ethernet module. A brand new module provides 800 hours of operation without the licence file. Before uploading, save the licence file on your PC hard disk and remember the path to it. Click on the Upload licence item in the Administration menu to upload the licence file into the module. This displays the licence file adding dialogue as shown below. ® Push the Browse button to select the path to the licence file and the Add button to upload the licence file into the module. 83 4.15. Firmware Updating The firmware updating function helps you update the 2N® OMEGA Lite Ethernet module firmware. Be sure to use the firmware supplied by the module producer or the producer‟s technical support department only. During firmware updating, new firmware versions with innovated functions are downloaded. The firmware file is named root.tgz.gpg and should have approximately 10 MB. The firmware updating process takes 5-10 minutes if you use your LAN and a delay may occur due to a lower transmission rate if you use the Internet. Click on the Update firmware item to update the firmware. The firmware updating dialogue is displayed as shown below. Push the Browse button to select the path to the firmware file and the Update button to upload the firmware file into the module. 84 4.16. Configuration Downloading You can download any configuration from the Ethernet module and save it into a file. To do this, click on the Configuration backup/Download config item in the Administration tag. The configuration downloading dialogue will be displayed. Save the successfully downloaded unambiguous destination. configuration backup.tgz to an 85 4.17. Configuration Uploading You can upload the saved configuration into the Ethernet module. To do this, click on the Configuration backup/Upload config item in the Administration tag. The configuration uploading dialogue will be displayed. Find the saved configuration backup.tgz and push Modify to upload the configuration. The downloaded configuration also includes the licence effective as of the backup date. Select Do not extract licence before uploading to keep the current licence valid. 86 5. Ethernet Module Parameter Setting by PBX Configuring Tool The 2N® OMEGA Lite PBX has to be equipped with the firmware version 4.02REV11 or later for the Ethernet module to work properly. If not, upgrade your PBX. 5.1. 2N® OMEGA PBX Firmware Upgrade The proper firmware upgrading procedure is as follows: 1. 2. 3. 4. 5. 6. 7. 8. 9. Read and save the PBX settings by the original PBX configuration tool. Read all accounting data (if they are to be further processed). Terminate all open connections. Use the original configuration tool to import the firmware in the Data – Saving software in the PBX menu and reset and boot from flash (you will be prompted automatically by the configuration tool). Reset the factory values. Launch the current configuration tool and create a new configuration (while upgrading versions lower than 4.02), or download the originally stored configuration). Check all the PBX settings. Back-up the configuration on the hard disk. Export the data to the PBX. 5.2. Hardware Configuration Having performed the PBX firmware upgrade, insert and connect the VoIP module (with the PBX switched off). After the PBX power up download the data and adjust all the module and PBX settings. After downloading, the presence of the Ethernet module is indicated in the Global data / Information in the configuration tool and in the Global data/Hardware module. 87 88 5.3. VoIP Line Setting Use the External lines/Digital line types/VoIP in the PBX configuration tool for setting the VoIP line. Set the following: Name – line name of up to 14 characters. Without authoris. – no authorisation check is performed on this line. Private – the line is connected to a private network where no accounting is performed. Prefix – prefix of up to four digits, which is automatically called after outgoing line seizure as the first (DID via the superior exchange). The prefix is not written into the accounting line. Minimum accounting time - time subtracted from the call time for pseudoaccounting. Priority – an internal line must be of a higher or equal priority to use an external line. CLIP – enter how the line should be identified for outgoing calls. Remove – enter the number of digits to be removed from the incoming identification in the inbound direction in order that the remaining digits are the DID to the subscriber or the ringing table. Dial to VoIP [s] – maximum delay before the next VoIP line dialling. The timeout is reset after every digit received from the internal subscriber and the dialling mode is changed into the calling mode after its expiry. If enabled, the expiry and thus the dialling end are announced by a short beep. Any later dialling is considered a service into the call. 5.4. Outgoing Calling 89 The VoIP lines have to be bundled (trunked) for outgoing calls. In the factory setting, the VoIP lines are automatically included in trunk 6 and all internal lines may seize the trunk using the Seizure of external line trunk (dialling 86). Include the VoIP lines into the LCR for comfortable calling. 5.5. Incoming Ringing The behaviour of the VoIP module is the same as that of the ISDN BRI module with the DDI function in the inward direction. Unless specified in the module setting, define the count of digits to be removed from the incoming identification, the remaining digits being considered as the dial-in. Then, the DID is used for the PBX subscriber according to the DID numbering plan: Or, the DID ringing table is used as the case is with the ISDN dial-in. 90 6. 2N® XAPI Server The Ethernet module also integrates a 2N® XAPI server, which helps the PBX users work with the available applications (PBX Assistant, SMS server, TAPI client, etc.). For details on the applications refer to the installation CD enclosed to the Ethernet module or PBX. 6.1. 2N® XAPI Server Console The XAPI Server Console is designed for 2N® XAPI server administration. It helps you create application users (clients), add licences, download accounting and system data, set the input number normalising for the running user applications, and so on. 91 6.1.1. Installation For installation use the available installation CD and a PC, or your PBX system administrator‟s server. 92 Select the XAPI Server Console and enable installation: Push Yes: Push Next: 93 Select the target directory and complete installation. 94 95 6.1.2. Communication Setting If you run the 2N® XAPI Server Console for the first time, set its communication with the running 2N® XAPI server. To set communication, use the Set/Communication menu. Enter the following: IP address – IP address of the running 2N® XAPI server (Ethernet module in this case). Host – name of the running 2N XAPI server PC (LocalHost), entered instead of the IP address. Port – 2N® XAPI server communication port. The default value is 6800 and there is no need to change it. Service – registered service number – to be entered instead of the port. Push OK for confirmation. 96 If the IP address setting is incorrect, active XAPI servers are searched for automatically within the LAN and you can select the IP address of the required connection directly. Push Open to open connection. Push Find again to start another search. Push Cancel to quit searching. 97 6.1.3. Connection Establishing Having set up communication, try to establish connection with the 2N ® XAPI server. Push Connect . If the 2N® XAPI server is active, all the other buttons will become active. You need not push the Connect connection using the automatic XAPI server search. 6.1.4. button if you have opened Connection Closing Push Disconnect to close the 2N® XAPI server connection. 98 6.1.5. PBX Module Push PBX Module to access the PBX module. A window gets displayed providing information on the PBX connected. It includes the PBX serial number, PBX firmware type, available boards, 2N ® XAPI server ID (one of the XAPI server licence adding options). 99 Push Setup 6.1.5.1. to set the PBX module parameters. Trace Enable/set the following: Trace – enable the creation of the PBX module LOG communication. Erase trace at start – enable the deletion of the PBX module LOG communication upon the XAPI server start. File size limit – limit the LOG file size (*.trc). When the limit is exceeded, the oldest data are overwritten. 6.1.5.2. Number Conversion 100 This menu helps you normalise received/called numbers to/from the current applications (PBX Assistant, TAPI driver, etc.). Remember to set this parameter to prevent dialling unsupported local and international calls to some outgoing connection types (ISDN, e.g.). Set the following: From – original number format before normalising. To – resultant number format after normalising (% is always the first character in the format). 6.1.5.3. Called Number Assigning This parameter helps you see the called party identification in the application (PBX Assistant). This function is suitable for reception desks that are shared by multiple PBX users. Set the following: From – DISA or DDI for ISDN connections. To – name to be displayed in the application. 101 6.1.6. User Module Push USR Module to enter the User module. The User module is designed for creation of application users (clients) and displays the current connections. Meanings of USR parameters: Handle – number of the currently active connection. Name – user name. Attributes – user rights. Line – line used by the currently active connection. Firm – FirmCode (application) used for the currently active connection. Push 6.1.6.1. Push to enter the user settings. User Creation to enter the user creating menu. 102 Enter the following: Name – user name. Password – user login password. Rights – user rights (the user rights included in the application licence may only be assigned). Line – line used by the currently active connection. Firm – FirmCode (application) used for the currently active connection. Push OK for confirmation, or Cancel to clear the setting. 6.1.6.2. User Deletion Select a user with the right-hand mouse button and push the delete the user. icon to 103 6.1.6.3. Push Setup User Module Setting to set the User module parameters. Trace Enable/set the following: Trace – enable the creation of the User module LOG communication. Erase trace at start – enable the deletion of the User module LOG communication upon the XAPI server start. File size limit – limit the LOG file size (*.trc). When the limit is exceeded, the oldest data are overwritten. Life Enter the following: Close at idle longer than – define the idle time after which the application shall be closed. Most applications are provided with protection and thus retain the 0min = no forced disconnection setting unless provided otherwise. 104 6.1.7. Licence Module Push Licence Module to enter the Licence module. The Licence module is designed for adding and monitoring of application licences. Meanings of Licence module parameters: Type – licence type. Way – ADD is used as a rule. Users – maximum count of users (clients). Active – maximum count of users (clients) of simultaneously active connections. Function - user rights. Expiry – licence validity limit. Firm – FirmCode (application) used for the currently active connection. 6.1.7.1. Licence Adding Push New licence to add a licence. 105 Enter the following: Id – first licence part. Key – second licence part. Push OK to add the licence. A licence is granted by the manufacturer with the following data: - PBX serial number – information on the PBX; PBX main board serial number – information on the PBX; Application type; Count of users (clients); Name of the licence holder. 6.1.7.2. Licence Module Setting Push Setup to set the Licence module parameters. Send licence info Enter the following: Licence expiry in – number of days till the licence expiry. It is displayed whenever the application start is executed or attempted. 106 Trace Enable/set the following: Trace – enable the creation of the Licence module LOG communication. Erase trace at start – enable the deletion of the Licence module LOG communication upon the XAPI server start. File size limit – limit the LOG file size (*.trc). When the limit is exceeded, the oldest data are overwritten. Limit Enter the following: Max. currently open connections – count of application connections active on a line at the same time. 107 6.1.8. Database Module Push Database Module to enter the Database module. The database module is designed for monitoring and saving of accounting and system data. 6.1.8.1. Database Module Setting Push Setup to set the Database module parameters. Trace Enable/set the following: 108 Trace – enable the creation of the Database module LOG communication. Erase trace at start – enable the deletion of the Database module LOG communication upon the XAPI server start. File size limit – limit the LOG file size (*.trc). When the limit is exceeded, the oldest data are overwritten. Accounts Enable/set the following: At open window only – enable data downloading either At open window only or Always. Interval at data – data query interval [ms] if earlier data are available. Interval at no data – data query interval [ms] if no earlier data were available in the last query. Filename – filename for saving downloads. The storage is on the XAPI console installation site. Push OK for confirmation. 109 6.1.9. XML Module Push XML Module to enter the XML module. The XML module is designed for monitoring of XML communication with the open applications. 6.1.9.1. XML Module Setting Push Setup to set the XML module parameters. Trace 110 Enable/set the following: Trace – enable the creation of the XML module LOG communication. Erase trace at start – enable the deletion of the XML module LOG communication upon the XAPI server start. File size limit – limit the LOG file size (*.trc). When the limit is exceeded, the oldest data are overwritten. Terminal Enable the following: New line – enable closing of a line and proceeding to the next one for XAPI console connections (PuTTY, e.g.). This parameter is not used in normal operation. 111 The manufacturer reserves the right to make such modifications in the documentation that will result in improvement of the product qualities. Use the product in compliance with the Instructions for Use and for the purposes mentioned therein only. When expired, the product or parts thereof should be disposed of in accordance with the applicable environmental control regulations. 112 2N TELEKOMUNIKACE a.s. Modřanská 621, 143 01 Prague 4, Czech Republic Tel.: +420 261 301 500, Fax: +420 261 301 599 E-mail: [email protected] Web: www.2n.cz 1424v1.3 113