1
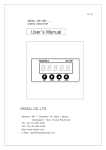
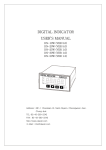
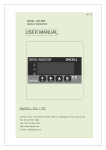
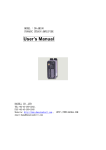
MODEL : DN-120
DIGITAL INDICATOR
USER’S MANUAL
DACELL CO.,LTD.
Address : 356-1 Cheoksan -Ri ,Nami - Myeon ,
Cheongwon - Gun ,Chung-Buk,Korea
TEL : 82-43-260-2242
FAX : 82-43-260-2245
http://www.danaloadcell.com
E-Mail : [email protected]
目
次
1. Features ⋅⋅⋅⋅⋅⋅⋅⋅⋅⋅⋅⋅⋅⋅⋅⋅⋅⋅⋅⋅⋅⋅⋅⋅⋅⋅⋅⋅⋅⋅⋅⋅⋅⋅⋅⋅⋅⋅⋅⋅⋅⋅⋅⋅⋅⋅⋅⋅⋅⋅⋅⋅⋅⋅⋅⋅⋅⋅⋅⋅⋅⋅⋅⋅⋅⋅⋅⋅⋅⋅⋅⋅⋅⋅⋅⋅⋅⋅⋅⋅⋅⋅⋅⋅⋅⋅⋅⋅⋅⋅⋅⋅⋅⋅ 3
1-1. Sigma-Delta Conversion System ⋅⋅⋅⋅⋅⋅⋅⋅⋅⋅⋅⋅⋅⋅⋅⋅⋅⋅⋅⋅⋅⋅⋅⋅⋅⋅⋅⋅⋅⋅⋅⋅⋅⋅⋅⋅⋅⋅⋅⋅⋅⋅⋅⋅⋅⋅⋅⋅⋅⋅ 3
1-2. Calibration System ⋅⋅⋅⋅⋅⋅⋅⋅⋅⋅⋅⋅⋅⋅⋅⋅⋅⋅⋅⋅⋅⋅⋅⋅⋅⋅⋅⋅⋅⋅⋅⋅⋅⋅⋅⋅⋅⋅⋅⋅⋅⋅⋅⋅⋅⋅⋅⋅⋅⋅⋅⋅⋅⋅⋅⋅⋅⋅⋅⋅⋅⋅⋅⋅⋅⋅⋅⋅⋅⋅⋅⋅⋅⋅⋅⋅⋅⋅⋅⋅⋅⋅⋅⋅ 3
1-3. HI⋅LO OUTPUT ⋅⋅⋅⋅⋅⋅⋅⋅⋅⋅⋅⋅⋅⋅⋅⋅⋅⋅⋅⋅⋅⋅⋅⋅⋅⋅⋅⋅⋅⋅⋅⋅⋅⋅⋅⋅⋅⋅⋅⋅⋅⋅⋅⋅⋅⋅⋅⋅⋅⋅⋅⋅⋅⋅⋅⋅⋅⋅⋅⋅⋅⋅⋅⋅⋅⋅⋅⋅⋅⋅⋅⋅⋅⋅⋅⋅⋅⋅⋅⋅⋅⋅⋅⋅⋅⋅⋅⋅⋅⋅⋅⋅⋅ 3
1-4. DATA BACK-UP & Watch-Dog Function ⋅⋅⋅⋅⋅⋅⋅⋅⋅⋅⋅⋅⋅⋅⋅⋅⋅⋅⋅⋅⋅⋅⋅⋅⋅⋅⋅⋅⋅⋅⋅⋅⋅⋅⋅⋅⋅⋅⋅⋅⋅⋅⋅⋅⋅⋅⋅⋅⋅⋅⋅⋅⋅⋅ 3
1-5. Option ⋅⋅⋅⋅⋅⋅⋅⋅⋅⋅⋅⋅⋅⋅⋅⋅⋅⋅⋅⋅⋅⋅⋅⋅⋅⋅⋅⋅⋅⋅⋅⋅⋅⋅⋅⋅⋅⋅⋅⋅⋅⋅⋅⋅⋅⋅⋅⋅⋅⋅⋅⋅⋅⋅⋅⋅⋅⋅⋅⋅⋅⋅⋅⋅⋅⋅⋅⋅⋅⋅⋅⋅⋅⋅⋅⋅⋅⋅⋅⋅⋅⋅⋅⋅⋅⋅⋅⋅⋅⋅⋅⋅⋅⋅⋅⋅⋅⋅⋅⋅⋅⋅ 3
1-6. Power Supply ⋅⋅⋅⋅⋅⋅⋅⋅⋅⋅⋅⋅⋅⋅⋅⋅⋅⋅⋅⋅⋅⋅⋅⋅⋅⋅⋅⋅⋅⋅⋅⋅⋅⋅⋅⋅⋅⋅⋅⋅⋅⋅⋅⋅⋅⋅⋅⋅⋅⋅⋅⋅⋅⋅⋅⋅⋅⋅⋅⋅⋅⋅⋅⋅⋅⋅⋅⋅⋅⋅⋅⋅⋅⋅⋅⋅⋅⋅⋅⋅⋅⋅⋅⋅⋅⋅⋅⋅⋅⋅⋅⋅⋅⋅⋅⋅⋅ 3
1-7. Standard built-in product ⋅⋅⋅⋅⋅⋅⋅⋅⋅⋅⋅⋅⋅⋅⋅⋅⋅⋅⋅⋅⋅⋅⋅⋅⋅⋅⋅⋅⋅⋅⋅⋅⋅⋅⋅⋅⋅⋅⋅⋅⋅⋅⋅⋅⋅⋅⋅⋅⋅⋅⋅⋅⋅⋅⋅⋅⋅⋅⋅⋅⋅⋅⋅⋅⋅⋅⋅⋅⋅⋅⋅⋅⋅ 4
2. Cautions ⋅⋅⋅⋅⋅⋅⋅⋅⋅⋅⋅⋅⋅⋅⋅⋅⋅⋅⋅⋅⋅⋅⋅⋅⋅⋅⋅⋅⋅⋅⋅⋅⋅⋅⋅⋅⋅⋅⋅⋅⋅⋅⋅⋅⋅⋅⋅⋅⋅⋅⋅⋅⋅⋅⋅⋅⋅⋅⋅⋅⋅⋅⋅⋅⋅⋅⋅⋅⋅⋅⋅⋅⋅⋅⋅⋅⋅⋅⋅⋅⋅⋅⋅⋅⋅⋅⋅⋅⋅⋅⋅⋅⋅⋅⋅⋅⋅⋅⋅⋅⋅⋅⋅⋅⋅⋅⋅⋅⋅⋅ 5
2-1. Set-up Cautions ⋅⋅⋅⋅⋅⋅⋅⋅⋅⋅⋅⋅⋅⋅⋅⋅⋅⋅⋅⋅⋅⋅⋅⋅⋅⋅⋅⋅⋅⋅⋅⋅⋅⋅⋅⋅⋅⋅⋅⋅⋅⋅⋅⋅⋅⋅⋅⋅⋅⋅⋅⋅⋅⋅⋅⋅⋅⋅⋅⋅⋅⋅⋅⋅⋅⋅⋅⋅⋅⋅⋅⋅⋅⋅⋅⋅⋅⋅⋅⋅⋅⋅⋅⋅⋅⋅⋅⋅⋅⋅⋅⋅ 5
2-2. Use Cautions ⋅⋅⋅⋅⋅⋅⋅⋅⋅⋅⋅⋅⋅⋅⋅⋅⋅⋅⋅⋅⋅⋅⋅⋅⋅⋅⋅⋅⋅⋅⋅⋅⋅⋅⋅⋅⋅⋅⋅⋅⋅⋅⋅⋅⋅⋅⋅⋅⋅⋅⋅⋅⋅⋅⋅⋅⋅⋅⋅⋅⋅⋅⋅⋅⋅⋅⋅⋅⋅⋅⋅⋅⋅⋅⋅⋅⋅⋅⋅⋅⋅⋅⋅⋅⋅⋅⋅⋅⋅⋅⋅ 5
3. Specifications ⋅⋅⋅⋅⋅⋅⋅⋅⋅⋅⋅⋅⋅⋅⋅⋅⋅⋅⋅⋅⋅⋅⋅⋅⋅⋅⋅⋅⋅⋅⋅⋅⋅⋅⋅⋅⋅⋅⋅⋅⋅⋅⋅⋅⋅⋅⋅⋅⋅⋅⋅⋅⋅⋅⋅⋅⋅⋅⋅⋅⋅⋅⋅⋅⋅⋅⋅⋅⋅⋅⋅⋅⋅⋅⋅⋅⋅⋅⋅⋅⋅⋅⋅⋅⋅⋅⋅⋅⋅⋅⋅⋅⋅⋅⋅⋅⋅⋅⋅ 6
3-1. General Specifications ⋅⋅⋅⋅⋅⋅⋅⋅⋅⋅⋅⋅⋅⋅⋅⋅⋅⋅⋅⋅⋅⋅⋅⋅⋅⋅⋅⋅⋅⋅⋅⋅⋅⋅⋅⋅⋅⋅⋅⋅⋅⋅⋅⋅⋅⋅⋅⋅⋅⋅⋅⋅⋅⋅⋅⋅⋅⋅⋅⋅⋅⋅⋅⋅⋅⋅⋅⋅⋅⋅⋅⋅⋅⋅⋅ 6
4. Front Panel ⋅⋅⋅⋅⋅⋅⋅⋅⋅⋅⋅⋅⋅⋅⋅⋅⋅⋅⋅⋅⋅⋅⋅⋅⋅⋅⋅⋅⋅⋅⋅⋅⋅⋅⋅⋅⋅⋅⋅⋅⋅⋅⋅⋅⋅⋅⋅⋅⋅⋅⋅⋅⋅⋅⋅⋅⋅⋅⋅⋅⋅⋅⋅⋅⋅⋅⋅⋅⋅⋅⋅⋅⋅⋅⋅⋅⋅⋅⋅⋅⋅⋅⋅⋅⋅⋅⋅⋅⋅⋅⋅⋅⋅⋅⋅⋅⋅⋅⋅⋅⋅⋅⋅⋅⋅⋅⋅⋅⋅ 7
4-1. Picture Description of the Display of the Front Panel ⋅⋅⋅⋅⋅⋅⋅⋅⋅⋅⋅⋅⋅⋅⋅⋅⋅⋅⋅⋅⋅⋅⋅⋅⋅⋅⋅⋅⋅⋅⋅⋅⋅ 7
4-2. Description of the Display ⋅⋅⋅⋅⋅⋅⋅⋅⋅⋅⋅⋅⋅⋅⋅⋅⋅⋅⋅⋅⋅⋅⋅⋅⋅⋅⋅⋅⋅⋅⋅⋅⋅⋅⋅⋅⋅⋅⋅⋅⋅⋅⋅⋅⋅⋅⋅⋅⋅⋅⋅⋅⋅⋅⋅⋅⋅⋅⋅⋅⋅⋅ 7
4-3. Description of the Keys on the Display ⋅⋅⋅⋅⋅⋅⋅⋅⋅⋅⋅⋅⋅⋅⋅⋅⋅⋅⋅⋅⋅⋅⋅⋅⋅⋅⋅⋅⋅⋅⋅⋅⋅⋅⋅⋅⋅⋅⋅⋅⋅⋅⋅⋅⋅ 7
1
5. Back Panel ⋅⋅⋅⋅⋅⋅⋅⋅⋅⋅⋅⋅⋅⋅⋅⋅⋅⋅⋅⋅⋅⋅⋅⋅⋅⋅⋅⋅⋅⋅⋅⋅⋅⋅⋅⋅⋅⋅⋅⋅⋅⋅⋅⋅⋅⋅⋅⋅⋅⋅⋅⋅⋅⋅⋅⋅⋅⋅⋅⋅⋅⋅⋅⋅⋅⋅⋅⋅⋅⋅⋅⋅⋅⋅⋅⋅⋅⋅⋅⋅⋅⋅⋅⋅⋅⋅⋅⋅⋅⋅⋅⋅⋅⋅⋅⋅ 8
5-1. Form of Back panel & Using terminal stand ⋅⋅⋅⋅⋅⋅⋅⋅⋅⋅⋅⋅⋅⋅⋅⋅⋅⋅⋅⋅⋅⋅⋅⋅⋅⋅⋅⋅⋅⋅⋅⋅⋅⋅⋅⋅⋅⋅⋅⋅⋅⋅⋅⋅⋅ 8
5-2. Function & characteristics of back panel by the terminal ⋅⋅⋅⋅⋅⋅⋅⋅⋅⋅⋅⋅⋅⋅⋅⋅⋅⋅⋅⋅⋅⋅⋅⋅⋅⋅⋅ 8
6. Setting Mode ⋅⋅⋅⋅⋅⋅⋅⋅⋅⋅⋅⋅⋅⋅⋅⋅⋅⋅⋅⋅⋅⋅⋅⋅⋅⋅⋅⋅⋅⋅⋅⋅⋅⋅⋅⋅⋅⋅⋅⋅⋅⋅⋅⋅⋅⋅⋅⋅⋅⋅⋅⋅⋅⋅⋅⋅⋅⋅⋅⋅⋅⋅⋅⋅⋅⋅⋅⋅⋅⋅⋅⋅⋅⋅⋅⋅⋅⋅⋅⋅⋅⋅⋅⋅⋅⋅⋅⋅⋅⋅⋅⋅⋅⋅⋅⋅⋅ 10
6-1. Setting Method ⋅⋅⋅⋅⋅⋅⋅⋅⋅⋅⋅⋅⋅⋅⋅⋅⋅⋅⋅⋅⋅⋅⋅⋅⋅⋅⋅⋅⋅⋅⋅⋅⋅⋅⋅⋅⋅⋅⋅⋅⋅⋅⋅⋅⋅⋅⋅⋅⋅⋅⋅⋅⋅⋅⋅⋅⋅⋅⋅⋅⋅⋅⋅⋅⋅⋅⋅⋅⋅⋅⋅⋅⋅⋅⋅⋅⋅⋅⋅⋅⋅⋅⋅⋅⋅⋅⋅⋅⋅⋅⋅ 10
6-2. Setting Hi, Lo
⋅⋅⋅⋅⋅⋅⋅⋅⋅⋅⋅⋅⋅⋅⋅⋅⋅⋅⋅⋅⋅⋅⋅⋅⋅⋅⋅⋅⋅⋅⋅⋅⋅⋅⋅⋅⋅⋅⋅⋅⋅⋅⋅⋅⋅⋅⋅⋅⋅⋅⋅⋅⋅⋅⋅⋅⋅⋅⋅⋅⋅⋅⋅⋅⋅⋅⋅⋅⋅⋅⋅⋅⋅⋅ 10
6-3. Setting Decimal point ⋅⋅⋅⋅⋅⋅⋅⋅⋅⋅⋅⋅⋅⋅⋅⋅⋅⋅⋅⋅⋅⋅⋅⋅⋅⋅⋅⋅⋅⋅⋅⋅⋅⋅⋅⋅⋅⋅⋅⋅⋅⋅⋅⋅⋅⋅⋅⋅⋅⋅⋅⋅⋅⋅⋅⋅⋅⋅⋅⋅⋅⋅⋅⋅⋅⋅⋅⋅⋅⋅⋅⋅⋅⋅⋅⋅ 10
6-4. Setting Round off ⋅⋅⋅⋅⋅⋅⋅⋅⋅⋅⋅⋅⋅⋅⋅⋅⋅⋅⋅⋅⋅⋅⋅⋅⋅⋅⋅⋅⋅⋅⋅⋅⋅⋅⋅⋅⋅⋅⋅⋅⋅⋅⋅⋅⋅⋅⋅⋅⋅⋅⋅⋅⋅⋅⋅⋅⋅⋅⋅⋅⋅⋅⋅⋅⋅⋅⋅⋅⋅⋅⋅⋅⋅⋅⋅⋅⋅⋅⋅⋅⋅⋅⋅⋅ 11
6-5. Setting Peak Hold ⋅⋅⋅⋅⋅⋅⋅⋅⋅⋅⋅⋅⋅⋅⋅⋅⋅⋅⋅⋅⋅⋅⋅⋅⋅⋅⋅⋅⋅⋅⋅⋅⋅⋅⋅⋅⋅⋅⋅⋅⋅⋅⋅⋅⋅⋅⋅⋅⋅⋅⋅⋅⋅⋅⋅⋅⋅⋅⋅⋅⋅⋅⋅⋅⋅ 11
6-6. Setting Baud rate ⋅⋅⋅⋅⋅⋅⋅⋅⋅⋅⋅⋅⋅⋅⋅⋅⋅⋅⋅⋅⋅⋅⋅⋅⋅⋅⋅⋅⋅⋅⋅⋅⋅⋅⋅⋅⋅⋅⋅⋅⋅⋅⋅⋅⋅⋅⋅⋅⋅⋅⋅⋅⋅⋅⋅⋅⋅⋅⋅⋅⋅⋅⋅⋅⋅⋅⋅⋅⋅⋅⋅⋅⋅⋅⋅⋅⋅⋅⋅⋅⋅⋅⋅⋅⋅ 12
6-7. Setting ID Number Setting ⋅⋅⋅⋅⋅⋅⋅⋅⋅⋅⋅⋅⋅⋅⋅⋅⋅⋅⋅⋅⋅⋅⋅⋅⋅⋅⋅⋅⋅⋅⋅⋅⋅⋅⋅⋅⋅⋅⋅⋅⋅⋅⋅⋅⋅⋅⋅⋅⋅⋅⋅⋅⋅⋅⋅⋅⋅⋅⋅⋅⋅⋅⋅⋅⋅⋅⋅⋅⋅⋅⋅ 12
6-8. Setting Back Light ⋅⋅⋅⋅⋅⋅⋅⋅⋅⋅⋅⋅⋅⋅⋅⋅⋅⋅⋅⋅⋅⋅⋅⋅⋅⋅⋅⋅⋅⋅⋅⋅⋅⋅⋅⋅⋅⋅⋅⋅⋅⋅⋅⋅⋅⋅⋅⋅⋅⋅⋅⋅⋅⋅⋅⋅⋅⋅⋅⋅⋅⋅⋅⋅⋅⋅⋅⋅⋅⋅⋅⋅⋅⋅⋅⋅⋅⋅⋅⋅⋅⋅⋅⋅⋅⋅⋅ 12
6-9. Setting Buffer ⋅⋅⋅⋅⋅⋅⋅⋅⋅⋅⋅⋅⋅⋅⋅⋅⋅⋅⋅⋅⋅⋅⋅⋅⋅⋅⋅⋅⋅⋅⋅⋅⋅⋅⋅⋅⋅⋅⋅⋅⋅⋅⋅⋅⋅⋅⋅⋅⋅⋅⋅⋅⋅⋅⋅⋅⋅⋅⋅⋅⋅⋅⋅⋅⋅⋅⋅⋅⋅⋅⋅⋅⋅⋅⋅⋅⋅⋅⋅⋅⋅⋅⋅⋅⋅⋅⋅⋅⋅⋅⋅⋅⋅⋅⋅⋅ 12
6-10. Setting Auto Tracking Value ⋅⋅⋅⋅⋅⋅⋅⋅⋅⋅⋅⋅⋅⋅⋅⋅⋅⋅⋅⋅⋅⋅⋅⋅⋅⋅⋅⋅⋅⋅⋅⋅⋅⋅⋅⋅⋅⋅⋅⋅⋅⋅⋅⋅⋅⋅⋅⋅⋅⋅⋅⋅⋅⋅⋅⋅⋅⋅⋅⋅⋅⋅⋅⋅⋅⋅⋅⋅⋅⋅⋅ 13
6-11. Setting Auto Tracking Time ⋅⋅⋅⋅⋅⋅⋅⋅⋅⋅⋅⋅⋅⋅⋅⋅⋅⋅⋅⋅⋅⋅⋅⋅⋅⋅⋅⋅⋅⋅⋅⋅⋅⋅⋅⋅⋅⋅⋅⋅⋅⋅⋅⋅⋅⋅⋅⋅⋅⋅⋅⋅⋅⋅⋅⋅⋅⋅⋅⋅⋅⋅⋅⋅⋅⋅⋅⋅⋅⋅⋅⋅⋅⋅⋅⋅⋅ 13
7. Calibration ⋅⋅⋅⋅⋅⋅⋅⋅⋅⋅⋅⋅⋅⋅⋅⋅⋅⋅⋅⋅⋅⋅⋅⋅⋅⋅⋅⋅⋅⋅⋅⋅⋅⋅⋅⋅⋅⋅⋅⋅⋅⋅⋅⋅⋅⋅⋅⋅⋅⋅⋅⋅⋅⋅⋅⋅⋅⋅⋅⋅⋅⋅⋅⋅⋅⋅⋅⋅⋅⋅⋅⋅⋅⋅⋅⋅⋅⋅⋅⋅⋅⋅⋅⋅⋅⋅⋅⋅⋅⋅⋅⋅⋅⋅⋅ 14
7-1. Real-weight Calibration ⋅⋅⋅⋅⋅⋅⋅⋅⋅⋅⋅⋅⋅⋅⋅⋅⋅⋅⋅⋅⋅⋅⋅⋅⋅⋅⋅⋅⋅⋅⋅⋅⋅⋅⋅⋅⋅⋅⋅⋅⋅⋅⋅⋅⋅⋅⋅⋅⋅⋅⋅⋅⋅⋅⋅⋅⋅⋅⋅⋅⋅⋅⋅⋅⋅⋅⋅⋅⋅⋅⋅⋅⋅⋅⋅⋅⋅⋅⋅⋅⋅⋅⋅ 14
7-2. Constant Value Calibration ⋅⋅⋅⋅⋅⋅⋅⋅⋅⋅⋅⋅⋅⋅⋅⋅⋅⋅⋅⋅⋅⋅⋅⋅⋅⋅⋅⋅⋅⋅⋅⋅⋅⋅⋅⋅⋅⋅⋅⋅⋅⋅⋅⋅⋅⋅⋅⋅⋅⋅⋅⋅⋅⋅⋅⋅⋅⋅⋅⋅⋅⋅⋅⋅⋅⋅⋅⋅⋅⋅⋅⋅⋅⋅⋅⋅ 15
8. Setting KEY LOCK ⋅⋅⋅⋅⋅⋅⋅⋅⋅⋅⋅⋅⋅⋅⋅⋅⋅⋅⋅⋅⋅⋅⋅⋅⋅⋅⋅⋅⋅⋅⋅⋅⋅⋅⋅⋅⋅⋅⋅⋅⋅⋅⋅⋅⋅⋅⋅⋅⋅⋅⋅⋅⋅⋅⋅⋅⋅⋅⋅⋅⋅⋅⋅⋅⋅⋅⋅⋅⋅⋅⋅⋅⋅⋅⋅⋅⋅⋅⋅⋅⋅⋅⋅⋅⋅⋅⋅⋅⋅⋅⋅⋅⋅⋅ 16
2
1. Features
We are grateful to you for picking up our product. If you experience problems while
using it, you may refer to the user manual or contact the Technical Support Department
of the company.
This product is an indicator which amplifies the minute voltage signals of each sensor
and converts themit into digital. It is mainly used in Physics quantity measurement for
strain gauge, pressure sensor, LVDT, and acceleration sensor, etc. It has the following
features.
1-1. Sigma-Delta Conversion System
A medium and high speed A/D conversion device is adopted to detect input signals
from the sensor.
1-2. Calibration System
Systems are adopted: calibration system based on real weight(standard weight);
1-3. HI, LO Output
It is possible to set upper limit and lower limit from the keys on the front panel.
It is also possible to send the contact signals of the rear panel.
Open collector output.
1-4. Data Back-up & Watch-Dog Function
As set value such as span, upper limit and low limit, etc. is stored in FALSH MEMORY,
it is not necessary to reset the input data for they are stored in the memory even when
the electricity or power is cut off.
The system operation automatic return (Watch-Dog) which is caused by with power
change and external noise.
1-5. Option
OP-01 : RS232C
OP-02 : RS485
OP-03 : Back Light
3
OP-04 : Ni-Mh battery (1200mAh)
1-6. Power Supply
Power of this product built in DC 7.2V battery, charges with DC 12V adapter,
Operation it is possible even with charging. (option : 24V)
1. Ni-Cd battery (600mAh)
Charge time
: About 3 hours
Use time
: About 12 hours (Out of use Back Ligh)
2. Ni-Mh battery (1200mAh)
Charge time
: About 3 hours
Use time
: About 24 hours (Out of use Back Light)
1.7. Standard built-in product
1.
2.
3.
4.
Body
Operating instructions
The panel the parts for a fixation
DC 12V Adapter
4
2. Cautions
For optimum performance and safety, please read these instructions carefully.
Do not remodel this equipment at one's discretion.
2-1. Set-up Cautions
• Keep it out of wet places.
• Do not set it up near vibration & impulse, high temperature and humidity.
Keep it out of the direct rays of the sun. Set it up where there is less dust, and Keep
it out of direct air including salt and ion.
• Do not use when there is inflammable gas or heavy machinery, and smog.
• Ground earth-terminal(GN)
• Make wire separately from power system wiring and noise wiring.
• Make sure the use of 4 line sealed cable as a sensor cable. Too long cable leads to
measurement error due to wiring resistance.
2-2. Cautions
During calibration, Do not input free-load state and real-weight load until it becomes
stable. Pressing Enter Key in unstable condition leads to calibration error.
Do not press any Key in use at one's discretion. Please refer to 7. Setting-up mode for
the function and method of Key.
5
3. Specifications
•
Available sensor (DC)
1) Micro-voltage output sensor (mV)
2) Strain gage sensor (Bridge 350Ω, 120Ω).
•
Maximum display
-19999 ~ + 19999
• A/D conversion
100 time/sec
•
Front panel
Measured value display
State display LED
Key switch
•
: 4 1/2 Digit LCD
: Red LED 4 pieces
: 4 pieces
OUTPUT
: Possible for setting Upper limit(HI) & Lower limit(LO) (OPEN COLLECTOR)
3-1 General Specifications
•
•
•
•
•
Power Supply
: DC 7.2V Battery (Recharging), External power DC 12V
Temperature Range: -10℃∼60℃, less than 85% RH
(where there is no dewing.)
Size
: 96 × 96 × 89 mm(W × H × D)
Cutting Size
: 92 × 92
Weight
: about 300 g
6
4. Front Panel
4-1. Picture Description of the Display of the Front Panel
① Measured Value Indication
②,③,④,⑤ Condition indication LED
⑥ Function Key / ESC Key
⑦ Shift Key / ZERO Key
⑧ Up Key / CAL Key
⑨ Enter Key / HOLD Key
4-1. Picture Description of the Display of the Front Panel
① Measured Value indicator
② HIGH indicator LED
③ LOW indicator LED
④ HOLD indicator LED
⑤ CHARGE indicator LED
: indicates the measured data or set point.
: Hi LED will be turned on when measured value is
higher than or equal to the set Hi value.
: Lo LED will be turned on when measured value is
lower than or equal to the set Lo value.
: LED will be turned on when measured data is
HOLD.
: LED will be turned on while charging.
4-3. Description of the Keys on the Display
⑥
: If you push this key for more than 3 seconds, the machine will enter the
setting mode. If you want to exit to escape from the setting mode, you may
use the ESC key.
⑦
: If you want to change the number, you may use this key.
And this key adjusts the number to zero regardless of the current value.
7
⑧
: If you push this key, it will increase the number by one.
And if you want to enter the calibration mode, you should hold this key for 3
seconds.
⑨
: If you are to store the set value, you may use the Enter key.
5. Back panel
5-1. Form of Back panel
5-2. Function & characteristics of back panel by the terminal
①
②
③
④
⑤
⑥
⑦
⑧
⑨
Power ON, OFF S/W
CAL
Adapter Terminal : DC 12V
Power S/W
: Internal charge battery & External power (Charge condition) S/W
COM
: RS232C Signal GND
TXD
: RS232C Signal TXD, RS485 Signal TX+
RXD
: RS232C Signal RXD, RS485 Signal TXGND
: External Input-output Common Terminal
IN1
: External ZERO Input Terminal
8
⑩
⑪
⑫
⑬
⑭
⑮
16
○
17
○
18
○
IN2
: External HOLD Input Terminal
LOW
: low(lower limit) Output Terminal
HIGH
: high(upper limit) Output Terminal
+EXC
: Sensor Supply Voltage + Connection Terminal(RED)
-EXC
: Sensor Supply Voltage – Connection Terminal(White)
+SIG
: Sensor Output Signal + Connection Terminal(Black)
-SIG
: Sensor Output Signal - Connection Terminal(Green)
GND
: Sensor SHIELD Connection Terminal
Amplification Adjustment Switch
SW1 : 1.0mV/V
SW2 : 1.5mV/V
SW3 : 2.0mV/V
SW4 : 3.0mV/V
(Set with the number which gets near to maximum output value of sensor .)
9
6. Setting Mode
6-1. Setting Method
If you push the
will come out.
key for about 3 seconds,
will appear and then
HL
If you push the
key at that time, the setting mode will change in the following
direction, and if you push the
key at that time, the setting mode will change in the
key, the present mode will be chosen.
opposite direction. If you push the
6-2. Setting Hi, Lo
You can set up the upper limit and lower limit of the relay output. HI will work if HI is
larger than the HI set value. LO will works if LO is smaller than the LO set value.
If you push the function key, the setting mode will come out.
If you push the Up key, you can choose
,
or
(The upper limit ->
, The lower limit ->
)
If you push the ENT key, you choose HI or LO setting.
If you push the Shift key, you can choose the number location.
If you push the Up key, you can change the number as you wish.
….
You can save the setting value by pushing the ENT key.
->
or
Press Function key to return to measure mode from setting mode.
6-3. Setting Decimal point
This product operates in a way of fixed decimal point, the decimal point must be
preset.
If the decimal point is changed after presetting, displaying value does not increase
according to the decimal point.
10
Press Function key and then Up key to become
->
Press ENT key to choose decimal point setting.
Press Shift key to choose the required number.
Press ENT key to store the number.
->
Press Function key to return to measure mode from setting mode.
6-4. Setting Round off
It is to set the variations of display number. When the value varies considerably, you
can set it properly. It is possible to set 1, 2, 5, 10, 20, 50, 100.
Press Function key and then Up key to be
->
Press ENT key to choose round off setting.
Press Shift key to choose the required number.
Press ENT key to store the number.
->
Press Function key to return to measure mode from setting mode.
6-5. Setting Peak Hold, Sample Hold
This Product also has Peak Hold Function. So if you need this function, you can use
this, with operating as follows. When you are in this mode. You can reset the value by
pressing
key.
Press Function key and then Up key to be
->
Press ENT key to choose Peak Hold setting.
Press Shift key
When using Peak Hold ->
, When it does not use ->
Press ENT key to store it.
11
->
.
Press Function key to return to measure mode from setting mode.
6-6. Setting Baud Rate
This mode is designed to set up Baud Rate when you engage in serial
communication.
You can set up 2400, 4800, 9600, 19200 bps.
Press Function key and then Up key to be
->
Press ENT key to choose baud rate setting.
Press Shift key to choose what you want.
Press ENT key to store it.
->
Press Function key to return to measure mode from setting mode.
6-7. Setting ID Number
In serial communication mode, it is used for giving product specific number for RS485 serial communication.
Press Function key and then Up key to be
->
Press ENT key to choose ID number setting.
Press Up key to change the required number.
(When it presses Up key, the number increases. When it presses Shift key, the number
decrease)
…….
Press ENT key to store it.
->
Press Function key to return to measure mode from setting mode.
6-8. Setting Back Light (OPTION)
Setting LCD Back Light ON/OFF.
12
6-9. Setting Buffer
As setting Display speed and the number of A/D Sampling , it can set up 1~32.
Press Function key and then Up key to be
.
->
Press ENT key to choose buffer setting mode.
Press Up key to choose what you want.
…….
Fast Å---------------------------Æ Slow
Press ENT key to store it.
->
Press Function key to return to measure mode from setting mode.
6-10. Setting Auto Tracking Value
If the absolute value of the change of measurement is not higher than this value,Auto
Tracking Value within Zero Tracking Time (See 6-11 Setting Zero Tracking),
measurement will be zero.
According to 6-1, Press Function key and then Up key to be
->
Press ENT key to choose Auto zero.
Press Up key to change the required number.
Press ENT key to store it.
->
Press Function key to return to measure mode from setting mode.
Ex) If Auto Tracking Value is made 10.0 in this setup and the absolute value of the
change of measurement within Zero Tracking Time is not higher than 10.0 ,then
measurement will be 0.
6-11. Setting Zero Tracking Time
According to 6-1, Press Function key and then Up key to be
->
13
.
Press ENT key to choose time mode.
Press Up key to change the required number.
…
Press ENT key to store it.
->
Press Function key to return to measure mode from setting mode.
14
7. Calibration
Before calibration, You should select Dip switch to the most near thing in sensor
output value and make
.
7-1. Real-weight Calibration
Standard weight is necessary. When being used Multiple sensor at one Indicator, It
calibtrate certainly at Real-weight.
1) Real-weight Calibration Mode Setting
Press Function key about 3 seconds to return to Setup mode.
Press Up key to be
->
Press ENT key to be
※ If, when being in
be
.
, press
Up key to
Press ENT key to store it.
->
Press Function key to return to measure mode from setting mode.
2) Zero and Span Setting
Press Up key about 3 seconds to return to Real-weight Calibration mode.
->
Leave the sensor free-load and press ENT key to set Zero.
->
->
Press Up key to be
Press ENT key, It uses
Shift key and
Up Key and it inputs Real-weight
value. (Standard weight value it was prepared).
Press ENT key
, put counterweight on.
Press ENT key to set SPAN value.
->
->
Press Function key to return to measure mode from setting mode.
15
7-2. Constant value Calibration
Sensor CAPA and Output value are necessary. (When the sensor purchasing, it is
becoming marking in Calibration sheet.)
It considers a sensor quality and a circumference condition, use Real-weight
calibration for precision measuring.
1) Constant value Calibration mode setting
Press Function key about 3 seconds to return to setup mode
Press Up key to be
->
Press ENT key to set sensor output value.
After selecting from in
Press ENT key to store it.
->
Press Function key to return to measure mode from setting mode.
2) CAPA setting and Sensor output setting
Set it with reference to Calibration sheet, enclosed with the sensor.
Press Up key about 3 seconds to return to CAPA mode.
Press ENT key, It uses
value.
Shift key and
Up Key and it inputs Sensor CAPA
Shift key and
Up Key and it inputs Sensor output
Press ENT key to store it.
->
Press Up key to be
Press ENT key, It uses
value.
Press ENT key to store it.
->
Press Function key to return to measure mode from setting mode.
16
8. Setting KEY LOCK
It will be able to prevent the optional handling of the user. Must start power off.
Press Function key
POWER ON ->
->
->
or
is indicated
Press Up key to choose
or
Press ENT key to store it.
If you choose
-> Only HI, LO setting and ZERO key does operate,
If you choose
-> Setting is possible.
17