1
Unpacking and Installation
The MicroTAP comes packed to ensure its safe travel and arrival. Carefully unpack the pre-amplifier
parts from the packing box and remove the protective foam wrapping. Once the pre-amp is unpacked choose a
location to put it into your system. Here are some guidelines for choosing a location for the MicroTAP
controller:
Unlike traditional passive pre-amps (which must be placed for min cable lengths) the MicroTAP
Controller can be located anywhere in your listening room.
The MicroTAP consumes a very small amount of power and so it does not generate any heat. Any
position that suits cable routing and user access will be just fine.
A final note that may impact the location you choose for the TAP-X is that to use the remote control
handset you must have a clear path from your seating position to the front panel of the TAP-X.
Connections
Step 1 - Connect Your Bent Unit to Your Amp
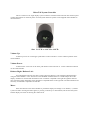
Place each Bent Unit at the input to your amplifier and plug it's short integral cable into the amp input.
Be sure to place the right Bent Unit (red RCA jack) at the right amp and the left Bent Unit (white RCA jack) at
the left amp.
Step 2 - Connect Your Source Components
Plug the right channel interconnect from your source into the Input RCA jack on the Right channel Bent
Unit. Plug the left channel interconnect into the input RCA jack on the left channel Bent Unit.
Step 3 – Connect The Fiber Optic Cable
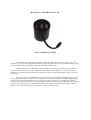
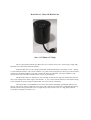
The fiber optic cables connect the controller to the bent Units. Plug one end of the supplied Toslink
Cables into one of the Data OUT jack on the back of the Controller. Then plug the other end of each Toslink
cable into the “Data In” jack on top of each Bent Unit (located at the amplifier inputs). Alternately – if the
system layout suits it better – plug a single fiber optic cable into Data Out on the Controller and plug the end into
the “Data IN” on the closest Bent Unit. Then route the second cable from that Bent Unit's “Data OUT” jack on
to the “Data IN” jack on the second Bent Unit. This is an example of a what is called a 'daisy chained'
connection.