1
ETC Setup Guide
Universal Fader Wing Setup Guide
A t t a c h U n i v e r s a l F a d e r Wi n g ( s ) d i r e c t l y t o C o n s o l e
r
oj
ong
C
r
o
Ion onsole
C
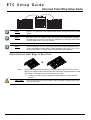
CAUTION:
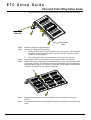
Step 1:
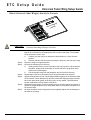
Step 2:
Step 3:
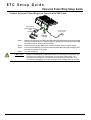
Step 4:
Step 5:
Step 6:
Step 7:
No USB cables or external power supplies should be used when connecting
Universal Fader Wings directly to a console.
Using a #1 Phillips head screwdriver, remove the two screws securing the bumpers
that will be removed from the appropriate side or sides of the wings. The bumpers
will be removed in a later step.
a:
Carefully turn the wing over and place it faders-down on a clear, flat work
surface.
b:
Remove and save the two screws securing the bumper to the side of the wing.
Return the wing to its upright position.
Remove the bumper(s) from the wing.
a:
Gently pull the bumper on the right side of the wing up until it is flush with the
facepanel. Gently push the bumper on the left side of the wing down until it
loosens from the facepanel.
b:
Pull the bumper away from the facepanel until it is free from the wing.
Repeat steps 2 and 3 for each side of each wing that needs to be exposed.
Align the wing and the console. Lift the wing and place it gently on the hooks provided
on the console. Check that the wing and the console are aligned properly front and
back, then press down gently on the wing until it is fully seated. This should be a
smooth connection but may require a little force.
Repeat above procedure to connect another wing to the other side of the console, if
desired. If multiple wings are to be used, attach them to one another first and then to
the console itself.
Re-insert screws to secure wings and console together and secure the bumpers to
the sides of the wings.
U ni ver sa l F ad er Win g S et u p G ui de
Page 5 of 6
El ect r on ic T he at r e C on tr o ls , I nc.