1
EsofLAN Door Access Control Management System
Chapter 1 – How To Start The EsofLAN Program Modules
CHAPTER 1
1. HOW TO START THE EsofLAN
PROGRAM MODULES
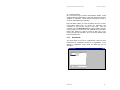
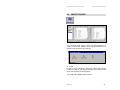
To start the EsofLAN program, click the “Start” button on the
Status Bar. Then, click the “Programs” and click again on
“EsofLAN” on the item list.
1.1
EsofLAN FOLDER
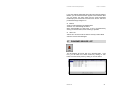
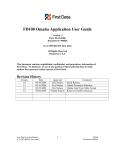
Click on the ‘Security Manager’. This is the Alarm Monitoring and
Card Access Management program. The log-in screen for
Security Manager will appear.
Revision 1.0
1
EsofLAN Door Access Control Management System
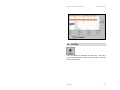
1.2
Chapter 1 – How To Start The EsofLAN Program Modules
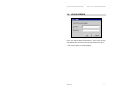
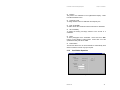
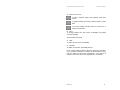
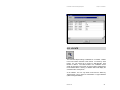
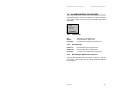
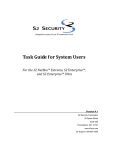
LOG IN SCREEN
Log-In Screen
Key in your User ID Name and Password. Then, press ‘OK’ Key.
(The default name for both the User ID and Password are ‘elid’.)
* Click ‘Cancel’ button to quit the program.
Revision 1.0
2
EsofLAN Door Access Control Management System
1.2.1
Chapter 1 – How To Start The EsofLAN Program Modules
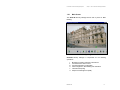
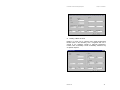
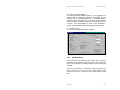
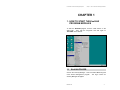
Main Screen
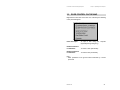
The EsofLAN Security Manager Screen with a picture of Main
Building:
EsofLAN Security Manager Screen
EsofLAN Security Manager is responsible for the following
operations:i.
ii.
iii.
iv.
v.
vi.
Revision 1.0
Monitoring Controller and Alarm Transactions
Controller and I/O Point Control
Controller Parameter Configuration
Card Configuration, Downloading and Verification
Transaction Reporting
Simple Time Management (TMS)
3
EsofLAN Door Access Control Management System
1.3
Chapter 1 – How To Start The EsofLAN Program Modules
BAR COMMAND FOR SCREEN
1.3.1
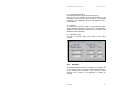
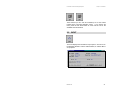
Top Bar
The Top Bar can be seen at the top of EsofLAN Manager screen.
Top Bar
Label
•
Left-hand corner label is the Workstation Name.
example, it is identified as KLCHONG.
In this
•
The second label indicates the User Name. It displays the
Global User Name shared by all workstations.
•
The third label is the current Floor Plan Name. It is also used
as an Alert Banner. It shows all alarm statements that have
not been acknowledged. If there are more than one alarm
statement they will be scrolled in the column. It displays the
title of current Map/Floor Plan if no alarm has been triggered.
Icons (Pictorial Buttons)
These buttons toggle whether to display the labels of
items/devices or not to.
To activate or to deactivate online printing for
transmitted data. This is applicable to Dot Matrix
Epson printer only.
To switch On or Off the PC's Audio Alert Sound.
(Left) Back to the Home Screen.
(Right) It is on-line help.
Scroll the Maps/Floor Plan.
Revision 1.0
4
EsofLAN Door Access Control Management System
Chapter 1 – How To Start The EsofLAN Program Modules
The middle white portion of this Main Screen serves the purpose
of displaying Floor Plan.
There are a number of buttons located in the bottom panel of the
screen. Left arrow key allows you to see other command buttons.
You will see in Part 1.4, all the button that is found in the bottom
panel of the screen.
1.4
•
BOTTOM COMMAND BAR
Trans/Map
Revision 1.0
-
This button is to activate the online
transaction log and toggle with the Floor
Plan or Graphics.
5
EsofLAN Door Access Control Management System
•
Queue
-
•
•
•
•
•
•
•
•
•
List
Hist
Input
Output
Reader
Card
Status
Video
Report
-
•
Exit
-
•
•
•
•
•
•
Trace
Locate
On
Off
Operator
Verify
-
•
•
TMS
Import Export -
•
Exit
Revision 1.0
-
Chapter 1 – How To Start The EsofLAN Program Modules
Alarm Response Table. Click this button
when it is in red color to acknowledge
alarm
Disarmed Point List
Alarm Acknowledge Records
Input Points Properties
Output Points Properties
Reader Database
Cardholder Database
Device Status
Video Comparison & Verification
Report for Access Control & Alarm
Monitoring
Quit the ‘Security’ program
Area Trace
Locate Card Holder/Reader
Switch on Output Points
Switch off Output Points
Define EsofLAN User and Access Right
Determination of cards validity by
verifying and rectifying
Time Management System
Import of cards and exports of
transactions
Quit the ‘Security’ program
6
EsofLAN Door Access Control Management System
Chapter 1 – How To Start The EsofLAN Program Modules
Note the “often use” buttons below. Commands in this panel are
divided into the following categories. In Chapter 3, you will be able
to find full descriptions of these commands.
Reader
CARD, READER, VERIFY
Output
Output, ON , OFF
Input
Input
Transaction
Queue, List, History, Report,
Status
Personnel Tracking
Trace, Locate
ID Photo
Video
System
System,
Exit
Operator Setup Module
Operator
Time Management Module
TMS
Import and Export Function
Import and Export
Revision 1.0
Map,
Transaction,
7
EsofLAN Door Access Control Management System
Chapter 2 – Command Bar
CHAPTER 2
2. COMMAND BAR
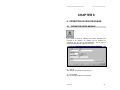
2.1
CARD OPERATION
There are 11 Forms for the setting of card information:i.
ii.
iii.
iv.
v.
vi.
vii.
viii.
ix.
x.
xi.
Revision 1.0
Card Holder Database
Card Holder Operation
Department Definition
Position Definition
Door Accessibility
Time Zone
Timer
Lift Accessibility
Floor Zone
Holiday
Batch Add/Delete
8
EsofLAN Door Access Control Management System
2.1.1
Chapter 2 – Command Bar
Card Holder Database
Card Holder DB Screen
In CardHolder Database form, you will find the following
parameters:
Staff Number
To define unique Staff Number by means of a numbering system
relevant to user. Staff Number System can be different from that
of Card Number. Maximum field length is 12 characters.
Card Number
To define unique Card Number relevant to a controller.
length is 6 digits.
Field
PIN
To assign 4-digit Personal Identification Number.
Start and Expiry Date
To define valid period for cardholder. These date fields will only
be supported in the future release.
Department
To define the department a cardholder belongs to.
Department Definition Form.
Revision 1.0
Refer to
9
EsofLAN Door Access Control Management System
Chapter 2 – Command Bar
Position
The position of a cardholder in the organization/company. Refer
to Position Definition Form.
Temporary Card
To assign another card to a cardholder for temporary use.
Door Accessibility
To define which door and the time frame relevant to a cardholder.
Lift Accessibility
To define the floor(s) and lift(s) relevant to the access of a
cardholder.
Photo
To store photograph of the cardholder. Photo must be in BMP
format, of size 100(W) x 120(H) pixels. Photo area out of the
specified boundary will not be visible.
Prefer Button
This function allows user to choose whether to automatically send
data to controllers or send only upon request.
2.1.2
Card Holder Operation
Card Holder Operation Screen
Revision 1.0
10
EsofLAN Door Access Control Management System
Chapter 2 – Command Bar
Install and Delete
One can select a range of cards to be installed or deleted. Install
means uploading all information of cards and cardholders stored in
database to controllers. Delete means removing all records of
cards and cardholders from controllers.
Note that Batch Adding of Cards is different from this context.
Cards Batch added does not contain any information and
controllers do not hold any records of the cards. They are
recorded only in the EsofLAN database. Batch Deleting of Cards
means purges all records from both database and controllers.
Where else, deleting of cards by means of this Form is only
purging records from controllers. One can still see deleted cards
from Card Holder Form.
2.1.3
Department
This Form allows for the input of Department Codes and their
Descriptions for cardholders, relevant to an organization. Once
defined, a Department Code cannot be edited but only its
description.
Department Screen
Revision 1.0
11
EsofLAN Door Access Control Management System
2.1.4
Chapter 2 – Command Bar
Position
The Form is used for the definition of Position codes and their
descriptions for cardholders relevant to an organization. When
edited, only descriptions can be changed, not the Tagged Position
(or Position Codes).
Position Screen
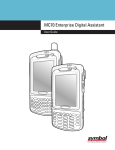
2.1.5
Door Accessibility
This table allows for the categorization of staff's accessibility to
secured doors controlled with time zones. With reference to the
Form below, for example, a person assigned with Door
Accessibility 'DC_EVENG' can only access doors with mounted
controllers RDR001 to RDR004 and during time zone
'TZ_EVENING'. 'ACC ALL' means Door Access is not constraint
by any time zone.
To efficiently set up this database would require that all staff be
clearly categorized beforehand (also, Timer and Time Zone
must be pre-planned and defined). Grouped Accessibility
requires a Tag Name. Each Tag can be used for intended group
of staff or cardholders. Refer to Card Holder Database Form.
Revision 1.0
12
EsofLAN Door Access Control Management System
Chapter 2 – Command Bar
Buttons in the Form
To add a selected reader and particular Time Zone
record.
To replace existing record with a different reader or Time
Zone.
To remove existing selected record in the list box of
reader and Time Zone.
EDIT
To change readers and Time Zones, accessibility Tag Name
cannot be changed.
See Time Zone and Timer.
ADD
To add a new set of Door Accessibility.
DELETE
To delete a set of Door Accessibility Record.
In this context, reader’s labels in the Form below are controllers.
So, a controller connected to 2 readers for the purposes of entry
and exit share the same Door Accessibility. The physical 2
readers in this sense cannot have separate set of Time Zone.
Revision 1.0
13
EsofLAN Door Access Control Management System
Chapter 2 – Command Bar
Door Accessibility Screen
2.1.6
Time Zone
A set of Time Zone consists of 8 Timer Tags, each one serving for
Sunday to Saturday and a particular holiday. System allows user
to set 8 different Timer Tags to make up one Time Zone.
However, this will be complicated for management purposes.
Normally, a particular timer is repeated over a few working week
days.
The maximum number of Time Zone record is 10. These 10 Time
Zones could be used to serve various groups of staff or
departments, as some may require shifts on most days while
others have fixed working hours.
Revision 1.0
14
EsofLAN Door Access Control Management System
Chapter 2 – Command Bar
Time Zone Screen
2.1.7
Timer
A Timer requires a Name Tag. Each one is divided into 2 periods
(with start and end). The periods are named Timer 1 and Timer 2.
One period can be sufficient for certain users. Time format is
hhmm (hours and minutes), 24 hourly, between 0000 and 2359.
One cannot enter a Start Time greater than End Time, for it will
carry no meaning. A controller reads timer on a daily basis and a
timer of one day cannot be mixed with another timer of the
following day.
Timer Screen
Revision 1.0
15
EsofLAN Door Access Control Management System
2.1.8
Chapter 2 – Command Bar
Lift Accessibility
This command is logically analogous to Door Accessibility, and
allows you to give a Tag Name to categorized Floor Zones that are
to be secured with controllers. For this, it means you can
designate each Floor Zone with one controller or with multiple
controllers. In this context, Reader means Controller. Physically,
only either one of the two readers of a controller can be applied, at
present. Note that only Lift Controllers apply to this function.
Refer also to Floor Zone in Part 2.1.9.
Lift Accessibility Screen
2.1.9
Floor Zone
One can define several floors of a building to make up a Floor
Zone. Each Floor Zone is tagged with a name.
Selective floors could be grouped together but still categorize
them as a Floor Zone. Here, a maximum of 4 groups is provided
for a Floor Zone. For example, Floors 2 to 4, 8 to 10 and 12 to 14,
making up of three groups can be defined as a Floor Zone. This
might be because these are the working floors. Floors 5 to 7 and
11 might be applied to other activities, and therefore, zoned
separately. See Lift Accessibility.
Revision 1.0
16
EsofLAN Door Access Control Management System
Chapter 2 – Command Bar
Both, 'FREE ACC' which means full access to 64 floors and 'NO
ACC' which means absolutely no access. Both of these are
system default settings. They cannot be deleted.
Floor Zone Screen
2.1.10 Holiday
You can store up to 20 holidays. You might store holiday records
for other years, but only those of current year's holidays (base on
PC time) will be downloaded to controllers.
The two-digit year ranges from 1990 to 2089. This means that
digits between 90 and 99 will be read as 1990 and 1999, digits
between 00 and 89 will be read as 2000 and 2089.
When edited, only holiday description of specified date can be
changed.
Revision 1.0
17
EsofLAN Door Access Control Management System
Chapter 2 – Command Bar
Holiday Screen
Batch Add/Delete
This function is used for adding and deleting User or Temporary
Cards by Batch (the Chunk).
Adding A Batch Of Cards
Radio buttons under Card Type allows selection of either user or
temporary type of card. The Card Numbers are not to be repeated
for both temporary and permanent uses. When adding the user
type of cards, predefined information such as Department,
Position, Door Accessibility and Floor Accessibility can be selected
at the same time. However, take note that temporary cards can
only be declared solely for their numbers as the rest of the
information will be dependent to temporary attachment during use.
Revision 1.0
18
EsofLAN Door Access Control Management System
Chapter 2 – Command Bar
Batch Screen (i)
Deleting A Batch Of Cards
Deletion of cards can be selected using Staff Number/Card
Number (click on the checkbox), and / or together with one or
several of the conditions specific to particular Department,
Position, Door Accessibility or Floor Accessibility, whichever way
an operator requires.
Batch Screen (ii)
Revision 1.0
19
EsofLAN Door Access Control Management System
2.2
Chapter 2 – Command Bar
READER OPERATION
Reader Database Screen
There are 8 Main Configuration Screens/Forms :
Reader Detail
Operation
PIN Code Entry
Log Transaction
Alarm Transaction
Time Zone
Timer
Floor Zone
The parameters are grouped for the convenient of sending them to
controllers. Reader Operation in this context does not provide any
processing.
Data of each of the parameter will become
instructions to designated controllers.
2.2.1
Reader Detail
Automatic Lock Release
This defines the time during which you want the door to be
unlocked. For example, if you set the Time Zone to "OFFICE
HOURS", then the door will be unlocked automatically during
office hours.
Revision 1.0
20
EsofLAN Door Access Control Management System
Chapter 2 – Command Bar
Automatic PIN Disable Time Zone
This defines the time and day during which you want a controller
or controllers to allow access without the need of user PIN. For
example, if you set Time Zone to a certain "OFFICE HOURS",
then designated controllers will switch to card only mode during
office hours, but back to requiring both in Card and User PIN for
access after the period, for all designated days.
Anti-passback Delay
(This function does not apply to EL12XX.)
Anti-pass Back on one reader can be set to one of the 3 modes :
•
None
Do not apply Anti-passback.
•
Time
To set a period of time to prevent a cardholder from either
Multiple Entry or Multiple Exit, immediately after first access.
The delay time or latency period (in minutes) before triggering
the Anti-passback can also be set.
•
Reader
To prevent a cardholder from successive Multiple Entry or
Multiple Exit. It involves 2 controllers. A defined controller
with Anti-passback, using the Entry Reader and Exit Reader
keeps track of whether a person is in or out of the area
protected by the controller. If he is IN, then he is only allowed
to go out, If he swipes again in the Entry Reader, he will raise
an alarm.
In this command, the delay time for the triggering of Anti-passback
(Time Mode) can be set.
Note that to apply Global Anti-passback, user is advice to seek
Technical Manual or Technical Support of ELID to check the
availability of an external setting. The routine is simple but user
may not have a direct access to external application.
Revision 1.0
21
EsofLAN Door Access Control Management System
Chapter 2 – Command Bar
Anti-passback Reset Time
(This function does not apply for EL12XX Controllers.)
Enter the hours and minutes at which Anti-passback is to be
automatically reset (freeing locked access) to all designated
controllers. This is applicable only when Anti-passback is set to
"Reader Mode".
PIN Offset
This refers to the number of digits to be skipped/offset before
device reads actual PIN Number from a card. This parameter is
applied to EL20xx Controllers. Please refer to the EL20xx User
Manual for further explanation.
Lock Release Time
This value, in seconds, define a time delay for door, before
relocked.
Reader Details Screen
2.2.2
Operation
All command parameters relative to controllers are provided in the
Form, in order to allow user to send predefined data selectively or
by the complete set to controllers. This command is useful
whenever minor changes or reconfiguration is needed for
resetting.
Revision 1.0
22
EsofLAN Door Access Control Management System
Chapter 2 – Command Bar
Reader Select
This menu resides at the right side of the Form. A range of
readers/controllers can be selected by means of "From Reader"
and "To Reader". In this context, the reader means controller.
Alternately, one can select only required readers by checking on
"Selected Readers" and refer to its immediate "..." button to
prompt another Form, Selective Reader.
Selective Parameters
This menu resides at the left side of the Form.
Control Signals
Permanent Lock Release
To unlock door indefinitely.
Inhibit Access
To lock door indefinitely (even inhibiting valid cardholder from
opening door).
PIN Mode
To require PIN alongside card to access.
Anti-passback
To set to Timer or Reader Mode. 'None' means not to apply Antipassback. For further reference, refer help through Designer
under the same Anti-passback topic.
Parameters
With reference to the bottom left of the Form, the data of these
parameters are expected to have been predefined elsewhere. In
this context, user is liberated to select only required parameters by
checking on the relevant boxes to update them on controllers.
Send Button
To send data of selected parameters to selected controllers.
Revision 1.0
23
EsofLAN Door Access Control Management System
Chapter 2 – Command Bar
Reset Anti-passback Button
This button affects all installed controllers. It is only applied by an
operator when a cardholder is trapped in the building by Antipassback due to some operational error, or cardholder failed to
exit after swiping card before door is re-locked. Similar situation
might occur that a cardholder failed to enter building before door is
re-locked. Once Anti-passback is reset for the cardholder to
reswipe, the Anti-passback will be set ON again to all controllers.
Pulse Door Open
To open door to designated readers/controllers.
Reader Operation Screen
2.2.3
PIN Code Entry
This command is only applicable to the EL22xx series of readers
(controllers) which allows door opening by PIN. The required PIN
length can be adjusted by pressing on the scroll button along the
scale bar.
User can record a total of 10 PIN Codes, each with distinct Time
Zone. The data can only be sent to one reader (select through
Combo Box), at a time. One has to click on EDIT button to input
data.
Revision 1.0
24
EsofLAN Door Access Control Management System
Chapter 2 – Command Bar
Take note that this function is not related to Card Holder
Database.
PIN Code Entry Screen
2.2.4
Log Transaction
This command allows you to define the transactions that need to
be logged into the transaction buffer in each controller. By
selecting only useful data to be logged, storage file size and traffic
of data bus will be reduced.
Log Transaction Screen
Revision 1.0
25
EsofLAN Door Access Control Management System
2.2.5
Chapter 2 – Command Bar
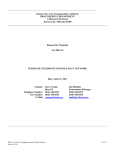
Alarm Transaction
This command allows you to define events that constitute alarm,
and so requires special reporting. You can set a unique list for
each reader. After setting, you can then send the parameters
down to readers/controllers.
In the example given in the Form below, the following are defined
as alarm events for RDR001 :• Invalid Entry
• Duress Alarm
• Wrong PIN
• Door Open
• Wrong Customer Code
• Wrong Time Zone
• Anti-passback Alarm
• Door Left Open
Alarm Transaction Screen
Revision 1.0
26
EsofLAN Door Access Control Management System
2.3
Chapter 2 – Command Bar
CARD VERIFY AND RECTIFY
This button is located at the bottom toolbar panel of Security
Manager screen. If you cannot see it, press the left arrow button
to scroll over for the rest of the available command buttons.
This function checks the data of cards in controllers if they match
with those of the main database. By means of verification, it
immediately reveals errors which may cause the occurrence of
access failure without the need of lengthy troubleshooting. One
can be assured of all cardholders' accessibility by applying
rectification. It is recommended that an operator periodically verify
data if change of records to cardholders is frequent. This is to
eliminate unprecedented errors through daily operations.
What The Function Verifies
The verification process checks through the availability of cards in
the Communication Server Database.
It also check Door
Accessibility, Time Zone and Timer Records from the database
related to each cardholder if they match with the copies in every
relevant controllers. 'Rectify' downloads data that are found
mismatched or missing into controllers. The system assumes that
the database always correctly being updated but not always the
case in controllers.
User Interface
When verification or rectification process is running, both 'Verify'
and 'Rectify' buttons are grayed. Highlight in blue indicates
current processing record, while red indicates error has been
found relative to its record. All buttons including the vertical scroll
bar will only be reactivated at the completion of data processing.
Revision 1.0
27
EsofLAN Door Access Control Management System
Chapter 2 – Command Bar
Verify Screen
2.4
OUTPUT
The Form displays the information of output points. One has to
run the Designer Module in order to add and delete, or edit the
data of an output point.
Revision 1.0
28
EsofLAN Door Access Control Management System
Chapter 2 – Command Bar
Output Properties Screen
2.4.1
On And Off Command
They are used to turn On or Off a range of output points. The
range of output points can be selected using 'From' and 'To'
combo boxes. Checking at 'All' means every output points is to be
switched (to On or Off). The Send Button is to trigger the On or
Off instruction for the selected points.
Switch ON Output Points Screen
Switch OFF Output Points Screen
Revision 1.0
29
EsofLAN Door Access Control Management System
Chapter 2 – Command Bar
These buttons (for On and Off Command) are at the bottom
toolbar panel of Security Manager screen. If you cannot see
them, press the left arrow button to scroll over the rest of the
available command buttons.
2.5
INPUT
This Form displays the information of input points. One has to run
the Designer Module in order to add and delete, or edit the data of
an input point.
Input Properties Screen
Revision 1.0
30
EsofLAN Door Access Control Management System
2.6
Chapter 2 – Command Bar
ALARM QUEUE COMMAND
This command is used for acknowledging alarm. If buzzer
is
set to ON, then, when an Alarm Condition is detected, the buzzer
will sound. To acknowledge the alarm, click on the button above,
alarm message will be prompted together with instructions for
required actions. An Alarm Queue screen.
Alarm Queue Screen
Revision 1.0
31
EsofLAN Door Access Control Management System
Chapter 2 – Command Bar
If you have defined appropriate alarm instruction through Designer
Module, you will see the instruction appear at the Instruction field.
You can specify the action taken and the result (Inspection
Feedback) by the Combo Box and select from the list. This list is
pre-defined through Designer too.
Buttons
'ACK' is to acknowledge an immediate alarm.
'ACK ALL' is to acknowledge all alarms.
When acknowledging an alarm point, it has to be disarmed by
clicking on ‘Disarm’ button, before rearming is possible.
Alarm List
'Alarm List' is to show the list of devices currently in Alarm State
and have not been acknowledged.
2.7
DISARMED SENSOR LIST
This list displays all sensors that are in disarmed state. From
here, you can either arm certain sensors by clicking on ‘Arm’
button or all the sensor points by clicking on ‘Arm All’ button.
Disarmed Point List Screen
Revision 1.0
32
EsofLAN Door Access Control Management System
2.8
Chapter 2 – Command Bar
ACK HISTORY
This command is used for viewing history listing of acknowledged
alarms.
Alarm Acknowledgment Records Screen
2.9
REPORT
This command generates transaction report of Door Access and
Alarm Monitoring.
Revision 1.0
33
EsofLAN Door Access Control Management System
Chapter 2 – Command Bar
Reports Screen
2.10 DEVICE STATUS
This command shows the status of each device at one glance.
One need not browse through every single map to check the
status of devices. This command shows detail status of each
device.
The screen displays the current status of all devices in the system.
Click "Refresh" button at the bottom right of the Form to get
updated status.
Revision 1.0
34
EsofLAN Door Access Control Management System
Chapter 2 – Command Bar
Device Status Screen
2.11 AREA TRACE
This command reveals whereabouts are the cardholders.
Click the area you desire from the Combo Box, and cardholders in
the area will be listed alongside ID Number and Name.
Revision 1.0
35
EsofLAN Door Access Control Management System
Chapter 2 – Command Bar
Area Trace Screen
2.12 LOCATE
This command helps locating a cardholder or a controller. Reader
in the Form means controller in this context. To search by 'Card
Holder', one can request for a person by Staff Number, Card
Number or Name. The latest location of a cardholder will be
shown at the bottom of the Form as record is being selected from
the immediate listbox. Clicking on "Details" button will display the
card information of the person.
As for 'Reader', one can only select record from the listbox by
Tagged Name, not by means of Unit Number or Logical Address
(refer to Designer Module).
Revision 1.0
36
EsofLAN Door Access Control Management System
Chapter 2 – Command Bar
Locate Card Holder/Reader Screen
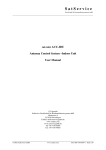
2.13 VIDEO COMPARISON
Click on the first button will bring up a Video Comparison screen,
while the latter will close the screen.
This Command allows an operator to see related photo of a
Swiped Card. It is useful if a CCTV is installed near a door. An
operator can then compare the person captured on CCTV with the
photo showing in Video Comparison screen (at the most 4
readers, as indicated by the number of frames allowed).
To setup the readers that connected to this screen, choose Setup
Frame from File menu. The setup screen is as shown below.
Each photo frame connects to a reader (controller).
Revision 1.0
37
EsofLAN Door Access Control Management System
Video Comparison Screen
Chapter 2 – Command Bar
Frame Setup Screen
System
This command allows for the specification of preferences as well
as showing relevant information about EsofLAN Application.
Preferences Concern
Show related map if Alarm trigger.
To automatically prompt the map containing device or devices that
relate to alarm.
Pop-up Alarm Box
To prompt alerting box when alarm occurs.
Revision 1.0
38
EsofLAN Door Access Control Management System
Chapter 2 – Command Bar
System Screen
Revision 1.0
39
EsofLAN Door Access Control Management System
Chapter 3 – Map Reading & Alarm Response
CHAPTER 3
3. MAP READING AND ALARM
RESPONSE
3.1
MAP COMMANDS
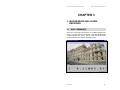
Take note of the bright green button on the Main Building Plan.
Click on it, a first Floor Plan will appear. (This Main Building Plan
could be different from yours.) On your Floor Plan, there should
be representative icons of doors and alarm points.
Main Building Plan
Revision 1.0
40
EsofLAN Door Access Control Management System
3.1.1
Chapter 3 – Map Reading & Alarm Response
Search For A Specific Floor Plan
Click on the right button of the mouse anywhere on your Floor
Plan, a menu panel will appear as follows. Then choose a floor
and click on the mouse button again.
Search Floor Plan Screen
Revision 1.0
41
EsofLAN Door Access Control Management System
3.2
Chapter 3 – Map Reading & Alarm Response
DOOR CONTROL ON THE MAP
Right button mouse click on the door icon of the map, the following
menu panel will appear:
Pulse Door Open
To open a door using your computer
(especially during emergency).
Enable Permanent
Lock Release
To unlock a door permanently.
Disable Permanent
Lock Release
To lock the door permanently.
Note :
* Other operations to be ignored unless instructed by a senior
personnel
Revision 1.0
42
EsofLAN Door Access Control Management System
3.3
Chapter 3 – Map Reading & Alarm Response
ALARM CONTROL ON THE MAP
Click the right button mouse on the Sensor Icon (Alarm or Status)
or any of the contact points on the map, the following menu panel
wills appear:
3.3.1
Input Points
Arm
Disarm
Properties
3.3.2
Output Points
Switch On
Switch Off
Properties
3.3.3
- Just to arm on the Alarm Point.
- Just to disarm the Alarm Point.
- To check on the details of the Alarm Point.
- Click to switch on the Output Points
- Click to switch off the Output Points.
- To check on the details of the Output Point
What Happen When Alarm Comes In
A Pop-up Box indicating the Alarm Points, to alert you. See the
next screen. Click the Box and the ‘Alarm Response’ Dialogue
Box will appear.
Revision 1.0
43
EsofLAN Door Access Control Management System
Chapter 3 – Map Reading & Alarm Response
Alarm Screen
Alarm Response Screen
Revision 1.0
44
EsofLAN Door Access Control Management System
Chapter 3 – Map Reading & Alarm Response
Read the instruction (if any, or seek help) and take action. Return
to the screen and acknowledge the alarm by clicking on the ‘ACK’
button.
Click the ‘Alarm List’ button to check whether there is any other
point that has not been checked.
Revision 1.0
45
EsofLAN Door Access Control Management System
Chapter 4 – On Line Transaction
CHAPTER 4
4. ON LINE TRANSACTION
DEVICE NAME
For example, Reader Number, Sensor (Input or
Output).
DATE
Current Date
TIME
Time of Action
CARD/PNT
Card Number/Point Number
NAME
Name of the Card Holder
LOCATION
Place of the event
TRANSACTION Event that has taken place
USER
Personnel that log in at the PC
WORKSTATION Identity of the Workstation
Revision 1.0
46
EsofLAN Door Access Control Management System
Chapter 4 – On Line Transaction
On Line Screen
Revision 1.0
47
EsofLAN Door Access Control Management System
Chapter 5 – Install & Delete Cards
CHAPTER 5
5. INSTALL & DELETE CARDS
(REQUIRE APPROVAL FROM THE
SUPERIOR)
To install a new card, click the ‘Card’ button. From
the Card Holder DB screen, click the ‘Add’ button.
Card Holder DB Screen
ADD
Proceed to enter :
Staff No., Card No., Pin,
if any Name, Start Date, Expiry Date,
if any Dept., Position, Door Accessibility (Pick from the list)
and the Lift Accessibility (if applicable)
Then, proceed to click the ‘Send’ button.
Revision 1.0
48
EsofLAN Door Access Control Management System
Chapter 5 – Install & Delete Cards
DELETE
To delete a card, click the ‘Card’ button. Similarly, from the Card
Holder DB, click ‘Search’ to find the Card Number to be deleted.
Then, click the ‘Delete’ button.
Shortcut
Go to the map and use the right mouse click at the ‘Door’ icon
(right handed). A panel will appear.
Click the ‘Card Holders Control’ and similar function could be
performed.
Revision 1.0
49
EsofLAN Door Access Control Management System
Chapter 6 – Operator Access Privilege
CHAPTER 6
6. OPERATOR ACCESS PRIVILEGE
6.1
OPERATOR SETUP MODULE
This module is used for defining User Name, Password and
Privilege of an operator. An operator can be assigned on
monitoring only, and not on Card Operation. This is done by
defining the operator with certain access right.
System Operator Screen
User ID
The name of the operator to Log In/log out.
Access Right
The Access right assigned to the operator.
Revision 1.0
50
EsofLAN Door Access Control Management System
Chapter 6 – Operator Access Privilege
Password
Password for the operator.
You can also put a photograph of the operator by clicking on the
photo button to load a ‘bmp’ formatted photo. Click on the define
button for the following Form to specify Access Rights.
The listbox on the left displays defined Access Rights. The center
list shows exactly the screen and functions relating to particular
Access Rights, selected by user. For example, a supervisor have
the priviledge to access into the Designer, FEP Setup(Net Setup),
Security Manager Main Screen, Security Manager ACK History
Command, Security Manager Alarm Queue Command and etc.
The right list contains the privileges predefined by the EsofLAN
system for selection purposes.
"+" is to add a privilege to the Center List Box
"<" is to replace
">" is to remove
Add is to define a new Access Right while delete is to
remove/purge it.
Edit is to change the Access Functions, Screen or Module of an
existing Access Right.
Revision 1.0
51
EsofLAN Door Access Control Management System
6.2
Chapter 6 – Operator Access Privilege
IMPORT EXPORT
Access Rights Setup Screen
This command allows user to import card data predefined by
means of a third party software, and to export transactions to a
text file for the use of third party software.
Import/Export Screen
Import
In order to import card data, a third party software must provide
the data in a text file, with string format per record data (for field
length and sequence) as showing below :
<OP><SN><CN><NAME><DEPT><POS>
Revision 1.0
52
EsofLAN Door Access Control Management System
Chapter 6 – Operator Access Privilege
An example of a record data:
A 000110
OP
SN
CN
NAME
DEPT
POS
000188 Thang Hong Cho
Marketing
Manager
Operation Code, 1 character, currently requires only 'A'
which represents an indicator for adding card
Staff Number, 12 characters
Card Number, 6 characters
Name of Card Holder, 50 characters
Department, 30 characters
Position, 30 Characters
Note that all fields must be given in fixed length. For example if a
given SN field has 6 characters, then padding of another 6
character space after Staff Number in order to obtain full 12
characters string is required.
Export
Click on the 'Export Trans' button.
Selection Criteria' will be prompted.
A form 'Access Report
Access Report Selection Criteria Screen
You can select conditions and category of transactions that are to
be exported. Click Export button to enter the name of the output
file and save it to a directory. A typical data record of an exported
transaction:
Revision 1.0
53
EsofLAN Door Access Control Management System
Chapter 6 – Operator Access Privilege
"RDR002", "19990712", "1110", "000210", "XT00123", "Mary", "Available”, ”Not Available”, ”0”, “Valid Entry”
Every field starts and ends with a double quote ("). Each field is
separated by a comma (,). The order of the fields :1.
2.
3.
4.
5.
6.
7.
8.
9.
10
Reader Tag
Transaction date in yyyymmdd
Transaction Time in hhmm
Card Number
Staff Number
Name
Department
Position
Transaction Code
Description of the Transaction Code
Revision 1.0
54
EsofLAN Door Access Control Management System
Chapter 7 – Exit Security Manager Program
CHAPTER 7
7. EXIT SECURITY MANAGER
PROGRAM
Click the 'Exit' button on the Bottom Command Bar and the
program for the "SECURITY MANAGER" program. Choose
whether you want to Shut Down or Log Out of Security Manager.
The Computer will disconnect the system if you choose the ‘Shut
Down’ option. The "Log-In Screen” will appear if you choose the
‘Log-Out’ option, waiting for another user to log in.
Exit Option
Revision 1.0
55
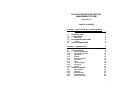
EsofLAN DOOR ACCESS CONTROL
MANAGEMENT SYSTEM
User Manual
TABLE OF CONTENTS
CHAPTER 1 : HOW TO START THE EsofLAN PROGRAM
MODULES
1
1.1
1.2
1.2.1
1.3
1.3.1
1.4
1
2
3
4
4
5
EsofLAN FOLDER
LOG IN SCREEN
Main Screen
BAR COMMAND FOR SCREEN
Top Bar
BOTTOM COMMAND BAR
CHAPTER 2 : COMMAND BAR
2.1
CARD OPERATION
2.1.1
Card Holder Database
2.1.2
Card Holder Operation
2.1.3
Department
2.1.4
Position
2.1.5
Door Accessibility
2.1.6
Time Zone
2.1.7
Timer
2.1.8
Lift Accessibility
2.1.9
Floor Zone
2.1.10
Holiday
2.2
READER OPERATION
2.2.1
Reader Detail
2.2.2
Operation
2.2.3
PIN Code Entry
2.2.4
Log Transaction
2.2.5
Alarm Transaction
8
8
9
10
11
12
12
14
15
16
16
17
20
20
22
24
25
26
i
2.3
2.4
2.4.1
2.5
2.6
2.7
2.8
2.9
2.10
2.11
2.12
2.13
CARD VERIFY AND RECTIFY
OUTPUT
On And Off Command
INPUT
ALARM QUEUE COMMAND
DISARMED SENSOR LIST
ACK HISTORY
REPORT
DEVICE STATUS
AREA TRACE
LOCATE
VIDEO COMPARISON
27
28
29
30
31
32
33
33
34
35
36
37
CHAPTER 3 : MAP READING AND ALARM RESPONSE
40
3.1
3.1.1
3.2
3.3
3.3.1
3.3.2
3.3.3
40
41
42
43
43
43
43
MAP COMMANDS
Search For A Specific Floor Plan
DOOR CONTROL ON THE MAP
ALARM CONTROL ON THE MAP
Input Points
Output Points
What Happen When Alarm Comes In
CHAPTER 4 : ON LINE TRANSACTION
46
CHAPTER 5 : INSTALL & DELETE CARDS (REQUIRE
APPROVAL FROM THE SUPERIOR)
48
CHAPTER 6 : OPERATOR ACCESS PRIVILEGE
50
6.1
6.2
50
52
OPERATOR SETUP MODULE
IMPORT EXPORT
CHAPTER 7 : EXIT SECURITY MANAGER PROGRAM
55
ii