1
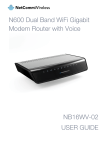
N600 Dual Band WiFi
Extender
NP126
USER GUIDE
Copyright
Copyright©2014 NetComm Wireless Limited. All rights reserved.
The information contained herein is proprietary to NetComm Wireless Limited. No part of this document may be translated,
transcribed, reproduced, in any form, or by any means without prior written consent of NetComm Wireless Limited.
Note: This document is subject to change without notice.
Save Our Environment
When this equipment has reached the end of its useful life, it must be taken to a recycling centre and processed separately from
domestic waste.
The cardboard box, the plastic contained in the packaging, and the parts that make up this device can be recycled in accordance
with regionally established regulations. Never dispose of this electronic equipment along with your household waste. You may be
subject to penalties or sanctions under the law. Instead, ask for disposal instructions from your municipal government.
Please be responsible and protect our environment.
This manual covers the following products:
NetComm Wireless NP126
DOCUMENT VERSION
1.0 - Initial document release
DATE
January 2014
Table 1 - Document Revision History
www.netcommwireless.com
NetComm Wireless NP126 User Guide
2
Table of Contents
Table of Contents ..........................................................................................................................................................................3
Overview.........................................................................................................................................................................................4
Introduction ................................................................................................................................................................................................... 4
Target Users.................................................................................................................................................................................................. 4
Prerequisites ................................................................................................................................................................................................. 4
Notation ........................................................................................................................................................................................................ 4
Product Introduction ......................................................................................................................................................................5
Product Overview .......................................................................................................................................................................................... 5
Package Contents ......................................................................................................................................................................................... 5
Product Features ........................................................................................................................................................................................... 5
Interfaces and LED Indicators .......................................................................................................................................................6
Front panel .................................................................................................................................................................................................... 6
Bottom panel ................................................................................................................................................................................................ 7
Physical Dimensions ...................................................................................................................................................................................... 7
Safety and Product Care ...............................................................................................................................................................8
Transport and Handling .................................................................................................................................................................8
Installation and Configuration of the NP126 .................................................................................................................................9
Placement of your NP126 .............................................................................................................................................................................. 9
Avoid obstacles and interference.................................................................................................................................................................... 9
Cordless Phones ........................................................................................................................................................................................... 9
Choose the “Quietest” Channel for your Wireless Network ............................................................................................................................ 10
Hardware installation ................................................................................................................................................................................... 11
Accessing the NP126 for the first time .................................................................................................................................................. 11
PC configuration .......................................................................................................................................................................................... 11
Making a wireless connection to the WiFi Extender ....................................................................................................................................... 14
Web Based Configuration Interface ............................................................................................................................................15
Logging in ................................................................................................................................................................................................... 15
Setup .......................................................................................................................................................................................................... 16
Connection Wizard .............................................................................................................................................................................. 16
Mode Settings ..................................................................................................................................................................................... 18
Advanced.................................................................................................................................................................................................... 19
Connection to Hub/Router ................................................................................................................................................................... 19
Extended Wireless Network ................................................................................................................................................................. 20
Wireless Advanced Settings ................................................................................................................................................................. 21
WPS Settings ...................................................................................................................................................................................... 21
Device List........................................................................................................................................................................................... 22
System........................................................................................................................................................................................................ 23
Status ................................................................................................................................................................................................. 23
System Information .............................................................................................................................................................................. 23
System Logs ....................................................................................................................................................................................... 23
Set Password ...................................................................................................................................................................................... 24
Firmware Upgrade ............................................................................................................................................................................... 24
Reboot ................................................................................................................................................................................................ 24
Logout ........................................................................................................................................................................................................ 25
Additional Product Information ...................................................................................................................................................26
Establishing a wireless connection ............................................................................................................................................................... 26
Windows XP (Service Pack 3)............................................................................................................................................................... 26
Windows Vista ..................................................................................................................................................................................... 26
Windows 7 .......................................................................................................................................................................................... 26
Mac OSX 10.6 ..................................................................................................................................................................................... 26
Troubleshooting........................................................................................................................................................................................... 27
Using the indicator lights (LEDs) to Diagnose Problems ......................................................................................................................... 27
Technical Data .............................................................................................................................................................................28
Environmental Specifications / Tolerances .................................................................................................................................................... 28
Legal & Regulatory Information ...................................................................................................................................................29
Intellectual Property Rights ........................................................................................................................................................................... 29
Customer Information .................................................................................................................................................................................. 29
Consumer Protection Laws .......................................................................................................................................................................... 29
Product Warranty ........................................................................................................................................................................................ 30
Limitation of Liability ..................................................................................................................................................................................... 30
Contact .........................................................................................................................................................................................31
NetComm Wireless NP126 User Guide
3
www.netcommwireless.com
Overview
Introduction
This manual provides information related to the installation, operation, and use of the NP126.
Target Users
The individual reading this manual is presumed to have a basic understanding of telecommunications terminology and concepts.
Prerequisites
Before continuing with the installation of your NP126, please confirm that you comply with the minimum system requirements
below.
Computer with Windows, Macintosh, or Linux-based operating systems with a working Ethernet adapter with TCP/IP
Protocol installed.
A Web Browser such as Internet Explorer, Google Chrome, Mozilla Firefox, Opera, Safari etc.
Wireless Computer System Requirements:
Computer with a working 802.11b, 802.11g or 802.11n wireless adapter.
Notation
The following symbols are used in this manual:
Indicates a note requiring attention.
Indicates a note providing a warning.
Indicates a note providing useful information.
www.netcommwireless.com
NetComm Wireless NP126 User Guide
4
Product Introduction
Product Overview
The N600 Dual Band WiFi Extender is the perfect product to combat weak wireless signals in the home or office. With its dual
functionality, and featuring concurrent dual band WiFi, the NP126 is the perfect product to give users a massive wireless boost.
If you have an existing wireless network that cannot service all areas, the NP126 will work as a wireless repeater. Simply plug the
device into a convenient location, it will pick up the existing weak wireless signal and redistribute a strong wireless signal for users
to connect to. No more non-existent, unstable or inconsistent wireless signals in the upstairs bedrooms, living rooms at the end of
the house or the far corner office.
If you have an existing Internet connection but no wireless or older Wireless G, then the NP126 can connect directly into your
modem/router and act as a wireless N access point. When in access point mode the NP126 connects into your modem/router by
Ethernet cable and makes available a high speed wireless signal that multiple users can connect to.
The NP126 is designed to connect directly into the wall and its tidy housing makes it an unobtrusive fixture in any home or office.
Also featuring a WPS button and advanced wireless security options, the NP126 is an ideal solution for enabling wireless
connectivity throughout your entire home or office.
1 Maximum wireless signal rate and coverage values are derived from IEEE Standard 802.11g and 802.11n specifications. Actual wireless speed and coverage are dependent on network and
environmental conditions included but not limited to volume of network traffic, building materials and construction/layout.
Package Contents
The NP126 package consists of:
1x N600 Dual Band WiFi Extender.
Quick start guide.
Ethernet cable (RJ-45).
Wireless security card.
Warranty card.
If any of these items are missing or damaged, please contact NetComm Wireless Support immediately by visiting the NetComm
Wireless Support website at: http://www.netcommwireless.com/contact-forms/support
Product Features
2 in 1 functionality. Works as a wireless repeater or wireless access point
When in wireless repeater mode: Extend wireless signal to areas unreached by router
When in wireless access point mode: Connect into a modem/router to create a wireless network
WPS button for easy pairing with wireless clients
Concurrent dual band WiFi - extend the reach of your 2.4Ghz and 5Ghz WiFi network
5 signal strength LEDs guide you into the best placement within your WiFi network
Connects directly to the wall - allows for unobtrusive placement within the home/office
NetComm Wireless NP126 User Guide
5
www.netcommwireless.com
Interfaces and LED Indicators
Front panel
The NP126 features 7 LEDs on the front panel and a WPS button. The top 5 LEDs give an indication of the distance and strength
of the signal between the NP126 and the connected router. The signal strength LEDs only functions when the device is in repeater
mode. The images below describe the meaning of each indicator and button.
The NP126 is located too far from the router to provide a reliable
signal.
The NP126 is located just out of the optimal range of the
connected router.
Optimal signal and distance from the connected router to
provide the widest coverage area for your network.
The NP126 has a good signal to the router but is too close to
maximize the coverage area.
The NP126 has a strong signal to the router but is too close to
maximize the coverage area.
When illuminated, indicates that the NP126 is correctly powered
and is switched on.
When illuminated, indicates that the NP126 is connected to an
active Ethernet connection.
WPS button/LED – Press and hold the WPS button for between
1 and 2 seconds then release to trigger the WPS connection
when you are connecting a client device to the NP126. Press
and hold the button for between 4 and 9 seconds then release to
trigger the WPS connection when you are connecting the NP126
to a router. The WPS LED blinks when the WPS process is
triggered.
www.netcommwireless.com
NetComm Wireless NP126 User Guide
6
Bottom panel
Reset button – press and hold this button for more than 3 second to
restore the factory default settings of the NP126.
Ethernet port – Connect the supplied RJ-45 Ethernet cable here to set
up the WiFi Extender.
Power switch – Turns the NP126 on or off.
Physical Dimensions
The following table lists the physical dimensions of the NP126.
NP126 DIMENSIONS
Length
NetComm Wireless NP126 User Guide
7
89 mm
Width
67 mm
Height
117 mm
Weight
165 grams
www.netcommwireless.com
Safety and Product Care
With reference to unpacking, installation, use and maintenance of your electronic device, the following basic guidelines are
recommended:
Do not use or install this product near water to avoid fire or shock hazard. For example, near a bathtub, kitchen sink,
laundry tub, or near a swimming pool. Also, do not expose the equipment to rain or damp areas (e.g. a wet
basement).
To safeguard the equipment against overheating, make sure that all openings in the unit that offer exposure to air are
unobstructed.
When the device is connected by Ethernet cable to a computer, the cable should not exceed 100 metres in length.
Keep the device clean and avoid exposing it to direct sunlight for extended periods.
Do not place any metallic objects in the device.
WARNING
Disconnect the power line from the device before servicing.
Transport and Handling
When transporting the NP126, it is recommended to return the product in the original packaging. This ensures the product will not
be damaged.
In the event the product needs to be returned, ensure it is securely packaged with appropriate padding to prevent
damage during courier transport.
www.netcommwireless.com
NetComm Wireless NP126 User Guide
8
Installation and Configuration
of the NP126
Placement of your NP126
The wireless connection between your NP126 and your WiFi devices will be stronger the closer your connected devices are to
your NP126. Your wireless connection and performance will degrade as the distance between your NP126 and connected
devices increases. This may or may not be directly noticeable, and is greatly affected by the individual installation environment.
As the WiFi Extender is designed to increase the wireless range of your network, it is best placed in a location that is neither too
close nor too far from the router so as to achieve a good balance of range and performance. You may need to try connecting the
WiFi Extender to different power points in the area you wish to cover and observe the signal strength LEDs in order to find the
best position for it.
If you have concerns about your network’s performance that might be related to range or obstruction factors, try moving the WiFi
Extender to a position between three to five meters from the router in order to see if distance is the problem.
Note: While some of the items listed below can affect network performance, they will not prohibit your wireless network
from functioning; if you are concerned that your network is not operating at its maximum effectiveness, this checklist may
help.
If you experience difficulties connecting wirelessly between your WiFi Devices and your NP126, please try the following steps:
In multi-storey homes, place the NP126 on a floor that is as close to the centre of the home as possible. This may
mean placing the NP126 on an upper floor.
Try not to place the NP126 near a cordless telephone that operates at the same radio frequency as the NP126
(2.4GHz).
Avoid obstacles and interference
Avoid placing your NP126 near devices that may emit radio “noise,” such as microwave ovens. Dense objects that can inhibit
wireless communication include:
Refrigerators
Washers and/or dryers
Metal cabinets
Large aquariums
Metallic-based, UV-tinted windows
If your wireless signal seems weak in some spots, make sure that objects such as those listed above are not
blocking the signal’s path (between your devices and the NP126).
Cordless Phones
If the performance of your wireless network is impaired after considering the above issues, and you have a cordless phone:
Try moving cordless phones away from your NP126 and your wireless-enabled computers.
Unplug and remove the battery from any cordless phone that operates on the 2.4GHz band (check manufacturer’s
information). If this fixes the problem, your phone may be interfering with the NP126.
If your phone supports channel selection, change the channel on the phone to the farthest channel from your
wireless network. For example, change the phone to channel 1 and move your NP126 to channel 11. See your
phone’s user manual for detailed instructions.
If necessary, consider switching to a 900MHz or 5GHz cordless phone.
NetComm Wireless NP126 User Guide
9
www.netcommwireless.com
Choose the “Quietest” Channel for your Wireless Network
In locations where homes or offices are close together, such as apartment buildings or office complexes, there may be wireless
networks nearby that can conflict with your wireless network. Use the Site Survey capabilities found in the Wireless Utility of your
wireless adapter to locate any other wireless networks that are available (see your wireless adapter’s user manual), and switch
your Router and computers to a channel as far away from other networks as possible.
Experiment with more than one of the available channels, in order to find the clearest connection and avoid interference from
neighbouring cordless phones or other wireless devices.
www.netcommwireless.com
NetComm Wireless NP126 User Guide
10
Hardware installation
1.
Connect a PC to the WiFi Extender using the Ethernet cable provided in the package.
2.
Plug the WiFi Extender into the wall socket.
3.
Turn the power switch to the ON position.
Accessing the NP126 for the first time
For the initial setup procedure, you may connect to the NP126 by Ethernet cable or by WiFi. The following diagram illustrates the
methods you may use to connect to the NP126 for the initial configuration.
In order to do this, you must first configure the TCP/IP settings of your computer to be able to access the NP126. Refer to the
following PC configuration section for further detail.
PC configuration
By default, the LAN IP address of the router is 192.168.40.1, the subnet mask is 255.255.255.0, and the intelligent DHCP server
is enabled. It is recommended that you set your network adapter to Obtain an IP address automatically .Under the Router mode,
the connected PC can obtain a set of TCP/IP settings. (Including IP address, subnet mask, gateway, and DNS server.)
Note: The following steps describe configuration using Windows 7. Other versions of Windows may differ slightly.
To manually set the network adapter, perform the following:
1.
Right-click the network icon in the system tray and choose Open Network and Sharing Center from the pop-up menu.
The Network Sharing Center window appears.
2.
The NP126 shows up in the Network and Sharing Center as an Unidentified Network. Left-click on the Local Area
Connection link on the right side of the window.
NetComm Wireless NP126 User Guide
11
www.netcommwireless.com
The Local Area Connection Status window is displayed.
Note: If multiple network cards are installed on your PC, you may see multiple networks. To be sure you are configuring
the correct network, we recommend using a single network card.
3.
Click the Properties button. The Local Area Connection Properties window is displayed.
www.netcommwireless.com
NetComm Wireless NP126 User Guide
12
4.
Left-click the Internet Protocol Version 4 (TCP/IPv4) option and then click the Properties button.
5.
Select Use the following IP address and enter the IP address of the network adapter. The IP address must be
192.168.40. X (where X is a number in the range of 2 to 254). If you want to access the Internet through a wireless
router, you need to enter the default gateway and IP address of the DNS server correctly.
Set the subnet mask to 255.255.255.0 and click OK.
After setting, you can ping the default IP address of the wireless router, to check whether the current connection
between the PC and the wireless router is normal. Click the Start button, then type cmd and press Enter.
Note: 192.168.40.1 in the ping command is the default IP address of the LAN interface of the Extender. If the IP address
changes, enter the current IP address instead.
If the PC receives a ping response through the default IP address of the wireless router, the following page appears, indicating
that the connection between your PC and the wireless router is normal.
NetComm Wireless NP126 User Guide
13
www.netcommwireless.com
Making a wireless connection to the WiFi Extender
To connect the wireless network adapter to the Extender:
1.
If a wireless network adapter is installed on your PC, the wireless icon
appears in the lower right corner of the
desktop. Left-click it to display a list of wireless networks within range of your computer.
Note: The Wireless network name shown here is for demonstration only. Your particular wireless network name (SSID)
may differ.
2.
Left-click the network name (SSID). Click the Connect button that appears. You are prompted to enter a password.
Enter the password for the appropriate network listed on the included Wireless Security card.
The wireless connection is complete.
Note: The TCP/IP settings of the connected PC should be set to be Obtain an IP address automatically.
www.netcommwireless.com
NetComm Wireless NP126 User Guide
14
Web Based Configuration
Interface
Logging in
Please follow the steps below to configure your NP126 Wireless router via the web based configuration interface.
1.
Open your web browser (e.g. Internet Explorer/Firefox/Safari) and type http://192.168.40.1/ into the address bar at the
top of the window.
2.
In the window that is displayed as shown below, enter the password, and click Login. If Remember my password is
selected, you will not need to enter the password when accessing the WiFi Extender from this computer in the future.
Note: Entering an incorrect password 5 consecutive times will result in you not being able to login for one minute. If it is up
to 6 consecutive times, you need to wait for 2 minutes before starting login. Up to 7 times, you need to wait for 3 minutes
and so on, up to a maximum of 15 minutes.
NetComm Wireless NP126 User Guide
15
www.netcommwireless.com
Setup
The Setup submenu contains Connection Wizard and Mode Settings.
Connection Wizard
1.
Select Set-up > Connection Wizard and the following screen appears. This page presents the current wireless
configuration including SSID and security mode of your WiFi Extender and connected uplink device.
FIELD
DESCRIPTION
SSID of Router
The SSID of connected uplink device. It is blank when no uplink device is connected.
Wireless Security Mode
The wireless security mode of connected uplink device. It shows None when no uplink
device is connected.
Connect Status
The connection status of uplink connection. It shows Connected if it connected to an
uplink device. It shows Disconnected if no uplink device is connected.
SSID of 2.4GHz Interface
The SSID of the Extender in the 2.4GHz band.
2.4GHz Wireless Security
Mode
The wireless security mode of the Extender in the 2.4GHz band.
SSID of 5GHz Interface
The SSID of the Extender in the 5GHz band.
5GHz Wireless Security Mode
The wireless security mode of the Extender in the 5GHz band.
If the Wireless Connection to Router/Hub shows Disconnected, you can click Start on the bottom of this page, and the
following figure appears.
Click Refresh to force the Extender to search available network.
2.
Select the SSID that matches your router’s network. Click Next to go to the page of Security Settings shown as follow.
www.netcommwireless.com
NetComm Wireless NP126 User Guide
16
3.
In the Wireless key field, enter the password of the selected network and click Finish.
When the connection is successful, the following screen is displayed.
4.
Click the OK button. Your WiFi Extender is now connected and has been assigned an IP address by the router. To
continue configuring the WiFi Extender, access your router’s web configuration interface to find the IP address assigned
to the WiFi Extender. Refer to your router’s user guide for more information.
When you have found the IP address of the WiFi Extender, enter it into your browser’s URL field and press enter. Refer
to the Logging in section of this guide to log in again, substituting the IP address with the one assigned by your router.
NetComm Wireless NP126 User Guide
17
www.netcommwireless.com
Mode Settings
The mode settings page allows you to change the operation mode of the WiFi Extender. In Repeater mode, the WiFi Extender
extends the range of an existing wireless network. When in AP mode, the WiFi Extender acts as an access point. This is useful for
adding a wireless network to a router that does not have a wireless function. When in AP mode, connect the WiFi Extender to a
LAN port on the router using the provided Ethernet cable.
Note: Switching modes requires the WiFi Extender to be restarted in order for the change to take effect.
The following diagrams illustrate the different modes of operation:
Factory default setting
The NP126 initially uses the IP address 192.168.40.1 and is accessible on both the 2.4GHz and 5GHz spectrums. For illustration
purposes, the NetComm Wireless NB16DG ADSL Dual Band WiFi modem is pictured here with the IP address of 192.168.20.1.
Repeater mode
In repeater mode, the NP126 joins the 2.4GHz or 5GHz wireless network of the NB16DG to extend the range of the wireless
signal. The NP126 becomes a DHCP client and is assigned an address by the NB16DG in the 192.168.20.X range. The client
device (in this example, a laptop) may connect to the NP126 through 2.4GHz or 5GHz WiFi or via Ethernet cable.
AP mode
In AP mode, the NP126 connects to the router via an Ethernet cable (up to 100 metres in length) to provide a full-speed link
between the router and the NP126. This is useful for adding WiFi to a router which does not have WiFi built in or creating a WiFi
network that provides coverage to an area further away from the router. If the router does have WiFi, it provides you with
additional coverage since clients can connect to the WiFi signal of the router or the NP126.
www.netcommwireless.com
NetComm Wireless NP126 User Guide
18
Advanced
Connection to Hub/Router
Select Advanced > Connection to Hub/Router and the following screen appears. This page allows you to configure the
connection between the WiFi Extender and your wireless broadband hub/router.
Select the frequency, enter the SSID, select the Security Mode, and enter the password of the router to which you are connecting.
Click Apply to go to confirm your settings. The WiFi Extender attempts to apply the settings.
When the connection is successful, the following screen is displayed.
NetComm Wireless NP126 User Guide
19
www.netcommwireless.com
Extended Wireless Network
Click Advanced > Extended Wireless Network and the following page appears.
On this page, you can set the basic parameters of your extended wireless network. If you wish to have the same SSID and
security settings for both 2.4GHz and 5GHz bands, select the checkbox at the top of the screen to enable this function.
The following table describes parameters on this page.
FIELD
DESCRIPTION
Wireless network/SSID
Wireless Network name. The SSID can contain no more than 32 characters. Illegal
characters including ? “ $ [ \ +, the initial character cannot be ! #. The SSID cannot contain
such string (case sensitive): BTWiFi | Auto-BT | BTFON | BTOpenzone | DIRECT.
Security
Security is used to set the encryption mode to protect your wireless network. You can
select one from the dropdown list.
Wireless key
Please enter a password for your wireless network. The length of the password should be
between 8-63 characters, or within 64 HEX digits.
Channel
Sets the channel used for the 5GHz band.
Note: If Enable 5GHz Wireless is not selected, the Extender will not work on the 5GHz band.
www.netcommwireless.com
NetComm Wireless NP126 User Guide
20
Wireless Advanced Settings
This page allows you to configure advanced settings of the wireless radio. The default settings are optimal for most situations. We
recommend that you do not change these settings unless you are aware of the effect that they will have.
FIELD
DESCRIPTION
Frequency
Use the drop down list to select the frequency that you wish to configure.
Fragmentation length
This specifies the maximum size of a packet during the fragmentation of data to be
transmitted. If you set this value too low, it will result in bad performance.
CTS/RTS Threshold
When the packet size is smaller than the RTS threshold, the wireless router will not use the
RTS/CTS mechanism to send this packet.
Preamble Mode
A radio preamble is a part of a datagram packet at the head of the Physical Layer
Convergence Protocol (PLCP) to increase throughput. Shortening the preamble reduces
the size of the data packet increasing throughput. However not all wireless network
adapters are able to use this setting.
Transmit Power Control
This determines the transmission or output power of the broadcast wireless signal.
WPS Settings
Click Advanced > WPS Settings and the following page appears.
WPS is the abbreviation of WiFi Protected Setup. You can easily add the wireless clients to your wireless network by WPS without
additional settings such as SSID, Security mode and so on, but it requires that the wireless clients also support WPS.
WPS may be used to connect the WiFi Extender to a router or to connect a wireless client device to the WiFi Extender.
NetComm Wireless NP126 User Guide
21
www.netcommwireless.com
To connect a wireless client device to the WiFi Extender:
1. Select the Enable WPS option. Click Apply.
2. Under the Down Link section, Select the PBC or PIN method.
3. If using PBC mode, click the PBC button and press the PBC button on your client device. If using the PIN method,
obtain the PIN number from your client and in the PIN field, enter the PIN number and then click the PIN button. The
WPS connection is established.
To connect the WiFi Extender to a router:
1. Select the Enable WPS option. Click Apply.
2. Under the Up Link section, Select the PBC or PIN method.
3. If using PBC mode, click the PBC button and press the PBC button on your client device. If using the PIN method, enter
the PIN displayed in the PIN field into your router’s user interface and trigger the WPS connection. The WPS connection
is established. You may change the WPS PIN at any time by pressing the Generate PIN button.
Device List
The Device List displays a list of all wireless devices connected to the WiFi Extender, detailing the IP Address assigned, the MAC
Address of the client and the Device Name. Click the Refresh button to update the listing.
www.netcommwireless.com
NetComm Wireless NP126 User Guide
22
System
Select the System menu. The System submenus include Status, System Information, System Logs, Set Password, Firmware
Upgrade and Reboot.
Status
Select System > Status. This page shows the connection status and signal strength of the connected uplink device.
System Information
Select System > System Information, and the following page appears.
This page displays the system information including basic system information, MAC Address of the Ethernet port and wireless
port.
System Logs
Select System > System Logs to display this page. The System log displays log information which is useful for troubleshooting
connection problems.
NetComm Wireless NP126 User Guide
23
www.netcommwireless.com
Set Password
Select System > Set Password. The following page appears.
On this page, you can modify the login password. After you have entered the old password and the new password (twice), click
Apply to make the settings take effect.
Note: After setting a new password and clicking Apply, the page will go back to the login page. You need to enter the new
password to access the WiFi Extender’s web configuration interface.
Firmware Upgrade
Select System > Firmware Upgrade. The following page appears.
This page is used to upgrade the software version of the WiFi Extender. Click Browse… and navigate to the update file stored on
your computer. If you select Clear Config, the Extender restores to the default settings after upgrade. If you do not select it, the
current settings will remain. Click Upload and Install to start the upgrade.
After the upgrade is complete, the WiFi Extender automatically reboots.
Caution: During upgrade, do not power off the Extender or press the Reset button.
Reboot
Select System > Reboot. The following page is displayed.
www.netcommwireless.com
NetComm Wireless NP126 User Guide
24
The reboot page provides the ability to reboot the WiFi Extender, backup the current configuration and restore the configuration
from a backed up file. Additionally, the Restore button restores the WiFi Extender to the factor default configuration.
Logout
Clicking the Logout menu button immediately logs you out of the WiFi Extender’s configuration interface.
NetComm Wireless NP126 User Guide
25
www.netcommwireless.com
Additional Product
Information
Establishing a wireless connection
Windows XP (Service Pack 3)
1.
2.
3.
4.
5.
Open the Network Connections control panel (Start -> Control Panel -> Network Connections):
Right-click on your Wireless Network Connection and select View Available Wireless Networks:
Select the wireless network listed on your included wireless security card and click Connect.
Enter the network key (refer to the included wireless security card for the default wireless network key).
The connection will show Connected.
Windows Vista
1.
2.
3.
4.
5.
6.
7.
Open the Network and Sharing Center (Start > Control Panel > Network and Sharing center).
Click on "Connect to a network".
Choose "Connect to the Internet" and click on "Next".
Select the wireless network listed on your included wireless security card and click Connect.
Enter the network key (refer to the included wireless security card for the default wireless network key).
Select the appropriate location. This will affect the firewall settings on the computer.
Click on both "Save this network" and "Start this connection automatically" and click "Next".
Windows 7
1.
2.
3.
4.
5.
6.
7.
8.
9.
Open the Network and Sharing Center (Start > Control Panel > Network and Sharing Center).
Click on "Change Adapter settings" on the left-hand side.
Right-click on "Wireless Network Connection" and select "Connect / Disconnect".
Select the wireless network listed on your included wireless security card and click Connect.
Enter the network key (refer to the included wireless security card for the default wireless network key).
You may then see a window that asks you to "Select a location for the 'wireless' network". Please select the "Home" location.
You may then see a window prompting you to setup a "HomeGroup". Click "Cancel" on this.
You can verify your wireless connection by clicking the "Wireless Signal" indicator in your system tray.
After clicking on this, you should see an entry matching the SSID of your NP126 with "Connected" next to it.
Mac OSX 10.6
1.
2.
3.
4.
Click on the Airport icon on the top right menu.
Select the wireless network listed on your included wireless security card and click Connect.
On the new window, select “Show Password”, type in the network key (refer to the included wireless security card for the
default wireless network key) in the Password field and then click on OK.
To check the connection, click on the Airport icon and there should be a tick on the wireless network name.
Note: For other operating systems, or if you use a wireless adaptor utility to configure your wireless connection, please
consult the wireless adapter documentation for instructions on establishing a wireless connection.
www.netcommwireless.com
NetComm Wireless NP126 User Guide
26
Troubleshooting
Using the indicator lights (LEDs) to Diagnose Problems
The LEDs are useful aides for finding possible problem causes.
Power LED
The Power LED does not light up.
STEP
CORRECTIVE ACTION
1
Make sure that the NP126 is plugged in to an appropriate power source.
2
Check that the NP126 and the power source are both turned on and device is receiving sufficient power.
3
Turn the NP126 off and on.
4
If the error persists, you may have a hardware problem. In this case, you should contact technical support.
Web Configuration
I cannot access the web configuration pages. CORRECTIVE ACTION
STEP
CORRECTIVE ACTION
1
Make sure you are using the correct IP address of the NP126. You can check the IP address of the device
from the Network Setup configuration page or find the DHCP-assigned IP address from your router if it is
running in Repeater mode.
2
Your computer’s and the NP126’s IP addresses must be on the same subnet for LAN access. You can
check the subnet in use by the router on the Network Setup page.
3
If you are still not able to access the web configuration pages, reset the router to the factory default settings
by pressing the reset button for ten seconds and then releasing it. When the Power LED begins to blink, the
defaults have been restored and the NP126 restarts. Navigate to 192.168.40.1 in your web browser and
enter “admin” (without the quotes) as the username and password.
The web configuration does not display properly.
STEP
CORRECTIVE ACTION
Delete the temporary web files and log in again. In Internet Explorer, click Tools, Internet Options and
then click the Delete Files ... button. When a Delete Files window displays, select Delete all offline
content and click OK. (Steps may vary depending on the version of your Internet browser.)
1
CORRECTIVE ACTION
Login Username and Password
I forgot my login username and/or password.
STEP
CORRECTIVE ACTION
1
Press the Reset button for 3 seconds, and then release it. When the Power LED begins to blink, the defaults
have been restored and the NP126 restarts.
You can now login with the factory default username and password “admin” (without the quotes)
2
It is highly recommended to change the default username and password. Make sure you store the username
and password in a safe place.
S CORRECTIVE ACT
WLAN Interface
I cannot access the NP126 from the WLAN or ping any computer on the WLAN.
STEP
CORRECTIVE ACTION
1
Check the WiFi LED on the front of the unit and verify the WLAN is enabled as per the LED Indicator section.
2
If you are using a static IP address for the WLAN connection, make sure that the IP address and the subnet
mask of the NP126 and your computer(s) are on the same subnet. You can check the router’s configuration
from the Network Setup page.
TE CORREC
NetComm Wireless NP126 User Guide
27
www.netcommwireless.com
Technical Data
The following table lists the hardware specifications of the NP126.
FEATURE
SPECIFICATION
Standards
•Wireless:
• 2.4GHz - IEEE 802.11n/g/b
• 5GHz - IEEE 802.11n/g (NP126 only)
• Ethernet: IEEE802.3 10/100, IEEE802.3u, IEEE802.3ab
Network Support
• OFDM 1024/256/64/16/8 QAM, QPSK, BPSK and ROBO Modulation Scheme Wireless
• IEEE802.11n: BPSK, QPSK, QAM-16, QAM-64
• IEEE802.11g: BPSK, QPSK, QAM-16, QAM-64
• IEEE802.11b: CCK, QPSK, BPSK
Security
Wireless: 64/128-bit WEP, WPA, WPA2
Hardware
• SPI FlashRom: 8MB
• SDRAM: 64MB
Operating System
OS Independent with TCP/IP protocol installed
Power Requirements
• Supply voltage range: 100VAC - 240VAC (50/60Hz)
• Connects directly to wall
LED Indicators
• 1 x Power LED
• 1 x Ethernet LED
• 5 x Signal strength LEDs
External Connectors
• 1 x RJ45 for 10/100 Base T-LAN
• 1 x Reset button
• 1 x On/Off Switch
• 1 x WPS Button
Measurements
• 118(h) x 67(w) x 67(d)mm
• 165g / adapter
Environmental Temperature
• Operating: 0°C to 40°C
• Non-Operating: -40°C to 70°C
Humidity
Regulatory Approval
• Operating: 10% to 90% relative humidity (non-condensing)
• Non-Operating: 5% to 95% relative humidity (non-condensing)
RCM
Environmental Specifications / Tolerances
The NP126 housing enables it to operate over a wide variety of temperatures from 0˚C - 40˚C (operating temperature).
www.netcommwireless.com
NetComm Wireless NP126 User Guide
28
Legal & Regulatory
Information
Intellectual Property Rights
All intellectual property rights (including copyright and trade mark rights) subsisting in, relating to or arising out this Manual are
owned by and vest in NetComm Wireless (ACN 002490486) (NetComm Wireless Limited) (or its licensors). This Manual does not
transfer any right, title or interest in NetComm Wireless Limited’s (or its licensors’) intellectual property rights to you.
You are permitted to use this Manual for the sole purpose of using the NetComm Wireless product to which it relates. Otherwise
no part of this Manual may be reproduced, stored in a retrieval system or transmitted in any form, by any means, be it electronic,
mechanical, recording or otherwise, without the prior written permission of NetComm Wireless Limited.
NetComm, NetComm Wireless and NetComm Wireless Limited are a trademark of NetComm Wireless Limited. All other
trademarks are acknowledged to be the property of their respective owners.
Customer Information
The Australian Communications & Media Authority (ACMA) requires you to be aware of the following information and warnings:
1.
This unit may be connected to the Telecommunication Network through a line cord which meets the requirements of the
AS/CA S008-2011 Standard.
2.
This equipment incorporates a radio transmitting device, in normal use a separation distance of 20cm will ensure radio
frequency exposure levels complies with Australian and New Zealand standards.
3.
This equipment has been tested and found to comply with the Standards for C-Tick and or A-Tick as set by the ACMA.
These standards are designed to provide reasonable protection against harmful interference in a residential installation.
This equipment generates, uses, and can radiate radio noise and, if not installed and used in accordance with the
instructions detailed within this manual, may cause interference to radio communications. However, there is no guarantee
that interference will not occur with the installation of this product in your home or office. If this equipment does cause
some degree of interference to radio or television reception, which can be determined by turning the equipment off and
on, we encourage the user to try to correct the interference by one or more of the following measures:
4.
i.
Change the direction or relocate the receiving antenna.
ii.
Increase the separation between this equipment and the receiver.
iii.
Connect the equipment to an alternate power outlet on a different power circuit from that to which the receiver/TV is
connected.
iv.
Consult an experienced radio/TV technician for help.
The power supply that is provided with this unit is only intended for use with this product. Do not use this power supply
with any other product or do not use any other power supply that is not approved for use with this product by NetComm
Wireless. Failure to do so may cause damage to this product, fire or result in personal injury.
Consumer Protection Laws
Australian and New Zealand consumer law in certain circumstances implies mandatory guarantees, conditions and warranties
which cannot be excluded by NetComm and legislation of another country's Government may have a similar effect (together these
are the Consumer Protection Laws). Any warranty or representation provided by NetComm is in addition to, and not in
replacement of, your rights under such Consumer Protection Laws.
If you purchased our goods in Australia and you are a consumer, you are entitled to a replacement or refund for a major failure
and for compensation for any other reasonably foreseeable loss or damage. You are also entitled to have the goods repaired or
replaced if the goods fail to be of acceptable quality and the failure does not amount to a major failure. If you purchased our
goods in New Zealand and are a consumer you will also be entitled to similar statutory guarantees.
NetComm Wireless NP126 User Guide
29
www.netcommwireless.com
Product Warranty
All NetComm Wireless products have a standard one (1) year warranty from date of purchase, however, some products have an
extended warranty option (refer to packaging and the warranty card) (each a Product Warranty). To be eligible for the extended
warranty option you must supply the requested warranty information to NetComm Wireless Limited within 30 days of the original
purchase date by registering online via the NetComm Wireless web site at www.netcommwireless.com. For all Product Warranty
claims you will require proof of purchase. All Product Warranties are in addition to your rights and remedies under applicable
Consumer Protection Laws which cannot be excluded (see Consumer Protection Laws Section above).
Subject to your rights and remedies under applicable Consumer Protection Laws which cannot be excluded (see the Consumer
Protection Laws Section above), the Product Warranty is granted on the following conditions:
1.
the Product Warranty extends to the original purchaser (you / the customer) and is not transferable;
2.
the Product Warranty shall not apply to software programs, batteries, power supplies, cables or other accessories
supplied in or with the product;
3.
the customer complies with all of the terms of any relevant agreement with NetComm and any other reasonable
requirements of NetComm including producing such evidence of purchase as NetComm may require;
4.
the cost of transporting product to and from NetComm’s nominated premises is your responsibility;
5.
NetComm Wireless Limited does not have any liability or responsibility under the Product Warranty where any cost, loss,
injury or damage of any kind, whether direct, indirect, consequential, incidental or otherwise arises out of events beyond
NetComm’s reasonable control. This includes but is not limited to: acts of God, war, riot, embargoes, acts of civil or
military authorities, fire, floods, electricity outages, lightning, power surges, or shortages of materials or labour; and
6.
the customer is responsible for the security of their computer and network at all times. Security features may be disabled
within the factory default settings. NetComm Wireless Limited recommends that you enable these features to enhance
your security.
Subject to your rights and remedies under applicable Consumer Protection Laws which cannot be excluded (see Section 3
above), the Product Warranty is automatically voided if:
1.
you, or someone else, use the product, or attempt to use it, other than as specified by NetComm Wireless Limited;
2.
the fault or defect in your product is the result of a voltage surge subjected to the product either by the way of power
supply or communication line, whether caused by thunderstorm activity or any other cause(s);
3.
the fault is the result of accidental damage or damage in transit, including but not limited to liquid spillage;
4.
your product has been used for any purposes other than that for which it is sold, or in any way other than in strict
accordance with the user manual supplied;
5.
your product has been repaired or modified or attempted to be repaired or modified, other than by a qualified person at
a service centre authorised by NetComm Wireless Limited; or
6.
the serial number has been defaced or altered in any way or if the serial number plate has been removed.
Limitation of Liability
This clause does not apply to New Zealand consumers. Subject to your rights and remedies under applicable Consumer
Protection Laws which cannot be excluded (see the Consumer Protection Laws Section above), NetComm Wireless Limited
accepts no liability or responsibility, for consequences arising from the use of this product. NetComm Wireless Limited reserves
the right to change the specifications and operating details of this product without notice.
If any law implies a guarantee, condition or warranty in respect of goods or services supplied, and NetComm Wireless’s liability for
breach of that condition or warranty may not be excluded but may be limited, then subject to your rights and remedies under any
applicable Consumer Protection Laws which cannot be excluded, NetComm Wireless’s liability for any breach of that guarantee,
condition or warranty is limited to: (i) in the case of a supply of goods, NetComm Wireless Limited doing any one or more of the
following: replacing the goods or supplying equivalent goods; repairing the goods; paying the cost of replacing the goods or of
acquiring equivalent goods; or paying the cost of having the goods repaired; or (ii) in the case of a supply of services, NetComm
Wireless Limited doing either or both of the following: supplying the services again; or paying the cost of having the services
supplied again.
To the extent NetComm Wireless Limited is unable to limit its liability as set out above, NetComm Wireless Limited limits its liability
to the extent such liability is lawfully able to be limited.
www.netcommwireless.com
NetComm Wireless NP126 User Guide
30
Contact
Address: NETCOMM WIRELESS LIMITED Head Office
PO Box 1200, Lane Cove NSW 2066 Australia
Phone: +61(0)2 9424 2070
Fax: +61(0)2 9424 2010
Email: [email protected] [email protected]
NetComm Wireless NP126 User Guide
31
www.netcommwireless.com