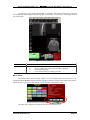
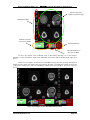
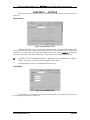
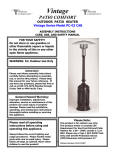
1
American Medical Sales, Inc. – Catella Diagnostic Workstation User Manual, v. 4.0 CATELLA ® DIAGNOSTIC WORKSTATION USER MANUAL Version 4.0 REF (Revised July 2005) 330-4-001 Rev 05 © 2005, AMS Form 330-4-001 Rev. 05 Page i American Medical Sales, Inc. – Catella Diagnostic Workstation User Manual, v. 4.0 Table of Contents TABLE OF FIGURES V CHAPTER 1 – INTRODUCTION 1 Indications for Use Key Concepts Power of Digital without the Complexity of Computing Eliminating Icons – Increasing Productivity DICOM Compliant Manual Conventions Special Helpful Hints for Reading this Manual CHAPTER 2 – CATELLA WORKSTATION COMPONENTS The Catella Workstation Display Trackball Keyboard Information Network Databases DICOM Push DICOM Query/Retrieve Other Databases DICOM Print CHAPTER 3 –STARTING THE CATELLA WORKSTATION Powering Up the Catella Workstation Starting the Catella Program Passwords On Call Status What the On Call System Does CHAPTER 4 – PRIMARY IMAGE CONTROL TOOLS Monitor Control Primary Image Control Tools Zoom Pan Window/Level CHAPTER 5 – MORE ADVANCED TOOLS Types of Controls Advanced Image Manipulation Tools Rotate Flip Image Reset Invert Window/Level Measure Annotate Thumbnails Form 330-4-001 Rev. 05 1 1 2 2 2 2 3 4 4 4 5 6 7 7 7 7 8 8 9 9 9 9 10 11 12 12 12 12 13 13 15 15 15 15 15 15 15 15 15 17 19 Page ii American Medical Sales, Inc. – Catella Diagnostic Workstation User Manual, v. 4.0 Image Details Print Image Creating a CD Logout Quad Display Overlay Locator Select Move/ Resize 3D CHAPTER 6 – WORKLIST Prefetch Sortable Worklist Select Mode Cancel Delete Mode Query/Retrieve Overview of Query Levels: Conducting an Advanced Query Moving Between Levels Select Desired Images Logout CHAPTER 7 – MOVING TO ANOTHER PATIENT’S IMAGES Basic Concept Diagnosis OK-Next Remarks Verify CHAPTER 8 – MULTI-FRAME IMAGES Setting Display Configurations Basic Image Controls (Same as Others) Stack Viewing CHAPTER 9 – CINE IMAGES Setting Display Configurations Basic Image Controls (Same as Others) Stack Viewing CHAPTER 10 – MPR – MULTI-PLANAR RECONSTRUCTION Screen Layout Screen Layout CHAPTER 11 – OPTIONS Administrative Identification Tools Window/Level Preferences DICOM/Transfer About Catella Form 330-4-001 Rev. 05 19 20 20 20 21 21 21 22 24 25 25 26 26 27 27 27 28 28 29 29 29 30 30 30 30 30 31 32 32 32 32 34 34 34 34 35 35 35 37 37 37 38 38 39 39 Page iii American Medical Sales, Inc. – Catella Diagnostic Workstation User Manual, v. 4.0 The Other Basic Buttons at the Bottom CHAPTER 12 – END OF SESSION Logging Off Shutting Down 39 40 40 40 CHAPTER 13 – CATELLA SCAN STATION 41 CHAPTER 14 – CATELLA SCRIBE 42 About Catella Scribe 42 CHAPTER 15 – ACTIVITY MENU & TRACKBALL CONTROLS 43 CHAPTER 16 – WARNING MESSAGES 44 CHAPTER 17 – CONTACTING US 45 CHAPTER 18 - IMPORTANT NOTES 47 CHAPTER 19 - LICENSE AGREEMENTS 49 APPENDIX A – DIGAMS.INI FILE 51 APPENDIX B – DOCTORS.INI FILE 53 INDEX 54 Form 330-4-001 Rev. 05 Page iv American Medical Sales, Inc. – Catella Diagnostic Workstation User Manual, v. 4.0 TABLE OF FIGURES Figure 1: A Catella 2-Monitor workstation with an additional Navigation Monitor for RIS or 3-D ......... 4 Figure 2: Location of display elements on a Catella Monitor .................................................................... 4 Figure 3: Trackball components. .................................................................................................................... 5 Figure 4: Zoom, Pan, Window/Level and Stack Control Icons...................................................................... 5 Figure 5: Catella Start or “Short Cut” Icon................................................................................................ 9 Figure 6: Individual User List Box............................................................................................................... 10 Figure 7: Catella Password Box............................................................................................................... 10 Figure 8: Default Layout of Activity Menu.................................................................................................. 12 Figure 9: Advanced WINDOW/LEVEL Option Box................................................................................... 14 Figure 10: Measure Method Selection Box .................................................................................................. 16 Figure 11: Length Measurement Information Box ....................................................................................... 16 Figure 12: Length Measurement Information Box with Calibrated Result .................................................. 16 Figure 13: Views of Measurement Windows Showing Distance, Angle, and Hounsfeld Units - ROI......... 17 Figure 14: Annotate submenu....................................................................................................................... 18 Figure 15: Thumbnail Column shown on left side of screen........................................................................ 19 Figure 16: Example of Display of Image Details on a Monitor. .................................................................. 19 Figure 17: Printer Selection Screen. ............................................................................................................. 20 Figure 18: Quad Display. ............................................................................................................................. 21 Figure 19: Locator Selection. ....................................................................................................................... 22 Figure 20: Examples of how MOVE/RESIZE functions.............................................................................. 23 Figure 21: Worklist....................................................................................................................................... 25 Figure 22: Query Window............................................................................................................................ 28 Figure 23: Query Window returned with Patient Level Information............................................................ 29 Figure 24: Remarks Window........................................................................................................................ 31 Figure 25: Report Verification Screen.......................................................................................................... 31 Figure 26: Stack Viewing Mode................................................................................................................... 32 Figure 27: Detail of Stack Controls .............................................................................................................. 33 Figure 28: Typical MPR screen presentation. .............................................................................................. 35 Figure 29: Administrative Tab ..................................................................................................................... 37 Figure 30: Identification Tab........................................................................................................................ 37 Figure 31: Tools Tab .................................................................................................................................... 38 Figure 32: Window/Level Preferences ......................................................................................................... 38 Figure 33: DICOM/Transfer Tab ................................................................................................................. 39 Figure 34: About Catella Tab................................................................................................................... 39 Figure 35: Basic Components of a Catella Scan Station. ......................................................................... 41 Figure 36: Example of first part of digams.ini file. ...................................................................................... 51 Figure 37: Example of doctors.ini file.......................................................................................................... 53 Form 330-4-001 Rev. 05 Page v American Medical Sales, Inc. – Catella Diagnostic Workstation User Manual CHAPTER 1 – INTRODUCTION Thank you for selecting Catella as part of your healthcare information enterprise solution. Catella Advanced Digital Products offer full-featured digital medical image viewing and communications. The basic design criteria, after assuring high-quality images, are ease of operation and simplicity of design that allow the health care professional to smoothly move to digital image reading without hesitation or resistance. Catella Workstation products focus on the final part of the process of medical imaging, diagnosis and reporting, and are key to increasing the productivity of the healthcare professional. Indications for Use The Catella Diagnostic Workstation, Version 4.0, is a medical image and information management system that allows easy viewing, selection, processing, printing, telecommunications, and media interchange of multi-modality medical images from a variety of diagnostic imaging systems. The Catella PACS interfaces to various storage and printing devices using DICOM or similar interface standards. The system is available for diagnostic and non-diagnostic workstations, including workstations designed as web-based, remote viewers or CD-viewer workstations. The software may be installed as a PCbased stand alone system, a software application, a web-based or SDK format, and is designed to be integrated with various DICOM compliant OEM systems. The Catella PACS displays, stores, prints, and telecommunicates images from a number of medical modalities, including but not limited to MR, CT, DR, CR, X-ray, Angiography, Ultrasound, or digitizers. The Catella Diagnostic Workstation, Version 4.0 performs other user-defined post-processing functions, such as multi-planar reformatting of images. The Catella PACS can display processed data from certain FDA-cleared third party image processing systems that create DICOM output. With proper links, the Catella Workstation also can invoke FDA-cleared third party image processing systems for advanced image processing, such as 3D display. It can also access RIS and HIS systems and can be used to review patient information. The Catella Diagnostic Workstation, Version 4.0, is not intended for use for primary diagnostic interpretation of mammographic images. Key Concepts Images can be generated anywhere throughout the healthcare enterprise. With the exception of mammography, Catella Workstations are designed as primary diagnostic stations which can be added to your existing digital imaging network (such as a PACS system), tied directly to digital modalities (MR, CT, DR, CR, or digitizers), or used as part of a teleradiology solution. Any type of digital image can be displayed, including CT, CR, DR, MR, X-Ray, Angiography, Ultrasound, etc. With proper links, Catella can also access RIS and HIS systems, and can be used to review patient information. The Catella Workstation is an intuitive system. It is operated by a two-button trackball (or mouse). Easy to learn, it is even easier to use. Catella operates under the Windows 2000 operating system using standard graphical user interface techniques. Icons are kept to a minimum to avoid confusion, as there are no “standards” between medical equipment interfaces. Catella is designed to allow you to transition from film/screen reading techniques to digital diagnosis easily and efficiently. Catella’s unique operating methods allow you to be as productive or more productive than you are today while gaining the benefits of digital images. You want the clearest image possible, presented in a way that keeps your attention on your diagnostic work. With the Catella system, your workflow is as intuitive in the digital environment as it has always been in the film setting. Form 330-4-001 Rev. 05 Page 1 American Medical Sales, Inc. – Catella Diagnostic Workstation User Manual Power of Digital without the Complexity of Computing Did you notice that it’s hard to find the computer and the keyboard? Again, this is intentional. We want you to think of Catella as just the latest, most modern radiology “viewbox”...that just happens to be powered by a computer. The keyboard is hidden because you rarely need to use it. There are no “CTRL – ALT – T” type commands. You use a trackball (like that used with Ultrasound equipment) or mouse. The keyboard is only used in a few instances: entering passwords if you aren’t using the fingerprint reader, typing remarks (optional, because you can use your voice), and setting user options. In the typical reading session, the keyboard is never used! Using the trackball’s simple, two-button controls will give you the three most common digital imaging tools. These three tools (window/level, zoom and pan) will account for up to 95% of the tasks you will perform in digital imaging. Probably more than 99% of what you want and need to do is within one click. For those who may want or need more tools, they are available from an “activity menu” at the bottom of the screen. While Catella may appear simple, it is supported by a very sophisticated software system that attains this look and feel. Behind Catella’s simple “face” are all the powerful, sophisticated tools that you may need. Eliminating Icons – Increasing Productivity Catella makes you efficient in numerous ways. Since there are no “industry standard icons,” we have minimized their use. We have not made up symbols, the translation of which you need to memorize. By using simple, plain words, we eliminate the time-consuming mental translation step, to speed up your reading session. In another example, we have pioneered the concept of the customizable screen and Activity Menu™ which allows you to configure the viewing area to your preference. This helps reduce the need to divert your eyes from the images during your interpretative work. DICOM Compliant Catella Workstations comply with the DICOM 3.0 standards. DICOM stands for Digital Imaging and Communications in Medicine. It is an evolving standard developed by a wide group of international radiology healthcare professional organizations (such as the American College of Radiology, Radiological Society of North America, European College of Radiology, etc.), software and hardware medical and computer equipment manufacturers, and other interested professionals. Conformance to this standard assures you that Catella products will fit easily into pre-existing medical imaging networks or networks now being planned for implementation. It also assures easy connection to other manufacturers’ DICOM-compliant equipment. Occasionally device-specific variations in modalities will require some intervention or adjustment. You should confer with your system’s administrator so that they can contact the responsible vendors to discuss the related issues. Contact American Medical Sales, Inc. for the latest version of the Catella DICOM Compliance Statement. If you are contemplating using non-DICOM-compliant equipment in your system, contact American Medical Sales, Inc. Catella products can operate in non-DICOM environments as well. Manual Conventions There are a few things to be aware of while following the directions in this manual. Catella employs a very simple user interface controlled primarily by a two-button trackball (or mouse). Extremely limited keyboard use is necessary within Catella. The trackball or mouse is used to select commands and move about the viewing area. When the manual directs you to CLICK on a command or selection, move the trackball so the cursor is over the Form 330-4-001 Rev. 05 Page 2 American Medical Sales, Inc. – Catella Diagnostic Workstation User Manual desired command and press and release the left button. A single click is all that is necessary. Double clicking is not used in the Catella Workstation system. If a command button is “grayed out”, this means that that command is not functional for the particular image being viewed. Example of Active Button Example of “Grayed Out” Button – Not Active In some cases, there is a need to “grab and drag” an object. Move the cursor over the desired object. Hold the left key down. The object can then be “dragged” to the desired location by moving the trackball while keeping the button depressed. Specific functions will be explained in detail in other parts of this manual. The screen displays in this manual may not appear exactly as those seen on your screen. Catella systems generally use portrait monitors. If your system has been configured using a landscape monitor, the displays on your system will vary slightly from those printed in this manual. Regardless of your display configuration, you should be able to follow the instructions in this manual. Special Helpful Hints for Reading this Manual This manual has several conventions to highlight important information. =” indicates an important message. Pay careful attention to these notes. A“ Please note the following conventions: • Commands issued through the Activity Menu will be written in CAPITAL LETTERS. For example: CLICK on ROTATE. • The use of the word “Trackball” is interchangeable with the word “Mouse”. Form 330-4-001 Rev. 05 Page 3 American Medical Sales, Inc. – Catella Diagnostic Workstation User Manual CHAPTER 2 – Catella WORKSTATION COMPONENTS Catella Workstations operate on standard Windows 2000 operating systems. Each workstation includes a high performance computer, communications capability, monitor(s) (typically medical grade, high resolution) and video cards, trackball, microphone, keyboard and foot pedal. Each workstation’s communication package is configured during the installation process to meet the requirements of the specific institution. The appropriate Catella software components are preinstalled on the system, along with other necessary software. The installation package includes all appropriate software documents and licensing documents for each software component. Figure 1: A Catella 2-Monitor workstation with an additional Navigation Monitor for RIS or 3-D The Catella Workstation Display Catella Workstations typically use high-resolution medical grade monitors for image display. The standard monitor has a 2 mega-pixel resolution (2MP). Higher resolution monitors (3 or 5 MP) or color monitors can also be ordered. Catella displays images in a simple, direct format. This is done intentionally to maximize productivity. The figure below illustrates display components on a one-monitor workstation display configuration. Thumbnail Column Main Image Area Move Up or Down Thumbnail Column Activity Menu Figure 2: Location of display elements on a Catella Monitor Main Image Area: All images are initially presented in the correct aspect ratio and are enlarged to take advantage of as much of the monitor as possible in this area. Form 330-4-001 Rev. 05 Page 4 American Medical Sales, Inc. – Catella Diagnostic Workstation User Manual Activity Menu: All controls for the workstation are located here (this is the default location). This horizontal area at the bottom of the screen is divided into four general areas. From left to right: Window/Level Controls, Measurement and Stack controls, Advanced Tools and Image Information. Image Information includes such items as patient name, patient ID number, image date and time. Your system administrator can modify the data displayed in this box. Thumbnail Column: The first image in each of the current patient’s series is displayed vertically in this column. This allows you to quickly understand the number of image sets needing review. By clicking on one of these images, that image set will be displayed in the Main Image Area. If more series are available than can be displayed in this vertical area, controls are provided to move up and down the column. Trackball Catella utilizes a two-button trackball or mouse as its primary mechanical control method. We highly recommend that a trackball be used instead of a two-button mouse as the trackball limits hand and arm movement. Typical users report that it takes about one week to become completely comfortable with a trackball. Medical professionals who operate ultrasound equipment will already be familiar with this device. Center Button (NotTool assigned.) (To Switch Primary & to Swap to Images) Left Button (Control Function) Right Button (Display Floating Menu) (Select command Trackball Roller function - Zoom, Pan, Window/Level, Stack Control) Figure 3: Trackball components. With the trackball, you can easily control the four major tools of digital imaging: zoom, pan, window/level, and, when appropriate for the image set, stack control. In addition, the trackball is used to move the cursor to any monitor. When you log in to Catella, a predetermined primary “tool” will be assigned to the trackball. It may be zoom or window/level. This may be different for each doctor. See your system administrator for more information. The trackball screen cursor will indicate which control function is currently active. See the figure below for icon definitions. W L Figure 4: Zoom, Pan, Window/Level and Stack Control Icons Controlling Zoom: Holding the left button down and simultaneously moving the trackball so that the icon moves towards the top of the screen will zoom the image to a larger size. Holding the left button down and simultaneously moving the trackball so that the icon moves toward the bottom of the screen will zoom the image to a smaller size. Form 330-4-001 Rev. 05 Page 5 American Medical Sales, Inc. – Catella Diagnostic Workstation User Manual Controlling Pan: Holding the left button down and simultaneously moving the trackball so that the icon moves in the direction you wish to move the image will complete this function. Note that the hand icon reduces slightly in size when you activate the pan movement. Controlling Window/Level: Holding the left button down and simultaneously moving the trackball so that the icon moves up or down changes the window values of the image. The image will change as you move the icon. Moving the icon up increases the window number, which lightens the image. Moving the icon down decreases the window number, which darkens the image. Holding the left button down and simultaneously moving the trackball so that the icon moves to the right or left changes the level values of the image. The image will change as you move the icon. Moving the icon to the left decreases the level values. Moving the icon to the right increases the level values. Moving the icon in a diagonal direction will change both the window and level values as indicated in the chart below. Icon Movement Right and Up Right and Down Left and Up Left and Down Window Value Higher Lower Higher Lower Level Value Higher Higher Lower Lower Controlling Stack: Holding the left button down and simultaneously moving the trackball so that the icon moves right will sequentially display images with higher numbers. Moving the icon to the left will display the images in the stack with lower numbers. = As you move the cursor from one monitor to another, you may find that the control icon changes. Catella remembers the last control function used on each monitor and returns to that function. This is another way Catella increases your productivity. Switching Functions: To switch between Zoom, Pan, Window/Level and Stack Control, simply CLICK on the right button. The icon will change to a new function. The order of change is Zoom to Pan, Pan to Window/Level, Window/Level to Stack Control (if available for the images being displayed, otherwise to Zoom) and Stack Control to Zoom. Activity Menu: The Activity Menu default location is along the bottom of the screen. Complete descriptions of each feature on the Activity Menu are found in Chapters 5, 6 and 7. Keyboard Controlling the Catella Workstation rarely involves the computer keyboard. The keyboard is only used in the following five situations: 1. System start-up: When the computer is first turned on, the Windows 2000 system will require keyboard commands. Since Catella is designed to be left on, the typical user need not be bothered by system startup. See Chapter 2 or your system administrator for more information. Form 330-4-001 Rev. 05 Page 6 American Medical Sales, Inc. – Catella Diagnostic Workstation User Manual 2. Password: The use of both the workstation and the Catella software are password controlled. Both of these passwords are entered via the keyboard, or the optional fingerprint reader. See your system administrator for more information. 3. Remarks: It is possible to enter remarks during the diagnostic process. These remarks can be entered either by the keyboard or can be dictated. See Chapter 7 for more information. 4. Entry of set-up parameters. See Chapter 11, Options, for more information. This type of data is usually entered only once for both the institution and doctor. This is another productivity feature of the Catella Workstation. 5. Typing annotations on the image. Information Network Catella provides communications capability to access sources of patient images, studies and records. The most effective way to do this is through a standard computer network or an existing PACS. Catella operates over an Ethernet network (10/100/1000Mbps). The operation of Catella is independent of the underlying communications technology. Connections between the Catella Workstation, Catella Scribe, Catella Scan, Catella Archive and other network equipment are regulated through the use of TCP/IP addresses and ports. Databases Database is computer language for source(s) of patient images, studies and records. Typically, each institution will have many of these, and each will contain some critical component of the patient record. Unfortunately, these are too often inaccessible and require complex and arcane user interactions. Catella can be configured to eliminate this problem and the confusion that comes with it by acting as a database access mechanism and by providing a single, simple user interface. American Medical Sales, information systems vendors, and your institution’s networking professionals will work to eliminate unnecessary complexity by using Catella as the platform to provide easy access to all of your institution’s patient records systems. DICOM Push There are a number of ways a workstation can receive image data under the DICOM standard. In a PACS environment, the most common way is for the PACS software to send images to the workstation. This is called a “push” function. Catella is a DICOM Push-compliant product. Once images are pushed to the workstation they will appear on the pending portion of your worklist. See Chapter 6 for more details on the worklist. DICOM Query/Retrieve Catella interacts with databases at your institution through a DICOM-compliant Query/Retrieve interface. This interface knows how to translate your requests for information into a form that the database understands. The database knows how to transfer your requests to Catella. In some cases this interface is provided by your institution, in some cases by another manufacturer’s component, and in some cases by American Medical Sales. See Chapter 6 for more details on operating Catella’s DICOM Query/Retrieve feature. Form 330-4-001 Rev. 05 Page 7 American Medical Sales, Inc. – Catella Diagnostic Workstation User Manual Other Databases Catella also has the ability to manage non-DICOM image files. In teleradiology applications, it is common to store and send images in other file formats such as JPEG, TIFF, or BMP. Legacy systems operating on proprietary software systems usually do not adhere to DICOM standards. American Medical Sales can help you with these special conditions so that Catella will work in these environments. In some cases, institutions also wish to integrate their HIS and RIS systems with their image viewing solutions. If desired, Catella may be integrated with your system. Contact American Medical Sales for further information and assistance. DICOM Print Catella supports DICOM Print. This allows users to print the patient images to a DICOM printer (either film or paper). Form 330-4-001 Rev. 05 Page 8 American Medical Sales, Inc. – Catella Diagnostic Workstation User Manual CHAPTER 3 –STARTING THE Catella WORKSTATION Powering Up the Catella Workstation To power up the computer push the power-on button on the front face of the computer. This may be a “momentary” type switch commonly found on “server” type computers. It may have to be held in the “in” position for several seconds before the computer turns on. This is a safety feature and not a cause for concern. The use of a momentary on/off switch helps to prevent accidental shut off of the computer. There are also individual ON switches on each monitor. Make sure each of these switches is also in the ON position. = It is highly recommended that the Catella Workstation be plugged into a Universal Power Supply (UPS) so that battery power is available to properly shut down the workstation in case of a general power failure in your facility. The UPS will also help assure a cleaner source of power for the workstation. = WARRANTIES AND SERVICE PLANS ON CATELLA EQUIPMENT AND SOFTWARE DO NOT COVER DATA LOSS OR CORRUPTION, OR CLAIMS, LIABILITIES, DAMAGES, COSTS AND EXPENSES RELATING THERETO, INCLUDING CHARGES FOR RECOVERY OR ATTEMPTED RECOVERY OF DATA, WHETHER SUCH LOSSES ARE CAUSED BY POWER SURGES, VIRUSES, IMPROPER HANDLING OR FAILURE OF EQUIPMENT AND HARD DRIVES, OR ANY OTHER CAUSE; NOR DO CATELLA WARRANTIES AND SERVICE PLANS COVER DAMAGE TO EQUIPMENT AND SOFTWARE CAUSED BY POWER SURGES, VIRUSES, OR IMPROPER HANDLING OF EQUIPMENT AND HARD DRIVES. A UPS WILL HELP PROTECT YOUR INVESTMENT. = If using a UPS, make sure that the power cords for the workstation’s CPU and the Number 1 monitor are connected to the battery back up. Once the computer is on, the Catella Workstation will power up into the Windows 2000 operating system. This may take several minutes. Once Windows 2000 is running, you may be asked to provide a password to turn on the computer (depending upon your institution’s requirements). Starting the Catella Program Passwords Catella offers two levels of security. Passwords are required to power up the Catella Workstation and, again, to verify a reading doctor’s identity when that doctor logs into a session. Once the correct password has been entered, a blank screen will appear on each monitor. One screen will also have the traditional Windows “Start” button and the Catella short-cut icon. The Windows Start button can be used to access other programs and to shut down the workstation. Figure 5: Catella Start or “Short Cut” Icon To activate the diagnostic reading software, CLICK on the Catella icon. The doctor’s log in list will appear. Highlight your name and CLICK on the LOG IN button. Form 330-4-001 Rev. 05 Page 9 American Medical Sales, Inc. – Catella Diagnostic Workstation User Manual Figure 6: Individual User List Box A second password screen will now appear. Type your password and press the ENTER key. If you have a fingerprint reader, you may have the computer verify your identity by putting your finger over the reader. Figure 7: Catella Password Box Your patient’s first images will immediately appear and you can begin your interpretative work. On Call Status Radiologists who have been set up with the permission to receive on call images will see an on call checkbox on their log-in screen (see the figure above). To receive on call images, a physician places a check mark on the on call checkbox and then logs-in using their password. Once the physician has loggedin as the on call physician all on call images that have not been delivered to the previous on call physician will be automatically sent. The on call feature is designed for use with Catella Review Workstations and Catella WebVue Stations, but the on call box will appear on the Catella Diagnostic Workstation login because there are some circumstances where it is useful (see below). The on call feature functions similarly to “wet-reads”. It is not designed for completing interpretations and diagnostics. If the physician wants to complete interpretation, a workstation with the Catella Diagnostic Software should be used. After an image is reviewed from a Review or WebVue station by an on call doctor it will not be marked as “diagnosed”. These images will remain on the “pending” portion of the Diagnostic Workstation worklist. When diagnosed on a Diagnostic Workstation (perhaps at the on call doctor’s home), these images will move from the “pending” to the “completed” portion of all Diagnostic Workstations, if desired. Remember, to be the on call doctor, the on call selection box must be checked before the OK box is clicked during the doctor logon: = Permission to receive on call images is set on the Catella Archive. See the Catella Archive User Manual for instructions. Form 330-4-001 Rev. 05 Page 10 American Medical Sales, Inc. – Catella Diagnostic Workstation User Manual What the On Call System Does Once an image is designated on call (by including on call in the accession field), the Image Gateway of the Catella Archive creates an additional destination (in addition to whatever other ones it would normally use for this image). This additional rule is “Send this image to the Web Server to hold in its on call box”. The Web Server will hold this image until a radiologist logs in as the on call doctor. Once a doctor is logged in as the on call doctor, the system will send all images being held as on call images to that doctor’s viewing station. = IMPORTANT NOTE: How images are routed to viewing stations is set-up differently for each network. See your system administration for details about your system. HOWEVER, in most systems all diagnostic workstations receive all images. IF YOU ARE USING A DIAGNOSTIC WORKSTATION AND YOU ALREADY HAVE PERMISSION TO RECEIVE ALL IMAGES, THEN THERE IS NO REASON TO EVER LOG IN AS THE ON CALL PHYSICIAN. The only time that it makes sense to check the on call box on a diagnostic workstation is if not all images are routed to that workstation AND you are the on call physician. In this case, you will get all your normally routed images, AS WELL AS those marked for the on-call physician. In most cases, ON CALL SELECTIONS SHOULD BE MADE ONLY FROM REVIEW WORKSTATIONS AND WEBVUE WORKSTATIONS. It is also important to note that these workstations are not typically used for diagnostic work. Therefore, reading on call images from these workstations should be considered as similar to “wet-reads” of films. The images will remain as “undiagnosed” on the network and on the Diagnostic Workstations. On call images read on a Diagnostic Workstation may be diagnosed, however, and will thereafter drop to the Completed portion of the worklist. Care should also be taken when reviewing on call images to avoid duplicate work. Unless the on call images have been regularly pulled, older images may be sent to your workstation. Unlike other routed images, the on call images are not purged from the list if another physician has already completed the diagnosis. Again, this is because the on call feature is intended primarily as a “wet read” option. Take care to purge older images that have already been interpreted by another physician. = IMPORTANT NOTE: If another doctor logs in as the on call doctor, the first doctor will be logged out. A message will display to alert the first doctor that the status has changed. This is done because 1) most physicians follow rotating schedules that will not overlap, and 2) as an image management safeguard in case the first doctor forgets to log-out when his/her rotation has ended. In the event that this transition takes place while images are flowing, some of the patient’s images will be on the first doctor’s system and some will be on the second doctor’s system. In this case, the technician may have to resend the image set to the new on call doctor or the doctor may query the Archive for the images. = IMPORTANT NOTE: Logging out cancels that doctor’s on call status. WHEN A PHYSICIAN’S ON-CALL ROTATION ENDS, THE DOCTOR SHOULD (1) MAKE SURE THAT ALL IMAGES FOR THE LAST PATIENT VIEWED HAVE ALL BEEN RECEIVED BEFORE LOGGING OUT OF THE SYSTEM, AND (2) THEN LOG OUT SO THAT NO FURTHER IMAGES WILL BE SENT TO HIM/HER. Once images are delivered to an on call doctor, they will be erased from the Web Server. As stated above, these images will still be in their other destinations (i.e., diagnostic workstations or archive) for later use. Form 330-4-001 Rev. 05 Page 11 American Medical Sales, Inc. – Catella Diagnostic Workstation User Manual CHAPTER 4 – PRIMARY IMAGE CONTROL TOOLS . All Catella image controls may be accessed through the Activity Menu. (See Chapter 2 for trackball control). The most commonly used controls (ZOOM, PAN, WINDOW/LEVEL) may also be accessed using your trackball or mouse buttons. = Commands issued through the Activity Menu are presented in this manual in capital letters, i.e. CLICK on ROTATE. Monitor Control Catella’s Activity Menu is located at the bottom of each screen. It governs the images on that screen. A column of thumbnails representing each image series available for the current patient is located on the left side of the left screen and on the right side of the right screen. These default locations may be moved and a new user-specified layout may be defined. See Chapter 5 description of “Move/Resize” feature for more details on customizing your screen configuration. The location of the cursor indicates which monitor is the current “active monitor”. The “active monitor” is the one that will be controlled by the associated Activity Menu. Figure 8 shows the default layout of the Activity Menu. Figure 8: Default Layout of Activity Menu Primary Image Control Tools Zoom Images are placed on the monitors so that they use as much of the screen as possible. (MR, CT, and Angiography multi-frame images are presented in Stack mode.) Method Trackball 1. 2. Activity Menu 1. 2. Enlarge Image Click on the right button until Zoom Icon appears. Depress and hold left button and move cursor up. Click on ZOOM in the Tool section of the Activity Menu. Depress and hold left button and move cursor up. 1. 2. 1. 2. Shrink Image Click on the right button until Zoom Icon appears. Depress and hold left button and move cursor up. Click on ZOOM in the Tool section of the Activity Menu. Depress and hold left button and move cursor down. Once the trackball icon has changed to the ZOOM icon, you can enlarge and shrink the image using the left button and trackball without returning to the Activity Menu. Controlling Zoom Using Only the Trackball: Holding the left button down and simultaneously moving the trackball so that the icon moves towards the top of the screen will zoom the image to a larger size. Holding the left button down and simultaneously moving the trackball so that the icon moves toward the bottom of the screen will zoom the image to a smaller size. Form 330-4-001 Rev. 05 Page 12 American Medical Sales, Inc. – Catella Diagnostic Workstation User Manual Pan Once the image is enlarged beyond the monitor’s ability to show it in its entirety, you may wish to move the image to a new area of interest. Method Trackball 1. 2. Activity Menu 1. 2. Move Image Right or Left Click on the right button until Pan Icon appears. Depress and hold left button and move cursor right or left. Click on PAN in the Tool section of the Activity Menu. Depress and hold left button and move cursor right or left. 1. 2. 1. 2. Move Image Up or Down Click on the right button until Pan Icon appears. Depress and hold left button and move cursor up or down. Click on PAN in the Tool section of the Activity Menu. Depress and hold left button and move cursor up or down. Once the trackball icon has changed to the PAN icon, you can move the image using the left button and trackball without returning to the Activity Menu. Controlling Pan Using Only the Trackball: Holding the left button down and simultaneously moving the trackball so that the icon moves in the direction you wish to move the image will complete this function. Wherever you grab the image, that point will be the central point of adjustment. The hand icon reduces slightly in size when you activate the pan movement. Window/Level Window and Level values can be adjusted “on the fly” with the trackball. All options for Window/Level are accessed from the Activity Menu. Once the trackball icon has changed to the WINDOW/LEVEL icon, you can window/level the images without returning to the Activity Menu. Controlling Window/Level with only the Trackball: Holding the left button down and simultaneously moving the trackball so that the icon moves up or down changes the window values of the image. The image will change as you move the icon. Moving the icon up lowers the window number (compresses the window), which darkens the screen. Moving the icon down increases the window number (expands the window). Holding the left button down and simultaneously moving the trackball so that the icon moves to the right or left changes the level value of the image. The image will change as you move the icon. Moving the icon to the left increases the level value. Moving the icon to the right decreases the level value. Moving the icon in a diagonal direction will change both the window and level values as indicated in the chart below. Icon Movement Right and Up Right and Down Left and Up Left and Down Window Value Higher Lower Higher Lower Level Value Higher Higher Lower Lower Advanced Window/Level Options: Advanced WINDOW/LEVEL features may be selected from the Advanced WINDOW/LEVEL Option Box. See the figure below. Its default location is to the left of the Activity Menu. Form 330-4-001 Rev. 05 Page 13 American Medical Sales, Inc. – Catella Diagnostic Workstation User Manual Figure 9: Advanced WINDOW/LEVEL Option Box Manual Control using Slider Bars: Use the trackball cursor to move the slider bars up or down to increase or decrease the respective values. The numerical interpretation is displayed at the center-bottom of the window. Select Preference Value: Catella allows each doctor to set preset values for each imaging modality (CR, CT, MR, NM, RF, US, XA). See Chapter 10 on how to set these values. If presets have been entered for this imaging modality, they will appear in the preference table. To change images to a set of specific preset values, go to the preference table and click on the desired description. If there are more options than can be displayed in the table a scroll bar will display. By clicking “Use File Values” label, you can instruct the system to use the DICOM file values as sent to Catella from the modality. Contrast Equalize: This adjusts the contrast of an image so that each intensity range has approximately the same number of pixels in it. This algorithm may assist the health professional in visualizing subtle differences in the anatomy. Activate by pressing the CONTRAST EQUALIZE button. Optimize: This process helps to assure that there is no pixel saturation in any area of the image. The minimum value and maximum value of the window is determined, and the image is displayed with the level set to the middle of this range. Activate by pressing the OPTIMIZE button = The image is set to these new window and/or level values as soon as the option is selected and the same settings will apply to all images in the same series. Reset: This returns the image to the window and level settings specified in the DICOM header file. Invert: The Invert function reverses the black/white scale for the selected image. Form 330-4-001 Rev. 05 Page 14 American Medical Sales, Inc. – Catella Diagnostic Workstation User Manual CHAPTER 5 – MORE ADVANCED TOOLS The basic image tools were addressed in Chapters 2 and 4. Chapter 5 focuses on Catella’s advanced imaging tools. Types of Controls The Catella system divides commands into four categories. These are: 1. Image manipulation - Tools that alter the display of the image, such as zoom, pan, rotate, etc. 2. Image status - Tools that allow movement of files or show information about the image file, such as entry of diagnostic status or display of DICOM header information. 3. Worklist Management – Tools that allow you to access the list of images to be read and to allow random access to this list. Functions such as Query/Retrieve are included in this tool group. 4. Miscellaneous – This category includes functions such as user options, printing, and system management. Advanced Image Manipulation Tools Rotate The Rotate function turns the image 90o in a clockwise direction each time the function is selected. Click on ROTATE on the Activity Menu. Flip Image The Flip Image function flips the image 180 o on the vertical axis. Click on FLIP IMAGE on the Activity Menu. Reset The Reset function returns the image on the active image area to its DICOM Window/Level settings as sent from the modality. Click on RESET on the Activity Menu in the Window/Level Section. Invert The Invert function reverses the black/white scale for the selected image. Click on INVERT on the Activity Menu in the Window/Level Section. Window/Level The Window/Level function changes these values for the image displayed on the active monitor. See Chapter 4 for details of how to access this function using the Activity Menu. Measure Catella allows you to measure distances and angles for any image. Measurements in Hounsfeld Units are also available for MR images. If the DICOM file has measurement calibration information, Catella will allow you to begin measurement processing directly. If you wish to activate either the angle or Hounsfeld Units function, click on the appropriate option in the “Measure” box on the Activity Menu. (See the figure below.) Form 330-4-001 Rev. 05 Page 15 American Medical Sales, Inc. – Catella Diagnostic Workstation User Manual Figure 10: Measure Method Selection Box If measurement information is not sent with the DICOM file, Catella will ask that you calibrate distance before conducting a measurement. Use something of known size (i.e., a label). An information box similar to the figure below will appear. Figure 11: Length Measurement Information Box To draw a measurement calibration line, select a location on the image, press and hold down the left trackball button and, while holding it down, move the trackball in either a horizontal or vertical direction. When you release the left button, Catella will indicate the line that you have just drawn and will request you supply its length. Use the slide bar to adjust this as desired. Figure 12: Length Measurement Information Box with Calibrated Result Form 330-4-001 Rev. 05 Page 16 American Medical Sales, Inc. – Catella Diagnostic Workstation User Manual Type of Measurement Length Angle Hounsfeld Units – Single Point Hounsfeld Units - ROI 1. 2. 3. 4. 1. 2. 3. 4. 5. 6. 7. 1. 2. 3. 1. 2. 3. 4. Method Click on the DISTANCE button Move cursor to start point. Press and hold left trackball button. Drag cursor to desired end point and release button. Measurement appears on monitor. Click on the ANGLE button. Move cursor to vertex of angle. Click left trackball button. Move cursor along one leg of angle. At desired end of leg, click left trackball button once. Move cursor to desired second point. The second leg of the angle forms as you are doing this and the angle measurement appears on the monitor. To set the angle, click on the left trackball button again. Click on HOUNSFELD UNITS button. Move cursor to area of interest. Unit values will appear in the measure box. Click on HOUNSFELD UNITS button. Move cursor to area of interest. Holding the left button down, draw a circle or ellipse to create the Region of Interest (ROI). The average, maximum and minimum values for the ROI will appear in the measure box. The figure below shows an image on a monitor with the three types of measurements. = When calculating ROI values, all pixels on or inside the perimeter of the circle or ellipse are used. Figure 13: Views of Measurement Windows Showing Distance, Angle, and Hounsfeld Units - ROI. Many measurements can be made on an image. To clear measurements from the screen, select Annotate, edit, select measurement and then delete. = When using a color monitor, each type of measurement is displayed using a different color. Distance – blue. Angle – yellow. Hounsfeld Units – red. Annotate Occasionally the radiologist will wish to highlight and annotate images in a study so that this information can be transferred to the referring physician. Select ANNOTATE from the Activity Menu. A special Annotation submenu will appear on the left side of the Activity Menu. Form 330-4-001 Rev. 05 Page 17 American Medical Sales, Inc. – Catella Diagnostic Workstation User Manual Figure 14: Annotate submenu. You may annotate an image with an ARROW, a CIRCLE or with TEXT overlay. The process is similar to that used in any common drawing program. Select the mode you wish to enter by pressing one of the three “Annotation” buttons. Move the cursor to the area of the image you wish to highlight. When using the ARROW press the left mouse button and, while holding the button down, move the mouse towards the area of interest. Release the mouse button where you wish to place the arrow’s point. When using the CIRCLE press the left mouse button and, while holding the button down, move the mouse towards the area of interest. Release the mouse button when the circle has enlarged to cover the area of interest. When using the TEXT press the left mouse button at the location you wish to begin the text comment to draw a text box. Begin to type and press the <Enter> key if you wish to start a new line. To delete any typing, select it and press the delete key. Once you have completed your annotation, you can edit it by pressing the Edit button. If the Save button is pressed, the screen is saved. If your network is using the Catella Scribe™ transcription software, the image automatically will be added to the report. You can also modify the resolution and the compression factors used in saving these images to your reports. The “write resolution” window indicates whether bits are to be skipped in the saving process. Compression makes the image file size smaller, but it is lossy compression (meaning that image information is lost). Physicians can try various settings to determine their preference for the output quality they need for their referring physician reports and output files. Remember these resolution and compression selections do not affect the images saved on the archive; only the images used in your reports and images saved to files for other, non-diagnostic work. = Annotation is not saved to the archive. (Check before final release–saving may be in first version.) = If you change the file name, the image will be saved as a “.jpg” file under the name you give it. This will allow you to manipulate the image in other computer programs, such as teaching files. If you do not change the name, the file automatically will be picked up by the Catella Scribe system. You can delete any of the annotations simply by highlighting them and pressing the DELETE button. Save as DICOM – Saves image in DICOM format. Form 330-4-001 Rev. 05 Page 18 American Medical Sales, Inc. – Catella Diagnostic Workstation User Manual Thumbnails Figure 15: Thumbnail Column shown on left side of screen. The Thumbnail Column gives you a quick idea of how many series of images are available for the patient on your workstation. As seen in the figure above, all images in a series are presented by the first image in each series. The series currently being displayed in the Main Image Area is highlighted in outline in the Thumbnail Column. To display a different series, simply click on a different thumbnail in the column. If more series are available than can be displayed in this vertical area, controls are provided to move up and down the column. Image Details Catella allows you display the DICOM “header” information. For readers familiar with the individual entries in these records, a vast amount of detailed information about how the image was captured and, in some cases, patient information can be found. The figure below shows one page of the image detail file. Figure 16: Example of Display of Image Details on a Monitor. Form 330-4-001 Rev. 05 Page 19 American Medical Sales, Inc. – Catella Diagnostic Workstation User Manual Method Activity Menu 1. 2. 3. Show Image Details Click on IMAGE DETAILS Use the scroll bar on the display or the Page Up and Page Down keys on the keyboard to display additional sections of these details. Click on OK to close Image Details Window. Print Image You may print the images being reviewed on any monitor by selecting the Print Image button from the Activity Menu. When this button is selected a submenu will appear as per the example below. The available destination printers will be listed here. See your system administrator if you would like additional printer selections added. Figure 17: Printer Selection Screen. Method Activity Menu Print Image Click on PRINT IMAGE on the Activity Menu. Creating a CD You can create copies of patient images on a CD if your network includes a Catella CD Burner System. The CD will include both the images and viewing software. The CD will “self-play” when inserted into most Windows® based PC’s. If your network includes the advanced version of the Catella CD Burner software, it will also automatically print a CD label including information about your institution, patient name and date of creation. (See the Catella CD Burner manual for more details.) Logout Logout allows you to end your reading session. This will take you back to the doctor login screen and signals Catella that you are no longer actively reading images. Where the Catella Workstation can be accessed by more than one doctor, this is an important safety step to prevent misreporting of the reading physician. Further, HIPAA requirements may make this necessary, depending on physical access to the workstation. Method Activity Menu Close Worklist Window Click on LOGOUT on the Activity Menu. See Chapter 12 for more details. Form 330-4-001 Rev. 05 Page 20 American Medical Sales, Inc. – Catella Diagnostic Workstation User Manual Quad Display Catella allows you to easily reconfigure the layout to display multiple series on one screen. Simply click on the Quad Display button. The Main Image Area will automatically divide into four equal viewing areas. The first image of the first four series will be loaded into each area. The active quadrant will be outlined in red. To designate a quadrant as “active” move the cursor into the quadrant and left click. This new quadrant will now be outlined in red. Figure 18: Quad Display. Also note that for studies that include scout images, the scout image for each series appears in the lower right corner of each frame, with locator lines. Method Activity Menu = Quad Display Click on Quad Display on the Activity Menu. When the Quad Display is activated, the button label resets to SINGLE IMAGE. Press this button to deactivate Quad Display. Overlay Text Overlay allows the doctor to see some of the modality’s settings (i.e. mag strength, slice thickness, etc.) Method Activity Menu Overlay Click on Overlay on the Activity Menu. Locator Select Allows the user to manually select a more relevant image to use as the scout image. Form 330-4-001 Rev. 05 Page 21 American Medical Sales, Inc. – Catella Diagnostic Workstation User Manual To select a new scout, click on LOCATOR. A selection of new possible scout images, along with relevant DICOM data will appear along the top edge of the monitor. To select a new scout, simply click on one of the images. Figure 19: Locator Selection. Method Activity Menu 1. 2. 3. 4. Locator Select Click on Locator Select on the Activity Menu Review possible new scout images from those displayed. Click on desired image. Close locator window by clicking “CLOSE”. Move/ Resize This function allows menus or image windows to be moved around on the screen and resized. By clicking the MOVE/RESIZE button a sub-menu will appear in the lower right corner of the Activity Menu. This menu allows you to move and resize the various elements of the monitor screen The figure below identifies the elements that can be moved and resized. Form 330-4-001 Rev. 05 Page 22 American Medical Sales, Inc. – Catella Diagnostic Workstation User Manual Main Viewing Area (Single or Quad Viewing) Thumbnail Column Window/Level and Tool Activity Menus Patient Information Advanced Options on the Activity Menu To move any element, click on MOVE, click on the element and drag it to a new location. Similarly, to resize any element, simply click on RESIZE, click on the element and drag it left, right, up or down. Below see two examples. On the left is a resized Main Viewing Area (the top image area has been enlarged to take up the full width of the screen) and on the right is a Thumbnail Column moved to the center of the viewing area. Note: the Thumbnail Column can be moved right or left, but it cannot be resized. Figure 20: Examples of how MOVE/RESIZE functions. Form 330-4-001 Rev. 05 Page 23 American Medical Sales, Inc. – Catella Diagnostic Workstation User Manual 3D The Catella Diagnostic Workstation optionally supports 3D imaging. When viewing a study, you may press the 3D button to invoke 3D viewing for this image set. In most installations, the third party 3D package will be installed on the Catella Diagnostic Workstation so that you may use the same mouse and keyboard controls to operate the 3D program. The 3D software may be viewed on a dedicated monitor (usually a color monitor). Simply move the cursor from the Catella image screen to the 3D screen to operate the 3D software. Form 330-4-001 Rev. 05 Page 24 American Medical Sales, Inc. – Catella Diagnostic Workstation User Manual CHAPTER 6 – WORKLIST The worklist displays the names of patients whose images are pending to be read as well as those whose images have been read. The figure below gives an illustration of a typical worklist. Catella lists patient name, number of images for this case, and the imaging modality. If there are more cases than can be listed in the assigned space, a scroll bar will appear to the right of each section. Figure 21: Worklist. Prefetch Prefetch requests are generated by Catella workstations and need no connection to RIS or HIS systems. The prefetch is automatically generated when an image is presented to Catella that represents an image for a new patient or new modality for the patient. The request is user-definable to include the most recent study(ies) with or without matching the current modality. Since the Catella workstation may generate prefetch requests without knowing which doctor will read the images, the choices are for all doctors using the Catella workstation. Images generated within the last 24-hours will NOT be automatically retrieved from the archive in a prefetch. They should already be on the Catella workstation that generated the prefetch request. The information that controls the type of prefetch that will be conducted is located in the digams.ini file. To modify this, please contact your system administrator. Prefetch may be set as follows: ALL - Returns all previous images. Form 330-4-001 Rev. 05 Page 25 American Medical Sales, Inc. – Catella Diagnostic Workstation User Manual MRS# - Returns the most recent studies, where “#” is a single digit that indicates how many studies to return. LMO# - Returns the most recent studies with the same modality, where “#” is a single digit that indicates how many studies to return. Sortable Worklist When a case is diagnosed, the patient’s name will move from the Pending Patients Worklist to the Completed Patients Worklist. You may view images from the Completed Patients Worklist, as well. After a few days, patients’ names will be automatically moved from the Completed Patients worklist to a Local Archive on the Catella workstation. This allows fast access to recent images, but keeps the information on the worklist manageable. After a few more days (the number is determined by settings for your site), the images are automatically deleted from the Local Archive also. = Catella’s straightforward worklist design has a purpose. It increases your productivity. Keep in mind that the more information displayed, the more time you will spend reviewing it. Limit your worklist information to the bare minimum necessary. Remember that you can always bring up DICOM Image Details if you need more information. You may also sort the worklist. You can sort by any of the columns shown. As with other “Windows” style programs, click on a column heading to sort in ascending order. Click a second time to change the sort to descending order. The VIEW option allows you to select to see pending or completed studies. The COLUMNS option allows you to select the columns to be displayed for the two different types of studies. The displayable columns are: = = Patient ID Patient Name Institution Name Time Modality Stat (Marked as emergency) Keep in mind that the DICOM standard does not tell how many images are in a series. Therefore, if a new study is being sent to your workstation, give it time to arrive. If you are reading a study and receiving the warning that more images are arriving, it is best to move on to another patient and allow time for your network to deliver all the images before returning to that patient. Note: If your local archive is nearly full, the following warning message will appear on the worklist screen: “Disk Drive Almost Full! Please Delete Some Patients.” If you do not know how to do this, see your systems administrator. The bottom section of the worklist provides other user functions. These are described below. To select a patient case to view, use these commands. Select Mode When in the Select Mode, the Worklist can be used to call up patient images. The title on the top of the Worklist indicates the mode (Select or Delete). Method Activity Menu 1. 2. Form 330-4-001 Rev. 05 Viewing Cases using the Worklist Click on WORKLIST on the Activity Menu Click on name of patient to view case. Page 26 American Medical Sales, Inc. – Catella Diagnostic Workstation User Manual Cancel The cancel button is used to close the worklist window. Method Activity Menu Close Worklist Window Click on CANCEL Delete Mode The Catella Workstation deletes cases from your worklist in two ways. First, Catella will automatically remove all cases that have moved to the Completed Patients worklist after a given period of time. (See your system administrator for details.) Second, cases can be deleted manually. Manual deletion should not normally need to be done. To manually delete a case, click on the DELETE MODE button. (Note that the button will now say SELECT MODE. Clicking on the SELECT MODE button will return the Worklist to the select mode.) Next, click on the patient’s name. A confirmation window will appear. To confirm your desire to delete this case, click on DELETE. To stop the deletion, click on CANCEL. Deleted images will be moved to the Local Archive, so they can be quickly retrieved in case of erroneous deletion. Query/Retrieve Catella interacts with databases at your institution through a DICOM-compliant Query/Retrieve interface. This interface knows how to translate your requests for information into a form that the database understands. The database knows how to transfer your requests to Catella. In some cases this interface is provided by your institution, in some cases by another manufacturer’s component, and in some cases by American Medical Sales. = = Important definitions: Query is the act of searching a database to see which images are available from that source. Retrieve is the act of pulling the selected images to the Catella workstation. In most cases, images are automatically sent to your workstation based on your institution's protocols. The amount of time it takes to retrieve images on-demand depends on your network and its configuration. In general, on-demand Query/Retrieve will reduce your efficiency. If your system is not pre-loading the historical images you need, speak to your system administrator. Catella will allow you to open another case for review while the selected images are being received. You can view the retrieved cases later. The easiest method to retrieve past patient images is to bring them all to your workstation. To do this, follow these simple steps: Step 1: Click on QUERY on the Worklist Window. Step 2: The Query Window will appear. (See the figure below.) The name and ID of the current patient will appear in the Query Info Name box. If you wish to query for a different patient, click on the CLEAR PATIENT INFORMATION button. Then fill in a new name or ID number. Form 330-4-001 Rev. 05 Page 27 American Medical Sales, Inc. – Catella Diagnostic Workstation User Manual Figure 22: Query Window Step 3: = = Click on the QUERY (PATIENT LEVEL) button. The current status of your query will appear in the STATUS line on the lower right corner of the Query Window. Helpful hints: Entering Partial Names will bring back all patients with those beginning letters. For example, “Smi” will bring back “Smilie”, “Smite”, “Smith”, etc. Entering Partial ID will bring back all patients with those beginning characters. The less specific an inquiry, the longer it will take and the more results will be displayed. Step 4: Select the patient name whose images you wish to retrieve. Click on the GET SELECTED IMAGES button. This will close the QUERY Window and open the WORKLIST Window. When the retrieve is complete, the patient study appears as the last item on the WORKLIST (if sorted by time images have been received). It can then be studied. Overview of Query Levels: Under the DICOM standard, image files are stored in a specific hierarchy. DICOM Hierarchical Level First Second Third Fourth Layers Patient Study Series Image Conducting an Advanced Query Queries are conducted by layer; therefore this process involves multiple steps. Step 1: Click on QUERY on the Worklist Window. Step 2: The Query Window will appear. (See Figure 21.) The name and ID of the current patient will appear in the Query Info Name box. Step 3: If you wish to query for a different patient, click on the CLEAR PATIENT INFORMATION button. Form 330-4-001 Rev. 05 Page 28 American Medical Sales, Inc. – Catella Diagnostic Workstation User Manual Step 4: If you have cleared the patient information, type in a name or ID number. Due to the limitations of most database systems (not Catella), queries will respond with close matches only. Therefore it is preferable to use ID numbers. Step 5: Start your query by clicking on the QUERY (PATIENT LEVEL) button. A filled in Query Window such as that found in the figure below will appear. If no information is available, a warning message will appear in the Status area at the bottom right of this window. While Catella waits for a response, the status of your Query will appear at the lower right side of the window. Figure 23: Query Window returned with Patient Level Information. Step 6: If the Query returns items, you can highlight one or more lines with a click of the left button (<PATIENT NAME>). Click on GET SELECTED IMAGES to begin the retrieval process. This patient’s image files will appear at the end of your worklist when they have transferred to Catella. To remove the highlighted status, click on the name again. Moving Between Levels Catella provides a productive method for moving up or down the DICOM storage hierarchy. The QUERY button (lower left) changes its second line descriptor to describe the next lower level. It starts with “Patient Level”, changes to “Study Level”, then to “Series Level” and finally, to “Image Level”. To move down to the next image level, click on this first QUERY button. To move up a level, click on the UP QUERY LEVEL button. Select Desired Images Now that you have determined the level you wish to retrieve from, pulling the images to your worklist is simple. Click to highlight the line that represents the image(s) you wish to retrieve. You can retrieve more than one item by highlighting as many lines as desired. See example in Step 6, above. You must select at least one item before using the GET SELECTED IMAGES Command. To exit the Query Window, click on the EXIT button. Logout Logout allows you to end your reading session. This will take you back to the Catella login screen and allow another doctor to use the Catella Workstation. Method Activity Menu Form 330-4-001 Rev. 05 Close Worklist Window Click on LOGOUT. Page 29 American Medical Sales, Inc. – Catella Diagnostic Workstation User Manual CHAPTER 7 – MOVING TO ANOTHER PATIENT’S IMAGES Basic Concept Generally, the reader moves to the next patient’s images when he/she has either completed a diagnosis or wishes to reserve judgment for later decision-making (perhaps to review the images with another healthcare professional). In the case of diagnosis work, there will be either a normal or an abnormal finding. Many institutions have standard reports for normal findings. In one study completed by a major film company, it was found that 70% of all images receive a “normal” finding. Catella has used this information to help make you more productive. We have divided the movement function into two parts: give a normal diagnosis and give a specific diagnosis. Diagnosis Catella takes advantage of the power of computers and the available DICOM information to reduce the time needed to complete your reading. To do this, Catella divides the diagnostic process into “normal” and “abnormal” results. OK-Next Since the DICOM image already has the pertinent patient information, you should not need to reenter or repeat this information into your dictation system. Catella also knows who you are and the current date and time. If, in addition, your institution has standard normal reports for an image or study type, this information should be able to be communicated to your transcription system without you having to enter the same information repeatedly. Catella, when properly interfaced with your RIS, HIS, or transcription system, makes the issuance of a normal report as simple as two trackball button clicks. (See your system administrator for exact details as to how the OK-NEXT feature works on your network.) Assuming the OK-NEXT feature is integrated into your network, here are the commands: Method Activity Menu Issuing a Normal Report Click on the OK-NEXT button. (As a default set up, the OK-NEXT button will be disabled if not all images have been reviewed. Your institution may wish to handle this differently. Contact your system administrator.) If Catella Scribe is part of your network, the OK-NEXT command can send a complete report to your transcription station where preset reports can be added. See your system administrator and the Catella Scribe manual for details. Remarks If an abnormal diagnosis is necessary, you can use Catella to record your dictated or typed comments. Simply press the footswitch and Catella will capture your voice dictation to send to transcription. Editing is accomplished through the REMARKS window. (See the figure below.) Since the DICOM image already has the pertinent patient information, you should not need to reenter or repeat this information. Catella, when properly interfaced with your RIS, HIS or transcription system, makes the issuance of an abnormal report much simpler, avoiding duplicate data input and greatly speeding your dictation process. (See your system administrator for exact details as to how the REMARKS feature works on your network.) Form 330-4-001 Rev. 05 Page 30 American Medical Sales, Inc. – Catella Diagnostic Workstation User Manual Figure 24: Remarks Window Note that specific patient information appears on the Word template. This comes from the DICOM record. Click on the OK button when your remarks are complete. Catella allows you to enter and edit both typed and dictated remarks for a single patient, if you wish. Dictation is controlled by the four buttons and a slider control in the DICTATION box at the lower right of this window. Verify Your transcribed dictation can be redirected to a Catella Workstation for electronic verification. Figure 25: Report Verification Screen The figure above shows a displayed report as it would appear on your workstation. The report can be accepted as presented or corrected. To accept the report, CLICK on ACCEPT REPORT. To type corrections to the report, move the cursor to the desired location on the screen and type using the keyboard. To dictate changes to the report, press the foot pedal and dictate the changes. If there are verbal corrections, CLICK on CORRECTIONS and the transcriptionist will get your comments to add to the document. When the report is correct, CLICK on ACCEPT. Form 330-4-001 Rev. 05 Page 31 American Medical Sales, Inc. – Catella Diagnostic Workstation User Manual CHAPTER 8 – MULTI-FRAME IMAGES Setting Display Configurations You may select how you wish to view image series. Image series can be viewed in 1-up or Quad (two-over-two). All imaging tools function with either configuration. Catella automatically adjusts the zoom factor of the images to take advantage of the monitors’ full viewing area. Basic Image Controls (Same as Others) When viewing multiple image files, all the same basic image controls are available. These include Zoom, Pan, Window/Level, Invert, Rotate, Flip Image, Measure and Reset. In addition, loop viewing and image scouts with line locators are available for MR and CT images. Stack Viewing All images on this version of Catella are presented in the stack mode. A series of MR images are shown below in the Quad Display mode. Note that the scout image is shown in the lower right corner of each frame, together with reference lines for the individual image(s) you are viewing. Figure 26: Stack Viewing Mode The following tools are available for stack viewing: Zoom: Enlarges the image. Note that the percentage factor is listed next to the Zoom command (see figure below). Run: Begins automatic stack viewing. The length of time an image is displayed is controlled by slider bar below. Form 330-4-001 Rev. 05 Page 32 American Medical Sales, Inc. – Catella Diagnostic Workstation User Manual Stop: Halts the automated stack viewing. The RUN button changes to the STOP button once the run command is given. Loop: Plays the images in a continuous loop from beginning to end. Sync: You can move multiple series shown on the same monitor together at one time. To do this, engage the “Sync” function on the monitor. Window/Level Source: The workstation displays the stack using the window and level values found in the DICOM file. These may differ for each image. You may use the Window/Level functions to adjust this display as you would for any other type of image. (See Chapter 4.) Figure 27: Detail of Stack Controls In addition, the current frame number and the total number of frames is displayed. Form 330-4-001 Rev. 05 Page 33 American Medical Sales, Inc. – Catella Diagnostic Workstation User Manual CHAPTER 9 – CINE IMAGES Setting Display Configurations You may select how you wish to view cine image files. Images can be viewed in 1-up or Quad (two-over-two). All imaging tools function with any configuration. Catella automatically adjusts the zoom factor of the images to take advantage of the monitors’ full viewing area. Basic Image Controls (Same as Others) When viewing cine image files, all the same basic image controls are available. These include Zoom, Pan, Window/Level, Invert, Rotate, Flip Image, Measure and Reset. In addition, loop viewing and image scouts with line locators are available for cine images. Stack Viewing All images on this version of Catella are presented in the stack mode. Stacked images are displayed in a similar fashion as seen in Figure 27. The following tools are available for stack viewing: Zoom: Enlarges the image. Note that the percentage factor is listed next to the Zoom command (see figure below). Run: Begins automatic stack viewing. The length of time an image is displayed is controlled by slider bar below. Stop: Halts the automated stack viewing. The RUN button changes to the STOP button once the run command is given. Loop: Plays the images in a continuous loop from beginning to end. Sync: You can move multiple series displayed on the same monitor together at one time. To do this, engage the “Sync” function on the monitor. Window/Level Source: The workstation displays the stack using the window and level values found in the DICOM file. These may differ for each image. You may use the Window/Level functions to adjust this display as you would for any other type of image. (See Chapter 4.) See Figure26 for an example of the control section of the Activity Menu. In addition, the current frame number and the total number of frames is displayed. Form 330-4-001 Rev. 05 Page 34 American Medical Sales, Inc. – Catella Diagnostic Workstation User Manual CHAPTER 10 – MPR – Multi-Planar Reconstruction Multiplanar Reconstruction (MPR) is a post-processing technique that reconstructs the axial images into coronal and sagittal anatomical planes. Catella’s MPR program allows the user to: • • • Scroll through the series in the axial, coronal or sagittal image planes. Utilize 2D measurement tools like length, angle, Hounsfeld units; Complete annotation. Screen Layout Below is the default screen layout. Note that each view is appropriately labeled: axial, coronal or sagittal. Figure 28: Typical MPR screen presentation. Screen Layout Using MPR is simple. Move the cursor to any one of the images. Once over the image, the cursor changes to a set of “cross-hairs”. When the left trackball button is pressed the center of the cross-hairs becomes the point of the cursor. As you move the cursor in any direction, the other images shift to show you the reconstructed images for that point. Moving the cursor to one of the other images changes the reconstruction control to that new image. = Keep in mind that Catella only displays actual data points. It does not “interpolate” information. Therefore the best-reconstructed images will be attained using CT or MR series with a large number of image slices spaced evenly and closely together. Form 330-4-001 Rev. 05 Page 35 American Medical Sales, Inc. – Catella Diagnostic Workstation User Manual = = = If a series does not have the number or type of slices necessary to allow for reconstruction (a minimum of four parellel slices is required), the MPR button will be grayed out. In some instances, the original images allow for reconstruction, but with less than optimal MPR views. In these cases, Catella displays a warning, but still allows for MPR. The quality of reconstructed images depends on a number of factors, many of which are beyond the control of the MPR function. It is therefore important that neither treatment nor diagnostic decisions should be based solely on the results of MPR analysis. All notes and cautions regarding the Catella MPR function apply equally to information exported from this product (for example, a CD or printed report). Users should ensure that recipients of this information are familiar with the notes and cautions supplied here. Form 330-4-001 Rev. 05 Page 36 American Medical Sales, Inc. – Catella Diagnostic Workstation User Manual CHAPTER 11 – OPTIONS This area should only be used by the system administrator to add users and to set preferences for these users. Administrative Figure 29: Administrative Tab Adding and removing a user is a system administration function. A special tab is provided for this work and a special password is required. When a new user name is added and confirmed, all settings of the current user are copied to the new user’s profile. When a password is entered, Catella automatically (and without notice to the user) logs out the old user. You can now reenter under the new user name. = Setup Hint: Set up a “Standard Doctor Profile”. While logged into the Standard Doctor, add new doctors. This will give each doctor the same institution-wide settings. The Administrator can also reset the Worklist and the Error Log. Identification Figure 30: Identification Tab This tab allows you to change the entry password for the current user. To change a password, enter the old password and then the new password. Form 330-4-001 Rev. 05 Page 37 American Medical Sales, Inc. – Catella Diagnostic Workstation User Manual Tools Figure 31: Tools Tab Using these options, each user can customize the way they use Catella.. Default Tool: Each user can select the default tool that comes up when they begin each patient. Pan is not an option because images never initially appear larger than can be seen on one monitor. Multi-Frame Images: Choose the default setting to display or not display text overlay. Orientation Markers: Choose to display or not to display orientation markers. Window/Level Preferences Figure 32: Window/Level Preferences Catella allows you to establish preset window and level preferences for each of eight modalities. In addition, you can give each preference a unique description. These will appear when the Window/Level Tool Window is used. . Modality Abbreviation AS CR CT MR NM RF US XA Form 330-4-001 Rev. 05 Full Name Angioscopy Computed Radiography Computed Tomography Magnetic Resonance Nuclear Medicine Radio Fluoroscopy Ultrasound X-Ray Angiography Page 38 American Medical Sales, Inc. – Catella Diagnostic Workstation User Manual To enter preferences, first select the modality, then enter the name, window value, and level value for each preference. These are user-specific preferences, and not applicable across the institution. DICOM/Transfer This tab is used to select the DICOM header information that will appear on the monitor. There are eleven elements to select from. In addition, this tab can be used to reset the DICOM receive engine and to test connectivity to the Scribe or other system. Contact your system administrator prior to using this tab. Figure 33: DICOM/Transfer Tab About Catella This tab shows the current version of your software and other related information. Figure 34: About Catella Tab The Other Basic Buttons at the Bottom OK: Closes the Options Window. Log Out: Ends the reading session, returns the workstation to the Catella logo screens, but keeps the workstation ready for another user log in. Form 330-4-001 Rev. 05 Page 39 American Medical Sales, Inc. – Catella Diagnostic Workstation User Manual CHAPTER 12 – END OF SESSION = Under normal circumstances, end your session with the Log Out command. Logging Off The Logout command can be selected from a number of different locations. These include the Activity Menu, the Worklist window, and the Options window. The Logout Command ends the reading session, returns the workstation to the Catella logo screens, but keeps the workstation ready for another log in. = = Catella should always be left on and not shut down. This will allow the workstation to receive incoming images and to process them. If the Catella Workstation is shut down, images will be received only when the workstation is turned on. The accumulated images that should have been sent to the workstation may take significant time to load and process. Logging out cancels that doctor’s on call status. WHEN A PHYSICIAN’S ON-CALL ROTATION ENDS, THE DOCTOR SHOULD MAKE SURE THAT ALL NEW IMAGES HAVE ALL BEEN RECEIVED AND THEN LOG OUT OF THE SYSTEM SO THAT NO IMAGES WILL BE SENT TO HIM/HER. Shutting Down The Shutdown command can be selected from the Doctor Log In window. Form 330-4-001 Rev. 05 Page 40 American Medical Sales, Inc. – Catella Diagnostic Workstation User Manual CHAPTER 13 – Catella Scan Station Catella Scan Stations operate on standard Windows 2000 operating systems. Each station includes a medical grade film scanner, computer, communications capability, color monitor, mouse, and keyboard. Each station’s communication package is configured during the installation process to meet the requirements of the specific applications and may be configured to encrypt images for transmission over the Internet. The appropriate Catella software components are preinstalled on the system, along with other necessary software. The installation package includes all appropriate software documents and licensing documents for each software component. The figure below shows the Catella Scan Station. Figure 35: Basic Components of a Catella Scan Station. Catella Scan allows you to automate the film scanning process for up to 50 films at one time. More importantly, Catella Scan will format films into the DICOM standard automatically with all required header information. For more information, call American Medical Sales or the consult the Catella Scan manual. Form 330-4-001 Rev. 05 Page 41 American Medical Sales, Inc. – Catella Diagnostic Workstation User Manual CHAPTER 14 – Catella SCRIBE About Catella Scribe The other side of Catella Workstation’s dictation system is Catella Scribe. The Catella Scribe System allows for the receipt of digital data and voice files from a transmitting Catella Workstation and the automation of much of the transcription process. Completed work is pulled back via a digital network (LAN, WAN, telecom, web, etc.) for verification, distribution and storage. Because Catella Workstations operate under the DICOM file protocol, patient, study, and physician information can be automatically populated in transcription reports, saving much repetitive work. Catella Scribe’s preset reports also provide total automation for issuance of standard “normal” reports using the MS Word macro system. Catella Scribe helps to automate non-standard reports by allowing development of preset report templates that can be used in conjunction with voice transcription. This can include use of complete “standard” negative reports or portions of commonly used sections for either normal or abnormal reports. The transcriptionist has full control over the input, editing, and use of these preset report templates. For more information, call American Medical Sales or consult the Catella Scribe manual. Form 330-4-001 Rev. 05 Page 42 American Medical Sales, Inc. – Catella Diagnostic Workstation User Manual CHAPTER 15 – ACTIVITY MENU & TRACKBALL CONTROLS Here is a comprehensive alphabetical list of the controls used by the Activity Menu and Trackball. Command ANGLE CANCEL CLEAR PATIENT INFORMATION CONTRAST EQUALIZE DELETE DELETE MODE DISTANCE DOWN QUERY LEVEL ERASE TO END EXIT FLIP IMAGE GET IMAGES HOUNSFELD UNITS IMAGE DETAILS INVERT LOCATOR SELECT LOGOUT MEASURE MOVE/RESIZE MPR OK OK NEXT OPTIMIZE OPTIONS OVERLAY QUAD DISPLAY/SINGLE DISPLAY PAN PLAY BACK PRINT IMAGE QUERY RECORD REMARKS REWIND RESET ROTATE RUN SELECT MODE SHUT DOWN VERIFY STACK STOP UP QUERY LEVEL WINDOW/LEVEL WORKLIST ZOOM 3D Form 330-4-001 Rev. 05 Description Activates angle measurement tool. Terminates current operation. Active on QUERY screen to perform this function. An option under Window/Level. Selects images for removal. Must be confirmed. Changes selection function on the Worklist. Activates linear measurement tool. Moves query down one hierarchical level. To remove a portion of a dictation. Terminates current operation. Flips image 180o around the up/down axis of the active monitor. Query command to retrieve selected images. Activates Hounsfeld Units measurement tool. Displays DICOM header record for the displayed images. Reverses the black/white scale for the selected image. Pick the image in the series to be used as the scout image. Close reading session. Activates the measure algorithm. Reconfigure the elements of the monitor layout. Multi-Planar Reconstruction Accepts status. Issues normal diagnosis An option under Window/Level. Brings up Option Tabs. Display image data found in the DICOM file for overlay. Shift from 2-over-2 to single image viewing. Activates PAN function. Allows review of recorded remarks. Sends image on active monitor to printer queue. Activates initial query screen; activates query request from query. Starts recording dictated remarks. Activates the dictation window for abnormal diagnosis. To move backwards in dictation position. Returns image on active monitor to its original DICOM settings. Moves image 90o in a clockwise direction. Begins functions. Changes selection function on the Worklist. Close system and go to Windows 2000 desktop. To call up the verification program for reports. Activates rapid stack or cine display algorithm. Halts functions. Moves query up one hierarchical level. Activates the Window/Level algorithm. Displays the current doctor’s worklist. Enlarges or reduces image on active monitor. Invokes the third party integrated 3D imaging package Page 43 American Medical Sales, Inc. – Catella Diagnostic Workstation User Manual CHAPTER 16 – WARNING MESSAGES Here is a list of the warning messages used by the Catella Workstation. A brief description is included in this table. Warning Message Printer Unavailable – Print Job Aborted. Draw a line and set line length, or CANCEL to exit. Invalid Password Network failure – cannot connect to Scribe Server. Form 330-4-001 Rev. 05 Comment Be sure the Scribe Server pc is on and logged in properly. Page 44 American Medical Sales, Inc. – Catella Diagnostic Workstation User Manual CHAPTER 17 – CONTACTING US First Support Contact Your system administrator has completed extensive training in the operation of the Catella Workstation, and its software and hardware components. This person is also most familiar with other aspects of your imaging network. For these reasons, the best place to start looking for assistance is your system administrator. Second Support Contact In most areas of the world, your Catella system has been sold to your facility through an equipment retailer. These medical imaging specialists have been thoroughly trained on the Catella system. They will be particularly helpful in handling the hardware aspects of your system. See your system administrator for their contact information. Third Support Contact Please contact American Medical Sales for support that cannot be provided from either your system administrator or your local Catella reseller. American Medical Sales provides support help 24 hours a day, seven days a week. Please see below for the appropriate contact methods at the time of printing of this manual. Please note the following restrictions: Free telephone support is limited to the limited warranty provided at the time of purchase. Usually this includes 2-hours of support per station purchased. This support must be used within the limited warranty period provided with your purchase. American Medical Sales’ support personnel will log the person calling, location, date, time and length of call. Additional telephone support can be purchased in 5-hour increments. Once your free telephone support has been exhausted or the warranty period has lapsed, whichever comes first, additional time can be purchased. Contact AMS for current rates. When contacting AMS with a service request, the following items are required: 1. 2. 3. 4. 5. 6. Catella Service Contract number, if applicable. The specific time and Catella component exhibiting the issue, and the date/time the issue arose. A full description of the issue (as detailed as possible). When concerning a specific patient file, the specific patient name and ID are essential for analysis. Contact information for a person at both the distributor and user sites who can speak to AMS personnel regarding the issue. Noncompliance with the above can/will cause a delay in initiating a timely response. To service your account remotely, AMS personnel must have full time remote access to your network and all Catella equipment. This will help facilitate effective updating of software programs and resolving service requests. Customers requiring service who have valid service contracts will be billed as per the service contract. Customers without service contracts will be serviced only after acceptable financial agreements have been completed (i.e. credit card authorization, valid purchase order, etc.). Please ask for current hourly billing rates. Diagnostic and repair time are billable and are charged in 15minute increments. Form 330-4-001 Rev. 05 Page 45 American Medical Sales, Inc. – Catella Diagnostic Workstation User Manual How to Contact Us Mailing Address American Medical Sales, Inc. 4928 West Rosecrans Avenue Hawthorne, CA 90250-6616 U.S.A. E-Mail [email protected] Please note that e-mail support is only available during normal business hours. American Medical Sales, Inc. business hours are approximately 6:00AM to 5:00PM Pacific Standard Time, Monday through Friday. E-mail is checked several times each day by our support personnel. This method of inquiry should be used for more in depth questions that are not time sensitive. Fax Number 310-219-3201 Telephone Number 310-219-3200 American Medical Sales uses an advanced voice mail system to support your needs. If a support operator is not available, please listen to the message carefully. Messages for non-urgent inquiries should be left, and will be answered as quickly as possible. If your inquiry is urgent, and an operator does not answer your call, listen to the message to activate our emergency response system. Form 330-4-001 Rev. 05 Page 46 American Medical Sales, Inc. – Catella Diagnostic Workstation User Manual CHAPTER 18 - IMPORTANT NOTES Catella Workstations™ display pre-recorded and previously stored digitized diagnostic images, patient information and associated data using computer systems supplied with the workstation and databases available from the user’s facility. ® The intended purpose of this device is to allow health care professionals to view the electronically available images and other patient information for review, evaluation, and possible treatment planning. The Catella Diagnostic Workstation, Version 4.0, is a medical image and information management system that allows easy viewing, selection, processing, printing, telecommunications, and media interchange of multi-modality medical images from a variety of diagnostic imaging systems. The Catella PACS interfaces to various storage and printing devices using DICOM or similar interface standards. The system is available for diagnostic and non-diagnostic workstations, including workstations designed as web-based, remote viewers or CD-viewer workstations. The software may be installed as a PCbased stand alone system, a software application, a web-based or SDK format, and is designed to be integrated with various DICOM compliant OEM systems. The Catella PACS displays, stores, prints, and telecommunicates images from a number of medical modalities, including but not limited to MR, CT, DR, CR, X-ray, Angiography, Ultrasound, or digitizers. The Catella Diagnostic Workstation, Version 4.0 performs other user-defined post-processing functions, such as multi-planar reformatting of images. The Catella PACS can display processed data from certain FDA-cleared third party image processing systems that create DICOM output. With proper links, the Catella Workstation also can invoke FDA-cleared third party image processing systems for advanced image processing, such as 3D display. It can also access RIS and HIS systems and can be used to review patient information. The Catella Diagnostic Workstation, Version 4.0, is not intended for use for primary diagnostic interpretation of mammographic images. Effective use of the Catella PACS requires adherence to modality imaging protocol requirements and the imaging manufacturers’ instructions regarding maintenance and calibration of the modality imager. Patients must be instructed to avoid movement during their imaging exams to minimize misregistration of images. Achieving satisfactory registration will contribute to optimizing the performance of the Catella PACS. Catella’s measurement accuracy is limited to modality imaging system accuracy and sitespecific imaging techniques. All digital images and associated data displayed by this device are presented for the interpretation of the health care professional, as is any image or patient information. All medical professionals and personnel using Catella must be trained in the use of the device by American Medical Sales or by an authorized Catella dealer. Catella Scan™ is an enabling software and hardware device that allows the digitization of film images. Catella Scan software includes other manufacturers' image grabbing software to capture images from a variety of manufacturers’ film scanning and digitizing devices. Catella Scan temporarily stores these images for transmittal via network communications to storage or viewing devices. Other than to check the basic quality of the image and positioning, Catella Scan is not intended to be used to display the images. Catella Scan is not a diagnostic viewing station and should not be used as such. Catella Scribe™ is an enabling software and hardware device that allows the receiving of voice and text transmissions from other computer systems. Designed to work in conjunction with Catella Workstations, Catella Scribe displays and plays received messages. These messages can be stored, but Catella Scribe is not intended to act as the permanent archive of this information. Catella Scribe can receive physician specified patient image files in .jpg format for purpose of inclusion in reports. It is not Form 330-4-001 Rev. 05 Page 47 American Medical Sales, Inc. – Catella Diagnostic Workstation User Manual intended to be used to display images. Catella Scribe is not a diagnostic viewing station and should not be used as such. These devices can be a software and hardware component in a complex and layered computer hardware and software system, which provides storage, display, and network communications for medical practitioners at various levels of decision making. This manual is not intended to be a definitive explanation of this product. Figures used in this manual are representative only and may vary from what appears on the screen. Attempts have been made to include all user functions, but there may be variations with your installed version. See your system administrator for updates. Although Catella products, where applicable, adhere to the DICOM 3.0 standard and are designed to be compatible with a wide range of other devices that also adhere to this standard, devicespecific variations may occasionally occur which require intervention or adjustment. Should incompatibility appear to an issue, please contact your system’s administrator so that they can contact the responsible vendors to discuss the related issues. = Power outages, power surges, storms, temperature and humidity may affect computer equipment, network equipment and communication devices and networks to which software is associated. It is the responsibility of the user to protect the equipment and provide the environment to handle these possible issues. If you are a third party installer (not the end-user), you are required by the United States of America Food and Drug Administration (FDA) to maintain records relating to the installation and testing of this equipment. These records must be maintained by you for FDA review. It is recommended that these records be kept for the life of the product plus ten (10) years. If the installer is unable to maintain these records at its place of business, the records should be forwarded to American Medical Sales, Inc. at the following address (current as of 2005, confirm address before mailing): American Medical Sales, Inc. Installation Records 4928 West Rosecrans Avenue Hawthorne, CA 90250-6619 United States of America EC REP Our authorized representative is: CEpartner4U , Esdoornlaan 13, 3951DB Maarn. The Netherlands. Tel.: +31 (0)6.516.536.26 Form 330-4-001 Rev. 05 Page 48 American Medical Sales, Inc. – Catella Diagnostic Workstation User Manual CHAPTER 19 - LICENSE AGREEMENTS The SOFTWARE PRODUCT is protected by copyright laws and international copyright treaties, as well as other intellectual property laws and treaties. The Software Product is licensed, not sold. The Grant of License grants you the right to use one copy of the Software Product on one computer. If the computer is connected to a network, this License does not allow you to use the Software Product on other computers on the network. You may not reverse engineer, decompile, or disassemble the Software Product, except and only to the extent that such activity is expressly permitted by applicable law notwithstanding this limitation. Except as noted above, the Software Product is licensed as a single product. Its component parts may not be separated for use on more than one computer. American Medical Sales, Inc. is not obligated to provide any party with the source code of any Software Products. Resellers may sublicense the Software Products to end-users on condition that the enduser may not grant sublicenses, leases or other rights in the Software Products to others. You may permanently transfer all of your rights, under this License only as part of a sale or transfer of the Digital Workstation, provided you retain no copies, you transfer all of the Software Product (including all component parts, the media and printed materials, any upgrades, a copy of this agreement) and the recipient agrees to the terms of this agreement. If the Software Product is an upgrade, any transfer must include all prior versions of the Software Product. Without prejudice to any other rights, American Medical Sales, Inc. may terminate this License if you fail to comply with the terms and conditions of this agreement. In such event, you must destroy all copies of the Software Product and all of its component parts. All title and copyrights in and to the Software Product (including but not limited to any images, photographs, animations, video, audio, music, text incorporated in the Software Product), the accompanying printed materials, and any copies of the Software Product, are owned by American Medical Sales, Inc. or its suppliers. The Software Product is protected by copyright laws and international treaty provisions. You may not copy the printed materials accompanying the Software Product. Limited Warranty: American Medical Sales, Inc. warrants that (a) the Software Product will perform substantially in accordance with the accompanying written materials for a period of ninety (90) days from the date of receipt, and (b) any American Medical Sales, Inc. hardware accompanying the Software Package will be free from defects in materials and workmanship under normal use and service for a period of six (6) months from the date of receipt or for the period of time indicated by the manufacturer of a specific piece of equipment, whether that period is longer or shorter than six (6) months. Any implied warranties on the Software Product or the equipment pieces are limited to these stated periods. American Medical Sales, Inc.’s entire liability and your exclusive remedy shall be, at American Medical Sales, Inc.’s option, either (a) return of the price paid, or (b) repair or replacement of the Software Product or hardware that does not meet this Limited Warranty and which is returned to American Medical Sales, Inc. with a copy of your receipt. This Limited Warranty is void if failure of the Software Product or equipment has resulted from accident, abuse, or misapplication. Any replacement of the Software Product or equipment will be warranted for the remainder of the original warranty period or thirty (30) days, whichever is longer. To the maximum extent permitted by applicable law, American Medical Sales, Inc. disclaims all other warranties, either express or implied, including, but not limited to implied warranties of merchantability and fitness for a particular purpose, with regard to the Software Product, the accompanying written materials, and any accompanying equipment. Form 330-4-001 Rev. 05 Page 49 American Medical Sales, Inc. – Catella Diagnostic Workstation User Manual To the maximum extent permitted by applicable law, in no event shall American Medical Sales, Inc. or its suppliers be liable for any damages whatsoever (including without limitation, special, incidental, consequential, or indirect damages for personal injury, loss of business profits, business interruption, loss of business information, or any other pecuniary loss) arising out of the use of or inability to use this product, even if American Medical Sales, Inc., the supplier, or the buyer has been advised of the possibility of such damages. In any case, American Medical Sales, Inc. and its supplier’s entire liability under any provision of this agreement shall be limited to the amount actually paid by you for the Software Product and equipment. = The License Agreement applicable to your product is located on the Catella software accessible in the Options area. The wording may differ from the wording in this manual. Copyright © 1998 - 2005 by American Medical Sales, Inc. All rights reserved American Medical Sales®, AMS®, Catella ®, Catella Scan™ and Catella Scribe™, Catella Reports™, Image Armor™, CatellaVue™, CatWeb™, Activity Menu™, and Audio Attendant™ are trademarks of American Medical Sales, Inc. All other trademarks, trade names, products or services are registered trademarks of their respective companies. Form 330-4-001 Rev. 05 Page 50 American Medical Sales, Inc. – Catella Diagnostic Workstation User Manual APPENDIX A – DIGAMS.INI FILE The digams.ini file (located in the C:\AMS\Cat4 DataElements\ folder) contains information about the system you are using, the locations of the equipment from which you wish to receive images and send dictation files, and options related to configuration of the workstation. It is very important that you set this file up correctly. It is recommended that you have a staff member familiar with editing these types of files complete this work. Below is a typical digams.ini file. Bill is this correct? 1 2 1200 1600 linear 1 days 5 days ; this computer's id for locking/diagnosed messages ; Number of screens ; pixel width of single screen ; pixel height of one screen ; configuration is rectangular or linear ; autodelete age cutoff, number followed by "hours" or "days" ; Local archive for x days ("NONE" = no archive) 3052565 Admin 600 NONE NONE ; # seconds with Echo test pending before reset StoreSCP (>0) ; Host Name for RIS system for Reports (HL/7) (or TCP/IP address) ; RIS Server (HL/7) Port [Display Fields] 0010,0010 0010,0020 0010,0030 0008,0020 0008,0090 0008,0080 ; enumerate display fields desired ; patient name ; patient id ; patient birthdate ; study date ; referring physician ; institution name [Volume Levels] 3 ; Pre-Recorded Volume Level (0-9) 9 ; Dictation Volume Level [Worklist Order] NoSkip ; skip or noskip patients without current images (RIS or 24 hours) 24 ; If no RIS, Number of hours an image is aged before it is considered 'diagnosed' for worklist skip [Scribe] none ;192.168.0.30 ;None ; scanner ; TCP/IP address for SCRIBE Server (or Reports Machine) NONE for none 25 12341 ; Scribe port (unique for each Catella) Figure 36: Example of first part of digams.ini file. Form 330-4-001 Rev. 05 Page 51 American Medical Sales, Inc. – Catella Diagnostic Workstation User Manual [Printers] none ;hp840c ; Verified Report printer (or NONE) none ; Codonics NP-1660M ; Summary Report printer (or NONE) hp4500 ;none ;Codonics NP-1660M ; Image printer (or NONE) (may be multiple printers - until blank line) Fuji (DICOM) ; 2nd Image Printer - Dicom [Catella DICOM] ; Information on main Catella DICOM engines 37703 ; Archive Hub DICOM listening port (= "X" for DICOM Disabled) no ; YES/NO for encrypted reception 36877 ; Web Server Port yes ;encrypted reception NO ; DICOM window displayed (Yes or No - Yes for diagnostics) [PreFetch] ; Rules for Prefetch-one rule per machine. ; (None) get none, (All) All Archived Images, (LMB) Last Study of same Modality ; (same body part if possible) NONE [Gateway Dynamic Address Information] ; 3 lines to send message to Gateway informing it of the Address of this workstation (blank line ends this section) Cat 1 ; line 1 is Friendly name as registered on Gateway 192.168.0.24 ; line 2 is Gateway IP address 12222 ; line 3 is Gateway Dynamic address port [Date Format] US ; US is MM/DD/YYY, EU is DD/MMM/YYYY [Promote Small Images] No ; Should we promote 256 by 256 images to 512 by 512? [No Activity Time-Out] 20 ; HIPAA when nothing happens, log out ; minutes [Image Server Info] ; where to get images from CATWS1 ; AE Title of calling application 10.10.10.9 ; Host Name for Image Server (or TCP/IP address) 36872 ; use 106 for Dicom Q/R CATELLA PROPRIETARY ; image server manufacturer ACME_STORE ; Called AE Title (Image Server AE Title) 36873 ; TCP/IP Push Port (only for Proprietary) (or NONE) 36877 ; Push Port – can be marked “Archived” [Move DICOM] ; information on DICOM MOVE receive engine ACME1 ; AE title to find MOVE engine 10040 ; MOVE port Figure 36: Example of second part of digams.ini file. = It is recommended that you make an electronic copy and a printed copy of this file, once you have made your desired changes. This will save you much time in the future should this file need to be reestablished. Form 330-4-001 Rev. 05 Page 52 American Medical Sales, Inc. – Catella Diagnostic Workstation User Manual APPENDIX B – DOCTORS.INI FILE The doctors.ini file (located in the C:\AMS\Cat4 DataElements\ folder) contains information about the doctors’ preferences and options related to configuration of the workstation. It is very important that you set this file up correctly. It is recommended that you have a staff member familiar with editing these types of files complete this work. The figure below shows a typical doctors.ini file. Bill needs to check before final release. Last: Goody First: Oscar Password: olives Default Tool: Window Display Multi: False key: SAMPLE05.key Figure 37: Example of doctors.ini file. = It is recommended that you make an electronic copy and a printed copy of this file, once you have made your desired changes. This will save you much time in the future should this file need to be reestablished. Form 330-4-001 Rev. 05 Page 53 American Medical Sales, Inc. – Catella Diagnostic Workstation User Manual Index 3 3D, 24 A Activity Menu, 5, 6, 12 Adding and Removing Users, 37 Annotate, 17 C Cancel, 27 Catella SCRIBE, 42 Catella Workstation, 4, 9 CD, 20 Clear Patient, 28 CONTACTING US, 45 Contrast Equalize, 14 D Delete Mode, 27 Diagnosis, 30 DICOM, 2, 15, 19, 27, 28, 29, 30 DICOM Print, 8 DICOM Push, 7 DICOM Query/Retrieve, 7 Digams.ini File, 51 Display, 4 Display Configurations, 32, 34 Doctors.ini File, 53 F Flip Image, 15 G Get Selected Images, 29 H I Identification, 37 IMAGE CONTROL TOOLS, 12 Image Details, 19 Invert, 14, 15 K Keyboard, 6 L LICENSE, 49 Locator Select, 21 Logging Off, 40 Logout, 20, 29 Loop, 33, 34 M Main Image Area, 5 Monitor Control, 12 Move Resize, 22 O OK-Next, 30 On Call, 10, 11 Optimize, 14 Overlay, 21 R Remarks, 30 Reset, 14, 15 Rotate, 15 Run, 32, 34 S Scan Stations, 41 Select Mode, 26 Shutdown, 40 Shutting Down, 40 Slider Bars, 14 Sortable Worklist, 26 Stack Control, 5, 6 Stack Viewing, 32, 34 Stop, 33, 34 Support, 45 Sync, 33, 34 T Thumbnail Column, 5 Thumbnails, 19 Tools, 38 Trackball, 5 U Up Query Level, 29 V Verify, 31 P Pan, 5, 6, 12, 13 Passwords, 9 Prefetch, 25 Preset Value, 14 Print Image, 20 Q Quad Display, 21 Query, 28 Query (Patient Level), 29 Query/Retrieve, 27 W WARNING MESSAGES, 44 Window/Level, 5, 6, 12, 13, 14, 15, 38 Worklist Management, 15 Z Zoom, 5, 6, 12, 32, 34 Hounsfeld Units, 15 Form 330-4-001 Rev. 05 Page 54