1
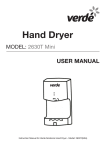
Hand Dryer
MODEL: 2006H Maxi
USER MANUAL
Instruction Manual for Verde Solutions Hand Dryer - Model: 2006H.(Maxi)
WARNING
Misuse of this product or failure to follow the manufacturer’s guidelines as to correct installation and
use, may lead to serious personal injury, property damage and a voiding of the warranty.
1. Do not open, modify or disassemble the unit. This may lead to electric shock. There are no user serviceable parts inside.
2. Do not hang from the unit or place any objects on it.
3. Please use a dedicated power outlet.
4. Drain Tank and air filter must be installed
5. After power is connected, please wait 10 seconds before switching on.
6. Environmental Protection-Waste electrical products should not be disposed of with
household waste.
Please recycle where facilities exist.
Check with your local authority for recycling advice.
FEATURES
1. Hygienic, Easy to Use
With an automatic sensor control, our hand dryer is energy efficient and easy to use. The design allows
contactless hand drying effectively preventing cross bacterial contamination.
2. Smart Control, Energy Saving
Using the most advanced IR sensor technology, plus advanced electronic control systems, our product
delivers efficient, reliable and accurate performance.
3. No Mess, Less cost.
With our product there are no messy wet paper towels to clean up and nothing for vandals to clog drains
with. The cost saving of our product over paper towels is enormous.
4. Stronger Air, High Speed Drying
Effective hand drying is achieved in a little as 10 seconds by the use of motor and fan speeds of as high as
24,000 rpm.
5. Safety Guaranteed
With over-current protection fitted as standard, users can be confident of safe and incident free operation.
Auto-stop function, the built in timer will stop the unit after 25 seconds of continuous operation.
6. Easy Installation and Maintenance
Our product is designed for ease of installation requiring only standard fixings and simple maintenance
routines. Caution! Power must be shut off before any maintenance procedure is commenced. Our products
are suitable for use in most high traffic public venues including hospital, medical and science and technology
facilities.
INSTALLATION INSTRUCTIONS
Warning
1.
2.
3.
4.
5.
6.
Do not use in places where there is condensation or water build up.
Direct connection of AC line must be carried out by a licensed and professional electrician.
The power must be off for machine installation.
Hand dryer must be installed indoors. A clean and unobstructed environment is required.
The power is 220v-240v/50Hz AC.
Unauthorized disassembling and reassembly is not permitted, it may lead to fire, electric shock, product failure, voiding of warranty etc.
Attention
1.
2.
3.
4.
5.
6.
The dryer should be installed at least 400mm from other appliances or fixtures. Do not install in positions where bright light or highly reflective surfaces may interfere with the sensor operation..
Product must be installed on strong flat wall to avoid possible dislodgment that may cause personal injury or damage to the product.
Do not install the product where it may come in contact with corrosive or flammable gases or materials that may cause fire, product or operational failure.
Do not install the product in dusty environments, as it may cause product or operational failure.
The left side of the unit must be installed at least 150mm away from any walls, because the control panel is located on the left.
The bottom of the unit must be at least 150mm higher than the floor or any objects under it.
Installation
Suggested Installation Height
From Floor to Top of Hand Dryer
Male:1000mm- 1100mm
Female:950-1050mm
Electrical Installation Options
Simple electrical connection by plug and lead as supplied. Or can be direct wired by qualified electrician.
1. Unpack the product.
2. Locate the water collection tray and remove it. ( See figure 1 )
3. Locate the air filter compartment and remove it. Locate the security screw inside and remove it to detach the mounting plate from the unit. ( See figure 2 )
4. Fix the metal mounting plate onto the wall, using the expanding screws and plugs supplied. Ensure plate is mounted level.
5. Hang the dryer on the metal mounting plate.
6. Fix the machine securely by replacing the security screw. Replace the air filter and the water collection tray to finish the installation.
1
2
security screw
3
Important Information
After Installation and before operation, please use the Allen key provided and open
the cover of the switch settings box (located on the top left side of the unit) and
ensure the switches are set to the following positions: - Hot-Set to “On”
Speed- Set to “H” You may set to “L” but drying time may be increased.
Power set to “ON” (I) Close switch cover and lock with Allen key. (Keep Allen key in
a safe place for future use) You are now ready to operate your unit.
OPERATION
1. Plug the unit in, switch the power on and wait 10 seconds.
2. Placing hands in the drying compartment will start the unit automatically. Once drying is finished and hands withdrawn the machine stops automatically.
3. For fast hand drying, shake excess water from hands before using the dryer.
4. Rub hands gently together under the air stream.
Operating Precautions
1. Do not interfere with the power mains or leave any objects on the dryer as they may cause malfunction, fire or injury. Do not touch the power mains and switches with wet hands.
2. Children or persons with limited mobility should be assisted or supervised when using the dryer.
3. Ensure water or water droplets do not enter the machine as it may cause a short circuit or fire.
Attention
1. Removing excess water from hands and rubbing together whilst drying in the machine is the fastest and most energy efficient manner to use the dryer.
2. Using the hand dryer to dry wet clothes, towels etc. is not recommended.
ROUTINE CLEANING
• If you wash the air filter with water,
dry it as much as possible.
• Do not expose to fire.
EXTERNAL CLEANING
• Wipe using a damp cloth
• In cases of severe grime, wipe using a damp cloth dipped with neutral detergent, then clean with dry cloth
• Caution!
• Only neutral detergent should be used
• Do not use organic solvent, acid or alkali such as typically found in detergents for bathroom cleaning or
a nylon brush, it could damage the surface.
• Only the cavity for hands should be sterilized with alcohol if required • Only use medical use (<83%) alcohol solution.
• If chemical cloth is to be used, please confirm its scope of application prior to use. • Apply no other sterilization solution as it may damage the machine.
1. Take care to ensure no water penetrated the unit during the cleaning process as it may result in a short circuit.
2. Turning the machine off when not in use for long periods will enhance its life.
3. If any operating problems or unsafe conditions occur switch main power off and call qualified maintenance personnel.
WARRANTY
1. The product is covered by a one (1) year parts and service warranty.
2. 1 year extended warranty on motor and circuit board.
3. Warranty claims must be supported by proof of purchase not older than one (1) year.
4. Warranty is limited to evidence of correct installation and operating environment, normal operation and maintenance performed by qualified personnel.
5. See separate warranty card for full warranty details.
SPECIFICATIONS
Rated Voltage
AC220-240V~
Motor
Brushless DC Motor
Power Rating
1650-1990W
Induction Method
IR Blocking
Protection Class
IPX4
Dimensions
330x220x684
Net Weight
11KG
High Speed 48LS
Air Flow
Low Speed 44 LS
High 69DB
Noise
Low 67DB
PACKAGING LIST
Machine........................................................................................................... 1
Mounting Plate................................................................................................ 1
Screws & Wall Plugs........................................................................................ 6
User Manual (include Packing List and Warranty Card)........................................ 1
Verde Solutions-Australian Owned
Phone: 03 9773 6077
11 Frankston Gardens Drive,
Carrum Downs, 3201 Victoria, Australia.
www.verdesolutions.com.au