1
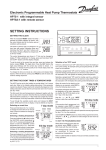
Mains Voltage Operated Electronic Programmable Room Thermostats TP75M with integral sensor. TP75MA with remote sensor. SETTING INSTRUCTIONS SETTING THE CLOCK After the recessed RESET button has been pressed the display appears as shown, with the colon blinking, and all the factory preset conditions will be present. To set the clock to the correct time, press and release the button marked PROG. The digits blink. +1 HR +2 HR +3 HR +1 HR +2 HR +3 HR Press the DAY button (the digits stop blinking) until the correct day number is shown. (1 = Monday). Flap lowered Press and release the + or - buttons to change the time by one minute, or press and hold down to change the time in ten minute steps. When the time is correct press PROG to start the clock and continue setting sequence. SETTING THE OSC PERIOD (IF ENABLED) This display will only appear if the OSC function has been enabled. +1 HR +2 HR +3 HR Use the + or - button to select an OSC period. The choices are 0:30 (30 minutes), 1:00 (one hour), 1:30, and 2:00. The recommended initial setting is 0:30, for more details see the post-commissioning notes in the Installation & Commissioning Guide. If the OSC period is set to 0:00, the function is disabled. ..../continued Press and hold down the + or - buttons to change the event time in ten minute steps. Press and release to change by one minute. Press and release the s button to raise the control temperature by 0·5°C (1°F), or press and release the t button to lower the control temperature by 0·5°C. Press and hold down these buttons to make larger changes to the control temperature. In addition to being able to programme a temperature, it is also possible to programme an OFF simply by pressing the t button until the symbol 'OF' appears on the display. 7 day mode +1 HR +2 HR +3 HR 5/2 day mode +1 HR +2 HR +3 HR Caution: If Off is selected, frost protection is not provided. When set as required press PROG to continue. When all events for the day(s) on display are as required press DAY to show the following day's events. SETTING THE EVENT TIMES & TEMPERATURES The display will appear similar to one of the diagrams on the right, depending on whether the TP75M has been set up for 7 day or 5/2 day mode. The installer will have configured the TP75M to run in 7 day mode or 5/2 day mode by means of a switch on the back of the unit. The first event (time and temperature) is displayed, together with the day (7 day mode) or days (5/2 day mode) when it is active. Note that the day number(s) displayed will reflect the current day. To step through the six available events press and release the NEXT button. Whilst each event is on display, it may be altered as required. continued/.... 7 day mode Control temp. Event No. +1 HR +2 HR +3 HR OR If the previous day's programme is to be repeated, press COPY to repeat those events with just one button press. Day Time 5/2 day mode Event No. Use the +, -, s , t, NEXT buttons to alter the events as required, Control temp. +1 HR +2 HR +3 HR (Pressing COPY when in 5/2 day mode will repeat the events programmed for days 1 to 5 at the weekend). +1 HR +2 HR +3 HR Use DAY and NEXT to check all the events programmed, using the +, -, s , t, NEXT buttons to make alterations to each event as necessary. When all the events for every day are as required, press PROG to return to RUN mode, with the colon blinking. Days Time The heating system will now be controlled to provide the temperatures programmed. Refer to the USER's GUIDE for details of the manual over-rides available during day to day operation. 1 FACTORY PRE-SET PROGRAMME The TP75M range of programmable room thermostats are provided with a factory pre-set programme of switching times and temperatures, so that, once the clock has been set and the TP75M returned to the RUN mode, the heating system will be controlled at the times and to the temperatures of the pre-set programme, as shown in the following table and indicated by the fine line in the diagram below. The instructions on the previous page show how to change the times and temperatures to the users requirements. The table should be used to record the users programme. If the TP75M has been configured for 5/2 day control only days 1 and 6 need be recorded. 7LPH 0RQGD\ :HGQHVGD\ 7KXUVGD\ )ULGD\ 6DWXUGD\ 8VHU V 3UHVH W & ) & ) & ) & ) & ) 3UHVH W & ) 7LPH 6XQGD\ 8VHU V 7LPH 3UH VHW 7LPH 8VHU V 7LPH 3UH VH W 7LPH 8VH U V ) 7XHVGD\ 3UH VHW & 7LPH 8VH U V W & V W Q H Y ( Q H Y ( & & & Q H Y ( If the event time being set is moved past midnight into the following day then the number of the following day will blink. When using the + button to adjust events 1 to 5 and the event time being adjusted becomes the same as the following event time, then both are changed simultaneously. This applies to all subsequent event times reached and is demonstrated in the diagram on the left. When using the - button to adjust events 2 to 6 and the previous event time is reached the - button ceases to respond. The factory pre-set programme may be reinstated by pressing the recessed RESET button. This will however reinstate all the factory pre-set conditions, so that the clock type, temperature scale and optimum start period (if enabled) may also have to be re-set. Q H Y ( & & & & )DFWRU\3UHVHWV 8VHU V6HWWLQJV & In the above diagram the heavy line indicates what a typical user-set programme might be. Note that event 2 has been moved to 14:00, that events 3 & 4 have also been moved to that time, and that the following control temperature will be that of event 4. It is possible to move events past midnight into the following day, when the day number will blink in the display, see the display diagram in the notes on setting event times. 2 Event 3 may be set at any time between event 2 and 23 hours, 59 minutes after event 1. Event 4 may be set at any time between event 3 and 23 hours, 59 minutes after event 1,.... and so on. W W 8VH U V & & When setting event times and temperatures it is not possible to set event times out of chronological order. Event 2 may be set at any time between event 1 and 23 hours, 59 minutes after event 1. (YHQWV 3UH VH W If, during the event checking and setting procedure, no buttons are pressed for more than two minutes then the TP75M will return to RUN mode automatically. If this appears to have occurred, it is advisable to re-check the programme to ensure that it is as required. Event 1 may be set at any time from 0:00 to 23:59 (but would normally be in the morning). )DFWRU\3UHVHW3URJUDPPHDQGVSDFHVIRUXVHU VVHWWLQJV 'D\ NOTES ON SETTING EVENT TIMES Mains Voltage Operated Electronic Programmable Room Thermostats TP75M with integral sensor. TP75MA with remote sensor. USER'S GUIDE IMPORTANT - On initial power up, and after periods of power disruption which may have caused memory loss, press the RESET button under the flap prior to carrying out any programming. - The battery back-up in this unit is provided by a rechargeable cell which will take up to ten days from initial power before it is fully charged. During this period battery back up cannot be guaranteed. How to: Select a 12 hour or a 24 hour clock display. Select a °C or a °F temperature display. Change between Winter Time and Summer Time at the press of a button. Convert the TP75M to act as a thermostat, controlling at the selected temperature continuously. Use the TP75M as a frost thermostat. Use the holiday function. Override the programmed temperature. Extend an existing temperature for 1, 2 or 3 hours. Flap lowered DISPLAY ELEMENTS (Those that will appear whilst following these user's instructions). Programme type indicator The in-built feature is an intelligent electronic anticipator which measures the rate of temperature rise then switches the boiler off before the set temperature is reached. However the required comfort temperature will be reached due to the residual heat in the system after the boiler has shut down. This feature is only activated when the room temperature is 2°C or more lower than the set temperature. If the optional Optimum Start Control feature has been enabled, (indicated by the display showing typically 0:30 and OP after the second press of the PROG button from the RUN mode), then the boiler will fire some time before the programmed event 1 time to provide the event 1 comfort temperature by that time. If the optional Chrono-proportional feature has been enabled, then the boiler will fire at regular intervals to maintain radiator temperature and so prevent the large swings in room temperature caused by radiators alternating between very hot and cold. In mild weather and when the system is up to temperature the boiler may fire only in short bursts with long periods of inactivity. This is not a fault, and will provide increased comfort . RUN MODE Whilst the TP75M is in RUN mode, i.e. controlling the space temperature in accordance with the programme, the colon between the hours and minutes digits blinks. The colon does not blink whilst the time and programme are being set. + 1 HR + 2 HR + 3 HR Fig. 1. Display following a RESET.(Colon blinking) Boiler ON indicator Indicates temperature display + 1 HR + 2 HR + 3 HR HEATING SYSTEM PERFORMANCE. The TP75M includes one in-built and two optional energy saving and comfort enhancement features that may have been enabled by your installer. All will affect the way in which the heating system operates, and this will be different from that provided by conventional time controls and room thermostats. Programmed temperature indicator Extended temperature indicators Day of week Temperature override indicators Clock time, digital thermometer, or number of holiday days Holiday mode selected SELECTING THE CLOCK TYPE (12hr or 24hr) The factory pre-set clock has a 24 hour display. If a 12 hour display with AM/PM indication is preferred then press and hold down the NEXT and DAY buttons until the display changes. Repeat to return to a 24 hour display. + 1 HR + 2 HR + 3 HR Fig. 2. Clock set to 12 hour display. SELECTING THE TEMPERATURE DISPLAY (°C or °F) The factory pre-set temperature display is °C. If a °F display is preferred then press and hold down the DAY and COPY buttons until the display changes. Repeat to return to a °C display. + 1 HR + 2 HR + 3 HR Fig. 3. Temperature range changed to Fahrenheit. 3 SETTING THE CLOCK HOLIDAY MODE Press PROG to display the time of day (the display blinks). Press DAY (the display stops blinking) to select today (1 = Monday, 6 = Saturday etc.). Press and hold down the + or - button to change the time quickly in ten minute steps, or press and release to change the time by one minute. When the day and time are correct, press and release PROG once to start the clock and further press and release as necessary until the colon starts blinking, (RUN mode.) The intermediate stages are explained in the Setting Instructions. Whilst in thermostat mode pressing the DAY button will activate the holiday mode. The display will change to that shown in Fig. 7 with a number indicating the default holiday period of 00 days. Use the s or t buttons to adjust the control temperature as required, and use the + or - buttons to set the number of days required, in the range 1-99 days. If the number of days is left at 00 then the unit will return to normal at event 1 the following day. When the selected number of days have elapsed the unit will automatically return to normal, controlling temperatures to the set programme. + 1 HR + 2 HR + 3 HR Fig. 4. Clock time ready for changing. (Colon steady, digits blinking). WINTER TIME / SUMMER TIME CLOCK When the clocks are changed from Summer Time to Winter Time (or vice versa) there is no need to alter the clock by entering programming mode (i.e. pressing the PROG button). Instead just press and hold down the - button to change from Summer Time to Winter Time or the + button to change from Winter Time to Summer Time. The first time this is done (after a RESET) the clock is set and can only be changed by one hour as appropriate. Control may also be restored to normal by pressing the s and t together. USER OVERRIDES Whilst the unit is operating normally in RUN mode the following overrides are available: TEMPERATURE SETTING OVERRIDE Press s to increase or t to decrease the current set temperature. Each press will change the temperature setting by 0.5°C (or 1°F). To make larger changes press the button and hold it down. + 1 HR + 2 HR + 3 HR If a mistake is made, e.g. pressing the + button in the autumn when the - button should have been pressed, rectify the problem by pressing the correct button and then re-setting the clock by one hour as appropriate. (Refer to SETTING THE CLOCK above). Fig. 8 Temperature overridden boiler firing. / OVERRIDE TIME OR TEMPERATURE DISPLAY With programme. The default display in RUN mode shows the time of day. This may be changed to display the actual temperature being sensed by pressing both COPY and NEXT buttons together. Return to time display by pressing them together again. (allday) selected the temperature set for Event 1 will With be maintained until Event 6. During this "ALLDAY" period the programmed temperature may be overridden as above. Fig. 5. Temperature Display. (Room temperature is below the set temperature, so the boiler is firing) + 1 HR + 2 HR + 3 HR (profiled) selected temperature control will follow the + 1 HR + 2 HR + 3 HR Fig. 9. Allday selected - event 1 temperature active. THERMOSTAT MODE +1 HR/+2 HR/+3 HR OVERRIDE The TP75M may be converted to control at a constant, user selected, temperature by pressing and holding down the s and t buttons until the display changes to that shown in Fig. 6 with the default temperature of 8°C (or 46°F), which may be changed as required using the s or t button. The unit will stay in thermostat mode until the s and t are pressed together again. Pressing this button once causes the current control temperature to last for an extra hour. Press it twice for an extra 2 hours, and three times for 3 hours. Pressing a fourth time will remove the override. For example, a comfort temperature of 21°C programmed to end at 22:30 could be extended passed midnight. Alternatively, a morning set-back temperature of 15°C could be extended to effectively cancel a midday comfort setting. Fig. 6. Thermostat mode. + 1 HR + 2 HR + 3 HR + 1 HR + 2 HR + 3 HR Fig. 10. Current temperature extended by 2 hours. FROST THERMOSTAT MODE POWER FAILURE Whilst in thermostat mode the + 1 HR TP75M may be set to guard + 2 HR + 3 HR against possible frost damage in areas where the unit (or its remote sensor) is fitted. The control temperature may be set to a Fig. 7. Holiday mode. suitable level using the s or t buttons. The unit will stay in frost thermostat mode until the s and t are pressed together again. During a power failure the unit will go into 'sleep' mode. The time and programme will be maintained by an internal battery for fifteen days. The display and control relay will not operate. + 1 HR + 2 HR + 3 HR Fig. 11. Unit in 'sleep' mode. Danfoss can accept no responsibility for possible errors in catalogues, brochures and other printed material. Danfoss reserves the right to alter its products without notice. This also applies to products already on order provided that such alterations can be made without subsequent changes being necessary in specifications already agreed. Danfoss Randall Ltd Ampthill Road Bedford, MK42 9ER Tel: (01234) 364621 Fax: (01234) 271474 Email: [email protected] Website: www.danfoss-randall.co.uk 4 Part No: 3661 Iss. 7 09/99