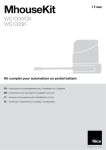
1
Data-Entry and Forms Reference Manual Revision date: January 6, 2011 WisDOT Table of Contents Overview ____________________________________________________________________ 1 Electronic Accident Data Collection and Reporting with TraCS ______________________________ 1 Key concepts in TraCS __________________________________________________________ 2 Differences between paper and electronic forms ____________________________________ 3 Form layout _____________________________________________________________________________ 3 Document Number________________________________________________________________________ 3 Help Screens _____________________________________________________________________________ 3 Validations ______________________________________________________________________________ 3 Ability to import data from other sources ______________________________________________________ 3 Pre‐filled data fields based on user default files _________________________________________________ 3 Data sharing among forms __________________________________________________________________ 3 Using TraCS __________________________________________________________________ 4 Logon to TraCS _____________________________________________________________________ 4 Start Shift _________________________________________________________________________ 5 Opening a contact and form __________________________________________________________ 6 Basic Layout of a Form in Badger TraCS ___________________________________________ 7 Night Time Mode ___________________________________________________________________ 9 Changing the display size of the displayed form (Zoom) ___________________________________ 9 Customizing the databar ____________________________________________________________ 10 Moving around a TraCS form ________________________________________________________ 11 Types of data fields ________________________________________________________________ 11 Adding or Deleting Groups __________________________________________________________ 14 Pop Up Error Messages _____________________________________________________________ 14 Common Information Manager _________________________________________________ 15 Replicate: Concerns and Cautions ____________________________________________________ 15 Populating the Common Information Manager _________________________________________ 16 Autopopulating Forms _____________________________________________________________ 20 Validation __________________________________________________________________ 21 Printing ____________________________________________________________________ 24 Closing a Form ______________________________________________________________ 25 Deleting Forms ______________________________________________________________ 25 End Shift ___________________________________________________________________ 26 Resending/Viewing/Printing/Emailing Forms After End Shift _________________________ 29 i Contact Manager ____________________________________________________________ 30 Emailing TraCS Reports _______________________________________________________ 33 Defaults____________________________________________________________________ 36 TraCS Crash Forms ___________________________________________________________ 39 Crash Form – MV4000e _____________________________________________________________ 39 Data Fields _______________________________________________________________________ 40 Law Enforcement Agent Group ______________________________________________________ 41 Accident Summary ________________________________________________________________ 41 Unit Group _______________________________________________________________________ 47 Driver ___________________________________________________________________________ 47 Vehicle __________________________________________________________________________ 53 Vehicle Owner ____________________________________________________________________ 57 Insurance ________________________________________________________________________ 59 School Bus _______________________________________________________________________ 60 Trailer Towed Group _______________________________________________________________ 60 Occupant Group __________________________________________________________________ 61 Witness Group ____________________________________________________________________ 64 Accident Summary Continued Group __________________________________________________ 65 Property Owner Group _____________________________________________________________ 66 Property Owner ___________________________________________________________________ 66 Fixed Objects Struck _______________________________________________________________ 67 Description Group _________________________________________________________________ 68 Truck and Bus Group _______________________________________________________________ 69 Attachment Group ________________________________________________________________ 71 Validation________________________________________________________________________ 73 Printing__________________________________________________________________________ 73 Deer Crash Form _____________________________________________________________ 74 Data Fields _______________________________________________________________________ 74 Law Enforcement Agent Group ______________________________________________________ 75 Accident Summary ________________________________________________________________ 76 Unit Group _______________________________________________________________________ 78 Attachment Group ________________________________________________________________ 83 Amended Crash Form _________________________________________________________ 84 ii Driver Information Exchange ___________________________________________________ 86 Accident Summary ________________________________________________________________ 86 Driver ___________________________________________________________________________ 89 Vehicle Owner ____________________________________________________________________ 92 Insurance ________________________________________________________________________ 95 Property Owner ___________________________________________________________________ 96 Printing__________________________________________________________________________ 97 Fatal Supplement Form _______________________________________________________ 98 Data Fields _______________________________________________________________________ 99 Document/Police Number and Ambulance Information__________________________________________ 99 Law Enforcement Agency __________________________________________________________ 100 Accident Information _____________________________________________________________ 100 Unit Information _________________________________________________________________ 101 Fatality Information ______________________________________________________________ 103 Attachment Group _______________________________________________________________ 105 Validation_______________________________________________________________________ 105 Printing_________________________________________________________________________ 105 ELCI (Electronic Traffic Citation)________________________________________________ 107 Data Fields ______________________________________________________________________ 107 Violator Section ________________________________________________________________________ 107 Vehicle Information Section ________________________________________________________ 110 Offense Section __________________________________________________________________ 112 Statute Number / Trans Rule Number: _______________________________________________ 112 Plaintiff Section __________________________________________________________________ 117 Timely Transmission of TraCS eCitations for DA Routing _________________________________ 117 Officer Section ___________________________________________________________________ 118 Parent/Guardian Group ___________________________________________________________ 119 Attachment Group _______________________________________________________________ 119 Entering Additional Citations _______________________________________________________ 120 Printing a citation ___________________________________________________________ 121 Voiding a Citation ___________________________________________________________ 122 To void a citation: ________________________________________________________________ 122 User defaults for the ELCI form _____________________________________________________ 123 NTC (Electronic Non‐Traffic Citation)____________________________________________ 125 iii Data Fields: _____________________________________________________________________ 125 Violator Section ________________________________________________________________________ 125 Vehicle Information Section ________________________________________________________ 127 Offense Section __________________________________________________________________ 129 Plaintiff Section __________________________________________________________________ 131 Timely Transmission of TraCS eCitations for DA Routing _________________________________ 132 Officer Section ___________________________________________________________________ 133 Parent/Guardian Section __________________________________________________________ 133 Entering Additional Citations _______________________________________________________ 134 Printing a citation ___________________________________________________________ 135 Deleting a Non‐traffic Citation ________________________________________________ 136 Natural Resources Citation Form _______________________________________________ 138 Getting Started __________________________________________________________________ 138 Entering Data into the Fields _______________________________________________________ 139 Defendant Information Section ____________________________________________________________ 139 Violation Information Section ______________________________________________________ 143 Plaintiff Information Section _______________________________________________________ 148 Vehicle / Equipment Section _______________________________________________________ 149 Law Enforcement Agency Information Section _________________________________________ 151 Adding Attachments ______________________________________________________________ 153 Entering Additional Citations _______________________________________________________ 153 Printing a Citation ________________________________________________________________ 154 Voiding a Citation ________________________________________________________________ 156 To void a citation: _______________________________________________________________________ 156 User Defaults for the DNR Form _____________________________________________________ 157 ALCHL Form ________________________________________________________________ 159 Form Selection Section___________________________________________________________________ 159 Driver Information section _________________________________________________________ 160 Vehicle Information Section ________________________________________________________ 161 Offense Information Section _______________________________________________________ 163 Additional Information Section _____________________________________________________ 164 Officer Section ___________________________________________________________________ 164 Attachment Group _______________________________________________________________ 164 Printing the ALCHL reports _________________________________________________________ 165 iv Deleting an ALCHL Form ___________________________________________________________ 166 Influence Form (eSP4005) ____________________________________________________ 168 The process flow of the Influence form: ______________________________________________ 168 Open new Influence citation form ___________________________________________________ 169 Violator Section ________________________________________________________________________ 169 Opinions Section _________________________________________________________________ 171 Pre‐Interrogation_________________________________________________________________ 171 Questions _______________________________________________________________________ 172 Officer _________________________________________________________________________ 173 Attachment Group _______________________________________________________________ 173 Printing ___________________________________________________________________ 174 Deleting a Influence form ____________________________________________________ 174 Warning Form______________________________________________________________ 176 Searching For License Plate Records _________________________________________________ 177 MDB License Plate Search Routine Error ______________________________________________ 177 Searching For Violation Section Numbers _____________________________________________ 177 Editing the Violation And Section Number ____________________________________________ 180 Entering another Violation _________________________________________________________ 181 Entering A Violation Manually ______________________________________________________ 181 Violation Code Shortcuts __________________________________________________________ 181 Searching For Local Ordinance Violation Numbers ______________________________________ 182 Correct At Once Violations _________________________________________________________ 183 Report In Person Violations ________________________________________________________ 184 Entering A Comment (optional) _____________________________________________________ 185 Printing The Warning _____________________________________________________________ 185 Deleting a Warning _______________________________________________________________ 186 Attachment Form ___________________________________________________________ 189 Data Fields ______________________________________________________________________ 190 Adding Groups ___________________________________________________________________ 192 Driver Condition or Behavior Report Form _______________________________________ 194 Data Fields ________________________________________________________________ 194 Individual Information section_________________________________________________ 194 Narrative Section ___________________________________________________________ 195 v Agency Section __________________________________________________________________ 196 Printing the Driver Condition / Behavior Report Form ______________________________ 196 Correcting a Driver Condition / Behavior Report Form _____________________________ 197 To Delete a Driver Condition / Behavior Report Form ___________________________________ 197 Traffic Stop Data Collection ___________________________________________________ 199 General Information Section _______________________________________________________ 200 Vehicle/Driver Section ____________________________________________________________ 201 Reason for Stop Section ___________________________________________________________ 202 Vehicle Search ___________________________________________________________________ 203 Driver Search Section _____________________________________________________________ 204 Passenger Search Section __________________________________________________________ 205 Law Enforcement Agency __________________________________________________________ 206 Citizen Contact _____________________________________________________________ 208 General Information Section ______________________________________________________________ 209 CNUM Form _______________________________________________________________ 220 Installing ELCI Citation Numbers ____________________________________________________ 220 Appendix A – Violation, Property and Insurance Shortcuts __________________________ 221 Violation Shortcuts _______________________________________________________________ 221 Property Owner Shortcuts _________________________________________________________ 232 Insurance Shortcuts (Aliases) _______________________________________________________ 233 Appendix B ‐ Vehicle Types Chart ______________________________________________ 236 Appendix C – Sample Forms ___________________________________________________ 238 ELCI Violator Copy Sample _________________________________________________________ 238 ELCI Officer Copy Sample __________________________________________________________ 239 ELCI Court Copy Sample ___________________________________________________________ 240 ELCI Parental Notification Sample ___________________________________________________ 241 NTC Violator Copy Sample _________________________________________________________ 242 NTC Officer Copy Sample __________________________________________________________ 243 NTC Court Copy Sample ___________________________________________________________ 244 NTC Spanish Sample ______________________________________________________________ 245 NTC Parental Notification Sample ___________________________________________________ 246 Traffic/Equipment Warning for Individual Sample ______________________________________ 247 Traffic/Equipment Warning for Non‐Individual Sample __________________________________ 248 vi WARNING Non‐Traffic Sample ______________________________________________________ 249 WARNING Officer Copy Sample _____________________________________________________ 250 WARNING Report in Person Copy Sample _____________________________________________ 251 WARNING Mail‐In Sample _________________________________________________________ 252 Natural Resources Citation Violator Sample ___________________________________________ 253 Natural Resources Citation Court Sample _____________________________________________ 254 Natural Resources Citation Officer Sample ____________________________________________ 255 ALCOHOL Informing the Accused Copy Sample _________________________________________ 256 ALCOHOL Blood Urine Analysis Copy Sample __________________________________________ 257 ALCOHOL Notice of Intent to Revoke Front Side Copy Sample ____________________________ 258 ALCOHOL Notice of Intent to Revoke Back Side Copy Sample _____________________________ 259 ALCOHOL Notice of Intent to Suspend Copy Sample ____________________________________ 260 ALCOHOL Administrative Review Request Copy Sample _________________________________ 261 Influence Report Sample___________________________________________________________ 262 Influence Interrogation Report Sample _______________________________________________ 263 CRASH Sample ___________________________________________________________________ 264 Crash Report Office Version Sample _________________________________________________ 268 DRIVER EXCHANGE of Information Sample ____________________________________________ 272 DEER CRASH Sample ______________________________________________________________ 273 DEER CRASH Office Version Sample __________________________________________________ 274 DRIVER CONDITION / BEHAVIOR Sample _____________________________________________ 275 FATAL SUPPLEMENT Sample________________________________________________________ 276 ATTACHMENT Sample _____________________________________________________________ 277 Traffic Stop Sample _______________________________________________________________ 278 Citizen Contact Sample ____________________________________________________________ 280 Appendix D – Using a Mobile Data Browser ______________________________________ 282 Searching MDB for Driver’s License Records ___________________________________________ 282 MDB Driver’s License Search Routine Error ____________________________________________ 283 Searching For License Plate Records _________________________________________________ 284 Appendix E – Using the Barcode Reader _________________________________________ 285 Reading a License: ________________________________________________________________ 285 Procedure: ______________________________________________________________________ 285 Checking Data in the Common Information Manager: ___________________________________ 286 vii Populating Data Fields: ____________________________________________________________ 287 Using the Barcode Reader as an Imager: ______________________________________________ 288 Appendix F ‐ Setting User Defaults _____________________________________________ 290 ELCI or NTC Fields Highly Recommended for Defaults ___________________________________ 292 Other ELCI Fields Available to Set Defaults ____________________________________________ 292 Appendix G – Using the TraCS Diagram Tool _____________________________________ 294 Roads __________________________________________________________________________ 295 Intersect: _______________________________________________________________________ 295 Units: __________________________________________________________________________ 295 Signs: __________________________________________________________________________ 296 Objects: ________________________________________________________________________ 296 Tools: __________________________________________________________________________ 297 Diagramming ____________________________________________________________________ 298 Backgrounds ____________________________________________________________________ 299 Other Drawing Packages ___________________________________________________________ 299 Appendix H ‐ Driver Exchange Form ____________________________________________ 300 Appendix I ‐ Using GPS within TraCS ____________________________________________ 301 Appendix J ‐ Examples of Location Information in TraCS Crash Report _________________ 302 State and federal highways ________________________________________________________ 302 Ramps _________________________________________________________________________ 303 County Highways _________________________________________________________________ 304 Local Roads _____________________________________________________________________ 305 Parking Lots and Private Property ___________________________________________________ 305 Appendix K – Hit and Run Crashes ______________________________________________ 307 Hit and Run Unit Data _____________________________________________________________ 307 Appendix L – Auto‐Population _________________________________________________ 310 Crash to ELCI ____________________________________________________________________ 310 Crash to NTC ____________________________________________________________________ 310 Crash to Traffic Stop ______________________________________________________________ 311 Crash to Warning _________________________________________________________________ 311 Crash to Driver Condition __________________________________________________________ 312 Crash to Fatal Supplement _________________________________________________________ 312 Deer Crash to ELCI ________________________________________________________________ 313 viii Deer Crash to NTC ________________________________________________________________ 313 Deer Crash to Warning ____________________________________________________________ 314 Deer Crash to Driver Condition______________________________________________________ 314 ELCI to Crash ____________________________________________________________________ 315 ELCI to CrashUnit _________________________________________________________________ 315 ELCI to Deer Crash ________________________________________________________________ 316 ELCI to Alcohol ___________________________________________________________________ 316 ELCI to Alcohol UTC _______________________________________________________________ 317 ELCI to NTC ______________________________________________________________________ 318 ELCI to Traffic Stop _______________________________________________________________ 318 ELCI to Warning __________________________________________________________________ 318 ELCI to Driver Condition ___________________________________________________________ 319 ELCI to Citizen Contact ____________________________________________________________ 319 ELCI to Influence _________________________________________________________________ 319 ELCI to ELCI______________________________________________________________________ 319 NTC to Crash ____________________________________________________________________ 321 NTC to Deer Crash ________________________________________________________________ 321 NTC to Crash Unit ________________________________________________________________ 321 NTC to Traffic Stop _______________________________________________________________ 322 NTC to Citizen Contact ____________________________________________________________ 322 Warning to Crash _________________________________________________________________ 323 Warning to Deer Crash ____________________________________________________________ 323 Warning to Driver Condition _______________________________________________________ 324 Warning to ELCI __________________________________________________________________ 324 Warning to NTC __________________________________________________________________ 324 Warning to Traffic Stop ____________________________________________________________ 325 Traffic Stop to Crash ______________________________________________________________ 326 Traffic Stop to Deer Crash __________________________________________________________ 326 Traffic Stop to DNR _______________________________________________________________ 327 Traffic Stop to Driver Condition _____________________________________________________ 327 Traffic to ELCI ____________________________________________________________________ 327 Traffic Stop to Drug/Alcohol Influence _______________________________________________ 328 Traffic Stop to NTC _______________________________________________________________ 328 ix Warning to Traffic Stop ____________________________________________________________ 328 Warning to Citizen Contact _________________________________________________________ 329 Drivers Condition to Citizen Contact _________________________________________________ 329 Citizen Contact to Warning _________________________________________________________ 329 x Overview Electronic Accident Data Collection and Reporting with TraCS Electronic data collection generally begins in the field. Data is entered into the TraCS system on the mobile data computer. Alternatively, an office desktop computer may function as the field unit for agencies that don’t have mobile data computers. Completed reports are checked for errors (validated), printed at the squad (if desired), and transmitted to the local agency office copy of the TraCS database. At the office, reports can be reviewed and returned to the field unit if corrections are needed. If no corrections are needed, the TraCS data is then extracted and transmitted. Accident and driver condition reports are transmitted to the Wisconsin Department of Transportation (WisDOT) and citations are transmitted to the courts. Data Entry and Forms Reference Page 1 Key concepts in TraCS The key elements of the TraCS software are as follows: Contacts Forms Groups Collections Contacts are the primary components of TraCS. Before you can create and enter data into a Form, you must create or open a Contact. Within a Contact, officers open Forms. Forms are used to collect data pertaining to a particular incident. For example, if an officer were at the scene of an accident, he/she would open an accident report form in order to enter the appropriate data. A Contact can be assigned an unlimited number of Forms. If citations were issued in connection with the accident, citation forms would be opened as well within the same contact. Forms contain sets of fields called Groups. All forms are composed of one or more Groups that organize related information. For example, all information concerning the driver of a vehicle in an accident is placed in a Group, while location information regarding the accident is placed in a different Group. Groups that occur one time in a form are known as Non-Recurring Groups, and Groups that can occur more than one time in a Form are known as Recurring Groups. Some Groups contain Collections of Common Information. TraCS organizes Common Information into the following four categories, which are called Collections: • • • • Individuals (for example, name, address, phone number, etc.) Vehicles (for example, make, model, license plate number, VIN, etc.) Commercial Carriers (for example, carrier name, carrier address, DOT #, etc.) Location (for example, location description, latitude, longitude, etc.) Once common information is entered into a TraCS Contact, it can be used in multiple forms. Data Entry and Forms Reference Page 2 Differences between paper and electronic forms Form layout The layouts of the TraCS forms are significantly different from the paper forms. They contain all the data fields on the paper forms plus, in some cases, a few additional data fields. Document Number TraCS automatically generates document numbers for all forms. You cannot change the number. This is very important so that duplicate document numbers do not occur for different reports. Unlike the document number on the paper MV4000 that consists of seven numbers, the TraCS accident document numbers contain numbers and letters. Help Screens TraCS has built-in help screens that can be accessed for a data field by pressing the <F2> key. Help is available for each of the forms in the suite. The Help button on the toolbar brings up information about the TraCS software, in general. Validations The forms contain numerous validation rules that check data integrity and completeness as well as enable or disable data fields based on the value entered in another field. Ability to import data from other sources TraCS allows the import of operator and vehicle information from external data sources such as a mobile data browser or by using a 2D barcode scanner. Your agency may or may not be set up to use these features. Pre-filled data fields based on user default files Some data fields such as your agency name, address and phone number can be automatically populated into the report from your user file. Data sharing among forms If multiple forms are opened within a contact (e.g. accident plus citations), once data is entered in one of the forms, it can be brought into other forms without re-keying. Data Entry and Forms Reference Page 3 Using TraCS Logon to TraCS Start TraCS by double-clicking on the TraCS icon. appear: The following screen should Select your user name from the drop-down list. Hit [Enter]. Key your password. Hit [Enter] or click OK. Your screen should now look like this: It contains a Menu Bar across the top and a Toolbar with only some of the buttons enabled. Data Entry and Forms Reference Page 4 Start Shift Start Shift TraCS Office Workstation Software Updates TraCS Field Unit Forms At the beginning of your shift, your agency may direct you to first do a Start Shift by clicking on the Start Shift button on the toolbar. The Start Shift function allows the office to return forms (reports) to you for further action or to send you software updates. Once you’ve clicked the Start Shift button on the toolbar, click on the arrow in the Select Communication Method window. The screen will look something like this; however your agency will probably be set up to use only some of the methods of communication so the list will be shorter: Select the proper communication method and click Start. Your agency will provide directions on which communication method(s) to use. Once the Start Shift has run, you will see a screen like this: In this case, the office sent some reports back to the officer. Click OK. Data Entry and Forms Reference Page 5 Opening a contact and form To start a report, open a contact by clicking on the Contact button on the toolbar, or by clicking File and then New Contact on the Menu Bar. The screen shown below will appear showing the available forms to choose from: “Warning” is a warning citation. “ELCI” is the electronic uniform traffic citation. “NTC” is the non-traffic citation. “DNR” is the natural resources citation. “ALCHL” prepares the forms used in conjunction with an OWI arrest. “Influence” is the Alcohol/Drug influence report, eSP4005. “Deer Crash” is an abbreviated MV4000 that can be used to report single-unit, property damage only motor vehicle/deer or other non-domesticated animal crashes. “Crash” is the full MV4000 Police Report of Accident. “Amended Crash” is used to amend an MV4000 that has already been submitted to WisDOT. “Fatal Supplement” is the supplemental form (MV3480) that must be submitted to WisDOT for fatal accidents. “Driver Condition” is the Wisconsin Driver Condition or Behavior Report (MV3141). “Attachment” is a form that can be used to send non-TraCS form data files to the office (e.g. digital photos, Word files, etc.). “CNUM” is a form used by TraCS administrators for managing ELCI citation number allocations. Open the appropriate form by either highlighting it and hitting [Enter] or double-clicking on the form. Once the first form is open, you can open additional forms one at a time by either clicking the Add Form button on the toolbar and selecting the appropriate form, or by clicking File on the Menu Bar and then Add Form. Only one Crash or Deer Crash form should be opened for a single Contact (but not both). You could have an Amended Crash form with either of these in the same Contact plus a Fatal Supplement. Multiple ELCI, NTC, DNR, Warning, ALCHL, Influence, Driver Condition or Attachment forms can be opened within the Contact. It is recommended that all forms, which may be needed in this contact, be opened right away. Some data fields on one form require data from another form. I.e. Crash Document Number to the ELCI form. However, care should be taken on opening ECLI forms since they cannot be deleted. Once they are opened they must be either issued or voided. Data Entry and Forms Reference Page 6 Basic Layout of a Form in Badger TraCS Once a form is opened (in this case a crash form, ELCI and Warning were all opened), the screen looks like this: There is a Menu Bar across the top of the screen. Below the Menu Bar is the Toolbar. You will see that all of the buttons on the toolbar are now enabled. Data Entry and Forms Reference Page 7 Below the toolbar is the Databar. This is where you will enter all the data on the form. There is a description of the field you’re entering above the data entry window. To the right of the data entry window are buttons that can perform actions in that field. You can either click these buttons or use the key pad alternative which is [Alt + the underlined letter on the button] (e.g. Previous would be [Alt + P].) You may use the <ENTER> key to move to the next field. There is a Navigation Tree on the lower left-hand side of the form. It shows the Groups on the forms and all forms that are currently open in the Contact. The Group that you’re currently entering data in is highlighted. You can use the Navigation Tree to move around the form by clicking on the Group that you want to go to. The middle of the lower part of the screen shows the portion of the form into which you’re currently keying data. The data field that corresponds to the data bar where you’re entering data is highlighted. Fields that are “grayed out” are disabled and not available for data entry unless further actions are taken. Data Entry and Forms Reference Page 8 “Hot Key” references are shown along the lower, right-hand portion of the screen. Hot keys are keystroke combinations that can be used to navigate around the form or to enable data fields that are currently disabled. For example, [Ctrl + R] takes you to the beginning of the Property Owner group on the Crash form. Night Time Mode TraCS has a night time mode that can be accessed by clicking View-Night Time Mode on the Menu Bar at the top of the form. Changing the display size of the displayed form (Zoom) By default, the form is displayed at 100% of its size. The form can be displayed larger by zooming in up to 200% or smaller by shrinking it down to 50%. To increase the display of a form, select View-Zoom-and then the percent on the Menu Bar at the top of the form. Data Entry and Forms Reference Page 9 Customizing the databar You can change the alignment of the databar and its display mode (standard or expert) by selecting View-Databar on the Menu bar at the top of the screen: The databar normally displays at the top of the screen; however, it can be changed to align at the bottom of the screen by selecting Align Bottom. When the Expert Mode line is not checked on the Menu tree, the databar displays in Standard mode. Expert mode decreases the size of the databar and converts information in graphical representations into list boxes when applicable. When the Expert Mode is turned ON, only one possible value will be displayed for each field. The down arrow button in the box can be selected to display the other possible values. To use Expert mode, select it from the menu tree. This puts a check mark in front of Expert mode on the menu tree. To change back to Standard mode, select it again which will remove the check mark. Standard mode: Expert mode: Data Entry and Forms Reference Page 10 Moving around a TraCS form There are a variety of ways to move around a TraCS form: • • • • • Enter sequentially through the data fields. Use the mouse to scroll up or down the form and then click on the desired data field. Use the Navigation Tree to go to a different area of the form. Page Up or Page Down to go to the first data field of the previous Group (Page Up) or to the first field of the next Group (Page Down). Use Hot Keys Types of data fields The data fields are set up for data entry in a variety of ways: • Text databar – This type of data field is available for keystroke entry. • Single list databar – A value is chosen from a list. Only one value may be chosen. You can choose the value by beginning to key the choice you want until it is highlighted and then hit Enter or scroll using the mouse or cursor, highlight the choice you want and hit Enter. If you start keying and accidentally go past the value you need, key the first letter of the value twice to go to that value on the list. • Single list other databar – This is similar to the Single list databar except you can enter a value not shown on the list by keying Alt + O or clicking the Other button to the right of the databar and then key the value that you want. Data Entry and Forms Reference Page 11 • Multi list databar – This is similar to the single list databar except that multiple values may be chosen. Go to the value of your first choice by either keying or scrolling. Once it’s highlighted, select it by hitting the Spacebar. Go to your next value by keying or scrolling, highlight it and hit the Spacebar to select it. Hit the Spacebar while over a highlighted choice to unselect that choice. Once all of the appropriate values have been selected, hit Enter. • Date databar – Date databars are set up for a mm/dd/yyyy format. It is important to key two-digit months and days (e.g. 01 for January). A radio button is defaulted for the first two digits of the year but can be changed if it is not the correct value by clicking on the other button with the mouse or using the up or down cursor. • Linked text databar – This type of databar displays data that is part of a Contact’s Individual Common Information so that, if applicable, you can save time by selecting this existing information. However, this databar also enables you to enter new information. If Individual Common Information has not yet been entered for the active Contact, the linked text databar displays in Edit/New Mode as shown below: Type the desired data in the databar. Data Entry and Forms Reference Page 12 If Individual Common Information has already been entered for the active Contact, the linked text databar displays in List mode as seen below: If the individual or vehicle that you want to enter is on the list, select them and hit [Enter]. If they are not on the list, key [Alt + E] or click on the Edit/New button and then key the data. • Button or key databar – This type of databar has buttons that can be clicked to make the selection or the value can be keyed into the databar. • Yes/No databars – These databars accept a value of “Y” (Yes) or “N” (No) and generally appear as a box on the form that has an “X” in it if “Y” is keyed or the Yes button is clicked or is blank if “N” is keyed or the No button is clicked. If you don’t select Yes or No, a No value is automatically entered. Data Entry and Forms Reference Page 13 Adding or Deleting Groups You can add or delete a group in a variety of ways. While you are in a data field in a group, you can add another group of the same type by keying [CTRL + “+”] or by clicking Forms-Add Current Group on the Menu Bar at the top of the screen. From anywhere on the form, you can click Forms-Add Group on the Menu Bar at the top of the screen and then select the type of group you want to add from the list. You can also right click on any of the groups on the Navigation Tree then select Add and then the group you want to add. To delete a group, while you are in a data field of the group you want to delete, you can delete it by keying [CTRL + “-“] or clicking Forms-Delete Current Group on the Menu Bar at the top of the screen. (Note: It’s very important to make sure that you’re in the group you want to delete or else you will delete a group that you may not want to delete). From anywhere on the form, you can click Forms-Delete Group on the Menu Bar at the top of the screen and then select the group that you want to delete from the list. You can also right click on any of the groups on the Navigation Tree then select Delete and then the group you want to delete. From the menu bar: From the navigation tree: Pop Up Error Messages There are some error messages that automatically pop up in some data fields if you enter an unacceptable value or do not enter anything in a data field. In some cases, you will need to correct the error before you can move on. Data Entry and Forms Reference Page 14 Common Information Manager The Common Information Manager contains the persons and vehicles involved in the Contact. This information can be used to populate fields on any of the forms contained in the Contact. Caution: Great care must be taken with the use of Common Information! The forms themselves do not actually store the person and vehicle information, just a pointer to a common information entry. When you change, for example, a name or an address, the common information entry is updated and the change cascades across all forms in a contact saving you time. Usually this is a good thing, but there are certain situations where common information can work against you instead of for you. Please be aware that when you change person or vehicle information in one form you could potentially change that information in all the forms in the contact including issued citations! Replicate: Concerns and Cautions **EXTREMELY IMPORTANT** The replicate button may be used with the citation forms. It should only be used for issuing additional citations to the same person (or company) in the same incident/contact. The user should never replicate a citation and then change the defendant name to a different person (or company). If you do, the name field pointers on the original citation, and on any other forms, will be changed as well. Unfortunately, the error will not be noticed until the citation is end-shifted into the Office Database. From the officer’s perspective, the citation will VALIDATE, PRINT and switch to ISSUED status correctly. However, when the citation is end-shifted off the field unit and imported into the Office Database, the name field pointers will be broken, and the copy of the citation that gets TRANSMITTED to the court(s) will display defendant names that are incorrectly associated with specific citations numbers. As a result, the court (e.g. CCAP) receives the wrong defendant information. To issue a citation to a separate defendant within the same Contact, you should add a form and use autopopulate, NOT replicate. If you replicate a citation and then decide you don’t need it, you should void the citation. You should never save it and then reuse it later for someone else. Here are some ways to protect you from making unintended changes to issued forms: • Never choose a person or vehicle that’s already in Common Information and edit it to be another person or vehicle. For example, if a husband is driving a vehicle and his wife is the owner, do not choose the husband from the list in the Vehicle Owner section and then change the first name and middle initial. This will change the data for the husband on all the forms where they were entered, including issued citations. Data Entry and Forms Reference Page 15 • If you accidentally selected the wrong person or vehicle from the drop down list, simply go back and select the correct entry. If the person or vehicle is not on the list, move up to the blank item at the top of list before pressing the edit button to add the new person or vehicle. Remember, if you press edit, you are editing the person or vehicle you have selected on the list, not creating a new entry. • Use replicate only to issue citations to the same individual. If you are citing an additional person, use the add form button to add a new citation and then use the auto-populate button to bring in location information. • Open all forms associated with the contact when you are working on reports saved in the contact manager. In other words, open up all the citations when you go back to finish up the crash report. This will allow TraCS to do a better job of protecting common information on issued citations. Populating the Common Information Manager The Common Information Manager can be populated in a variety of ways. Ways to populate include: • • • • Opening the Common Information Manager and keying the information in directly. Keying data into data fields on forms that are contained in the Common Information Manager. Using a Barcode reader to scan driver and registration information from 2D barcoded licenses and registrations. Using the external search feature to query your Mobile Data Browser (MDB) and return the information. This feature is only available if it has been implemented by your agency. Data Entry and Forms Reference Page 16 When you click on the Common Information button open a Contact, you will see a screen like this: on the toolbar when you first You can add information to Common Information by first selecting the Individuals or Vehicles tab at the top of the window and then clicking the Add button or keying [ALT + A]. Data Entry and Forms Reference Page 17 If you choose to Add an Individual, you will get a screen that looks like this where you can key in the data: Once you have keyed the necessary information and click OK, the screen will look like this: Data Entry and Forms Reference Page 18 If you choose to Add a Vehicle, you will get a screen that looks like this where you can key in the data: Do not enter the Vehicle Type through Common Information because different forms use different vehicle types. Once you have keyed the necessary information and click OK, the screen will look like this: Data Entry and Forms Reference Page 19 Once the data is in Common Information, it can be brought into the appropriate data fields on the form by highlighting the appropriate Individual or Vehicle and then clicking OK. Note Carriers information is not used in Wisconsin’s suite of forms. Autopopulating Forms Forms containing common data fields can be populated from one another. The Autopop button when pressed will move data from fields containing data to the same fields on the other forms that do not contain data. Fields already containing data will not be overwritten. Some of the fields include County, Municipality, On Hwy, On Street, and others. Drivers, Owners, Witnesses, Passengers and Vehicles are stored in the Common Information Manager and are not filled in with the Autopop button. Data Entry and Forms Reference Page 20 Validation Once you have completed a form, you need to validate it by either pressing the <F5> button on your keyboard or by clicking on the Validate button on the toolbar. Validation checks your form against rules set up in the program. From the validation rules, you may see error messages that require you to correct them before the form can be successfully validated. Warning messages alert you to something that could be wrong but may also be correct. They give you an opportunity to review the data to be sure that it’s correct. If your form contains no errors or warnings, you will see a screen like this: Just click OK. The form will now have a status of Validated. If the form contains no errors but there are warnings, you will get a screen that looks like this: Data Entry and Forms Reference Page 21 If you click Yes to view the warnings, you will get a screen that looks like this: The bottom portion of the screen shows the warning(s) in a text description. The righthand portion of this shows the data fields that may be causing the problem. TraCS automatically takes you to the first field associated with the first warning on the list. If this field is not causing the problem, click on the other field(s) shown on the list in the right-hand window and review the data there. In the case of a warning, if all fields associated with the warning appear to be correct, you can disregard the warning and move on. If you make a correction that addresses the warning, it will disappear from the list. If you have addressed all of the warnings and there are no errors, click on Validate again and this time when it asks you if you want to view the warnings click No. Your form will then have a status of Validated when you close it. Data Entry and Forms Reference Page 22 When you validate and have errors as well as warnings, you will get a screen that looks like this: You address errors in the same manner that you address warnings as described above; however, you will not be able to validate the form until all of the errors are corrected. Data Entry and Forms Reference Page 23 Printing You can print a report while you have the form open by clicking on the Print button on the toolbar, which will bring up the Print Manager that looks like this: The Print Manager displays all possible reports associated with the forms that are open in the Contact whether you intend to use them or not. In the screen above, all of the reports available with the ALCHL form are listed even though none of them were checked in the form itself. You can print preview a report by highlighting it (as opposed to checking the box in front of it) in the Print Manager (e.g. ELCI A100009 is highlighted in the picture above) and clicking on the Print Preview button. It is strongly recommended that you Print Preview ELCIs before actually printing them. Printing an ELCI causes its status to go to Issued and only the officer’s narrative can be edited once a citation is Issued. To print reports, click on the box in front of the ones you want to print and then click OK, or click on the Select All button on the right to select all reports shown in the window and then click OK. You can choose to print multiple copies by changing the Number of Copies in the window in the bottom left-hand corner of the window. Data Entry and Forms Reference Page 24 Alternatively, you can print reports from the Contact Manager by clicking on the form(s) that you want to print and then clicking on the Print button on the toolbar at the bottom of the screen that will then bring up the Print Manager shown above. Closing a Form You can close a form at any time by clicking on the Close button. It will be saved in your Contact Manager. You can go back and edit the form later by accessing it through the Contact Manager. Generally, when you have completed a form, you should validate it. Once you’ve validated it, you click the Close button to close the contact. Deleting Forms All forms other than ELCIs may be deleted; ELCIs may never be deleted. ELCIs must be completed to point where they are in a “Validated” status and then must be Voided. See the ELCI section for more information. Data Entry and Forms Reference Page 25 You can delete forms (other than ELCIs) while they are open by clicking on the Delete button on the toolbar. A message box will appear asking you to confirm that you want to delete the form: If you click Yes, most forms will be deleted. On the Warning form, you’ll receive a second message box where you are asked to state the reason that the form is being deleted: You can also delete all forms other than ELCIs from the Contact Manager. Highlight the form(s) you want to delete and click on the Delete button on the toolbar at the bottom of the screen. End Shift Once your work is completed for the day, End Shift any completed forms to your Central Office. This transfers the data to the office. Data Entry and Forms Reference Page 26 To do the End Shift, click on the End Shift screen that looks like this: button on the toolbar. You will get a Select the forms that you want to send to the office by clicking on them to highlight them and then clicking the End Shift button at the bottom of the screen. You can limit the list of forms that appears in the window by choosing a specific status (e.g. validated) in the window in the upper left-hand corner of the screen. To select multiple nonconsecutive forms, hold down the [CTRL] key as you highlight the forms. To select multiple consecutive forms, hold down the [SHIFT] key and then click on the first and last forms that you want to select. Once you’ve clicked the End Shift button on the lower toolbar, click on the arrow in the Select Communication Method window. The screen will look something like this, however your agency will probably be set up to use only some of the methods of communication so the list may be shorter: Data Entry and Forms Reference Page 27 Select the proper communication method and click Start. Your agency will provide directions on which communication method to use. During the End Shift, a screen will come up that looks like this: Once the End Shift has run, you will see a screen like this: Click OK. Data Entry and Forms Reference Page 28 Resending/Viewing/Printing/Emailing Forms After End Shift Once you have End Shifted a form, it will no longer appear in the Contact Manager; however, you can still resend, view, print or email (if you’re set up with email capabilities) it from the field unit within 30 days of when it was End Shifted to the Central Office (or however long your agency has your unit set up for). To do this, click the End Shift button on the toolbar at the top of the main TraCS screen, which will bring up the End Shift manager. It will bring up the list of the forms currently in your Contact Manager. Click Communication on the menu bar at the very top of the screen or key [Alt + C] and select Resend, which will then bring up the forms that you’ve already End Shifted. Highlight the form(s) that you want to resend, print, view or email and the click the appropriate button on the toolbar at the bottom of the screen. Data Entry and Forms Reference Page 29 Once you have finished, go back to the End Shift manager by clicking the End Shift button on the toolbar at the top of the screen. Click Communication again on the menu bar at the top of the screen and click Resend again so that it will no longer be checked. The list of the forms in your current Contact Manager will then reappear. This is important so that you do not accidentally End Shift the same forms more than once since End Shift is an option on the bottom toolbar. Contact Manager Once you close a form (whether you’ve validated it or not), it will be saved in your Contact Manager that can be accessed by clicking the Manager button on the toolbar. If you have not yet validated it, it will have a status of Open. If you have validated it but not End Shifted, it will have a status of Validated. Citations that have been issued will have a status of Issued. Crashes End Shifted to the office that have been sent back to you, it will have a status of Rejected. Forms that you have End Shifted will no longer be in your Contact Manager. Your Contact Manager will look something like this: Data Entry and Forms Reference Page 30 You can limit the forms that show in the Contact Manager by choosing a specific Status in the window in the upper left-hand corner of the screen or by selecting specific dates in the window in the middle of the upper portion of the screen. The window on the lefthand portion of the body of the screen shows a list of all the contacts. The largest window shows the Form Type, Form Number (Document Number), Status, Locked (whether it’s locked or not), Date/Time (the Date and Time that the form was initially created), User (person who created the form) and a Description related to the data in the form. From the Contact Manager, you can edit a form by highlighting it and then clicking the Edit button on the toolbar at the bottom of the screen. You can highlight it by clicking on it with the mouse or by using the cursor to move to it. If you edit a form that has already been validated, it will return the status of the form to Open so you will want to validate it again once you have finished editing it. Data Entry and Forms Reference Page 31 You can also View , Print , Delete (other than ELCIs), Void or Email a form in the same manner by highlighting it and clicking the appropriate button on the toolbar at the bottom of the screen. Viewing allows you to look at a form but not make any changes. It does not change the status of the form. To close the Contact Manager, click on the red “X” button in the upper right-hand corner of the screen. Data Entry and Forms Reference Page 32 Emailing TraCS Reports You can email a TraCS report directly from the Contact Manager or from the form itself while it is open in View or Edit mode. This feature has been tested and is known to work with Outlook and Eudora email software. Start your email software if it is not already running. Open your Contact Manager by clicking the Manager button on the toolbar. A list of your current forms will be shown and will look similar to this: Select (highlight) the form(s) that you want to send. To select multiple forms, hold down the CTRL key as you select all the forms. When you have the forms selected, click the E-mail bottom of the screen. Data Entry and Forms Reference button on the toolbar at the Page 33 An E-mail Manager will be displayed and look similar to this: Some forms have multiple reports. For example, for the crash report, you will see the Driver Exchange of Information Report as well as the full Crash Report. Check the box in front of the report(s) that you want to send, or if you want to send all of the reports, click the Select All button in the upper right-hand corner of the manager, or key [Alt + A]. To Deselect All of the forms, click the Deselect All button in the same location or key [Alt + D]. Choose whether you want the report(s) to be sent as TIFF or PDF files using the radio buttons in the upper right-hand corner of the Manager. You can decrease the size of the report(s) being sent by zipping them. To do this, check the Zip Report(s) box toward the bottom of the Manager. A file name will be displayed. You can change the name of the zip file; however, you should leave .zip as the extension of the new file name. Data Entry and Forms Reference Page 34 Click the Create E-mail button on the bottom of the Manager or key [Alt + E]. A Report Generation Status area in the bottom of the E-mail Manager will display the progress. A new email message will come up with the file(s) automatically attached. Key the email address of the person(s) you want to send the report(s) to in the To: field. You can change the Subject and text of the message if you’d like. Send the message. Close the Contact Manager. The procedure is the same if you’re doing it while a form is open in View or Edit mode, however in this case, the E-mail button is on the toolbar at the top of the screen rather than the bottom. Data Entry and Forms Reference Page 35 Defaults TraCS allows default values to be set for some of the fields. Setting up a default will not populate the field; rather it selects the default answer from the choices presented when you enter the field. The User file that your agency supplies you with will already have several defaults built into it. You can set up individual defaults by clicking Tools-User Preferences-Edit Defaults from the Menu Bar at the top of the form. The Defaults Editor allows you to change the default GUI (Graphical User Interface) Settings for the Databar, Toolbar and Navigational Tree. Data Entry and Forms Reference Page 36 Click the Fields tab to set default for individual fields. For many fields, the default setting for a field needs to be a number rather than words because it needs to be the underlying code value for that field. For example, the default setting for a county needs to be the correct number, e.g. 13 rather than Dane for Dane County. Additional information on the Defaults Editor is available in Appendix F at the end of the User Manual. Data Entry and Forms Reference Page 37 TraCS Crash Forms Data Entry and Forms Reference Page 38 TraCS Crash Forms Crash Form – MV4000e Open a Crash form by selecting the Contact button on the toolbar or by selecting the Add Form button (if the Contact is already open) and then selecting “Crash” from the Available Forms list and hitting the OK button: You can enter the Common Information (e.g. operators, vehicles, etc.) at any time. Some people choose to do so as soon as they open a Contact. This can be done by keying the information into the appropriate data fields, or by importing the data from another data source such as through a mobile data browser or by using a 2D barcode scanner. See the section on Common Information for more information. You can choose to complete a Driver Exchange of Crash Information form before completing the full crash report form. This form gives basic information about the operators and vehicles involved in the crash, the time and location of the crash, and the officer completing the crash report. You can complete this form by clicking the Driver X button on the toolbar. When this button is clicked, all data fields other than those used for the Driver Exchange form are grayed out. If you have printing capabilities, you can print the report and give a copy to each operator/participant when the data fields are completed. To finish completing the full Crash form; click this button again so that it is no longer enabled. See the section on the Driver Exchange Report later in the book for more information about how to use it. Data Entry and Forms Reference Page 39 Data Fields On the Crash, Amended Crash and Deer Crash forms, the numbers at the beginning of the data field labels refer to the Field Number on the paper MV4000. • DOT Document Number - This number is automatically generated and cannot be changed. It is a combination of letters and numbers created from: • The TraCS agency selector (assigned by Badger TraCS) • The field or workstation unit number assigned by the local agency • A sequential number It is important that the number not be changed so that there are no duplicate document numbers for different accidents. • Accident Number - This is a number that your agency can use to identify the crash. This data field is equivalent to the vertical data field on the left-hand side, middle of the paper MV4000. This field is optional. • Police Number - This is also a number that your agency can use to identify the crash. This data field is equivalent to the vertical data field on the left-hand side, top of the paper MV4000. This field is optional. Data Entry and Forms Reference Page 40 Law Enforcement Agent Group Many of the data fields in this Group fill in automatically based on your user file. Complete the data fields that are not already filled in. • • • • Date Notified – Defaults to today’s date. If this is not correct, key in the correct date. Be sure to key two-digit months and days (e.g. 01 for January). Time Notified – Key in the four-digit military time without any punctuation (e.g. 0330 for 3:30 am). Time Arrived - Key in the four-digit military time without any punctuation (e.g. 0330 for 3:30 am). Date of Report - Defaults to today’s date. If this is not correct, key in the correct date. Be sure to key two-digit months and days (e.g. 01 for January). Accident Summary This section contains general information about the accident. The first part is shown on the Navigation Tree as Accident Summary. Data Entry and Forms Reference Page 41 • Reportable - This field indicates whether or not this is a reportable crash. It always defaults to “Reportable” which is indicated by the “X” in the field. If your agency keeps data on non-reportable crashes, you can change this field to non-reportable by clicking File on the menu bar and then Toggle Non Reportable. A message box will come up asking if you really want to change it to Non-Reportable. If you click Yes, the “X” will be removed from the box. You can change it back to reportable by following the same steps. • On Emergency – Key “Y” or click the Yes button if one of the units involved in the accident was operating as an emergency vehicle (lights and siren are activated). If not, key “N”, click the No button or leave blank. • Accident Date – Defaults to today’s date. If this is not correct, key in the correct date. Be sure to key two-digit months and days (e.g. 01 for January). • Time - Key in the four-digit military time without any punctuation (e.g. 0330 for 3:30 am). • Total Units – Key in the number of total units involved in the accident. The value entered in this field automatically creates the appropriate number of Unit groups in the form. • Total Injured – Key in the total number of persons injured in the accident. • Total Killed - Key in the total number of persons killed in the accident. • EMS Number – Key the EMS number if one is available. • Hit and Run – Key “Y” or click the Yes button if a hit and run unit was involved in the accident. If not, key “N”, click the No button or leave blank. • Government Property - Key “Y” or click the Yes button if government-owned, non-vehicle property was involved in the accident. If not, key “N”, click the No button or leave blank. • Fire - Key “Y” or click the Yes button if the accident involved fire in a motor vehicle in transport. If not, key “N”, click the No button or leave blank. If Yes is selected, describe the sequence of accident events, the fire’s origin, and what burned in the narrative. Fire does not include those originating in a legally parked vehicle. • Photos Taken - Key “Y” or click the Yes button if any mechanical method to capture the accident scene was used (e.g. photos, video tape, etc.). If not, key “N”, click the No button or leave blank. Enter the name of the person who took the photos or videotape in the 105 - Photos By field in the Description section at the bottom of the form. Data Entry and Forms Reference Page 42 • Trailer or Towed - Key “Y” or click the Yes button if one of the vehicles involved was pulling a trailer or towing another vehicle prior to the accident. If not, key “N”, click the No button or leave blank. This does not include vehicles towed from the accident scene as a result of the accident. Record the trailer or towed vehicle information in the Trailer Towed section of the form. • Load Spillage - Key “Y” or click the Yes button if a load spilled from a cargocarrying vehicle. If not, key “N”, click the No button or leave blank. Identify hazardous material spilled in the narrative. • Construction Zone - Key “Y” or click the Yes button if the accident occurred in or was related to a construction zone. If not, key “N”, click the No button or leave blank. • Names Exchanged - Key “Y” or click the Yes button if you have given instructions to every party involved in an accident to exchange their names, drivers license numbers, dates of birth, vehicle registration information and phone numbers or you have provided them with the Driver Exchange form. If not, key “N”, click the No button or leave blank. • Supplemental Reports - Key “Y” or click the Yes button if there are supplemental reports associated with this accident that will not be sent to WisDOT (e.g. special diagrams, measurement records, field notes, etc.). If not, key “N”, click the No button or leave blank. • Witness Statements - Key “Y” or click the Yes button if there are written witness statements associated with this accident that will not be sent to WisDOT. If not, key “N”, click the No button or leave blank. • Measurements Taken - Key “Y” or click the Yes button if you have taken and recorded measurements for this accident. If not, key “N”, click the No button or leave blank. • Start Date – The date you created the form. It is automatically filled in by the software. • Start Time – The time you created the form. It is automatically filled in by the software. • Processor – Your identification number. It is automatically filled in by the software. • Machine – Your field unit number. It is automatically filled in by the software. • Truck, Bus or Hazmat - Key “Y” or click the Yes button if the accident involved a vehicle registered as a truck (this includes pickup trucks), a vehicle displaying a hazardous materials placard, or a vehicle designed to carry 9 or more people including the driver. If not, key “N”, click the No button or leave blank. • Any truck or truck combination >10,000 lbs GVWR/GCWR - Key “Y” or click the Yes button if the accident involved a truck or truck combination > 10,000 lbs GVWR/GCWR. If not, key “N”, click the No button or leave blank. Data Entry and Forms Reference Page 43 • Any vehicle displaying a hazardous materials placard - Key “Y” or click the Yes button if the accident involved a vehicle displaying a hazardous materials placard. If not, key “N”, click the No button or leave blank. • Any vehicle designed to carry 9 or more people, including the driver - Key “Y” or click the Yes button if the accident involved a vehicle designed to carry 9 or more people, including the driver. If not, key “N”, click the No button or leave blank. • Fatal Injury - Key “Y” or click the Yes button if a person was fatally injured as a result of the accident. If not, key “N”, click the No button or leave blank. • Medical Transport - Key “Y” or click the Yes button if a person required transport for immediate medical treatment as a result of injuries received in the accident. If not, key “N”, click the No button or leave blank. • One or more vehicles towed from the scene due to disabling damage - Key “Y” or click the Yes button if one or more vehicles involved had to be towed from the scene as a result of the accident. If not, key “N”, click the No button or leave blank. The second part starting with County is shown on the Navigation Tree as Location. Location information is entered differently in TraCS than on the paper MV4000. It is very important to try to enter the data correctly. Appendix J of this manual shows examples of how location information should be entered. • County – Select the county in which the accident occurred. You can default this value if you usually report accidents in one county. • Municipality – Select the municipality in which the accident occurred. Be careful to make the correct selection in cases where there is a city/village with the same name as a township. You can default this value if you usually report accidents in one municipality. • Accident Location – Select the appropriate accident location using the spot where control was lost. • On Hwy # - If the accident occurred on a federal, state or county highway, select the highway from the list. If the highway also has a street name, key it in the next field (On Street Name). Exception: If the accident occurred on a county Data Entry and Forms Reference Page 44 highway within a city or village, key this in the next data field (On Street Name) as part of the street name (e.g. CTH M Century Ave). See the <F2> Help screen and/or Appendix J for more information about selecting highways. • On Street Name – If a list of roads is provided, select the street name of the road the accident occurred on from the list or hit [Alt + O] to key in the street name if it’s not on the list. If no list is provided, key in the street name. See the <F2> Help screen or the examples in Appendix J for instructions on how to enter parking lot and private property accidents. • Business/Frontage/Ramp – If the accident occurred on business highway, frontage road or ramp, select the appropriate designation from the list. If not, leave blank. If the accident occurred on a ramp, see the <F2> Help screen or Appendix J for instructions on how to enter an accident on a ramp. Note: This field only refers to data in the On Hwy # field; it does not refer to the fact that a parking lot was at a business. • Est. Dist – The following databar first appears when you are in this field: If your measurement is in feet, key the number here. If your measurement is in miles, change the databar to miles by either clicking the radio button next to Miles, hit the letter “M”, or cursor down to Miles. The databar will now look like this: Key the distance in miles using the decimal point. • From Dir – Select the direction that the accident occurred from the nearest intersecting street or highway. • From/At Highway # - If the nearest intersecting road is a federal, state or county highway, key the highway number or letter (county highways may be entered in this field regardless of whether the location is in a town, city or village). See the <F2> Help screen or Appendix J for more information about selecting which highway to use. If the highway also has a street name, key it in the next field (From/At Street Name). Note: This field is only meant for a highway number or letter; it does not refer to whether or not the “At” roadway was “From” or “At” the “On” roadway. FR, FRM, AT etc. should not be entered in this field unless they are the name of a county highway. • From/At Street Name – If appropriate, enter the name of the nearest intersecting roadway. If a list of roads is provided, select the street name from the list or hit [Alt + O] to key in the street name if it’s not on the list. If no list is provided, key in the street name. See the <F2> Help screen or the examples in Appendix J for instructions on how to enter parking lot and private property accidents. Data Entry and Forms Reference Page 45 • Business/Frontage/Ramp – If the From/At Highway was a business highway, frontage road or ramp, select the appropriate value. If not, leave blank. Note: This field only refers to data in the From/At Highway # field; it does not refer to the fact that a parking lot was at a business. • Structure Type – If you would like to record a specific location such as a house number, block number, light pole number, etc., choose which type of structure you’re referencing in this field. If not, leave blank. Use this field to identify parking lot and private property locations. • Structure Number - If you would like to record a specific location such as a house number, block number, light pole number, etc., record the number of the structure in this field. If not, leave blank. Use this field to identify parking lot and private property addresses. • Agency Space – This field is available for your agency’s use. They will instruct you how to use it. • Latitude and Longitude – If available, key in the latitude and longitude in units of decimal degrees. Or, import the data directly from a GPS unit if you have that capability. Data Entry and Forms Reference Page 46 Unit Group This section contains information about the drivers and vehicles involved in the crash. There should be a Unit group for each unit in the crash. When you key the number of Total Units involved in the crash earlier in the form (field 6), TraCS automatically creates that number of Unit groups. If you want to add or subtract a Unit group, see Adding or Deleting Groups. If you close the form before entering any data in a group, that group will be deleted. You will have to manually add a group when you re-open the form. Driver • Unit Status – If any of the unit statuses listed apply to this unit, select the appropriate item. If not, leave blank. See Appendix K for instructions on how to fill out a hit and run crash. • Total Occupants – Key the number of occupants (including the driver) for this unit. TraCS will automatically create additional Occupant groups based on the number entered here. Exception: No Occupant groups are added for buses or trains since data is not usually captured for non-injured occupants of these vehicles. You will have to manually add Occupant groups for injured occupants of buses or trains. If you close the form before putting any data in a group, that group will be deleted. You will have to manually add the group when you reopen the form. Key zero if there are no occupants (e.g. in a legally parked vehicle). Note: The form can allow a maximum of 20 Occupant groups. If you have more than 20 occupants in the accident, key the correct number in this field. Add an Amended Crash form to the contact and provide the additional occupant information. • Dir of Travel – Select the actual or compass direction the unit was traveling before the crash. Data Entry and Forms Reference Page 47 • Speed Limit – Select the speed limit for the roadway at the time of the crash. Select N/A from the bottom of the list if a speed limit does not apply (e.g. pedestrian). • On Duty Accident – If the operator of the unit was On Duty at the time of the crash as an EMT/First Responder, Fire Fighter, Police or Winter Hwy Maintenance, select the appropriate designation. If not, leave this field blank. • Most Harmful Event: Collision With – Select the event which caused the greatest injury or damage to this unit. Only one selection may be made for each unit. See the <F2> Help screen for this data field for more information on choosing the event. • What Driver Was Doing – Select the value that best describes what the pedestrian or operator of this unit was doing prior to the crash. • Traffic Control – Select the value that best describes the type of traffic control present for this unit. • Skidmarks to Impact – Key in feet the measurements of any skidmarks up to impact for the unit. Key zero if there are no skidmarks for the unit. • Driver Factors – Select all driver factors for this unit that may have contributed to the crash. Choose as many as apply. To select multiple factors using a mouse, scroll to the first applicable factor, click the item to highlight it; scroll to the second applicable factor, click the item to highlight it; etc. When you have selected all applicable factors, hit [Enter]. To select multiple factors using a cursor, scroll to the first applicable factor until you reach it, hit the [Space Bar] to highlight it; scroll to the second applicable factor until you reach it, hit the [Space Bar] to highlight it; etc. When you have selected all applicable factors, hit [Enter]. To select multiple factors using key strokes, start keying the first applicable factor until you reach it, hit the [Space Bar] to highlight it; start keying the second applicable factor until you reach it, hit the [Space Bar] to highlight it; etc. When you have selected all applicable factors, hit [Enter]. If you select several factors, they may not all show on the screen but all will be shown on the printed report and all will be entered into the database. • Highway Factors - Select all highway factors for this unit that may have contributed to the crash. Choose as many as apply. To select multiple factors using a mouse, scroll to the first applicable factor, click the item to highlight it; scroll to the second applicable factor, click the item to highlight it; etc. When you have selected all applicable factors, hit [Enter]. To select multiple factors using a cursor, scroll to the first applicable factor until you reach it, hit the [Space Bar] to highlight it; scroll to the second applicable factor until you reach it, hit the [Space Bar] to highlight it; etc. When you have selected all applicable factors, hit [Enter]. To select multiple factors using key strokes, start keying the first applicable factor until you reach it, hit the [Space Bar] to highlight it; start keying the second applicable factor until you reach it, hit the [Space Bar] to highlight it; etc. When you have selected all applicable factors, hit [Enter]. If you select several factors, Data Entry and Forms Reference Page 48 they may not all show on the screen but all will be shown on the printed report and all will be entered into the database. • Unit Type – Select the type of unit. If the unit is a vehicle, base this on the license plate. • Pedestrian Location – Select the item that best describes the location of the pedestrian at the time of the first harmful event in the crash. • Pedestrian Action – Select the item that best describes the pedestrian “action” that may have been a factor in the crash. Only one item may be selected. If no “action” is applicable, select Blank. • Last Name – If any person data has been entered in Common Information, a list of the individuals will come up when you enter this data field. If the person is already on the list, select them from the list and hit [Enter]. If a List appears and the person is not on the List, key [Alt + E] or click on the Edit/New last name. button on the databar and then key the operator or pedestrian’s Never choose a person that’s already in Common Information and edit it to be another person. For example, if a husband is driving a vehicle and his wife is the owner, do not choose the husband from the list in the Vehicle Owner section and then change the first name and middle initial to that of the wife. This will change the data for the husband on all the forms where they were entered, including issued citations. If you accidentally select the wrong person from the drop down list, simply go back and select the correct entry. If the person is not on the list, move up to the blank item at the top of list before pressing the Edit/New button to add the new person. Remember, if you press edit, you are editing the person or vehicle you have selected on the list, not creating a new entry. If a List does not come up when you enter the field, key the last name of the operator or pedestrian. If your agency is set up to retrieve data from an external data source such as through a Mobile Data Browser, key [Alt + S] or hit the Search Data Entry and Forms Reference button on Page 49 the databar to retrieve the operator information. Note: Depending on how your agency’s mobile data interface is set up, you may need to key in the operator’s last name before you do the search. Check with your agency on which method to use. Enter the operator or pedestrian’s last name as it appears on their Driver’s License. If the operator is unlicensed or a pedestrian, the legal name should be recorded. When the operator’s true name is different from what appears on the license, the reason should be listed in the narrative. Important: For H&R (unknown driver) and Legally Parked units, leave name fields blank. • First Name - Key the operator or pedestrian’s first name. • Middle Initial - Key the operator or pedestrian’s middle initial or middle name, whichever is shown on their driver license. • Suffix – If applicable, select the name suffix, (e.g. Jr) • DOB – Key the operator or pedestrian’s date of birth using two digits per month and day and four digits per year. • Sex – Key the sex of the operator or pedestrian or click on the appropriate button on the databar. • Street Address – Key the current address of the operator or pedestrian. If the street address was brought in from data scanned using a barcode reader or from an external data source, verify that it represents the current address. If not, key in the current address. • PO Box – Key the operator or pedestrian’s PO Box, if applicable. • City – Key the operator or pedestrian’s current city of residence. Note: For Canadian addresses, the province abbreviation should be listed in the City field after the city name followed by the zip code if there’s room (e.g. Toronto ON 2R34BR). If the zip code doesn’t fit here, enter it in the Street Address field after the street address (e.g. 1245 Main St 2R34BR). • St – Select the operator or pedestrian’s current state of residence. Note: If the address is Canadian, enter “CN” in this field rather than the province abbreviation. See note under “City” regarding the province. • Zip code – Key the operator or pedestrian’s current zip code of residence. Note: Canadian zip codes should be entered in the City field after the city name and province abbreviation (e.g. Toronto ON 2R34BR). If it does not fit in that field, put it in the Street address field following the street address (e.g. 1245 Main St 2R34BR). • Telephone Num – Key the operator or pedestrian’s current telephone number. If they do not have a telephone number or their number is an unpublished/unlisted number which is not public record, key in 000 000-0000. Data Entry and Forms Reference Page 50 • Driver’s License Number – If not already filled in, key the operator’s Driver License number without any spaces or punctuation such as hyphens. If your agency is set up to retrieve data from an external data source such as through a Mobile Data Browser, you can also do a search from this field to retrieve the operator information by keying [Alt + S] or hitting the Search button on the databar. Note: Depending on how your agency’s mobile data interface is set up, you may need to key in the driver’s license number before you do the search. Check with your agency on which method to use. Note: If the driver has no license, leave this field plus the next two fields (State and Expiration Year) blank. • State – Select the state that issued the Driver’s License. Note: For Canadian driver licenses, put the abbreviation for the province that issued the license in this field. • Expiration Year – Key the Driver’s License expiration year. • Operating As Classification – Select the appropriate class of vehicle operation the person was engaged in at the time of the crash, whether or not the person was licensed for this type of operation. Note: This field must be completed even for Legally Parked, Unknown or Hit and Run vehicles where no operator information is entered/required. • Operating As Endorsements – Based on the type of operation engaged in at the time of the crash, select any endorsements required for legal operation of the unit. Choose all that apply. See the directions for Driver Factors for information on selecting multiple items. Note: This field must be completed even for Legally Parked, Unknown or Hit and Run vehicles where no operator information is entered/required. • Operating a Commercial Motor Vehicle – If the unit requires a Class A, B, or C license for operation, key “Y” or click the Yes button on the databar. If the Class is D, M or O, key “N”, click the No button on the databar, or leave blank. • Injury Severity – Based on your observations at the scene, select the degree of injury severity to the operator or pedestrian. Data Entry and Forms Reference Page 51 • Airbag – Select the level of airbag deployment for the operator in the crash. Select “Not Applicable” if no airbag is furnished for the seat position. Select “Non-Deployed” only if the seat position is equipped with an airbag and the airbag did not deploy. • Ejected – Select the level of the operator’s ejection in the crash. “Ejected” can apply to motorcyclists, bicyclists, etc. “Not Applicable” applies to pedestrians. • Trapped/Extricated – Select the level of the operator’s entrapment or extrication. “Trapped/Not Extricated” means the operator died in the vehicle. • Medical Transport – If the operator was injured in the crash and transported to a medical facility by a qualified medical professional, key “Y” or click the Yes button on the databar. If not, key “N”, click the No button on the databar, or leave blank. • # Citations Issued – Key the number of citations issued to the unit. The form contains spaces to list up to five statute numbers in the next few fields. Based on the number entered in this field, an appropriate number of fields will open up for data entry. Additional statute numbers may be listed in the narrative. List the violations that most contributed to the crash in the 1st and 2nd Statute Number fields. • 1st Statute Number – Key the statute number, including subsection and paragraph, of the violation that contributed most to the crash. Alternatively, use the Violation Search engine to select the statute number by keying [Alt + S] or clicking the Search button on the databar. See page 247 of the TraCS Baseline User Manual for information on how to use the Violation Search engine. You may also type in a Statute Number shortcut. Shortcuts are found by pressing <F2> for help. Be sure to enter a statute number rather than the citation number. • 2nd Statute Number – Key or select the statute number of the violation the second most contributed to the crash. • 3rd, 4th and 5th Statute Number – Key or select any additional violations. • Driver or Pedestrian Cond – Select the value that best depicts the operator or pedestrian’s condition at the time of the crash. • Substance Presence – Select the value that best depicts the presence of alcohol or other drugs in the operator or pedestrian at the time of the crash. “Yes” may be selected even though a test is not given if evidence exists that indicates the presence of alcohol or other drugs. • Alcohol Test – Select the value that best depicts whether or not a chemical alcohol test was given to the operator or pedestrian. PBTs are not considered to be tests for this data field. • Alcohol Content – If an intoxilyzer, blood or urine alcohol test was given, select the alcohol concentration (AC value). Do not enter PBT value. • Drug Test - Select the value that best depicts whether or not a drug test was given to the operator or pedestrian. Data Entry and Forms Reference Page 52 • Drug Presence – If a drug test was given and drugs were present, select the drugs found. Select all that apply. When you select “Other Drug Medications”, record the type of medication in the narrative. • Seat Position – Select the seat position of the operator or pedestrian. Selection may be made by keying the number in the box or clicking on the appropriate button. Select “Pedestrian (Nonoccupant)” for DRIVERLESS MOTOR VEHICLES. • Safety Equipment – Select the safety equipment used by the operator or pedestrian. Select “Not Applicable-Nonmotorist” for PEDESTRIANS and DRIVERLESS MOTOR VEHICLES. Vehicle • Vehicle Type – Select the value that best describes the vehicle type. The list of values is limited by values entered for DL Classification, Endorsements and Unit Type. If you don’t see the value you expect here, go back and reconsider your entries for these fields. The <F2> Help screen for this data field shows valid Unit Type, Plate Type and Vehicle Type combinations. The following is a complete list of the vehicle types: o Passenger Car o Police on Emergency – This type is only for police cars that are operating “on emergency” (lights and sirens activated). Other police cars would be passenger cars. o Utility Truck – These are single unit trucks with a gross vehicle weight rating of under 10,000 pounds such as pickup trucks. o Straight Truck (Insert Truck) – These are single unit trucks with a gross vehicle weight rating of 10,000 pounds or more. Data Entry and Forms Reference Page 53 o Truck Tractor (Not Attached) – These are truck tractors not attached to any trailer. o Truck Tractor (Semi Attached) o Truck Tractor (Double Bottom) o Motor Home o Ambulance on Emergency – This type is only for ambulances that are operating “on emergency” (lights and siren activated). Non-emergency ambulances should have a vehicle type based on what the vehicle would be if it were not an ambulance (usually utility truck). o Fire Truck on Emergency - This type is only for fire trucks that are operating “on emergency” (lights and siren activated). Non-emergency fire trucks should have a vehicle type based on what the vehicle would be if it were not a fire truck (usually straight truck (insert truck)). o Motorcycle o Moped o School Bus – This type of school bus is for cases where only the driver was present on the bus at the time of the crash or it was an empty school bus (parked). o Pupil Transportation School Bus – This type of school bus is for cases where pupils are on the bus as well as the driver. o Passenger Bus – Buses other than school buses designed to carry 16 or more passengers o Farm Tractor/Self Propelled – This includes all self-propelled farm equipment (tractors, combines, corn pickers, etc.) o Other Working Machines – Other large pieces of equipment such as road graders, front end loaders, backhoes, fork lifts, street sweepers, large mowers, etc. o Railway Train o Snow plow – Any vehicle with an attached blade used for plowing snow o Snowmobile/ATV o Miscellaneous – Other smaller pieces of equipment such as lawn tractors, go-carts, motorized bicycles, Segways, golf carts, motorized scooters, riding lawn mowers, horse and buggies, Neighborhood Electric Vehicles (NEVs), etc. o Bicycle o Pedestrian – Includes a horse and rider, a person in a wheelchair, a person on a child’s tricycle, persons on any mechanically propelled vehicles especially designed for disabled persons. Data Entry and Forms Reference Page 54 o Fire Fighter on Emergency – A fire fighter responding to an emergency with lights activated. • License Plate Number – If any vehicle data has been entered in Common Information, a list of vehicles will come up when you enter this data field. If the vehicle is already on the list, select it from the list and hit [Enter]. If a List appears and the vehicle is not on the List, key [Alt + E] or click on the Edit/New button on the databar and then key the license plate number displayed on the unit without any spaces or punctuation such as hyphens. If you accidentally select the wrong vehicle from the drop down list, simply go back and select the correct entry. If the vehicle is not on the list, move up to the blank item at the top of list before pressing the edit button to add the new vehicle. Remember, if you press edit, you are editing the person or vehicle you have selected on the list, not creating a new entry. If a List does not come up when you enter the field, key the license plate number displayed on the unit without any spaces or punctuation such as hyphens. If your agency is set up to retrieve data from an external data source such as through a Mobile Data Browser, key [Alt + S] or hit the Search button on the databar to retrieve the vehicle information. Note: Depending on how your agency’s mobile data interface is set up, you may need to key in the license plate number before you do the search. Check with your agency on which method to use. Note: If the vehicle had no plates, leave this field blank. In the case of a combination vehicle, enter the power unit information. Trailer plates must only be entered in the Trailer section. See the <F2> Help screen for information on entering parked trailers. If this information was brought in from data scanned using a barcode reader or by a search from an external data source, verify that it is the correct value by double-checking the number on the unit. Data Entry and Forms Reference Page 55 • Plate Type – Select the plate type for the unit. For out-of-state license plates, select the WI value that best describes the unit. Note: A value must be entered in this field even if the vehicle had no plates. Select a plate type that is common for this vehicle type (e.g. AUT for a passenger car). • St – Select the state that issued the license plate. Leave this field blank if the vehicle had no plates. Note: For Canadian license plates, put the abbreviation for the province that issued the plate in this field. • Exp Year – Key the year that the license plate will expire. For non-expiring plates, leave blank. Note: Leave blank if the vehicle had no plates. • Vehicle Identification Number – Key the Vehicle Identification Number. If this information was brought in from data scanned using a barcode reader or by a search from an external data source, verify that it is the correct value by doublechecking the number on the unit. • Yr – Key the model year of the vehicle. • Make – Select the make of the vehicle (e.g. Ford). • Model – Key the model of the vehicle (e.g. Taurus). • Body Style – Select the body style of the vehicle (e.g. 2dr). • Color – Select the color that best describes the predominant color of the vehicle. • Vehicle Damage – Key the area(s) where the vehicle was damaged in the crash using the two-digit value (05) or select them by clicking on the value(s) on the databar. If “11 Total (Damage to all areas)” is selected, do not select any other values. Trailer or towed unit damage is shown in this data field; see the <F2> Help screen for information on how to show it. • Extent of Damage – Select the value that best describes the extent of damage to the vehicle. • Towed Due to Damage – Key “Y” or click the Yes button if the vehicle was towed from the scene due to damage in the crash. If it was not towed, key “N”, click the No button, or leave blank. Data Entry and Forms Reference Page 56 • Vehicle Removed By – Select the name of the towing company that removed the vehicle. If it is not on the list, Key [ALT + O] or click the Other button on the databar and key the information. DO NOT HIGHLIGHT OTHER on the list and hit [Enter] because due to a bug in the current form of TraCS, it brings in weird data. • Vehicle Factors - Select all vehicle factors for this unit that may have contributed to the crash. Choose as many as apply. To select multiple factors using a mouse, scroll to the first applicable factor, click the item to highlight it; scroll to the second applicable factor, click the item to highlight it; etc. When you have selected all applicable factors, hit [Enter]. To select multiple factors using a cursor, scroll to the first applicable factor until you reach it, hit the Space Bar to highlight it; scroll to the second applicable factor until you reach it, hit the Space Bar to highlight it; etc. When you have selected all applicable factors, hit [Enter]. To select multiple factors using key strokes, start keying the first applicable factor until you reach it, hit the Space Bar to highlight it; start keying the second applicable factor until you reach it, hit the Space Bar to highlight it; etc. Hitting the Space Bar while on a highlighted selection will unselect it. When you have selected all applicable factors, hit [Enter]. If you select several factors, they may not all show on the screen but all will be shown on the printed report and all will be entered into the database. Vehicle Owner • Vehicle Owner Same as Operator – Key “Y” or click the Yes button if the vehicle owner is the same person as the operator. Key “N”, click the No button, or leave blank if they are not the same. Selecting Yes will copy the information about the operator into this section. • Use Operator Address - Key “Y” or click the Yes button if the address of the vehicle owner is the same as the operator’s. Key “N”, click the No button, or leave blank if they are not the same. Selecting Yes will copy the operator’s address information into these data fields. • Last Name – If any person data has been entered in Common Information, a list of the individuals will come up when you enter this data field. Data Entry and Forms Reference Page 57 If the person is already on the list, select them from the list and hit [Enter]. If a List appears and the person is not on the List, key [Alt + E] or click on the Edit/new button on the databar and then key the vehicle owner’s last name as it appears on the registration record. Never choose a person that’s already in Common Information and edit it to be another person. For example, if a husband is driving a vehicle and his wife is the owner, do not choose the husband from the list in the Vehicle Owner section and then change the first name and middle initial to that of the wife. This will change the data for the husband on all the forms where they were entered, including issued citations. If you accidentally select the wrong person from the drop down list, simply go back and select the correct entry. If the person is not on the list, move up to the blank item at the top of list before pressing the Edit/New button to add the new person or vehicle. Remember, if you press edit, you are editing the person or vehicle you have selected on the list, not creating a new entry. If a List does not come up when you enter the field, key the vehicle owner’s last name as it appears on the registration record. • First Name - Key the vehicle owner’s first name. • Middle Initial - Key the vehicle owner’s middle initial or name as shown on identification. If they have no middle initial, leave field blank; do not enter “NMI.” • Suffix - If applicable, key the suffix of the vehicle owner’s name. • Date Of Birth—Key the vehicle owner’s date of birth, if required by your agency. • Company Name – If the vehicle owner is a business or government organization, key the name of the business or government. • Org Type – Select the type of person/company that owns the vehicle. • Street Address – Key the current address of the vehicle owner. If the street address was brought in from data scanned using a barcode reader or from an external data source, verify that it represents the current address. If not, key in the current address. • PO Box – If applicable, key the PO Box of the vehicle owner. • City – Key the city of the vehicle owner’s current residence. Data Entry and Forms Reference Page 58 Note: For Canadian addresses, the province abbreviation should be listed in the City field after the city name followed by the zip code if there’s room (e.g. Toronto ON 2R34BR). If the zip code doesn’t fit here, enter it in the Street Address field after the street address (e.g. 1245 Main St 2R34BR). • State - Select the state of the vehicle owner’s current residence. Note: If the address is Canadian, enter “CN” in this field rather than the province abbreviation. See note under “City” regarding the province. • Zip code - Key the zip code of the vehicle owner’s current residence. Note: Canadian zip codes should be entered in the City field after the city name and province abbreviation (e.g. Toronto ON 2R34BR). If it does not fit in that field, put it in the Street address field following the street address (e.g. 1245 Main St 2R34BR). • Telephone Number - Key the vehicle owner’s current telephone number. If they do not have a telephone number or their number is an unpublished/unlisted number which is not public record, key in 000 000-000. Insurance • Insurance Company – It is VERY important to select the correct insurance company. Sometimes, there are several companies with similar names. Ask to see the operator’s insurance card if they have it with them and get the correct name. See the <F2> Help screen for this data field for the “real” name of some common insurance companies such as AAA. If the insurance company is not on the list, key [ALT + O] or click the “Other” button on the databar and key the name of the insurance company. Do not enter the name of the insurance agent, agency or motor club. If the vehicle is not insured, select “None”. If the insurance company is unknown, select Unknown from the list. Aliases have been set up for common insurance companies. To use an alias, key [Alt + O] or hit the “Other” button on the databar and then key the alias (e.g. SF for State Farm) in the Insurance Company field and hit [Enter]. A message box will pop up asking you to verify that the correct company was selected. A list of the aliases that come loaded in TraCS can be found by clicking on the red Alias List link in the <F2> help screen. • Policy Holder Same As Owner - Key “Y” or click the Yes button if the insurance policy holder is the same as the vehicle owner. Key “N”, click the No button, or leave blank if they are not the same. Data Entry and Forms Reference Page 59 • Policy Holder Last Name – If the insurance policy holder is not the same as the vehicle owner and is an individual, key their last name. • Policy Holder First Name – Key the first name of the insurance policy holder. • Policy Holder Company – If the insurance policy holder is a business or government unit and not the same as the vehicle owner, key the name of the business/government. School Bus Complete this section for school buses involved in crashes. • Bus Traveling To/From – Select whether the bus was traveling “to” or “from” school. • School Name – Key the name of the school the bus was traveling to or from. • Body Make – Key the body make of the bus. • Seating Capacity – Key the seating capacity of the bus. • School District - Key the name of the school district the bus is contracted with. Trailer Towed Group Complete this section for any trailer involved in a crash. • • Trailer Unit Number – Key the number of the unit on this report that the trailer or towed unit is associated with. If a value comes up automatically in this field, verify that it’s correct. IMPORTANT: If a power unit was towing more than one trailer or towed unit, enter the information for only one of the trailers or towed units in this group. Put the information about any additional trailers or towed units for this power unit in the narrative. If more than one power unit was pulling a trailer or towed unit in the crash, additional Trailer Towed unit groups can be added (see Adding or Deleting Groups). Plate Number – Key the license plate number displayed on the trailer or towed unit. Do not use spaces or punctuation such as hyphens. Alternatively, if you have already entered the trailer information into the Common Information, key [Alt + L] or click on the List button on the databar, select the trailer from the list Data Entry and Forms Reference Page 60 and hit [Enter]. See the <F2> Help Screen for information on recording trailer information for parked trailers. If your agency is set up to retrieve data from an external data source such as through a Mobile Data Browser, key [Alt + S] or hit the Search button on the databar to retrieve the vehicle information. Note: Depending on how your agency’s mobile data interface is set up, you may need to key in the license plate number before you do the search. Check with your agency on which method to use. Always verify all data returned from the Mobile Data Browser. Note: If the trailer had no plates, leave this field blank. • Plate Type – Select the type of license plate displayed on the trailer or towed unit. For out-of-state plates, select the WI plate type that most closely represents the plate type. • State – Select the state that issued the license plate. Note: For Canadian license plates, put the abbreviation for the province that issued the plate in this field. • Plate Expiration Year – Key the year that the license plate will expire. • Make – Key the make of the trailer. • Unit Type – Select the value that best describes the trailer or towed unit type. See the <F2> Help screen for more information on these unit types. • Vehicle Identification Number - Key the Vehicle Identification Number. If this information was brought in from data scanned using a barcode reader or by a search from an external data source, verify that it is the correct value by doublechecking the number on the trailer. Occupant Group This section contains information about the passengers in vehicles involved in the crash. There should be an Occupant group for each passenger in the crash. When you key the number of Total Occupants involved for each unit in the crash earlier in the form, TraCS automatically creates that number of Occupant groups. Exception: No Occupant groups are added for buses or trains since data is not required for non-injured occupants of these vehicles. You will have to manually add Occupant groups for injured occupants of buses or trains. If you close the form before putting any data in a group, that group will be deleted. You will have to manually add the group when you re-open the form. If you want to add or subtract an Occupant group, see Adding or Deleting Groups. Data Entry and Forms Reference Page 61 • • Unit No – Key the unit number that the OCCUPANT (i.e. passenger) was in. Last Name – Key the last name of the occupant. If the person refused to give their name, key “R”. If the name is unknown, key “U”. If you have already entered the occupant information into the Common Information (e.g. person is vehicle owner but not driver), key [Alt + L] or click on the List button on the databar, select the occupant from the list and hit [Enter]. Never choose a person that’s already in Common Information and edit it to be another person. For example, if a husband is driving a vehicle and his wife is an occupant, do not choose the husband from the list and then change the first name and middle initial to that of the wife. This will change the data for the husband on all the forms where they were entered, including issued citations. If you accidentally select the wrong person from the drop down list, simply go back and select the correct entry. If the person is not on the list, move up to the blank item at the top of list before pressing the Edit/New button to add the new person. Remember, if you press edit, you are editing the person or vehicle you have selected on the list, not creating a new entry. • • • • • First Name – Key the first name of the occupant. Middle Initial – Key the middle initial or middle name of the occupant as shown on identification. If they have no middle initial, leave field blank; do not use “NMI.” Suffix – If applicable, key the suffix to the name of the occupant. Address Same as Operator - Key “Y” or click the Yes button on the databar if the occupant has the same address as the operator. Key “N”, click the No button, or leave blank if they are not the same. Selecting Yes will copy the address information so you don’t need to re-key it. Address Same as Owner - Key “Y” or click the Yes button on the databar if the occupant has the same address as the vehicle owner. Key “N”, click the No Data Entry and Forms Reference Page 62 • • • • • • • • • • • • • • • button, or leave blank if they are not the same. Selecting Yes will copy the address information so you don’t need to re-key it. Street Address – Key the current street address of the occupant. PO Box – If applicable, key the PO Box of the occupant. City – Key the city of current residence of the occupant. Note: For Canadian addresses, the province abbreviation should be listed in the City field after the city name followed by the zip code if there’s room (e.g. Toronto ON 2R34BR). If the zip code doesn’t fit here, enter it in the Street Address field after the street address (e.g. 1245 Main St 2R34BR). St – Select the state where the occupant resides. Note: If the address is Canadian, enter “CN” in this field rather than the province abbreviation. See note under “City” regarding the province. Zip code – Key the zip code of the current residence of the occupant. Note: Canadian zip codes should be entered in the City field after the city name and province abbreviation (e.g. Toronto ON 2R34BR). If it does not fit in that field, put it in the Street address field following the street address (e.g. 1245 Main St 2R34BR). Sex – Key F or M for female or male or click the appropriate button on the databar for the occupant. Date of Birth – Key the date of birth of the occupant using two-digit months and days and a four-digit year. Injury Severity - Based on your observations at the scene, select the degree of injury severity to the occupant. Seat Position – Select the seat position of the occupant. List an occupant sitting on a person’s lap as the same seat position as that person. Safety Equipment – Select the safety equipment used by the occupant. Airbag – Select the level of airbag deployment for the occupant in the crash. Select “Not Applicable” if no airbag is furnished for the seat position. Select “Non-Deployed” only if the seat position is equipped with an airbag and the airbag did not deploy. Ejected – Select the level of the occupant’s ejection in the crash. “Ejected” can apply to motorcyclists, bicyclists, etc. Trapped/Extricated – Select the level of the occupant’s entrapment or extrication. “Trapped/Not Extricated” means the occupant died in the vehicle. Medical Transport – If the occupant was injured in the crash and transported to a medical facility by a qualified medical professional, key “Y” or click the Yes button on the databar. If not, key “N”, click the No button on the databar, or leave blank. Agency Space – This space is provided for your agency’s use. Data Entry and Forms Reference Page 63 Witness Group This section contains information about witnesses to the crash. There should be a Witness group for each witness to the crash. If you want to add or subtract a Witness group, see Adding or Deleting Groups. • Last Name – Key the last name of the witness. • First Name – Key the first name of the witness. • Middle Initial – Key the middle initial of the witness or middle name as shown on identification. If they have no middle initial, leave field blank; do not use “NMI.” • Street Address – Key the current street address of the witness. • PO Box – If applicable, key the PO Box of the witness. • City – Key the city of current residence of the witness. • State– Select the state where the witness resides. • Zip code – Key the zip code of the current residence of the witness. Note: Canadian zip codes should be entered in the City field along with the name of the city (e.g. Edmonton 2R34B). • Date of Birth – Key the date of birth of the witness using two-digit months and days and a four-digit year. • Phone Number – Key the telephone number of the witness. If they do not have a telephone number or their number is an unpublished/unlisted number which is not public record, key in 000 000-0000. Data Entry and Forms Reference Page 64 Accident Summary Continued Group This section contains additional basic information about the crash. • First Harmful Event – Select the value that best describes the FIRST OCCURRENCE of injury or damage in the crash. • Special Study – If the crash is involved in a special study, key the appropriate value. The WI Dept of Transportation must approve the use of Special Study values in advance. More than one value may be selected. See the instructions for the Driver Factors field for information on how to select values for this field. • Manner of Collision – Key the value that best describes the manner of collision at the point of the first harmful event or select it by clicking on the appropriate value on the databar. Only one selection may be made. • Access Control – Select the value that best describes the type of roadway access control for the ON Street/Hwy vehicle. • Road Curvature – Select the value that best describes the horizontal road terrain at the first harmful event. • Road Terrain – Select the value that best describes the vertical road terrain at the first harmful event. • Light Condition – Select the value that best describes the light condition at the time of the crash. • Traffic Way – Select the value that best describes the ON Street/Hwy traffic way. • Road Surface Condition – Select the value that best describes the road surface condition at the time of the crash. • Relation to Roadway – Select the value that best describes the location of the crash. • Weather Condition – Select the value that best describes the weather condition at the time of the crash. Data Entry and Forms Reference Page 65 Property Owner Group This section contains information about owners of fixed objects struck in the crash. There should be a Property Owner group for each property owner in the crash. If you want to add or subtract a Property Owner group, see Adding or Deleting Groups. Note: You will need a property owner group for every crash where some sort of fixed object is struck, including ditches, etc. If the property owner is unknown, just key “Unknown” in the last name field. Several property owner aliases are included with TraCS for common companies and WisDOT. These are executed from the Company Name field. See the <F2> Help screen for a list of supplied aliases. Property Owner • Last Name – If the property owner is an individual, key their last name. Alternatively, if you have already entered the property owner information into the Common Information, key [Alt + L] or click on the List button on the databar, select the owner from the list and hit [Enter]. • First Name - Key the property owner’s first name. • Middle Initial - Key the property owner’s middle initial or middle name as shown on identification. If they have no middle initial, leave field blank; do not enter “NMI.” • Suffix - If applicable, key the suffix of the property owner’s name. • Date of Birth – If applicable and available, key the property owner’s date of birth. • Government Property Type – If the property owner is a unit of government, select the government type. • Company Name – If the property owner is a business or government organization, key the name of the business or government. Aliases are available Data Entry and Forms Reference Page 66 for this field. To use an alias, key in the alias in this field. After you hit [Enter], the full name of the company or governmental group will be filled in along with their address. To see a list of aliases that come with TraCS, look at the <F2> help screen for this field and click on the red “Alias Name” link. Agencies can add additional aliases to TraCS. • Organization Type – Select the property owner type. • Street Address – Key the address of the property owner. • PO Box – If applicable, key the PO Box of the property owner. • City – Key the city of the property owner’s residence. Note: For Canadian addresses, the province abbreviation should be listed in the City field after the city name followed by the zip code if there’s room (e.g. Toronto ON 2R34BR). If the zip code doesn’t fit here, enter it in the Street Address field after the street address (e.g. 1245 Main St 2R34BR). • St - Select the state of the property owner’s residence. Note: If the address is Canadian, enter “CN” in this field rather than the province abbreviation. See note under “City” regarding the province. • Zip code - Key the zip code of the property owner’s residence. Note: Canadian zip codes should be entered in the City field after the city name and province abbreviation (e.g. Toronto ON 2R34BR). If it does not fit in that field, put it in the Street address field following the street address (e.g. 1245 Main St 2R34BR). • Damage Tag Number – For agencies following the Damage Claim Program and Tagging System, key the yellow Govt. Damage Tag number in this field. • Telephone Number - Key the property owner’s telephone number. If they do not have a telephone number or their number is an unpublished/unlisted number which is not public record, key in 000 000-0000. Fixed Objects Struck There are spaces in this section for several fixed objects that were struck for each property owner. If additional spaces are needed, key the information in the narrative. • • Striking Unit – Key the unit number of the unit that struck the fixed object. Struck Object – Select the value that best describes the type of fixed object. Data Entry and Forms Reference Page 67 Description Group This section contains additional description of the crash. • Photos By – Key the name of the person(s) who took photos or video recordings of the scene. • Surface Type – Select the value that best describes the type of road surface for the ON Street/Hwy. • Diagram – Click on the appropriate button on the databar to bring up the type of diagram tool you want to use. Provide a diagram that corresponds with the narrative description of the crash. See Appendix G on the TraCS Diagram Tool and Image Capture & Import (Appendix E) for more information on how to use these options. Note: A diagram within the TraCS report is required for all crashes. You may create an additional diagram if desired. • Narrative – Click on the Narrative button on the databar to write a narrative description of the crash. It should describe the sequence of events for all units involved in the crash. Once you have keyed the narrative, click Continue to place it in the form. Note: Narratives within the TraCS report are required for all crashes. You may prepare additional narrative reports, if desired. Data Entry and Forms Reference Page 68 Truck and Bus Group This section contains information about trucks and buses that are in crashes that meet certain criteria. A Truck and Bus Accident group should be completed for each vehicle that meets the following criteria: A): it was a truck or truck combination > 10,000 lbs GVWR or GCWR, OR it was any vehicle displaying a hazardous materials placard, OR it was any vehicle designed to carry 9 or more persons including the driver; AND B): a person was fatally injured in the crash, OR a person injured in the crash needed to be transported for immediate medical treatment, OR one or more vehicles had to be towed from the scene due to damage in the crash. If you need to add or subtract a Truck or Bus group, see Adding or Deleting Groups. • • • • • Unit Number – Key the number of the unit on this form that the information refers to. Use Vehicle Owner Information – If appropriate, key “Y” or click the Yes button on the databar to copy the vehicle owner information to the Carrier name and address fields. If not, key “N”, click the No button or leave blank. HazMat Class – If hazardous materials are being transported, select the type of material. The number corresponds to the number shown on the shipping papers or in the bottom point of the hazardous materials placard. If not, leave blank. HazMat “UN” Nos. – If the carrier is transporting hazardous materials, key the four-digit UN number from the shipping papers or placard. On cargo tanks, the UN number may also be found on an orange panel adjacent to the placard. HazMat Placard Displayed - If a hazardous material placard is displayed on the vehicle, key “Y” or click the Yes button on the databar. If not, key “N”, click the No button on the databar, or leave blank. Data Entry and Forms Reference Page 69 • • • • • • • • • • • • • • • • Hazardous Cargo Released – If hazardous material was released as a result of the crash, key “Y” or click the Yes button on the databar. If not, key “N”, click the No button on the databar, or leave blank. Hazardous Materials in this Load – Key the name(s) of the hazardous material(s) present in the load. If additional space is needed, list them in the narrative. Hazardous Materials Released – Key the name(s) of hazardous material(s) released as a result of the crash. If additional space is needed, list them in the narrative. Do not include fuel that powers the vehicle. Interstate Carrier - Key “Y” or click the Yes button on the databar for any of the following situations: an out-of-state driver, or an out-of-state vehicle, or it has an US DOT or ICC MC#, or it is a carrier with an out-of-state address, or any other indication that the driver crosses state lines. Otherwise, key “N”, click the No button on the databar, or leave blank. US DOT # - Key the US DOT number if available. The number can usually be found on the outside door panel of the power unit. ICC MC # - Key the ICC MC # if available. The number can usually be found on the outside door panel of the power unit. Carrier Name – Key the name of the motor carrier company from the first available source. The name of the carrier may be found printed on the vehicle’s side, on the shipping papers, or by asking the driver. Source – Select the source of the carrier number information. Carrier Address – Key the carrier’s current street address. City – Key the carrier’s current address city. Note: For Canadian addresses, the province abbreviation should be listed in the City field after the city name followed by the zip code if there’s room (e.g. Toronto ON 2R34BR). If the zip code doesn’t fit here, enter it in the Street Address field after the street address (e.g. 1245 Main St 2R34BR). State – Key the carrier’s current address state. Note: If the address is Canadian, enter “CN” in this field rather than the province abbreviation. See note under “City” regarding the province. Zip code – Key the carrier’s current address zip code. Note: Canadian zip codes should be entered in the City field after the city name and province abbreviation (e.g. Toronto ON 2R34BR). If it does not fit in that field, put it in the Street address field following the street address (e.g. 1245 Main St 2R34BR). LC # - Key the LC # if available. The number can usually be found on the outside door panel of the power unit. IC # - Key the IC # if available. The number can usually be found on the outside door panel of the power unit. GVWR – Key the vehicle’s gross vehicle weight rating (GVWR) in pounds. This information can be found on the manufacturer’s specification plate in the driver’s door area, on the side of the vehicle or by asking the driver. Tot Axles – Key the total number of axles on the truck or bus, including the axles on the truck, bus, semi-trailers and trailers. Data Entry and Forms Reference Page 70 • • • • • • Vehicle Configuration – Select the value that best describes the configuration of the vehicle. Cargo Body Type – If applicable, select the value that best describes the cargo body type. First Event – Select the value that best describes the first event that occurred to the vehicle in the crash. Second Event – Select the value that best describes the second event that occurred to the vehicle in the crash. Third Event – Select the value that best describes the third event that occurred to the vehicle in the crash. Fourth Event - Select the value that best describes the fourth event that occurred to the vehicle in the crash. Attachment Group Depending on the policies of your agency, you may attach files to your report. Not all agencies use attachments. • • • • • • • • • Attached File – Click the attach file button. You will be prompted to enter the file name and path of the file you wish to attach to the form. File Name – Enter the name of the file. Unit Number – Enter the unit number associated with the attachment. (Optional) Driver License – Enter the driver license number of the individual associated with the attachment. (Optional) Last Name – Enter the last name of the individual associated with the attachment. (Optional) First Name – Enter the first name of the individual associated with the attachment. (Optional) Middle Name – Enter the middle name of the individual associated with the attachment. (Optional) Suffix Name – Enter the suffix name of the individual associated with the attachment. (Optional) Sex – Enter the sex of the individual associated with the attachment. (Optional) Data Entry and Forms Reference Page 71 • • • • • • • Date of Birth – Enter the date of birth of the individual associated with the attachment. (Optional) License Plate Number – Enter the license plate number of the vehicle associated with the attachment. (Optional) Plate Type – Enter the plate type of the vehicle associated with the attachment. (Optional) Plate State – Enter the plate registration state of the vehicle associated with the attachment. (Optional) Exp Year – Enter the expiration year of the vehicle associated with the attachment. (Optional) Vehicle Identification Number – Enter the vehicle identification number of the vehicle associated with the attachment. (Optional) Agency Space – Enter any agency specific information required by your agency. Data Entry and Forms Reference Page 72 Validation Once you have completed a crash form, validate it. See the section on Validation earlier in the book. Printing Three reports are available for printing the crash report: the Driver Exchange of Information Report, the full Crash Report, and an office copy of the full crash report which shows the code values rather than the descriptive values for some fields. Data Entry and Forms Reference Page 73 Deer Crash Form The Deer Crash Form can be used to report single unit, property damage only, deer or other non-domesticated animal crashes. It contains only the necessary fields from the Crash form. To start a Deer Crash form, choose it from the Available Forms menu: Data Fields The numbers at the beginning of the data field labels refer to the Field Number on the paper MV4000. • DOT Document Number - This number is automatically generated and cannot be changed. It is a combination of letters and numbers created from: • The TraCS agency selector (assigned by Badger TraCS) • The field or workstation unit number assigned by the local agency • A sequential number It is important that the number not be changed so that there are no duplicate document numbers for different accidents. Data Entry and Forms Reference Page 74 • Reportable - This field indicates whether or not this is a reportable crash. It always defaults to “Reportable” which is indicated by the “X” in the field. If your agency keeps data on non-reportable crashes, you can change this field to non-reportable by clicking File on the menu bar and then Toggle Non Reportable. A message box will come up asking if you really want to change it to nonreportable. If you click Yes, the “X” will be removed from the box. You can change it back to reportable by following the same steps. • Accident Number - This is a number that your agency can use to identify the crash. This data field is equivalent to the vertical data field on the left-hand side, middle of the paper MV4000. This field is optional. • Police Number - This is also a number that your agency can use to identify the crash. This data field is equivalent to the vertical data field on the lefthand side, top of the paper MV4000. This field is optional. Law Enforcement Agent Group Many of the data fields in this Group fill in automatically based on your user file. Complete the data fields that are not already filled in. • Date Notified – Defaults to today’s date. If this is not correct, key in the correct date. Be sure to key two-digit months and days (e.g. 01 for January). • Date of Report - Defaults to today’s date. If this is not correct, key in the correct date. Be sure to key two-digit months and days (e.g. 01 for January). Data Entry and Forms Reference Page 75 Accident Summary This section contains general information about the accident. Location information is entered differently in TraCS than on the paper MV4000. It is very important to try to enter the data correctly. Appendix J of this manual shows examples of how location information should be entered. • Accident Date – Defaults to today’s date. If this is not correct, key in the correct date. Be sure to key two-digit months and days (e.g. 01 for January). • Time - Key in the four-digit military time without any punctuation (e.g. 0330 for 3:30 am). • Total Units – This is pre-filled with one unit since the form may only be used for single unit, property damage only deer or other non-domesticated animal crashes. • County – Select the county in which the accident occurred. You can default this value if you usually report accidents in one county. • Municipality – Select the municipality in which the accident occurred. Be careful to make the correct selection in cases where there is a city/village with the same name as a township. You can default this value if you usually report accidents in one municipality. • Accident Location – Select the appropriate accident location using the spot where control was lost. • On Hwy # - If the accident occurred on a federal, state or county highway, select the highway from the list. If the highway also has a street name, key it in the next field (On Street Name). Exception: If the accident occurred on a county highway within a city or village, key this in the next data field (On Street Name) as part of the street name (e.g. CTH M Century Ave). See the Help screen <F2> and/or Appendix J for more information about selecting highways. • On Street Name – If a list of roads is provided, select the street name of the road the accident occurred on from the list or hit [Alt + O] to key in the street name if it’s not on the list. If no list is provided, key in the street name. See the Help Data Entry and Forms Reference Page 76 screen <F2> for instructions on how to enter parking lot and private property accidents. • Business/Frontage/Ramp – If the accident occurred on a business highway, frontage road or ramp, select the appropriate designation from the list. If not, leave blank. If the accident occurred on a ramp, see the <F2> Help screen for instructions on how to enter an accident on a ramp. Note: This field only refers to data in the On Hwy # field; it does not refer to the fact that a parking lot was at a business. • Est. Dist – The following databar first appears when you are in this field: If your measurement is in feet, key the number here. If your measurement is in miles, change the databar to miles by either clicking the radio button next to Miles, hit the letter “M”, or cursor down to Miles. The databar will now look like this: Key the distance in miles using the decimal point. • From Dir – Select the direction that the accident occurred from the nearest intersecting street or highway. • From/At Hwy - If the nearest intersecting road is a federal, state or county highway, key the highway number or letter (county highways may be entered in this field regardless of whether the location is in a town, city or village). See the Help screen for more information about selecting which highway to use. If the highway also has a street name, key it in the next field (From/At Street Name). Note: This field is only meant for a highway number or letter; it does not refer to whether or not the “At” roadway was “From” or “At” the “On” roadway. FR, FRM, AT etc. should not be entered in this field unless they are the name of a county highway. • From/At Street Name – If appropriate, enter the name of the nearest intersecting roadway. If a list of roads is provided, select the street name from the list or hit [Alt + O] to key in the street name if it’s not on the list. If no list is provided, key in the street name. See the <F2> Help screen or the examples in Appendix J for instructions on how to enter parking lot and private property accidents. • Business/Frontage/Ramp – If the From/At Highway was a business highway, frontage road or ramp, select the appropriate value. If not, leave blank. Note: This field only refers to data in the From/At Highway # field; it does not refer to the fact that a parking lot was at a business. • Structure Type – If you would like to record a specific location such as a house number, choose which type of structure you’re referencing in this field. If not, Data Entry and Forms Reference Page 77 leave blank. Use this field to identify the type of Parking Lot or Private Property address. • Structure Number - If you would like to record a specific location such as a house number, record the number of the structure in this field. If not, leave blank. Use this field to identify the Parking Lot or Private Property address. • Agency Space – This field is available for your agency’s use. They will instruct you how to use it. • Latitude and Longitude – If available, key in the latitude and longitude in units of decimal degrees. Or, import the data directly from a GPS unit if you have that capability. • Deer / Non-Domesticated Animal – Click the appropriate bubble for the type of accident. Non-Domesticated Animals do NOT include dogs and cats running wild or farm animals. • Animal Hit – Type in what kind of animal was hit. Non-Domesticated Animals do NOT include dogs and cats running wild or farm animals. • First Harmful Event – This field will pre-fill with “Deer” or “Other Animal” based on the button selected in the Deer / Non-Domesticated Animal field. Unit Group This section contains information about the driver and vehicle (optional) involved in the crash. • Unit Status – If any of the unit statuses listed apply to this unit, select the appropriate item. If not, leave blank. Data Entry and Forms Reference Page 78 • Total Occupants – Key the number of occupants (including the driver) for the unit. There are no data fields on the Deer Crash form to record occupants other than the driver since that data is not required. • Dir of Travel – Select the actual or compass direction the unit was traveling before the crash. • Speed Limit – Select the speed limit for the roadway at the time of the crash. Select N/A from the bottom of the list if a speed limit does not apply. • On Duty Accident – If the operator of the unit was On Duty at the time of the crash as an EMT/First Responder, Fire Fighter, Police or Winter Hwy Maintenance, select the appropriate designation. If not, leave this field blank. • Most Harmful Event: Collision With – Select the event that caused the greatest injury or damage to this unit. Only one selection may be made for each unit. See the Help screen for this data field for more information on choosing the event. • Unit Type – Select the type of unit based on the license plate. • Last Name – If any person data has been entered in Common Information, a list of the individuals will come up when you enter this data field. If the person is already on the list, select them from the list and hit [Enter]. If a List appears and the person is not on the List, key [Alt + E] or click on the Edit/New button on the databar and then key the operator last name. Never choose a person that’s already in Common Information and edit it to be another person. For example, if a husband is driving a vehicle and his wife is the owner, do not choose the husband from the list in the Vehicle Owner section and then change the first name and middle initial to that of the wife. This will change the data for the husband on all the forms where they were entered, including issued citations. If you accidentally select the wrong person from the drop down list, simply go back and select the correct entry. If the person is not on the list, move up to the blank item at the top of list before pressing the Edit/New button to add the new person. Remember, if you press edit, you are editing the person or vehicle you have selected on the list, not creating a new entry. If a List does not come up when you enter the field, key the last name of the operator. Data Entry and Forms Reference Page 79 If your agency is set up to retrieve data from an external data source such as through a Mobile Data Browser, key [Alt + S] or hit the Search button on the databar to retrieve the operator information. Note: Depending on how your agency’s mobile data interface is set up, you may need to key in the operator’s last name before you do the search. Check with your agency on which method to use. Enter the operator’s last name as it appears on their Driver’s License. If the operator is unlicensed, the legal name should be recorded. When the operator’s true name is different from what appears on the license, the reason should be listed in the narrative. Important: For H&R (unknown driver) and Legally Parked units, leave name fields blank. • First Name - Key the operator’s first name. • Middle Initial - Key the operator’s middle initial or middle name as shown on their driver license. If they have no middle initial, leave blank; do not enter “NMI.” Suffix – Select the name suffix, if applicable (e.g. Jr) • DOB – Key the operator’s date of birth using two digits per month and day and four digits per year. • Sex – Key the sex of the operator or click on the appropriate button on the databar. • Street Address – Key the current address of the operator. If the street address was brought in from data scanned using a barcode reader or from an external data source, verify that it represents the current address. If not, key in the current address. • PO Box – Key the operator’s PO Box, if applicable. • City – Key the operator’s current city of residence. Note: For Canadian addresses, the province abbreviation should be listed in the City field after the city name followed by the zip code if there’s room (e.g. Toronto ON 2R34BR). If the zip code doesn’t fit here, enter it in the Street Address field after the street address (e.g. 1245 Main St 2R34BR). • St – Select the operator’s current state of residence. Note: If the address is Canadian, enter “CN” in this field rather than the province abbreviation. See note under “City” regarding the province. • Zip code – Key the operator’s current zip code of residence. Note: Canadian zip codes should be entered in the City field after the city name and province abbreviation (e.g. Toronto ON 2R34BR). If it does not fit in that field, put it in the Street address field following the street address (e.g. 1245 Main St 2R34BR). Data Entry and Forms Reference Page 80 • Telephone Num – Key the operator’s current telephone number. If they do not have a telephone number or their number is an unpublished/unlisted number which is not public record, key in 000 000-0000. • Driver’s License Number – If not filled in, key the operator’s Driver License number without any spaces or punctuation such as hyphens. If your agency is set up to retrieve data from an external data source such as through a Mobile Data Browser, key the Driver’s License Number and then key [Alt + S] or hit the Search button on the databar to retrieve the rest of the operator information. Note: If the driver has no license, leave this field plus the next two fields (State and Expiration Year) blank. • State – Select the state that issued the Driver’s License. Note: For Canadian drivers licenses put the abbreviation for the province that issued the license in this field. • Expiration Year – Key the Driver’s License expiration year. • Operating As Classification – Select the appropriate class of vehicle operation the person was engaged in at the time of the crash, whether or not the person was licensed for this type of operation. Note: This field must be completed even for Legally Parked, Unknown or Hit and Run vehicles where no operator information is entered/required. • Operating As Endorsements – Based on the type of operation engaged in at the time of the crash, select any endorsements required for legal operation of the unit. Choose all that apply. Note: This field must be completed even for Legally Parked, Unknown or Hit and Run vehicles where no operator information is entered/required. • Operating a Commercial Motor Vehicle – If the unit requires a Class A, B, or C license for operation, key “Y” or click the Yes button on the databar. If the Class is D, M or O, key “N”, click the No button on the databar, or leave blank. • Vehicle Data -Vehicle data is not required for this form but your agency may require it. If you want to enter the Vehicle information, key “Y” or select the Yes button on the databar which will then open up the vehicle fields for data entry. • License Plate Number – If any vehicle data has been entered in Common Information, a list of vehicles will come up when you enter this data field. If the vehicle is already on the list, select it from the list and hit [Enter]. If a List appears and the vehicle is not on the List, key [Alt + E] or click on the Edit/New Data Entry and Forms Reference Page 81 button on the databar and then key the license plate number displayed on the unit without any spaces or punctuation such as hyphens. If your agency is set up to retrieve data from an external data source such as through a Mobile Data Browser, key the license plate number and then the plate type in the next data field and then key [Alt + S] or hit the Search button on the databar to retrieve the rest of the vehicle information. Note: If the vehicle had no plates, leave this field blank. • Plate Type – Select the plate type for the unit. For out-of-state license plates, select the WI value that best describes the unit. Note: A value must be entered in this field even if the vehicle had no plates. Select a plate type that is common for this vehicle type (e.g. AUT for a passenger car). • State – Select the state that issued the license plate. Note: For Canadian license plates, put the abbreviation for the province that issued the plate in this field. • Expiration Year – Key the year the license plate will expire. For non-expiring plates, leave blank. • Vehicle Identification Number – Key the Vehicle Identification Number. If this information was brought in from data scanned using a barcode reader or by a search from an external data source, verify that it is the correct value by doublechecking the number on the unit. A search to an external data source can be executed from this field as well. • Yr – Key the model year of the vehicle. • Make – Select the make of the vehicle (e.g. Ford). • Model – Key the model of the vehicle (e.g. Taurus). • Body Style – Select the body style of the vehicle (e.g. 2dr). • Color – Select the color that best describes the predominant color of the vehicle. • Vehicle Damage – Key the area(s) where the vehicle was damaged in the crash using the two-digit value (05) or select them by clicking on the value(s) on the databar. If “11 Total (Damage to all areas)” is selected, do not select any other values. Trailer or Data Entry and Forms Reference Page 82 towed unit damage is shown in this data field; see the <F2> Help screen for information on how to show it. • Extent of Damage – Select the value that best describes the extent of damage to the vehicle. Attachment Group Depending on the policies of your agency, you may attach files to your report. Not all agencies use attachments. • • • Attached File – Click the attach file button. You will be prompted to enter the file name and path of the file you wish to attach to the form. File Name – Enter the name of the file. Agency Space – Enter any agency specific information required by your agency. Data Entry and Forms Reference Page 83 Amended Crash Form This form can be used to amend either a paper MV4000 or a TraCS Crash or Deer Crash report. This form looks very much like the Crash form except that it includes a data field at the top called Document Number Override. To start an Amended Crash form, choose it from the Available Forms menu: Other than the top row of the form, it is exactly like the Crash Form. The top row of the Amended Crash form looks like this: Key the Document number of the report that you’re amending in the Document Number Override field. The Document Number Override should always be the Document Number of the original crash report, not a prior amended crash report or a case number. Then, fill in the fields that are required (now highlighted in yellow) for all amended reports: • Date of Report– Use the date that the report was amended. • Accident Date – Key in the Date of Accident using MMDDYY format • Total Units – Key in the number of units involved in the original accident. This will create the appropriate number of Unit groups. • County – Select the County in which the accident occurred. You can default this value if you usually report accidents in one county. • Municipality – Select the municipality in which the accident occurred. Be careful to make the correct selection in cases where there is a city/village with the same name as a township. You can default this value if you usually report accidents in one municipality. • Driver or Owner Names - Key in the name of the Operators or Owners for each unit identified on the original report. TraCS will delete empty unit groups and Data Entry and Forms Reference Page 84 renumber the remaining groups. If you were amending a 2-unit accident and made changes to Unit 2 without adding the Driver or Owner Name for Unit 1, TraCS would delete Unit 1 and renumber Unit 2 to Unit 1. This makes it very difficult for Accident Records staff to know which Unit information was being amended. • Narrative – List the Unit Number(s), if appropriate, and fields that are being amended. Beyond those fields, enter only the information that you are amending. List the Unit Number(s), if appropriate, and fields that were amended in the Narrative. You will need to validate the Amended Crash form, just as you do the other Crash forms. Data Entry and Forms Reference Page 85 Driver Information Exchange The Driver Information Exchange form is a subset of the MV4000e. This form contains Driver, Owner, Insurance, Property Owner and Law Enforcement information. It can be used to quickly gather this information and print it at the crash site to give to each driver/participant in the crash as your agency policy dictates. Use of this form is optional. To use the Driver Information Exchange form, when you have a Crash form open, click the Driver X button on the toolbar. this time. • This will grey out those fields not needed at Enter your Agency Accident Number and/or Agency Police Number if your agency uses either number. Accident Summary Data Entry and Forms Reference Page 86 Location information is entered differently in TraCS than on the paper MV4000. It is very important to try to enter the data correctly. Appendix J of this manual shows examples of how location information should be entered. • Accident Date – Enter the date of the accident. Be sure to key two-digit months and days (e.g. 01 for January). • Total Units – Key in the number of total units involved in the accident. The value entered in this field automatically creates the appropriate number of Unit groups in the form. • County – Select the county in which the accident occurred. You can default this value if you usually report accidents in one county. • Municipality – Select the municipality in which the accident occurred. Be careful to make the correct selection in cases where there is a city/village with the same name as a township. You can default this value if you usually report accidents in one municipality. • On Hwy # - If the accident occurred on a federal, state or county highway, select the highway from the list. If the highway also has a street name, key it in the next field (On Street Name). Exception: If the accident occurred on a county highway within a city or village, key this in the next data field (On Street Name) as part of the street name (e.g. CTH M Century Ave). See the Help screen and/or Appendix J for more information about selecting highways. • On Street Name – If a list of roads is provided, select the street name of the road the accident occurred on from the list or hit [Alt + O] to key in the street name if it’s not on the list. If no list is provided, key in the street name. See the <F2> Help screen for instructions on how to enter parking lot and private property accidents. • Est. Dist – The following databar first appears when you are in this field: If your measurement is in feet, key the number here. If your measurement is in miles, change the databar to miles by either clicking the radio button next to Miles, hit the letter “M”, or cursor down to Miles. The databar will now look like this: Key the distance in miles using the decimal point. • From Dir – Select the direction that the accident occurred from the nearest intersecting street or highway. • From/At Hwy - If the nearest intersecting road is a federal, state or county highway, key the highway number or letter (county highways may be entered in this field regardless of whether the location is in a town, city or village). See the Data Entry and Forms Reference Page 87 <F2> Help screen for more information about selecting which highway to use. If the highway also has a street name, key it in the next field (From/At Street Name). Note: This field is only meant for a highway number or letter; it does not refer to whether or not the “At” roadway was “From” or “At” the “On” roadway. FR, FRM, AT, STH, CTH, HWY, etc. should not be entered in this field unless they are the name of a county highway. • From/At Street Name – If appropriate, enter the name of the nearest intersecting roadway. If a list of roads is provided, select the street name from the list or hit [Alt + O] to key in the street name if it’s not on the list. If no list is provided, key in the street name. See the <F2> Help screen or the examples in Appendix J for instructions on how to enter parking lot and private property accidents. • Structure Type – If you would like to record a specific location such as a house number, choose which type of structure you’re referencing in this field. If not, leave blank. Use this field to identify the type of Parking Lot or Private Property address. • Structure Number - If you would like to record a specific location such as a house number, record the number of the structure in this field. If not, leave blank. Use this field to identify the Parking Lot or Private Property address. Data Entry and Forms Reference Page 88 Driver • Last Name – If any person data has been entered in Common Information, a list of the individuals will come up when you enter this data field. If the person is already on the list, select them from the list and hit [Enter]. If a List appears and the person is not on the List, key [Alt + E] or click on the Edit/New last name. button on the databar and then key the operator or pedestrian’s Never choose a person that’s already in Common Information and edit it to be another person. For example, if a husband is driving a vehicle and his wife is the owner, do not choose the husband from the list in the Vehicle Owner section and then change the first name and middle initial to that of the wife. This Data Entry and Forms Reference Page 89 will change the data for the husband on all the forms where they were entered, including issued citations. If you accidentally select the wrong person from the drop down list, simply go back and select the correct entry. If the person is not on the list, move up to the blank item at the top of list before pressing the edit button to add the new person. Remember, if you press edit, you are editing the person or vehicle you have selected on the list, not creating a new entry. If a List does not come up when you enter the field, key the last name of the operator or pedestrian. If your agency is set up to retrieve data from an external data source such as through a Mobile Data Browser, key [Alt + S] or hit the Search button on the databar to retrieve the operator information. Note: Depending on how your agency’s mobile data interface is set up, you may need to key in the operator’s last name before you do the search. Check with your agency on which method to use. Enter the operator or pedestrian’s last name as it appears on their Driver’s License. If the operator is unlicensed and in the case of pedestrians, the legal name should be recorded. When the operator’s true name is different from what appears on the license, the reason should be listed in the narrative. Important: For H&R (unknown driver) and Legally Parked units, leave name fields blank. Data Entry and Forms Reference Page 90 • First Name - Key the operator or pedestrian’s first name. • Middle Initial - Key the operator or pedestrian’s middle initial or middle name as shown on their driver license. If they have no middle initial, leave blank; do not enter “NMI.” • Suffix – Select the name suffix, if applicable (e.g. Jr) • DOB – Key the operator or pedestrian’s date of birth using two digits per month and day and four digits per year. • Sex – Key the sex of the operator or pedestrian or click on the appropriate button on the databar. • Street Address – Key the current address of the operator or pedestrian. If the street address was brought in from an external data source, verify that it represents the current address. If not, key in the current address. • PO Box – Key the operator or pedestrian’s PO Box, if applicable. • City – Key the operator or pedestrian’s current city of residence. Note: For Canadian addresses, the province abbreviation should be listed in the City field after the city name followed by the zip code if there’s room (e.g. Toronto ON 2R34BR). If the zip code doesn’t fit here, enter it in the Street Address field after the street address (e.g. 1245 Main St 2R34BR). • St – Select the operator or pedestrian’s current state of residence. Note: If the address is Canadian, enter “CN” in this field rather than the province abbreviation. See note under “City” regarding the province. • Zip code – Key the operator or pedestrian’s current zip code of residence. Note: Canadian zip codes should be entered in the City field after the city name and province abbreviation (e.g. Toronto ON 2R34BR). If it does not fit in that field, put it in the Street address field following the street address (e.g. 1245 Main St 2R34BR). • Telephone Num – Key the operator or pedestrian’s current telephone number. If they do not have a telephone number or their number is an unpublished/unlisted number which is not public record, key in 000 000-0000. • Driver’s License Number – If not already filled in, key the operator’s Driver License number without any spaces or punctuation such as hyphens. If your agency is set up to retrieve data from an external data source such as through a Mobile Data Browser, you can also do a search from this field to retrieve the operator information by keying [Alt + S] or hitting the Search button on the databar. Note: Depending on how your agency’s mobile data interface is set up, you may need to key in the driver’s license number before you do the search. Check with your agency on which method to use. Note: If the driver has no license, leave this field plus the next two fields (State and Expiration Year) blank. Data Entry and Forms Reference Page 91 • State – Select the state that issued the Driver’s License. Note: For Canadian drivers licenses, put the abbreviation for the province that issued the license in this field. • Expiration Year – Key the Driver’s License expiration year. Vehicle Owner • License Plate Number – If any vehicle data has been entered in Common Information, a list of vehicles will come up when you enter this data field. If the vehicle is already on the list, select it from the list and hit [Enter]. If a List appears and the vehicle is not on the List, key [Alt + E] and then key the license plate number displayed on the unit without any spaces or punctuation such as hyphens. If a List does not come up when you enter the field, key the license plate number displayed on the unit without any spaces or punctuation such as hyphens. Data Entry and Forms Reference Page 92 If your agency is set up to retrieve data from an external data source such as through a Mobile Data Browser, key the license plate number and then the plate type in the next data field and then key [Alt + S] or hit the Search button on the databar to retrieve the rest of the vehicle information. The search is executed from the Plate Type field. Be sure to review all data returned from an external data source for accuracy. In the case of a combination vehicle, enter the power unit information. Trailer plates must only be entered in the Trailer section. See the Help screen for information on entering parked trailers. Note: If the vehicle had no plates, leave this field blank. • Plate Type – Select the plate type for the unit. For out-of-state license plates, select the WI value that best describes the unit. Note: A value must be entered in this field even if the vehicle had no plates. Select a plate type that is common for this vehicle type (e.g. AUT for a passenger car). • Vehicle Identification Number – Key the Vehicle Identification Number. If this information was brought in from data scanned using a barcode reader or by a search from an external data source, verify that it is the correct value by doublechecking the number on the unit. • Yr – Key the model year of the vehicle. • Make – Select the make of the vehicle (e.g. Ford). • Model – Key the model of the vehicle (e.g. Taurus). • Vehicle Owner Same as Operator – Key “Y” or select the Yes button on the databar if the vehicle owner is the same person as the operator. Key “N”, select No from the databar, or leave blank if they are not the same. Selecting Yes will copy the information about the operator into this section. • Use Operator Address - Key “Y” or select the Yes button on the databar if the address of the vehicle owner is the same as the operator’s. Key “N”, select No from the databar, or leave blank if they are not the same. Selecting Yes will copy the operator’s address information into these data fields. • Last Name – If any person data has been entered in Common Information, a list of the individuals will come up when you enter this data field. If the person is already on the list, select them from the list and hit [Enter]. If a List appears and the person is not on the List, key [Alt + E] or click on the Data Entry and Forms Reference Page 93 Edit/new button on the databar and then key the vehicle owner’s last name as it appears on the registration record. Never choose a person that’s already in Common Information and edit it to be another person. For example, if a husband is driving a vehicle and his wife is the owner, do not choose the husband from the list in the Vehicle Owner section and then change the first name and middle initial to that of the wife. This will change the data for the husband on all the forms where they were entered, including issued citations. If you accidentally select the wrong person from the drop down list, simply go back and select the correct entry. If the person is not on the list, move up to the blank item at the top of list before pressing the edit button to add the new person or vehicle. Remember, if you press Edit/New, you are editing the person or vehicle you have selected on the list, not creating a new entry. If a List does not come up when you enter the field, key the vehicle owner’s last name as it appears on the registration record. • First Name - Key the vehicle owner’s first name. • Middle Initial - Key the vehicle owner’s middle initial or middle name as shown on driver license. If they have no middle initial, leave field blank; do not enter “NMI.” • Suffix - If applicable, key the suffix of the vehicle owner’s name. • Date of Birth – Key vehicle owner’s date of birth if available. • Company Name – If the vehicle owner is a business or government organization, key the name of the business or government. • Org Type – Select the type of person/company that owns the vehicle. • Street Address – Key the current address of the vehicle owner. • PO Box – If applicable, key the PO Box of the vehicle owner. • City – Key the city of the vehicle owner’s current residence. Note: For Canadian addresses, the province abbreviation should be listed in the City field after the city name followed by the zip code if there’s room (e.g. Toronto ON 2R34BR). If the zip code doesn’t fit here, enter it in the Street Address field after the street address (e.g. 1245 Main St 2R34BR). • State - Select the state of the vehicle owner’s current residence. Note: If the address is Canadian, enter “CN” in this field rather than the province abbreviation. See note under “City” regarding the province. • Zip code - Key the zip code of the vehicle owner’s current residence. Note: Canadian zip codes should be entered in the City field after the city name and province abbreviation (e.g. Toronto ON 2R34BR). If it does not fit in that Data Entry and Forms Reference Page 94 field, put it in the Street address field following the street address (e.g. 1245 Main St 2R34BR). • Telephone Number - Key the vehicle owner’s current telephone number. If they do not have a telephone number or their number is an unpublished/unlisted number which is not public record, key in 000 000-0000. Insurance • Insurance Company – It is VERY important to select the correct insurance company. Sometimes, there are several companies with similar names. Ask to see the operator’s insurance card if they have it with them and get the correct name. See the <F2> Help screen for this data field for the “real” name of some common insurance companies such as AAA. Select the name of the insurance company for the vehicle. If the insurance company is not on the list, key [ALT + O] or click the Other button on the databar and key the Alias or name of the insurance company. Do not enter the name of the insurance agent, agency or motor club. If the vehicle is not insured, select “None”. If the insurance company is unknown, select ‘Unknown’ from the list. Aliases have been set up for common insurance companies. To use an alias, key [Alt + O] or hit the Other button on the databar and then key the alias (e.g. SF for State Farm) in the Insurance Company field and hit [Enter]. A message box will pop up asking you to verify that the correct company was selected. A list of the aliases that come loaded in TraCS can be found by clicking on the red Alias List link in the <F2> help screen. Data Entry and Forms Reference Page 95 Property Owner • Last Name – If the property owner is an individual, key their last name. Alternatively, if you have already entered the property owner information into the Common Information, key [Alt + L] or click on the List button on the databar, select the owner from the list and hit [Enter]. • First Name - Key the property owner’s first name. • Middle Initial - Key the property owner’s middle initial or middle name. If they have no middle initial, leave field blank; do not enter “NMI.” • Suffix - If applicable, key the suffix of the property owner’s name. • Date of Birth – Key date of birth if applicable and available. • Government Property Type – If the property owner is a unit of government, select the government type. • Company Name – If the property owner is a business or government organization, key the name of the business or government. Aliases are available for this field. To use an alias, key in the alias in this field. After you hit [Enter], the full name of the company or governmental group will be filled in along with their address. To see a list of aliases that come with TraCS, look at the <F2> help screen for this field and click on the red “Alias Name” link. Agencies can add additional aliases to TraCS. • Organization Type – Select the property owner type • Street Address – Key the address of the property owner. • PO Box – If applicable, key the PO Box of the property owner. • City – Key the city of the property owner’s residence. Note: For Canadian addresses, the province abbreviation should be listed in the City field after the city name followed by the zip code if there’s room (e.g. Toronto ON 2R34BR). If the zip code doesn’t fit here, enter it in the Street Address field after the street address (e.g. 1245 Main St 2R34BR). • State - Select the state of the property owner’s residence. Note: If the address is Canadian, enter “CN” in this field rather than the province abbreviation. See note under “City” regarding the province. Data Entry and Forms Reference Page 96 • Zip code - Key the zip code of the property owner’s residence. Note: Canadian zip codes should be entered in the City field after the city name and province abbreviation (e.g. Toronto ON 2R34BR). If it does not fit in that field, put it in the Street address field following the street address (e.g. 1245 Main St 2R34BR). • Property Damage Tag – Enter the yellow government damage tag number if available. • Telephone Number - Key the property owner’s telephone number. If they do not have a telephone number or their number is an unpublished/unlisted number which is not public record, key in 000 000-0000. Printing Print the form and distribute to involved parties. Three reports are available for printing. Select the Driver Exchange of Information Report print box. Change the Number of Copies field to the appropriate number and click on OK. To un-grey the form fields and complete the crash form, click on the Driver X button on the toolbar. Data Entry and Forms Reference Page 97 Fatal Supplement Form A Fatal Supplement Form (either electronic or paper) is required whenever there is a traffic crash resulting in a fatality. The death must occur within 30 days of the crash to be considered a traffic fatality. A fetus must be 28 weeks developed to be counted as a traffic fatality. This form replaces the paper MV3480 Fatal Supplement Form when submitted as part of a TraCS electronic crash report and is necessary to comply with the requirements of the federal Fatality Analysis Reporting System (FARS). If an electronic MV4000e (Crash report) has been completed for the crash but has not yet been end shifted, open the Contact that contains it, click on the Add Form button on the toolbar, select “Fatal Supplement” from the Available Forms list and then click the OK button. If the Crash report was completed on a paper MV4000 or if the electronic MV4000e Crash report has already been end shifted, click on the Contact button on the toolbar, select “Fatal Supple” from the Available Forms list and then click the OK button. If the electronic MV4000e (Crash report) is open in the Contact with the Fatal Supplement form, click on the Autopop button all available data in the electronic MV4000. on the toolbar to fill the form with If the Fatal Supplement Form is submitted after the electronic crash is sent (e.g., a critically injured person dies two weeks after the crash), it must be completed as a separate form and all information must be manually entered. The electronic MV3480 is different from the paper version. It requires certain yes or no responses in order to open or gray out additional fields. Data Entry and Forms Reference Page 98 Data Fields Document/Police Number and Ambulance Information • Fatality Document Number – This number is automatically generated and cannot be changed. It identifies the Fatal Supplement. • Document Number (From MV4000) –This number corresponds to the MV4000 or MV4000e Crash Form, and serves to link the Crash Report and Fatal Supplement Forms. • Agency Accident Number – This number corresponds to the Agency Accident Number on the Crash report, if your agency has assigned one. This field is optional. • Police Number – This number corresponds to the Police Number on the Crash report, if your agency has assigned one. This field is optional. • Accident Date – Defaults to today’s date. If this is not correct, key in the correct date. Be sure to key two-digit months and days. • Accident Time – Key in the four-digit time of the crash in military time without punctuation (e.g. 0330 for 3:30am). • Ambulance Notification – Select the value that best describes the notification of an ambulance in connection with the crash whether or not it was called for the fatally injured person(s). • Time Notified – Key the four-digit time the ambulance was notified in military time. • Ambulance Arrival at Scene – Select the value that best describes the arrival of an ambulance at the scene of the crash. • Time Arrived at Scene - Key the four-digit time the ambulance arrived at the scene in military time. • Ambulance Arrival at Hospital – Select the value that best describes the arrival of the ambulance at the hospital transporting an injured person. The person transported could be either the eventual fatality or another person injured in the crash, but it should not be used if a dead body is transported. • Time Arrived at Hospital - Key the four-digit time the ambulance arrived at the hospital in military time. Data Entry and Forms Reference Page 99 Law Enforcement Agency • Officer information is completed in this section. Most fields are automatically filled in based on your user file. • Report Date – Date the Fatal Supplement was completed. Defaults to today’s date. If this is not correct, key the correct date. Be sure to key two-digit months and days. Accident Information Some of the data fields in this section will autopopulate from the MV4000e if it is open in the same Contact as the Fatal Supplement. • No. of Travel Lanes – Key in the number of travel lanes of the roadway based on the following criteria: The total number of travel lanes on an undivided roadway, or The total number of lanes in ONE direction on a divided highway • Roadway Surface Type – Select the value that best describes the roadway surface of the ON Street/Hwy where the unstablilized situation began. • Roadway Profile – Select the value that best describes the roadway profile at the first harmful event in the crash. • Special Jurisdiction – Select the value that best describes the presence of a special jurisdiction in the crash location. • Relation to Roadway – Select the value that best describes the location of the First Harmful Event in the crash. • Trafficway Flow – Select the value that best describes the ON Street/Hwy trafficway flow. • Total Units – Enter the number of total units involved in this crash. This field is used to create the Surviving Driver information on this form. • Total Killed – Enter the number of total fatalities involved in this crash. This field is used to create the fatality information on this form. Data Entry and Forms Reference Page 100 Unit Information Some of the data fields in this section will autopopulate from the MV4000e if it is open in the same Contact as the Fatal Supplement. The unit information portion of the electronic MV3480 is substantially different from the paper version. ALL units are now pulled into the form, not just surviving driver information. If a driver is a fatality, then all driver information will gray out based upon a K – Fatal Injury entered into the Driver Injury Severity field. If the driver survives, then all fields are open for data entry. • • • • • • • • Special Use – Select the value that best describes any special use of the unit. Emergency Use? – Key “Y” or click the Yes button if this unit was operating as an emergency vehicle (lights and sirens activated). If not, key “N”, click the No button or leave blank. Fire – Key “Y” or click the Yes button if fire was involved with this unit. If not, key “N”, click the No button or leave blank. Estimated Travel Speed – Select the officer’s estimate of this unit’s travel speed. It does not have to be based upon reconstruction data. Driver Injury Severity – Based on your observations at the scene, select the degree of injury severity to the operator or pedestrian. If “K” is selected, then the alcohol and drug test information will gray out and information will need to be completed in the Fatality portion of the form. If any other injury is selected, then all fields of this portion of the form must be completed. Unit Status – If any of the unit statuses listed apply to this unit, select the appropriate item. If not, leave blank. Ejected – Select the level of the operator’s ejection in the crash. “Ejected” can apply to motorcyclists, bicyclists, etc. “Not Applicable” applies to pedestrians. If ejected and ejection path is known, enter that information in the narrative of the MV4000. Extricated – Select the level of the operator’s entrapment or extrication. Select “Trapped/extricated” only if extrication tools are used in an attempt to rescue trapped individuals. This does not apply to removal of dead persons from the vehicle. Data Entry and Forms Reference Page 101 • Driver Last Name – If any person data has been entered in Common Information, a list of the individuals will come up when you enter this data field. If the person is already on the list, select them from the list and hit [Enter]. If a List appears and the person is not on the List, key [Alt + E] or click on the Edit/New button on the databar and then key the operator or pedestrian’s last name. Never choose a person that’s already in Common Information and edit it to be another person. For example, if a husband is driving a vehicle and his wife is the owner, do not choose the husband from the list in the Vehicle Owner section and then change the first name and middle initial. This will change the data for the husband on all the forms where they were entered, including issued citations. If you accidentally select the wrong person from the drop down list, simply go back and select the correct entry. If the person is not on the list, move up to the blank item at the top of list before pressing the edit button to add the new person. Remember, if you press edit, you are editing the person or vehicle you have selected on the list, not creating a new entry. If a List does not come up when you enter the field, key the last name of the operator or pedestrian. If your agency is set up to retrieve data from an external data source such as through a Mobile Data Browser, key [Alt + S] or hit the Search button on the databar to retrieve the operator or pedestrian information. Note: Depending on how your agency’s mobile data interface is set up, you may need to key in the operator’s last name before you do the search. Check with your agency on which method to use. Enter the operator’s last name as it appears on their Driver’s License. If the operator is unlicensed and in the case of pedestrians, the legal name should be recorded. When the operator’s true name is different from what appears on the license, the reason should be listed in the narrative. • • Driver First Name – Key the operator or pedestrian’s first name. Driver Middle Initial – Key the operator or pedestrian’s middle initial. If they have no middle initial, leave blank. • Suffix – If applicable, select the name suffix, (e.g. Jr). • Date of Birth -- Key date of birth if available. • Alcohol Test Given – Select the value that best depicts whether or not an alcohol test was given to the operator or pedestrian. Data Entry and Forms Reference Page 102 • • • • • Alcohol Test Results – If an alcohol test was given, select the test result. Alcohol Test Type – If an alcohol test was given, select the type of test used. Drug Test Given - Select the value that best depicts whether or not a drug test was given to the operator or pedestrian. Drug Test Results - If a drug test was given and drugs were present, select the drugs found. Select all that apply. For information on selecting multiple values, see the Driver Factors in the Crash form instructions. When you select “Other Drug Medications”, record the type of medication in the narrative. Drug Test Type - If a drug test was given, select the type of test used. Fatality Information This section contains information regarding the fatality(ies) in this crash. This section is unable to auto-populate, so these fields must be completed manually. Unit Number – Key the unit number that the fatally injured person was in. Last Name – If any person data has been entered in Common Information, a list of the individuals will come up when you enter this data field. If the person is already on the list, select them from the list and hit [Enter]. If a List appears and the person is not on the List, key [Alt + E] or click on the Edit/New button on the databar and then key the fatally injured person’s last name. Never choose a person that’s already in Common Information and edit it to be another person. For example, if a husband is driving a vehicle and his wife is the owner, do not choose the husband from the list in the Vehicle Owner section and then change the first name and middle initial. This will change the data for the husband on all the forms where they were entered, including issued citations. If you accidentally select the wrong person from the drop down list, simply go back and select the correct entry. If the person is not on the list, move up to the blank item at the top of list before pressing the edit button to add the new person. Data Entry and Forms Reference Page 103 Remember, if you press edit, you are editing the person or vehicle you have selected on the list, not creating a new entry. If a List does not come up when you enter the field, key the last name of the fatally injured person. If your agency is set up to retrieve data from an external data source such as through a Mobile Data Browser, key [Alt + S] or hit the Search button on the databar to retrieve the person’s information. Note: Depending on how your agency’s mobile data interface is set up, you may need to key in the person’s last name before you do the search. Check with your agency on which method to use. • • • • • • • • First Name – Key the first name of the fatally person. Middle Initial – Key the middle initial of the fatally person. If they have no middle initial, leave this field blank. Suffix – If applicable, select the name suffix, (e.g. Jr). Date of Birth – Key date of birth. Ejected – Select the level of the fatally injured person’s ejection in the crash. “Ejected” can apply to motorcyclists, bicyclists, etc. “Not Applicable” applies to pedestrians. If ejected and ejection path is known, enter that information in the narrative of the MV4000. Extricated – Select the level of the fatally injured person’s entrapment or extrication. Select “Trapped/extricated” only if extrication tools are used in an attempt to rescue trapped individuals. This does not apply to removal of dead persons from the vehicle. Date of Death – Enter date coroner pronounces death. Time of Death – Enter time coroner pronounces death. Data Entry and Forms Reference Page 104 Attachment Group Depending on the policies of your agency, you may attach files to your report. Not all agencies use attachments. • • • Attached File – Click the attach file button. You will be prompted to enter the file name and path of the file you wish to attach to the form. File Name – Enter the name of the file. Agency Space – Enter any agency specific information required by your agency. Validation Once you have completed the fatal supplement form, validate it. See the section on Validation earlier in the book. Printing One report is available for printing the fatal supplement form. Data Entry and Forms Reference Page 105 ELCI Form (Electronic Traffic Citation) Page 106 ELCI (Electronic Traffic Citation) Open an ELCI form by selecting the Contact button on the toolbar or by selecting the Add Form button (if the Contact is already open) and then selecting “ELCI” from the Available Forms list and hitting the OK button: Data Fields Violator Section • Police Number – Key your agencies case number or other data as directed by your agency. • Defendant Type – Select the value that best describes the violator. Page 107 • Last Name – If any person data has been entered in Common Information, a list of the individuals will come up when you enter this data field. If the person is already on the list, select them from the list and hit [Enter]. If a List appears and the person is not on the List, key [Alt + E] or click on the Edit/New button on the databar and then key the violator’s last name. Never choose a person that’s already in Common Information and edit it to be another person. For example, if a husband is driving a vehicle and his wife is an occupant that is not wearing a seatbelt, do not choose the husband from the list and then change the first name, middle initial, etc. to that of the wife in order to issue a seatbelt citation to the wife. This will change the data for the husband on all the forms where they were entered, including issued citations. If you accidentally select the wrong person from the drop down list, simply go back and select the correct entry. If the person is not on the list, move up to the blank item at the top of list before pressing the Edit/New button to add the new person. Remember, if you press edit, you are editing the person or vehicle you have selected on the list, not creating a new entry. If a List does not come up when you enter the field, key the last name of the violator. If your agency is set up to retrieve data from an external data source such as through a Mobile Data Browser, key [Alt + S] or hit the Search button on the databar to retrieve the violator information. Note: Depending on how your agency’s mobile data interface is set up, you may need to key in the person’s last name before you do the search. Check with your agency on which method to use. Enter the last name as it appears on their Driver’s License. If the person is unlicensed, the legal name should be recorded. Page 108 If the Mobile Data Import functionality is programmed for your agency, and you click on Search, the External Search Results window appears listing the person responses. • • • Click to highlight the entry you want to import from the Result Items pane. Click on Apply. The person’s data will be imported into the appropriate fields in the ELCI form. • If you selected the person data from the MDB responses, the person’s data will be imported into the appropriate fields in the ELCI form. Complete any remaining fields. • • • • • • • First Name – Type first name. Middle Name – Type middle name or initial, if appropriate. Suffix – Click to select suffix from the pick list, if needed. Company Name – If you selected NonIndividual in the first field, the Company Name field will be active. Type company name. Street Address – Type street address. P.O. Box – Type PO Box number. City – Type city name. Page 109 • • • • • • • • • • • • • • • • • • • • • State – Click to select state from the pick list. Zip Code – Type 5 or 9 character zip code. Date of Birth – Type individual’s date of birth. Gender – Click to select gender from the pick list. Race – Click to select race from the pick list. Height – Type individual’s height. Weight – Type individual’s weight. Hair – Click to select hair color from the pick list. Eye – Click to select eye color from the pick list. Biometric Type – Click to select biometric type from pick list, if needed. Driver License Number – Type individual’s driver license number without spaces or dashes. State of Issuance – Click to select license state of issuance from the pick list. DL Expire Year – Type driver license expiration year. Licensed as DL Class – Click to select licensed as class from the pick list. License Endorsements – Click to select license endorsements from the pick list. Operating as Driver Type – Click to select driver type from the pick list. Vehicle Operated Class – Click to select DL Operating class from the pick list. Holds CDL – If the driver holds a commercial driver’s license, choose Y, otherwise choose N (Does not hold commercial driver’s license). Vehicle Operated Endorsements – Click to select DL operating endorsements from the pick list. CDL Waiver – Click to select CDL Waiver from the pick list. Phone Number – Type individual’s telephone number and extension if known. Vehicle Information Section License Plate Number: • • Click on Search to select the Vehicle data from the MDB responses, or Type plate number. Page 110 If the Mobile Data Import functionality is programmed for your agency, and you click on Search, the External Search Results window appears listing the vehicle responses. • • • Click to highlight the entry you want to import from the Result Items pane. Click on Apply. The vehicle data will be imported into the appropriate fields in the ELCI form. Page 111 If you selected the vehicle data from the MDB responses, the vehicle’s data will be imported into the appropriate fields in the ELCI form. Complete the remaining fields. • • • • • • • • • • • License Plate Type – Click to select plate type from the pick list. Issuing State – Click to select registration state from the pick list. Plate Expiration Year – Type plate expiration year. Vehicle Year – Type vehicle manufacturer year. Vehicle Make – Click to select vehicle make from the pick list. Vehicle Type – Click to select vehicle type from the pick list. Vehicle Color – Click to select vehicle color from the pick list. VIN Number – Type Vehicle Identification Number. US DOT Number – Type US DOT Number. HazMat – Type Hazmat number. Vehicle Overweight by (lbs.) – Type weight amount. Offense Section Statute Number / Trans Rule Number: • • • Type shortcut value, or Click on Search to select the Statute from Violations table, or Type statute number. If you type the statute number, the query brings back the first statute number that matches, so if there are several charges with the same statute number you might not get the charge you want. Page 112 If you click on Search, the Violation Search window appears. • • • • Click to select the appropriate radio button for Wisconsin Violations or Trans Rules. Click to select the Search Category you want to focus on. Click to select the charge from the list of violations. Click on Done. Page 113 After selecting the charge from the Violation Search window, you return to the Statute Number / Trans Rule Number field on the citation. • Press Enter to advance the field focus from Statute Number to the next available field. The imported violation data then prefills many fields. Ordinance Number: • • If your agency has populated Violations Local table with your local ordinances, click Search to select the Ordinance from the table, or Type ordinance number. If you click on Search, the Violation Search window appears. • • Click to select the charge from the list of local ordinances. Click on Done. Page 114 After selecting the local ordinance from the Violation Search window, you return to the citation. • • • • • • • • • • • • • • • • • • • • • • Ordinance Description – Type ordinance description if you did not select it in the Violation Search window. Actual Speed – Active only when a statute from the Speeding or Speeding Work category is selected. Type vehicle speed. Speed Limit – Active only when a statute from the Speeding or Speeding Work category is selected. Select posted speed from the pick list. Speed Over – Automatically calculated by TraCS. No input allowed. BAC Level – Active only when a statute from the Operating While Intoxicated category is selected. Type BAC Level without the decimal. Points – Automatically populated based upon the statute selected. Roadway Zones – Click to select roadway zone from pick list. Underage passenger – Click to select yes or no, as appropriate. Violation Date – Defaults to current system date. Violation Time – Defaults to current system time. Date Citation Served – Defaults to current system date. Method Citation Served – Click to select method from the pick list. County Name – Click to select “Violation County” from the pick list. City/Town/Village – Click to select violation community from the pick list. On Hwy Type – Click to select highway type from the pick list. Hwy name – Type highway number or letters. Hwy Direction – Click to select direction from the pick list. Street Location – Select street location from the pick list or click the “Othe”r button to type in street. At Distance From – Type distance number and select the unit of measure. At Direction – Click to select direction from the pick list. At Hwy Type – Click to select highway type from the pick list. At Hwy Name – Type highway number or letters. Page 115 • • • • • • At Hwy Direction – Click to select direction from the pick list. At Street Location – Select street location from the pick list or click the Other button to type in street. GPS Latitude Coordinate – The databar contains the fields for both LAT and LONG. Type coordinates if you do not have the GPS configured for TraCS. TraCS is able to import the GPS coordinates from some GPS devices. Accident Severity – Click to select accident severity from the pick list. Accident Doc No. – Type accident document number or if you already have an accident form open, click the autopop button. Agency Space – 200 character field for miscellaneous data. Page 116 Plaintiff Section • • • • • • • • • • • • • Plaintiff – Click to select plaintiff type from the pick list. County – If you are a County or Municipal Agency, click to select plaintiff county from the pick list. City/Village/Town – If you are a Municipal Agency, click to select plaintiff community from the pick list. Court Type – Click to select court type from the pick list. Court Name – Click to select court from the pick list. Appear Required – Automatically populated based on the statute selected. Court Appearance Date – Type court date. Court Time – Type court time. Truck Surcharge – Click to select yes or no, as appropriate to indicate if truck driver surcharge applies to this conviction. If yes, the deposit amount will automatically increase by $8.00. Deposit/Bail – Automatically populated based on the statute and court type selected. Can be overwritten if your court amounts are different. Cash? – Click to select yes or no, as appropriate. Credit Card? – Click to select yes or no, as appropriate. DA Routing? – Click to select yes or no, as appropriate. Timely Transmission of TraCS eCitations for DA Routing For an eCitation to be useful to the DA office, it MUST be received by them in a timely fashion. In general, that means less than 24 hours from the time of the incident, and certainly before the paperwork arrives in their office, particularly if the defendant is in custody. The eCitation information is needed for the DA to file the criminal complaint. In order for an eCitation to be received in the DA office, Law Enforcement Agency (LEA) TraCS Administration staff should insure the following procedure is implemented in their agency: 1. The Officer must put a “Y” in the "DA ROUTING?" field. The DA Routing fields are located in the "Plaintiff" section of the form. 2. Once in ISSUED status, if the citation was issued from a TraCS Field Unit, the citation must be End Shifted into the LEA TraCS Office Database as soon as possible, typically at end of shift. If the ELCI was completed and ISSUED in the office on a TraCS Workstation, it is already in the TraCS Office Database, ready for TRANSMISSION. Page 117 3. Citations in an ISSUED status should be reviewed/approved per LEA policy and then TRANSMITTED from TraCS Utilities. As mentioned above, in general, that means less than 24 hours from the time of the incident, and before the paperwork arrives in the DA office. This also applies to any non-criminal Citations associated with a criminal incident that your DA wishes to receive. Routing non-criminal eCitations to the DA office is something that should be discussed and decided between the referring LEA, the DA and the Clerk of Circuit Court, as each county may have their own thoughts on how this should be handled. • If a DA office informs you that they will not be prosecuting the criminal charge, DMV needs to be notified that the citation is being withdrawn. Either the DA office or the LEA can report VOIDED or WITHDRAWN citations directly to [email protected] • Officer Section Page 118 • • • • • • • • • • Highway – Click to select highway description from the pick list. Number of Lanes – Click to select number of lanes from the pick list. Weather Conditions – Click to select weather conditions from the pick list. Road Conditions – Click to select road conditions from the pick list. Light Conditions – Click to select light conditions from the pick list. Traffic Conditions – Click to select traffic conditions from the pick list. Department – Field is not accessible. Department name automatically fills based upon user file definition. Officer ID – Field is not accessible. Officer ID automatically fills based upon user file definition. Officer Name – Field is not accessible. Officer name automatically fills based upon user file definition. Narrative – When focus is on the narrative field, a button labeled Narrative appears in the databar area. Click on Narrative to get the Narrative window and type in a narrative up to 990 characters in length. When narrative is complete, click on Continue. • Parent/Guardian Group Complete the parent/guardian group if the defendant is a minor. Attachment Group Depending on the policies of your agency, you may attach files to your report. Not all agencies use attachments. • • • Attached File – Click the attach file button. You will be prompted to enter the file name and path of the file you wish to attach to the form. File Name – Enter the name of the file. Agency Space – Enter any agency specific information required by your agency. Page 119 Entering Additional Citations • If you want to issue another ticket to the same individual: Click on Replicate on the toolbar. Another citation will be created copying all fields except the Statute Number, Statute Description, Points, Bond Amount, and Narrative fields. • If you want to issue another ticket but to a different individual: Click on Add Form on the toolbar. The Available Forms dialog box appears. • Double-click on ELCI, or • Click on ELCI and click on OK. Another citation is created ready for you to fill out. Page 120 Printing a citation • Click on Print on the TraCS toolbar. The Print Manager dialog box appears. • • • Click the box for each form you want to print so that a check mark appears in front of each form to be printed. Click on OK. The form prints and the fields lock. You can reprint any form later. Note: - After Printing the Violator report, Officer copy or Court copy, the input form will lock. You will not be able to change anything except the narrative field. Verify all data before going to the print dialog box. Page 121 Voiding a Citation If an error is discovered after the citation has been issued, the citation will have to be voided. A new citation can then be issued. Citations can never be deleted. Citations can only be voided if they have been validated or issued. If you try to void a citation that has not been validated or issued you will get the following message box. To void a citation: 1. You can void citations from the contact manager. Select the citation in the list before clicking the void button. You will get the following message box. 2. Click Yes, and you will get the following message box. 3. Enter a reason for voiding the citation, click OK. Note: Voided citations will still need to be transmitted to DOT. Page 122 A voided citation can be seen in the contact manager. The Status field along with the description field will say voided. Refer to the example below. User defaults for the ELCI form There are several user defaults that you might like to set for the ELCI form. See Appendix F for instructions on how to do this . Page 123 NTC Form (Electronic NonTraffic Citation) Page 124 NTC (Electronic Non-Traffic Citation) To start a NTC citation form, choose it from the Available Forms menu: The Available Forms dialog box appears. • • Double-click on NTC, or Click on NTC and click on OK. Data Fields: Violator Section • • • • • Defendant Type - Select the value that best describes the violator. Last Name: If any person data has been entered in Common Information, a list of the individuals will come up when you enter this data field, or Click on Search to select the person data from the MDB responses, or Click on List to select the person data from the Barcode scanned data, or Type last name. Page 125 If the Mobile Data Import functionality is programmed for your agency, and you click on Search, the External Search Results window appears listing the person responses. • • • Click to highlight the entry you want to import from the Result Items pane. Click on Apply. The person’s data will be imported into the appropriate fields in the NTC form. If you selected the person data from the MDB responses, the person’s data will be imported into the appropriate fields in the NTC form. Complete the remaining fields. • • • • • • • First Name – Type first name. Middle Name – Type middle name or initial, if appropriate. Suffix – Click to select suffix from the pick list, if needed. Company Name – If you selected Non Individual in the first field, the Company Name field will be active. Type company name. Street Address – Type street address. P.O. Box – Type PO Box number. City – Type city name. Page 126 • • • • • • • • • • • • • • • • State – Click to select state from the pick list. Zip Code – Type 5 or 9 character zip code. Date of Birth – Type individual’s date of birth. Juvenile — Click to select yes or no, as appropriate Gender – Click to select gender from the pick list. Race – Click to select race from the pick list. Height – Type individual’s height. Weight – Type individual’s weight. Hair – Click to select hair color from the pick list. Eye – Click to select eye color from the pick list. Driver License Number – Type individual’s driver license number without spaces or dashes. State of Issuance – Click to select license state of issuance from the pick list. DL Expire Year – Type driver license expiration year. Other ID Type – Type Other ID type description, if appropriate. Other ID Number – Type Other ID type number, if appropriate. Phone Number – Type Phone Number, if known. Vehicle Information Section License Plate Number: • • • Click on Search to select the Vehicle data from the MDB responses, or Click on Common to select the Vehicle data from the Barcode scanned data, or Type plate number. Page 127 If the Mobile Data Import functionality is programmed for your agency, and you click on Search, the External Search Results window appears listing the vehicle responses. • • • • Click to highlight the entry you want to import from the Result Items pane. Click on Apply. The vehicle data will be imported into the appropriate fields in the NTC form. If you selected the vehicle data from the MDB responses, the vehicle’s data will be imported into the appropriate fields in the NTC form. Complete the remaining fields. • • • License Plate Type – Click to select plate type from the pick list. Issuing State – Click to select registration state from the pick list. Plate Expiration Year – Type plate expiration year. Page 128 Offense Section • Ordinance Number: If your agency has populated Violations Local table with your local ordinances, click Search to select the Ordinance from the table, or Type ordinance number. If you click on Search, the Violation Search window appears. • • Click to select the charge from the list of local ordinances. Click on Done. Adopting State Statute: Page 129 • • • Type shortcut value, or Click on Search to select the Statute from Violations table, or Type statute number. If you type the statute number, the query brings back the first statute number that matches, so if there are several charges with the same statute number you might not get the charge you want. If you click on Search, the Violation Search window appears. • • • • Click to select the appropriate radio button for NTC Municipal Violations. Click to select the Search Category you want to focus on. Click to select the charge from the list of violations. Click on Done. Page 130 After selecting the Adopting State Statute from the Violation Search window, you return to the citation. • • • • • • • • • • Violation Date – Defaults to current system date. Violation Time – Defaults to current system time. Date Citation Served – Defaults to current system date. Method Citation Served – Click to select method from the pick list. Name of Person Citation Left With – If the citation is left with someone other than violator, type their name in this field. Age – Type in age of person citation left with, if appropriate. At Street Location – Type in unit number and street address of location where violation occurred. County Name – Click to select violation county from the pick list. City/Town/Village – Click to select violation community from the pick list. Agency Space - 200 character field for miscellaneous data. Plaintiff Section • • • • • • • • • • • • • • Plaintiff – Click to select plaintiff type from the pick list. County – If you are a County or Municipal Agency, click to select plaintiff county from the pick list. City/Village/Town – If you are a Municipal Agency, click to select plaintiff community from the pick list. Court Type – Click to select court type from the pick list. Court Name – Click to select court from the pick list. Appear Required – Automatically populated based on the statute selected. Court Appearance Date – Type court date. Court Time – Type court time. Truck Surcharge – Click to select yes or no, as appropriate to indicate if truck driver surcharge applies to this conviction. If yes, the deposit amount will automatically increase by $8.00. Deposit/Bail – Automatically populated based on the statute and court type selected. Can be overwritten if your court amounts are different. Cash? – Click to select yes or no, as appropriate. Credit Card? – Click to select yes or no, as appropriate. DA Routing? – Click to select yes or no, as appropriate. Page 131 Timely Transmission of TraCS eCitations for DA Routing For an eCitation to be useful to the DA office, it MUST be received by them in a timely fashion. In general, that means less than 24 hours from the time of the incident, and certainly before the paperwork arrives in their office, particularly if the defendant is in custody. The eCitation information is needed for the DA to file the criminal complaint. In order for an eCitation to be received in the DA office, Law Enforcement Agency (LEA) TraCS Administration staff should insure the following procedure is implemented in their agency: 1. The Officer must put a “Y” in the "DA ROUTING?" field. The DA Routing fields are located in the "Plaintiff" section of the form. 2. Once in ISSUED status, if the citation was issued from a TraCS Field Unit, the citation must be End Shifted into the LEA TraCS Office Database as soon as possible, typically at end of shift. If the ELCI was completed and ISSUED in the office on a TraCS Workstation, it is already in the TraCS Office Database, ready for TRANSMISSION. 3. Citations in an ISSUED status should be reviewed/approved per LEA policy and then TRANSMITTED from TraCS Utilities. As mentioned above, in general, that means less than 24 hours from the time of the incident, and before the paperwork arrives in the DA office. This also applies to any non-criminal Citations associated with a criminal incident that your DA wishes to receive. Routing non-criminal eCitations to the DA office is something that should be discussed and decided between the referring LEA, the DA and the Clerk of Circuit Court, as each county may have their own thoughts on how this should be handled. • If a DA office informs you that they will not be prosecuting the criminal charge, DMV needs to be notified that the citation is being withdrawn. Either the DA office or the LEA can report VOIDED or WITHDRAWN citations directly to [email protected] Page 132 Officer Section • • • • Department – Field is not accessible. Department name automatically fills based upon user file definition. Officer ID – Field is not accessible. Officer ID automatically fills based upon user file definition. Officer Name – Field is not accessible. Officer name automatically fills based upon user file definition. Narrative – When focus is on the narrative field, a button labeled Narrative appears in the databar area. Click on Narrative to get the Narrative window and type in a narrative up to 990 characters in length. When narrative is complete, click on Continue. • Parent/Guardian Section • • • • • • • • Last Name – Type Last Name. First Name – Type First Name. Middle Name – Type Middle Name or Initial. Suffix – Click to select Suffix from the pick list. Date of Birth – Key date of birth if available. Address same as Defendant? – Key “Y” or select the Yes button on the databar if the Parent/Guardian has the same address as the minor defendant. Key “N” or select No from the databar, or leave blank if they are not the same. Selecting “Yes” will copy the address information from the defendant into this section. Street Address – Type Street Address P.O. Box – Type PO Box number, if appropriate. Page 133 • • • • • City – Type City name. State – Click to select State from the pick list. Zip code – Type 5 or 9 digit zip code. Phone Number – Type phone number if known. Entering Additional Citations • If you want to issue another ticket to the same individual: Click on Replicate on the toolbar. Another citation will be created copying all fields except the Statute Number, Statute Description, Points, Bond Amount, and Narrative fields. • If you want to issue another ticket but to a different individual: Click on Add Form on the toolbar. The Available Forms dialog box appears. • Double-click on NTC, or • Click on NTC and click on OK. Another citation is created ready for you to fill out. Page 134 Printing a citation • Click on Print on the TraCS toolbar. The Print Manager dialog box appears. • • • Click the box for each form you want to print so that a check mark appears in front of each form to be printed. Click on OK. The form prints and the fields lock. You can reprint any form later. Note: - After Printing the Violator report, Officer copy or Court copy, the input form will lock. You will not be able to change anything except the narrative field. Verify all data before going to the print dialog box. Page 135 Deleting a Non-traffic Citation If an error is discovered after the citation has been issued, the non-traffic citation can be voided. A new citation can then be issued. To delete a non-traffic citation: 1. You can delete NTC citations from the contact manager; select the citation in the list before clicking the delete button. You will get the following message box. 2. Click Yes, and the NTC citation will be deleted. Page 136 Natural Resources Citation Page 137 Natural Resources Citation Form Getting Started Open a DNR form by selecting the Contact button on the toolbar or by selecting the Add Form button (if the Contact is already open) and then selecting “DNR” from the Available Forms list and hitting the OK button: Page 138 Entering Data into the Fields Defendant Information Section • • • • Citation Number – The citation number is in the upper left corner and fills in automatically. Police Number – If there is a Case Activity Report (CAR) to reference this citation to, enter that number here. Defendant Type – Select the value that best describes the violator. If the violator is a business, select non-individual. Last Name – If person data has been entered into Common Information, a list of the individuals will come up when you enter this data field. If the person is already on the list due to a previous citation or contact, select them from the list and hit [Enter]. The defendant information on file for that individual will auto-fill into the defendant fields. Review each of the fields and make any necessary changes. If a List appears and the person is not on the List, key [Alt + E] or click on the Edit/New button the violator’s last name. on the databar and then type Never choose a person that’s already in Common Information and edit it to be another person. For example, if a husband and wife are fishing without a Page 139 license and you have already issued a citation to the husband, do not choose the husband from the list and then change the first name, middle initial, etc. to that of the wife in order to issue a citation to the wife. This will change the data for the husband on the forms where they were entered, including the issued citation(s). If you accidentally select the wrong person from the drop down list, simply go back and select the correct entry. If the person is not on the list, move up to the blank item at the top of list before pressing the Edit/New button to add the new person. Remember, if you have a person highlighted and you press edit, you are editing the person or vehicle you have selected on the list, not creating a new entry. If a list does not come up when you enter the field, type the last name of the violator, then press enter to move to the next field. If your agency is set up to retrieve data from an external data source such as through a Mobile Data Browser, key [Alt + S] or hit the Search button on the databar to retrieve the violator information. Note: Depending on how your agency’s mobile data interface is set up, you may need to key in the person’s last name before you do the search. Check with your agency on which method to use. Enter the last name as it appears on their Driver’s License. If the person is unlicensed, the legal name should be recorded. If the Mobile Data Import functionality is programmed for your agency, and you click on Search, the External Search Results window appears listing the person responses. Page 140 Click to highlight the entry you want to import from the Result Items pane (see example above). Click on Apply. The person’s data will be imported into the appropriate fields on the DNR citation. If you selected the person data from the MDB responses, the person’s data will be imported into the appropriate fields on the DNR citation. Review the imported data and complete any remaining fields. If a data import was not done to get you started, complete the rest of the citation using guidance described by the field headers below. • • • • • • • • First Name – Type the defendant’s first name. Middle Name – Type the defendant’s middle name or initial, if appropriate Suffix – Click to select suffix from the drop down list, if needed. Company Name – If you selected Non-individual in the Defendant Type field, then the Company Name field will be active. Type in the company name. Street Address – Type the defendant’s street address. P.O. Box – Type the defendant’s PO Box number. Country – Type the defendant’s country of residence. This field defaults to United States. City – Type the defendant’s city of residence. Page 141 • • • • • • • • • • • • • • • • • • • • Note: For Canadian addresses, the province abbreviation should be listed in the City field after the city name followed by the zip code if there’s room (e.g. Toronto ON 2R34BR). If the zip code doesn’t fit here, enter it in the Street Address field after the street address (e.g. 1245 Main St 2R34BR). State – Click or arrow up or down to select the defendant’s state of residence. Zip Code – Type the defendant’s 5 or 9 character zip code. Note: Canadian zip codes should be entered in the City field after the city name and province abbreviation (e.g. Toronto ON 2R34BR). If it does not fit in that field, put it in the Street address field following the street address (e.g. 1245 Main St 2R34BR). Date of Birth – Type the individual’s date of birth. If you selected Non-individual in the Defendant Type field, then this field will not be active. Sex – Click to select gender from the drop down list. Race – Click to select race from the drop down list. Height – Type the individual’s height. Weight – Type the individual’s weight in lbs. Hair – Click to select the individual’s hair color from the drop down list. Eye - Click to select the individual’s eye color from the drop down list. Biometric Type - Click to select biometric type from the drop down list, if needed. Technology availability may not dictate the use of this field by your agency. Driver License Number – Type the individual’s driver license number without spaces or dashes. State of Issuance – Click to select the license state of issuance from the drop down list. DL Expire Year – Type the driver license expiration year. Phone Number – Type the defendant’s phone number and extension. If they do not have a telephone number or their number is an unpublished/unlisted number which is not public record, key in 000 000-000. Phone Country – Click to select the defendant’s country of residence. SSN Number – If the individual does not have a DNR Customer ID, then enter the individual’s social security number. DNR Customer ID – Enter the individual’s Customer ID issued by the DNR. Backtag – Enter the individual’s 7 character backtag that is assigned to a deer or bear hunting license. Page 142 Violation Information Section • Statute Number / Wis Admin Code - Type shortcut value, or Click on Search to select the Statute from Violations table, or Type statute number. If you type the statute number, the query brings back the first statute number that matches, so if there are several charges with the same statute number you might not get the charge you want. If you click on Search , the Violation Search window appears. Page 143 Click to select the Search Category you want to focus on. Click to select the charge from the list of violations. Click on Done. After selecting the charge from the Violation Search window, you return to the Statute Number / Wis Admin Code field on the citation. Press [Enter] to advance the field focus from Statute Number to the next available field. The imported violation data then pre-fills many fields including: Description, Offense Code, Wildlife Compact Violation, Max Penalty, etc. Page 144 • • Party To Viol– if the violator was a party to the violation, enter Y in the Party To Viol field. Ordinance Number – If your agency has populated the Violations Local Table with your local ordinances, click Search to select the Ordinance from the table, or type the ordinance number. If you click on Search , the Violation Search window appears. Click to select the Charge from the list of local ordinances. Click on Done. After selecting the local ordinance from the Violation Search window, you return to the Ordinance Number field on the citation. Press [Enter] to advance to the field focus from Ordinance Number to the next available field. Page 145 • • • • • • • • • • • • • • • • • • • Ordinance Description – Type the ordinance description if you did not select it in the Violation Search window. It may have pre-filled from the Ordinance Number field. Species – Select the species violated from the drop down list. By selecting a species here, the Animal Assessment field will pre-fill with the amount the animal is worth as determined by state statute. Animal Units – Enter the number of the selected species that were violated. For example, if the species selected is “deer” and there were two deer that were taken illegally, you would enter “2” in this field. Approval Type – Select the type of approval that the defendant should have purchased. For example, if a Wisconsin resident was caught fishing without a license, then the approval type could be “Fishing, Resident Annual”. Hotline Violation – If the citation is being issued because of a complaint that came through the DNR hotline, select “Yes”. If the citation is not due to a DNR hotline complaint, select “No”. Commercial Fish Protection – Enter the dollar amount of the commercial fish protection surcharge pursuant to s. 29.984(1), Wis. Stats., if applicable. Fishing Shelter Removal –Enter the actual costs of the fishing shelter removal surcharge pursuant to s. 29.985(1), Wis. Stats., if applicable. Fishing Net Removal Cost – Enter the actual costs of the fishing net removal if applicable. Great Lakes Viol – Select “Yes” if the violation involved Great Lakes fish or violation of s. 29.514 or 29.519. Restitution – Automatically populated based on the statute selected. Max Penalty – Automatically populated based on the statute selected. Violation Date – Enter the date that the violation occurred. This field defaults to the current system date. Day of Week – Automatically populated based on the violation date entered. Violation Time – Enter the time that the violation occurred. This field defaults to the current system time. Date Citation Served – Enter the date that the citation will be served. This field defaults to the current system date. Method Citation Served – Select if the citation is served “In Person” or “Mailed” to the defendant from the drop down list. County Name – Select the violation county from the drop down list. City/Village/Town – Select the violation community from the drop down list. Note: the county field must be selected before the city/village/town options will be available. GPS Latitude Coordinate – The databar (shown below) contains the fields for both Latitude and Longitude. Type the coordinates if you do not have the GPS configured for TraCS. TraCS is able to import the GPS coordinates from some GPS devices. To access this feature, click on the GPS button Page 146 . Page 147 • • • BAC Level – This field is active only when the selected statute involves a possible blood alcohol concentration level. Type the BAC Level without the decimal or select from the drop down list. Agency Space – This is a 200 character field for miscellaneous data. Probable Cause – Type in the probable cause statement as you want it to appear on the citation. This field is included on the defendant’s copy of the citation. • Plaintiff Information Section Plaintiff Type – Click to select the plaintiff type from the drop down list. Plaintiff County– Select the plaintiff county from the list. City/village/Town– Select the plaintiff city, village, or town from the list. Court Type – Click to select the court type from the drop down list. Court Name – Click to select the court name from the drop down list. Appear Required – Automatically populated based on the statute selected. You may change this field if it populates incorrectly. If you notice an error, please contact Kristin Turner at [email protected]. • • • Court Appearance Date – Type in the court date. Court Time – Type in the court appearance time. Deposit/Bail – This field is calculated based on the statute and court type selected. This field can be overwritten if your court amounts are different. When entering a juvenile citation, this field will need to be overwritten. Select F2 for the help file or see the chart below for juvenile information: Page 148 Vehicle / Equipment Section • Registration Number – Type the vehicle’s license plate number or registration number for recreational vehicles. If the Mobile Data Import functionality is programmed for your agency, and you click on Search, the External Search Results window appears listing the vehicle responses. Click to highlight the entry you want to import from the Result Items pane. Click on Apply. The vehicle data will be imported into the appropriate fields in the DNR form. Page 149 • • • • • • • • • • • • • • • • • • • Registration Type – Select the registration type from the drop down list. Issuing State – Select the registration issuing state from the drop down list. Registration Expiration Year – Type in the year that the registration expires. Vehicle Year – Enter the vehicle manufacturer year. Vehicle Type – Enter the type of vehicle. If you select a recreational vehicle then the next field available will be Recreational Vehicle Make, the Motor Vehicle Make field will not be available. If you select any option other than All Terrain Vehicle, Boat or Snowmobile then the Motor Vehicle Make field will be available, but the Recreational Vehicle Make field will be grayed out. Recreational Vehicle Make – Select the appropriate vehicle make, if applicable. Motor Vehicle Make – Select the appropriate vehicle make, if applicable. Vehicle Color – Select the color of the vehicle from the drop down list. VIN / HIN – Enter either the Vehicle Identification Number or the Hull Identification Number. Seizure Tag 1 – Enter the seizure tag number for the first item seized. Seizure Description 1 – Enter the description of the first item seized. Make 1 – Enter the Make of the first item seized. Model 1 – Enter the Model number of the first item seized. Serial Number 1 – Enter the serial number of the first item seized. Seizure Tag 2 & Seizure Tag 3 – Enter the seizure tag number for the second and third items seized. Seizure Description 2 & Seizure Description 2 – Enter the description of the second and third items seized. Make 2 & Make 3 – Enter the Make of the second and third items seized. Model 2 & Model 3 – Enter the Model number of the second and third items seized. Serial Number 2 & Serial Number 3 – Enter the serial number of the second and third items seized. Page 150 Violations Committed by Juveniles – Applicable Court & Presumptive Penalties Type of Violation Any Violation ATV, Boating, Snowmobile & Traffic Violations. Fish & Game, and All Other Civil Law & Ordinance Violations Age Court Presumptive Penalty Under 12 Juvenile Referral to Juvenile Court Intake Worker as Necessary 12 and 13 Juvenile Deposit Schedule Forfeiture Only 1 14 and 15 Juvenile Deposit Schedule Forfeiture & $25 Court Cost Only 2 16 and 17 Adult Deposit Schedule Total Deposit Amount 3 12 and 13 Juvenile Deposit Schedule Forfeiture Only 1 14,15 & 16 Juvenile Deposit Schedule Forfeiture & $25 Court Cost Only 2 17 Adult Deposit Schedule Total Deposit Amount 3 1 – No Court Costs, Fees or Surcharges Included Surcharges Included 2 – No Surcharges or Fees Included 3 – All Costs, Fees & • DA Routing – Click to select Yes or No as appropriate. Law Enforcement Agency Information Section • • • • • • Law Enforcement Agency Number – This field is not accessible. LE Agency Number automatically fills based upon user file definition. Law Enforcement Agency Name – This field is not accessible. LE Agency Name automatically fills based upon user file definition. Officer ID – This field is not accessible. Officer ID automatically fills based upon user file definition. Officer Name – This field is not accessible. Officer Name automatically fills based upon user file definition. Law Enforcement Agency Street Address – This field is not accessible. LE Agency Street Address automatically fills based upon user file definition. Page 151 • • • • • • • • • Law Enforcement Agency City – This field is not accessible. LE Agency City automatically fills based upon user file definition. LEA State – This field is not accessible. Law Enforcement Agency State automatically fills based upon user file definition. LEA Zip Code – This field is not accessible. Law Enforcement Agency Zip Code automatically fills based upon user file definition. LEA Phone Number – This field is not accessible. Law Enforcement Agency Phone Number automatically fills based upon user file definition. Assisting Officer Last Name – Enter the last name of the assisting officer. Assisting Officer First Name – Enter the first name of the assisting officer. Assisting Officer Middle – Enter the middle name or initial of the assisting officer, if applicable. Assist Officer ID – Enter the 9 digit DNR number assigned to the assisting officer. If a Ranger, then enter the 9 digit DNR number assigned to the park the Ranger is working in. If the assisting officer is a member of a police department, sheriff’s office or water patrol, then enter the 9 digit DNR number assigned to your agency. Assisting Department – Enter the name of the department that the assisting officer works for. Officer Notes - When focus is on the Officer Notes Field, a button labeled Narrative appears in the databar area. Click on Narrative in order for the Narrative text box window to appear. Type a narrative up to 990 characters in length. When the narrative is complete, click on Continue. Note: Once a citation is validated, this is the ONLY field in the citation that can be updated. This field for the officer’s use only and is not shown on any of the printed citation copies. Page 152 Adding Attachments Attached File – In the databar (shown below) click on Attach File to choose the file to attach. Once the file is attached, clicking on Attach File again will give the options to open file or save file as. Image Capture & Import – In the databar (shown below) click on Image Capture & Import to choose a photo or scanned image to attach to the citation. Once the file is attached, clicking on Image Capture & Import again will allow the file to be viewed and give the option to delete the file. • If you attached the wrong file, simply click on the Attached File field and • • click the Clear button in the databar. File Name – Enter the file name Agency Space – Enter any miscellaneous comments to include. Entering Additional Citations If you need to issue another citation to the same individual: Click on Replicate on the toolbar. Another citation will be created copying all fields except most fields in the Violation Information section. Page 153 If you need to issue another citation but to a different individual: Click on Add Form on the toolbar. The Available Forms dialog box appears. Double-click on DNR, or Click on DNR and click on OK. Another citation is created ready for you to fill out. Printing a Citation Click on Print on the TraCS toolbar. Page 154 The Print Manage dialog box appears (shown below). • Click the box for each form you want to print so that a check mark appears in front of each form to be printed. • Click OK. The form prints and the fields lock. You can reprint any form later. Note: After Printing the Violator report, Officer copy, or Court copy, the input form will lock. You will not be able to change anything except the narrative field. Verify all data before going to the print dialog box. Page 155 Voiding a Citation If an error is discovered after the citation has been issued, the citation will have to be voided. A new citation can then be issued. Citations can never be deleted. Citations can only be voided if they have been validated or issued. If you try to void a citation that has not been validated or issued you will get the following message box. To void a citation: You can void citations from the contact manager, select the citation in the list before clicking the void button. You will get the following message box. Click Yes, and you will get the following message box. Enter a reason for voiding the citation, click OK. Note: Voided citations will still need to be transmitted to DNR. Page 156 User Defaults for the DNR Form There are several user defaults that you might like to set for the DNR form. See Appendix F for instructions on how to do this. • • • • • • • APRN_CT_NB = Court Name (8-digit number) APRN_CT_TY = Court type (Circuit, Municipal, Tribal) DLVY_TYCD = Delivery method (Mailed, In-Person) MDTY_APRN_DT = Court appearance date (MM/DD/YYYY) MDTY_APRN_TM = Court time (HH:MM) Military time. PLTF_GOVT_TY = Plaintiff Type (City/Village/Town, County of, State of Wisconsin) VLTN_CNTY_CD = Violation County (name) Page 157 ALCHL Form (Alcohol Incident Forms) Page 158 ALCHL Form To start an Alcohol Form, choose it from the Available Forms menu: The Available Forms dialog box appears. • • Double-click on ALCHL, or Click on ALCHL and click on OK. Data Fields Form Selection Section Form Name Checkbox: • Select yes or no for each report you will be creating. (Depending on the forms you select, different additional form fields will be enabled.) Page 159 Driver Information section • • Last Name – If you have issued Alcohol related ELCI forms in this contact, the person’s name will be available to select in the list. You can also click the search button or key the Last name. If the Mobile Data Import functionality is programmed for your agency, and you click on Search, the External Search Results window appears listing the person responses. Page 160 • • • Click to highlight the entry you want to import from the Result Items pane. Click on Apply. The person’s data will be imported into the appropriate fields in the ALCHL form. If you selected the person data from the MDB responses, the person’s data will be imported into the appropriate fields in the ALCHL form. If you have the Alcohol tickets filled out in this contact, after you enter the individuals DL number, you can click the Autopopulate button in the tool bar and have the vehicle information and Statute information automatically fill in from the completed ELCI forms. Complete the remaining fields. • • • • • • • • • • • • • • • • First Name – Type first name. Middle Name – Type middle name or initial, if appropriate. Suffix – Click to select suffix from the pick list, if needed. Street Address – Type street address. P.O. Box –Type PO Box number. City – Type city name. State – Click to select state from the pick list. Zip Code – Type 5 or 9 character zip code. Daytime Phone – Type in area code and phone number if known. Date of Birth – Type individual’s date of birth. Gender – Click to select gender from the pick list. Driver License Number – Type individual’s driver license number without spaces or dashes. State of Issuance – Click to select license state of issuance from the pick list. DL Expire Year – Type driver license expiration year. Operating as DL Class - Click to select Operating as DL Class from the pick list. Operating as DL Endorsements - Click to select Operating as DL Endorsements from the pick list. • • Vehicle Information Section Page 161 License Plate Number: • • Click on Search to select the Vehicle data from the MDB responses, or Type plate number. If the Mobile Data Import functionality is programmed for your agency, and you click on Search, the External Search Results window appears listing the vehicle responses. • • • Click to highlight the entry you want to import from the Result Items pane. Click on Apply. The vehicle data will be imported into the appropriate fields in the ALCHL form. Page 162 If you selected the vehicle data from the MDB responses, the vehicle’s data will be imported into the appropriate fields in the ALCHL form. Complete the remaining fields. • • • • • License Plate Type – Click to select plate type from the pick list. Vehicle Year – Type Vehicle Year. Vehicle Make – Type Vehicle Make. VIN Number – Type Vehicle ID Number. Offense Information Section If you have issued the ELCI alcohol related tickets and they are part of this contact, after you select the individual and their data is copied into the ALCHL form, you may click the autopop button on the tool bar. Autopop will copy data from the alcohol tickets into this ALCHL form. The data that will be copied is Operating as Class, Operating as Endorsements, Vehicle information section, and Offense Information section. You may type in this information manually if you choose. • • • • • • • • Violation Date – Type in violation date of Alcohol citation. Violation Time - Type in violation time of Alcohol citation. County Name – Click to select the Violation County from the pick list. UTC Number – Type in UTC Number for alcohol conviction. UTC Check Digit – Type in UTC Number Check digit. Adopting State Statute: Type shortcut value, or Click on Search to select the Statute from Violations table, or Type statute number. If you type the statute number, the query brings back the first statute number that matches, so if there are several charges with the same statute number you might not get the charge you want. • After selecting the Adopting State Statute from the Violation Search window, you return to the ALCHL form. • • Court Type – Click to select Court Type from the pick list. Court Name – Click to select Court Name from the pick list. Page 163 Additional Information Section These fields are enabled or disabled as needed for the Reports you plan on creating from the selections at the top of the ALCHL form. • • • • • • • • • Notice Date – Type Notice Date. Notice Time – Type Notice Time. This Notice (MV3519) issued – Click to select Issued Method from the pick list . Criminal Complaint Issued – Click to select yes or no from the pick list. Date of Refusal – Type Refusal Date. Out of Service Order Issued – Click to select yes or no from the pick list. Chemical Test Type – Click to select Chem Test Type from the pick list. Submit to Chem test – Click to select yes or no from the pick list Driver ID Type – Click to select Identification type from the pick list. Officer Section • Agency Space – Key agency specific data in the agency space field as directed by your agency. Attachment Group Depending on the policies of your agency, you may attach files to your report. Not all agencies use attachments. • • • Attached File – Click the attach file button. You will be prompted to enter the file name and path of the file you wish to attach to the form. File Name – Enter the name of the file. Agency Space – Enter any agency specific information required by your agency. Page 164 Printing the ALCHL reports • Click on Print on the TraCS toolbar. The Print Manager dialog box appears. • • • Click the box for each form you want to print so that a check mark appears in front of each form to be printed. Click on OK and the form(s) will print. You can reprint any form later. Page 165 Deleting an ALCHL Form If an error is discovered after the ALCHL reports have been printed you can go back to the input form and make the necessary changes, then reprint the report. To delete an ALCHL form: You can delete ALCHL forms from the contact manager. Select the ALCHL form in the list before clicking the delete button. You will get the following message box. • Click Yes, and the ALCHL form will be deleted. Page 166 Alcohol/Drug Influence Form Page 167 Influence Form (eSP4005) The process flow of the Influence form: 1. Have an alcohol citation completed 2. Click Add Form to open a new Influence form 3. Click the Print button | Highlight Interrogation Report in order to print the PreInterrogation paragraph 4. Read the Pre-interrogation to violator and have the violator sign it. 5. Complete the rest of the Influence form 6. Validate and print the form Notes: The Influence form must be Validated and Accepted before it can be transmitted to your RMS. Page 168 Open new Influence citation form 1. Choose it from the Available Forms menu: The Available Forms dialog box appears. 2. Double-click on Influence, or 3. Click on Influence and click on OK. Data Fields: Violator Section • • Police Number – A number which is on all forms and can be used within agency. Last Name - Click on Search to select the person data from the MDB responses, or Click on List to select the person data from the Barcode scanned data, or Type last name. Page 169 If the Mobile Data Import functionality is programmed for your agency, and you click on Search, the External Search Results window appears listing the person responses. Click to highlight the entry you want to import from the Result Items pane. • • Click on Apply. The person’s data will be imported into the appropriate fields in the Influence form. If you selected the person data from the MDB responses, the person’s data will be imported into the appropriate fields in the Influence form. Complete the remaining fields. • • • • • • • • • First Name – Type first name. Middle Name – Type middle name or initial, if appropriate. Suffix – Click to select suffix from the pick list, if needed. Street Address – Type street address. P.O. Box – Type PO Box number. City – Type city name. State – Click to select state from the pick list. Zip Code – Type 5 or 9 character zip code. Date of Birth – Type individual’s date of birth. Page 170 • • • • • • • • • • • • • Gender – Click to select gender from the pick list. Race – Click to select race from the pick list. Incident Date—Type Date Incident Time - Type Time Arrest Date—Type Date Arrest Time—Type Time Citation Number—Type the citation number the Influence is connected to. Breath, Odor of Alcohol Beverage—Select or type Alcohol type Attitude—Type violator’s attitude Speech—Type speech concerns Describe Clothing—Describe clothing and condition Signs or Complaints of Illness or Injury—Type any signs or complaints What first led you - Type what first led officer to suspect alcohol or drugs influence Opinions Section • • • • • Is the subject under the influence of intoxicants—Officers opinion Yes/No Is the subject’s ability to operate a motor vehicle impaired—Officers opinion Yes/No Names of Other Occupants in Vehicle—Type names of occupants in vehicle Condition of Other Occupants—Type condition of each occupant Witness(es)—Type names of witnesses Pre-Interrogation • • • • • Date—Type the signed date from the printed Pre-Interrogation report Time—Type the time from the printed Pre-Interrogation report Signature—Officer signature if used Notes—Type notes from printed Pre-Interrogation report Witness—Type the name(s) of the witness(es) Page 171 Questions The question section consists of fields, which are text or drop down lists. Each drop down list has Yes, No or See Comments. If See Comments is selected, the officer will add the violator response to the question in the Comments section at the bottom of the Influence form. If No is selected, all fields related to that field will gray out. To enable a grayed out field, select Yes instead of No. The following fields have the ability to use a dropdown list or manual enter text using the OTHER option. Page 172 Officer • • • • Department – Field is not accessible. Department name automatically fills based upon user file definition. Officer ID – Field is not accessible. Officer ID automatically fills based upon user file definition. Officer Name – Field is not accessible. Officer name automatically fills based upon user file definition. Comments – When focus is on the narrative field, a button labeled Narrative appears in the databar area. Click on Narrative to get the Narrative window and type in a narrative up to 990 characters in length. When narrative is complete, click on Continue. Attachment Group Depending on the policies of your agency, you may attach files to your report. Not all agencies use attachments. • • • Attached File – Click the attach file button. You will be prompted to enter the file name and path of the file you wish to attach to the form. File Name – Enter the name of the file. Agency Space – Enter any agency specific information required by your agency. Page 173 Printing 1. Click on Print on the TraCS toolbar. 2. The Print Manager dialog box appears. 3. Click the box for each form you want to print so that a check mark appears in front of each form to be printed. 4. Click on OK. Note: Highlighting the Report will enable you to Print Preview it. The Influence Interrogation report will always be blank. Deleting a Influence form The Influence can be deleted at any time. To delete a Influence form: 1. You can delete Influence forms from the Contact Manager; highlight the Influence form in the list before clicking the delete button. You will get the following message box. 2. Click Yes, and the Influence form will be deleted Page 174 Warning Form Page 175 Warning Form To start a Warning form, choose it from the Available Forms menu: Searching MDB For Driver’s License Records While the cursor focus is on the violator’s Last Name field, select the violator from the listing of persons in the Common Information Manager. If a custom DLL has been written by\for the local agency, TraCS can be configured to search the MDB for the last five driver’s license records queried. To search, select the Search button, or press ALT-S. Page 176 TraCS will attempt to read the MDB Inbox for the last five driver’s license records. If the Search is successful, the Search Status will display “External Search Successful.” Highlight the desired name and select the Apply button. Currently, the custom dll for the HTE mobile data browser will attempt to recognize driver’s license records from 26 States. The States include California, Illinois, Indiana, Iowa, Kentucky, Michigan, Minnesota, Missouri, Nebraska, New York, Ohio, Texas and Wisconsin. If the Search routine does not recognize the driver’s license State, the driver’s license information will have to be manually entered into the Warning form. Searching For License Plate Records While the cursor focus is on the violator’s License Plate field, TraCS can also search the MDB for the last five license plate records queried if your agency has the custom dll written. To search, select the Search button, or press ALT-S. TraCS will attempt to read the MDB Inbox for the last five license plate records queried. If the Search is successful, the Search Status will display “External Search Successful.” Highlight the desired license plate and select the Apply button. Currently, TraCS will attempt to recognize license plate records from 26 States. The States include California, Illinois, Indiana, Iowa, Kentucky, Michigan, Minnesota, Missouri, Nebraska, New York, Ohio, Texas and Wisconsin. If the Search routine does not recognize the license plate State, the vehicle information will have to be manually entered into the Warning form. MDB License Plate Search Routine Error If the Search encountered problems reading the MDB Inbox, the Search Status will display “Error: Type mismatch has occurred in ExecuteQuery Function.” and no Search records will be displayed. The vehicle information will have to be manually entered into the Warning form. Searching For Violation Section Numbers While the cursor focus is in the Violation Section Number field, select the Search button, or press ALT-S, to search for Section Numbers. By default, TraCS will search for the Statute Code. To search for violation description, select the Offense radio button. Page 177 Also by default, TraCS will search for Wisconsin Violations. Select the Trans Rules radio button to search for Trans Orders. Page 178 To search for a violation: 1. Type in the desired search string 2. Select the Find button 3. Scroll through the search results 4. Highlight the desired violation Statute Number 5. Select the Done button 1 2 4 3 5 Page 179 The selected Statute Number will be entered into the Section Number field. The Violation Description field will not be completed until the cursor is moved off the Section Number field by pressing the [Enter] key, or pressing ALT-P. Editing the Violation And Section Number The Violation field and Section Number field may be changed to better describe the violation. For instance: Can be edited to describe: Page 180 Entering another Violation A maximum of 10 violations can be entered on one Warning form. If more than 10 violations need to be issued during one traffic stop, this Warning form will need to be printed and closed, and another Warning form created. To insert another violation the cursor must be on the Violation field or Section Number field, then select the + Group button. The insertion of the additional violation line will make it look like the last violation disappeared or was erased, but the Warning form was really shifted up and the new violation line inserted in its place. Entering A Violation Manually Instead of searching for a Section Number, a violation can be entered manually by typing in the Violation and Section Number. Violation Code Shortcuts The Violation field can accept shortcut codes to help speed up the completion of the Violation and Section Number fields. The shortcut codes can be found in Appendix A or by pressing the <F2> help key while in the field. Many of the shortcut codes are MCIR codes, many others are driver’s license record abbreviations, and the rest are made-up abbreviations for common violations. To enter a shortcut code violation: 1. The cursor must be on the Violation field 2. Type in the shortcut code 3. Press [Enter] Page 181 Example 1 Example 2 Searching For Local Ordinance Violation Numbers While the cursor focus is in the Violation(s) description field, select the Search button, or press ALT-S, to search for Local Ordinance Violation Numbers. By default, TraCS will search for the Statute Code. To search for violation description, select the Offense radio button. Also by default, TraCS will search for Local Ordinances. Page 182 Correct At Once Violations For violation(s) that require the owner or operator to correct the violation(s) at once then mail personal certification back to the issuing law enforcement agency, this type of action is called Correct At Once. If the violation(s) need to be corrected at once, the Warning form will prompt for the number of days the violation needs to be corrected by. Page 183 The number of days will be added to today’s date and the correction date will be calculated. The owner or operator is then requested to mail personal certification back to the law enforcement agency by this calculated date. Report In Person Violations For violation(s) that require the owner or operator to report to a law enforcement officer for certification then mail back to the issuing law enforcement agency, this type of action is called Report In Person. If Report In Person is requested, enter the number of days the owner the owner or operator needs to report by. The number of days will be added to today’s date and the report in person date will be calculated. The owner or operator is then requested to mail the officer certification back to the law enforcement agency by this calculated date. NOTE: Only one Check Box (Correct At Once or Report In Person) can be checked at a time. Page 184 Entering A Comment (optional) An optional comment, up to 60 characters, may be entered to the Warning. The comment will not be printed on the Warning Notice. The comment will only be visible to law enforcement personnel. Printing The Warning To print the Warning, select the Print button, or press CONTROL-P. The Print Manager window will then appear with three types of forms that can be printed. Page 185 Place a check mark next to the warning report you want to print and click OK. NOTE: After a Warning is printed, its Status is changed to Issued and it cannot be changed. If another violation is discovered after the Warning has been printed, another Warning will have to be created and printed. Deleting a Warning If the Warning needs to be deleted, select the Delete button. Page 186 TraCS will confirm that you really want to delete the form. Since each Warning form needs to be accounted for, TraCS will ask for the reason why the form is being deleted. Page 187 Attachment Form Page 188 Attachment Form The attachment form is an optional form that may be used by your agency to facilitate the transfer of non-TraCS files from the field unit to the administrative workstation. This form is provided as a convenience for your agency and the data provided on it is only used locally within the agency. The form is designed to be extremely flexible and meet a variety of agency needs. For example, you could use it send a fingerprint file, a work report in Word format, an Excel spreadsheet or virtually any other file on your laptop. Your TraCS coordinator will have more information on how this form is to be used within your agency. Typically, you will have started a contact with one or more forms already opened prior to adding an attachment to the contact. Add an Attachment form by selecting the Add Form button on the toolbar and selecting the Attachment form from the available forms dialog box. Page 189 Data Fields The document number and agency information always pre-fill for you and cannot be changed: The Attachment group is where you will attach your file and fill in any additional identifying information. The Attached File field is the only required field on the form. You will use the Attachments data bar to attach your file. You may click on Image Capture & Import if you wish to attach an image from your scanner. Click on Attach File if you wish to attach a file from your field unit. The Attach File dialog box will appear: Page 190 Select the file you wish to attach and click Open. You have now attached a file to the contact. The Attached File field is the only required field in this group. The remaining fields are optional and serve to further describe the nature and purpose of the attached file. Please consult with your local TraCS coordinator to determine how and when these fields should be used. Use the File Name field to enter the name of your file. If your attachment is related to a particular form in the Contact, select the appropriate form type and enter the form’s document number in the Form Reference Number. If your attachment is related to a crash, you may enter the Accident Number, Police Number, and/or Unit Number. Page 191 If your attachment is related to a person, you may enter their information in this section. Usually, you will select the information from the list that appears in the Driver License Number field. If your attachment is related to a vehicle, you may enter that information in this section. Usually, you will select the information from the list that appears in License Plate Number field. Agency Space can be used to further describe the file. Adding Groups If you have more than one attachment associated with the contact, you may add an additional group by pressing <ctrl>+ while in the attachments group. Page 192 Driver Condition/Behavior Form Page 193 Driver Condition or Behavior Report Form To start a Driver Condition or Behavior Report form, choose it from the Available Forms menu: The Available Forms dialog box appears. • • Double-click DriverCondition Form, or Click on DriverCondition and click on OK. Data Fields Individual Information section • • Last Name – Type the individual’s last name as it appears on their Driver’s License. If the individual is unlicensed, the legal name should be recorded. When the individual’s true name is different from what appears on the license, the reason should be listed in the narrative. First Name - Type the individual’s first name. Page 194 • • • • • • • • • • • • • Middle Initial - Type the individual’s middle initial. If they have no middle initial, leave blank. OPTIONAL: For out-of-state drivers, the full middle name may be recorded. Suffix – Click to select suffix from the pick list, if needed. Street Address – Type the current address of the individual. If the street address was brought in from data scanned using a barcode reader or from an external data source, verify that it represents the current address. If not, type in the current address. P.O. Box – Type the individual’s P.O. Box, if applicable. City – Type the individual’s current city of residence. State – Select the individual’s current state of residence from the pick list. Zip Code – Type the individual’s current 5 or 9 character zip code. Driver License Number – Type the individual’s driver license number. State Of Issuance – Click to select drivers license state of issuance from the pick list Gender – Click to select gender from the pick list Date of Birth – Type individual’s date of birth using two digits per month and day and four digits per year. Telephone Number – Type the individual’s current telephone number. Driver Condition – Click to choose possible medical conditions that could have caused the behavior witnessed from the pick list. You may pick multiple conditions or no conditions if you aren’t sure. Narrative Section • Narrative – Type any concerning witnessed behaviors with specific examples to indicate the concern/cause for the report. This is free form. Be as specific as possible. This is a required field and must be filled in completely. Do not enter text that references comments or narratives in an associated form. Fill the field in with the complete narrative. Use copy and paste if the text of the narrative is available from another resource or form. The Crash form itself is a separate document that is not accessible to the Medical Review Section. Please do not include in the narrative references to the Crash form. Instead, explicitly list all behavior/condition issues in the narrative of the Driver Condition/Behavior form. Page 195 Agency Section • • • • • • • • Type of Enforcement Action Taken – Type if citation was issued, warning, crash report only, no additional action taken, etc. Incident Date – Type the date of the incident if different than the date you are entering the report. This is extremely important information. Incident Time – Type the time of incident if different than the time you are entering the report. Agency Space – Type up to 200 characters for miscellaneous data. ELCI Document – Type ELCI document number or if you already have an ELCI form open, click the autopop button. Crash Document – Type accident document number or if you already have an accident form open, click the autopop button. Warning Document – Type Warning document number or if you already have a Warning form open, click the autopop button. Agency Information (remainder of form) – Field is not accessible. Agency information automatically fills based upon user file definition. Printing the Driver Condition / Behavior Report Form • Click on Print on the TraCS toolbar. Page 196 The Print Manager dialog box appears. Click the box for each form you want to print so that a check mark appears in front of each form to be printed. Click on OK and the form(s) will print. Correcting a Driver Condition / Behavior Report Form If an error is discovered after the Driver Condition / Behavior Report Form has been printed you can go back to the input form and make the necessary changes, then reprint the form. To Delete a Driver Condition / Behavior Report Form • You can also delete the Driver Condition / Behavior Report Form from the contact manager. Select the Driver Condition / Behavior Report Form in the list before clicking the delete button. You will get the following message box. • Click Yes, and the Driver Condition / Behavior Report Form will be deleted. Page 197 Traffic Stop Data Collection Form Page 198 Traffic Stop Data Collection Effective January 1, 2011, all Wisconsin law enforcement officers will be required to collect and submit data from traffic stops to determine if racial disparities may exist in the criminal justice system. This form helps you comply with the state reporting requirement. The information below is collected. • • • • • • • • General Information Vehicle Driver Reason for Stop Vehicle Search Driver Search Passenger Search Agent This form should be completed for each vehicle involved in a traffic stop as defined by the Office of Justice Assistance (OJA.) For more information on traffic stop data collection requirements, see the OJA website: http://oja.wi.gov/section.asp?linkid=1643&locid=97 Definition of a traffic stop: http://oja.wi.gov/docview.asp?docid=20516&locid=97 Frequently Asked Questions: http://oja.wi.gov/docview.asp?docid=20298&locid=97 If you have additional questions not answered by the website, please contact OJA at [email protected] for additional assistance. Open a Traffic Stop Data Collection form by selecting the Contact button on the toolbar or by selecting the Add Form button (if the Contact is already open) and then selecting “Traffic Stop” from the Available Forms list and click the OK button: Page 199 General Information Section • Police Number – Key your agencies case number or other data as directed by your agency. • Report Date – The date that the report is being completed. • Date of Stop – The date that the Stop occurred. • Time of Stop – The time that the stop occurred. • County – Click to select the county that the stop occurred in from the pick list. • Municipality – Click to select the city/town/village that the stop occurred in from the pick list. • On Hwy # - Click to select the highway letter or number. • On Hwy Dir – Click to select the direction from the pick list. • On Street Name – Select the street location from the pick list or click on the “Other” button to type the street name. • Est. Dist – Type the distance number and select the unit of measure. • Est. Dist. Dir – Select the direction from the pick list. • From/At Highway # - Click to select the highway letter or number. Page 200 • From/At Hwy Dir – Click to select the direction from the pick list. • From/At Street Name – Select the street location from the pick list or click on the “Other” button to type the street name. • Roadway Type – Select the roadway type from the list. • Latitude / Longitude – If available, type in the latitude and longitude in units of decimal degrees. Or import the data directly from a GPS unit if you have that capability. • Agency Space – 200 character field for miscellaneous data. Vehicle/Driver Section • License Plate # - Click the search button to select the vehicle data from the MDB responses, or type the plate number. • Plate Type – Click to select the plate type from the list. • State – Click to select the registration state from the pick list. • Expiration Year – Type plate expiration year. • Body Style – Click to select the body style from the list. • Color – Click to select the color from the list. • Vehicle Year – Click to select Type vehicle manufacturer year. • Make Code – Click to select the vehicle make from the list. • Model Code – Click to select the vehicle model from the list. • # of Passengers Observed (Driver Excluded) – Enter the number of passengers in the vehicle excluting the driver. • Tot Pass Searched/Consent Req – Enter the number of the passengers who were searched or were asked permission to be searched. Page 201 • At Least One Non-White Passenger Observed – Answer ‘Yes’ or ‘No’ for whether at least one of the passengers observed are non-white. • Driver Zip Code – Click the search button to select the vehicle data from the MDB responses, or type the plate number otherwise type in the driver zip code. • Driver Date of Birth – Type in the driver date of birth. • Driver Age – Type in the driver’s age. • Driver Sex – Choose the gender of the driver. • Driver Race/Ethnicity – Select the Race/Ethnicity of the driver. Reason for Stop Section • Reason for Stop – Select the reason(s) for the stop from the list. If the necessary reason is not available in the list then choose “Other” and enter the description of the reason for the stop in the next field “Other Reason for Stop”. • Other Reason for Stop – Enter a description of the reason for the stop if “Other” was chosen in the prior field. An entry in this field is not required if there is anything else selected in the “Reason for Stop” field. • Detailed Reason – Choose further descriptions of the reason for the stop if applicable. This field is not required. • Other Detailed Reason – If the Detailed Reason that this stop requires is not listed in the “Detailed Reason” field than it can be typed into this field. This is not a required field. • Event Outcome – Choose the appropriate outcome(s) from the list. • Event Duration – Select the time range that is appropriate for the stop. Page 202 Vehicle Search • Consent Requested – Answer whether or not consent was requested to search the vehicle. • Consent Received – Answer whether or not consent was received to search the vehicle. • Search Conducted – Answer whether or not the vehicle was searched. Answering ‘Yes’ will unlock the remaining boxes for the vehicle portion. • Search Basis – Select the reason(s) why the search was made. If the basis for the search is not available here then choose “Other” or leave this field blank. • Other Search Basis – If the reason for why the search was made is not available in the prior “Search Basis” field then type that basis here. • Contraband Found – Select the type(s) of contraband found. If there was no contraband found then select “None”. If the type is not available in the list then choose “Other” or leave this field blank. • Other Contraband – Enter the type of contraband that was found if it was not available in the prior field. Otherwise this is not a required field. Page 203 Driver Search Section • Consent Requested – Answer whether or not consent was requested to search the driver. • Consent Received – Answer whether or not consent was received to search the driver. • Search Conducted – Answer whether or not the driver was searched. Answering ‘Yes’ will unlock the remaining boxes for the driver portion. • Search Basis – Select the reason(s) why the search was made. If the basis for the search is not available here then choose “Other” or leave this field blank. • Other Search Basis – If the reason for why the search was made is not available in the prior “Search Basis” field then type that basis here. • Contraband Found – Select the type(s) of contraband found. If there was no contraband found then select “None”. If the type is not available in the list then choose “Other” or leave this field blank. • Other Contraband – Enter the type of contraband that was found if it was not available in the prior field. Otherwise this is not a required field. Page 204 Passenger Search Section • Consent Requested – Answer whether or not consent was requested to search the passenger. • Consent Received – Answer whether or not consent was received to search the passenger. • Search Conducted – Answer whether or not the passenger was searched. Answering ‘Yes’ will unlock the remaining boxes for the passenger portion. • Search Basis – Select the reason(s) why the search was made. If the basis for the search is not available here then choose “Other” or leave this field blank. • Other Search Basis – If the reason for why the search was made is not available in the prior “Search Basis” field then type that basis here. • Contraband Found – Select the type(s) of contraband found. If there was no contraband found then select “None”. If the type is not available in the list then choose “Other” or leave this field blank. • Other Contraband – Enter the type of contraband that was found if it was not available in the prior field. Otherwise this is not a required field. • Passenger Race/Ethnicity – Choose the Race/Ethnicity of the passenger. Page 205 Law Enforcement Agency The Law Enforcement Agency section is mostly grayed out but is auto populated based off of the User who is signed into TraCS. If there are fields not populated contact TraCS Administrator. In the cases where someone other than the officer that made the traffic stop is completing the form in TraCS the officer id and name should be over-written with the correct information. Page 206 Citizen Contact Form Page 207 Citizen Contact The Citizen Contact form is a tool used by agencies to collect data on individuals, associates or vehicles which can be imported into their Records Management System (RMS). The information below is collected. Multiple groups can be added by clicking the + group on the tool menu when in a section (ie Vehicles). • • • • • • • • Individual Individual Action Vehicle(s) Location Associate(s) Parent(s) / Guardian(s) Assisting Officer(s) Attachment(s) Open a Citizen Contact form by selecting the Contact button on the toolbar or by selecting the Add Form button (if the Contact is already open) and then selecting “Citizen Contact” from the Available Forms list and click the OK button: Page 208 General Information Section • Document Number—Auto generated by TraCS based off of the agency TAS, Machine and serial number. • Date of Contact—Auto filled based on date form was opened. Can be changed. • Time of Contact—Auto filled based on time form was opened. Can be changed. • Police Number – Key your agencies case number or other data as directed by your agency. This field can be auto populated from any other form. • Individual Indentified – Yes or No field. If an individual was indentified, select Yes and the Individual’s first and last name will be required. • Vehicle Involved—Yes or No field. If a vehicle was involved, select Yes and the vehicle section will enable. • Associate Involved—Yes or No field. If an associate was involved, select Yes and the Associates section will enable. • Reason for Contact— Select the reason for the subject interaction or cause for contact. Selections for this field may be changed. See your TraCS Administrator. • Agency Space—Agency use. 100 character max. Contact Location • • • • • • County Name – Click to select county from the pick list where the contact happen. City/Town/Village – Click to select community from the pick list. On Hwy Type – Click to select highway type from the pick list. Hwy name – Type highway number or letters. Hwy Direction – Click to select direction from the pick list. On Street Location – Select street location from the pick list or click the “Other” button to type in street. Page 209 • • • • • At Distance From – Type distance number and select the unit of measure. At Direction – Click to select direction from the pick list. At Hwy Type – Click to select highway type from the pick list. At Hwy Name – Type highway number or letters. At Hwy Dir-- Click to select direction from the pick list • At Street Location – Select street location from the pick list or click the “Other” button to type in street. • GPS Latitude Coordinate – The databar contains the fields for both Latitude and Longitude. Type coordinates in units of decimal degrees if you do not have the GPS configured for TraCS. TraCS is able to import the GPS coordinates from some GPS devices. • Structure Type—Select a structure type from the pick list and then the Structure Number field will enable. • Structure Number—Enter number of the Structure Type. 20 characters max. Individual Section • Juvenile—Yes or No field. Select Yes, if the subject is under the age of 18. The Parent / Guardian section will enable. • Last Name – If any person data has been entered in Common Information, a list of the individuals will come up when you enter this data field. If the person is already on the list, select them from the list and hit [Enter]. If a List appears and the person is not on the List, key [Alt + E] or click on the Edit/New button on the databar and then key the violator’s last name. Never choose a person that’s already in Common Information and edit it to be another person. For example, if a husband is driving a vehicle and his wife Page 210 is an occupant that is not wearing a seatbelt, do not choose the husband from the list and then change the first name, middle initial, etc. to that of the wife in order to issue a seatbelt citation to the wife. This will change the data for the husband on all the forms where they were entered, including issued citations. If you accidentally select the wrong person from the drop down list, simply go back and select the correct entry. If the person is not on the list, move up to the blank item at the top of list before pressing the Edit/New button to add the new person. Remember, if you press edit, you are editing the person or vehicle you have selected on the list, not creating a new entry. If a List does not come up when you enter the field, key the last name of the violator. If your agency is set up to retrieve data from an external data source such as through a Mobile Data Browser, key [Alt + S] or hit the Search button on the databar to retrieve the violator information. Note: Depending on how your agency’s mobile data interface is set up, you may need to key in the person’s last name before you do the search. Check with your agency on which method to use. Enter the last name as it appears on their Driver’s License. If the person is unlicensed, the legal name should be recorded. If the Mobile Data Import functionality is programmed for your agency, and you click on Search, the External Search Results window appears listing the vehicle responses. o Click to highlight the entry you want to import from the Result Items pane. o Click on Apply o The vehicle data will be imported into the appropriate fields in the Citizen Contact form. If you selected the person data from the MDB responses, the person’s data will be imported into the appropriate fields in the Citizen Contact form. Complete any remaining fields. Page 211 • • • • • • • • • • • • • • • • • • • • • • • First Name – Type first name. Middle Name – Type middle name or initial, if appropriate. Suffix – Click to select suffix from the pick list, if needed. Street Address – Type street address. P.O. Box – Type PO Box number. City – Type city name. State – Click to select state from the pick list. Zip Code – Type 5 or 9 character zip code. Date of Birth – Type individual’s date of birth. Gender – Click to select gender from the pick list. Race – Click to select race from the pick list. Height – Type individual’s height. Weight – Type individual’s weight. Hair – Click to select hair color from the pick list. Eye – Click to select eye color from the pick list. Driver License Number – Type individual’s driver license number without spaces or dashes. State of Issuance – Click to select license state of issuance from the pick list. DL Expire Year – Type driver license expiration year. Other ID Type—Enter the ID type used to ID Individual other than Driver’s License. 50 Characters max. Other ID Number—Enter the number from the ID used. 50 characters max. Phone Number – Type individual’s telephone number and extension if known. Description Y/N—Yes or No field. Select Yes to enable the following fields. Aliases--List any known aliases of the individual stopped. Max of 50 characters Page 212 • • • • • • • • • • • • • • • • • Appearance-- Choose a single Appearance type which applies to the individual at the time of contact. For Multiple Appearances types use the OTHER button on the tool bar. Speech--Choose a single Speech type which applies to the individual at the time of contact. For Multiple Speech types use the OTHER button on the tool bar. Demeanor--Choose a single Demeanor type which applies to the individual at the time of contact. For Multiple Demeanor types use the OTHER button on the tool bar. Scars, Marks, Tattoos—Enter individual details up to 100 characters. Build-- Choose a single Build type which applies to the individual at the time of contact. For Multiple Build types use the OTHER button on the tool bar. Facial Hair-- Choose a single Facial Hair type which applies to the individual at the time of contact. For Multiple Facial Hair types use the OTHER button on the tool bar. Hair Style-- Choose a single Hair Style type which applies to the individual at the time of contact. For Multiple Hair Style types use the OTHER button on the tool bar. Clothing Description-- Choose a single or multiple Clothing Descriptions for the individual at the time of the contact. Other Clothing Description—Enter individual clothing descriptions which aren’t in the previous field up to 75 characters. On Parole/Probation Y/N—Yes or NO field. Select Yes if the individual is on parole or probation. Parole/Probation #--Enter the parole or probation number of previous field up to 20 characters. Employer/School—Enter the name of the employer or school of the individual up to 50 characters. Employer/School Address— Enter the address of the employer or school of the individual up to 75 characters. Employer/School Phone Number-- Enter individual’s telephone number and extension if known. Gang Act—Yes or No field. Is the Individual involved in Gang Activity? Gang Affiliation— Any known gang affiliation of the subject stopped. Selections for this field may be changed. See your TraCS Administrator. Gang Involvement— Choose a single Gang Involvement type which applies to the individual at the time of contact. For Multiple Gang Involvement types use the OTHER button on the tool bar. Page 213 Individual’s Actions Section • • • • • • Assault— Choose a single Assault type which applies to the individual at the time of contact. For Multiple Assault types use the OTHER button on the tool bar Property Crime— Choose a single Property Crime type which applies to the individual at the time of contact. For Multiple Property Crime types use the OTHER button on the tool bar Investigation-- Choose a single Property Crime type which applies to the individual at the time of contact. For Multiple Property Crime types use the OTHER button on the tool bar Vice-- Choose a single Vice type which applies to the individual at the time of contact. For Multiple Vice types use the OTHER button on the tool bar Location-- Choose a single Location type which applies to the individual at the time of contact. For Multiple Location types use the OTHER button on the tool bar Traffic-- Choose a single Traffic type which applies to the individual at the time of contact. For Multiple Traffic types use the OTHER button on the tool bar. Vehicle Section • License Plate Number – o Click on Search to select the Vehicle data from the MDB responses, or Type plate number. If the Mobile Data Import functionality is programmed for your agency, and you click on Search, the External Search Results window appears listing the vehicle responses. o Click to highlight the entry you want to import from the Result Items pane. o Click on Apply Page 214 o The vehicle data will be imported into the appropriate fields in the Citizen Contact form. • • • • • • • • Plate Type—Select type from the pick list. Issuing State – Select registration state from the pick list. Plate Expiration Year – Enter plate expiration year. VIN-- Enter Vehicle Identification Number. Vehicle Year – Enter vehicle manufacturer year. Vehicle Make – Select vehicle make from the pick list. Vehicle Type – Select vehicle type from the pick list. Vehicle Color – Select vehicle color from the pick list. Associates W/ Individual Section • Last Name— if any Associates data has been entered in Common Information, a list of the individuals will come up when you enter this data field. If your agency is set up to retrieve data from an external data source such as through a Mobile Data Browser, key [Alt + S] or hit the Search button on the databar to retrieve the Associates information or type Associates last name. • • First Name—Enter Associates first name if not populated by Mobile Data Browser. Middle Name— Type Associates middle name or initial, if appropriate. Page 215 • • • • • • • • Suffix— Select suffix from the pick list, if needed. Date of Birth—Enter date of birth Street Address—Enter street address, 40 characters max. P.O. Box—Enter PO Box City—Enter City State—Select State Zip Code—Enter Zip Code Phone Number— Enter telephone number and extension if known Parent / Guardian Information Section • Last Name— If any Parent / Guardian data has been entered in Common Information, a list of the individuals will come up when you enter this data field. If your agency is set up to retrieve data from an external data source such as through a Mobile Data Browser, key [Alt + S] or hit the Search button on the databar to retrieve the Parent / Guardian information or type Parents / Guardian last name. • • • • • • • • • • First Name—Enter Parent / Guardian first name if not populated by Mobile Data Browser. Middle Name— Type Parent / Guardian middle name or initial, if appropriate. Suffix— Select suffix from the pick list, if needed. Date of Birth—Enter date of birth Street Address—Enter street address, 40 characters max. P.O. Box—Enter PO Box City—Enter City State—Select State Zip Code—Enter Zip Code Phone Number— Enter telephone number and extension if known Page 216 Law Enforcement Agency The Law Enforcement Agency section is grayed out but is auto populated based off of the User who is signed into TraCS. If there are fields not populated contact TraCS Administrator. • • • • • Assist Officer ID—Enter officer’s ID. 9 characters max. Assisting Officer Last Name—Enter Officer’s last name. 30 characters max. Assisting Officer First Name—Enter Officer’s first name. 15 characters max. Assisting Officer Middle—Enter Officer’s middle name. 15 characters max. Assisting Officer Department—Enter Officer’s Department. 30 characters max. Comments section User can enter up to 990 characters. Attachment Section • • • Attached File – Click the attach file button. You will be prompted to enter the file name and path of the file you wish to attach to the form. File Name – Enter the name of the file. Agency Space – Enter any agency specific information required by your agency. Transmitting Page 217 After the form is validated, it is end-shifted into headquarters. The form will need to be changed to accepted status in the contact manager. After acceptance, the form may then be transmitted from TraCS utilities. The transmitted forms will go to the WIJIS Workflow, just like citations. Page 218 CNUM Form Page 219 CNUM Form Installing ELCI Citation Numbers Depending on the policies of your agency you may be asked to install citation numbers for the ELCI form when they run low. If your agency start-shifts a CNUM form to you, follow these procedures to install the citations. 1. Perform a start-shift to bring in the CNUM form into your contact manager. 2. Go to the contact manager and open the CNUM form for edit. 3. Click the search button to install the citation numbers. 4. Close the form. 5. End-shift the CNUM form. Page 220 Appendix A – Violation, Property and Insurance Shortcuts The following lists of available shortcuts are the default shortcuts supplied with the Wisconsin TraCS Pack. Your agency may have modified these lists to reflect local conditions. Contact your TraCS coordinator for more information on local differences. Violation Shortcuts Enter the shortcut in the statute number field on any of the citation forms and the complete violation information will pre-fill for you. Shortcut Statute Description L 287.81(2)(a) LITTERING-PUBLIC PROPERTY ORS 341.03(1) OPER VEH AFTER REV/SUS/CAN OF REG <=10000 LBS RLX 341.04(1) NON-REGISTRATION OF VEHICLE <=10000 LBS RLM 341.04(1) NON-REGISTRATION OF VEHICLE <=10000 LBS IWR 341.04(1) NON-REGISTRATION OF VEHICLE <=10000 LBS ER 341.04(1) NON-REGISTRATION OF VEHICLE <=10000 LBS UV 341.04(1) NON-REGISTRATION OF VEHICLE <=10000 LBS RHM 341.04(1) NON-REGISTRATION OF VEHICLE >10000 LBS RLI 341.04(1) NON-REGISTRATION OF VEHICLE <=10000 LBS IVR 341.04(2) IMPROPER REGISTRATION OF VEHICLE <=10,000 LBS FCRC 341.11(4) NO DISPLAY OF REGISTRATION CERTIFICATE RCC 341.11(4) NO DISPLAY OF REGISTRATION CERTIFICATE RPM 341.15(1) FAIL/DISPLAY VEHICLE LICENSE PLATES FLP 341.15(1) FAIL/DISPLAY VEHICLE LICENSE PLATES IP 341.15(1) FAIL/DISPLAY VEHICLE LICENSE PLATES FDRD 341.15(1m)(a) FAIL/ATTACH REAR REGIS. DECAL/TAG IDLP 341.15(2) IMPROPERLY ATTACHED LICENSE PLATES LPC 341.15(2) IMPROPERLY ATTACHED LICENSE PLATES LPB 341.15(2) IMPROPERLY ATTACHED LICENSE PLATES RPA 341.15(2) IMPROPERLY ATTACHED LICENSE PLATES Page 221 Shortcut Statute Description FDLP 341.15(3)(a) IMPROPER DISPLAY/PLATES (NO PLATES) AV 341.335(1) FAIL/NOTIFY DMV OF ADDRESS CHANGE UDLP 341.61(2) DISPLAY UNAUTH. VEH. REGISTRATION PLATE RTT 342.15(2) TRANSFEREE FAIL/APPLY NEW TITLE FTT 342.15(2) TRANSFEREE FAIL/APPLY NEW TITLE DLX 343.05(3)(a) OPERATE W/O VALID LICENSE (EXP W/IN 3 MTHS) OWL 343.05(3)(a) OPERATE W/O VALID LICENSE EDL 343.05(3)(a) OPERATE W/O VALID LICENSE (EXP W/IN 3 MTHS) MCDL 343.05(3)(b) OPERATE MOTORCYCLE W/O VALID LICENSE OWE 343.05(3)(b) OPERATE MOTORCYCLE W/O VALID LICENSE FCDL 343.18(1) OPERATE W/O CARRYING LICENSE DLC 343.18(1) OPERATE W/O CARRYING LICENSE ADL 343.22(2)(b) FAIL/NOTIFY ADDRESS CHANGE VOR 343.43(1)(d) LICENSE/PERMIT RESTRICTION VIOLATION GDLP 343.43(1)(d) VIOLATE GDL RESTRICTIONS - PASSENGER GPV 343.43(1)(d) VIOLATE GDL RESTRICTIONS - PASSENGER GCV 343.43(1)(d) VIOLATE GDL RESTRICTIONS - CURFEW GDLC 343.43(1)(d) VIOLATE GDL RESTRICTIONS - CURFEW OAS3 343.44(1)(a) OPERATING AFTER SUSPENSION (3RD) OAS4 343.44(1)(a) OPERATING AFTER SUSPENSION (4TH+) OWS4 343.44(1)(a) OPERATING AFTER SUSPENSION (4TH+) OWS3 343.44(1)(a) OPERATING AFTER SUSPENSION (3RD) OAS2 343.44(1)(a) OPERATING AFTER SUSPENSION (2ND) OWS 343.44(1)(a) OPERATING AFTER SUSPENSION OAS 343.44(1)(a) OPERATING AFTER SUSPENSION OWS2 343.44(1)(a) OPERATING AFTER SUSPENSION (2ND) OAR 343.44(1)(b) OPERATING AFTER REVOCATION Page 222 Shortcut Statute Description OAR2 343.44(1)(b) OPERATING AFTER REVOCATION (2ND) OAR3 343.44(1)(b) OPERATING AFTER REVOCATION (3RD) OAR4 343.44(1)(b) OPERATING AFTER REVOCATION (4TH+) LOC 346.05(1) OPERATING LEFT OF CENTER LINE SVKR 346.05(3) FAILURE OF SLOWER VEHICLE TO KEEP RIGHT STKR 346.05(3) FAILURE OF SLOWER VEHICLE TO KEEP RIGHT PI 346.072(1)(a) ILLEGALLY PASS CERTAIN STOPPED VEHICLES ULD 346.13(1) UNSAFE LANE DEVIATION TLD 346.13(1) UNSAFE LANE DEVIATION FTC 346.14(1) AUTOMOBILE FOLLOWING TOO CLOSELY POE 346.16(2)(a) PEDESTRIAN/BIKE ON EXPRESSWAY/PROHIBITED POI 346.16(2)(a) PEDESTRIAN/BIKE ON EXPRESSWAY/PROHIBITED FYR 346.18(3) FAIL/YIELD RIGHT/WAY FROM STOP SIGN FYEV 346.19(1) FAIL/YIELD TO STOP FOR EMERGENCY VEHICLE ULC 346.34(1)(a)3 UNSAFE TURN-W/O REASONABLE SAFETY FSLC 346.34(1)(b) FAIL TO SIGNAL TURN FST 346.34(1)(b) FAIL TO SIGNAL TURN FUTS 346.34(1)(b) FAIL TO SIGNAL TURN FOS 346.46(1) FAIL/STOP AT STOP SIGN TSS 346.46(1) FAIL/STOP AT STOP SIGN IS 346.57(2) UNREASONABLE AND IMPRUDENT SPEED FVC 346.57(2) FAILURE TO KEEP VEHICLE UNDER CONTROL TFC 346.57(3) DRIVING TOO FAST FOR CONDITIONS 6125 346.57(4)(e) SPEEDING ON CITY HIGHWAY (35-39 MPH) 5325 346.57(4)(e) SPEEDING ON CITY HIGHWAY (25-29 MPH) 5425 346.57(4)(e) SPEEDING ON CITY HIGHWAY (25-29 MPH) 5825 346.57(4)(e) SPEEDING ON CITY HIGHWAY (30-34 MPH) Page 223 Shortcut Statute Description 5925 346.57(4)(e) SPEEDING ON CITY HIGHWAY (30-34 MPH) 5725 346.57(4)(e) SPEEDING ON CITY HIGHWAY (30-34 MPH) 5525 346.57(4)(e) SPEEDING ON CITY HIGHWAY (30-34 MPH) 5625 346.57(4)(e) SPEEDING ON CITY HIGHWAY (30-34 MPH) 6325 346.57(4)(e) SPEEDING ON CITY HIGHWAY (35-39 MPH) 6025 346.57(4)(e) SPEEDING ON CITY HIGHWAY (35-39 MPH) 6225 346.57(4)(e) SPEEDING ON CITY HIGHWAY (35-39 MPH) 6625 346.57(4)(e) SPEEDING ON CITY HIGHWAY (40-44 MPH) 6725 346.57(4)(e) SPEEDING ON CITY HIGHWAY (40-44 MPH) 6825 346.57(4)(e) SPEEDING ON CITY HIGHWAY (40-44 MPH) 6925 346.57(4)(e) SPEEDING ON CITY HIGHWAY (40-44 MPH) 6525 346.57(4)(e) SPEEDING ON CITY HIGHWAY (40-44 MPH) 7025 346.57(4)(e) SPEEDING ON CITY HIGHWAY (45+ MPH) 3425 346.57(4)(e) SPEEDING ON CITY HIGHWAY (1-10 MPH) 5225 346.57(4)(e) SPEEDING ON CITY HIGHWAY (25-29 MPH) 6425 346.57(4)(e) SPEEDING ON CITY HIGHWAY (35-39 MPH) S25 346.57(4)(e) SPEEDING ON CITY HIGHWAY (1-10 MPH) T25 346.57(4)(e) SPEEDING ON CITY HIGHWAY (1-10 MPH) 5125 346.57(4)(e) SPEEDING ON CITY HIGHWAY (25-29 MPH) 3525 346.57(4)(e) SPEEDING ON CITY HIGHWAY (1-10 MPH) 3725 346.57(4)(e) SPEEDING ON CITY HIGHWAY (11-15 MPH) 4025 346.57(4)(e) SPEEDING ON CITY HIGHWAY (11-15 MPH) 3825 346.57(4)(e) SPEEDING ON CITY HIGHWAY (11-15 MPH) 3625 346.57(4)(e) SPEEDING ON CITY HIGHWAY (11-15 MPH) 3925 346.57(4)(e) SPEEDING ON CITY HIGHWAY (11-15 MPH) 4125 346.57(4)(e) SPEEDING ON CITY HIGHWAY (16-19 MPH) 4325 346.57(4)(e) SPEEDING ON CITY HIGHWAY (16-19 MPH) Page 224 Shortcut Statute Description 4425 346.57(4)(e) SPEEDING ON CITY HIGHWAY (16-19 MPH) 4825 346.57(4)(e) SPEEDING ON CITY HIGHWAY (20-24 MPH) 4925 346.57(4)(e) SPEEDING ON CITY HIGHWAY (20-24 MPH) 4625 346.57(4)(e) SPEEDING ON CITY HIGHWAY (20-24 MPH) 4525 346.57(4)(e) SPEEDING ON CITY HIGHWAY (20-24 MPH) 4225 346.57(4)(e) SPEEDING ON CITY HIGHWAY (16-19 MPH) 5025 346.57(4)(e) SPEEDING ON CITY HIGHWAY (25-29 MPH) 4725 346.57(4)(e) SPEEDING ON CITY HIGHWAY (20-24 MPH) 9965 346.57(4)(gm) SPEEDING ON FREEWAY (30-34 MPH) 8965 346.57(4)(gm) SPEEDING ON FREEWAY (20-24 MPH) 8665 346.57(4)(gm) SPEEDING ON FREEWAY (20-24 MPH) 9265 346.57(4)(gm) SPEEDING ON FREEWAY (25-29 MPH) 9365 346.57(4)(gm) SPEEDING ON FREEWAY (25-29 MPH) 9165 346.57(4)(gm) SPEEDING ON FREEWAY (25-29 MPH) 9465 346.57(4)(gm) SPEEDING ON FREEWAY (25-29 MPH) 9065 346.57(4)(gm) SPEEDING ON FREEWAY (25-29 MPH) 10065 346.57(4)(gm) SPEEDING ON FREEWAY (35+ MPH) 9565 346.57(4)(gm) SPEEDING ON FREEWAY (30-34 MPH) 9765 346.57(4)(gm) SPEEDING ON FREEWAY (30-34 MPH) 9665 346.57(4)(gm) SPEEDING ON FREEWAY (30-34 MPH) 8565 346.57(4)(gm) SPEEDING ON FREEWAY (20-24 MPH) 7865 346.57(4)(gm) SPEEDING ON FREEWAY (11-15 MPH) 9865 346.57(4)(gm) SPEEDING ON FREEWAY (30-34 MPH) 7465 346.57(4)(gm) SPEEDING ON FREEWAY (1-10 MPH) S65 346.57(4)(gm) SPEEDING ON FREEWAY (1-10 MPH) 8265 346.57(4)(gm) SPEEDING ON FREEWAY (16-19 MPH) 7565 346.57(4)(gm) SPEEDING ON FREEWAY (1-10 MPH) Page 225 Shortcut Statute Description 8765 346.57(4)(gm) SPEEDING ON FREEWAY (20-24 MPH) 7765 346.57(4)(gm) SPEEDING ON FREEWAY (11-15 MPH) 8065 346.57(4)(gm) SPEEDING ON FREEWAY (11-15 MPH) 7965 346.57(4)(gm) SPEEDING ON FREEWAY (11-15 MPH) 7665 346.57(4)(gm) SPEEDING ON FREEWAY (11-15 MPH) 8165 346.57(4)(gm) SPEEDING ON FREEWAY (16-19 MPH) 8465 346.57(4)(gm) SPEEDING ON FREEWAY (16-19 MPH) 8365 346.57(4)(gm) SPEEDING ON FREEWAY (16-19 MPH) 8865 346.57(4)(gm) SPEEDING ON FREEWAY (20-24 MPH) T65 346.57(4)(gm) SPEEDING ON FREEWAY (1-10 MPH) 6955 346.57(4)(h) SPEEDING IN 55 MPH ZONE (11-15 MPH) 6555 346.57(4)(h) SPEEDING IN 55 MPH ZONE (1-10 MPH) S55 346.57(4)(h) SPEEDING IN 55 MPH ZONE (1-10 MPH) T55 346.57(4)(h) SPEEDING IN 55 MPH ZONE (1-10 MPH) 7055 346.57(4)(h) SPEEDING IN 55 MPH ZONE (11-15 MPH) 6855 346.57(4)(h) SPEEDING IN 55 MPH ZONE (11-15 MPH) 9255 346.57(4)(h) SPEEDING IN 55 MPH ZONE (35-39 MPH) 8955 346.57(4)(h) SPEEDING IN 55 MPH ZONE (30-34 MPH) 8855 346.57(4)(h) SPEEDING IN 55 MPH ZONE (30-34 MPH) 8555 346.57(4)(h) SPEEDING IN 55 MPH ZONE (30-34 MPH) 8755 346.57(4)(h) SPEEDING IN 55 MPH ZONE (30-34 MPH) 9355 346.57(4)(h) SPEEDING IN 55 MPH ZONE (35-39 MPH) 8655 346.57(4)(h) SPEEDING IN 55 MPH ZONE (30-34 MPH) 9155 346.57(4)(h) SPEEDING IN 55 MPH ZONE (35-39 MPH) 9055 346.57(4)(h) SPEEDING IN 55 MPH ZONE (35-39 MPH) 9955 346.57(4)(h) SPEEDING IN 55 MPH ZONE (40-44 MPH) 9755 346.57(4)(h) SPEEDING IN 55 MPH ZONE (40-44 MPH) Page 226 Shortcut Statute Description 9555 346.57(4)(h) SPEEDING IN 55 MPH ZONE (40-44 MPH) 9655 346.57(4)(h) SPEEDING IN 55 MPH ZONE (40-44 MPH) 10055 346.57(4)(h) SPEEDING IN 55 MPH ZONE (45+ MPH) 6655 346.57(4)(h) SPEEDING IN 55 MPH ZONE (11-15 MPH) 9455 346.57(4)(h) SPEEDING IN 55 MPH ZONE (35-39 MPH) 7455 346.57(4)(h) SPEEDING IN 55 MPH ZONE (16-19 MPH) 6755 346.57(4)(h) SPEEDING IN 55 MPH ZONE (11-15 MPH) 9855 346.57(4)(h) SPEEDING IN 55 MPH ZONE (40-44 MPH) 8355 346.57(4)(h) SPEEDING IN 55 MPH ZONE (25-29 MPH) 7355 346.57(4)(h) SPEEDING IN 55 MPH ZONE (16-19 MPH) 7155 346.57(4)(h) SPEEDING IN 55 MPH ZONE (16-19 MPH) 7955 346.57(4)(h) SPEEDING IN 55 MPH ZONE (20-24 MPH) 7555 346.57(4)(h) SPEEDING IN 55 MPH ZONE (20-24 MPH) 8255 346.57(4)(h) SPEEDING IN 55 MPH ZONE (25-29 MPH) 7755 346.57(4)(h) SPEEDING IN 55 MPH ZONE (20-24 MPH) 8055 346.57(4)(h) SPEEDING IN 55 MPH ZONE (25-29 MPH) 7855 346.57(4)(h) SPEEDING IN 55 MPH ZONE (20-24 MPH) 8455 346.57(4)(h) SPEEDING IN 55 MPH ZONE (25-29 MPH) 7655 346.57(4)(h) SPEEDING IN 55 MPH ZONE (20-24 MPH) 7255 346.57(4)(h) SPEEDING IN 55 MPH ZONE (16-19 MPH) 8155 346.57(4)(h) SPEEDING IN 55 MPH ZONE (25-29 MPH) 31OVER 346.57(5) EXCEEDING SPEED ZONES, ETC. (30-34 MPH) 30OVER 346.57(5) EXCEEDING SPEED ZONES, ETC. (30-34 MPH) 32OVER 346.57(5) EXCEEDING SPEED ZONES, ETC. (30-34 MPH) 33OVER 346.57(5) EXCEEDING SPEED ZONES, ETC. (30-34 MPH) 28OVER 346.57(5) EXCEEDING SPEED ZONES, ETC. (25-29 MPH) 36OVER 346.57(5) EXCEEDING SPEED ZONES, ETC. (35-39 MPH) Page 227 Shortcut Statute Description 43OVER 346.57(5) EXCEEDING SPEED ZONES, ETC. (40-44 MPH) 25OVER 346.57(5) EXCEEDING SPEED ZONES, ETC. (25-29 MPH) 26OVER 346.57(5) EXCEEDING SPEED ZONES, ETC. (25-29 MPH) 34OVER 346.57(5) EXCEEDING SPEED ZONES, ETC. (30-34 MPH) 39OVER 346.57(5) EXCEEDING SPEED ZONES, ETC. (35-39 MPH) 37OVER 346.57(5) EXCEEDING SPEED ZONES, ETC. (35-39 MPH) 38OVER 346.57(5) EXCEEDING SPEED ZONES, ETC. (35-39 MPH) 35OVER 346.57(5) EXCEEDING SPEED ZONES, ETC. (35-39 MPH) 42OVER 346.57(5) EXCEEDING SPEED ZONES, ETC. (40-44 MPH) 40OVER 346.57(5) EXCEEDING SPEED ZONES, ETC. (40-44 MPH) 44OVER 346.57(5) EXCEEDING SPEED ZONES, ETC. (40-44 MPH) 29OVER 346.57(5) EXCEEDING SPEED ZONES, ETC. (25-29 MPH) SI 346.57(5) EXCEEDING SPEED ZONES, ETC. (11-15 MPH) 41OVER 346.57(5) EXCEEDING SPEED ZONES, ETC. (40-44 MPH) 17OVER 346.57(5) EXCEEDING SPEED ZONES, ETC. (16-19 MPH) 9OVER 346.57(5) EXCEEDING SPEED ZONES, ETC. (1-10 MPH) 10OVER 346.57(5) EXCEEDING SPEED ZONES, ETC. (1-10 MPH) S EXCEEDING SPEED ZONES, ETC. (1-10 MPH) 346.57(5) 11OVER 346.57(5) EXCEEDING SPEED ZONES, ETC. (11-15 MPH) 45OVER 346.57(5) EXCEEDING SPEED ZONES, ETC. (45+ MPH) 15OVER 346.57(5) EXCEEDING SPEED ZONES, ETC. (11-15 MPH) 14OVER 346.57(5) EXCEEDING SPEED ZONES, ETC. (11-15 MPH) 13OVER 346.57(5) EXCEEDING SPEED ZONES, ETC. (11-15 MPH) 27OVER 346.57(5) EXCEEDING SPEED ZONES, ETC. (25-29 MPH) 18OVER 346.57(5) EXCEEDING SPEED ZONES, ETC. (16-19 MPH) 16OVER 346.57(5) EXCEEDING SPEED ZONES, ETC. (16-19 MPH) 19OVER 346.57(5) EXCEEDING SPEED ZONES, ETC. (16-19 MPH) Page 228 Shortcut Statute Description 20OVER 346.57(5) EXCEEDING SPEED ZONES, ETC. (20-24 MPH) 21OVER 346.57(5) EXCEEDING SPEED ZONES, ETC. (20-24 MPH) 22OVER 346.57(5) EXCEEDING SPEED ZONES, ETC. (20-24 MPH) 23OVER 346.57(5) EXCEEDING SPEED ZONES, ETC. (20-24 MPH) 24OVER 346.57(5) EXCEEDING SPEED ZONES, ETC. (20-24 MPH) SE 346.57(5) EXCEEDING SPEED ZONES, ETC. (20-24 MPH) 12OVER 346.57(5) EXCEEDING SPEED ZONES, ETC. (11-15 MPH) OWI5 346.63(1)(a) OPERATING WHILE INTOX. (5TH+) OWI4 346.63(1)(a) OPERATING WHILE INTOX. (4TH) OWI 346.63(1)(a) OPERATING WHILE INTOX. OWI2 346.63(1)(a) OPERATING WHILE INTOX. (2ND) OWI3 346.63(1)(a) OPERATING WHILE INTOX. (3RD) DRUG 346.63(1)(am) OPER W/DETECT LEVEL CONTROL SUBSTANCE PAC3 346.63(1)(b) OWI-(3RD) BAC .08%+ PAC4 346.63(1)(b) OWI-(4TH) BAC >.02%+ PAC2 346.63(1)(b) OWI-(2ND) BAC .08%+ PAC 346.63(1)(b) OWI-""BAC .1%+"" PAC 346.63(1)(b) OWI-""BAC .08 - .99%"" PAC5 346.63(1)(b) OWI-(5TH+) BAC >.02%+ ABS 346.63(2m) VIOLATE ABSOLUTE SOBRIETY LAW UAO 346.63(2m) VIOLATE ABSOLUTE SOBRIETY LAW DSP 346.69 HIT AND RUN-PROPERTY ADJACENT TO HIGHWAY FRA 346.70(1) FAILURE TO NOTIFY POLICE OF ACCIDENT VO 346.88(3)(b) OBSTRUCTED DRIVERS VISION-FRONT VIEW ID 346.89(1) INATTENTIVE DRIVING IIV 346.93(1) MINOR TRANSPORTING INTOXICANTS IN MV IVP 346.935(1) DRINK OPEN INTOXICANTS IN MV-PASSENGER Page 229 Shortcut Statute Description IVO 346.935(1) DRINK OPEN INTOXICANTS IN MV-DRIVER ERV 346.94(16) ILLEGAL USE OF RADIO, ETC. LHI 347.06(1) OPERATION W/O REQUIRED LAMPS LIGHTED DHL 347.06(1) OPERATION W/O REQUIRED LAMPS LIGHTED CL 347.06(3) UNCLEAN/DEFECTIVE LIGHTS OR REFLECTORS RL 347.06(3) UNCLEAN/DEFECTIVE LIGHTS OR REFLECTORS ICL 347.07(2)(b) OPERATE VEHICLE W/ NONRED TAILLIGHTS LBC 347.07(2)(b) OPERATE VEHICLE W/ NONRED TAILLIGHTS FDHL 347.12(1)(a) APPROACHING OPERATOR FAIL/DIM MULTIBEAMS LHD 347.12(1)(a) APPROACHING OPERATOR FAIL/DIM MULTIBEAMS DTL 347.13(1) NO TAIL LAMP/DEFECTIVE TAIL LAMP-NIGHT LTI 347.13(1) NO TAIL LAMP/DEFECTIVE TAIL LAMP-NIGHT DBL 347.14(1) OPERATE VEHICLE W/O STOPPING LIGHTS DSL 347.14(1) OPERATE VEHICLE W/O STOPPING LIGHTS LSI 347.14(1) OPERATE VEHICLE W/O STOPPING LIGHTS DTS 347.15(1) SALE/OPERATE VEH. W/O DIRECTIONAL LIGHTS LDI 347.15(1) SALE/OPERATE VEH. W/O DIRECTIONAL LIGHTS BL 347.25(4) EQUIP NONPOLICE VEH. W/ BLUE LIGHTS PBI 347.35(1a) FAIL/EQUIP VEHICLE W/ PARKING BRAKE DPB 347.35(1a) FAIL/EQUIP VEHICLE W/ PARKING BRAKE NM 347.39(1) OPERATE MOTOR VEH. W/O ADEQUATE MUFFLER IM 347.39(1) OPERATE MOTOR VEH. W/O ADEQUATE MUFFLER AE 347.39(2) EQUIP MOTOR VEHICLE WITH ILLEGAL MUFFLER VMR 347.40(1) OPERATE VEHICLE W/O REARVIEW MIRROR DS 347.41 DEFECTIVE SPEEDOMETER SCI 347.47(3) TOWING WITH IMPROPER SAFETY CHAINS SBM 347.48(1)(a) SELL/BUY MOTOR VEHICLE W/O SAFETY BELTS Page 230 Shortcut Statute Description DSB 347.48(1)(a) SELL/BUY MOTOR VEHICLE W/O SAFETY BELTS SBW 347.48(2m)(b) VEHICLE OPERATOR FAIL/WEAR SEAT BELT FFS 347.48(2m)(b) VEHICLE OPERATOR FAIL/WEAR SEAT BELT SBP 347.48(2m)(d) RIDE IN VEHICLE W/O WEARING SEAT BELT FDDS TR139.04(6) USE MOTOR VEHICLE LABEL TSC TR305.09(4) FAIL/MAINTAIN SIGNAL LENSES DLPL TR305.13(1) PLATE LAMP NOT FUNCTION OR MISSING-IL LRP TR305.13(1) PLATE LAMP NOT FUNCTION OR MISSING-IL LSO TR305.15(4) COVER/OBSTRUCT STOP LAMP LENSES BLC TR305.15(4) COVER/OBSTRUCT STOP LAMP LENSES IHSL TR305.15(5) FAIL/MAINTAIN HIGH-MOUNTED STOP LAMP TPTL TR305.20(5) TAIL PIPE NOT EXTEND PAST PASSNGR COMPART MIM TR305.26(1) FAIL/EQUIP REQUIRED MIRRORS LOM TR305.26(1) FAIL/EQUIP REQUIRED MIRRORS ROM TR305.26(1) FAIL/EQUIP REQUIRED MIRRORS DWNO TR305.32(2) FRONT DRIVERS SIDE WINDOW NOT OPERATE TINT TR305.32(4)(b)2 VENT/SIDE WINDOW EXCESSIVE TINTING RRWT TR305.32(5)(b) REAR WINDOW EXCESSIVE TINTING ERWT TR305.32(5)(b) REAR WINDOW EXCESSIVE TINTING RRSWT TR305.32(6) REAR SIDE WINDOW EXCESSIVE TINTING ERSWT TR305.32(6) REAR SIDE WINDOW EXCESSIVE TINTING CW TR305.34(3) CRACKED/DAMAGED VEHICLE WINDSHIELD TW TR305.34(6) ILLEGAL MATERIALS ON WINDSHIELD TR2 TR326.01(1) 49 CFR PART 107 - GROUP 1 TR1 TR326.01(1) 49 CFR PART 107 Page 231 Property Owner Shortcuts Key these shortcuts in the property owner company name field on the crash form to bring back complete property owner information. Shortcut Company Location ALLIANT ENERGY ALLIANT ENERGY MADISON ALLIANT ALLIANT ENERGY MADISON SBC SBC WAUKESHA AMERITECH SBC WAUKESHA VERIZON TELEPHONE CO VERIZON TELEPHONE CO SUN PRAIRIE VERIZON VERIZON TELEPHONE CO SUN PRAIRIE NC - RHINELANDER WISCONSIN DEPT OF TRANSPORTATION RHINELANDER NC - WIS RAPIDS WISCONSIN DEPT OF TRANSPORTATION WI RAPIDS NE - GREEN BAY WISCONSIN DEPT OF TRANSPORTATION GREEN BAY NW - EAU CLAIRE WISCONSIN DEPT OF TRANSPORTATION EAU CLAIRE NW - SUPERIOR WISCONSIN DEPT OF TRANSPORTATION SUPERIOR SW - LA CROSSE WISCONSIN DEPT OF TRANSPORTATION LA CROSSE SW - MADISON WISCONSIN DEPT OF TRANSPORTATION MADISON SE - WAUKESHA WISCONSIN DEPT OF TRANSPORTATION WAUKESHA WEPCO WISCONSIN ELECTRIC CLAIMS MILWAUKEE WISCONSIN ELECTRIC CLAIMS WISCONSIN ELECTRIC CLAIMS MILWAUKEE WISCONSIN PUBLIC SERVICE WISCONSIN PUBLIC SERVICE GREEN BAY WPS WISCONSIN PUBLIC SERVICE GREEN BAY XCELL ENERGY XCELL ENERGY EAU CLAIRE XCELL XCELL ENERGY EAU CLAIRE Page 232 Insurance Shortcuts (Aliases) If you free key an insurance company on the crash form using Alt-O, TraCS will attempt to match it to an insurance company on this list. Shortcut Company AAA AUTO CLUB INS ASSOC AARP HARTFORD UNDERWRITERS INS CO ACUITY ACUITY, A MUTUAL INSURANCE CO AFFIRMATIVE AFFIRMATIVE INS CO ALLIED ALLIED PROPERTY AND CASUALTY INS CO AMERICAN STANDARD AMERICAN STANDARD INS CO OF WIS AMERICAN STATES AMERICAN STATES INS CO AMFAM AMERICAN FAMILY MUTUAL INS CO ATLANTA CASUALTY ATLANTA CASUALTY CO AUTO OWNERS AUTO OWNERS INS CO BADGER BADGER MUTUAL INS CO CHUBB CHUBB INDEMNITY INS CO CINCINNATI CINCINNATI INS CO CNA CONTINENTAL CASUALTY CO (C/O CNA-LPS CLAIMS) COLONIAL NATIONWIDE ASSURANCE CO COLONIAL PENN AIG CENTENNIAL INSURANCE CO DAIRYLAND DAIRYLAND INS CO DEPOSITORS DEPOSITORS INS CO ECONOMY ECONOMY FIRE & CASUALTY CO ECONOMY PREFERRED ECONOMY PREFERRED INS CO EMASCO EMCASCO INS CO EMC EMPLOYERS MUTUAL CASUALTY CO ENCOMPASS ENCOMPASS INSURANCE CO OF AMERICA FEDERATED FEDERATED MUTUAL INS CO Page 233 Shortcut Company GE PROPERTY & CASUALTY AIG CENTENNIAL INSURANCE CO GEICO GOVERNMENT EMPLOYEES INS CO GENERAL CASUALTY GENERAL CASUALTY CO OF WISCONSIN GLOBE AMERICAN GLOBE AMERICAN CASUALTY CO GO AMERICA GLOBE AMERICAN CASUALTY CO GRE GLOBE AMERICAN CASUALTY CO GREAT WEST GREAT WEST CASUALTY CO GREATWAY GREATWAY INS CO GRINNEL MUTUAL GRINNELL MUTUAL REINSURANCE CO HANOVER HANOVER INS CO HARTFORD HARTFORD UNDERWRITERS INS CO HERITAGE ACUITY, A MUTUAL INSURANCE CO IDS IDS PROPERTY CASUALTY INS CO INTEGRITY INTEGRITY MUTUAL INS CO KEMPER KEMPER NATIONAL LIBERTY LIBERTY MUTUAL MET LIFE METROPOLITAN PROPERTY & CASUALTY INS CO MIDWEST SECURITY STATE AUTO INSURANCE CO OF WISCONSIN MSI MUTUAL SERVICE CASUALTY INS CO NATIONWIDE NATIONWIDE ASSURANCE CO OMAHA P & C BEAZLEY INSURANCE COMPANY, INC PARTNERS PARTNERS MUTUAL INS CO PREMATIC SERVICE CORP FARMERS INS EXCHANGE PROGRESSIVE PROGRESSIVE NORTHERN INS CO PRUDENTIAL LM PROPERTY AND CASUALTY INSURANCE CO RURAL RURAL MUTUAL INS CO (ATTN: CLAIMS DEPT) Page 234 Shortcut Company SAFECO SAFECO INS CO OF AMERICA SECURA SECURA INS A MUTUAL CO SELECTIVE SELECTIVE INS CO OF AMERICA SF STATE FARM ST PAUL ST PAUL FIRE & CASUALTY INS CO STATE AUTO STATE AUTO INSURANCE CO OF WISCONSIN TIG TIG INS CO TOWER HAWKEYE-SECURITY INSURANCE TRANSPORTATION TRANSPORTATION INS CO (C/O CNA-LPS CLAIMS) TRAVELERS TRAVELERS INS CO UNITED SERVICES UNITED SERVICES AUTOMOBILE ASSN UNITRIN UNITRIN PREFERRED INS CO USAA UNITED SERVICES AUTOMOBILE ASSN USF&G UNITED STATES FIDELITY & GUARANTY CO VALLEY FORGE VALLEY FORGE INS CO (C/O CNA-LPS CLAIMS) VIKING VIKING INS CO OF WISCONSIN WAUSAU WAUSAU UNDERWRITERS INS CO WEA WEA PROPERTY & CASUALTY INS CO ZURICH ZURICH AMERICAN INS CO Page 235 Appendix B - Vehicle Types Chart VEHICLE TYPES UNIT TYPE AUTO UNIT TYPE CODE PLATE TYPE VEHICLE TYPE VEHICLE TYPE CODE 1 AMA,ANT,AUT,BRV,CLS,COL,CVG,DMO,DLR, DIS,DUK,END,FIN,FRF,GLF, PASSENGER CAR 1 POLICE EMERGENCY* 2 GOV,GST,HEG,HEM,HOB,HSV,KID,LDF,MDH, MEN,MFR,MGP,MLG,MUN,OFF,ONI, PAK,SES,SOV,SPT,SPX,TMP,TRP,VET,WHF, WHL,WNG,WSP,XPW AUTO 1 AUT, BRV, MUN, OFF, LDF, MEN, ONI, SOV, WSP AUTO 1 SAME PLATES AS VEHICLE TYPE 1 SNOWPLOW 19 AUTO 1 SAME PLATES AS VEHICLE TYPE 1 FIREFGHTR/EMERGENCY * 24 TRUCK 2 AMA,ANT,BRV,CLS,COL,CVG,DIS,DLR,DMO,D UK,END,FIN,FRM,FRF,GLF,GOV, UTILITY TRUCK 3 GST,HEG,HEM,HOB,HSV,KID,LDF,LTK,MDH, MEN,MFR,MGP,MLG,MUN,OFF,ONI, PAK,SES,SOV,SPT,SPX,TMP,TOR,TRP,VET, WHF,WHL,WNG,WSP,XPW TRUCK 2 ANT,APO,BRV,COL,DMO,DLR,FIN,GOV,HFM, HOB,HTK,LDF,MDH,MEN, MFR,MUN,OFF,ONI,SOV,SPX,TMP,TRP,XPW STRAIGHT TRUCK (INSERT TRUCK) 4 TRUCK 2 ANT, APO, BRV, COL, DMO, DLR, FIN, GOV, LDF, MDH, MEN, MFR, MUN, OFF, ONI, SOV, SPX, TMP, TOR, TRP, XPW TRUCK TRACTOR (Not Attached) 5 TRUCK 2 ANT, APO, BRV, COL, DMO, DLR, FIN, GOV, HTK, LDF, MDH, MEN, MFR, MUN, OFF, ONI, SOV, SPX, TMP, TOR, XPW TRUCK TRACTOR (Semi Attached) 6 TRUCK 2 ANT, APO, BRV, COL, DMO, DLR, FIN, GOV, LDF, MDH, MEN, MFR, MUN, OFF, ONI, SOV, SPX, TMP, TOR, XPW TRUCK TRACTOR (Double Bottom) 7 TRUCK 2 AMA, BRV, CLS, COL, CVG, DMO, DIS, DLR, DUK, END, FIN, FRF, GLF, GST, HEG, HEM, HOB, KID, LDF, MEN, MFR, MGP, MLG, MTM, ONI, PAK, SES, SPT, SOV, TMP, TRP, VET, WHF, WNG, XPW MOTOR HOME 8 TRUCK 2 AUT, BRV, LDF, LTK, MEN, MUN, ONI, SPX AMBULANCE/EMEGENCY* 9 TRUCK 2 BRV, LDF, MEN, MUN, ONI, SOV, SPX FIRETRUK EMERGENCY * 10 TRUCK 2 SAME AS VEHICLE TYPE 3 POLICE EMERGENCY* 2 Page 236 TRUCK 2 SAME AS VEHICLE TYPE 3 FIREFGHTR/EMERGENCY * 24 TRUCK 2 SAME AS PLATES ON VEHICLE TYPE 3 & 4 SNOWPLOW 19 MOTORCYCLE 3 AMC, BRV, CMC, CYC, DMC, DVC, GOV, HMC, LDF, MCD, MDC, MEN, MNC, ONI, SOV, TMP, TPD, TRP, VMC, WSC MOTORCYCLE 11 MOTORCYCLE 3 SAME AS VEHICLE TYPE 11 POLICE EMERGENCY* 2 MOTORCYCLE 3 SAME AS VEHICLE TYPE 11 FIREFGHTR/EMERGENCY * 24 MOTORCYCLE 3 AMC, CMC, HMC, MDC, MNC, MPD, TRP, VMC MOPED 12 BUS 4 BUS, SOV, GOV, TRP SCHOOL BUS 13 BUS 4 BUS, SOV, GOV PUPIL TRANS SCHOOL BS 14 BUS 4 ANT,APO,AUT,BRV,BUS,COL,GOV,HOB,HSV, LDF,MEN,MUN,OFF,ONI,SOV,SPX,TRP PASSENGER BUS 15 EQUIPMENT 5 FARM TRACTOR/SELF PROPELLED ** 16 EQUIPMENT 5 OTHER WRKNG MACH** 17 EQUIPMENT 5 RAILWAY TRAIN ** 18 EQUIPMENT 5 SNOW PLOW** 19 EQUIPMENT 5 SNWMBLE/ATV/MINIBK ** 20 EQUIPMENT 5 MISCELLANEOUS ** 21 BICYCLE 6 BICYCLE 22 BICYCLE 6 POLICE EMERGENCY* 2 PEDESTRIAN 7 PEDESTRIAN 23 * Use if 'On Emergency' bubble is marked. ** If Unit Type = 5 then require entry of Vehicle Type Code 16-21. Page 237 Appendix C – Sample Forms ELCI Violator Copy Sample Page 238 ELCI Officer Copy Sample Page 239 ELCI Court Copy Sample Page 240 ELCI Parental Notification Sample Page 241 NTC Violator Copy Sample Page 242 NTC Officer Copy Sample Page 243 NTC Court Copy Sample Page 244 NTC Spanish Sample Page 245 NTC Parental Notification Sample Page 246 Traffic/Equipment Warning for Individual Sample Page 247 Traffic/Equipment Warning for Non-Individual Sample Page 248 WARNING Non-Traffic Sample Page 249 WARNING Officer Copy Sample Page 250 WARNING Report in Person Copy Sample Page 251 WARNING Mail-In Sample Page 252 Natural Resources Citation Violator Sample Page 253 Natural Resources Citation Court Sample Page 254 Natural Resources Citation Officer Sample Page 255 ALCOHOL Informing the Accused Copy Sample Page 256 ALCOHOL Blood Urine Analysis Copy Sample Page 257 ALCOHOL Notice of Intent to Revoke Front Side Copy Sample Page 258 ALCOHOL Notice of Intent to Revoke Back Side Copy Sample Page 259 ALCOHOL Notice of Intent to Suspend Copy Sample Page 260 ALCOHOL Administrative Review Request Copy Sample Page 261 Influence Report Sample Page 262 Influence Interrogation Report Sample Page 263 CRASH Sample Page 264 Page 265 Page 266 Page 267 Crash Report Office Version Sample Page 268 Page 269 Page 270 Page 271 DRIVER EXCHANGE of Information Sample Page 272 DEER CRASH Sample Page 273 DEER CRASH Office Version Sample Page 274 DRIVER CONDITION / BEHAVIOR Sample Page 275 FATAL SUPPLEMENT Sample Page 276 ATTACHMENT Sample Page 277 Traffic Stop Sample Page 278 Page 279 Citizen Contact Sample Page 280 Page 281 Appendix D – Using a Mobile Data Browser Searching MDB for Driver’s License Records While the cursor focus is on the Last Name field, select the person from the listing of persons in the Common Information Manager. If a custom DLL has been written by\for the local agency, TraCS can be configured to search the MDB for the last five driver’s license records queried. To search, select the Search button, or press ALT-S. Page 282 TraCS will attempt to read the MDB Inbox for the last five driver’s license records. If the Search is successful, the Search Status will display “External Search Successful.” If highlight the desired name and select the Apply button. Currently, the custom dll written by State Patrol for the HTE mobile data browser will attempt to recognize driver’s license records from 26 States. The States include California, Illinois, Indiana, Iowa, Kentucky, Michigan, Minnesota, Missouri, Nebraska, New York, Ohio, Texas and Wisconsin. If the Search routine does not recognize the driver’s license State, the driver’s license information will have to be manually entered into the Warning form. Your agency’s situation may be different. MDB Driver’s License Search Routine Error If the Search routine encounters a problem reading the MDB Inbox, the Search Status will display “Error: Type mismatch has occurred in ExecuteQuery Function.” and no Search records will be displayed. The driver’s license information will have to be manually entered into the form. Page 283 Searching For License Plate Records While the cursor focus is on the License Plate field, TraCS can also search the MDB for license plate records queried if your agency has the custom dll written. To search, select the Search button, or press ALT-S. TraCS will attempt to read the MDB Inbox for the license plate records queried. If the Search is successful, the Search Status will display “External Search Successful.” Highlight the desired license plate and select the Apply button. Currently, TraCS in connection with the HTE Mobile Data Browser will attempt to recognize license plate records from 26 States. The States include California, Illinois, Indiana, Iowa, Kentucky, Michigan, Minnesota, Missouri, Nebraska, New York, Ohio, Texas and Wisconsin. Your situation may be different depending on what type of MDB your agency uses. If the Search routine does not recognize the license plate State, the vehicle information will have to be manually entered into the form. MDB License Plate Search Routine Error If the Search encountered problems reading the MDB Inbox, the Search Status will display “Error: Type mismatch has occurred in ExecuteQuery Function.” and no Search records will be displayed. The vehicle information will have to be manually entered into the form. Page 284 Appendix E – Using the Barcode Reader TraCS can be configured to use a Barcode Reader \ Imager to read 2D bar-coded information. Information from Drivers License and Certificates of Registration can be imported into TraCS if the issuing state followed the AAMVA (American Association of Motor Vehicle Administrator) standards. The following states are known to provide complete information: • • • • • • • Alaska Tennessee Iowa Wisconsin Indiana Oregon Other states have not been tested with TraCS The following states provide limited data: • • Illinois: o Last Name o First Name o Middle Name o License Number o License Expiration Year o Date of Birth o State of Issuance Minnesota o Last Name Field contains First, Middle and Last Name o License Number o Date of Birth o State of Issuance Reading a License: It is preferable to read bar-coded information once the contact is opened. Data read at this time is place in the Common Information Manager. This data is available to all forms opened in the contact. Procedure: Aim the barcode reader at the 2D barcode on the license. Hold the license at a slight angle and pull the trigger moving the red light onto the barcode until a beep is heard. This signifies that the data has been read. Repeat the procedure if additional licenses need to be read. Page 285 Checking Data in the Common Information Manager: Data read by the barcode reader can be checked in the Common Information Manager. Click the Common Icon on the toolbar to open the manager. opens showing the scanned individuals name. The dialog box Clicking on the name will place the data in the bottom box for review. When checking an Out of State driver’s license, be sure that the data contained in the fields is the correct data for that field. Some states switch First and Last Name around, some put the entire name in the Last Name field. Click OK when done with the review. Page 286 Populating Data Fields: Data in the Common Information Manager is used to populate data fields on the accident report. Place the cursor on the Driver’s License Number field. Notice that a List icon appears on the databar. Click on the List icon to show a listing of individuals in the Common Information Manager. Click on the person desired and then hit the <Enter> key. The data will be imported into the appropriate driver fields. Page 287 Using the Barcode Reader as an Imager: The barcode reader is also an imager. It can be used in the Diagram section to take a picture of a drawing, license or other items and be placed in the diagram area. When in the Diagram field click on the Image Capture & Import icon. The Image Capture & Import (Diagram) dialog box opens. Hold the object to be scanned, point the imager at it, pull the trigger moving the red light to the desired location and wait for the beep that signifies the image have been captured. If the image is not correct, click the Re-Scan button to clear the image. Closing the dialog box inserts the image into the diagram field. Page 288 Page 289 Appendix F - Setting User Defaults 1. Open TraCS and log in as yourself. 2. Click Tools | User Preferences | Edit Defaults menu. 3. The Defaults Editor will appear. 4. Click the GUI tab. 5. Add the DataBar control to the left pane by double clicking DataBar in the GUI controls panel. 6. Select the Alignment option you prefer. 7. Select your Expert Mode preference. Note: New Users should set the Expert Mode to NO. After you are familiar with the pick lists and forms, you can set the Expert Mode to YES which makes the databar area smaller. 8. Click the Fields tab. Page 290 9. In the Show Fields For: field - choose the form you want to set defaults for. Note: Defaults do not carry from Form to Form and must be set for each Form. 10. Choose the fields in the right pane that you want to set with defaults, either double click each of them or single click the entry and click the add button to add them to the left pane. 11. Enter the default value for the field in the value field. Note: If you are unsure what the default value should be, leave the value field blank and set the Retains last value entered radio button to YES. After you complete a form and select values in the associated fields you can come back to the defaults editor and see what default value is stored for each of the fields. 12. Choose the type of default button. A. YES means that whatever the user has entered on the form will be the default value until he or she changes it, either through the Default Editor or by Entering\Selecting a different value on the form. It will carry over between sessions of TraCS. B. If you select Temporary, the default will be the last value entered in that field when the TraCS application is open. If the user changes the value in the field that new value will become the default value. If the user closes the TraCS application the default will revert back to the original default value. C. If you select NO, the default value will always be what is indicated in the value field. Some field values need to be reference by their underlying code. County name is not stored as the text value of the name but rather the numeric value in the underlying tables. Page 291 13. Field names for each of the forms may be written in a way that is very intuitive. Unfortunately the field names for the ELCI form are not intuitive. The following lists of ELCI fields are configured to accept defaults although which fields you choose is up to you. ELCI or NTC Fields Highly Recommended for Defaults • • • • • • • • • • APRN_CT_NB = Court Name. (8-digit number). APRN_CT_TY = Court type. (M, C, or T) DLVY_TYCD = Delivery method. (P, M) MDTY_APRN_DT = Court appearance date. (MM/DD/YYYY) MDTY_APRN_TM = Court time. (HH:MM) Military time. PLTF_CMTY_NM = Plaintiff Municipality. (4 digit number) PLTF_CNTY_CD = Plaintiff County (2 digit number) PLTF_GOVT_TY = Plaintiff Type (1 digit number) VLTN_CMTY_NM = Violation Municipality (4 digit number) VLTN_CNTY_CD = Violation County (2 digit number) Other ELCI Fields Available to Set Defaults • • • • • • • • • • • • • • • • • • • • • • • • • AT_HWY_DIR_CD = At Highway Direction. (N, S, E, W) AT_HWY_TY_CD = At Highway Type (H, I) BIOM_CD = Biometric Code (F, R) BOND_CASH_FL = Cash Bond Flag (Y, N) BOND_CRCD_FL = Credit Card Bond Flag (Y, N) CUST_TERR = Violator Address State (i.e. WI) DIS_UOM_TYCD = Distance Unit of Measurement (FT, MI) DIST_ATTY_RTE_FL = District Attorney Routing Flag (Y, N) DL_ISSG_TERR = Driver License State of Issuance (i.e. WI) ESTDS_DIR_CD = Estimated Distance Direction (N, S, E, W) EYE_COLR_CD = Eye Color (i.e. BLU) FROM_AT_HWY = At Highway Name (3 character length) FROM_AT_STR = At Street Location HAIR_COLR_CD = Hair Color (i.e. BRO) HWY_TY = On Highway Type (H, I) INCD_RPT_NARR = Narrative (990 characters) INDV_DOB = Date of Birth (Agency.adf defaults the century to 19) INDV_NNDV_RB = Defendant Type (I, N) LENF_AGCY_CM = Agency Space (200 character length) LGT_COND = Light Conditions (2 digits) LICD_AS_CLS_CD = Licensed As DL Class (A, B, C, D, M, O) LOC_ESTD_DIS = Location Estimated Distance (Number field) LOR_DESC = Ordinance Description (Text Field) LOR_NB = Ordinance Number MINR_VEH_FL = Underage Passenger (Y, N) Page 292 • NB_OF_LNES = Number of Lanes (1, 2, 3, 4, 5, 6, 7, 8, 9) • ON_HWY = On Hwy Name (3 character length) • ON_HWY_DIR_CD = On Hwy Direction (N, S, E, W) • ON_HWY_TY_CD = On Hwy Type (I, H) • ON_STR = Street Location • OPAS_CLS_CD = Operating As DL Class (A, B, C, D, M, O) • PLT_EXPN_YEAR = Plate Expiration Year (4 digits) • PLT_TYCD = License Plate Type (i.e. AUT) • PSTD_SPD_LMT = Posted Speed Limit (3 digit number) • RACE_CD = Race (A, B, H, I, W) • RDWY_ZONE_CD = Roadway Zones (C, R, S, U,) • REG_ISSG_TERR = Plate Issuing State (i.e. WI) • ROAD_TY = Road Conditions (2 digit length) • SEX_TYCD = Gender (M, F) • TRFC_TY = Traffic Conditions (L, M, H) • VEH_COLR_TYCD = Vehicle Color (i.e. BLU) • VEH_MAKE_TYCD = Vehicle Make (i.e. CHEV) • VEH_STYL_TYCD = Vehicle Type (i.e. 4D) • WI_CIT_LAE_CD = License Endorsements (F, H, N, P, S, T) • WTHR_TY = Weather Conditions (2 digit number) 14. Click OK to save the default settings. You will have to close TraCS and then re-open TraCS to see the default changes you have saved. NOTE: The defaults set in the Agency.adf file will override any settings the user tries to default in their personal user defaults. Page 293 Appendix G – Using the TraCS Diagram Tool Launch the TraCS Diagram tool by clicking the Diagram dialog box displays. icon on the databar. The The toolbars that are included are shown at the top of the dialog box. Select which toolset you want to use by clicking on the appropriate tab. The contents of each tab are shown below. Page 294 Roads The roads tab contains the following tools: One lane road. Four lane road. Two lane road. Five lane road. Corner Turn around Three lane road. Curve Merged Bridge Parking Lot Rail Road Track Intersect: The intersect tab contains the following tools: Three Way Four way Four turn lanes Two turn lanes Center lane Turn lane Two turn lanes Two way two lane Roadway with ramps Units: The units tab contains the following tools: Car. Double clicking this unit will create the outline version. Overturned car. Double click for the outline version. Pick up. Double click for the outline version. Van. Double click for the outline version. Bus. Double click for the outline version. Truck. Double click for Jack Knife Cab Left version. Double click again for Jack Knife Cab Right version. Double click again for the outline version. Jack Knife truck. Double click for Jack Knife Cab Right version. Double click for outline version. Page 295 Double click for Truck. Tractor. Double click image to create the outline version. Train. Double click to reverse the image. Motorcycle. Bicycle. Double click image to reverse the image. Horse and rider. Pedestrian. Other vehicle. Double click image to create the outline version. Signs: The Signs tab contains the following tools. Traffic Signal. Double click image to change light to Yellow. Double click again to change light to Green. Double click again to change light to Red. Stop sign. Yield sign. Rail Road crossing One way. Double click on image to create the reverse image. No U turn No Parking Compass Objects: The Objects tab contains the following tools. Shrubs Building Median barrier Cone Fence Debris Guardrail Pole Skid marks River Animal. Double click to create the reverse image. Deer Other object. Page 296 Tools: The Tools tab contains the following tools. Text. Used to add text to the diagram Horizontal line. Double click to create a left pointing arrow. Double click again to create a right pointing arrow. Double click again to return to a horizontal line. Vertical line. Double click to create an upward pointing arrow. Double click again to create a downward pointing arrow. Double click again to return to a vertical line. Draw Ink. Used to add freehand drawing. Erase Ink. Used to erase portions of freehand drawing. Erase All Ink. Used to erase entire freehand drawing. Rotate tool. When this tool is used, the selected object in the diagram will have green handles. Grabbing a handle with the mouse and dragging will rotate the object in the direction of the drag. Page 297 Diagramming Click the desired tab to display the tools desired. Click the appropriate icon and then click once in the white space in the Diagram dialog box. This will move the icon into the diagram space. It should look something like this. To move the object, position the cursor inside the object, hold the left mouse button down and move the object to the desired location. The object can be sized by clicking and dragging the black boxes on the corners or middle of the object. Clicking on the corners will resize the object while keeping the proper proportions (height and width change at the same time). Clicking on the black boxes in the middle will stretch to object while not retaining the proportions (only height or width will change). Closing the Diagram dialog box inserts the diagram into the TraCS form. Diagrams may be reopened for further work by clicking the tool button that was used to create the diagram. Page 298 Backgrounds Diagrams of intersections can be used as background images in the diagram. Images drawn with other graphic packages must be saved as a bmp file to the C:\TraCS\Backgrnd sub-directory. Drawings done within the TraCS diagram tool can also be saved for later use. Select Object from the toolbar then click on Save Background. Saved backgrounds can be retrieved much the same way. Select Object from the toolbar the click on Load, then select the appropriate object. This will bring the background into the diagram tool. You only need to add the vehicles. Other Drawing Packages TraCS has built in interfaces for MS VISIO, Quick Scene, and Easy Street Draw. Follow the manufacturers’ instructions for use. Page 299 Appen ndix H - Driver Exchan nge Form m P Page 300 Appendix I - Using GPS within TraCS To get GPS coordinates into the accident form, place the cursor on the Latitude field. The GPS databar is shown. Clicking the GPS button will populate the fields with the current GPS coordinates. The Stored button will bring in the GPS coordinates that were previously stored. To update stored coordinates, right click on the Globe Icon in the tool tray at the bottom of the screen. Select Get GPS Coordinates from the menu. This will store the current coordinates for retrieval later. These coordinates will not be updated until you repeat the process. Page 301 Appendix J - Examples of Location Information in TraCS Crash Report State and federal highways Please also see additional notes at the end of this document regarding entering highways. 1. On eastbound IH 94 0.5 miles east of STH 73. 2. On northbound IH 39/90 0.1 miles south of milepost 150. (See notes at end about roadways with multiple highway designations.) 3. On northbound IH 43/94 0.1 miles north of W Greenfield Ave at lightpole AGN3. (See notes at end about roadways with multiple highway designations.) 4. On USH 12 100 feet north of Dunlap Hollow Rd Page 302 5. On USH 12 at STH 19 eastbound (Note: when a highway intersects another highway at one location, runs concurrently with it for a while and then splits off again, please indicate which portion of the intersecting highway is being referenced by using direction) 6. On USH 151/East Washington Ave at Blair St (Note: when a highway also has a street name, please include it). 7. On USH 51/N Stoughton Rd 0.1 miles north of USH 12/18/W Beltline Hwy. (See notes at end about roadways with multiple highway designations.) 8. Business USH 51 at Jelinek Ave. Ramps 9. Ramp from northbound IH 39/90/94 to northbound USH 151. (See notes at end about roadways with multiple highway designations.) Page 303 10. Ramp from National Ave to northbound IH 43. County Highways 11. CTH A/Spooner Ave 20 feet west of 4th St W at house number 1831, City of Altoona (Note: county highways in cities or villages are entered in the On Street Name field when they are the roadway the crash occurred “On”.) 12. On CTH F at 65th St, Town of Black Brook. (Note: county highways in townships should always be selected from the list in the On Hwy # field when they are the “On” roadway.) 13. On Wood St 25 feet south of CTH B/Gillette St at house number 1571, City of LaCrosse. (Note: When county highways are the “At” roadway, they should be keyed in the Frm/At Hwy field regardless of whether they are in a city, village or township.) Page 304 Local Roads 14. On W Madison St 40 feet east of 75th St. in the 7400 block. 15. S Washington St 30 feet south of STH 29/E Walnut St. 16. On Killsnake Rd at McHugh Rd. Parking Lots and Private Property 17. Holiday Inn parking lot at 625 CTH VVV/W Rolling Meadows Dr. Page 305 18. In driveway at 23526 125th St. Notes on entering highways: When the roadway has two or more highway designations, choose the highway with the highest classification. Order of hierarchy: Interstate highway U.S. highway State trunk highway U.S. business route State trunk business route County trunk highway Local streets or roads For example, USH 41 and IH 94 run concurrently in Kenosha County. In this case, 94 should be chosen as the On Hwy # because an interstate highway is higher in the order of hierarchy than a US highway. When the roadway has two or more designations of the same classification, choose the lowest numbered highway. For example, interstate highways 39, 90 and 94 run concurrently for a while in Dane County. In this case, 39 should be chosen as the On Hwy # since they are all highways with the same classification and 39 is the lowestnumbered one. If the highway you're looking for isn't on the list, check that you have the correct county and municipality selected in fields 2 and 3. In many counties, there is a township and city or village with the same name. If you have double-checked the county and municipality and have followed the rules above for selecting highways with more than one designation, and it’s not a county highway within a city or village (in which case it should be entered in the On Street Name field), enter it in the On Street Name field by keying Alt + O or selecting the "Other" button on the tool bar and then keying STH, IH, USH, or CTH plus the number or letter. You will get a warning about this but you can still validate the form. Please make every effort to select the highway from the list rather than keying it in the On Street Name field. Other data fields such as highway class are added to the data behind the scenes based on the value in this field. Page 306 Appendix K – Hit and Run Crashes 1. Key “Y” or click the Yes button in Field 9 if a hit and run unit was involved in the accident. Hit and Run Unit Data If you know the information about the operator, enter it as usual and indicate in the Unit Status field that the unit was hit and run. If you do not know the operator or vehicle information, you will still need to fill in some of the data fields. Important: Do not put “Unknown”, “H & R”, “Hit and run” or any variation thereof in any text field like Last Name, Drivers License Number, License Plate Number, etc.; these fields should be left blank if you do not know the information. For an unknown operator and vehicle, enter the data as follows: The following fields are required even for an unknown operator and vehicle: 1. Total Occupants – Enter “1” unless you know the number of total occupants. 2. Speed limit – Select the posted speed at the location of the crash. 3. Most Harmful Event – Select the value that was most likely the most harmful event for the hit and run vehicle. 4. Traffic Control – Select the value that was most likely the value for the hit and run vehicle. 5. Driver Factors – Select the driver factor(s) that were most likely applicable for the hit and run driver. 6. Highway Factors – Select the highway factor(s) that were most likely applicable for the hit and run vehicle. 7. Unit Status – Select “H-Hit and Run”, “G-Hit and Run/On Emergency”, or “TStolen/Hit and Run”. 8. Unit Type – Select the unit type of the hit and run vehicle. If you have no idea what it is, select Automobile. Page 307 The remaining fields in this section may be left blank. The following fields are required even for an unknown operator and vehicle: 1. Operating as classification – Choose the operating as classification that would be required to operate the hit and run unit. If you have no information about the vehicle and you have chosen Automobile for the unit type, choose Class D. 2. Airbag – Choose Unknown unless you have other information. 3. Ejected – Choose Unknown unless you have other information. 4. Trapped/extricated - Choose Unknown unless you have other information. The remaining fields in this section may be left blank. Note: if you hit enter through the State field (referring to the drivers license issue state) it will be populated with WI due to the default. This will cause an error if no DL number is entered. To remove the WI, scroll to the top of the list in the data field where the blank space is and hit Enter. The following fields are required even for an unknown operator and vehicle: 1. 2. 3. 4. 5. Driver or Pedestrian Cond – Choose Not Observed if the value is unknown. Substance Presence – Choose Unknown unless you have other information. Alcohol Test – Choose Test Not Given unless you have other information. Drug Test - Choose Test Not Given unless you have other information. Safety Equipment - Choose Unknown unless you have other information. Page 308 6. Vehicle Type – Choose Passenger Car unless you have other information. 7. Extent of Damage – Choose Unknown unless you have other information. 8. Vehicle Factors - Select the vehicle factor(s) that were most likely applicable for the hit and run vehicle. The remaining fields in this section may be left blank. The following fields are required even for an unknown operator and vehicle: 1. Insurance Company – Choose Unknown from the list unless you have other information. The remaining fields in this section may be left blank. Page 309 Appendix L – Auto-Population Data may be entered into a form through direct keying, validation rules, defaults, and external search. Data may also be copied out of one form and into another through common information, and auto-population. Common information is created each time a person, vehicle, or carrier is entered in a form. The common information is then available to be selected into additional forms in the contact. Auto-population is triggered through the auto-populate button. When the button is pushed, the auto-populate rules are triggered and the forms are populated according to the rules. The current cross-form population rules are: Crash to ELCI Crash Field ELCI Field Accident Number Accident Doc. No. 2 – County County Name 3 – Municipality City/Town/Village 12 – Latitude GPS Latitude Coordinate 13 – Longitude GPS Longitude Coordinate 14 – On Hwy # Hwy Name 14 – On Street Name Street Location 15 – From Dir At Direction 15 – Est Dist At Distance From 16 – From/At Highway # At Hwy Name 16 – From/At Street Name At Street Location (Direction, Street … 114 – Light Condition Light Conditions 115 – Traffic Way Highway 116 – Road Surface Condition Road Conditions 118 – Weather Weather Conditions Crash to NTC Crash Field MUNI Field 2 – County County Name 3 – Municipality City/Town/Village Page 310 Crash to NTC Crash Field MUNI Field Crash to Traffic Stop Crash Field Traffic Stop Field Police Number Police Number 2 – County 5 - County 3 – Municipality 6 - Municipality 14 – On Hwy # 7 - On Hwy # 14 – On Street Name 7 - On Street Name 15 – Estimate Distance Est. Dist. 15 – From Dir Est. Dist. Dir 16 – From/At Highway # 8 - From/At Highway # 16 – From/At Street Name 8 - From/At Street Name 12 – Latitude 10 - Latitude 13 – Longitude 10 - Longitude 18 – Agency Space Agency Space Crash to Warning Crash Field Warning Field 2 – County County 3 – Municipality City/Town/Village 12 – Latitude GPS Latitude 14 – On Hwy # On Highway Name 14 – On Street Name On Street Location 13 – Longitude GPS Longitude 15 – Est Dist At Distance From 15 – From Dir At Direction 16 – From/At Highway # At Hwy Name 16 – From/At Street Name At Street Location Page 311 Crash to Warning Crash Field Warning Field Crash to Driver Condition Crash Field Driver Condition Field DOT Document Number Crash Document 4 – Accident Date Incident Date 5 – Time Incident Time Crash to Fatal Supplement Crash Field Fatal Supplement Field Accident Number Agency Accident Number DOT Document Number Document Number (From MV4000) Police Number Police Number Surface Type Roadway Surface Type Unit Status Unit Status 4 – Accident Date Accident Date 5 – Time Accident Time 6 – Total Units Total Units 8 – Total Killed Total Killed 25 – Last Name Driver Last Name 25 – First Name Driver First Name 25 – Middle Initial Middle Initial 25 – Suffix Suffix 38 – Injury Severity Driver Injury Severity 42 – Ejected Ejected 43 – Trapped/Extricated Extricated 90 – Alcohol Test Alcohol Test Given 90 – Alcohol Content Alcohol Test Results 91 – Drug Test Drug Test Given Page 312 Crash to Fatal Supplement Crash Field Fatal Supplement Field Accident Number Agency Accident Number 91 – Drug Presence Drug Test Results 115 – Traffic Way Trafficway Flow 117 – Relation To Roadway Relation To Roadway Deer Crash to ELCI Deer Crash Field ELCI Field DOT Document Number Accident Doc. No. 2 – County County Name 3 – Municipality City/Town/Village 12 – Latitude GPS Latitude Coordinate 14 – On Hwy # Hwy Name 14 – On Street Name Street Location 13 – Longitude GPS Longitude Coordinate 15 – Est Dist At Distance From 15 – From Dir At Direction 16 – From/At Highway # At Hwy Name 16 – From/At Street Name At Street Location (Direction, Street … Deer Crash to NTC Deer Crash Field NTC Field 2 – County County Name 3 – Municipality City/Town/Village Page 313 Deer Crash to Traffic Stop Crash Field Traffic Stop Field Police Number Police Number 2 – County 5 - County 3 – Municipality 6 - Municipality 14 – On Hwy # 7 - On Hwy # 14 – On Street Name 7 - On Street Name 15 – Estimate Distance Est. Dist. 15 – From Dir Est. Dist. Dir 16 – From/At Highway # 8 - From/At Highway # 16 – From/At Street Name 8 - From/At Street Name 12 – Latitude 10 – Latitude 13 – Longitude 10 - Longitude 18 – Agency Space Agency Space Deer Crash to Warning Deer Crash Field Warning Field 2 – County County 3 – Municipality City/Town/Village 12 – Latitude GPS Latitude 14 – On Hwy # On Highway Name 14 – On Street Name On Street Location 13 – Longitude GPS Longitude 15 – Est Dist At Distance From 15 – From Dir At Direction 16 – From/At Highway # At Hwy Name 16 – From/At Street Name At Street Location Deer Crash to Driver Condition Deer Crash Field Driver Condition Field DOT Document Number Crash Document Page 314 Deer Crash to Driver Condition Deer Crash Field Driver Condition Field 4 – Accident Date Incident Date 5 – Time Incident Time ELCI to Crash ELCI Field Crash Field County Name 2 - County City/Town/Village 3 – Municipality GPS Latitude Coordinate 12 – Latitude GPS Longitude Coordinate 13 - Longitude Hwy Name 14 – On Hwy # Street Location 14 – On Street Name At Direction From 15 – Est Dist At Direction 15 – From Dir At Hwy Name 16 – From/At Highway # At Street Location (Direction, Street … 16 – From/At Street Name Light Conditions 114 – Light Condition Highway 115 – Traffic Way Road Conditions 116 – Road Surface Condition Weather Conditions 118 - Weather ELCI to CrashUnit ELCI Field Crash Unit Field Statute Number / Trans Rule Number 64 – 1st Statute No. Statute Number / Trans Rule Number 64 – 2nd Statute No. Statute Number / Trans Rule Number 64 – 3rd Statute No. Statute Number / Trans Rule Number 64 – 4th Statute No. Statute Number / Trans Rule Number 64 – 5th Statute No. Page 315 ELCI to Deer Crash ELCI Field Deer Crash Field County Name 2 – County City/Town/Village 3 – Municipality GPS Latitude Coordinate 12 – Latitude Hwy Name 14 – On Hwy # Street Location 14 – On Street Name GPS Longitude Coordinate 13 – Longitude At Distance From 15 – Est Dist At Direction 15 – From Dir At Hwy Name 16 – From/At Highway # At Street Location (Direction, Street … 16 – From/At Street Name ELCI to Alcohol ELCI Field Alcohol Field County Name County Name Court Type Court Type Court Name Court Name (Hidden) Court Address 1 (Hidden) Court Address 1 (Hidden) Court Address 2 (Hidden) Court Address 2 (Hidden) Hazardous Material Flag HAZMAT Operation? Operating As DL Class Operating As DL Class (Hidden) Operating as CMV Flag CMV Operation? Violation Date Violation Date Violation Time Violation Time Operating As DL Endorsements Operating As DL Endorsements License Plate Number License Plate Number Vehicle Year Vehicle Year Vehicle Make Vehicle Make VIN VIN Page 316 ELCI to Alcohol UTC ELCI Field Alcohol Field Citation Number (1 ) UTC Number (1) Citation Number (2 ) UTC Number (2) Citation Number (3 ) UTC Number (3) Citation Number (4 ) UTC Number (4) Citation Number (5 ) UTC Number (5) (Hidden) Citation Check Digit (1) Chk (1) (Hidden) Citation Check Digit (2) Chk (2) (Hidden) Citation Check Digit (3) Chk (3) (Hidden) Citation Check Digit (4) Chk (4) (Hidden) Citation Check Digit (5) Chk (5) Description (1) Description (1) Description (2) Description (2) Description (3) Description (3) Description (4) Description (4) Description (5) Description (5) Statute Number / Trans Rule Number (1) Statute Number (1) Statute Number / Trans Rule Number (2) Statute Number (2) Statute Number / Trans Rule Number (3) Statute Number (3) Statute Number / Trans Rule Number (4) Statute Number (4) Statute Number / Trans Rule Number (5) Statute Number (5) (Hidden) QWST Statute Severity Code (1) (Hidden) QWST Statute Severity Code (1) (Hidden) QWST Statute Severity Code (2) (Hidden) QWST Statute Severity Code (2) (Hidden) QWST Statute Severity Code (3) (Hidden) QWST Statute Severity Code (3) (Hidden) QWST Statute Severity Code (4) (Hidden) QWST Statute Severity Code (4) (Hidden) QWST Statute Severity Code (5) (Hidden) QWST Statute Severity Code (5) Page 317 ELCI to NTC ELCI Field NTC Field County Name County Name City/Town/Village City/Town/Village ELCI to Traffic Stop ELCI Field Traffic Stop Field Police Number Police Number Count Name 5 - County City/Town/Village 6 - Municipality Hwy Name 7 - On Hwy # Street Location 7 - On Street Name At Distance From Est. Dist. At Direction Est. Dist. Dir At Hwy Name 8 - From/At Highway # At Street Location 8 - From/At Street Name GPS Latitude Coordinate 10 - Latitude GPS Longitude Coordinate 10 - Longitude Agency Space Agency Space ELCI to Warning ELCI Field Warning Field County Name County City/Town/Village City/Town/Village GPS Latitude Coordinate GPS Latitude GPS Longitude Coordinate GPS Longitude Hwy Name On Highway Name Hwy Direction On Highway Direction On Hwy Type On Highway Type Street Location On Street Location Page 318 ELCI to Warning ELCI Field Warning Field At Direction At Direction At Hwy Name At Highway Name At Hwy Direction At Highway Direction At Hwy Type At Highway Type At Street Location (Direction, Street … At Street Location At Distance From At Distance From Violation Time Time ELCI to Driver Condition ELCI Field Driver Condition Field Citation Number ELCI Document Violation Date Incident Date Violation Time Incident Time ELCI to Citizen Contact ELCI Field Citizen Contact Field Police Number Police Number ELCI to Influence ELCI Field Influence Field Police Number Police Number Citation Number Citation Number ELCI to ELCI ELCI Field ELCI Field At Hwy Direction At Hwy Direction At Hwy Type At Hwy Type Page 319 At Distance From At Distance From At Direction At Direction At Hwy Name At Hwy Name At Street Location (Direction, Street … At Street Location (Direction, Street … GPS Latitude Coordinate GPS Latitude Coordinate GPS Longitude Coordinate GPS Longitude Coordinate Highway Highway Light Conditions Light Conditions Number of Lanes Number of Lanes Hwy Name Hwy Name Hwy Direction Hwy Direction On Hwy Type On Hwy Type Street Location Street Location Road Contitions Road Contitions Traffic Conditions Traffic Conditions City/Town/Village City/Town/Village County Name County Name Weather Conditions Weather Conditions ELCI Replicate. All fields on a ELCI will be populated when replicating except the following: ELCI Fields not Replicated BAC Level Deposit/Bail Points Narrative Ordinance Number Appear Required Speed Over Page 320 ELCI Fields not Replicated Phone Number Speed Limit Citation Number Actual Speed Description Statute Number / Trans Rule Number NTC to Crash NTC Field Crash Field County Name 2 - County City/Town/Village 3 – Municipality NTC to Deer Crash NTC Field Deer Crash Field County Name 2 - County City/Town/Village 3 – Municipality NTC to Crash Unit NTC Field Crash Unit Field Adopting State Statute 64 – 1st Statute No. Adopting State Statute 64 – 2nd Statute No. Adopting State Statute 64 – 3rd Statute No. Adopting State Statute 64 – 4th Statute No. Adopting State Statute 64 – 5th Statute No. Page 321 NTC to Traffic Stop NTC Field Traffic Stop Field Police Number Police Number Count Name 5 - County City/Town/Village 6 - Municipality GPS Latitude Coordinate 10 - Latitude GPS Longitude Coordinate 10 - Longitude Violation Date Date of Stop Violation Time Time of Stop Agency Space Agency Space NTC Replicate All fields on a NTC will be populated when replicating except the following: NTC Fields not Replicated Address same as Defendant? Deposit/Bail Route to DA? Narrative Agency Space Description Ordinance Number Citation Number Phone Number Statute Description Adopting State Statute NTC to Citizen Contact ELCI Field Citizen Contact Field Police Number Police Number Page 322 Warning to Crash Warning Field Crash Field County 2 - County City/Village/Town 3 – Municipality GPS Latitude 12 – Latitude GPS Longitude 13 - Longitude On Highway Name 14 – On Hwy # On Street Location 14 – On Street Name At Direction 15 – From Dir At Distance From 15 – Est Dist At Highway Name 16 – From/At Highway # At Street Location 16 – From/At Street Name Warning to Deer Crash Warning Field Deer Crash Field County 2 - County City/Village/Town 3 – Municipality GPS Latitude 12 – Latitude GPS Longitude 13 - Longitude On Highway Name 14 – On Hwy # On Street Location 14 – On Street Name At Direction 15 – From Dir At Distance From 15 – Est Dist At Highway Name 16 – From/At Highway # At Street Location 16 – From/At Street Name Page 323 Warning to Driver Condition Warning Field Driver Condition Field Form ID Number Warning Document Date Incident Date Time Incident Time Warning to ELCI Warning Field ELCI Field County County Name City/Town/Village City/Town/Village GPS Latitude GPS Latitude Coordinate GPS Longitude GPS Longitude Coordinate On Highway Name Hwy Name On Highway Direction Hwy Direction On Highway Type On Hwy Type On Street Location Street Location At Direction At Direction At Highway Name At Hwy Name At Highway Direction At Hwy Direction At Highway Type At Hwy Type At Street Location At Street Location (Direction, Street … At Distance From At Distance From Time Violation Time Warning to NTC Warning Field NTC Field County County Name City/Village/Town City/Town/Village Page 324 Warning to Traffic Stop Warning Field Traffic Stop Field County 2 - County City/Village/Town 3 – Municipality GPS Latitude 12 – Latitude GPS Longitude 13 - Longitude On Highway Name 14 – On Hwy # On Street Location 14 – On Street Name At Direction 15 – From Dir At Distance From 15 – Est Dist At Highway Name 16 – From/At Highway # At Street Location 16 – From/At Street Name Police Number Police Number Date 3 - Date of Stop Time 4 - Time of Stop Agency Space Agency Space Warning Replicate All fields on a Warning will be populated when replicating except the following: Warning Fields not Replicated At Direction At Distance From At Highway Name At Highway Direction At Highway Type At Street Location Comments Correct Date Form ID Number Days to Correct GPS Latitude Page 325 Warning Fields not Replicated At Direction At Distance From GPS Longitude On Highway Name On Highway Direction On Highway Type On Street Location P.O. Box State Traffic Stop to Crash Traffic Stop Field Crash Field Police Number Police Number 5 - County 2 – County 6 - Municipality 3 – Municipality 7 - On Hwy # 14 – On Hwy # 7 - On Street Name 14 – On Street Name Est. Dist. 15 – Estimate Distance Est. Dist. Dir 15 – From Dir 8 - From/At Highway # 16 – From/At Highway # 8 - From/At Street Name 16 – From/At Street Name 10 - Latitude 12 – Latitude 10 - Longitude 13 – Longitude Agency Space Agency Space Traffic Stop to Deer Crash Traffic Stop Field Deer Crash Field Police Number Police Number Page 326 Traffic Stop to Deer Crash Traffic Stop Field Deer Crash Field 5 - County 2 – County 6 - Municipality 3 – Municipality 7 - On Hwy # 14 – On Hwy # 7 - On Street Name 14 – On Street Name Est. Dist. 15 – Estimate Distance Est. Dist. Dir 15 – From Dir 8 - From/At Highway # 16 – From/At Highway # 8 - From/At Street Name 16 – From/At Street Name 10 - Latitude 12 – Latitude 10 - Longitude 13 – Longitude Agency Space Agency Space Traffic Stop to DNR Traffic Stop Field DNR Field Police Number Police Number GPS Latitude Coordinate 12 – Latitude GPS Longitude Coordinate 13 – Longitude Agency Space Agency Space Traffic Stop to Driver Condition Traffic Stop Field Driver Condition Field Police Number Police Number Traffic to ELCI Traffic Stop Field ELCI Field Police Number Police Number 5 - County Count Name 6 - Municipality City/Town/Village 7 - On Hwy # Hwy Name Page 327 Traffic to ELCI Traffic Stop Field ELCI Field 7 - On Street Name Street Location Est. Dist. At Distance From Est. Dist. Dir At Direction 8 - From/At Highway # At Hwy Name 8 - From/At Street Name At Street Location 10 - Latitude GPS Latitude Coordinate 10 - Longitude GPS Longitude Coordinate Agency Space Agency Space Traffic Stop to Drug/Alcohol Influence Traffic Stop Field Driver Condition Field Police Number Police Number Traffic Stop to NTC Traffic Stop Field NTC Field Police Number Police Number 5 - County Count Name 6 - Municipality City/Town/Village 10 - Latitude GPS Latitude Coordinate 10 - Longitude GPS Longitude Coordinate Date of Stop Violation Date Time of Stop Violation Time Agency Space Agency Space Warning to Traffic Stop Traffic Stop Field Warning Field 2 - County County 3 – Municipality City/Village/Town 12 – Latitude GPS Latitude Page 328 Warning to Traffic Stop Traffic Stop Field Warning Field 13 - Longitude GPS Longitude 14 – On Hwy # On Highway Name 14 – On Street Name On Street Location 15 – From Dir At Direction 15 – Est Dist At Distance From 16 – From/At Highway # At Highway Name 16 – From/At Street Name At Street Location Police Number Police Number 3 - Date of Stop Date 4 - Time of Stop Time Agency Space Agency Space Warning to Citizen Contact ELCI Field Citizen Contact Field Police Number Police Number Drivers Condition to Citizen Contact ELCI Field Citizen Contact Field Police Number Police Number Citizen Contact to Warning ELCI Field Citizen Contact Field Police Number Police Number Page 329