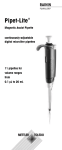
1
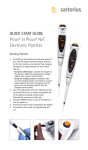
9920-348 E-MAN_revb.qxd
1/26/09
E-Man Hybrid
™
9:21 AM
Page 1
™
Manual pipette with real-time display
ContinuouslyAdjustable
Microliter
Pipette
with LCD
volume ranges
from
0.1 to 2000 μL
E-Man Hybrid
200 μL shown
9920-348 E-MAN_revb.qxd
1/26/09
9:21 AM
Page 2
Table of Contents
Introduction . . . . . . . . . . . . . . . . . . . . . . . . . . . . . . . . . .1
Battery Life . . . . . . . . . . . . . . . . . . . . . . . . . . . . . . . . . . .2
Display Modes and Cycle Count . . . . . . . . . . . . . . . . . . . .3
Sleep Mode . . . . . . . . . . . . . . . . . . . . . . . . . . . . . . . . . .3
Volume Lock . . . . . . . . . . . . . . . . . . . . . . . . . . . . . . . . .4
Setting Volume . . . . . . . . . . . . . . . . . . . . . . . . . . . . . . . .4
Tip Selection and Mounting . . . . . . . . . . . . . . . . . . . . . . .5
Tip Immersion Depth . . . . . . . . . . . . . . . . . . . . . . . . . . . .5
Operation . . . . . . . . . . . . . . . . . . . . . . . . . . . . . . . . . . . .5
PIPET Mode . . . . . . . . . . . . . . . . . . . . . . . . . . . . . . . .5
TRACK Mode . . . . . . . . . . . . . . . . . . . . . . . . . . . . . . .6
TITRATE Mode . . . . . . . . . . . . . . . . . . . . . . . . . . . . . .8
CC Cycle Counter . . . . . . . . . . . . . . . . . . . . . . . . . . . . . .9
Options . . . . . . . . . . . . . . . . . . . . . . . . . . . . . . . . . . . . .9
GLP Service Reminder . . . . . . . . . . . . . . . . . . . . . . . . . .10
Total Cycles Count . . . . . . . . . . . . . . . . . . . . . . . . . . . .11
Pipette Technique Alert . . . . . . . . . . . . . . . . . . . . . . . . . .11
User Calibration . . . . . . . . . . . . . . . . . . . . . . . . . . . . . .12
Standard Pipetting Guidelines . . . . . . . . . . . . . . . . . . . . .13
Prerinsing . . . . . . . . . . . . . . . . . . . . . . . . . . . . . . . .13
Reverse-Mode Pipetting . . . . . . . . . . . . . . . . . . . . . . .14
Temperature Considerations . . . . . . . . . . . . . . . . . . . .14
Autoclaving . . . . . . . . . . . . . . . . . . . . . . . . . . . . . . .14
Tip Ejector Arm Removal . . . . . . . . . . . . . . . . . . . . . . . .14
Troubleshooting and Repairs . . . . . . . . . . . . . . . . . . . . .15
Service, Calibration, and Repair . . . . . . . . . . . . . . . . . . .16
Replacement Parts . . . . . . . . . . . . . . . . . . . . . . . . . . . .17
Line Drawings . . . . . . . . . . . . . . . . . . . . . . . . . . . . .18-19
Specifications . . . . . . . . . . . . . . . . . . . . . . . . . . . . . . . .20
E-Man Storage . . . . . . . . . . . . . . . . . . . . . . . . . . . . . . .20
EC Declaration of Conformity . . . . . . . . . . . . . . . . . . . . .21
Contacting RAININ . . . . . . . . . . . . . . . . . . . . . . .Back Page
Figures
Figure 1
Figure 2
Figure 3
Figure 4
Figure 5
E-Man Hybrid Pipette . . . . . . . . . . . . . . . . . . . . . .1
E-Man Hybrid Controls and Indicators . . . . . . . . . .2
Volume Lock . . . . . . . . . . . . . . . . . . . . . . . . . . . .4
Removing the Tip Ejector Arm . . . . . . . . . . . . . . .14
Replacing the Battery . . . . . . . . . . . . . . . . . . . . .17
Line Drawings
E-Man Hybrid 2 μLto 300 μL . . . . . . . . . . . . . . . . . . . . . . .18
E-Man Hybrid 1000 μL and 2000 μL . . . . . . . . . . . . . . . . .19
Contents of Package
E-Man Hybrid as ordered
Instruction Manual
Performance Assurance Brochure
Sample tips
Rainin Test Report
If any item is missing or call Customer Service: 800-472-4646.
RAININ and LTS are registered trademarks and E-Man is a trademark of
Rainin Instrument, LLC. E-Man Hybrid Pipette: U.S. Patent Nos.
5,614,153; 5,849,248. Other patents pending. LTS Tip/Shaft System:
For use under U.S. Patent Nos. 6,168,761 B1; 6,171,553 B1;
6,568,288 B2; 6,737,023 B1; 6,745,636 B2; 6,967,004 B2
9920-348 E-MAN_revb.qxd
1/26/09
9:21 AM
Page 1
Introduction
Unique position sensing technology accurately monitors the
piston position at all times during operation and, in real time,
updates the LCD (liquid crystal display). The piston location
relative to zero position describes the volume of liquid in the tip.
Position-sensing provides certain advantages to the pipette
user. Functions that were previously only possible using an
electronic pipette can be performed, such as titration, dilution,
multidispensing, and measuring unknown volumes.
E-Man Hybrid also has the unique ability to warn of technique
errors: for example, if the aspiration rate is too fast, this can be
alerted to the operator.
Scheduled GLP service reminders can be displayed, and the
user can program multiple offsets into the calibration curve.
Real-time sensing allows true pipetting cycles to be counted.
Turning the plunger button is easy, as there are no geared dials
with mechanical resistance, and the display is always visible
from the normal operating position.
LCD shows volumes,
modes, and other info
Plunger button /
volume adjustment
Volume lock
Tip ejector
button
Fingerhook
Keypad
(see figure 2)
Body:
Comfortable
ergonomic design
Constructed from
high-impact,
low thermal
conductivity
polymer
Quick release
tip ejector arm
Stainless steel tip
ejector arm
Shaft
Disposable tip
Figure 1
E-Man Hybrid Pipette
–1–
9920-348 E-MAN_revb.qxd
1/26/09
LCD
9:21 AM
Page 2
MODE Key
Plastic
Strip
CC Key
Plunger
Button
Volume
Lock
Battery
Tray
(beneath display)
Tip Ejector
Button
Recessed Key
for Additional
Options
Figure 2
E-Man Hybrid Controls and Indicators
E-Man Hybrid has three display modes - PIPET, TRACK,
TITRATE, and a cycle counter (CC), described on the following
pages. Options: Pipette Technique Alert, GLP Service Reminder,
and User Calibration, are described later in this manual.
E-Man Hybrid is a comfortable rugged pipette with built-in
ergonomic features such as light plunger and tip-ejection
forces, a tip-ejector shock absorber, and a comfortable contoured handle with fingerhook. The pipette will give many years
of service with proper minimum care and maintenance.
Battery Life
Power is supplied to the LCD by a 3v lithium watch-type battery
in a sliding tray beneath the display. E-Man Hybrid is shipped
with a plastic strip isolating the battery terminal, switching
power off.
For operation, remove this strip by
pulling straight out from the battery tray.
The LCD briefly shows all segments, then
the pipette software revision, then “PrES”
appears. Remove this message by
pressing the plunger through the 1 ST
STOP.
When the battery voltage goes below a
predetermined threshold, the battery
symbol turns on and flashes at a slow
rate. This indicates the battery will need
to be changed within a week or so. The
battery will give up to two years’ service
before needing replacement.
See page 17 for Battery replacement diagram.
Operation is not affected while the battery symbol is flashing. If
the battery is not changed, eventually the display reads “dEAd”
and then goes blank. Although the pipette will operate with a
dead battery, the volume aspirated will be unknown.
–2–
9920-348 E-MAN_revb.qxd
1/26/09
9:21 AM
Page 3
Display Modes and Cycle Count
Select display modes by pressing the MODE key sequentially.
The CC key switches the Cycle Counter on or off.
PIPET MODE: Operation is exactly the
same as in other manual pipettes.
When setting volume, with the volume lock set to the unlocked position,
the display shows the changing
value. When the volume lock is
moved to the locked position, the set
volume is shown. When the piston is
at the 1ST STOP position, the display
reads PICKUP, as shown.
TRACK MODE: TRACK is shown in
the display. The volume of sample in
the tip is shown in real time.
As the piston is depressed beyond the
1ST STOP position the display reads
“bLo” to indicate the Blowout part of
the stroke.
TITRATE MODE: TITRATE is shown in
the display. The display shows the
volume of sample dispensed from the
tip in real time, as a negative number
relative to the upper set volume
(when the display shows 0.0).
CYCLE COUNTER: The CC key turns
on or off the cycle counter, and clears
the count. Cycle count is a visual reference of how many true pipetting
cycles (depress plunger - aspirate,
dispense - blowout - return) have
occurred in the current pipetting session. CYCLES and the count number
are shown in the display.
More detailed descriptions of the modes and cycle counter are
included in the OPERATION section. E-Man Hybrid options are
available by pressing a recessed button with the end of a disposable tip, see Options, page 10.
Sleep Mode
After 3 minutes of no activity the display will go to sleep to conserve battery life. To operate the pipette again simply touch any
key or press the plunger button through the 1ST STOP. E-Man
Hybrid remembers its display mode, the state of the cycle
counter and the set volume from its last use. E-Man Hybrid will
also wake up when the volume lock is moved to the unlocked
position without pressing the plunger to the 1ST STOP.
–3–
9920-348 E-MAN_revb.qxd
1/26/09
9:21 AM
Page 4
If the volume lock was UNLOCKED when E-Man Hybrid went to
sleep, changes to the upper set volume will not be registered
until either the plunger button is pressed through the 1ST STOP
and allowed to return to the set position, or, the volume lock is
moved to the locked position.
Volume Lock
The volume lock lever prevents the set volume drifting during
operation. When locked, the plunger button cannot be turned.
Move the lever to the right to free the plunger button, noting that
“UNLOCKED” is shown flashing on the display. This is a warning to the user to LOCK E-Man Hybrid before pipetting. If pipetting while unlocked, after two cycles “LOCh Err” appears.
Figure 3
Volume Lock
Setting Volume
1. Turn the volume lock lever right as shown above so the volume setting mechanism is unlocked and free to turn.
2. Looking at the volume setting on the LCD, rotate the plunger
button to change volume – counter-clockwise to increase,
and clockwise to decrease volume. The volume display
changes as you move the plunger button. Although not necessary for E-Man Hybrid, for consistency with other manual
pipettes with mechanical volume setting, it is a good idea
always to dial down to set the desired volume.
3. Stop when you reach the desired volume and move the volume lock back to the locked position, so E-Man Hybrid is
ready for pipetting.
Volume ranges and increments are shown below:
E-Man Hybrid
Model
2 μL
10 μL
20 μL
100 μL
200 μL
300 μL
1000 μL
2000 μL
Adjustable
Range (µL)
0 to 2
0 to 10
0 to 20
0 to 100
0 to 200
0 to 300
0 to 1,000
0 to 2,000
Range (µL)
Increment
Recommended (µL)
0.1 to 2
0.002
0.5 to 10
0.01
2 to 20
0.02
10 to 100
0.1
20 to 200
0.2
30 to 300
0.2
100 to 1000
1
200 to 2000
2
–4–
9920-348 E-MAN_revb.qxd
1/26/09
9:21 AM
Page 5
Tip Selection and Mounting
Always use RAININ tips with E-Man Hybrid pipettes; the pipettes
are calibrated with RAININ tips, and performance to published
specifications can only be guaranteed with RAININ tips.
To mount a tip, press E-Man Hybrid shaft into the end of the tip.
The tip will seal properly on the shaft with minimal force — do
not use more force than is required.
Tip Immersion Depth
The recommended depth for tip insertion into the sample for
each E-Man Hybrid model is shown below.
E-Man Hybrid Volume Range
2 μL
0.1 - 2 μL
10 μL
0.5 - 10 μL
20 μL
2 - 20 μL
100 μL
10 - 100 μL
200 μL
20 - 200 μL
300 μL
30 - 300 μL
1000 μL
100 - 1000 μL
2000 μL
200 - 2000 μL
Immersion Depth
1-2 mm
1-2 mm
2 - 3 mm
2 - 3 mm
3 - 6 mm
3 - 6 mm
3 - 6 mm
3 - 6 mm
Tip immersion depth is critical. If these depths are exceeded,
the volume measured may be inaccurate, possibly out of specification. Tip angle is also important. Hold the pipette within 20
degrees of vertical.
Operation
This section is divided into three sub-sections relating to the
three display modes: PIPET, TRACK, and TITRATE, and a section on the CC option. Some information in the PIPET mode
section will also apply to the other two modes.
PIPET Mode:
Before pipetting valuable samples, it is a good idea to practice
aspirating and dispensing water before pipetting with actual
samples.
1. Unlock the volume lock and set the desired volume as
described on page 4. Move the volume lock lever back to
the locked position to begin measurements. When locked,
the volume display will not change, just like in a standard
pipette
2. Attach a new RAININ tip by pressing the shaft into the tip
with only sufficient force to make a good seal.
3. Press the plunger button to the first
stop. The word PICKUP is shown on
the display as an aid to locate the
HOME position. Hold the plunger button in this position.
–5–
9920-348 E-MAN_revb.qxd
1/26/09
9:21 AM
Page 6
4. Holding the pipette vertically, place the tip into the sample to
the proper depth (p. 5) and relax thumb pressure on the
plunger. The light piston spring moves the piston upward,
aspirating sample. Do not release the plunger button, or the
piston may snap up, resulting in inaccurate measurement.
5. Pause briefly with the tip end still in the sample to ensure
that the full volume of sample is drawn into the tip.
6. Withdraw the tip from the sample. If any liquid remains on
the outside of the tip, wipe it carefully with a lint-free tissue,
taking care not to touch the tip orifice.
Dispensing:
1. Touch the tip end against the side wall of the receiving vessel and press the plunger slowly, past the first stop (PICKUP
will appear on the LCD as you reach the 1ST STOP) to
blowout (bottom of stroke.) Wait: 1 second for volumes to
300 μL, 1-2 seconds for 1000 μL and larger.
2. Still holding the plunger, withdraw the tip, sliding it along
the wall of the vessel.
3. Release the plunger and press the tip ejector button lightly to
discard the tip. Use a new tip for each sample to prevent
carry-over. Repeat for the next pipetting cycle.
TRACK Mode
Press the MODE key until TRACK is
shown on the LCD. In TRACK mode the
piston position relative to the zero point
is displayed in real time, equivalent to
the volume of sample present in the tip.
TRACK mode enables functionality previously unavailable on
manual pipettes, such as measuring an unknown sample volume, dilution, and multidispensing.
Note: Accuracy and precision results for specialized
operations such as Measuring, Dilute & Multidispense
will depend greatly on the skills of the operator, especially when very small sample volumes are involved.
Measuring an unknown volume:
1. Set a desired maximum volume and attach a RAININ tip as
described earlier. Press the plunger to the first stop and hold
there. The set volume and PICKUP will show on the LCD.
2. Place the tip into the sample and relax thumb pressure on
the plunger. The piston will move upward, aspirating sample. As the tip fills, the LCD shows the volume in the tip in
real time, increasing as you release pressure on the
plunger.
3. When you have measured the unknown volume, hold your
thumb steady to stop aspiration. Read the volume on the
LCD. Withdraw the tip slowly from the sample.
–6–
9920-348 E-MAN_revb.qxd
1/26/09
9:21 AM
Page 7
4. Dispense as desired. Touch the tip end against the side wall
of the receiving vessel and press the plunger slowly, past
the first stop (PICKUP will appear on the LCD as you reach
the first stop). As the piston is depressed beyond the FIRST
STOP position the display reads “bLo” to indicate the
Blowout part of the stroke. Stop at the second stop
5. Release the plunger and discard the used tip.
Dilution:
1. Set a desired maximum volume and attach a RAININ tip as
described earlier. Press the plunger to the 1ST STOP and hold
there. The set volume and PICKUP will show on the LCD.
2. Place the tip into the diluent and relax thumb pressure on
the plunger. The piston will move upward, aspirating diluent. As the tip fills, the LCD shows the real time volume in
the tip, increasing as you release pressure on the plunger.
3. When you have aspirated the diluent into the tip, hold your
thumb steady to stop aspiration. Observe the digital display
and record the volume. Withdraw the tip slowly from the
sample.
4. With the pipette tip clear of the diluent, release the thumb
pressure slightly to aspirate a small volume of air to create
an air gap. Record the new volume including the air gap.
5. Place the tip end into the sample and slightly release the
thumb pressure to aspirate, then stop when you have aspirated the desired sample volume..
6. Dispense the sample, air gap and diluent all at once, touching the tip end against the side wall of the receiving vessel
and pressing the plunger slowly, past the first stop; PICKUP
will appear on the LCD as you reach the first stop. Or if you
wish, place the tip in the liquid and move the plunger up
and down several times to mix in the tip. As the piston is
depressed beyond the FIRST STOP position the display
reads “bLo” to indicate the Blowout part of the stroke. Stop
at the second stop.
7. Release the plunger and discard the used tip.
Multidispense:
In TRACK mode, E-Man Hybrid allows you to accurately
dispense several known volumes from a single pickup.
When multidispensing you will need to calculate the total
volume of sample for the separate aliquots you need PLUS
an extra residual volume to ensure accuracy in the last
aliquot. For example, if you want to dispense 6 aliquots of
25 μl each, you should pick up 6 x 25 = 150 μl + 15 μl,
Total 165 μl.
1. Set a desired maximum volume (including the extra residual volume as described above) and attach a RAININ tip as
described earlier. Press the plunger to the first stop and hold
there. The set volume and PICKUP will show on the LCD.
–7–
9920-348 E-MAN_revb.qxd
1/26/09
9:21 AM
Page 8
2. Place the tip into the sample and relax thumb pressure on
the plunger. The piston will move upward, aspirating the
sample. As the tip fills, the LCD shows the volume in the tip
in real time, increasing as you release pressure on the
plunger.
3. When you have aspirated all the sample into the tip, hold
your thumb steady to stop aspiration. Withdraw the tip
slowly from the sample.
4. Move the tip end to the first of the receiving wells and dispense the desired aliquot volume – in the example 25 μL –
reading the display. Stop when the LCD shows you have
dispensed the first aliquot, and move to the next well.
5. Continue in this fashion until all the aliquots have been dispensed. Then discard the extra residual volume which was
included to ensure the last aliquot would be accurate.
6. DIscard the used tip.
TITRATE Mode
Note: E-Man Hybrid is not intended to replace specialized titration equipment, and will give results to an
accuracy of about 10%, depending on operator skill,
especially using very small sample volumes.
Press the MODE key until TITRATE is
shown on the LCD. In TITRATE mode
the display first shows zero, as shown
in the top image alongside.
As the plunger is depressed, the position sensor communicates to the LCD
the piston position (or the volume dispensed from the tip) by reference to the
zero volume, as a negative value, as
shown in the lower image.
1. Set a desired maximum volume and attach a RAININ tip as
described earlier. Press the plunger to the first stop and hold
there. The word TITRATE, the set volume and PICKUP will
show on the LCD.
2. Place the tip into the sample and relax thumb pressure on
the plunger. The piston will move upward, aspirating sample into the tip. As the tip fills, the LCD shows the volume in
the tip as a negative number in real time, decreasing in
value as you release pressure on the plunger. When the tip
is full the display reads zero as shown in the top image
above.
3. To begin titration, depress the plunger slowly to control the
volume dispensed. The LCD displays the accurate, realtime value for the volume dispensed.
–8–
9920-348 E-MAN_revb.qxd
1/26/09
9:21 AM
Page 9
4. Titrate the reagent as desired by pressing the plunger very
slowly until you reach the titration point (e.g. pH change),
recording the volume displayed on the LCD at that point.
5. Discard the remainder and eject the used tip.
CC Cycle Counter
E-Man Hybrid’s cycle counter records the number of complete
pipetting cycles which have occured since the last time the
count was zeroed. Maximum is 999 cycles; then the count
rolls over to 0.
1. Press the CC key. CYCLES and the
number of complete cycles are
shown in the display, as shown
here. If this is the first time CC key
is pressed, or if the counter has
been reset, the number reads 0.
2. With CC engaged, E-Man Hybrid
will record and count each complete pipetting cycle:
a.
b.
c.
d.
e.
press the plunger to the 1ST STOP
aspirate sample
dispense sample
press through blowout (cycle count added)
release plunger
The counter will not record incomplete cycles or mixing.
3. To switch off the cycle counter, press CC key again. This
does not clear the count, but removes it from the display.
4. To clear the count and reset to zero:
a. with CYCLES showing: press and hold the CC key. The
CYCLES display will momentarily go blank then return with
the cycle count reset to zero.
b. with CYCLES already off: Press and hold the CC key until
the count resets to zero.
Note: If the battery is removed when there is existing cycle
count data, the counter is reset to the last stored multiple of
256 below the actual count when the battery is replaced, i.e. if
the cycle count was 245, it is reset to zero. If the cycle count
was 519, it is reset to 512. For Total Cycles Count since manufacture, see additional options.
–9–
9920-348 E-MAN_revb.qxd
1/26/09
9:21 AM
Page 10
Options
E-Man Hybrid’s options can be
accessed by lightly pressing the
unmarked OPTIONS button recessed
between the MODE and CC keys with
the end of a tip or a straightened paperclip. The OPTIONS key is shown by the
arrow.
When the OPTIONS key is pressed,the first of the options is displayed. The MODE key is used to scroll through the options,
and the CC key is used to switch options on or off.
Scrolling with the MODE key, the sequence of E-Man Hybrid’s
options is:
1. GLP Service Reminder (GLPx, where x is a number 0 (off),
or 1 to 4 (service interval) + no. of days before next
service)
2. Total Cycles Count (since manufacture)
3. Pipette Techniques Alert (ALEr = on or off)
4. User Calibration (UCAL): - - - , on, or off.
5. User Calibration settings (UCAL SET)
6. User Calibration clear (UCAL CLr – if data exists)
7. (or 6) Return to previous display mode for normal
operation.
GLP Service Reminder
Because E-Man Hybrid keeps track of time, the software can
remind the user that GLP calibration service is approaching,
due, or overdue. This function is set OFF in new pipettes and is
invoked when E-Man Hybrid is sent to RAININ Service. The service center can set one of four service intervals. The display
counts down the number of days left before the next scheduled
service:
Service interval
1 year (364 days)
6 months (182 days)
4 months (121 days)
3 months (91 days)
Off
n/a
LCD
GLP1
GLP2
GLP3
GLP4
GLP0
Counts down from
364
182
121
91
The display alongside shows a pipette
with a 3 month service interval selected
and 90 days remaining before the next scheduled service.
When the next service is due within 30 days, a message is displayed each time the pipette wakes from sleep mode. The message flashes “ CAL dUe” followed by in “xx dAY” (xx = number
of days left) a few times before reverting to the normal display.
– 10 –
9920-348 E-MAN_revb.qxd
1/26/09
9:21 AM
Page 11
When the service is due, the display flashes “CAL dUE” a few
times before reverting to the normal display.
If the service becomes overdue, the number of days overdue
(up to 99) is flashed with a minus sign in front.
Leave GLP Service interval and scroll to Total Cycles Count by
pressing the MODE key.
Total Cycles Count
E-Man Hybrid keeps track of the total pipetting cycles since
manufacture, shown in the LCD. If the total cycles count is less
than 999, it will show in the bottom right corner.
For larger numbers the volume display is
also used, as seen here.
This example shows a total cycle count of
10,727.
If the battery is removed, E-Man Hybrid “remembers” the total
cycle count in increments of 256. So in this example, if the battery is now removed, the total cycle count will change to
10,496 when the battery is reinserted (the next-lowest multiple
of 256), and counting will restart at 10,497.
Leave Total Cycles Count and scroll to User Calibration by
pressing the MODE key.
Pipette Techniques Alert
Because E-Man Hybrid includes position-sensing technology
and an LCD, it can provide helpful information when technique
errors, such as an insufficient pause at the PICKUP position,
are sensed. In the event of such an alert, the LCD displays
“bAd”, indicating the type of alert.
Turn the Alert on or off by pressing the CC key when in Alert
option. With Alert turned on:
Technique Error during Pipetting
Insufficient pause at Pickup point
Pickup started away from Pickup point
Plunger is not returned to set volume
Dispense stroke not completed
LCD shows
bAd PIC
bAd PIC
bAd PIC
bAd dSP
Pipetting Technique Alert works in forward mode only, and not
in TRACK or TITRATE modes. Leave the Alert option and scroll
to GLP Service option by pressing the MODE key. (You can
also leave Options altogether by pressing the plunger button or
moving the volume lock to the unlocked position and back.)
– 11 –
9920-348 E-MAN_revb.qxd
1/26/09
9:21 AM
Page 12
User Calibration
E-Man Hybrid allows the user to place multiple offsets into the
calibration curve as opposed to a single offset as in other manual pipettes. User Calibation allows corrections at up to 50
points on the curve, and can be turned off and on as desired for
different samples. This manual describes setting a single-point
calibration offset.
Setting a Single-point Calibration Offset
Suppose you wish to offset the pipette to compensate for a
solution with higher density than water. Repeated weighings
indicate that the volume setting on a 20 μL pipette needs to be
offset by 1 microliter. Set E-Man Hybrid to the desired volume to
be offset, in this case 20 μL.
Press the Options key with the end of a tip. Scroll though the
MODES until “UCAL - - -” is shown on the display. (“UCAL - - -”
is shown when there are no existing user calibration settings. If
user calibration has already been set, the display will read
“UCAL on” or “UCAL oFF”.)
1. Press the MODE key to set user calibration. The symbol for “SET” will flash on
and off.
2. Press the CC key to toggle between Inc
(increase) and dEc (decrease). To
Increase the offset, the display appears
as shown here, with a set volume of 20
μL. “U-CAL” also shows in the display.
3. Now use the MODE key to scroll through
the increasing values. The display will
flash while you are increasing values.
Set the actual volume dispensed, in this
case 19.0, and press the Options key
with the tip end to “enter” the value.
4. When the offset is entered, “donE” appears on the display
briefly, then the pipette is returned to the previous display
mode. If the plunger is moved during any of the above steps
the calibration procedure is aborted and the pipette returns
to normal operation.
5. Once set, the display shows the offset value instead of the
original set value.“U-CAL” is shown with “μL” flashing as
reminders that User Calibration has been switched on.
6. This single-point offset of 1 μL is carried through the volume
range of the pipette.
The above procedure simply adds a single offset. More
points can be added to get better calibration over the entire
range of the pipette.
– 12 –
9920-348 E-MAN_revb.qxd
1/26/09
9:21 AM
Page 13
Turning Calibration on/off
The User Calibration offset can be turned on and off as desired.
Simply go to the Options menu by pressing the Options key
with the end of a tip. Then scroll through the Options using the
MODE key. When you reach User Calibration, toggle this function on or off with the CC key. If User Calibration is on, and you
have set an offset value, you will see the display set volume
change after you switch User Calibration off.
Setting a New Offset or Clearing an Existing Offset
Go to the Options menu by pressing the Options key with the
end of a tip. Then scroll through the Options using the MODE
key. With the display reading “UCAL on”–
To set a new offset:
Press the MODE key. The “SET” symbol
will flash and you should proceed as
described in steps 1-4 on the previous
page.
To clear an existing offset:
1. Press the MODE key until “UCAL Clr”
shows. Then press the CC key. The pipette
displays the confirmation screen, at right.
reading “U-CAL, Clr, no”.
2. Press and hold the CC key for a long press
if you wish to clear the offset. The display
shows “YES”. Note: the CC key must be
held for a long press to clear the offset.
When done, the display shows “U-CAL
Clrd” briefly before reverting to the previous display mode.
Standard Pipetting Guidelines
E-Man Hybrid pipettes incorporate several new features which
enhance pipetting consistency. You should also maintain:
1.
2.
3.
4.
5.
6.
Consistent pickup and dispense rhythm.
Consistent speed and smoothness when pipetting.
Consistent pressure on the plunger button at the first stop.
Consistent immersion depth. See table on page 5.
Pipette vertically, or within 20° of vertical.
Don’t invert or lay E-Man Hybrid flat with liquid in the tip.
Pre-Rinsing
Some solutions may leave a film on the inside tip wall. This
film remains relatively constant in successive pipettings with
the same tip, so excellent precision can be obtained by refilling
the tip and using the refilled volume as the sample. Successive
samples from this same tip will exhibit good reproducibility.
– 13 –
9920-348 E-MAN_revb.qxd
1/26/09
9:21 AM
Page 14
Reverse Mode Pipetting
In reverse mode pipetting the operating sequence is reversed.
TRACK mode will not show true volume picked up.
1. Mount a disposable tip on the pipette shaft.
2. Press the plunger button fully to the 2ND STOP.
3. Immerse the tip in liquid and allow the button to return slowly to the fully up position. Wait a moment for the liquid column to reach equilibrium in the tip.
4. Wipe any excess liquid from the outside of the tip without
touching the orifice.
5. To dispense, rest the end of the tip against the vessel wall
and press the plunger to the 1ST STOP. Hold this position a
few seconds, or long enough for the liquid column to reach
equilibrium again.
6. Remove the tip from the receiving vessel without blowing out
the remaining liquid.
7. Return excess sample in the tip to the original sample container by blowing it out, if desired. Discard the used tip.
Temperature Considerations
Warm or cold liquids can be measured with good precision by
using a consistent pipetting rhythm. This will help minimize
any differences in heating or cooling effects within the pipette.
Use a new tip each time for best accuracy and precision when
measuring samples with temperatures greatly different from
ambient, and do not pre-rinse. You will get best results if there
is no delay between picking up the sample and dispensing it.
Equilibrate pipette, tips and liquid to the same temperature
before pipetting.
Autoclaving
Autoclavable parts of E-Man Hybrid are the shaft, shaft coupling, and the tip ejector: 121°C, 1 bar, 15-20 minutes; dry
cycle 110°C for 10 minutes. Do not autoclave the complete
pipette or any parts other than listed here.
Tip Ejector Arm Removal
Press in the quick-release tabs on the ejector arm and slide the
ejector down. To replace the ejector arm insert the shaft through
the large opening, align the top with the tip ejector pushrod,
and push until the ejector arm snaps in place.
Figure 4 Removing the Tip Ejector Arm
– 14 –
9920-348 E-MAN_revb.qxd
1/26/09
9:21 AM
Page 15
Troubleshooting and Repairs
Warning:
When removing the shaft from the pipette body, make sure the
spring, seal and o-ring do not fall off the piston, especially on
the smaller models.
Sample Splash (liquid inside the mechanism)
1. Remove the tip ejector arm. Also refer to the appropriate
drawing on page 18 or 19.
2. On pipettes up to 1000 μL, unscrew the shaft coupling (B)
and remove the shaft (C). For 2000 μL, unscrew the shaft.
3. Inspect the seal assembly and piston for contamination.
The piston should be shiny and free of corrosion. Clean with
distilled water or isopropyl alcohol. Dry with a lint-free tissue and reassemble after inspecting the interior of the shaft
for any contamination.
4. If piston corrosion or staining is evident, do not use the
instrument.
In the US, call 800-543-4030 for Technical Support.
In other countries, please use the number on the back page.
Leaks, Inaccuracy, Abnormal Stroke
1. Loose shaft. Tighten coupling by hand.
2. Split or cracked shaft. Remove the tip ejector and inspect the
shaft. Replace the shaft if necessary. If the shaft was
dropped, remove it to see if the piston is bent. If so, return
the instrument for service.
3. Worn seal and / or o-ring. All models up to 2000 μL incorporate a polyethylene seal and o-ring. Examine the seal
and o-ring, replacing them as necessary. Pull off the old
seal and o-ring, position the new seal and o-ring on the piston assembly as shown in the drawings on pages 18-19,
and reassemble the pipette.
Note: It is NOT necessary to recalibrate E-Man Hybrid after
changing seals, o-rings, or shafts.
4. Do not lubricate any components. E-Man Hybrid uses a dry
sealing system.
– 15 –
9920-348 E-MAN_revb.qxd
1/26/09
9:21 AM
Page 16
Service, Calibration and Repair
RAININ Pipette Repair and Calibration facilities:
It is recommended to use only genuine RAININ replacement
parts such as seals, o-rings, and shafts. It is NOT necessary to
recalibrate the pipette after changing the seal, o-ring, or shaft.
Recalibration of the pipette is only necessary when the piston is
replaced, and should be done only by qualified factory-trained
personnel in one of the above-mentioned facilities.
For pipettes under warranty, please note that the
warranty will be voided if the pipette has been damaged as a result of physical or chemical abuse, or if
the pipette has been repaired or recalibrated by any
service facility which is not authorized by Rainin.
In the US, call 800-543-4030 for service. Or visit the web:
www.rainin.com/service.asp.
Service is also available outside the US.
See the RAININ website home page, www.rainin.com, and
click on the link “Customers outside North America”.
METTLER TOLEDO Pipette Repair and Calibration facilities or
authorized RAININ distributors who provide service can be
found by following this link and specifying the country or geographical region.
Contact Technical Support at 800-543-4030 for further information.
Acids and Corrosives
After pipetting concentrated acids or highly corrosive solutions, disassemble E-Man Hybrid liquid end and inspect
and clean the piston assembly, shaft, and seal with distilled
water. Dry all components thoroughly and reassemble.
Extensive contact with corrosive fumes may result in premature seal wear and damage to the piston. Exposure of internal components to corrosive fumes can be reduced by
using RAININ tips with aerosol barrier filters.
– 16 –
9920-348 E-MAN_revb.qxd
1/26/09
9:21 AM
Replacement Parts
(see pages 18-19)
Description
2 μl
A 6204-085
A*6204-144
B 6204-111
C 6202-063
C*6200-134
D 6202-071
D*6200-133
E 6202-076
E*6202-183
F 6200-131
G 6200-132
H 6202-083
J 6200-196
K 6204-083
L 6204-084
200 μl
6204-089
6204-148
6204-111
6202-067
6200-157
6202-073
6200-156
6202-080
6202-080
6200-154
6200-155
6202-084
6200-200
6204-083
6204-084
10 μl
6204-086
6204-145
6204-111
6202-064
6200-140
6202-071
6200-133
6202-077
6202-184
6200-138
6200-139
6202-083
6200-196
6204-083
6204-084
20 μl
6204-087
6204-146
6204-111
6202-065
6200-145
6202-071
6200-144
6202-078
6202-185
6200-143
6200-170
6202-083
6200-198
6204-083
6204-084
100 μl
6204-088
6204-147
6204-111
6202-066
6200-147
6202-073
6200-148
6202-079
6202-079
6200-150
6200-151
6202-084
6200-201
6204-083
6204-084
X* = non-LTS
A PLUNGER BUTTON
B SHAFT COUPLING
C SHAFT
D TIP EJECTOR
E PISTON ASSY
F SEAL
G PISTON O-RING
H STRONG SPRING
J SEAL RETAINER
K BATTERY DOOR
K
Figure 5
L
Replacing the Battery
– 17 –
300 μl
6204-090
6204-149
6204-111
6202-425
6200-413
6200-419
6200-419
6202-427
6202-427
6200-415
6200-414
6202-084
6200-416
6204-083
6204-084
Page 17
1000 μl 2000 μl
6204-091 6204-092
6204-150 6204-151
6204-111 6202-068 6202-214
6200-160 6200-169
6202-074 6200-168
6200-163 6200-168
6202-081 6202-082
6202-424 ( GLASS )
6202-081 6202-082
6200-161 6200-166
6200-162 6200-167
6204-083 6204-083
6204-084 6204-084
9920-348 E-MAN_revb.qxd
E-Man Hybrid 2 & 10 μL
1/26/09
9:21 AM
Page 18
E-Man Hybrid 20 μL
A
A
H
H
B
B
J
J
F
G
C
F
G
C
E
E
D
D
E-Man Hybrid 200 & 300 μL
E-Man Hybrid 100 μL
A
A
H
H
J
B
B
J
F
G
F
G
E
E
C
C
D
D
Legend for E-Man Hybrid 2 μL to 2000 μL Models (this page and top of next
page)
A - Plunger Button
D - Tip Ejector
G - O-ring
B- Shaft Coupling
E - Piston Assembly
H - Stroke Spring
– 18 –
C - Shaft
F - Seal
J - Seal Retainer
9920-348 E-MAN_revb.qxd
E-Man Hybrid 1000 μL
1/26/09
9:21 AM
Page 19
E-Man Hybrid 2000 μL
A
A
F
G
F
G
B
E
E
C
C
D
D
– 19 –
9920-348 E-MAN_revb.qxd
1/26/09
9:21 AM
Page 20
Specifications
These manufacturer’s specifications should be used as guidelines when establishing your own performance specification.
Specifications
Model
Volume
µL
Increment
µL
Accuracy
%
µL (±)
%
Precision
µL (≤)
2 µL
0.2
1.0
2.0
0.002
12.0
2.7
1.5
0.024
0.027
0.030
6.0
1.3
0.7
0.012
0.013
0.014
10 µL
1.0
5.0
10.0
0.01
2.5
1.5
1.0
0.025
0.075
0.1
1.2
0.6
0.4
0.012
0.03
0.04
20 µL
2
10
20
0.02
7.5
1.5
1.0
0.15
0.15
0.2
2.0
0.5
0.3
0.04
0.05
0.06
100 µL
10
50
100
0.1
3.5
0.8
0.8
0.35
0.4
0.8
1.0
0.24
0.15
0.1
0.12
0.15
200 µL
20
100
200
0.2
2.5
0.8
0.8
0.5
0.8
1.6
1.0
0.25
0.15
0.2
0.25
0.3
300 µL
30
150
300
0.2
2.5
0.8
0.8
0.75
1.2
2.4
1.0
0.25
0.15
0.3
0.375
0.45
1000 µL
100
500
1000
1
3.0
0.8
0.8
3.0
4.0
8.0
0.6
0.2
0.15
0.6
1.0
1.5
2000 µL
200
1000
2000
2
3.0
0.8
0.8
6.0
8.0
16.0
0.6
0.2
0.12
1.2
2.0
2.4
Specifications are subject to change without prior notice
E-Man Storage
After use, store the pipette in a clean safe place. E-Man Hybrid
is a precision instrument and should be treated with the level
of care appropriate for laboratory instrumentation.
Three types of hanger are available to hold your E-Man Hybrid
conveniently when not in use.
CR-7:
Free-standing carousel holds seven pipettes.
HU-M3: Set of three individual magnetic Hang-Ups ™ for
mounting on ferrous surfaces.
HU-S3: Three Hang-Ups attached to a clamp which fits onto
a shelf.
– 20 –
9920-348 E-MAN_revb.qxd
1/26/09
9:21 AM
Page 21
EC Declaration of Conformity
according to ISO/IEC Guide 22 and EN45014
Manufacturer’s Name: Rainin Instrument, LLC.
Manufacturer’s Address: 7500 Edgewater Drive, Oakland,
CA,94621, USA
declares that the following product:
Product Name:
E-Man Hybrid Microliter Pipette
Model Number:
E-Man Hybrid
conforms to the following Product Specifications:
Safety:
EN 61010–1: 2001 (2nd Edition)
EMC:
FCC - Part 15 Class A
EN 61326 04: 1997 + A1 06: 1998 +
A2: 2001 + A3: 2003 (Emissions)
EN55011:1998 + A1:1999,
CISPR 11:2003, Edition 4.1:2004,
Class A (Class A Radiated Emissions)
EN 61326 04: 1997 + A1 06: 1998 +
A2: 2001 +A3: 2003 (Immunity)
IEC 61000-4-2 Edition 1.2 (2001):
Electrostatic Discharge Immunity Test
IEC 61000-4-3:2002: Radiated RadioFrequency Electromagnetic
Field Immunity Test
Supplementary Information:
Responsible Signatory:
Date:
Jim Petrek, VP, R & D
August 2007
This Declaration of Conformity applies only to products which
have the CE mark attached.
WARNING:
This equipment generates and uses radio frequency energy and if not
installed and used properly, i.e. in strict accordance with the instruction
manual, may cause harmful interference to radio communications. It
has been tested and found to comply with the limits for a Class A computing device pursuant to Subpart J of Part 15 of FCC rules, which are
designed to provide reasonable protection against such interference
when operated in a commercial environment.
Operation of this equipment in a residential area is likely to cause interference, in which case the user at his own expense will be required to
take whatever measures may be required to correct the interference.
9920-348 E-MAN_revb.qxd
1/26/09
9:21 AM
Page 22
LIMITED WARRANTY
See the Limited Warranty and Limitations of Liability Statement. Please
complete and return the Warranty Registration Card on receipt of your
pipette.
RAININ pipettes are calibrated with RAININ tips. To assure excellent reproducibility and performance, use only RAININ tips as recommended in this
manual. Specified performance is guaranteed only when RAININ tips are
used.
Contacting RAININ
Technical Information:
T: 800-543-4030
F: 510-564-1617
Pipette Service:
T: 800-662-7027
F: 781-935-7631
Direct Order Line:
T: 800-472-4646
F: 510-564-1617
RAININ website: www.rainin.com
[email protected]
[email protected]
[email protected]
From outside North America:
T: +1-510-564-1600
[email protected] (from outside the U.S.)
METTLER TOLEDO Offices
METTLER TOLEDO website: www.mt.com/rainin
Mettler-Toledo (Schweiz) GmbH, Im Langacher , 8606 Greifensee CH
Verkauf
044 944 45 45
[email protected]
Service
044 944 47 47
[email protected]
Mettler Toledo GmbH, Ockerweg 3 , 35396 Giessen DE
Verkauf
+49 641 507 222
[email protected]
Service
+49 641 507 307
[email protected]
Mettler-Toledo SAS, 18-20 avenue de la Pépinière , 78220 Viroflay FR
Ventes
01 30 97 17 17
[email protected]
Laboratoire d'Etalonnage Accrédité,
264 rue Abraham Lincoln Service Pipette, 62400 Bethune FR
Service
03 21 64 54 66
[email protected]
N.V. Mettler-Toledo S.A., Leuvensesteenweg 384 , 1932 Zaventem BE
Sales
+32 2334 0211
[email protected]
Service
+32 2334 0211
[email protected]
Mettler-Toledo S.A.E., Miguel Hernández 69-71 ,
08908 L'Hospitalet de Llobregat (Barcelona) ES
Ventas
0034 93 223 7666
[email protected]
Servicio Técnico 0034 93 223 7666
[email protected]
Mettler-Toledo A/S, Naverland 8 , 2600 Glostrup DK
Salg
43 27 08 25
[email protected]
Service
43 27 08 25
[email protected]
Rainin Instrument, LLC
7500 Edgewater Drive, Box 2160, Oakland, CA 94621-0060
a METTLER TOLEDO Company
Prices and specifications are subject to change without notice.
Copyright 2008, Rainin Instrument, LLC.
9920-348 Rev C