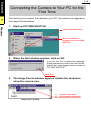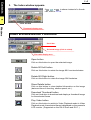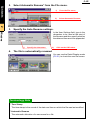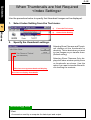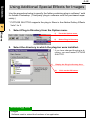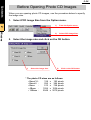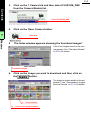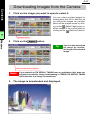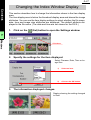
1
Contents
1
2
3
4
SOFTWARE for
FUJIFILM DIGITAL CAMERA
5
for Windows
Windows
User's Guide
Thank you for purchasing this Fujifilm product.This User's Guide provides detailed instructions on how to use the Software for Fujifilm
Digital Camera. For information on connecting a camera to your PC
and installing the software, refer to the Quick Start Guide.Read this
manual carefully to ensure that you use the software correctly.
Contents
IMPORTANT
Be sure to read this page before using the Interface Set.
1
2
Notes on the Software and User's Guide
3
(1) Unauthorized transfer or duplication of all or any part of the enclosed software or User's Guide is forbidden.
4
(2) The enclosed software and User's Guide can be used with only one device.
5
(3) Fuji Photo Film Co., Ltd. accepts no liability whatsoever for any loss or
injury incurred by the owner or by any third party while using a device with
the enclosed software or User's Guide.
Windows
(4) Every effort has been made to ensure that this product is flawless. If any
defect is found that is due to a fault on the part of the manufacturer, the
product will be replaced free of charge, at the discretion of Fuji Photo Film
Co., Ltd. No responsibility is accepted for defects not caused by the manufacturer.
(5) The contents of the enclosed software and User's Guide are subject to
change without notice.
Do not attempt to play the CD-ROM enclosed with this product on
an audio CD player.
Doing so could damage your hearing or could damage your speakers or headphones.
• Microsoft, MS-DOS and Windows are trademarks of the Microsoft Corporation of
the U.S. registered in the U.S. and other countries.
• Windows is an abbreviated term referring to the Microsoft Windows Operating System.
• Adobe Photoshop and PhotoDeluxe are trademarks of Adobe Systems Incorporated
of the U.S.
• SmartMedia™ is a trademark of Toshiba Corpration.
• All other company or product names are trademarks or registered trademarks of the
respective companies.
Contents
Preface
1
This User's Guide describes how to use the software (PICTURE SHUTTLE Data
Transfer Software and the DS SERIAL TWAIN Driver).
2
This User's Guide is written with the assumption that you have a basic understanding of how to use a PC (personal computer). For basic information on using your PC, refer to the manual supplied with your PC.
3
To use the software with your PC, perform the checks and preparatory steps
outlined in "Quick Start Guide" and then perform the following:
4
• Connect the camera to your PC.
• Install the software.
5
Windows
Notes
• Loss of power to the camera during data transfer could result in data corruption. If
you are connecting a camera to your PC, always connect an AC power adapter to
the camera beforehand.
• This software can be used with the MX / DX series digital cameras. However, some
functions may not be available on some models.
• Depending on your operating environment, the screens used in this manual and
screens you see may be slightly different.
Contents
PC and Camera Setup ................................................... (Quick Start Guide)
Refer to the Quick Start Guide for information on how to connect the camera to your PC and how to
install the software.
Chapter 1 PICTURE SHUTTLE Basics ............................................ (P.1-1 to)
This chapter describes how to use PICTURE SHUTTLE to download images from the camera to your
PC, and how to edit and print out the downloaded images.
Chapter 2 PICTURE SHUTTLE Advanced Features ....................... (P.2-1 to)
This chapter describes the advanced features offered by the PICTURE SHUTTLE software once you
have mastered the basics.Advanced Features introduces functions that allow you to use the software
more efficiently, such as how to manage the folders in which you saved your downloaded images.
Chapter 3 Using Other Software to Download Images from the Camera ..... (P.3-1 to)
This chapter describes how to use third-party software (such as Adobe Photoshop) to download images.
Chapter 4 Troubleshooting .............................................................. (P.4-1 to)
This chapter tells you what to do if an error occurs. If an error does occur, check here first.
Chapter 5 Appendix .......................................................................... (P.5-1 to)
This appendix gives detailed explanations of the terminology used in this User's Guide.
Contents
1–1
1
Chapter 1
PICTURE SHUTTLE Basics
Windows
This chapter describes how to use PICTURE SHUTTLE to download images
from the camera to your PC, and how to edit and print out the downloaded
images.
Basic PICTURE SHUTTLE Operation ........................................... 1-2
About PICTURE SHUTTLE ............................................................................... 1-2
Procedure Overview ................................................................................ 1-2
Connecting the Camera to Your PC for the First Time ...................................... 1-4
Switching Cameras ............................................................................................ 1-6
Viewing Camera Images ................................................................ 1-7
Viewing the Camera Image List (Index) ............................................................. 1-7
Index Window Button Functions .............................................................. 1-8
Saving Images from the List (Index) ........................................................ 1-9
Opening and Viewing Images Stored in the Camera ....................................... 1-11
Saving Opened Images ......................................................................... 1-12
Changing the Image Orientation ...................................................................... 1-13
Erasing Unwanted Images .............................................................................. 1-14
Closing the Image List (Index) ......................................................................... 1-15
Dealing with Multiple Folders on the Camera .................................................. 1-16
Editing Images .............................................................................. 1-17
Opening Images for Editing ............................................................................. 1-17
Cropping Images ............................................................................................. 1-21
Changing the Image Size and Orientation ....................................................... 1-22
Changing the Image Size by the Number of Pixels ............................... 1-25
Correcting Image Colors and Brightness ......................................................... 1-27
Applying Special Effects to Images ................................................................. 1-30
Reducing the Number of Image Colors ........................................................... 1-35
Saving Edited Images ...................................................................................... 1-36
Printing Images ............................................................................ 1-37
Specifying the Paper ....................................................................................... 1-37
Printing ............................................................................................................ 1-38
Contents
Basic PICTURE SHUTTLE Operation
1
The PICTURE SHUTTLE Data Transfer Software features the following functions:
Windows
1–2
• Image data can be sent to and received from devices (digital cameras or printers) connected to your PC, allowing you to view and print out the images stored on a camera.
• By registering image folders on your hard disk, you can easily save, organize and view
lists of images downloaded from a camera.
• Images can be enhanced easily and you can apply special effects.
• Detailed information is displayed for image files recorded in Exif file format*.
About PICTURE SHUTTLE
Notes
If the connected camera does not support a PICTURE SHUTTLE function, the screen button or menu for that function is disabled.
Procedure Overview
1.
Double-click on the camera icon or folder icon.
To view a list (index) of the images on the
camera –> P.1-7.
* Displayed if an MX-2700 is connected to
the PC.
Image Source window
Camera icon
2.
Folder icon
The Index window opens. Select the image you want to view
and click on the Open button.
1) Click to select.
2) Click on the Open button.
Index window
Contents
1–3
3.
The Image window opens.
1
Windows
Image window
4.
Select the desired special effect.
Emboss
Select a special effect.
White Vignette
Many other effects are available. For information on editing images, see "Editing
Images" on P.1-17.
Terminology Note
* Exif File Format
This is a still image format for full-color images used by digital still cameras. This
format also allows information such as the date and time of shooting to be recorded.
Contents
1–4
Connecting the Camera to Your PC for the
First Time
1
The first time you connect the camera to your PC, the camera icon appears in
the Image Source window.
Windows
1.
Start up PICTURE SHUTTLE.
Click on the Start button.
Select "FUJIFILM" in
Programs, select PICTURE
SHUTTLE.
2.
When the Hint window appears, click on OK.
If you tick the "Do not show this message"
checkbox before you click on OK, the Hint window will no longer appear when you start up
PICTURE SHUTTLE.
Click here.
3.
The Image Source window appears. Update the window to
show the camera icon.
1)
2)
Image Source window
From the View menu,
Select Update Information
Contents
1–5
4.
The camera icon appears in the Image Source window.
* The window at left appears when an MX2700 is connected to your PC.
1
Connected camera icon.
Windows
Contents
1–6
Switching Cameras
When you connect a different camera, update the Image Source window so that
the icon for the new camera appears.
1
1.
Update the Image Source window.
Windows
1)
2)
From the View menu,
Select Update Information.
Image Source Window
2.
The new camera icon appears in the Image Source window.
* Window shown when you switch to
an MX-700.
Icon for the connected camera
Contents
Viewing the Camera Image List (Index)
1
1–7
You can use PICTURE SHUTTLE to view a list (index) of the camera images.
Viewing Camera Images
1.
Double-click on the camera icon in the Image Source window.
Windows
Double-click
Tip
You can also view the Index window by selecting the camera icon and
then selecting Open from the File menu.
When the "Equipment is not connected or power is off" message appears...
Click on the OK button and check the following:
• Is the camera properly connected to the PC?
–> See "Quick Start Guide".
• Is the camera switched on?
–> Refer to the Owner's Manual for the camera.
• Is the camera set to PC mode?
–> Refer to the Owner's Manual for the camera.
• Is the SmartMedia card loaded into the camera correctly?
–> Refer to the Owner's Manual for the camera.
2.
The Processing progress box appears.
Click on the Cancel button to interrupt
downloading of the thumbnail images*.
Terminology Note
* Thumbnail Image
A small image displayed in screens such as index windows.
Contents
1–8
3.
The Index window appears.
If
,
or
is shown instead of a thumbnail, refer to P.2-14.
1
Index window
Windows
Thumbnail display area
Index Window Button Functions
Scroll bar
Selected image (Cick to select)
File name display area
Open button
Click on this button to open the selected image.
Rotate 90° Left button
Click on this button to rotate the image 90° counterclockwise.
Rotate 90° Right button
Click on this button to rotate the image 90° clockwise.
Show Details button
Click on this button to view detailed information on the image
(date and time of shooting, shutter speed, etc.).
Download Thumbnail button
Click on this button to download and display a thumbnail image
for the selected frame.
Play Video button
Click on this button to switch to Video Playback mode.In Video
Playback mode, the selected frame is displayed on the camera's
LCD monitor. (Supported on the DX-9 Zoom and DX-7.)
Contents
1–9
Select Folder
The name of the
currently selected
folder is displayed.
If there are multiple folders on the camera, use this list to select
the desired folder. (Supported on the MX series, DX-10 and
DX-8) (–> "Dealing with Multiple Folders on the Camera" P.116)
1
Thumbnail display area
Shows thumbnail images.
File name display area
Windows
Shows the file name.
Scroll bar
Used to view images that are not currently shown as they are
above or below the current window.
Saving Images from the List (Index)
You can download an image from the camera and save it to the hard disk on
your PC by dragging the image file from the Index window and dropping it onto
the desktop.Use this method wherever possible when you are transferring camera images directly to your PC.If you open the selected image and then save it,
the JPEG image is compressed again, thereby degrading the image quality.
1.
Click on the image you want to save to select it.
You can select multiple images by holding down
the Ctrl key as you click on the images. You can
also select all the images by selecting Select All
in the Edit menu (or by pressing Ctrl+A).
Selected image
Contents
1–10
2.
Drag the thumbnail and drop it on the folder in which you
want to save the image.
In this example, the screen shows a folder called
"New Folder" that has already been created on
the desktop.
1
Windows
Save to this folder.
3.
The image is saved in the destination folder.
Double-click to open.
Check that the image is saved.
Terminology Note
* Drag and Drop
The process of moving or copying an icon or thumbnail image by clicking the mouse
button over the object, moving the mouse to another location with the button held
down, and then releasing the mouse button.
Contents
1–11
Opening and Viewing Images Stored
in the Camera
1
Here, “Images stored in the camera” are images that are recorded on a
SmartMedia in the camera.This section describes how to download images in
the Index window from the camera and open them.
Windows
1.
Click on the thumbnail for the image you want to open to
select it.
You can select multiple images by holding down
the Ctrl key as you click on the images. You can
also select all the images by selecting Select All
in the Edit menu (or by pressing Ctrl+A).
Selected image
2.
Click on the Open button.
Tip
You can also view the image by
double-clicking on the thumbnail
or by selecting Open from the File
menu.
Click on the Open button.
3.
The image is downloaded and opened.
Image window
Contents
1–12
Saving Opened Images
This section describes how to name an opened image and save it.
1.
Click on
in the toolbar.
1
Windows
Click here.
Tip
2.
You can also save the image by selecting "Save As..." in the File menu.
The Save window appears.
1)
Select the location to which the image is
to be saved.
2)
Type in the file name.
3)
Select the file format.
4)
Click on the Save button.
* Select the format for the saved file from the Save as type: list box. The only available file
formats are BMP, Exif-TIFF, Exif-JPEG (High Quality), Exif-JPEG (Medium Quality) and
Exif-JPEG (Low Quality).
* When you save a file in the Exif-JPEG format, you can select from 3 image quality
settings. However, because images are compressed in the Exif-JPEG format, the image
quality suffers.
Notes
If the number of colors specified in the Display Properties window on
your PC is 256 or less, you cannot save images in the Image window in
any format other than BMP.
To save an image as a JPEG or TIFF file, set "256 Color Display" in the
Option menu to OFF and then download and save the image again. This
only affects the quality of the colors displayed on the screen and does
not affect the image data itself.
Terminology Note
* Exif File Format
This is a still image format for full-color images used by digital still cameras. This
format also allows information such as the date and time of shooting to be recorded.
Contents
1–13
Changing the Image Orientation
If an image is displayed on its side, use the procedure below to rotate it to an
upright orientation.
1
1.
Click on the image to be rotated to select it.
Windows
Click to select.
Device Index window
2.
Click on the
button to rotate the image to the left or the
button to rotate it to the right.
Tip
Click to rotate right.
Click to rotate left.
You can also rotate an image by
selecting Rotate Left or Rotate
Right in the Tools menu.
This rotation only applies in the Device Index
window.
If you open a rotated image in an Image window,
it does not appear rotated.
Contents
1–14
Erasing Unwanted Images
1
You can erase any displayed images that you no longer need. When you erase
the thumbnail image in the Index window, the image stored in the camera is also
erased.
1.
Click on the image to be erased to select it.
Windows
You can select multiple images by holding down
the Ctrl key as you click on the images. You can
also select all the images by selecting Select All
in the Edit menu (or by pressing Ctrl+A).
Click on the image to be erased to select it.
2.
3.
Select Delete from the File menu.
1)
From the File menu,
2)
Select Delete.
A confirmation dialog box appears.
To erase the selected image, click on the OK button.
Click on the Cancel button to return to the previous
screen without erasing the image.
Click on the OK button.
The image is erased.
Contents
This section describes how to close the currently displayed Index window.
1
1–15
1.
Closing the Image List (Index)
Click on the
to close the window.
Click here.
Windows
Tip
You can also close the Index window by selecting Close from the File
menu.
Contents
Dealing with Multiple Folders
on the Camera
1
1–16
If there are multiple folders on the SmartMedia in the camera, you can select the
folder to be opened from the pull-down folder menu.
Windows
You can use this feature when images shot on two or more models of Fujifilm
digital camera are stored on the same SmartMedia.
The folder selection menu is available for the MX series, DX-10 and DX-8.
1.
Click and hold down the mouse button on the folder selection
menu.
A list of the folders stored on the camera appears.
Folder selection menu.
* The folder for images shot using Fujifilm digital cameras is “IMFIDX10”, “IM01FUJI” or
“DCIM\100_FUJI” etc.
2.
Select the folder you want to open and release the mouse
button.
The images in the folder are displayed.
Select the folder you want to open.
Contents
1–17
Editing Images
Opening Images for Editing
1
To edit an image, you must use the fully opened image (the image in the Image
window) rather than the thumbnail (the image in the Index window).
Windows
Notes
If the number of colors specified in the Display Properties window on
your PC is 256, images are automatically reduced to 256 colors. Once
this has been done, you cannot use the image editing options described
below with those images. Set "256 Color Display" in the Option menu to
OFF and then download and edit the images again.
Setting "256 Color Display" to OFF only affects the quality of the colors
displayed on the screen and does not affect the image data itself.
This section describes how to open images stored on a camera connected to
your PC and images saved in a registered folder. (–> See "Registering Folders
in the Image Source Window" on P.2-2.)
1.
2.
Start up PICTURE SHUTTLE.
1)
Click on the Start button.
2)
From "FUJIFILM" in Programs,
select PICTURE SHUTTLE.
Open the Index window that contains the image you want to
edit.
To open the images on the camera, double-click on
the camera icon
To open an image saved in a registered folder in the
Image Source window, double-click on the folder
icon. See P.2-2 for information on how to register a
folder.
Double-click to open an image in
a folder registered on your PC.
Double-click to open an image
on the camera.
Contents
1–18
3.
Open the image.
1
You can select multiple images by holding down the Ctrl key as you click on
the images. You can also select all the
images by selecting Select All in the
Edit menu (or by pressing Ctrl+A).
1)
Windows
2)
4.
Select the image to be opened.
Click on the Open button.
Open the Image window.
Toolbar
From this window, you can edit, save
or print the image.
–> See P.1-12 for information on saving images.
–> See P.1-37 for information on printing images.
Notes
Image window
About the Toolbar
• If you open the Image
window and then save the
image as an Exif-JPEG
file, the image quality is
degraded since the image
is compressed again.
• If you want only to transfer a camera image, transfer the image by dragging
it from the Index window
and dropping onto the
desktop without opening
the Image window.
Copies the image to the clipboard (–> See P.2-26.)
Cancels the modifications and restores the image to its previous state.
Click to crop an image (–> See P.1-21.)
Prints the image (–> See P.1-37.)
Saves the image (–> See P.1-12.)
Opens the Image window (–> See P.1-19.)
Contents
1–19
• Opening Images Directly from the Image Window
You can also open images stored on your hard disk directly from the Image
window.
1.
Open the Image window.
1
See P.1-11 for information on how to
open the Image window.
Windows
Image window
2.
Click on
in the toolbar.
Tip
You can also open the
image by selecting Open
from the File menu.
Click here.
3.
The Open File dialog box appears.
Specify the file you want to open and
click on the Open button.
* Only BMP, Exif*-JPEG, Exif-TIFF and
PCD* files can be opened.
* PCD refers to the file format used on
photo CDs.
1)
Select the file to be opened.
2)
Click on the Open button.
Contents
1–20
4.
The image in the specified file opens.
Opened image
1
Windows
Terminology Note
* Exif File Format
This is a still image format for full-color images used by digital still cameras. This
format also allows information such as the date and time of shooting to be recorded.
Contents
1–21
Cropping Images
1
This section describes how to crop the image currently displayed. Trimming allows you to discard any unwanted parts of the image and keep only the required
portion. This is useful when you want to change the image layout or when the
original shot includes unnecessary parts.
Notes
Windows
1.
If your monitor is set to 256 colors or less, this function cannot be used.
(See "256 Color Display" on P.2-34 )
Specify the area to be cropped.
Drag* the mouse over the area you want to be
cropped. A dotted line appears around the selected area.
Drag to select.
2.
Click on
in the toolbar.
Click here.
The area outside the dotted lines is cropped off.
Tip
You can also crop the image by selecting Cropping from the Edit
menu.
Terminology Note
* Drag
The action of moving the mouse with the mouse button held down.
Contents
1–22
Changing the Image Size and Orientation
You can use PICTURE SHUTTLE to change the size and orientation of an image.
Notes
If your monitor is set to 256 colors or less, this function cannot be used.
(See "256 Color Display" on P.2-34 )
1
1.
Windows
2.
Select Process from the Edit menu.
1)
From the Edit menu,
2)
Select Process.
Select an item from the pull-down menu.
* To specify a portion of the image to
be edited, drag* the mouse over the
target area and then select Process.
Select one.
Contents
1–23
• Scale
The function enlarges the currently displayed image up to 200% or reduces it
down to 10% of its current size.
1
2)
Windows
1)
Click on the Execute button.
Type in the scale from the keyboard.
* If you want to specify a portion of the image for enlargement or reduction, trim the
specified area before using the Scale function.
* Ensure that scale setting (%) is such that the size of the image when enlarged or
reduced is no less than 64 x 64 pixels* and no more than 3584 x 3584 pixels. Images
cannot be enlarged or reduced to sizes outside this range.
* You can also change the image size by changing the number of pixels. (See "Changing the Image Size by the Number of Pixels" on P.1-25.)
Terminology Note
* Drag
The action of moving the mouse with the mouse button held down.
* Pixel
Picture element. Denotes the smallest unit used in computer graphics.
Contents
1–24
• Flip
This function inverts the image 180° either vertically or horizontally.
2)
Click on the Execute button.
1
Windows
1)
Select Flip Vertical or Flip Horizontal.
* If you specify a portion of the image to be flipped, only the selected portion is flipped.
Contents
1–25
• Rotate
This function rotates the displayed image through an angle between 1° and
359°.
1)
Type in the rotation angle from the keyboard.
2)
Click on the Execute button.
1
Windows
* If you want to specify a portion of the image to
be rotated, trim the specified area before using
the Rotate function.
Changing the Image Size by the Number of Pixels*
This section describes how to change the size of an image by changing the
number of vertical and horizontal dots (pixels) in the image.
Notes
1.
If your monitor is set to 256 colors or less, this function cannot be used.
(See "256 Color Display" on P.2-34 )
Select Image size... from the Edit menu.
1)
From the Edit menu,
2)
Select Image size...
Contents
1–26
2.
Specify the width, height and Background color, and then
click on the Execute button.
1
Windows
3.
1)
Type in the width and height from the
keyboard.
2)
Select the Background Color.
3)
Click on the Execute button.
The image size changes.
A margin is added to the image when you
alter the ratio of width to height in the new image size. This is to ensure that the aspect ratio
between height and width is maintained when
you vary the size of the image. In the example
shown at left, the image is displayed at 640 x
240 pixels including the backgrounds.
Background
Terminology Note
* Pixel
Picture element. Denotes the smallest unit used in computer graphics.
Contents
1–27
Correcting Image Colors and Brightness
Use the procedure below to correct image features such as the brightness, the
image colors and the level of bluring.
1
Notes
Windows
1.
Select Correct from the Edit menu.
Tip
2.
If your monitor is set to 256 colors or less, this function cannot be used.
(See "256 Color Display" on P.2-34 )
1)
From the Edit menu,
2)
Select Correct.
To specify a portion of the image to be corrected, drag the mouse over
the target area and then select Correct.
Select an item from the pull-down menu.
Select one.
Terminology Note
* Drag
Refers to the action of moving the mouse with the mouse button held down.
Contents
1–28
• Blur
This function blurs the entire image or a portion selected by dragging the mouse.
You can select the level of bluring.
1
1)
Select the level of bluring.
2)
Click on the Execute button.
Windows
• Sharpness
This function sharpens the entire image or a portion selected by dragging the
mouse. You can select either strong or weak sharpening.
1)
Select the level of sharpness.
2)
Click on the Execute button.
Contents
1–29
• Tone Adjustment
This function adjusts the tones over the entire image or in a portion selected by
dragging the mouse.
Slide bar
1)
Set the hue, saturation and brightness.
1
You can specify settings by moving the
slider bar or by typing in a value. The
effect is the same.
The box on the right of the window
shows the adjusted image.
Windows
2)
Click on the Execute button.
• Brightness / Contrast
This function allows you to adjust the brightness and contrast over the entire
image or in a portion selected by dragging the mouse.
You can specify settings by moving the
slider bar or by typing in a value.
The effect is the same.
The box on the right of the window
shows the adjusted image.
1)
2)
Set the contrast and brightness.
Click on the Execute button.
• Color Balance
This function allows you to adjust the balance of red, green and blue over the
entire image or in a portion of the image selected by dragging the mouse.
You can specify settings by moving the
slider bar or by typing in a value. The
effect is the same.
The box on the right of the window
shows the adjusted image.
1)
2)
Set the color balance.
Click on the Execute button.
Contents
1–30
Applying Special Effects to Images
PICTURE SHUTTLE allows you to apply a range of special effects to an image.
Notes
1
1.
If your monitor is set to 256 colors or less, this function cannot be used.
(See "256 Color Display" on P.2-34 )
Select Filter from the Edit menu.
Windows
1)
From the Edit menu,
2)
Select Filter.
* To apply special effects to a specific portion of
the image, drag* the mouse over the target area
and then select Filter. If no area is selected,
the effect is applied to the entire image.
2.
Select an item from the pull-down menu.
Select one.
Terminology Note
* Drag
Refers to the action of moving the mouse with the mouse button held down.
Contents
1–31
• Oil Painting
This filter gives the look of an oil painting to the entire image or to an area
selected by dragging the mouse.
1
Windows
• Emboss*
This filter applies a monotone effect with raised outlines to the entire image or to
an area selected by dragging the mouse.
1)
Select the embossing color.
2)
Click on the Execute button.
Terminology Note
* Emboss
Simulation of a raised effect in text or graphics.
Contents
1–32
• Mosaic
This filter applies a mosaic tiling effect to the entire image or to an area selected
by dragging the mouse. Select the size of the mosaic tiling and the click on the
Execute button.
1
Windows
1)
Select the mosaic size.
2)
Click on the Execute button.
• Soft Focus
This filter applies a soft focus effect to the entire image or to an area selected by
dragging the mouse.
• Sepia Tone
This filter applies sepia tones to the entire image or to an area selected by
dragging the mouse.
• White Vignette
This filter fades a circular area of the image out to a white border. If you have
selected an area of the image by dragging the mouse, white vignetting is only
applied to the selected area.
Contents
1–33
• Red-Eye*
This filter corrects the red-eye phenomenon in photographs of people.
1.
Specify the area in which the red-eye filter is to be applied.
1
Windows
1)
Drag the mouse over the target area.
2)
Click inside the selected area.
The selected area is shown enlarged.
Terminology Note
* Red-Eye
The phenomenon by which a person's eyes appear red when they are photographed
in low-light conditions using a flash. Red-eye is caused by the light of the flash reflecting off the inside of the eye.
Contents
1–34
2.
Click on the red portion of the first eye.
* If only one eye requires correction, click on Execute
after you click on the first eye.
1
Click.
Windows
3.
Click on the red portion of the second eye and then click on
the Execute button.
Click on the second eye.
4.
The red-eye replacement color window appears.
1)
Select the red-eye replacement color.
2)
Click on the Execute button.
A Processing window appears while red-eye correction is in progress. When processing
finishes, an image in which the selected red eyes are corrected appears.
Contents
1–35
Reducing the Number of Image Colors
You can reduce the number of colors in the displayed image to 256, 16 or 2
colors. You can select to show the image in fewer colors or fewer gray scale*
levels.
1
Notes
Windows
1.
If your monitor is set to 256 colors or less, this function cannot be used.
(See "256 Color Display" on P.2-34 )
Select Decrease color from the Edit menu.
The Decrease Color dialog box appears.
2.
1)
From the Edit menu,
2)
Select Decrease color.
Set the color reduction* settings.
Select Color or Gray Scale as the mode and
256, 16 or 2 as the number of colors.
1)
Set the mode and the
number of color.
2)
Click on the OK button.
Terminology Note
* Gray scale
An image that contains no color information, such as a black and white photograph.
* Color Reduction
A process that allows an image to be represented using fewer colors (256, 16 or 2
colors). This process reduces the file size but also degrades the image quality.
Contents
1–36
Saving Edited Images
This section describes how to name and save the currently displayed image.
1
1.
Click on
in the toolbar.
Tip
Windows
You can also save an image by
selecting Save As... from the File
menu.
Click here.
2.
The Save window appears.
* Select the format for the saved file from the Save
as type : list box. The only available file formats
are BMP, Exif*-JPEG (High Quality), Exif-JPEG
(Medium Quality), Exif-JPEG (Low Quality) and
Exif-TIFF.
* When you save a file in the Exif-JPEG format, you
can select from 3 image quality settings. However,
because images are compressed in the Exif-JPEG
format, the image quality suffers.
Notes
1)
Select the location to
which the image is to be saved.
2)
Type in the file name.
3)
Select the file format.
4)
Click on the Save button.
If the number of colors specified in the Display Properties window on
your PC is 256 or less, you cannot save images in the Image window in
any format other than BMP.
To save an image as a JPEG or TIFF file, set "256 Color Display" in the
Option menu to OFF and then download and save the image again. This
only affects the quality of the colors displayed on the screen and does
not affect the image data itself.
Terminology Note
* Exif File Format
This is a still image format for full-color images used by digital still cameras. This
format also allows information such as the date and time of shooting to be recorded.
Contents
1–37
Printing Images
Specifying the Paper
1
This section describes how to set the print size and specify the paper.
1.
Select Printer Setup from the File menu.
Windows
2.
1)
From the File menu,
2)
Select Printer Setup.
Specify the paper settings.
* The sample window shown at left is for illustration purposes only. The details shown in the
actual window will differ depending on the
printer.
* For details of how to specify the paper settings,
refer to the user's manual for the printer connected to your PC.
1)
2)
Specify the settings.
Click on the OK button.
Contents
1–38
Printing
This section describes how to send the image shown in the Image window to the
printer.
1
1.
Close the PICTURE SHUTTLE camera Index window currently
shown.
Windows
.
Notes
Index window
2.
Click on
You may not be able to print while
a PICTURE SHUTTLE camera Index window is open.
Click to close.
in the toolbar.
Tip
You can also print an image by selecting Print from the File menu.
Click here.
Notes
If the number of colors specified in the Display Properties window on
your PC is 256, the image is also printed in 256 colors. This is because
all the images displayed in the Image window are automatically reduced
to 256 colors if the 256 Color Display option in the Option menu is set to
ON.
If you want to print an image in full color in a 256-color environment,
manually set the 256 Color Display option in the Option menu to OFF.
Then redisplay and print the image.
However, bear in mind that setting the 256 Color Display option to OFF
in a 256-color environment can distort the colors shown on the screen.
This is only a display problem however, and does not adversely affect
the actual image data or the printed image.
Contents
1–39
3.
The Print window appears.
Refer to the explanations below for information on specifying the settings in the
Print window.
1
1)
Select one.
2)
Set the Centering.
3)
Click on the Execute button.
Windows
[Print all printable area (image cropped)]
This prints the image enlarged or reduced so that there is no margin around the image.
Any part of the image that overlaps the paper is cropped.
[Print entire image at maximum size (margins added)]
This prints the image enlarged or reduced so that the image does not overlap the paper.
No part of the image is cropped. Margins are added when the ratio of width to height
differs from that of the paper used for printing.
[Set Scale]
You can use this setting to specify the enlargement or reduction ratio. Areas of the image
that overlap the paper are cropped. Even when you specify the same scale, the size of the
printed image may differ depending on the printer resolution.
[Make image horizontal direction center]
Ticking this checkbox prints the image centered horizontally on the page. If this checkbox
is not ticked, the image is printed flush left on the page (print area).
[Make image vertical direction center]
Ticking this checkbox prints the image centered vertically on the page. If this checkbox is
not ticked, the image is printed at the top of the page (print area).
Notes
To set the scale when you are using a Fujifilm NX-5, NX-5D, NC-3D or
NC-2 printer, switch the Smoothing function in the printer driver off first.
If Smoothing is left on, the image will be printed smaller than the normal
size.
2–1
Contents
Chapter 2
PICTURE SHUTTLE Advanced Features
2
This chapter describes the advanced features that allow you to use the software
more effectively, such as how to manage the folders in which you saved your
downloaded images.
Windows
Using the Advanced Functions .................................................... 2-2
Registering Folders in the Image Source Window ............................................ 2-2
Deregistering Folders ........................................................................................ 2-5
Transferring Images to a Registered Folder ...................................................... 2-6
Saving Edited Images to a Folder ..................................................................... 2-9
Opening Images Saved in a Folder ................................................................. 2-11
Erasing Unwanted Images .............................................................................. 2-13
When Thumbnail Images do not Appear ......................................................... 2-14
Using the Advanced Functions .................................................. 2-16
Viewing Image Information
(Date and Time of Shooting, etc.) .................................................................... 2-16
Viewing Camera and Folder Information ......................................................... 2-17
Changing Image File Names ........................................................................... 2-19
Setting Copyright, Date and Time to the Camera ............................................ 2-22
Viewing Images on the Camera's LCD Monitor ............................................... 2-24
Editing Non-24-bit Image Data ........................................................................ 2-25
Pasting Images into Text Documents .............................................................. 2-26
Customizing PICTURE SHUTTLE ............................................... 2-29
Problems Downloading Camera Images <Communications Settings> .......... 2-29
When Thumbnails are Not Required <Index Settings> ................................... 2-30
Changing to Detail Display Modefor Index Windows ....................................... 2-31
Changing the Image Window Display .............................................................. 2-32
Using Additional Special Effects for Images .................................................... 2-35
Before Opening Photo CD Images .................................................................. 2-36
2–2
Contents
Using the Advanced Functions
Registering Folders in the Image Source Window
By registering a variety of folders in the Image Source window, you can set up
libraries for viewing different images. You can also organize your image files by
creating folders for particular trips, events or subjects.
2
1.
Start up PICTURE SHUTTLE and display the Image Source
window. (See P.1-4 for information on starting up PICTURE SHUTTLE.)
Windows
Image Source window
2.
Select Create Folder from the File menu
1)
From the File menu,
2)
Select Create Folder.
2–3
Contents
3.
The Register Folder dialog box appears. Create a folder.
If you have already created the folder
to be registered on your PC, you do
not need to create a new folder. Select the folder to be registered and
proceed to step 5.
2
2)
Windows
1)
4.
Click on the Create Folder button.
Select the location in which the folder is to be created.
Type in the folder name.
1)
Type in the folder name from
the keyboard.
Confirm the name by pressing
the Enter key on the keyboard.
5.
Double-click on the folder to be registered to open it, and
then click on the Register button.
1)
Double-click on the folder to be
registered.
2)
Click on the Register button.
2–4
Contents
6.
The new folder is registered.
Registered folder
2
Index window for the registered folder
Windows
2–5
Contents
Deregistering Folders
You can deregister a folder that you no longer need. This cancels the folder's
PICTURE SHUTTLE registration but does not delete the folder itself or the image files in the folder.
1.
Select the folder you want to deregister.
2
You can select multiple folders by
holding down the Ctrl key as you click
on the folders.
Windows
Click on the folder to be deregistered.
2.
3.
Select Delete Folders from the File menu.
1)
From the File menu,
2)
Select Delete Folders.
The deregistration confirmation screen appears.
Click on the OK button to deregister
the folder. Click on the Cancel button
to cancel the deregistration.
Click on the OK button.
The folder is deregistered.
2–6
Contents
Transferring Images to a Registered Folder
You can copy (transfer) an image file to another Index window by dragging and
dropping the image file. You can also use drag and drop to copy an image file to
the desktop.
1.
Open the Index window for the connected camera.
2
Windows
Double-click on the camera icon.
2.
Open the Index window for the folder in which you want to
save the image.
Double-click on the folder icon.
2–7
Contents
3.
Select the image to be transferred and then drag it to the
destination folder and drop it.
2
You can also transfer multiple images.
To select multiple images, hold down
the Ctrl key as you click on the images. You can also select all the images by selecting Select All in the Edit
menu (or by pressing Ctrl+A).
* This procedure only copies images.
It does not erase them.
Windows
1)
2)
Select the image to be transferred.
Drag and drop the image to copy it.
2–8
Contents
• Transferring Images to the Desktop
You can also use drag and drop to transfer images between the desktop and an
Index window.
Copy the image from the Index window to the desktop.
2
Windows
2)
1)
Drag and drop the image to copy it.
Select the image to be transferred.
Copy the image from the desktop to
the Index window.
1)
Drag the desired image,
2)
And drop it in the Index window
to copy it.
When a file with the same name already exists in the destination folder
Click on Auto to have PICTURE
SHUTTLE automatically rename the file.
Cancels copying
Overwrites the existing file
Automatically renames and copies the file
2–9
Contents
Saving Edited Images to a Folder
This section describes how to save an image to a registered folder after you
have changed the image size or applied special effects to the image.
Notes
1.
If your monitor is set to 256 colors or less, this function cannot be used.
(See "256 Color Display" on P.2-34 )
Edit the image. (See P.1-17 for information on editing images.)
2
Windows
Edited image
2.
Click on
in the toolbar.
Tip
Click here.
3.
You can also save an edited image by selecting
Save As... from the File
menu.
The Save dialog box appears.
Select a registered folder and save the
file.
1)
Select a registered folder.
2)
Type in the file name.
3)
Select the file format.
4)
Click on the Save button.
* Select the format for the saved file from the Save as type: list box. The only available file
formats are BMP, Exif*-JPEG (High Quality), Exif-JPEG (Medium Quality), Exif-JPEG
(Low Quality) and Exif-TIFF.
* When you save a file in the Exif-JPEG format, you can select from 3 image quality
settings. However, because images are compressed in the Exif-JPEG format, the image
quality suffers.
2–10
Contents
4.
Open the Index window for the saved folder and check the
image files. (See P.2-11.)
To display the thumbnail image,
click on the frame you want to display then click on the
button.
2
Click to display the thumbnail.
Saved image
Windows
Terminology Note
* Exif File Format
This is a still image format for full-color images used by digital still cameras. This
format also allows information such as the date and time of shooting to be recorded.
2–11
Contents
Opening Images Saved in a Folder
This section describes how to open images you have saved in a folder.
1.
Open the folder icon in the Image Source window.
2
Windows
Double-click on the icon for the folder containing the saved image.
2.
The Index window opens. Click on the image you want to
open to select it.
You can select multiple images by
holding down the Ctrl key as you click
on the images. You can also select all
the images by selecting Select All in
the Edit menu (or by pressing Ctrl+A).
Selected image
3.
Click on the Open button.
Tip
Click on the Open button.
You can also view the
image by double-clicking on the selected image or by selecting
Open from the File
menu.
2–12
Contents
4.
The image opens.
2
Windows
2–13
Contents
Erasing Unwanted Images
You can use the steps below to erase unwanted images displayed in the Index
window.
1.
Click on the image you want to erase to select it.
2
You can select multiple images by
holding down the Ctrl key as you click
on the images. You can also select all
the images by selecting Select All in
the Edit menu (or by pressing Ctrl+A).
Windows
Click on the image to be erased to select it.
2.
3.
Select Delete from the File menu.
1)
From the File menu,
2)
Select Delete.
A confirmation dialog box appears.
Click on the OK button to erase the
image. Click on the Cancel button to
return to the previous screen without
erasing the image.
Click on the OK button.
2–14
Contents
When Thumbnail Images do not Appear
This section explains the situations in which a thumbnail* is not displayed in the
Index window.
Shown when the Cancel button is pressed while the file is being downloaded, or when Index Setting in the Tool menu specifies that thumbnails
are not displayed.
2
Windows
Shown when a file in a registered folder does not have a thumbnail image.
Shown when the image cannot be opened and the thumbnail cannot be
displayed because the file format is incompatible.
If the problem with a frame in the folder index is something other than an incompatible file
format, use the procedure below to display the thumbnail.
1.
Click on the frame you want to view to select it.
You can select multiple frames by
holding down the Ctrl key as you click
on the frames. You can also select all
the frames by selecting Select All in
the Edit menu (or by pressing Ctrl+A).
Click on the frame for the thumbnail
you want to view.
Terminology Note
* Thumbnail
A small image displayed in screens such as index windows.
2–15
Contents
2.
Click on
.
Tip
2
Click here.
3.
The thumbnail image is displayed.
You can also display the thumbnail by selecting Preview from
the File menu.
Windows
2–16
Contents
Using the Advanced Functions
Viewing Image Information
(Date and Time of Shooting, etc.)
2
PICTURE SHUTTLE allows you to view image details such as the date and time
the image was shot and the shutter speed used.
Windows
1.
Select the image for which you want to view the details by
clicking on it.
Click to select.
2.
Click on the
button.
Tip
You can also view the
image information by
selecting Information...
from the File menu.
Click here.
3.
The details are displayed.
Click on the OK button to close the window.
Click on the OK button to close.
2–17
Contents
Viewing Camera and Folder Information
You can use the procedure below to view the location of a registered folder and
the camera's communication port information.
1.
In the Image Source window, click on the icon for which you
want to view more information.
2
The details shown for camera icons
and folder icons differ.
Windows
Click on the icon for which you want to view the information.
2.
Select Information... from the File menu.
1)
From the File menu,
2)
Select Information...
2–18
Contents
3.
The camera or folder information is displayed.
For camera icons, the connection port
and connection speed are displayed.
Click on the OK button to close the
window.
2
Windows
Click on OK to close.
For folder icons, the link destination*
appears, and you can open the linked
folder. Click on the OK button to close
the window.
Click on OK to close.
Click on Find Target... to open the linked folder.
Terminology Note
* Link Destination
The location of the source folder for the folder registered in the Image Source window.
2–19
Contents
Changing Image File Names
This section describes how to change the names of the image files displayed in
the Index window.Names can be changed automatically or manually.
Notes
2
•
The file names of images displayed in a camera Index window cannot be changed automatically.
•
If you change the file name, you will no longer be able to transfer the
image to the camera.
Windows
• Automatic Renaming
The Auto Rename function allows the names of image files in the Index window
to be changed by including the date and time and a specification code in the file
name. This can also be used to manage images shot on a camera so that file
names are not duplicated.
The example below illustrates how the file name suffixes change during automatic
renaming.For image data shot at 9.21 and 15 seconds on March 3rd 1999.
When "FUJI" is entered in the User Settings field, the file name changes as follows:
Date and time specified
Time only specified
Date only specified
–> "FUJI1999_0303_092115AA.JPG"
–> "FUJI092115AA.JPG"
–> "FUJI1999_0303AA.JPG"
If a modification then produces the same name as already exists, the two-letter code
(specification code) added to the end of the file name is incremented automatically to
prevent file name duplication. Image files that are not Exif files or that do not have the date
and time of shooting recorded are automatically renamed using the time stamp* for the
file.
1.
Select the image to be renamed by clicking on it.
You can rename multiple images at
one time by selecting multiple images.
To select multiple images, hold down
the Ctrl key as you click on the images. You can also select all the images by selecting Select All in the Edit
menu (or by pressing Ctrl+A).
Click on the image to be renamed.
2–20
Contents
2.
Select Automatic Rename* from the File menu.
1)
From the File menu,
2)
Select Automatic Rename.
2
3.
Specify the Auto Rename settings.
Windows
In the User Settings field, type in the
characters to be used at the start of
the filename and then specify whether
the date and time are to be appended.
1)
4.
Specify the characters.
2)
Click on the OK button.
The file is automatically renamed
You can use the Detail Display mode
(P.2-31) to check the new file names.
Terminology Note
* Time Stamp
The time stamp is the record of the date and time on which the file was last modified.
* Automatic Rename
The automatic allocation of a new name for a file.
2–21
Contents
• Manual Renaming
Use the procedure below to manually rename a file.
1.
Highlight the file name.
2
Windows
1)
2)
2.
Click on the image to be renamed.
Click on the file name.
Type in the new file name.
1)
Type in the new file name.
2)
Press the Enter key on the keyboard.
2–22
Contents
Setting Copyright, Date and Time
to the Camera
This function specifies settings on cameras that support date and time recording
functions and a copyright function*.
1.
Select the camera icon.
2
Windows
Click to select.
2.
3.
Select Option from the View menu.
1)
From the View menu,
2)
Select Option.
Specify the Copyright setting.
1)
Notes
Type in your
identifier here.
2)
Click on the
Send button.
When you type in an identifier, such
as your name, in the Copyright field
and click on the Send button, the identifier you typed in is sent to the device. From that point on, this identifier
is recorded in all the images shot and
can be viewed in the Copyright 1 field
in the Details window (see P.2-16).
The Send button is only enabled for compatible devices. For all other
devices, the Send button is grayed out* and cannot be selected.
2–23
Contents
4.
Set the date.
When you click the Send button for
the date and time, the currently displayed date and time is sent to the
device.The date and time for all images shot subsequently are then recorded by the reset internal clock and
can be viewed in the Details window.
2
Click on the Send button.
Windows
Notes
The Send button is only enabled for compatible devices. For all other
devices, the Send button is grayed out and cannot be selected.
Terminology Note
* Copyright Function
The copyright function records and displays the copyright information. If you specify
the copyright in the camera, the copyright information is automatically recorded in the
Copyright 1 field for images shot from that point on.
* Graying Out
This refers to the display mode for menu items and buttons that are shown in gray to
indicate that they are disabled.
2–24
Contents
Viewing Images
on the Camera's LCD Monitor
2
You can view images on a TV set or monitor by connecting the camera’s video
output jack to the video input jack on the TV set. This feature is supported on the
DX-9 ZOOM and DX-7 but not on the MX series and DX-8 digital cameras. On
the DX-9 ZOOM and DX-7 digital cameras, you can also use the camera’s remote video playback* function to view images out of sequence.
Windows
1.
Click on the
button so that it clicks down.
* DX-9 ZOOM screen
Click here.
2.
Click on an image.
The selected image is played back as
video on the camera.
Click on the image to be displayed.
Notes
This function can only be used if the selected camera supports a remote
video playback function. For devices that do not support a remote video
playback function, the button is grayed out and cannot be selected. All
images that were selected when operation was switched to video playback mode are deselected.
Terminology Note
* Remote Video Playback
A function that allows you to control the camera from your PC and view the images on
the camera as video output.
* Graying Out
This refers to the display mode for menu items and buttons that are shown in gray to
indicate that they are disabled.
2–25
Contents
Editing Non-24-bit Image Data
Use this procedure to convert non-24-bit image data to 24-bit data. Converting
an image to 24-bit data allows better results to be obtained when the image is
edited. Images downloaded from the camera are 24-bit data and do not require
conversion.
1.
Select Convert to 24-bit* from the Edit menu.
2
* This menu cannot be selected for
24-bit images.
Windows
1)
From the Edit menu,
2)
Select Convert to 24-bit.
Terminology Note
* Convert to 24-bit
Refers to the process of converting index color or gray scale images to full-color images with 8-bit depth for each RGB color.
2–26
Contents
Pasting Images into Text Documents
Use the procedure below to paste the image shown in the Image window into a
document in a word processor or other application.
1.
Open the Image window.
2
Windows
Image window.
2.
Select Copy to Clipboard* from the Edit menu.
You can also select a portion of the image to be pasted. To select an area, drag*
the mouse over the desired portion of the
image and then select Copy to Clipboard
from the Edit menu.
1)
2)
From the Edit menu,
Select Copy to Clipboard.
Terminology Note
* Drag
Refers to the action of moving the mouse with the mouse button held down.
* Clipboard
A shared storage area that can be accessed by various kinds of applications.
2–27
Contents
3.
Open a document created in another application.
Paste the image into the document.
In most applications, selecting Paste
from the Edit menu pastes the image
into the document.
(In some applications, the method
may differ or pasting may not be possible. Refer to the user’s manual supplied with the application.)
2
Windows
Paste the image into the document.
• Using Drag and Drop to Paste an Image
1.
Select a portion of the image and then drag the selected
portion and drop it into the target document.
You can paste an image into a document in Microsoft Word by dragging
the image and dropping it into the
document.
2–28
Contents
2.
The image is pasted into the document.
2
Windows
If you double-click on the pasted image, the edit functions of the PICTURE
SHUTTLE Image window appear.
2–29
Contents
Customizing PICTURE SHUTTLE
Problems Downloading Camera Images
<Communications Settings>
1.
Select Communication Setting from the Tool menu.
2
Windows
2.
1)
From the Tool menu,
2)
Select Communication Setting.
The Communication Setting dialog box appears.
• Connection Speed Setting
Select Communication Settings.
The default setting for the connection
speed is AUTO, which determines the
connection speed automatically.
Leave the setting on AUTO unless
communication errors occur.
If communication errors occur frequently, switch the camera off and
then on again. Then, beginning with
the highest baud rate(connection
speed), set progressively lower rates
until the errors cease to occur.
While the likelihood of errors decreases with lower baud rates, the
time required to receive an image increases.
• Port Selection Checkboxes
Problems with PICTURE SHUTTLE
operation can be remedied by
unchecking the checkboxes for ports
to which the camera is not connected.
3.
Select Update Information from the View menu.
If a camera has just been connected
to a previously vacant port*, the Update function automatically rechecks
the ports.
The icon for the connected camera
appears in the window.
1)
From the View menu,
2)
Select Update Information.
2–30
Contents
When Thumbnails are Not Required
<Index Settings>
Use the procedure below to specify that thumbnail images not be displayed.
1.
Select Index Setting from the Tool menu.
2
Windows
2.
1)
From the Tool menu,
2)
Select Index Setting.
Specify the thumbnail settings.
Selecting Show Filename and Thumbnail displays all the thumbnails for
checking. This is ideal when you want
to view images as you transfer them.
(Default setting)
Click here to suppress thumbnail display.
Selecting Show Filename Only displays the Index window quickly since
no thumbnails are shown. Use this
option if you want to transfer files without checking the contents.
Click here to display thumbnails.
Terminology Note
* Port
A connector used by a computer for data input and output.
2–31
Contents
Changing to Detail Display Mode
for Index Windows
If you switch to Detail Display mode in the Index window, the date and time of
shooting and the file size are always shown for each image.
2
1.
Select Details from the View menu.
Windows
To switch back to the original display
mode, select List from the View menu.
Detail display
1)
From the View menu,
2)
Select Details.
2–32
Contents
Changing the Image Window Display
Use the procedure below to set options such as the toolbar display, the display
scale and the shape of the cursor.
• Scale Display
2
You can reduce the image displayed down to 12.5% or enlarge it up to 800% of
its current size.
Windows
1.
Select Enlarge Reduce Display from the View menu and
select a scale.
The size of the image displayed
changes, but the original image data
is not changed.
1)
From the View menu,
3)
2)
Select the display scale.
Select Enlarge Reduce Dispay.
• Show/Hide Toolbar
This option allows you to specify whether the toolbar is displayed.
1.
Select Toolbar from the View menu.
To display the toolbar, select Toolbar
from the View menu again.
1)
From the View menu,
2)
Select Toolbar.
2–33
Contents
• Show/Hide Status Bar
The status bar shows the program status and displays explanations. This option
allows you to specify whether the status bar is displayed.
1.
Select Status Bar from the View menu.
2
1)
From the View menu,
2)
Select Status Bar.
Windows
To display the status bar, select Status Bar from the View menu again.
Status Bar
• Cursor Shape
You can select an arrow or a cross-hair as the shape of the cursor used to select
area. The default shape is the arrow.
1.
Select Cursor from the Option menu and then select the
cursor shape.
1)
2)
From the Option menu,
Select Cursor.
3)
Select the cursor shape.
2–34
Contents
• 256 Color Display
If your monitor supports 256 colors, this option displays images in 256 colors. If
your monitor displays more than 256 colors, this option is not available. It is only
valid for monitors that display images in 256 or fewer colors.
Notes
2
If the number of colors specified in the Display Properties window on
your PC is 256, any image displayed in the Image window is
automatically reduced to 256 colors. When this occurs, note the
following:
(1) The image is printed in 256 Colors also.
(2) You cannot edit the image.
(3) When you save the image, it can only be saved in the BMP format.
Windows
To avoid these problems, set "256 Color Display" in the Option menu
to OFF and then display the image again.
Once you do this, you can:
(1) Print the image in full color.
(2) Edit the image.
(3) Save the image in the JPEG or TIFF format.
Note that though this detracts from the quality of the colors displayed
on the screen, it does not affect the image data itself.
1.
Select 256 Color Display from the Option menu and select
ON or OFF.
1)
From the Option menu,
2)
Select 256 Color Display.
3)
Select ON or OFF.
2–35
Contents
Using Additional Special Effects for Images
Use the procedure below to specify the folder containing plug-in software* sold
for Adobe Photoshop. (Third-party plug-in software must be purchased separately.)
* PICTURE SHUTTLE supports the plug-in filters in the Adobe Gallery Effects
Vols 1 to 3.
2
1.
Select Plug-in Directory from the Option menu.
Windows
2.
1)
From the Option menu,
2)
Select Plug-in Directory.
Select the directory in which the plug-ins were installed.
* If you have changed the plug-in directory, you must restart PICTURE
SHUTTLE.
1)
Display the Plug-in directory here.
2)
Click on the OK button.
Terminology Note
* Plug-In
Software used to extend the functions of an application.
2–36
Contents
Before Opening Photo CD Images
When you are opening photo CD images, use the procedure below to specify
the image size.
1.
Select PCD Image Size from the Option menu.
2
Windows
2.
1)
From the Option menu,
2)
Select PCD Image Size.
Select the image size and click on the OK button.
1)
Select the image size.
2)
Click on the OK button.
* The photo CD sizes are as follows:
• Base/16 :
128 x 192 pixels
• Base/4 :
256 x 384 pixels
• Base
:
512 x 768 pixels
• 4Base :
1024 x 1536 pixels
• 16Base :
2048 x 3072 pixels
3–1
Contents
Chapter 3
Using Other Software to Download
Images from the Camera
This chapter describes how to use third-party software (such as Adobe
PhotoDeluxe) to download images.
3
About DS SERIAL TWAIN .............................................................. 3-2
Procedure Overview ................................................................................ 3-2
Windows
Starting Up and Quitting ................................................................ 3-5
Starting Up DS SERIAL TWAIN ......................................................................... 3-5
Quitting DS SERIAL TWAIN .............................................................................. 3-8
Viewing Camera Images ................................................................ 3-9
The Index Window ............................................................................................. 3-9
Index Window Button Functions .............................................................. 3-9
Downloading Images from the Camera ........................................................... 3-11
Rotating Images .............................................................................................. 3-12
Displaying Thumbnail Images Manually .......................................................... 3-13
Dealing with Multiple Folders on the Camera .................................................. 3-14
Other Functions ........................................................................... 3-15
Problems Downloading Camera Images <Communications Settings> ........... 3-15
Changing the Index Window Display ............................................................... 3-17
Checking the Version ....................................................................................... 3-18
Viewing the Image Information ........................................................................ 3-19
The following applications have been confirmed by Fujifilm as being
compatible with DS SERIAL TWAIN:
PhotoEnhancer Ver.3.2
Adobe PhotoDeluxe Ver.2.0
Adobe PhotoDeluxe Home Edition Ver 3.0
Adobe Photoshop Ver.4.0
Adobe Photoshop Ver.5.0
MGI PhotoSuite SE Ver.1.0
3–2
Contents
About DS SERIAL TWAIN
The DS SERIAL TWAIN* driver provides the following functions:
• Displays a list of the image data stored on a digital camera.
• Downloads image data directly into image processing software* such as Adobe
PhotoDeluxe. (See P.3-1 for a list of supported applications.)
Procedure Overview
3
1.
Start up the application to be used to download the images.
Windows
The descriptions in this manual use
Adobe PhotoDeluxe Home Edition 3.0
as an example.
The procedure for other applications
is a little different.
Select PhotoDeluxe.
2.
Click on the Get Photo button in the Get & Fix Photo tab and
select Cameras... from the pull-down menu.
1)
Select Get & Fix Photo tab,
2)
Click on the Get Photo.
The software connects to the
camera. See “Starting Up DS
SERIAL TWAIN” on P.3-5 for
details.
3)
Select Cameras
3–3
3.
Click on the 1 Camera tab and then select FUJIFILM_DSS
from the Camera ModeIs list .
Contents
Select FUJIFILM_DSS
4.
Click on the Open Camera button.
3
Click here
Windows
5
The Index window appears showing the thumbnail images*.
A list of the images stored on the camera appears. See “The Index Window”
on P.3-9 for details.
Index window
Thumbnail images
6.
Click on the image you want to download and then click on
the
button.
The image is downloaded into the application. See “Downloading Images
from the Camera” on P.3-11 for details.
1)
2)
Click to select.
Click on the Acquire button.
3–4
7.
The image is downloaded.
Contents
3
Windows
Terminology Note
* Image Processing Software
Application software that modifies or enhances images downloaded from a device
such as a digital camera.
* Thumbnail Image
A small image displayed in screens such as index windows.
* TWAIN
A global standard interface between application software and image capture devices
such as digital cameras and scanners.
3–5
Contents
Starting Up and Quitting
Starting Up DS SERIAL TWAIN
Here, the Adobe PhotoDeluxe software is used as an example of how to start up
DS SERIAL TWAIN*.
* Other third-party TWAIN-compatible applications include Adobe Photoshop .
(See P.3-1 for a list of compatible applications.)
(1) Select TWAIN.
3
1.
Start up PhotoDeluxe.
Windows
Select PhotoDeluxe.
2.
Click on the Get Photo button in the Get & Fix Photo tab and
select Cameras... from the pull-down menu.
1)
Select Get & Fix Photo tab,
2)
Click on the Get Photo.
The software connects to the camera.
3)
Select Cameras
Terminology Note
* TWAIN
A global standard interface between application software and image capture devices
such as digital cameras and scanners.
3–6
3.
Click on the 1 Camera tab and then select FUJIFILM_DSS
from the Camera Models list.
Contents
Select FUJIFILM_DSS.
* In other applications, “Select
TWAIN_32 Source” is often the item
to be selected from the File menu.
Click on FUJIFILM_DSS to select it.
3
(2) Start up TWAIN.
Windows
1.
Click on the Open Camera button.
Click here
* In other applications, “TWAIN_32”
is often the item to be selected from
the File menu.
* Some applications may not support
the Download Consecutive function.
3–7
2.
The Receiving Filenames window appears.
Contents
Click on the Close button to interrupt
the procedure.
3.
The Index window appears and the thumbnail images* are
downloaded.
3
Click on the Stop button to stop thumbnail downloading. If you already know
the name of the file you want to download, you can stop thumbnail downloading to save time.
Windows
Index window
Thumbnail images
Notes
If there is a file that DS SERIAL TWAIN cannot read, the thumbnail is not
displayed in the Index window.
Terminology Note
* Thumbnail Image
A small image displayed in screens such as index windows.
3–8
Quitting DS SERIAL TWAIN
Contents
Click on the
button to quit DS SERIAL TWAIN*.
Click here.
3
Windows
Terminology Note
* TWAIN
A global standard interface between application software and image capture devices
such as digital cameras and scanners.
3–9
Contents
Viewing Camera Images
The Index Window
3
Windows
Thumbnail display area
Selected image
Click to select
Scroll bar
Item display area
Index Window Button Functions
Acquire button
Downloads the selected image from the camera. This button is
only enabled when an image is selected.
Select All button
Selects all the images. If all the images are already selected, clicking on this button deselects the images.
Select Page button
Selects all the images currently shown in the Index window. If all
the images shown are already selected, clicking on this button
deselects the images.
Details button
Displays the details window for the selected image. This button is
disabled if multiple images are selected.
Rotate 90° Left button
Clicking on this button rotates the selected image 90° counterclockwise.
3–10
Rotate 90° Right button
Clicking on this button rotates the selected image 90° clockwise.
Contents
Get Thumbnail button
Clicking on this button downloads and displays the thumbnail image for the selected frame.
Folder selection menu
When there are multiple folders on the camera, use this menu to
select the folder. (Supported on the MX Series, DX-10 and DX-8)
(See “Dealing with Multiple Folders on the Camera” on P.3-14.)
Frame number display
3
Shows the frame number in the selected folder on the digital
camera.
Windows
Version Info button
Displays the Version Info window.
Set button
Opens the window used to specify the item settings and communications settings.
Close button
Closes the Index window and quits TWAIN*.
Thumbnail Display Area
Displays the thumbnail images.
Item Display Area
Displays the image attributes. The default attribute displayed is the file name. The date,
time and image size can also be displayed. Use the settings window to select the attributes to be displayed.
Scroll Bar
Scrolls the images up or down a row at a time.
Terminology Note
* TWAIN
A global standard interface between application software and image capture devices
such as digital cameras and scanners.
3–11
Downloading Images from the Camera
Contents
1.
Click on the image you want to open to select it.
You can select multiple images by
holding down the Ctrl or Shift key as
you click on the images. You can also
select all the images shown by clicking on the
(Select Page) button or
all the images in the current folder by
(Select All) button.
clicking on the
3
Click to select.
Windows
2.
Click on the
button.
Tip
You can also download
an image by doubleclicking on the selected
image.
Click on the Acquire button.
Notes
3.
If you started up DS SERIAL TWAIN from an application that does not
support consecutive image downloading in TWAIN, DS SERIAL TWAIN
quits after the first image is transferred.
The image is downloaded and displayed.
3–12
Rotating Images
Contents
When the image is displayed on its side, use this procedure to turn it upright.
1.
Click on the image to be rotated to select it.
3
Windows
Click to select.
2.
Click on the
or the
button to rotate the image counterclockwise
button rotate the image clockwise.
Click to rotate clockwise.
Click to rotate counterclockwise.
3.
If you click on the
button when the image is rotated,
the image is downloaded in the rotated orientation.
3–13
Displaying Thumbnail Images Manually
Contents
Thumbnail images are automatically displayed at startup. However, if you already know which frame you want to download (such as the last image shot),
you can stop thumbnail downloading at startup and manually display the thumbnail image you want to see.
1.
Select the frame for the thumbnail you want to view by
clicking on it.
3
You can select multiple frames by
holding down the Ctrl or Shift key as
you click on the frames. You can also
select all the frames shown by click(Select Page) button or
ing on the
all the frames in the current folder by
(Select All) button.
clicking on the
Windows
Click to select.
2.
Click on the
button.
Tip
You can also view a
thumbnail image by
double-clicking on the
selected frame.
Click here.
The thumbnail image is displayed.
Notes
If there is a file that DS SERIAL TWAIN cannot read, its thumbnail image
is not displayed in the Index window.
3–14
Contents
Dealing with Multiple Folders
on the Camera
If there are multiple folders on the camera, select the folder you want to open
from the folder selection pull-down menu. You can use this feature when images
shot on another manufacturer’s digital camera are stored on the same
SmartMedia.The folder selection menu is available for the MX series, DX-10
and DX-8.
1.
3
Click and hold down the mouse button on the folder selection
menu.
Windows
A list of the folders stored on the camera appears.
Folder selection menu.
* The folder for images shot using Fujifilm digital cameras is “IMFIDX10”, “IM01FUJI“ or
“DCIM\100_FUJI“ etc.
2.
Select the folder you want to open and release the mouse
button.
The images in the folder are displayed.
Select the folder you want to open.
3–15
Contents
Other Functions
Problems Downloading Camera Images
<Communications Settings>
The communication settings specify the camera port* and the connection speed.
Use these settings to remedy communication problems.
1.
Click on the
(Set) button to open the Settings dialog box.
3
Windows
Click here.
2.
Set the camera port and the connection speed.
• Camera Port setting
Set the port to which the cable linking
the PC and the digital camera is connected.
• Connection Speed setting
Click on the OK
button to close the
Settings dialog box.
The default setting for the connection
speed is AUTO, which determines the
connection speed automatically. Use
the AUTO setting unless a communication error occurs or the “This image
format cannot be proceeded” message appears.
If communication errors occur frequently, switch the camera off and
then on again. Then, beginning with
the highest baud rate, set progressively lower rates until the errors cease
to occur.While the likelihood of errors
decreases with lower baud rates, the
time required to receive an image increases.
3–16
Contents
Select the port.
Select the connection speed.
3
Windows
Terminology Note
* Camera Port
The socket on your PC to which the camera is connected.
3–17
Changing the Index Window Display
Contents
This section describes how to change the information shown in the item display
area.
The item display area is below the thumbnail display area and shows the image
attributes. You can use the item display settings to select whether the file name,
date, time and image size attributes are displayed. The default attribute displayed is the file name. (The date and time are not shown for the DX-5.)
1.
Click on the
(Set) button to open the Settings window.
3
Windows
Click here.
2.
Specify the settings for the item displayed.
Select Filename, Date, Time or Image Size.
3.
1)
Select an item.
2)
Click on the OK button.
The information displayed changes.
Display showing the setting changed
to Date.
3–18
Checking the Version
Contents
Use this procedure to view the DS SERIAL TWAIN* version information.
1.
Click on the
(Version Info) button.
Click here.
3
Windows
2.
The version information appears.
Click on the OK button to close
the window.
Click here to close.
Terminology Note
* TWAIN
A global standard interface between application software and image capture devices
such as digital cameras and scanners.
3–19
Viewing the Image Information
Contents
Use the procedure below to view information such as the date and time of shooting
and the shutter speed.
1.
Click on the
(Details) button.
Click here
3
Windows
2.
Image information such as the image size and the date and
time of shooting is displayed.
Click on the OK button to close the
window.
Click on the OK button to close.
4–1
Contents
Chapter 4
Troubleshooting
This chapter tells you what to do if an error occurs. If an error does occur, check
here first.
Troubleshooting ............................................................................. 4-2
Problems with PICTURE SHUTTLE ................................................................. 4-2
Problems with the DS SERIAL TWAIN Driver ................................................... 4-8
4
Windows
4–2
Troubleshooting
Problems with PICTURE SHUTTLE
Contents
When PICTURE SHUTTLE starts up
Problem
Cause
Solution
The “This application runs with
Windows 95 / 98 / NT 4.0.”
message appears at startup.
Your version of Windows is too
old to run PICTURE
SHUTTLE.
Run the program on Windows 95 /
98 or Windows NT 4.0.
When you run Update in the Image Source window to recognize a device
Problem
4
The icon for the connected
device does not appear in the
Image Source window.
Cause
Solution
Windows
The device is switched off.
Switch the device on.
The device is not connected.
Connect the device to the computer and switch the device on.
The port* to which the device
is connected is being used by
the operating system.
Connect the device to a different
port.
Alternatively, change the operating
system settings so that the operating system is no longer using the
port.
The port to which the device
is connected is being used by
another application.
Connect the device to a different
port.
Alternatively, quit the application
that is using the port.
The “Unsupported equipment
connected. This equipment
will be ignored.” message appears.
The connected device is not
supported by PICTURE
SHUTTLE.
In the Communication Settings dialog box, uncheck the port to which
the unsupported device is connected.
Terminology Note
* Port
A connector used for data input and output on a computer.
4–3
When you double-click on a device icon in the Image Source window to
open the Index window
Contents
Problem
Cause
Solution
The “The selected port is not
supported, or the OS or other
applications are in use.” message appears.
Device connection failed because the port cannot be
used.
Quit any other applications that are
using the port. Alternatively, connect the device to a different port
and then select Update Information
from the View menu.
The “Equipment is not connected or power is off.” message appears.
The device is switched off.
Switch the device on.
The device is not connected.
Connect the device to the computer and switch the device on.
The port to which the device
is connected was changed.
Select Update Information from the
View menu.
4
When you double-click on a folder icon in the Image Source window to
open the Index window
Windows
Problem
Cause
Solution
The “Folder not found” message appears.
The folder was registered on
a removable disk* and the disk
was subsequently switched.
Insert the original removable disk.
Alternatively, deregister the folder.
The folder on the disk was registered and the folder was
subsequently deleted.
The registered folder cannot be
used. Deregister the folder.
When you select an image in the Index window and open the Image window
Problem
Cause
Solution
The Open button is disabled
(grayed out).
The EZtouch image processing application is not installed.
Install
SOFTWARE
FOR
FUJIFILM DIGITAL CAMERA.
Terminology Note
* Removable disk
Data storage media such as floppy disks, MO disks or ZIP cartridges.
4–4
When you select “Information” for a frame with no thumbnail image.
Contents
Problem
Cause
Solution
The “This image file cannot be
used.” message appears.
You cannot view the information for the selected frame because the image file is not an
Exif-format file.
Open the image using EZtouch
and then save the image as an
Exif-JPEG or Exif-TIFF file.
When you copy a file by dragging it to a folder index and dropping it.
4
Windows
Problem
Cause
Solution
The “Process aborted, File is
locked.” message appears
when overwriting is specified.
The file to be overwritten is
locked.
Unlock the file to be overwritten.
Alternatively, close any other application that is using the file.
The “Process aborted, I/O error occurred.” message appears.
A disk I/O error occurred.
Use an error-free 3.5-inch floppy
disk or removable disk.
The disk is full.
Delete any unwanted files on the disk
to increase the amount of free space
so that the file can be copied.
The file format is not supported
by PICTURE SHUTTLE.
Use an image processing software
such as EZtouch to convert the file
format to one that is supported by
PICTURE SHUTTLE. (Note 1)
The “This file format is not
supported.” message appears.
Note 1: PICTURE SHUTTLE for Windows supports the BMP, Exif-JPEG, Exif-TIFF and JPEG file
formats.
4–5
When you copy a file to a device by dragging it to the device index and
dropping it.
Contents
4
Windows
Problem
Cause
Solution
The “This file name is not supported by this equipment.”
message appears.
An attempt was made to transfer an image with a file name
that is not supported by the
destination device.
In My Computer or Windows Explorer, change the file name to one
that is supported by the device. –>
Refer to Owner’s Manual for the
device.
The “Files exceeded 255
Kbytes cannot be sent to this
equipment.” message appears.
An attempt was made to transfer a file larger than 255 kilobytes to a camera that only
supports file transfer up to 255
kilobytes (DS-7, DX-5 or DX7).
Use a card adapter such as
FlashPath or the PC-AD3 to transfer the file. Alternatively, transfer
the file to a camera that can handle
files larger than 255 kilobytes (such
as the MX series, DX-9 ZOOM or
DX-8).
The “Insufficient card capacity for this unit” message appears.
There is not enough free
space on the SmartMedia in
the camera to copy the file.
Change to a SmartMedia card with
sufficient free space, or delete
some unwanted files on the card.
The “The dropped file cannot
be used by this equipment.”
message appears.
The dropped file cannot be
read by this camera.
Use EZtouch to convert the file to
a format that is supported by the
camera. –> Refer to Owner’s
Manual for the camera.
The “Card is write-protected.”
message appears.
The SmartMedia in the device
is write protected.
Remove the write-protect sticker.
When automatic renaming is specified for drag and drop copying
Problem
Cause
Solution
The “Cound not create a valid
file name.” message appears.
The automatic renaming function could not generate a
unique file name.
When the file is being copied from
a folder index, change the file name
to one that does not duplicate an
existing file in the copy destination
and then copy the file again.
The “Image files other than
Exif format files cannot be
named automatically.” message appears.
The file being copied is not an
Exif-format file.
When the file is being copied from
a device index, first copy the file to
a folder or to the desktop, and then
change the file name to one that
does not duplicate an existing file
in the copy destination and copy the
file again.
4–6
When you are using the Auto Rename function to rename files using information such as the date
Contents
Problem
Cause
Solution
The “Process was aborted as
the file name already exists.”message appears.
The file could not be automatically renamed because the
name to be used for automatic
renaming is already in use by
another file.
Type in the user-defined characters
that do not duplicate an existing file
name.
When you are changing an image file name
Cause
Solution
The character string typed in
as the file name is too long.
Use a file name of 255 characters
or less.
The “Filename is not valid as
a file name because it includes an illegal character.”
message appears.
The character string typed in
includes characters that cannot be used in a file name (“\”,
“/”, “?”, etc.).
Delete any illegal characters from
the file name.
4
Problem
The “Not valid as a file name
bacause it is too long.” message appears.
Windows
4–7
Other errors
Contents
Problem
Cause
Solution
The “Process aborted, insufficient memory.” message appears.
There is not enough memory.
Quit any other applications that are
running.
Alternatively, use the Control Panel
to set the virtual memory.
4
Windows
The “A card has not been inserted.” message appears.
The SmartMedia has been
removed.
Switch off the device, insert the
SmartMedia, and then switch the
device back on.
The “Device error, please
check equipment.” message
appears.
A card read error occurred.
Format the SmartMedia on a
Fujifilm device. If the error still recurs, use an error-free card.
The “The PC mode has been
cancelled.” message appears.
The device is no longer in PC
mode.
Set the device to PC mode. –> Refer to the user’s manual for the device.
The “Device error, low battery.” message appears.
There is too little charge remaining in the device batteries.
If the device uses rechargeable
batteries, charge the batteries. If
the device does not use rechargeable batteries, load new batteries.
Alternatively, use the AC adapter.
The “Communication error.”
message appears.
The stipulated cable is not
being used.
Use the cable supplied with the
device.
A device such as a serial
switcher is being used between the device and the computer.
Connect the computer and the device directly using the cable supplied.
There is too much ambient
electrical noise.
Lower the baud rate in the communication settings.
4–8
Problems with the DS SERIAL TWAIN Driver
When you select TWAIN
Contents
Problem
Cause
Solution
“FUJIFILM_DSS” is not listed
in the Select TWAIN dialog
box.
Some or all of the DS SERIAL
TWAIN files have been deleted.
Re-install Software for Fujifilm Digital Camera.
DS SERIAL TWAIN is not installed.
At TWAIN startup or when you switch ports in the communication settings
Cause
Solution
The “Unsupported equipment
connected. This equipment will
be ignored.”message appears.
The connected device is not
compatible with DS SERIAL
TWAIN.
Specify the correct port in the Communication Settings dialog box.
The “Camera is disconnected,
or power-off.” message appears.
The camera is not switched on.
Switch the camera on.
The camera is not connected.
Connect the camera to the computer and switch the camera on.
The name of the port to which
the camera is connected via
the serial cable differs from the
port name specified in the
communication settings.
Specify the correct port in the Communication Settings dialog box.
The port to which the device
is connected is being used by
the operating system.
Connect the device to another port,
or change the operating system
settings to free up the port.
The port to which the device
is connected is being used by
another application.
Connect the device to another port,
or quit any other applications that
are using the port.
The specified port does not
exist in the system.
Connect the device to another port.
4
Problem
Windows
The “Selected port is not supported, or used by Operating
System or other application.”
message appears.
4–9
Image transfer
Contents
Problem
Cause
Solution
The “Not enough memory”
message appears.
There is not enough memory.
Quit any other applications that are
running.
Alternatively, set the virtual
memory.
The “This image format cannot be proceeded.” message
appears.
The image format is not supported.
Do not select that image.
The file could not be received
correctly because the connection speed is too high.
Lower the baud rate in the Communication Settings dialog box.
Problem
Cause
Solution
The “PC mode is not selected.” message appears.
The camera was switched to
a mode other than PC mode
during operation.
Set the camera to PC mode. –>
Refer to the Owner’s Manual for
the camera.
The “No Card” message appears.
The SmartMedia was removed from the camera.
Switch off the device, load a
SmartMedia, and then switch the
device back on.
The “Not enough camera battery.” message appears.
There is not enough battery
charge for the camera to run
on the batteries.
If the device uses rechargeable
batteries, charge the batteries. If the
device does not use rechargeable
batteries, load new batteries. Alternatively, use the AC power adapter.
The“Communication Error.”
or “Could not set the communication speed.” message appears.
The cable supplied with the
device is not being used.
Use the cable supplied with the
device.
A device such as a serial
switcher is being used between the device and the computer.
Connect the computer and the device directly using the cable supplied.
There is too much ambient
electrical noise.
Lower the baud rate in the Communication Settings dialog box.
The data cannot be received
correctly because too many
programs are running on the
computer at the same time.
Quit any other applications, or
lower the baud rate in the Communication Settings dialog box.
Other errors
4
Windows
5–1
Chapter 5
Appendix
Contents
This appendix gives detailed explanations of the terminology used in this User’s
Guide.
Glossary of Terms .......................................................................... 5-2
5
Windows
5–2
Glossary of Terms
Contents
Application Software
Software programs intended for particular purposes, such as word processing, spreadsheet and graphics programs.
Auto Rename
The automatic allocation of a new name for a file.By automatically
renaming multiple images at a time, this software allows images to be
arranged by the date and time of shooting.
5
Baud Rate
The speed of serial communication. Faster speeds increase the likelihood of errors. At 1 baud, data is modulated once per second.
Windows
BMP
The standard image file format in Windows. The BMP file name extension is “.bmp”.
Camera Port
The port to which a camera is connected.
Clipboard
A shared storage area used to temporarily hold data that has been copied or cut. The clipboard data can also be pasted into other applications.
However, data cannot be pasted into an application that does not support the format of the data in the clipboard.
Color Reduction
A process that allows an image to be represented using fewer colors
(256, 16 or 2 colors). This process reduces the file size but also degrades the image quality.
Convert to 24-bit
The conversion of images to full-color images in which 8 bits are allocated for each of the RGB colors in each pixel. Thus, 24-bit images can
be displayed in up to 16.7 million (224) colors.
5–3
Contents
Copyright Function
The copyright function records and displays the copyright information. If
you specify the copyright in the camera, the copyright information is automatically recorded on images shot from that point on.
Device Icon
Either a camera icon or a printer icon. Indicates a device connected to
the personal computer.
Drag
Refers to the action of moving the mouse with the mouse button held
down.
5
Windows
Drag and Drop
The action of clicking the mouse button on an icon or thumbnail image,
moving the mouse to another location with the button held down so that
the object moves with the mouse, and then releasing the mouse button.
This technique can be used to move or copy a file.
Emboss
Simulation of a raised effect in text or graphics.
Exif File
Exif (Exchangeable image file format) is a format for full-color images for
use in digital still cameras. The Exif file format is compatible with JPEG
and TIFF and can be handled by most image processing software. Exif
also stipulates a recording method for thumbnail images and camera
data.
EZtouch
The application used as the Image window by PICTURE SHUTTLE.
EZtouch can be used to edit, save and print images.
Graying Out
This refers to the display mode for menu items and buttons that are shown
in gray to indicate that they are disabled.
5–4
Contents
Gray scale
Image data that not only represents images as black and white dots, but
also includes information on the levels of density in the image, so that
intermediate tones, such as those in a photographic image, can be processed. However, gray scale images contain no color information.
Image Processing Software
Application software that modifies or enhances images. Adobe Photoshop
is a typical example.
Index Window
A window that displays a list of thumbnail images.
5
Windows
Install
The setting up of software and hardware. Most software installation involves copying files from a floppy disk or CD-ROM to the hard disk on a
personal computer. Specialized installation software allows various program options to be specified.
JPEG
The standardization of still image compression techniques, or the applicable standard. JPEG allows efficient image compression.However, unlike BMP or TIFF, some of the original image data is lost during compression, and the restored image differs from the original. Compression ratios differ, but JPEG can compress images to between a tenth and a
hundredth of the original size.
PC Mode
The camera operation mode used when images are downloaded from a
digital camera. The camera and the personal computer can only communicate successfully if the camera is in PC mode. Refer to the owner’s
manual for the camera for information on selecting PC mode.
5–5
Pixel
Picture element. Also referred to as a dot. Denotes the smallest unit used
in computer image processing.
Contents
Plug-In
Files used to extend the functions of an application. When they are stored
in the designated folder, plug-ins can extend the functionality of an application.
Port
A connector used for data input and output on a computer.
5
Red-Eye
The phenomenon by which a person’s eyes appear red when they are
photographed in low-light conditions using a flash. Red-eye is caused by
the light of the flash reflecting off the inside of the eye.
Windows
Remote Video Playback
The process of controlling a camera from your personal computer and
playing back images stored on the camera as video output.
Scroll Bar
A shaded bar that can be used to move text or graphics displayed in a
window horizontally and vertically in small increments so that the entire
image can be seen. The contents of the Index and Image Source windows can only be scrolled up and down.
Thumbnail Image
An image displayed in reduced form so that the content of the file can be
checked.The “SOFTWARE for FUJIFILM DIGITAL CAMERA” displays
thumbnail images in an Index window to allow the images on a camera
to be checked.
5–6
TIFF
An image format. TIFF images are compatible with most graphics software.
Contents
Time Stamp
The time stamp is the record of the date and time on which the file was
last modified.The time stamp can be checked by clicking the right mouse
button and selecting Properties in Microsoft Explorer, or by selecting
Details from the View menu.
TWAIN
A global standard interface between application software and image capture devices such as digital cameras and scanners.
5
Windows
Contents
1
2
3
4
5
Windows
FGS-991102