1
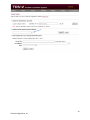
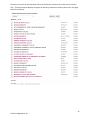
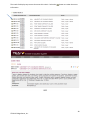
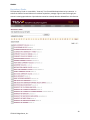
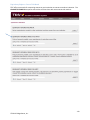
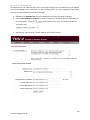
Functional Users Manual
rev. 9.20.13
TES® The Transfer Evaluation System
Research Courses. Track Evaluations. Empower Transfer.
This manual is designed to help you understand this powerful tool in a step by step, easy
to read format. If you have any additional questions we encourage you to contact us for
assistance. We also offer online webinars that give a full overview of TES®. You can sign
up or view the schedule by visiting our website.
COLLEGESOURCE.COM | TES.COLLEGESOURCE.COM | [email protected] | (800) 854‑2670
©2013 CollegeSource, Inc., All Rights Reserved.
Table of Contents
SEARCH:......................................................................................................................................................... 6
Course Finder (for U.S. Schools) ............................................................................................................... 6
Institutional Profile ............................................................................................................................... 8
Transcript Key ..................................................................................................................................... 10
Course Search ..................................................................................................................................... 11
Data Sets ............................................................................................................................................. 14
Show All Courses ................................................................................................................................. 17
Route evaluation to faculty/advisor with no course attached ........................................................... 18
Single or Batch Mode .......................................................................................................................... 19
Version History .................................................................................................................................... 21
Create Equivalency.............................................................................................................................. 23
Find Courses Containing the Following Keyword(s) ........................................................................... 25
Search My Courses By Department .................................................................................................... 25
Route evaluation to faculty/advisor with your institution course attached ...................................... 30
E-mail course descriptions to outside entity ...................................................................................... 32
Course Finder (for Non U.S. Schools) ...................................................................................................... 33
Search by Geographic Location........................................................................................................... 36
Find Courses By Title, Accreditation and State ................................................................................... 37
Equivalency Finder .................................................................................................................................. 39
Course List Report ................................................................................................................................... 41
Equivalency Report ............................................................................................................................. 47
Course Change Explorer .......................................................................................................................... 51
TRACK: ......................................................................................................................................................... 60
My Evaluations ........................................................................................................................................ 60
View the courses from sending institution’s catalog (Context View) ................................................. 66
Switch to ‘My Entered’ View ............................................................................................................... 71
All Evaluations ......................................................................................................................................... 72
Closed Evaluations .................................................................................................................................. 73
Send Email Reminders ............................................................................................................................ 75
MATCH: ....................................................................................................................................................... 77
Equivalency Manager .............................................................................................................................. 77
© 2013 CollegeSource, Inc.
2
De-Dupe .............................................................................................................................................. 83
Add new equivalencies from Equivalency Manager ........................................................................... 86
Create equivalencies with more than one course from sending institution (or your institution)...... 90
Select several different departments for equivalency........................................................................ 91
Batch Mode with User Added Course ................................................................................................. 92
Switch to No Equivalency View ........................................................................................................... 96
Groups ................................................................................................................................................. 97
Group Report .................................................................................................................................... 103
Equivalency Explorer ............................................................................................................................. 109
Equivalency Explorer: Reciprocal ...................................................................................................... 109
Equivalency Explorer: Course Title Match ........................................................................................ 113
Equivalency Explorer: Course Code Match ....................................................................................... 117
Equivalency Explorer: Course Tag Audit ........................................................................................... 119
User Added Courses .............................................................................................................................. 124
Course Tags & Outlines ......................................................................................................................... 132
Course Tags ....................................................................................................................................... 133
Course Outlines ................................................................................................................................. 135
SUPPORT ................................................................................................................................................... 138
Import Specifications ............................................................................................................................ 138
MANAGE ................................................................................................................................................... 144
User Preferences ................................................................................................................................... 144
Usage Statistics ..................................................................................................................................... 145
Evaluation Workflow............................................................................................................................. 149
Public View Management ..................................................................................................................... 150
User Management ................................................................................................................................ 156
Add New User ................................................................................................................................... 157
Set User Rights .................................................................................................................................. 159
Email User(s) ..................................................................................................................................... 164
Export Options ...................................................................................................................................... 165
Save Your Username/Password............................................................................................................... 166
© 2013 CollegeSource, Inc.
3
Introduction:
The purpose of this User’s Manual is to assist our clients and internal staff with the functional workings of
the CollegeSource, Inc. Transfer Evaluation System (TES®). Individuals that will use this manual include
Registrar and Admission staff, advisors, faculty, and CollegeSource staff.
TES® is an invaluable tool for researching institutional and course information for determining the
transferability of courses from a sending institution to your institution. TES® consists of a central database
of institutional catalogs maintained by CollegeSource for display of the course specific information
including the description, the number of units/credits, prerequisites or co-requisites, etc. Course
Descriptions set up as Evaluation tasks may be routed to advisors and faculty and tracked within the
database. Building transfer equivalencies can be accomplished in a few easy steps. Equivalencies may be
displayed on your website for public view. Tools consisting of several different reports can provide
additional assistance with the transfer evaluation process including a comparison of two catalogs from
the same institution for display of the changes to courses, dropped courses, and added courses. TES® can
save many hours per day for a staff member working with the transfer evaluation process.
© 2013 CollegeSource, Inc.
4
After logging in to TES®, the TES® homepage is displayed. Maneuvering is accomplished by using the Tabs
in the Header box (SEARCH, TRACK, MATCH, SUPPORT, MANAGE, LOGOUT) as well as easy access to the
link to the CollegeSource website. The individual that has logged in is automatically connected to their
institution’s catalog and institutional information, and they may access any other institution’s catalogs
and information in TES®.
© 2013 CollegeSource, Inc.
5
First, let’s review how an institution can research institutional and course information from a sending
institution. This will provide that valuable information including accreditation, calendar system, grading
scale, course level, course description, and much more.
SEARCH:
Course Finder (for U.S. Schools)
Type in the name, a partial name, or an abbreviation of the institution you would like to research. For this
example, the institution’s full name is entered. The partial name of northern colorado, the abbreviation
of unc, and other selections could be entered. Select the
SEARCH
button or hit the return/enter key.
Select the institution.
© 2013 CollegeSource, Inc.
6
Use the icons at the top right to access institutional information.
© 2013 CollegeSource, Inc.
7
Institutional Profile
•
The building icon
is used to access the Institutional Profile for the institution. This information
is pulled from reliable sources such as the Office of Postsecondary Education and is updated every
year.
o Address, phone number, degrees offered, calendar system, and accreditation among
other things are listed on this page.
© 2013 CollegeSource, Inc.
8
•
Accreditation Terms:
o Accredited - Institutions and/or programs that request an agency's evaluation and that
meet an agency's criteria are then "accredited" by that agency.
o Expired – Accreditation for institution has expired.
o Pre-Accredited - The status of public recognition that an accrediting agency grants to an
institution or program for a limited period of time that signifies the agency has
determined that the institution or program is progressing towards accreditation and is
likely to gain accreditation before the expiration of that limited period of time.
o Probation - A public status signifying that conditions at an accredited institution
jeopardize its ability to meet the Criteria for Accreditation. Only the Commission’s Board
of Trustees, acting on a recommendation by an evaluation team, the Commission’s
president, or a committee of peer reviewers, can place an institution on probation. The
institution must provide clear evidence of its progress toward ameliorating those
conditions at its next comprehensive evaluation. The maximum period of probation is
two years.
o Resigned - Denotes an institution or program that voluntarily withdrew its recognition
as an accredited institution or program.
o Terminated - The status of an institution or program that an agency no longer accredits.
•
The globe icon
© 2013 CollegeSource, Inc.
is used to open another browser to the institution’s website.
9
Transcript Key
•
The transcript key icon
is used to open another browser with the institution’s transcript key
(aka transcript legend, backing sheet). This key provides grading information, course levels,
accreditation, etc. The transcript key is produced by the institution and will be updated in TES®
as changes are provided.
Back to the first page accessed in Course Finder: You can access the institution’s course information by
either selecting the DATA SET or PDF CATALOG. Data sets normally date back to 1994. Older catalogs
might be listed in the PDF catalog list. Use the drop down menu to select the catalog year desired.
© 2013 CollegeSource, Inc.
10
Course Search
Another feature is to select a course from the institution’s data set by typing it in the COURSE SEARCH:
COURSE CODE or COURSE TITLE Box.
•
These searches will display every version of that course from that institution’s data sets in the
TES® database.
© 2013 CollegeSource, Inc.
11
•
This is the result of the ant 100 search. You may select any number of these course versions and
display the course information.
© 2013 CollegeSource, Inc.
12
© 2013 CollegeSource, Inc.
13
•
Don’t know the course code? Use the COURSE TITLE SEARCH if you want to look for a course
but don’t know the course code/number. Enter the full or partial COURSE TITLE. All versions of
any course with these words in the title will be displayed.
Data Sets
Another way to select the institution’s course information is to use the Data Set feature.
•
Select a catalog from the DATA SET drop down menu to enter the institution’s course database.
•
When the Data Set is selected, another icon
the institution’s PDF catalogs.
© 2013 CollegeSource, Inc.
is displayed at the top of the page for access to
14
The COURSE SEARCH function may be accessed from this page also (as outlined above except only the
version will show for the selected dataset).
Use the drop down menu to select a prefix from the institution’s data set.
© 2013 CollegeSource, Inc.
15
Select the desired course: The example below uses Chemistry as selected from the drop down menu and
then CHEM 112 is viewed from the University of Northern Colorado.
The display lists information about the course that is provided from the institution’s catalog. This includes
the description, units/credits, prerequisites, co-requisites and any information that the institution has
listed in their catalog for this course.
More icons are now displayed.
•
E-mail the information to someone by clicking on the envelope icon
. Enter the e-mail
address, subject, and elect to send yourself a copy. The person it is sent to will respond by email, not through TES®. Use this option to send the information to a student, etc. The course
description(s) are cut and pasted into the Email automatically. You may customize this Email.
•
Print the information by using the printer icon
© 2013 CollegeSource, Inc.
.
16
Show All Courses
If you want to view courses from multiple departments, from any prefix/department drop down list, scroll
to the bottom to “Show All Courses”. This allows you to browse all courses from that data set and select
multiple courses from various departments for viewing. You may also create equivalencies or route out
for evaluation with these courses attached from multiple departments.
© 2013 CollegeSource, Inc.
17
Route evaluation to faculty/advisor with no course attached
Need another TES User on your campus to determine if the course should transfer? The footsteps or
tracking icon
•
is used to route the evaluation task to an academic department for evaluation.
This sets up an evaluation task to be routed out for the determination of the equivalency for this
course. No course has been selected from the Home Institution (your institution) in this example.
An Alert will be displayed if you have in your queue or have sent in the past an Evaluation Task to
be reviewed for this selected course. Select the
button for viewing these tasks.
© 2013 CollegeSource, Inc.
18
•
The ASSIGN TO drop down will list your Users with the Evaluation Tracker User Rights and will
have their titles listed; your advisors and faculty selection for routing of these evaluations.
(See section on Manage/User Management for this setup.)
•
SEND EMAIL ALERT to the person ASSIGNED TO as the default option. Remove the check
mark if you don’t wish to send the Email Alert. Make sure that all reviewers have
[email protected] as an acceptable email address so that it doesn’t go into their Spam
folder.
•
Type any notes or questions in the COMMENTS field. This is optional. These comments will
be attached to the evaluation task and will not be displayed in the Public View.
Single or Batch Mode
• Select either SINGLE MODE or BATCH MODE.
o SINGLE MODE is used to create one evaluation task and is the default option. If two
or more courses were listed from the sending institution, then they would all be sent
as one task to the evaluator.
o BATCH MODE is used to create multiple evaluation tasks, one for each sending course
listed. An entire group of courses from one department could be sent to the person
to determine equivalents. One Email is sent to the person Assigned To.
© 2013 CollegeSource, Inc.
19
© 2013 CollegeSource, Inc.
20
Back to the course information page for other functions:
Version History
• Select VERSION HISTORY to display all versions of the selected course.
© 2013 CollegeSource, Inc.
21
© 2013 CollegeSource, Inc.
22
Create Equivalency
•
Select the puzzle piece icon
the evaluation of this course.
•
If you store your equivalencies in TES®, a search will be performed to see if an equivalent has been
assigned. As you can see in this example, no equivalencies were found for CHEM 112.
© 2013 CollegeSource, Inc.
to view existing equivalencies and to access tools to assist with
23
•
In the example with CHEM 111, a gray puzzle piece is displayed instead of a gold one. This
indicates that there is an equivalency for this course stored in TES.
•
An equivalency is found. TES® searched the stored equivalencies in my account for this
institution and found the equivalent of UNC’s CHEM 111 to my institution’s course CHEM 111.
© 2013 CollegeSource, Inc.
24
Find Courses Containing the Following Keyword(s)
Having trouble locating the equivalent course in your catalog? Use the SEARCH MY COURSES BY
KEYWORD and FIND COURSES CONTAINING THE FOLLOWING KEYWORD(S) function to assist with
locating a possible equivalency from your institution’s catalog.
•
•
Select the appropriate dataset for your institution.
Select either “Course contains ALL the checked items” or “Course contains ONE of the checked
items”. TES® will search for these keywords in the course titles and in the course descriptions of
your institution’s courses.
Search My Courses By Department
Use SEARCH MY COURSES BY DEPARTMENT to SELECT A DATASET to access your catalog and select a
course.
© 2013 CollegeSource, Inc.
25
•
Select the course(s) from your data set that is the perceived equivalent. Now the display is of
the sending institution’s course and your institution’s course(s).
•
Use the puzzle piece icon
© 2013 CollegeSource, Inc.
to CREATE the equivalent for the TES® database.
26
You will be asked to Confirm the navigation to Equivalency Manager to create the equivalency:
© 2013 CollegeSource, Inc.
27
•
•
•
•
•
Effective Date Range: Add a date range for the equivalency or leave blank. A default begin date
will be inserted that is the first year a course appeared in a catalog from the transfer school.
o Effective dates “limit and equivalency. When you set an effective begin date, the
equivalency will be “inactive” until the begin date. If you leave the begin date blank, the
equivalency is “active” back to the stone age and beyond!
o When you set an effective end date, the equivalency will be inactive after the end date.
If you leave an end date blank, your equivalency does not expire.
o Most users choose an effective begin date based on one of three factors: a) the first year
of accreditation (from whatever accreditation bodies you choose to recognize), or b) the
first year a course appeared in a catalog from the other school (look for the “version
history” fields shown for each course), or c) the date the equivalency was created. We
have chosen b) as the default value to try and save users some data entry.
Elect to HIDE FROM PUBLIC VIEW if this equivalent should not be displayed on your website.
o Why would you hide an equivalency, you ask, could be a number of reasons… maybe you
have created the equivalency for one student, maybe the academic department doesn’t
want it listed in the Public View as they only assign it to certain students, etc.
Add any Optional Public Notes desired for the Public View which will be displayed when this
equivalency is selected.
Add any Optional Internal Notes desired which will be displayed for internal TES® users on your
campus only.
Select the
button.
NOTE: If you are currently not utilizing the Public View feature and plan to in the future, do not
HIDE all your equivalencies when building them for the database. When you later utilize the Public
View, you would be required to change all of the hidden equivalencies that you want to be
displayed to not be hidden.
© 2013 CollegeSource, Inc.
28
© 2013 CollegeSource, Inc.
29
Route evaluation to faculty/advisor with your institution course attached
Need someone to review or approve your selection of equivalent course? Use the tracking icon
route the course out for approval of the course(s) selected.
to
This time the selected course(s) from your institution is attached. Proceed with selecting the ASSIGN TO
user and add any COMMENTS desired. The Comments will not be displayed in the Public View.
© 2013 CollegeSource, Inc.
30
© 2013 CollegeSource, Inc.
31
E-mail course descriptions to outside entity
Use the e-mail icon
•
if desired to send the course descriptions to someone not listed in TES®.
Enter the e-mail address, subject, and elect to send yourself a copy or not. The person it is sent
to will respond by e-mail, not through TES®. Use this option to send the information to a
student, etc. The course description(s) are cut and pasted in the Email automatically. You may
customize this Email. You may send to more than one e-mail address by typing in addresses
with a comma or semi-colon to separate the addresses.
© 2013 CollegeSource, Inc.
32
•
The Email will be sent on behalf of you from [email protected].
Course Finder (for Non U.S. Schools)
Use this feature to search for information on international institutions. There are numerous catalogs for
non-U.S. schools in the database.
Type the institution name in the box and select the Non U.S. Schools button or select the Alternate Search
link which will bring up a dropdown menu of countries outside of the U.S. included in the TES® database.
© 2013 CollegeSource, Inc.
33
© 2013 CollegeSource, Inc.
34
Selecting a country from the drop down menu will display the institutions from that country listed in
TES®. The below example displays the output of selecting Canada from the drop down menu (15 pages
and 370 institutions).
© 2013 CollegeSource, Inc.
35
Course Finder/Alternate Search
Search by Geographic Location
Search for U.S. institutions within a mile range of a certain city and state:
Results:
© 2013 CollegeSource, Inc.
36
SEARCH:
Course Finder/Alternate Search:
Find Courses By Title, Accreditation and State
This feature is used to locate certain courses searched by title from an institution in a particular state
with a specified accreditation.
•
•
•
Type in the Course Title.
Select the appropriate Accreditation.
Select the State.
© 2013 CollegeSource, Inc.
37
The results list displays any courses that meet this criteria. Select the
information.
© 2013 CollegeSource, Inc.
button to review the course
38
SEARCH:
Equivalency Finder
The Equivalency Finder is a searchable, “view only” list of established equivalencies by institution. It
echoes the Public View and allows users without equivalency manager rights to search through your
account’s existing equivalencies. Equivalencies cannot be created, edited or deleted from this function.
© 2013 CollegeSource, Inc.
39
Select an Institution:
Many searches can be performed on stored equivalencies:
•
•
•
•
Search by Course Code – enter a course code and then select the appropriate radio button,
Transfer Course, Home Course or Both.
Search by Effective Date – select Active for current equivalencies, Inactive for those
equivalencies that have an end date in the past, or Show All to see both Active and Inactive
equivalencies.
Select how many Records to be displayed per page.
Sort the list by Transfer Course, Home Course, Begin Date, or End Date.
© 2013 CollegeSource, Inc.
40
If an institution has an Equivalency Group Report, the Report will be displayed and can be viewed. Or
select the Submit button to view all equivalencies.
Course List Report
These reports are generated for display of courses from an institution. They may be used for advising; a
report can be produced for a student transferring from another institution, or for a current student that
needs to attend elsewhere for a semester and return to your institution, used as a Transfer Credit Report,
or any number of purposes.
•
•
Name the report in the Report Title Field (display will be all upper case).
To share this report with other TES Users on your campus that have access to these reports thru
their User Rights, check the Share report? Box. Non-owners of the shared reports cannot edit
these reports.
•
Select
.
© 2013 CollegeSource, Inc.
41
© 2013 CollegeSource, Inc.
42
•
Type in an institution and select
•
Select the institution.
© 2013 CollegeSource, Inc.
.
43
•
Select the DATA SET.
•
Add the courses by using the department drop down menu and selecting the
button. Grades may
be added to each course. The list of courses selected will appear at the bottom of the page.
© 2013 CollegeSource, Inc.
44
•
Select
© 2013 CollegeSource, Inc.
to display the course description for each course.
45
© 2013 CollegeSource, Inc.
46
Equivalency Report
Run an
(Equivalency Report):
•
This displays the equivalencies from the TES® database for any of the courses.
•
This report may be printed
© 2013 CollegeSource, Inc.
or e-mailed
.
47
•
Equivalencies are listed if articulated. Those that are not are listed as No equivalency found.
•
By selecting SEE COURSE DETAIL, the course description is returned to set up the evaluation or
creation of the equivalency.
© 2013 CollegeSource, Inc.
48
© 2013 CollegeSource, Inc.
49
These Course List Reports can be edited from the main screen: an EQ REPORT may be run, RENAME the
report, COPY the report, SHARE the report with other TES Users on your campus, or DELETE the report.
These reports can be sorted by the REPORT TITLE column or the DATE column.
© 2013 CollegeSource, Inc.
50
SEARCH:
Course Change Explorer
Having trouble and taking too much valuable time to find changes in versions of another institution’s
catalog? This tool is used to compare an institution’s catalogs from one year to the next. It can be used
for a catalog review when keeping your transfer equivalency database up-to-date. This saves valuable
time as TES® will highlight the changes between catalogs that are found in a matter of seconds, and makes
it very easy for the evaluator to determine what needs to be reviewed.
•
Type in name of the institution for comparison. Select
© 2013 CollegeSource, Inc.
.
51
•
Select the institution.
•
Select the two catalogs to be compared and
.
TES® will compare every course code, course title, course description, units/credits, etc. from these two
catalogs and provides a list of these changes along with a list of Dropped Courses and Added Courses.
© 2013 CollegeSource, Inc.
52
The CHANGED? List reports each course compared and marks the appropriate column for changes.
•
Select one of the entries by selecting the
© 2013 CollegeSource, Inc.
icon:
53
•
The first column displays the 2010-12 (older) version of this course and the second column
displays the 2012-14 (newer) version. The third column displays and highlights the changes with
the blue text as added text and the pink text as dropped text.
•
Use the puzzle piece icon
evaluation.
© 2013 CollegeSource, Inc.
to create an equivalency or the footstep icon
to route out for
54
•
The puzzle piece icon
displays the Course Finder screen with tools to assist with
evaluation. If you have an equivalent in the TES® database for this course, it will be
displayed.
© 2013 CollegeSource, Inc.
55
•
The footstep icon
determination.
© 2013 CollegeSource, Inc.
displays the Evaluation Tracker screen for routing course for transfer
56
The DROPPED? List reports any courses that were dropped from the older catalog to the newer catalog.
© 2013 CollegeSource, Inc.
57
The ADDED? List reports any new courses added to the later catalog.
•
From here, select a course for review and evaluation.
© 2013 CollegeSource, Inc.
58
•
Use the puzzle piece icon
or the footstep icon
to create or route for evaluation. If
you have an equivalent in the TES® database for this course, it will be displayed.
© 2013 CollegeSource, Inc.
59
The Tracking Tab is used to access Evaluation Tasks assigned to an individual. Current tasks and closed
tasks can be viewed. E-mail Reminders can be created by an Administrator. This is the place where faculty
and advisors view their tasks and make the equivalent determination.
TRACK:
My Evaluations
The open evaluation tasks assigned to person logged in are displayed. Select a task to view the details.
These tasks may be sorted by any of the column headers – TRANSFER INSTITUTION, COURSE(S), DATE, or
ENTERED BY. The Status of the task is noted.
© 2013 CollegeSource, Inc.
60
This task was routed to a faculty member for evaluation. An evaluation log is started. The decision is
attached to the evaluation log after the faculty member logs into TES® and reviews. This log is attached
to this course in TES® for viewing of these actions at any time. This information is stored with the
evaluation task, not with the course equivalent, and will not be displayed in the Public View.
•
•
•
•
•
The person assigned the evaluation task will select their response by using the SELECT ACTION
drop down.
Selecting Approve does not require a Note to be attached.
Selecting Deny requires a Note unless one of the reasons with Deny is selected.
Need More Information requires a Note because you need to know what information they desire.
There is not a way to attach another institution’s syllabus to an evaluation task in TES.
Re-Assign is used for that person to re-assign the evaluation task to another user.
© 2013 CollegeSource, Inc.
61
•
Select/Change Equivalent Course is used for the person assigned to select a course, or a different
course from your institution’s catalog, or one of your User Added Courses.
o The evaluation log will track the original course from when the evaluation task was
created and the new course selected. One line is listed with the Request Initiated and
another line for the Proposed Equivalent. If no course is selected from your institution,
the Proposed equivalent course will be blank.
Select the action and your Dataset, then
© 2013 CollegeSource, Inc.
:
62
Select the correct department from the drop down and
© 2013 CollegeSource, Inc.
:
63
Select the correct course from the drop down and
© 2013 CollegeSource, Inc.
:
64
Be sure to select Approve and
to finalize this transaction.
This task will be sent back to the initiator and another line added to the Evaluation Log to indicate that a
course or a different course was selected.
© 2013 CollegeSource, Inc.
65
View the courses from sending institution’s catalog (Context View)
Use the context view link at the end of the sending institution’s course description to view the sequence
of courses from that academic department in the selected catalog. This feature will assist when
determining equivalencies where a sequence is important or for viewing other course descriptions from
similar courses.
© 2013 CollegeSource, Inc.
66
Click on any of the
signs to view the course description for that particular course.
© 2013 CollegeSource, Inc.
67
Select Version History for review of all versions of this transfer course:
© 2013 CollegeSource, Inc.
68
© 2013 CollegeSource, Inc.
69
To create the equivalency from this screen, use the drop down menu under SELECT ACTION and select
Create Equivalency and Close. The equivalency will be created and the evaluation task closed.
© 2013 CollegeSource, Inc.
70
Switch to ‘My Entered’ View
Use this function to view and select tasks that you have entered and assigned to other users in TES. (Not
just the ones awaiting action from you.)
© 2013 CollegeSource, Inc.
71
All Evaluations
An Administrator can view all open evaluations by selecting All Evaluations. These are evaluation tasks
for all TES® users on your campus that are open and still awaiting a response. Any evaluation tasks that
have been approved or denied will not be displayed as those will be listed in the initiator’s queue.
© 2013 CollegeSource, Inc.
72
Closed Evaluations
The evaluation tasks listed here have been closed. When Creating an Equivalency from the Evaluation
Tracker, the task is closed and the equivalent created. Evaluation tasks cannot be deleted from TES.
•
Select an institution for viewing the closed tasks.
•
Select the appropriate evaluation task.
A task may be Re-opened, if an equivalency was not created. More information might have been
obtained that can be supplied to can be used for the determination of the equivalent. Select the
button and confirm that you want the task to be re-opened.
© 2013 CollegeSource, Inc.
73
© 2013 CollegeSource, Inc.
74
TRACK:
Send Email Reminders
An administrator has the ability to send E-mails to Assigned Users with Open Evaluations. These may be
filtered by a specific institution or by the age of the evaluation task. Send to all listed or check the box
next to the appropriate staff member’s name.
© 2013 CollegeSource, Inc.
75
A scripted e-mail reminder will be sent to the staff selected. The specific [X] value will be applied for
each user. Elect to send yourself a copy of the e-mail if desired.
© 2013 CollegeSource, Inc.
76
The Match Tab is used to manage your equivalencies and run reports. Add state approved course tags to
your courses and upload course outlines to your courses here.
MATCH:
Equivalency Manager
This list displays the equivalencies that have been stored in TES®. Equivalancies can be created, edited
and deleted from this screen. The link for this list to display on your website called the Public View, is
managed by the administrator and can be found under the Manage Tab and Public View Management
(see that section of the manual for instructions). Select an institution for viewing.
© 2013 CollegeSource, Inc.
77
All equivalencies are displayed and many searches can be performed on stored equivalencies:
•
•
•
•
Search by Course Code – enter a course code and then select the appropriate radio button,
Transfer Course, Home Course or Both.
Search by Effective Date – select Active for current equivalencies, Inactive for those
equivalencies that have an end date in the past, or Show All to see both Active and Inactive
equivalencies.
Select how many Records to be displayed per page.
Sort the list by Transfer Course, Home Course, Begin Date, or End Date.
© 2013 CollegeSource, Inc.
78
View the details of the equivalency by selecting the
button. Adding new equivalencies and Group
creation can be performed here. See instructions later in this section.
The equivalency is tagged at the bottom with the Creator of the equivalent and the date and time
created. This information will not be displayed in the Public View. The equivalent may be Edited or
Deleted from this screen.
© 2013 CollegeSource, Inc.
79
© 2013 CollegeSource, Inc.
80
•
Edit Header - Change or add Effective Date Range, change selection to Hide From Public View, or
change or add Public or Internal Notes.
© 2013 CollegeSource, Inc.
81
Edit Courses:
•
Click on an
•
Click on a
•
Click
to delete either the transfer or home course.
to add either a transfer or home course.
when finished editing.
© 2013 CollegeSource, Inc.
82
De-Dupe
This tool allows you to find, edit, and/or delte equivalencies where the values for the transfer course(s)
and home course(s) are identical to those of another equivalency.
All duplicate equivalencies will be listed with the total count of those equivalencies. Select the
button to see the details.
© 2013 CollegeSource, Inc.
83
Delete the undesired equivalency by selecting the
listed with the
button and edit the Effective Date.
© 2013 CollegeSource, Inc.
button, or select one of the equivalencies
84
© 2013 CollegeSource, Inc.
85
Add new equivalencies from Equivalency Manager
Select the appropriate data sets:
© 2013 CollegeSource, Inc.
86
Select the appropriate departments for the transfer course and home course:
© 2013 CollegeSource, Inc.
87
Select the desired courses for the equivalency and then the
© 2013 CollegeSource, Inc.
button:
88
Add the necessary information and
© 2013 CollegeSource, Inc.
:
89
Create equivalencies with more than one course from sending institution (or your
institution)
• One to many, many to one, and many to many course rules can be built using this function.
• Select the appropriate courses from both drop down menus and View. The equivalent can be
created or routed out for evaluation.
© 2013 CollegeSource, Inc.
90
Select several different departments for equivalency
Several departments on either the sending or receiving side can be selected by using the drop down
menu and selecting ‘SHOW ALL COURSES’ at the very bottom of the list.
© 2013 CollegeSource, Inc.
91
Batch Mode with User Added Course
This can be used when you need to assign a User Added Course to a number of courses from a sending
institution. In this example, the Auto Motorsports Technology courses will not transfer.
•
•
•
•
Select the appropriate department from the drop down list of sending courses.
Select the Batch Mode radio button.
If all courses should be included, select the Check All box. If not, select the appropriate courses.
Select the User Added Course from your list of departments.
•
Select
.
© 2013 CollegeSource, Inc.
92
© 2013 CollegeSource, Inc.
93
•
Assign the criteria desired; Effective Date Range, Public View Hide, Public or Internal Notes.
•
•
Select the
button.
Each course will be assigned the “+++ No Transfer” User Added Course.
© 2013 CollegeSource, Inc.
94
© 2013 CollegeSource, Inc.
95
Switch to No Equivalency View
This function can be used for display of those courses from the sending institution that do not have
equivalents in TES®. This is a good way to keep a feeder institution’s catalog complete with equivalents.
© 2013 CollegeSource, Inc.
96
Courses that have not been articulated from Front Range Community College to Collegesource University
are now displayed. Add equivalencies for these courses by first selecting the appropriate
button.
Use the puzzle piece icon
evaluation.
to create the equivalency or the footstep icon
to route out for
Groups
Do you have the need to display a list of equivalents for an institution in your Public View. These reports
are used to display groups of courses, lists, articulation agreements, etc. The equivalents in these groups
© 2013 CollegeSource, Inc.
97
are kept up-to-date by TES®. If any change is made to the equivalent it is changed in the Group and the
Group Report because these are dynamic reports not static reports. TES® pulls the current equivalent
every time one of the lists is displayed.
Equivalents must be built for an institution and stored in TES® before groups can be built. Then Group
Reports can be built from the Groups.
Select an institution from Equivalency Manager. In the upper right hand corner, select the
button.
Any Groups and Group Reports that have been previously created will display. To create a new Group,
select
.
© 2013 CollegeSource, Inc.
98
Enter the Header information for the Group:
•
Group Name
© 2013 CollegeSource, Inc.
99
•
•
•
Optional Public Note. Using HTML codes will allow for bolding, underlining, italics, paragraphs,
etc.
Optional Internal Note
The default is to Hide from the Public View. Remove the checkmark if you don’t want to hide
the Group.
Once you
, you will be prompted to add the courses to the Group:
© 2013 CollegeSource, Inc.
100
As you add the courses, they will display under the Header:
© 2013 CollegeSource, Inc.
101
Once you’ve added all the courses, select
to see what the Group looks like. From here, if
needed, Edit the Header, Edit the EQ List or Delete the Group.
© 2013 CollegeSource, Inc.
102
Group Report
Add all the Groups that you need for the Group Report. When you are ready to create the Group
Report, select the
© 2013 CollegeSource, Inc.
button.
103
Enter a report title and any information you want displayed in the Header. The default for hiding the
Report from Public View is checked so that the Report is not displayed until you’ve made all of the
additions and corrections that are needed. Using HTML codes will allow for bolding, underlining, italics,
paragraphs, etc.
© 2013 CollegeSource, Inc.
104
Once Submitted, you can view the text and add groups:
© 2013 CollegeSource, Inc.
105
Add the Groups in the order you want them displayed on the Report. You can View the groups with the
button and also Remove any Groups with the
© 2013 CollegeSource, Inc.
button.
106
Click
to display the Report format:
© 2013 CollegeSource, Inc.
107
You can edit the Header with the
button and edit the Groups with the
button at the top of the screen. You can also delete the list with the
button.
When you are ready for the Report to be displayed in your Public View, Edit the Header and remove the
checkmark from Hide from Public View and click the
© 2013 CollegeSource, Inc.
button.
108
MATCH:
Equivalency Explorer
Several different reports may be run from the Equivalency Explorer. These reports provide helpful
comparison reports of courses and equivalencies from other institutions.
Equivalency Explorer: Reciprocal
This report lists the equivalencies involving courses from your institution created by other institutions that
have subscribed and store their equivalencies in TES®.
© 2013 CollegeSource, Inc.
109
•
Select the institution
•
Select the Equivalency Data Set
© 2013 CollegeSource, Inc.
110
This displays any course equivalencies built by the transfer institution equivalent to courses from my
institution. View course descriptions using the
© 2013 CollegeSource, Inc.
button.
111
Create or route for evaluation of equivalency.
© 2013 CollegeSource, Inc.
112
Equivalency Explorer: Course Title Match
TES® offers some tools for comparing courses at your institution to courses at another institution. The
COURSE TITLE MATCH compares course titles and lists those with exact course title matches.
© 2013 CollegeSource, Inc.
113
•
Select the institution.
•
Select the Data Set for the transfer institution.
© 2013 CollegeSource, Inc.
114
•
Select the appropriate Data Set for your institution.
© 2013 CollegeSource, Inc.
115
TES® filters out any course titles with multiple matches. These can be added back in by checking the box
and selecting
. The results with exact course title matches are then displayed. Equivalencies can
be built from here. Check the appropriate lines to add as an equivalent or CHECK ALL to add them all as
equivalents and scroll to the bottom of the screen to submit.
© 2013 CollegeSource, Inc.
116
Equivalency Explorer: Course Code Match
This report is used mainly by those states that have common course numbering. It will display course
code matches of courses from your institution’s catalog with the courses from another institution.
© 2013 CollegeSource, Inc.
117
•
•
•
•
Select the institution.
Select the appropriate Data Set for the transfer institution
Select the appropriate Data Set for your institution.
Equivalencies can be built from here. Check the appropriate lines to add as an equivalent or
CHECK ALL to add them all as equivalents and submit at the bottom of the page.
© 2013 CollegeSource, Inc.
118
Equivalency Explorer: Course Tag Audit
This function is for use in states where coordination by general education (or other) tagging system
needs to occur. The tool assembles a list of courses from an institution that has one or more associated
tags. This list is then compared to a set of equivalencies.
© 2013 CollegeSource, Inc.
119
Enter the institution and select the appropriate entry:
Select the correct data set:
© 2013 CollegeSource, Inc.
120
A list will be displayed with all of the Course Tags assigned in TES® for this institution.
© 2013 CollegeSource, Inc.
121
Select the Catalog data set for your institution under RUN EQ REPORT USING:
•
Where equivalencies exist, you will see the matching course and tags. If you want to see details,
click on the
button to the left of each line.
© 2013 CollegeSource, Inc.
122
© 2013 CollegeSource, Inc.
123
•
Where equivalencies DO NOT exist, you will see a link labeled “Undetermined.” This link will
hook you back into the Course Finder utility and begin the process of a new evaluation.
MATCH:
User Added Courses
Administrators and those users with Equivalency Manager Rights may create department prefixes and
course numbers not in your catalog. These can be used as “wildcards” or “electives” for courses that
transfer but there is not a direct equivalent, to award the additional credit to a course from the sending
institution that is more credits than your institution’s course, etc.
•
Choose your Dataset.
© 2013 CollegeSource, Inc.
124
USER ADDED DEPARTMENT(S):
•
Add the Department Name and Abbreviation and
© 2013 CollegeSource, Inc.
.
125
Now that the department is built, add the courses by selecting the
button:
USER ADDED COURSE(S): ADD NEW:
© 2013 CollegeSource, Inc.
126
•
Check the appropriate Department box.
•
Select
.
© 2013 CollegeSource, Inc.
127
•
•
Add the desired fields. A detailed description may be listed with these added courses.
.
© 2013 CollegeSource, Inc.
128
You may add the User Added Courses to all of your departments in your catalog and the ones that you
have added all at once, once for each level (100, 200, 300, 400).
•
Check the CHECK ALL
© 2013 CollegeSource, Inc.
box and
.
129
•
Type in the desired information and
departments. Now repeat for 200 and so on.
© 2013 CollegeSource, Inc.
. This creates the 100 Level for all the
130
To find equivalencies that are attached to your User Added Course, click the #EQS link and the
institutions with equivalencies tied to these courses will be displayed. Remember, these User Added
Courses were added to an equivalency by selecting a dataset. To see the courses attached, you need
to view each dataset.
© 2013 CollegeSource, Inc.
131
MATCH:
Course Tags & Outlines
•
Select your DATA SET.
© 2013 CollegeSource, Inc.
132
Course Tags
Course Tags are to be used when there are state approved codes corresponding to courses from the
state’s institutions. Talk to staff at CollegeSource if your state has codes that you would like to be added
to TES®. An example of the tags added to courses is shown below. Administrators have rights to attach
these tags to courses from your institution.
Once these codes are added to TES®, you can then attach the code to your courses. Select the
appropriate course tag and
© 2013 CollegeSource, Inc.
.
133
The Course Tag will then be displayed within the course description for all TES clients to view:
© 2013 CollegeSource, Inc.
134
Course Outlines
• Select a course to add an outline. These Outlines are meant to be learning outcomes, etc., not
syllabi. Administrators may add these outlines to courses from your institution.
•
Use the
Outline.
© 2013 CollegeSource, Inc.
button to locate the appropriate PDF file in your directory to add a Course
135
The Outline will then be indicated with an Outline icon
in TES® as this CS 150 course displays.
Clicking on the icon will display the Course Outline in another browser window.
© 2013 CollegeSource, Inc.
136
This icon will also display with the course description for all TES clients to view:
© 2013 CollegeSource, Inc.
137
SUPPORT
The Support tab has many helpful features to assist with questions that you might have about a
particular function of TES®.
Import Specifications
•
The FAQ features a document with Import specifications listed. This is the setup needed for
Importing equivalencies from your transfer articulation system to TES®. Listed under FAQ
number 15, click on the click here link.
© 2013 CollegeSource, Inc.
138
© 2013 CollegeSource, Inc.
139
© 2013 CollegeSource, Inc.
140
© 2013 CollegeSource, Inc.
141
© 2013 CollegeSource, Inc.
142
•
•
•
Movie Demos are featured that show how to utilize certain functions.
The Webinars page lists the upcoming scheduled webinars that anyone may register for.
A Contact Us page is also listed for easy access to e-mailing CollegeSource staff.
© 2013 CollegeSource, Inc.
143
MANAGE
The Manage feature is used for all users to be able to change their password and set their default
homepage. Other functions are listed for an Administrator.
User Preferences
Change My Password:
Have all Users change their password to something they can remember. Enter the password a second
time to confirm, and Submit. Password will be changed!
Select your preference to set your TES homepage. This allows users to select a default homepage after
logging in.
•
•
Homepage options are dependent on the user’s rights.
If user no longer has rights to previously selected homepage, the user will be redirected to the
User Preferences page and prompted to select a new homepage.
© 2013 CollegeSource, Inc.
144
MANAGE:
Usage Statistics
TES® Statistics may be run for TES® General Use and for Evaluation Tracker use.
•
•
•
•
Select a Report Type: TES® GENERAL USE or EVALUATION TRACKER.
Select a FROM and TO date.
Select WHO you want to run the report for, Everyone or one user in particular.
.
© 2013 CollegeSource, Inc.
145
Many helpful statistics are listed. This example has been run from TES® General Use for Everyone.
© 2013 CollegeSource, Inc.
146
© 2013 CollegeSource, Inc.
147
This example has been run from the Evaluation Tracker for Everyone.
•
•
TOTALS: CLOSED TASKS – These are the numbers of any evaluation tasks that were closed or
posted for that time period. An average of Median Turn-Around to complete these tasks is
listed.
TOTALS: ALL ACTIVITY – These are the numbers of the evaluation tasks that are added up from
the columns in the PER USER: ALL ACTIVITY COLUMNS.
© 2013 CollegeSource, Inc.
148
MANAGE:
Evaluation Workflow
Add an email address of the person that you want to receive notifications of completed evaluation tasks.
This person may be the one to enter the equivalency into your Articulation System. This is an optional
function and does not have to be used. If the function later changes to a different person, enter this
screen and wipe out the old address and add the new one.
© 2013 CollegeSource, Inc.
149
Public View Management
The administrator can imbed the URL listed on this page to display your equivalencies on your website.
Brand your webpage, insert a disclaimer, list your transfer policies, etc. Your equivalencies will display
similiarly as shown in MATCH, Equivalency Manager.
•
•
Add text to the Read Me Text field to be displayed at the top of the Public View page.
Add an Email Address For Inquiries for users to contact your institution about an equivalency or
to ask a question. Check the
your Public View.
•
email option box for the e-mail option to display on
Add URLs for Transfer Policy, Transfer Appeals, and Transfer Section.
© 2013 CollegeSource, Inc.
150
•
Select the
© 2013 CollegeSource, Inc.
button to view how the Public View will display.
151
Select Equivalency Search under an institution’s name to see all equivalencies.
Select Equivalency Guides to see Group Reports for an institution:
Select
to view the Guide:
© 2013 CollegeSource, Inc.
152
© 2013 CollegeSource, Inc.
153
A Course Code Search can be conducted by entering the Course Code and then selecting Transfer
Course, Home Course, Both and then the
key.
By selecting the Show All Search Options, more Search Options are displayed.
•
•
•
The Search can be conducted with the Effective Date being Active for all current equivalencies,
Inactive for those equivalencies that have an end date that is past, or All equivalencies.
The number of Records Per Page can be changed to display more equivalencies on a page.
The List can be sorted by Transfer Course Number, Home Course Number, Begin Date and End
Date.
© 2013 CollegeSource, Inc.
154
From your Public View, users can create a Pick List of courses from your equivalencies by clicking on the
My List Add icon
and adding to a Temporary List.
This list may be edited, printed
or Emailed
.
MANAGE:
© 2013 CollegeSource, Inc.
155
User Management
This function is used by the administrator to manage the Users for your account in TES®. All those staff
using TES® or faculty and advisors determining equivalencies will need to be added here.
© 2013 CollegeSource, Inc.
156
Add New User
Enter the four necessary fields shown with the asterisk *- First Name, Last Name, Job Title, and Email.
Add any other optional fields as desired. The Job Title you enter for the User will be listed in any drop
down menus to aid in your selection. The Email can be used within several Email functions. Their
password will be sent to them if you leave the deafult for Notification.
© 2013 CollegeSource, Inc.
157
© 2013 CollegeSource, Inc.
158
Set User Rights
Select the appropriate User Rights for each staff member, faculty and advisor. Tooltips are displayed by
mousing over a column header in the User Management screen. These tooltips explain the allowed
functions for each user right. The below example show the TES Administrator column tooltip.
•
•
•
•
•
•
•
Every Option includes the Course Finder Feature (to view course and institution information) and
the Equivalency Finder Feature (to view and search all stored equivalencies in TES for your
institution).
Administrator – All rights are assigned with this selection. This includes all of the ones listed below
in addition to viewing evaluations assigned to all staff, the ability to send e-mail reminders to
users, assigning course tags and course outlines to your courses, running usage statistics, access
to the link for imbedding your equivalencies on to your website, managing user setup, and the
ability to run an export report.
Course List Report - For Course List Report access. Must have Equivalency Report rights to run
the EQ Report under the Course List Report.
Equivalency Report –Gives access to the EQ Report (Equivalency) function of the Course List
Report. Must also have Course List Report rights.
Evaluation Tracker – For Evaluation Tracker access. This needs to be assigned for faculty and
advisors on your campus to view evaluation tasks assigned to them for determination of
equivalents.
Equivalency Manager – Access to the Equivalency Manager (to create, edit, and view
equivalencies for your institution), Equivalency Migration (to migrate equivalencies from one
catalog to the next), and User Added Courses (to manage the courses added outside of your
catalog). This is needed by staff in the office that is building and managing equivalencies for your
institution.
Explorer Reports – Access to the Course Change Explorer (to compare two catalogs from an
institution) and the Equivalency Explorer (to compare course numbers and course titles with your
catalog and another institution, to view equivalencies assigned by other institutions to courses at
© 2013 CollegeSource, Inc.
159
•
your institution, and to view other institution’s course tags). This right is assigned to anyone
needing to run comparison reports.
To allow a User to only view institution information, course descriptions, and the Equivalency
Finder, add them as a User but don’t assign any rights.
This chart reflects the same information as the above bullets:
Course Finder
Course List Report
Equivalency Report
Course Change
Explorer
Administrator*
Yes
Yes
Yes
Yes
Course List Report
Yes
Yes
**No
No
Equivalency Report
Yes
**No
Yes
No
Evaluation Tracker
Yes
No
No
No
Equivalency Manager
Yes
No
No
No
Explorer Reports
Yes
No
No
Yes
Equivalency
Manager
Equivalency
Explorer
Equivalency
Migration
User Added Courses
Administrator*
Yes
Yes
Yes
Yes
Course List Report
No
No
No
No
Equivalency Report
No
No
No
No
Evaluation Tracker
No
No
No
No
Equivalency Manager
Yes
No
Yes
Yes
Explorer Reports
No
Yes
No
No
* Also gives access to All Evaluations, Send Email Reminders, Course Tags & Outlines, Usage Statistics, Public
View Management, User Management, Export Options.
**To run the Course List Report and the EQ (Equivalency) Report from within the Course List Report, assign both
the Course List Report and Equivalency Report rights.
© 2013 CollegeSource, Inc.
160
If the information needs to be updated for a User, the User needs to be deleted, or the User forgot their
Password, select their name in the list.
© 2013 CollegeSource, Inc.
161
Update any changes, delete, or provide their password by selecting EMAIL PASSWORD TO USER
© 2013 CollegeSource, Inc.
.
162
A customizable email format is available:
•
•
Change the SUBJECT if desired
Add text to the BODY to be sent along with the standard text message
shown.
© 2013 CollegeSource, Inc.
163
User Management:
Email User(s)
This function can be used to e-mail all users or one of the users in your TES® account.
•
•
Select recipeint, type in the subject, and create the body of the e-mail.
Elect for a copy to be sent to yourself if desired.
© 2013 CollegeSource, Inc.
164
MANAGE:
Export Options
The EDE can be triggered manually by a TES® administrator from the Administrator control panel. The
administrator may also configure the export with the simple controls/filters available within TES®. The
following screen shot illustrates the configuration options, which are further explained below.
Export Format: Users may request the EDE as tab-delimited TXT, an XLS file (for Microsoft Excel), or as an
XML tagged file. Data managers will be familiar with all of these formats. For illustration purposes, the
data specifications of the EDE, shown later in this document, are in XML format.
Date Range: Users establish the date range for the records to be contained within the EDE file. Also, users
select which field or fields to which the date range applies.
Eq Type: When an equivalency is created in TES®, users have the option of flagging it as a “hidden”
equivalency. This configuration option allows users to exempt or include only hidden equivalencies in the
EDE.
Institution: Users may request equivalency records that contain transfer courses from all institutions or
one institution at a time using this pull down menu.
Depending upon the amount of data you have stored in TES®, the EDE could take from several seconds to
several minutes.
© 2013 CollegeSource, Inc.
165
This file may be copied and dropped into an Excel spreadsheet. The columns can then be manipulated
and used to enter the information into your Student Information System.
Save Your Username/Password
You can set Internet Explorer or Firefox to save your username/password for CollegeSource and/or
other sites.
For Internet Explorer:
Go to the menu, then "Tools"
Select "Internet Options"
Then select “Content”
AutoComplete Click on “Settings”
Make sure all three boxes are checked and
Check “Prompt me to save passwords”
For Firefox:
Go to the menu, then "Tools"
Select "Options"
Then select “Security”
Check “Remember passwords for sites”
© 2013 CollegeSource, Inc.
166