1
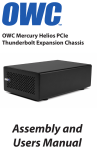
Store and Share your Digital Creations
ThunderTek/PX
™
Thunderbolt™ PCIe Expansion Chassis
User Manual
1
FirmTek, LLC
www.firmtek.com
Copyright
Copyright © 1999-2014 FirmTek, LLC. All rights reserved. No part of this manual may be
reproduced, translated by any means, photocopied, or transmitted in any form without the prior
written permission of FirmTek.
Trademarks
FirmTek, UltraTek, AV-Tek, SeriTek names and logotypes are trademarks of FirmTek, LLC. Apple,
Macintosh, OS X, and the Mac logo are registered trademarks of Apple Computer, Incorporated.
The "Built for OS X" graphic is a registered trademark of Apple Computer, Incorporated, and used
under license. Windows, Windows 98/98SE, Windows 2000, Windows XP, and Windows 7 are
registered trademarks of Microsoft Corporation in the United States and other countries.
Thunderbolt and the Thunderbolt logo are trademarks of Intel Corporation in the U.S. and/or other
countries. All other manufacturer product names mentioned in this manual are for identification
purposes only and are trademarks or registered trademarks of their respective owners.
Changes
FirmTek reserves the right to make any changes to product design, specifications, or details
without notice. Actual product photos or screenshots may look different from those provided.
Notice
The material content of this manual is for informational purposes only. It is possible the content of
this manual may contain technical inaccuracies, typographical, or other errors. FirmTek assumes
no liability for any errors, omissions, or from the use of this manual that may result from such
errors, including, but not limited to loss of data or profits.
Before installing the ThunderTek/PX or any other hardware or software, you are responsible
for backing up data contained on any storage devices. After the hardware or software
installation, you are responsible for backing up data on any storage devices at frequent
intervals. FirmTek, LLC is not liable for any loss of data or damage to equipment resulting
from the use of FirmTek products.
External Shielded Serial ATA Cables
SeriTek/Q6G, SeriTek/6G2+2 and SeriTek/e6G eSATA host adapters use specially shielded
external Serial ATA cables to ensure integrity during data transfers. Use caution and handle the
cables with care. When inserting and removing the cable, hold the connector at the ends (not the
cable) when inserting and removing the cable from the eSATA controller port and the external
Serial ATA enclosure.
Note: The SeriTek/Q6G, SeriTek/6G2+2, SeriTek/e6G utilize “Type I” Serial ATA cables
and connectors: This external SATA cable/connector is specifically design to provide
secure connections with external eSATA ports.
If you will be using the ThunderTek/PX with a Macintosh computer, please note that Macintosh
computers require unique external shielded Serial ATA cables for maximum reliability. FirmTek
Serial ATA cables are specially designed to be compatible with both PC and Macintosh computers.
Please only use FirmTek external shielded Serial ATA cables with the ThunderTek/PX.
2
TABLE OF CONTENTS
I.
Introduction ................................................................................................ 4
II.
Hardware Installation................................................................................. 8
PCIe Card Installation Steps....................................................................... 9
Verify ThunderTek/PX is Recognized .................................................... 13
III. Tips and Troubleshooting........................................................................ 14
IV. Product Support....................................................................................... 16
V. Product Warranty and Disclaimers ......................................................... 17
VI. Regulatory Compliance Statements....................................................... 17
3
I. Introduction
Welcome
Congratulations and thank you for purchasing the ThunderTek/PX, Thunderbolt PCIe Expansion Chassis. This
product is yet another innovative solution from FirmTek.
About This User Manual
The user manual will introduce you to the ThunderTek/PX adapter. Please read it carefully to familiarize you with the
proper operation of the ThunderTek/PX.
About Thunderbolt PCIe Chassis Technology
Thunderbolt™ technology utilizes a dual protocol I/O design that dramatically increases transfer rate performance
while offering daisy chain capability with multiple devices. Combining the power and functionality of a PCIe 2.0
controller with a Thunderbolt interface allows slim computer designs to expand their functionality and increase
performance. A Thunderbolt PCIe Expansion Chassis can offer the ability to support specialty cards, which would
normally not be compatible with computers that do not offer an internal PCIe slot.
About the ThunderTek/PX
The ThunderTek/PX adapter offers PCIe expansion via Thunderbolt with up to 10Gb/s dual channel data
transfer rates. It supports a single compatible half-length x1, x4 or x8 PCIe 2.0 card. The rugged silver
aluminum chassis is crafted for maximum durability and heat dissipation. The unique thoughtful design,
allows customers to easily install a PCIe controller inside the ThunderTek/PX. This feature provides virtually
unlimited upgrade possibilities in an ultra-slim, lightweight form-factor. Built from the ground-up as a true
PCIe 2.0 over Thunderbolt solution, the ThunderTek/PX is designed to provide the ultimate in performance.
Allowing for true end-to-end PCIe 2.0 capabilities, the ThunderTek/PX is compatible with external PCIe to
Serial ATA host adapters such as the SeriTek/Q6G, SeriTek/6G2+2, SeriTek/e6G. The ThunderTek/PX Chassis
is custom designed with shielded ports meeting regulatory requirements for electrostatic discharge (ESD),
electromagnetic interference (EMI) emissions, and susceptibility. This ensures a good ground path exists
between the cables and the connectors to prevent any ESD discharge during cable insertion or removal.
4
Package Contents
Part number TT-PX includes:
One ThunderTek/PX
external chassis
Four rubber feet
Universal power adapter
Part number TT-PW-Q6G also includes:
One SeriTek/Q6G
4-port PCI-Express external
SATA PM host adapter
Part number TT-PW-2+2 also includes:
One SeriTek/6G2+2
2-port internal, 2-port external
PCI-Express
SATA PM host adapter
Two SeriTek/6G2+2 mounting
posts, Four screws for
ThunderTek/PX
5
ThunderTek/PX Highlights
♦
♦
♦
♦
♦
♦
♦
♦
♦
♦
♦
Add compatible PCIe card to any Mac OS Thunderbolt enabled computer
Attractive, durable, portable Chassis supports single half-length x1, x4 or x8 PCIe 2.0 card
PCIe expansion via Thunderbolt offers up to 10Gb/s dual channel data transfer rates
Energy Saver Mode: automatically powers on/off with your computer
Supports compatible PCIe cards for eSATA and other specific needs
Light-weight, rugged, aluminum case for maximum durability and heat dissipation
Ventilated case with quiet operation
Single Thunderbolt connector and power connector
Perfect for both storage-hungry and speed-sensitive applications
Upgrading functionality is as easy as installing a new PCIe card
Kensington Security Slot
ThunderTek/PX Applications
♦
♦
♦
♦
♦
♦
♦
♦
Graphic arts
Digital photography
Computer animation
Offsite backup
Bulk data transport
Digital audio/music composition, recording, editing, storage and playback
Personal and professional high-definition digital video creation and editing
Supported Video Formats: 10-bit uncompressed HD; 1080/60i, 8-bit; uncompressed SD; DVCPro 25/50; HDV, DV, DVCA
ThunderTek/PX Specifications
General System
Hardware
Requirements
Operating
Systems
Supported
Chassis Capacity
External
Connectors
Cables Supported
Data Transfer
Rates
Advanced Data
Features
Warranty
Chassis
Dimensions
Weight
Color
Other Status
LEDs
Requires Macintosh computer with built-in Thunderbolt port
• Mac OS X 10.6.8 and later
• Accepts one PCIe 2.0 card, up to 6-inches in length
• One Thunderbolt port
• One Power connector
• 20-pin shielded copper Thunderbolt (data cable), up to 3 meter
in length
• Up to 1000 Mbytes/second or 10 Gbps burst data
• PCIe controller will determine final transfer rates
•
•
•
•
Supports Thunderbolt aware 3rd party PCIe controllers
PCIe based video cards are not supported
Ultra High Performance
Plug and Play
• One year limited parts & labor
• 170.5 mm (L) x 23.9 mm (H) x 188.5 mm (W)
• Chassis Only: 1lb 9oz: (without PCIe card)
• Silver Aluminum
• Front Power on LED
Power Adapter
• Universal power adapter:
• Input: 105 – 240 VAC; 1.2A, 50-60Hz
• Output: 12V 2.0A (36 Watts)
Environmental
• Operation Temperature: +41°F to +131°F ( +5°C to +55°C)
RoHS
EMC Compliance
• Compliant
• EN55022/1998, EN55024/1998
(European Community)
• FCC Part 15 Class B (US)
6
ThunderTek/PX System Requirements
Hardware Requirements
•
•
•
•
Compatible with external PCIe to SATA host adapters. Such as SeriTek/Q6G, SeriTek/6G2+2 and
SeriTek/e6G.
Compatible with Thunderbolt aware 3rd party PCIe controllers (6” long or less)
Requires a computer with a built-in Thunderbolt port
Available 105-240VAC, 50-60Hz power
7
II. Hardware Installation
Caution:
Please verify your data is backed up before attempting to use the ThunderTek/PX external adapter.
The ThunderTek/PX Chassis, PCIe controller and computer contain sensitive components that can be
permanently damaged by Static Electric Discharge. Be sure you’re working in an area free of static electricity to
prevent damage. Use a wrist grounding strap if you have one or regularly touch a metal part of the computer
chassis such as the power supply case or a port access cover to discharge any built-up static electricity from your
body.
Getting Started
This section describes the proper method of preparing the ThunderTek/PX for use. Please review this section and
familiarize yourself with the ThunderTek/PX chassis before installing a PCIe controller and connecting it to your
computer.
Front view of the ThunderTek/PX Chassis:
Power Indicator
Inside view of the ThunderTek/PX Chassis:
PCIe Mount Tab
Post supports
6G2+2
PCIe card slot
opening
Post supports
6G2+2
PCIe
Slot
PCIe Tab
Slot
Thunderbolt Port
Fan
Speeds
Control
Power Receptacle
8
PCIe Card Installation Steps
Install SeriTek/Q6G in the ThunderTek/PX
1. Mount Rubber Feet in suggested locations.
2. Remove Top Housing: Unscrew three screws on each side of the ThunderTek/PX
3. Loosen screw and remove the PCI Mounting Tab
4. Install the SeriTek/Q6G Card:
- Insert adapter bracket into PCIe Tab Slot and push Gold Teeth into the PCIe slot
- Gently press adapter in place while making sure the card is firmly seated in the PCIe slot with the
external eSATA ports facing the rear of the ThunderTek/PX chassis. Verify the PCIe card is fully seated
in the PCIe slot and the PCIe tab slot and the ports are aligned properly with the rear of the chassis. The
PCIe pins must be in the correct position to avoid damage.
Note: Hold PCIe card by its edges only. Do NOT touch Gold Teeth or any components on the card.
PCI Mounting
Tab
Card Firmly Seated
WARNING - POTENTIAL DAMAGE
NEVER install a PCIe card in the ThunderTek/PX while the chassis is connected to a computer or
power outlet! Doing so will risk injury, and damage to the card, chassis, and computer. DO NOT
attempt to insert an older PCI or PCI-X card into the ThunderTek/PX as this will cause damage not
covered by warranty.
9
5. Reinstall PCI Mounting Tab
- Properly position the PCI Mounting Tab in the housing. Make sure both holes align properly
Both Holes Align
properly
- Tighten the screw to secure the PCI Mounting Tab
Reinstall
Mounting Tab
Tighten Screw to
Secure Adapter
Tighten Screw to
Secure Tab
- Tighten the screw to secure the Card to the Mounting Tab
6. Reinstall Top Housing
Re-attach the Top Cover and secure the six screws
7. Attach Data Cables
Once the PCIe card is properly installed and the chassis top is back in place, attach any required
PCIe data cables to the rear of the ThunderTek/PX for each port of the PCIe card you wish to use.
Attach the other end of the data cable(s) to the device that will be used with the PCIe card.
8. Power
Once the PCIe card is fully installed and ready to be used, attach the power adapter to the
ThunderTek/PX and the other end to an AC outlet. Next, attach the Thunderbolt cable to the
ThunderTek/PX and the Thunderbolt port on the target computer.
Note: ThunderTek/PX will only power on when it has both DC power AND is receiving an active
Thunderbolt signal from the computer.
10
Install SeriTek/6G2+2 in ThunderTek/PX
1. Mount Rubber Feet in suggested locations.
2. Remove Top Housing: Unscrew three screws on each side of the ThunderTek/PX
3. Loosen screw and remove the PCI Mounting Tab
4. Screw Posts to Chassis Bottom
- Insert the screw from bottom of chassis
- Tighten the Post: Use a finger and press on
Flat Head Screw while the other hand holds
and turn the Post until tight
- Repeat the same steps for 2nd post
Flat Head
Screw
5. Install SeriTek/6G2+2 Card:
- Install drive(s) on SeriTek/6G2+2
- Insert adapter bracket in PCIe Tab Slot and push Gold Teeth into PCIe slot
- Gently press PCIe adapter into place while making sure the card is firmly seated in the PCIe slot
with external eSATA ports facing the rear of the ThunderTek/PX chassis. Verify PCIe card is
fully seated in the PCIe slot and the PCIe tab slot and the ports are aligned properly with the
rear of the chassis. The PCIe pins must be in the correct position to avoid damage.
- Screw the SeriTek/6G2+2 to the Posts
Card Firmly Seated
Secure Card
to Post
Note: Hold PCIe card by its edges only. Do NOT touch Gold Teeth or any components on the card
11
WARNING - POTENTIAL DAMAGE
NEVER install a PCIe card in the ThunderTek/PX while the chassis is connected to a computer or
power outlet! Doing so will risk injury, and damage to the card, chassis, and computer. DO NOT
attempt to insert an older PCI or PCI-X card into the ThunderTek/PX as this will cause damage not
covered by warranty.
6. Reinstall PCI Mounting Tab
- Properly position the PCI Mounting Tab in the housing. Make sure both holes align properly
Both Holes Align
properly
- Tighten the screw to secure the PCI Mounting Tab to the housing
Reinstall
Mounting Tab
Tighten Screw to
Secure Adapter
Tighten Screw to
Mounting Tab
- Tighten screw to secure the Card to Mounting Tab
7. Reinstall Top Housing
Re-attach Top Cover and secure the six screws
8. Attach Data Cables
Once the PCIe card is properly installed and the chassis top is back in place, attach any required
PCIe data cables to the rear of the ThunderTek/PX for each port of the PCIe card you wish to use.
Attach the other end of the data cable(s) to the device that will be used with the PCIe card.
9. Power
Once the PCIe card is fully installed and ready to be used, attach the power adapter to the
ThunderTek/PX and the other end to an AC outlet. Next, attach the Thunderbolt cable to the
ThunderTek/PX and the Thunderbolt port on the target computer.
Note: ThunderTek/PX will only power on when it has both DC power AND is receiving an active
Thunderbolt signal from the computer.
12
PCIe Driver Installation
While the ThunderTek/PX requires no driver, some PCIe cards may require a driver to fully function with the
ThunderTek/PX. As an Example:
ThunderTek/PX2+2 – No driver required for non-port multiplier based enclosures. Requires Mac OS X
driver version 6.1.7 or later when connecting the SeriTek/5PM. For Windows 7 or 8 - requires driver version
1.2.0.1038-TB or later for SeriTek/5PM support.
ThunderTek/PX-Q6G – No driver required for non-port multiplier based enclosures. Requires Mac OS X
driver version 6.1.7 or later when connecting the SeriTek/5PM. For Windows 7 or 8 - requires driver version
1.2.0.1038-TB or later for SeriTek/5PM support.
SeriTek/e6G – No driver required for non-port multiplier based enclosures. Requires Mac OS X driver
version 6.1.7 or later when connecting the SeriTek/5PM.
Verify ThunderTek/PX is recognized (Mac OS X)
Hold the "Option" key while clicking on the Apple Icon in the upper left corner of the screen. Pull down to
"System Information". Select “Thunderbolt” and verify the ThunderTek-PX is displayed in the device tree. If
so, ThunderTek/PX is recognized by the system.
Click on “PCI cards” to view the PCIe card installed in the ThunderTek/PX.
Note: If “Tunnel Compatible” indicates “Yes”, the PCIe card will function properly over Thunderbolt. If the
“Tunnel Compatible” status is “No”, please contact the PCIe card manufacturer to see if a Thunderboltaware driver is available.
13
III. Tips and Troubleshooting
• ThunderTek/PX will not power?
The ThunderTek/PX will only power up when DC power and an active Thunderbolt signal is connected. Check
the power outlet is working and determine if the Thunderbolt port is operational. Verify the proper Thunderbolt
cable is being used. Do not use a Mini DisplayPort or a Mini DisplayPort cable.
• Is the ThunderTek/PX bootable?
The ThunderTek/PX is bootable with Mac OS X when a SeriTek/Q6G or SeriTek/6G2+2 is installed. These
cards can be purchased in a bundle with the ThunderTek/PX.
• My PCIe card performance is lower than expected.
While Thunderbolt offers up to 10Gb/s of bandwidth, all Thunderbolt devices in the chain share this bandwidth.
In addition, some controllers will operate faster inside the Mac Pro as it can offer higher bandwidth.
• Does the ThunderTek/PX support video cards?
No, the ThunderTek/PX is not designed for use with video cards.
• Does the ThunderTek/PX support Thunderbolt Daisy chaining?
As the ThunderTek/PX only has one Thunderbolt port it will need to be used at the end of any Thunderbolt daisy
chain configuration.
• Does the ThunderTek/PX support Windows 7 and 8?
The ThunderTek/PX is certified for Mac OS X. At the time of certification, empty Thunderbolt PCIe Expansion
Chassis were not eligible for Windows Thunderbolt certification. The ThunderTek/PX-Q6G is certified for both
Mac OS X and Windows 7 and 8.
• Does the ThunderTek/PX support Bus Power?
The ThunderTek/PX can support up to one Thunderbolt bus powered device with a power requirement of less
than 9 watts.
• Does the ThunderTek/PX support Hot Plug?
While the ThunderTek can be connected and disconnected while the computer is on, any devices connected to
the PCIe card should be properly dismounted and turned off prior to disconnecting the ThunderTek/PX from the
computer.
• Can I change the PCIe Card in the ThunderTek/PX?
Yes. However, never remove or install a PCIe card while the ThunderTek/PX is plugged in or while the
Thunderbolt cable is connected to a computer. Failing to follow this warning can cause an unsafe
environment and damage the computer, PCIe card or the ThunderTek/PX.
• How do I install the SeriTek/6G2+2?
Secure any desired 2.5” drives to the card using the provided screws prior to
installing the card in the PX. Next, install the two mounting posts on the 2+2
card. These will provide extra stability for the drives mounted on the card.
Now, follow the install instructions provided on page 9. This configuration can
support up to two drives inside the PX plus two external eSATA enclosures.
Please see Quick Install Addendum for more details.
• Can I change the Fan Speed inside the ThunderTek/PX?
Yes. The fan speed is set at low by default, which works well with the SeriTek/Q6G installed. However, if you
need to change the fan speed simply unplug the ThunderTek/PX and take off the top cover to change the fan
setting (Settings are shown in the images on the next page).
14
15
IV. Product Support
Technical Support
For additional information on how to use ThunderTek/PX, download the latest updates, or for technical assistance,
please visit us at www.firmtek.com, or email us at [email protected].
Please provide the following information when contacting us:
• Product model and serial number
• Computer model
• Computer OS type and version (example: Mac OS X, version 10.8; Windows 8)
• Hardware and software installed on your system
• Contact information including daytime telephone number and email address
• A detailed description of the question or problem
Return Merchandise Authorization
To obtain limited warranty service, you must first obtain a Return Materials Authorization (RMA) and ship-to address by
contacting FirmTek at http://www.firmtek.com/support. Please, request the RMA by filling out the form at the bottom of
the page.
NO RETURNS WILL BE ACCEPTED WITHOUT AN RMA NUMBER.
If FirmTek technical support determines the product needs to be repaired or replaced, a Return Merchandise
Authorization (RMA) number and shipping address will be provided. Please pack the product in the original shipping
container and include all of the original packaging - including the static bag, all hardware, software, cables, and other
accessories that came with the original product. You are responsible for shipping and insurance costs, and any
damage incurred due to improper packaging or transport. You should remove all personal information from the
product prior to its return. For your protection insure the package and ship via a traceable method such as UPS or
FedEx. FirmTek is not responsible for lost or damaged packages.
FirmTek reserves the right to determine whether the product is to be repaired or replaced with refurbished parts, or
with a new or refurbished product. Data Recovery is not covered under this warranty and is not part of the warranty
returns process. Standard United States return shipping charges are paid by FirmTek, Foreign and other shipping
methods such as express shipping are available for an additional charge.
Write down the RMA number on the outside of the shipping container, and include the following information with the
shipment:
• A description of the problem
• A copy of the original purchase invoice
• Return shipping address
• Contact information including daytime telephone number and email address
FirmTek, LLC reserves the right to refuse shipments missing a valid RMA number.
16
V. Product Warranty and Disclaimers
FirmTek warrants to the original buyer only that this product shall be free from defects in material and workmanship for
a period of one year from the original date of purchase. This warranty is valid only when the original purchase invoice
is provided. This warranty shall not apply to any defects resulting from improper handling, misuse, misapplication,
abuse, or unauthorized modification(s), which are performed by the end user.
FirmTek, LLC reserves the right to make changes to any products described in this manual at any time without notice.
FirmTek, LLC assumes no responsibility for the use or reliability of hardware or software that is not supplied by
FirmTek, LLC or its affiliated companies. FirmTek, LLC does not assume any responsibility or liability arising out of the
application or use of any product described in this document, except as expressly agreed to in writing by FirmTek,
LLC; nor does the purchase or use of a product from FirmTek, LLC convey a license under any patent rights,
copyrights, trademark rights, or any other intellectual property rights of FirmTek, LLC or third parties.
For FirmTek products 1TB or greater: "One gigabyte (GB) is equal to one billion bytes and one terabyte (TB) equals
1,000 GB (one trillion bytes). Accessible capacity will vary from the stated capacity due to formatting and partitioning
of the hard drive, the computer's operating system, and other factors". For FirmTek products less than 1TB: "One
gigabyte (GB) is equal to one billion bytes when referring to hard drive capacity. Accessible capacity will vary
depending on the operating environment and formatting."
VI. Regulatory Compliance Statements
RoHS compliant
Federal Communications Commission Radio Frequency Interference Statement
WARNING: Changes or modifications to this unit not expressly approved by the party responsible for compliance could void the
user’s authority to operate the equipment.
This equipment has been tested and found to comply with the limits for a Class B digital device, pursuant to Part 15 of the FCC
rules. These limits are designed to provide reasonable protection against harmful interference in a residential installation. This
equipment generates, uses, and can radiate radio frequency energy, and if not installed and used in accordance with the instruction
manual, may cause harmful interference to radio communications. However, there is no guarantee that interference will not occur in
a particular installation. However, if this equipment does cause interference to radio or television equipment reception, which can
be determined by turning the equipment off and on, the user is encouraged to try to correct the interference by one or more of the
following measures:
• Reorient or relocate the receiving antenna.
• Increase the separation between equipment and receiver.
• Connect the equipment to an outlet on a circuit different from that to which the receiver is connected.
• Consult the dealer or an experienced radio/television technician for help.
• Use a shielded and properly grounded I/O cable and power cable to ensure compliance of this unit to the specified limits of the
rules.
This device complies with part 15 of the FCC rules. Operation is subject to the following two conditions: (1) this device may not
cause harmful interference and (2) this device must accept any interference received, including interference that may cause
undesired operation.
CE European Union Compliance Statement
EMC compliance:
Emissions:
EN55022: 1998, Class B
Immunity:
EN55024: 1998
EN61000-4-2: 1995+A1: 1998
EN61000-4-3: 1995+A1: 1998
EN61000-4-4: 1995
EN61000-4-6: 1996
EN61000-4-8: 1993
ThunderTek/PXTSLKC2KN0606
17