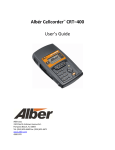
Download 4200-001 Rev 5.0
Transcript
Cellcorder Instruction Manual Revision 5.0 7775 West Oakland Park Blvd Sunrise, FL 33351 Tel: (954) 377-7101 Fax: (954) 377-7042 www.alber.com 1. WARRANTY AND LIMITATION OF LIABILITY LIMITED WARRANTY Albércorp warrants that the software product will perform in accordance with the accompanying written materials for a period of ninety (90) days from the date of receipt. Some states and jurisdictions do not allow limitations on duration of an implied warranty, so the above limitation may not apply to you. To the extent allowed by applicable law, implied warranties on the software product, if any, are limited to ninety (90) days. CUSTOMER REMEDIES Albércorp's entire liability and your exclusive remedy shall be, at Albércorp's option, either return of the price paid, or replacement of the software product that is returned to Albércorp with proof of purchase. This Limited Warranty is void if failure of the software product has resulted from accident, abuse or misapplication. Any replacement software product will be warranted for the remainder of the original period or thirty (30) days, whichever is longer. Albércorp shall not be liable for any data or programs stored in or used in conjunction with this software product. Without prejudice to the foregoing generality, Albércorp shall not be liable for the loss or corruption of data or programs stored in or used in conjunction with this or any other software product, nor shall Albércorp be liable for the cost of retrieving or replacing lost or corrupted data. Albércorp's sole and exclusive liability, for any and all losses and damages arising out of any cause whatsoever, shall in no event exceed the purchase price of the software product purchased. NO LIABILITY FOR CONSEQUENTIAL DAMAGES. ALBÉRCORP SHALL NOT IN ANY CASE BE LIABLE FOR ANY DAMAGES, INCLUDING SPECIAL, INCIDENTAL, INDIRECT, EXEMPLARY, COLLATERAL OR CONSEQUENTIAL, ARISING FROM BREACH OF WARRANTY, BREACH OF CONTRACT, NEGLIGENCE OR UNDER ANY OTHER LEGAL THEORY ARISING FROM THE WARRANTY HEREIN STATED OR THE PURCHASE OF PRODUCT, INCLUDING, WITHOUT LIMITATION, LOSS OF PROFITS, USE OR GOODWILL. Some states and countries do not allow the exclusion or limitation of incidental or consequential damages; therefore, the above exclusion or limitation may not apply to you. This warranty gives you specific legal rights, and you may also have other rights which vary state to state and country to country. i 2. SOFTWARE LICENSE AGREEMENT THIS IS A LEGAL AGREEMENT. PLEASE READ BEFORE INSTALLING SOFTWARE. Any use of this media other than to review this Software License Agreement constitutes your acceptance of and agreement with the terms of this Software License Agreement with respect to the Albércorp Software. If you do not accept and agree to these terms, you must return the full product with proof of purchase to Albércorp within thirty (30) days for a full refund. Installation or use of this software product constitutes your acceptance of and agreement with the terms of this Software License Agreement. LICENSORS. All software on this media is licensed to you by Albércorp. GRANT OF LICENSE. You are granted the right to use the Albércorp Software on a single personal computer. You may copy the software to use with this personal computer to any one hard disk drive of this personal computer and to the memory of this personal computer, provided that you reproduce all copyright and trademark notices, restricted rights legends, and other proprietary markings. RESTRICTIONS. You may not sublicense, rent or lease the Albércorp Software. You may not reverse engineer, decompile, disassemble, modify, translate or create derivative works of the Software. LIMITED WARRANTIES AND LIMITATION OF LIABILITY. The limited warranties and limitation of liability in Section 1 of this file apply to, are incorporated in, and are made a part of this Software License Agreement. EXPORT LAW ASSURANCES. You acknowledge and agree that the Software is subject to restrictions and controls imposed by the United States Export Administration Act (the "Act") and the regulations there under. You agree and certify that neither the Software nor any direct product thereof is being or will be acquired, shipped, transferred or exported, directly or indirectly, into any country, or used for any purpose, except as authorized by the Act and the regulations. GOVERNMENT LICENSEE. If you are acquiring the software on behalf of any unit or agency of the United States Government, the provisions of Section 3 apply to, are incorporated in, and are made a part of this Software License Agreement. ii GENERAL. This Software License Agreement will be governed by the laws of the State of Florida, except for that body of law dealing with conflicts of law. Should you have any questions concerning this Software License Agreement, or if you desire to contact Albércorp for any reason, please contact: Albércorp. 3103 No. Andrews Ave. Ext. Pompano Beach, FL 33064 email: [email protected]. 3. GOVERNMENT PROVISIONS The Government acknowledges the representations of the Albércorp software as "Restricted Computer Software" as the term is defined in Clause 52.227-19 of the Federal Acquisition Regulations (FAR) and is "Commercial Computer Software" as that term is defined in Clause 52.227-7013(a)(1) of the Department of Defense Federal Acquisition Regulation Supplement (DFARS). The Government agrees that: (i) if the software is supplied to the Department of Defense (DOD), the software is classified as "Commercial Computer Software" and the Government is acquiring only "restricted rights" in the software and its documentation as that term is defined in Clause 252.227-7013(c)(1) of the DFARS, and (ii) if the software is supplied to any unit or agency of the United States Government other than DOD, the Government's rights in the software and its documentation will be as defined in Clause 51.227-19(c)(2) of the FAR. RESTRICTED RIGHTS LEGEND. Use, duplication, or disclosure by the Government is subject to restrictions as set forth in subparagraph (c)(1)(ii) of the Rights in Technical Data and Computer Software clause at DFARS 252.227-7013. Albércorp 3103 No. Andrews Ave. Ext., Pompano Beach, FL 33064 Information in this document is subject to change without notice. Cellcorder Instruction Manual, 4200-001, Book Revision 5.0 1999, 2000 Albércorp., 3103 No. Andrews Ave. Ext., Pompano Beach, FL 33064 This manual may not be copied in whole or in part without express written permission from Albércorp. Microsoft Windows is a registered trademark of Microsoft Corporation. iii Safety Information • Except as explained in this manual, do not attempt to service Albércorp equipment yourself. Opening the equipment may expose you to dangerous voltages. Refer servicing beyond that described in this manual to authorized personnel. • Do not allow liquids or moisture to get into the equipment. If liquid does get into the equipment, unplug it immediately and contact your nearest authorized service center or Albércorp directly. • Ensure equipment is provided adequate ventilation. Do not block equipment ventilation openings. • Do not exceed equipment voltage or power ratings and capabilities. • Make sure that equipment is properly grounded. • Do not let unauthorized persons operate the equipment. • The maximum voltage the Cellcorder can read is 16V. Do not attempt to read Overall Volts. Use a separate meter, then enter the reading manually under the SG/TEMP/OV mode. • Never let any Cellcorder metal surfaces come in contact with a battery post or grounded rack while testing with the unit. • Do not attempt to read internal resistance of an open cell/module while the battery is on-line. iv Table of Contents 1 INTRODUCTION ...............................................................................................3 1.1 General Description.................................................................................3 1.2 Test Procedure Overview ........................................................................3 1.3 Test Modes ..............................................................................................4 1.3.1 Voltmeter..........................................................................................4 1.3.2 Multimeter........................................................................................4 1.3.3 Specific Gravity and Temperature ...................................................5 1.4 System Features.......................................................................................5 1.4.1 Float Voltage Readings ....................................................................5 1.4.2 Internal Cell Resistance....................................................................5 1.4.3 Intercell Resistance ..........................................................................5 1.4.4 Auto Ranging ...................................................................................5 1.4.5 Data Extraction and Analysis...........................................................6 1.4.6 System Display.................................................................................6 1.4.7 Power................................................................................................6 2 RECEIVING AND ACCEPTANCE TESTING.........................................................7 2.1 Unpacking ...............................................................................................7 2.2 Cellcorder Initial System Test .................................................................7 3 OPERATING INSTRUCTIONS...........................................................................10 3.1 General Concepts ..................................................................................10 3.2 Before Using the Cellcorder..................................................................11 3.3 General Operating Notes .......................................................................11 3.4 Operation Notes.....................................................................................12 3.4.1 Multimeter Mode ...........................................................................13 3.4.2 Connecting the Test Leads .............................................................14 3.4.3 Taking the Readings.......................................................................15 3.4.4 Storing Data for More Than One String.........................................16 3.4.5 Voltmeter Mode .............................................................................17 3.4.6 Entering Specific Gravity, Temperature and Overall Volts ...........18 3.4.7 Uploading Specific Gravity and Temperature Readings................19 3.4.8 Programming Test Parameters .......................................................20 3.4.9 Battery Charging ............................................................................21 3.5 Error Codes and Warning Messages .....................................................22 3.5.1 Resetting the Cellcorder .................................................................24 3.6 Diagnostics ............................................................................................25 3.6.1 Keypad (KEYBRD) ..........................................................................25 3.6.2 Display ...........................................................................................25 v 3.6.3 A/D Channel (AD CHAN) ................................................................25 3.6.4 Relays.............................................................................................26 3.6.5 RS-232............................................................................................26 3.7 Memory Management ...........................................................................27 3.8 Calibration .............................................................................................28 3.8.1 Entering the Calibration Screen .....................................................28 3.8.2 Entering the Password....................................................................28 3.8.3 Recording the Before Calibration Readings...................................29 3.8.4 Calibrating the Cellcorder ..............................................................31 3.8.5 Backing Up and Restoring the Calibration ....................................35 4 APPENDIX A: CELLCORDER PARTS LIST ......................................................36 5 APPENDIX B: SYSTEM SPECIFICATIONS ......................................................37 6 APPENDIX C: CELLCORDER CALIBRATION LOG ...........................................38 7 APPENDIX D: APPLICATION NOTE CC-001 .........................................................39 8 APPENDIX E: APPLICATION NOTE CC-002 ..........................................................48 9 APPENDIX F: APPLICATION NOTE CC-003 ..........................................................51 10 APPENDIX G: CELLCORDER CONNECTION OPTIONS .........................................52 vi What's New This section describes some of the many new features and enhancements in the Cellcorder. Several improvements have been made to both the Cellcorder hardware and software. Hardware A new circuit now helps protect the unit if it is accidentally placed across a high voltage circuit. The protection circuit senses the input voltage across the current carrying leads and, if the input voltage exceeds 24 volts, a beep sounds and the test current relays are disabled. Earlier models without this feature can be upgraded. As a reminder, it is still potentially hazardous to exceed the rated voltage of the Cellcorder (16 volts). A fuse on the Cellcorder rear panel now helps protect the operator and the Cellcorder if the unit comes in contact with a battery post or grounded rack during testing. Replace this fuse with a ceramic 1 amp fuse only. The symptoms of a blown fuse while testing are (1) the Cellcorder voltage reading indicates zero to one-half of the cell voltage being tested, and (2) the Cellcorder displays a Low Current - Cell or Connect Problem error message. Although this modification reduces the risk of damage to the Cellcorder, remember to never let any Cellcorder metal surfaces come in contact with a battery post or grounded rack while testing with the unit. Firmware The new version of firmware incorporates changes that have resulted in some Cellcorder keypad entry changes. The new changes, described below, are compared to the earlier methods of operation. Relay Diagnostics This diagnostic requires that you now press and hold the TEST key to activate the relay drivers. Release TEST to stop the relay drivers. Previously, you did not hold the TEST key, and ESC exited the diagnostic. Error Message for Low Current The error message for test current below 20 Amps now indicates that the TEST key must be pressed for at least one second to retry the test. Reset for Locked Cellcorder The key sequence for resetting a locked up unit has changed. To reset the unit, press ON and F1 simultaneously. The previous sequence was to press ON and TEST simultaneously. See warning in the Resetting the Cellcorder section. 1 A/D Channel 3 Diagnostic The key sequence to activate the A/D Channel 3 Diagnostic now requires pressing the TEST key after selecting Chan 3. Previously, pressing TEST was not required. Calibration for Current The key sequence to activate the Current calibration now requires pressing the TEST key after selecting option 4 - Current. Previously, pressing TEST was not required. Performing a Resistance Test The Test button must be pressed for longer than 1 second before the test will begin. WARNING The maximum voltage the Cellcorder can read is 16V. Do not attempt to read Overall Volts. Use a separate meter, then enter the reading manually under the SG/TEMP/OV mode. WARNING Never let any Cellcorder metal surfaces come in contact with a battery post or grounded rack while testing with the unit. WARNING Do not attempt to read internal resistance of an open cell/module while the battery is on-line. An open cell can be determined by the abnormally high voltage across it and the low voltage across all other cells/modules. Refer to Application Note CC-001 for further details. 2 1 Introduction This section describes the features of the Cellcorder. 1.1 General Description The Albércorp Cellcorder is a data storing battery multimeter that provides fast, accurate information in a fraction of the normal test time. Compact and light weight in design, this intelligent test unit displays and records readings of cell float voltage, internal cell resistance, and intercell connection resistance. Other data, such as specific gravity and temperature, can be entered manually. The Cellcorder may be used on a single cell or multicell module. Readings up to seven strings of 256 cells each or 28 strings of 64 cells can be stored and displayed on a bright fluorescent display. The Cellcorder features are further enhanced by a computer link and software that allows the transfer of readings to a personal computer (PC) for further analysis and report generation. 1.2 Test Procedure Overview The Cellcorder is a self-contained, battery powered unit comprised of a microprocessor, load resistor, display, and rechargeable battery. Two sets of test leads are provided: a standard set of digital voltmeter probes and a three clip set used in the multimeter mode. Optional test leads are available from Albércorp. When using the three clip set, connect the two larger test clips across the cell and its associated intercell connector (from the positive post of the cell being tested to the positive of the next cell), and connect the third smaller conductor clip to the negative terminal of the cell being tested. (Refer to Application Note CC-002.) After the leads are connected, the test sequence is initiated. First, the Cellcorder reads and records the cell float voltage. Next, the unit connects a fixed resistance across the cell and intercell being tested and forces a current of approximately 70 Amps to flow for a few seconds. During the load condition, the unit reads the current and voltage and calculates the intercell connection resistance and internal cell resistance. 3 Upon completion of testing, you can connect the Cellcorder to a PC-compatible computer via the RS-232 serial port and initiate the menu-driven data extraction, analysis, and report program. The imported information can be displayed in an easy to read bar graph format. You also have the option of defining a custom generated report or generating a report using Albér standard analysis. 1.3 Test Modes This section describes the test modes of the Cellcorder. 1.3.1 Voltmeter In this mode, the Cellcorder is used with standard voltmeter probes to take monthly or quarterly float voltage readings. When the probes access the first cell, the reading is displayed and, within two seconds, the unit beeps and indicates on the display that the reading has been stored. As the probes are lifted and make contact with the next cell, the Cellcorder automatically indexes the display and memory storage to the next higher number. This mode allows you to take valid recorded readings at a rate of ten to twelve per minute. 1.3.2 Multimeter The Cellcorder is used in this mode to take internal cell resistance and intercell connection resistance readings on each cell. A test harness consisting of three clips is connected as follows: 1) Large red clip to the positive post of the cell being tested. 2) Small black clip to the negative post of the cell being tested. 3) Large black clip to the positive post of the next cell. After connection, the Cellcorder tests and reads in the following sequence: 1) The cell voltage is read to automatically scale the Cellcorder for the correct range. 2) A load resistor is connected across the cell and associated intercell. The resulting test current is approximately 70 Amps (or 50 Amps for 4V through 12V modules). 3) While current is flowing, the unit reads cell voltage, current, and intercell voltage drop, then calculates internal cell and intercell resistances. 4 1.3.3 Specific Gravity and Temperature Specific gravity (SG) and temperature readings can be entered manually or automatically from a compatible data storing hydrometer. In automatic mode, the user connects the hydrometer to the Cellcorder via an RS-232 cable and transfers the readings by pressing the appropriate function key. In manual mode, the display prompts for the readings for each cell. The Cellcorder automatically inserts the first two numbers of the specific gravity reading to speed up the entry process. For example, for a reading of 1215, the display shows SG = 12 _ _ and the user enters the 1 and 5. After specific gravity is entered, enter the temperature. 1.4 System Features This section describes the features of the Cellcorder. 1.4.1 Float Voltage Readings The Cellcorder measures the voltage applied during full float operation. The voltage range covers all cells or modules up to 16 volts. Reading accuracy is to four full digits. 1.4.2 Internal Cell Resistance Internal resistance of a cell can be determined by how that cell responds to a momentary load. The instantaneous voltage drop and load current applied are used to calculate the resistance. The Cellcorder algorithms make this measurement possible on cells that are floating on-line. This method is useful for determining weak, potentially failing cells when comparing internal cell resistance of all the like cells in the string. For more information, refer to Application Note CC-001. 1.4.3 Intercell Resistance The Cellcorder measures and displays the total resistance of the connection between the terminals of two cells electrically connected to each other. This measurement includes resistance of the connector and the contact resistance at the points of connection to the cell terminals. 1.4.4 Auto Ranging The Cellcorder automatically selects the correct voltage range and load resistor for the test being performed. 5 1.4.5 Data Extraction and Analysis Upon completion of testing, the user connects the Cellcorder to a PCcompatible computer with the supplied RS-232 cable. The Albér data extraction program is executed and test results are imported into the program. Data is analyzed and displayed in an easy-to-read bar graph or tabulated format. (Refer to the Battery Analysis User's Guide.) 1.4.6 System Display The test sequence instructions and test results appear on a bright, easy-toread fluorescent display. 1.4.7 Power The Cellcorder is powered by a self-contained, sealed lead-acid rechargeable battery. Refer to Application Note CC-003 for optimizing battery life. Recharge or AC power operation is via a wall plug transformer module. 6 2 Receiving and Acceptance Testing This section describes the receiving and initial testing of the Cellcorder. 2.1 Unpacking Upon receipt of the Cellcorder, inventory all contents of the shipment. If there is any visible damage to the case or box, notify the freight carrier immediately for a damage claim. Unless otherwise noted, shipment of the unit is F.O.B. Boca Raton, Florida. Any shipping damage claims must be made by the purchaser directly to the freight carrier. The Cellcorder is designed to provide many years of service. The components of the Cellcorder are like those in a computer, and proper care should be provided when handling. The carrying case will help protect the unit from minor bumps during daily use. Verify that all contents are in the box and carrying case. Each system should include the materials described in Cellcorder Parts List. This equipment has passed several phases of quality control; however, if any of the contents are missing, contact Albércorp immediately. 2.2 Cellcorder Initial System Test Connect the AC adaptor to the POWER port on the rear of the Cellcorder, then plug the adaptor into a wall receptacle. The CHARGE indicator should light. Do not connect any other leads to the unit at this time. Press the ON key on the front of the Cellcorder. After a series of beeps and a system self test, the unit defaults to the Cellcorder Main Menu: _ 1 2 3 _MAIN MENU_ _ _ * - MODE SELECT - DIAGNOSTICS - SETUP NOTE: An asterisk ( * ) on the top right of the menu indicates memory configuration is 7 x 256. 7 Press 2 on the numeric keypad to display the Diagnostics Menu: _ 1 2 3 _DIAGNOSTICS MENU_ * KEYBRD 4 RELAYS DISPLAY 5 RS232 AD CHAN You may select any option from the Diagnostics Menu to ensure the unit is in working condition. Press the designated number on the keypad to select an option. Keybrd This displays the Keypad Diagnostic screen. Press any key except ON or ESC and the display indicates the key pressed. Press ESC to return to the Diagnostics Menu. Display The display goes through a self-test, illuminating each segment of the display. When complete, the unit returns to the Diagnostics Menu. A/D Channel Albércorp recommends that you use this diagnostic only when instructed by Albércorp technical support. This selection displays the reading from the analog to digital converter. Press ESC to return to the Diagnostics Menu. Relays WARNING: If this diagnostic is enabled while the unit is connected to a voltage source, the Cellcorder can be permanently damaged. Before you select the Relays diagnostic, verify that no leads are connected to the Cellcorder. A warning is displayed to ensure the leads are disconnected. Press and hold TEST to activate this diagnostic. A clicking noise will be heard as each relay is checked. Release TEST to stop the relay drivers, and press ESC to return to the Diagnostics Menu. 8 RS-232 Serial Port Diagnostic requires the use of a loopback connector (not supplied). The loopback connector can be simulated by connecting pin 2 to pin 3 of the RS-232 port. After connection, press TEST. The unit sequences through a series of transmit and receive signals and logs the errors on the display. After the sequence is started, the unit counts from 0 to 255 and continues cycling 0 to 255 until ESC is pressed. If errors exist, the error count field increments. This completes Cellcorder diagnostic acceptance testing. Before beginning operation, turn the Cellcorder off by pressing the ON key on the keypad; the ON key operates as an ON/OFF key. 9 3 Operating Instructions This section describes the operation of the Cellcorder. 3.1 General Concepts The Cellcorder is designed to improve the ease and accuracy of taking periodic maintenance readings. An effective maintenance program that meets the recommendations of most battery manufacturers calls for the following measurements: PARAMETER Monthly Cell Voltages INTERVAL SemiQuarterly Annually Annually X Intercell Resistance X Internal Resistance Vented Cells X Internal Resistance Sealed Cells X Specific Gravity X Temperature Profile X Capacity Vented Cells Every 3 to 5 years until signs of degradation, then once every year. Capacity Sealed Cells Every year. NOTE: VRLA or sealed cells need to be tested more frequently because of their shorter life expectancy and lower reliability. The Cellcorder saves time acquiring and analyzing these readings. This is especially true of float voltage readings, where the average time to measure 60 cells is less than five minutes. The Cellcorder, with its internal cell resistance measurement, is very effective in locating weak or problem cells. Because it is not susceptible to the normal noise sources present or the charger and pulsating load ripple currents, the Cellcorder can be used on-line on all battery installations. 10 Cellcorder resistance measurements should be used in conjunction with baseline information on the batteries being maintained. Either obtain the cell resistance baseline data from the battery manufacturer or Albércorp, or acquire it with a capacity test. Take Cellcorder readings according to the table above; the resistance readings dictate which battery string should be subjected to capacity testing. If one or more cells exhibit cell resistance 30% to 40% higher than the average or baseline value, then those cells should be capacity tested using a single cell tester, such as the Albércorp SCT-200. If the majority of cells are above the normal expected readings, then the entire string should be capacity tested. 3.2 Before Using the Cellcorder Check that the Cellcorder carrying case contains two sets of test leads, the battery charger module, and the RS-232 cable. Prior to testing, charge the Cellcorder for at least eight hours to guarantee six hours of battery operation. If the batteries wear down during testing, plug in the charger module and keep testing. If the battery is overdischarged, let the unit charge for 15 to 30 minutes before using it plugged into the AC. Data readings are stored in EEPROM memory chips and are not affected if the batteries are fully discharged. Verify the Cellcorder is calibrated or has been calibrated within the last year. The easiest way to check calibration is to read a known voltage and use a known shunt as an intercell connector. (Refer to Calibration.) 3.3 General Operating Notes At power up, the Cellcorder displays the Main Menu: _ 1 2 3 _ - MAIN MENU _ _ * MODE SELECT DIAGNOSTICS SETUP An asterisk ( * ) on the top right of the menu indicates memory configuration is 7 x 256. Each menu function is explained in detail in following sections. The Main Menu functions are as follows: 11 Mode Select Allows you to determine whether the Cellcorder will be used as a voltmeter, battery multimeter (volts and resistance), or as a recorder for specific gravity (SG) and temperature. NOTE: SG and temperature readings must be taken with a separate instrument. Diagnostics Allows you to test the keyboard keys, the front panel display, and the individual measuring channels. Setup Allows you to enter the Calibration, Test Parameter or Memory Configuration setup screens. 3.4 Operation Notes To power on the Cellcorder, press the ON key. (The ON key operates as an ON/OFF key.) After the display shows the firmware revision level, the Main Menu appears. At the Main Menu, select option 3 - Setup, then select 3 - Memory Configs. A warning message appears. CAUTION: Do not change memory configuration after data has been taken, or the memory will be scrambled. Changing back will unscramble the memory. To continue, press ENTER, then select either 7 x 256 (7 strings of 256 cells) or 28 x 64 (28 strings of 64 cells). After memory configuration is selected, it remains as the default configuration, even if the Cellcorder is powered off. (Refer to Memory Management.) After memory is configured, select option 1 - Mode Select from the Main Menu to display the following: _ 1 2 3 _ - MODE SELECT MENU _ * MULTIMETER VOLTMETER SG / TEMP / OV Select which measuring function to use. The voltmeter mode is automated to make it easy to use, since this mode is used most. It is recommended that the Cellcorder be used in voltmeter mode for quarterly float voltage readings. CAUTION: When voltage readings coincide with resistance measurements, the voltage readings must be taken first. 12 Skewing Effect When resistance readings are taken, there is a skewing effect of the cell voltages that leads to a small error. As the first half of the cells are resistance tested using an approximately 70 Amp load test, those voltages become depressed until the charger can bring them back to normal float levels. This means that the voltages of the remaining cells have to increase to make up the difference, since the overall voltage is controlled by the charger. The skewing effect is particularly noticeable on small and weak cells. For large batteries such as mini-tank cells, the effect is not as noticeable, but there is still a small error in the voltage readings. 3.4.1 Multimeter Mode When this mode is selected, the screen prompts the user to specify how many intercell connection readings are to be taken. (Refer to Connecting the Test Leads and to Application Note CC-002.) Select Combine when using test leads that do not support intercell readings. The intercell readings will be zero on the display. ENTER INTERCELL TYPE 1 SINGLE 3 TRIPLE 2 DUAL 4 QUAD 5 COMBINE After selecting the number of intercell readings, the screen prompts the user to specify whether the battery is smaller or larger than 1000 ampere hours. This selection has to do with the timing of the load being applied. _ _ CELL CAPACITY _ * SELECT AMP HOUR RATE 1 0 - 1000 AH 2 MORE THAN 1000 AH After the amp hour selection is made, the Cellcorder checks if float voltage readings, using the voltmeter mode, were already taken. If they were, the following screen appears: 13 _ _MULTIMETER_ _ * CELL=001 BAT ID=1 _V(mem)__Rc__ __Ric_ 02.225 ***** ***** Where V(mem) is the cell voltage previously taken using the voltmeter mode. If voltmeter readings were not previously taken, a message requests that you either take the float readings first or use the active present cell voltages. (Refer to Skewing Effect in Operation Notes.) If the present readings are selected, they are stored automatically with the resistance readings each time the TEST key is pressed. Press ESC to return to the voltmeter mode or press TEST to go to the resistance screen. [ESC] NO VFLOAT READINGS EXIST. USE VOLTMETER MODE FIRST [TEST] IGNORE VFLOAT After a choice of voltage readings is made, the Cellcorder is ready to take readings on Battery 1 cells. 3.4.2 Connecting the Test Leads The connection of the test leads for any type of resistance measuring instrument is very important and is directly related to the accuracy of the readings. WARNING: Never let any Cellcorder metal surfaces come in contact with a battery post or grounded rack while testing with the unit. WARNING: Do not attempt to read internal resistance of an open cell/module while the battery is on-line. An open cell can be determined by the abnormally high voltage across it and the low voltage across all other cells/modules. Refer to Application Note CC-001. When measuring internal cell resistance, place the voltage sense leads directly on the positive and negative terminal posts. This way, the measurement will not include any part of the external circuit. Remember, consistency in the way readings are taken is necessary when comparing them from one time interval to the next. 14 When reading intercell connector resistance, place the voltage sense leads on the terminal posts. The primary reason for taking intercell measurements is to check the quality of the connection between the intercell bar and the terminal post. Typical applications are shown in Application Note CC-002. Unfortunately, on some batteries (typically most VRLA modules) it is impossible to access the posts because they are covered by the intercell connector. For valve regulated batteries, where only the intercell and the stainless steel mounting bolt are accessible, connect the current lead to the bolt head and the voltage sensing lead to the intercell. Measuring from bolt head to bolt head is not a true measure of the connection between the post and intercell bar. In most cases, the reading will be unusually high because of the high resistance of the bolt itself. (Refer to Application Note CC-002.) Most battery terminal posts have a layer of lead dioxide, lead sulfate, copper oxide or dirt mixed with No-Ox grease. All of these are high in resistance, so make sure the test leads have good connection to the metal surfaces. 3.4.3 Taking the Readings After the test leads are connected, press TEST for at least one second. The following occurs: • A check is done for excessive intercell voltage. • Float voltage reading is stored, unless already stored in voltmeter mode. • A 70 Amp load is connected across the two current carrying conductors. NOTE: This is a 50 Amp load if the test is for 4V through 12V modules. • While the current is flowing (typically 3 to 4 seconds), the display indicates READING. If, for some reason, the test current is less than 20 amps, the test stops and the screen displays a message to check test lead connections. The leads are either connected wrong or there is a bad connection on one of the current leads. • The Cellcorder measures the current flow, cell voltage, and intercell voltage, and calculates both internal and external resistances. • The screen displays the internal cell resistance (Rc) and the intercell resistance (Ric). 15 The test leads can now be moved to the next cell. The cell number display automatically indexes to the next higher number as soon as the cell voltage sense leads are lifted. If the test requires taking two or more separate intercell readings, the display fills in the first resistance reading when TEST is initially pressed, and fills in the next reading after the test leads have been moved and TEST is pressed a second time. In this case, the cell display does not automatically index until the last resistance reading has been taken. Allow 15 seconds between tests. If TEST is pressed immediately after a test, the following message appears: _ _ MULTIMETER _ _ TEST INITIALIZATION PLEASE WAIT. Continue reading until all the cells are measured. If the leads are incorrectly connected or a bad connection is encountered, the unit advises what to do. If an error code is displayed, refer to Error Codes and Warning Messages. It is possible to find a cell that is failing so badly that the loaded voltage drops by more than 1.5 volts. In this case, the cell is declared as a failing cell and Error Code 9 is displayed. 3.4.4 Storing Data for More Than One String The Cellcorder has two memory configurations available under the Setup selection on the Main Menu. One mode is 7 x 256 (7 batteries with 256 cells in each battery), and the other is 28 x 64 (28 batteries with 64 cells in each battery). Select the proper configuration prior to using the unit and do not change it until all readings are transferred to the computer. After Battery ID #1 location has been used, the other Battery ID locations can be used by selecting a new string as follows: • Verify the blinking cursor is located in the Cell number display. If not already there, press the CELL key. • Press the ENTER key. This moves the cursor to the Battery ID location. • Select the desired number using the numeric keys, then press ENTER. 16 After the new battery storage location is selected, the control program recognizes whether float readings exist or if they need to be taken. (Refer to Multimeter Mode.) After some or all of the 7 or 28 battery locations have been used, connect the Cellcorder to a computer using the RS-232 cable provided, and copy the readings to the computer. (Refer to Managing Battery Data Files in the Battery Analysis User's Guide.) After copying to the computer, either erase all Cellcorder memory locations or selectively erase one string at a time. To erase the strings, at the Main Menu, press F1. (Refer to Erasing String Data in Memory Management.) 3.4.5 Voltmeter Mode To enter this mode, select option 2 - Voltmeter from the Mode Select Menu. When this mode is entered, the display indicates the present cell number to be tested and the Battery ID as shown below. _ _VOLTMETER_ _ _ * CELL=001 BATT ID=01 **.*** Volts To select another cell at any time, enter the cell number using the keypad, then press ENTER. To select another battery at any time, press ENTER to move to the Batt ID field, select the ID number using the keypad, then press ENTER. NOTE: The ENTER key moves the cursor between the Cell and Batt ID fields. When the cursor is in the Cell field, the UP or DOWN arrow keys may be used to change to another cell number. WARNING: The maximum voltage the Cellcorder can read is 16V. Do not attempt to read Overall Volts. Use a separate meter, then enter the reading manually under the SG/TEMP/OV mode. 17 When you place the voltmeter probes onto the cell, the Cellcorder reads the voltage and, within two seconds, automatically records the reading into memory. The unit beeps to indicate the value was recorded, and displays the message "Recorded in Memory." The unit ignores voltage polarity in this mode; therefore, you may connect the leads in either direction. When the leads are lifted and moved to the next cell, the Cellcorder increments to the next cell. During testing, you may review or retest previous readings. To return to a selected cell, press the UP or DOWN arrow keys (with the cursor in the Cell field) or enter a cell number and press ENTER. When retesting, select the desired cell then press TEST. The following screen appears. _*_READING EXISTS_** [TEST] Overwrite [ESC] Quit Press TEST a second time to store the new voltage reading. Or press ESC to return to the previous screen displaying the data of the cell being reviewed. 3.4.6 Entering Specific Gravity, Temperature and Overall Volts To enter this mode, select option 3 - SG/Temp/OV from the Mode Select Menu, then select option 1 - Manual Readings. In this mode, data must be entered manually. The Cellcorder prompts you to input the data using the keypad. When this mode is selected, the following is displayed. To enter or edit data, follow the steps below. _ _S.G./TEMP./O.V._ _ * CELL=001 BATT ID=01 S.G.=**** OV=***.** TEMP=***°F Several items explained below can only be entered when cell 001 is selected. This simplifies the entry of specific gravity and temperature values, since they are the majority of the entries that will be made. 3.4.6.1 Cell Selection If the cursor is in the Cell field, enter the cell number with the keypad, then press ENTER. If the cursor is in any other field, press CELL, then select the desired cell. 18 3.4.6.2 Battery Selection To select another battery, the cell number must be cell 001. (Refer to Cell Selection.) Press ENTER until the cursor is at the Batt ID field. Select the desired battery number, then press ENTER. 3.4.6.3 Specific Gravity (SG) Entry When the cursor is in the SG field, a 12— is automatically inserted to simplify entry. For example, for a specific gravity of 1215, you only have to enter 15, then press ENTER. Note that the value entered is not temperature corrected. However, most digital hydrometers provide correction automatically. Check with the manufacturer of the hydrometer to see if the unit has this feature. 3.4.6.4 Temperature Entry When the cursor is in the Temperature field, round the temperature reading to the nearest whole number and enter it using the keypad, then press ENTER. 3.4.6.5 Temperature Type Selection This selection can only be made when cell 001 is selected. (Refer to Cell Selection.) Press ENTER until the cursor is in the temperature type (F or C) field. To change the selection from F to C or from C to F, press the UP or DOWN arrow keys and wait two seconds. This function is independent of the temperature entry and does not convert the temperature value. 3.4.6.6 Overall Voltage Entry This selection can only be made when cell 001 is selected. (Refer to Cell Selection.) Press ENTER until the cursor is in the Overall Volts field. Measure the overall volts with a separate voltmeter, enter the value using the keypad, then press ENTER. 3.4.7 Uploading Specific Gravity and Temperature Readings This section describes how to use option 2 - Auto Readings on the Mode Select: SG/Temp/OV Menu to directly upload data from a compatible digital hydrometer. To upload data directly to the computer, refer to the Battery Analysis User's Guide. 19 1) With power off, connect the cable supplied with the digital hydrometer to the hydrometer and to the null modem adaptor. Connect the adaptor to the Cellcorder serial port. The null modem adaptor is normally supplied with the hydrometer and is only needed when connecting directly to the Cellcorder. (Not needed to connect directly to the computer.) 2) Power on both units. It does not matter which is powered on first. 3) Select the desired battery number on the hydrometer. 4) Program the Cellcorder as follows: a) From the Main Menu, select 1 - Mode Select. b) From the Mode Select Menu, select 3 - SG/Temp/OV. c) From the SG-Temperature Menu, select 2 - Auto Readings. d) Enter the battery string number to which readings will be stored, then press ENTER. e) At the next menu, to load data, press ENTER. After the transfer starts, the Cellcorder displays the cell number that has been loaded. When the display reaches 64 or 256, depending on the configuration selected, all readings have been loaded. Note that all uploaded temperature values are rounded off to the nearest whole number. If a message requests a password when attempting to upload, the Cellcorder is not enabled to upload readings. This is a Cellcorder option purchased separately from the basic unit. To add this function in the field, have the Cellcorder unit available and call Albércorp for instructions. 3.4.8 Programming Test Parameters The Cellcorder can be programmed to warn if the measurements taken are out of tolerance. After test parameters are programmed, the unit will display failed readings with a darkened background and sound a series of beeps. To program the test parameters, from the Main Menu select option 3 - Setup. In the Setup Menu, select option 2 - Test Parameters to display the Test Parameters Menu. To set the parameters, select the item, enter the threshold value, then press ENTER. The following table shows the description and ranges for each programmable entry. 20 V HIGH V LOW Rc High Rc Low Ric High Cell voltage high value Cell voltage low value Cell resistance high value Cell resistance low value Intercell resistance high 0.900v 0.900v 00000µ 00000µ 0000µ - 16.000V 16.000V 60000µΩ 60000µΩ 2000µΩ 3.4.9 Battery Charging Prior to doing any testing, charge the Cellcorder for at least eight hours to guarantee six hours of battery operation. The front panel CHARGE light indicates charging only and does not indicate when the battery is fully charged. The batteries are lead acid cells and do not exhibit the memory problems associated with nickel cadmium type batteries. If the batteries wear down during testing, plug in the charger module and keep testing. If the battery has been overdischarged, charge the unit for 15 to 30 minutes prior to using it plugged in to AC. The life of the battery is directly related to how well it is charged. Do not store the Cellcorder in a discharged condition. (Refer to Application Note CC-003.) During use, the unit indicates when the battery is near a discharged state by beeping four times and displaying the following: _ _ _ * WARNING * _ _ _ Cellcorder BATTERY LOW -RECHARGE- In this state, when any key is pressed, the Cellcorder returns to the Main Menu. This message appears once a minute for five minutes, then the unit powers itself off. All data will remain in memory and can be recovered after the battery is recharged. If the unit is powered on without being recharged, it will shut down without warning after one minute. If you continue to use the Cellcorder in this state, unpredictable results may occur and data storage could be affected. To conserve battery life, the Cellcorder automatically shuts down if unattended for more than eight minutes. 21 3.5 Error Codes and Warning Messages This section covers error codes and warning messages. If an error message or error code cannot be resolved, contact Albércorp for assistance. On power up, the Cellcorder does a diagnostic check of several hardware parameters. If more than three errors occur, only the first three are displayed until the problems are resolved. These messages are displayed along with audible beeps after the firmware revision number appears. The tests are performed in the following order: ERROR MESSAGES • • • • • • • CPU Failure Program RAM Failure Boot EPROM Failure NV PROM Failure PIO Failure A/D Failure Data RAM Failure The following error messages may appear during a Multimeter Mode test: ERROR CODE 1 Unit cannot lock in its autorange circuit. Possible noisy environment. ERROR CODE 2 Voltage reading is less than 2V when test is executed. The unit displays the message: _*_ READING ERROR_*_ Voltage Too Low Possible Faulty Cell [TEST] Retry Test ERROR CODE 3 Intercell voltage greater than 0.1V. Negative test lead could be across the adjacent cell instead of directly across intercell. Test is performed before the current is applied to cell. The unit displays the message: _*_ READING ERROR_*_ Intercell V Detected Check Test Leads [TEST] Retry Test 22 ERROR CODE 4 Reserved. ERROR CODE 5 A/D overflow, excessive noise or too high of voltage. ERROR CODE 6 Reserved. ERROR CODE 7 Intercell voltage greater than 0.1V. Bad intercell connection or possible poor test lead connections. Test is performed during load of cell. The unit displays the message: _*_ READING ERROR_*_ Intercell R Too High Connection Problem [TEST] Retry Test ERROR CODE 8 V Load > V Float. Cell possibly opened up at start of test. ERROR CODE 9 VF-VL > 1.5V. Failing cell. Cell cannot maintain test current. ERROR CODE A VF-VL/I is too large. Instrument overflow. The unit displays the message: _*_ READING ERROR_*_ Rc>60000u Possible Faulty Cell [TEST] Retry Test The following error messages may appear at any time during use of the Cellcorder. The voltage error message (below) appears when the input voltage exceeds 16V. The maximum voltage the Cellcorder can read is 16V. Never exceed the maximum input voltage or permanent damage may occur. _*_VOLTAGE ERROR_*_ Input voltage must be less than 16V. [ANY KEY]... 23 The reading error message appears when the test current exceeds 80 amps. This error may be the result of a hardware failure in the Cellcorder or an out-ofcalibration condition. _*_READING ERROR_*_ EXCESSIVE LOAD CHECK CONNECTION [ANY KEY]... The low current message appears when the test current is below 20 Amps. This may be the result of a poor test lead connection, faulty cell, hardware failure in the Cellcorder, or an out-of-calibration condition. Press test for at least one second to retry the test. LOW CURRENT - CELL OR CONNECT PROBLEM SELECT TEST BUTTON >1 SECOND TO RETRY The discharge warning message appears when the battery is fully discharged. When a low battery is detected, the unit displays this message once a minute for five minutes and then shuts down. (Refer to Battery Charging.) _ _ _*WARNING*_ _ _ Cellcorder BATTERY LOW - RECHARGE - The cool down fan message appears if an attempt is made to turn off the Cellcorder within five minutes of testing an 8V or 12V module. COOL DOWN FAN ON ALLOW 5 MINUTE WAIT KEEP CASE OPEN 3.5.1 Resetting the Cellcorder If the Cellcorder locks up (will not respond to any keys), simultaneously press the ON and F1 buttons to manually reset the unit. WARNING: If a manual reset is needed, disconnect any leads connected to the battery before initiating a reset. 24 3.6 Diagnostics If the Cellcorder appears to have a malfunction, the diagnostic features of the unit can help isolate the fault. To access the diagnostics functions, select option 2 - Diagnostics from the Main Menu. The following is displayed: _ 1 2 3 _DIAGNOSTICS MENU_ * KEYBRD 4 RELAYS DISPLAY 5 RS232 AD CHAN 3.6.1 Keypad (KEYBRD) When the Keypad diagnostic is selected, the Cellcorder displays the name of each key as it is pressed. The function of every key except ON and ESC can be checked. Press ESC to exit the diagnostic and return to the Diagnostics Menu. 3.6.2 Display When the Display diagnostic is selected, the Cellcorder lights each segment of the display. This test takes about ten seconds and cannot be interrupted. Upon completion, the unit returns to the Diagnostics Menu. 3.6.3 A/D Channel (AD CHAN) Albércorp recommends that you use this diagnostic only when instructed by Albércorp technical support. This diagnostic tests the input circuitry and the analog to digital converter. When the A/D Channel diagnostic is selected, the following menu appears: _ _A/D CHANNEL DIAG_ * 1 Chan 1 3 Chan 3 2 Chan 2 4 Ref [F1] UNCALIB/Calib In this mode, the unit can display uncalibrated (no internal calibration constant applied) or calibrated values. Use the F1 key to select uncalibrated or calibrated. The selected option changes to uppercase letters. 1 - Chan 1 Displays the voltage connected to the standard (two lead) set of voltage leads supplied with the unit. This input is for the cell voltage readings and must not exceed 16 volts. 25 2 - Chan 2 Displays the voltage connected to the negative clip and the small sense clip on the multimeter (three lead) lead set. This input is for the voltage reading across the intercell connector under a test condition. Typical input voltage is usually less than 10mV. 3 - Chan 3 Displays the voltage across the internal reference resistor. The multimeter (three lead) lead set must be properly connected across a 2 volt cell. The test will not start if the voltage is less than 0.5V or higher than 3 volts. After Chan 3 is selected on the A/D Channel Diag menu, press TEST to start the test. The test times out and turns off the load after ten seconds to prevent overheating. To restart the test, press ESC and select the test again. 4 - Ref. Displays the internal reference for the analog to digital converter. The value should be approximately 2048 ±2 counts. This reading cannot be displayed if the calibrated mode is selected. 3.6.4 Relays WARNING: If the Relays diagnostic is enabled while the Cellcorder is connected to a voltage source, the Cellcorder can be permanently damaged. Before you select the Relays diagnostic, verify that no leads are connected to the Cellcorder. A warning is displayed to ensure the leads are disconnected. Press and hold TEST to activate this diagnostic. While TEST is pressed, the unit energizes each load relay one at a time. The clicking of the relays verifies drive circuits are working properly. Release TEST to stop the relay drivers, and press ESC to return to the Diagnostics Menu. 3.6.5 RS-232 When the RS-232 diagnostic is selected, the display prompts you to install a loop back connector. This connector is not supplied with the Cellcorder; however, one can be simulated by connecting pin 2 to pin 3 on the RS-232 connector. After this is done, press TEST to transmit and receive known data. If the data has been corrupted, the error count field increments. Press ESC for at least two seconds to return to the Diagnostics Menu. 26 3.7 Memory Management The Cellcorder has the capability of storing data for either 7 strings of 256 cells or 28 strings of 64 cells. To change modes (from 7 x 256 to 28 x 64), at the Main Menu, select 3 - Setup, then select 3 - Memory Configs. A warning appears: CHANGING MODE WILL SCRAMBLE READINGS CAUTION: Do not change memory configuration after data has been taken, or the memory will be scrambled. Changing back will unscramble the memory. At the warning message, to continue, press ENTER. At the Memory Partitioning menu, choose 7 x 256 or 28 x 64 configuration. After a configuration is selected, the Cellcorder always defaults to it. (That is, if you select 7 x 256, then every time the Cellcorder is powered on, the configuration will be in 7 x 256 mode until it is changed.) An asterisk ( * ) on the top right corner of a menu indicates the memory configuration is set to 7 x 256. No asterisk indicates a 28 x 64 configuration. Erasing String Data After uploading Cellcorder data to the computer or at any other time, you may erase data in all Cellcorder memory locations or in selected strings. CAUTION: After the memory is cleared, there is no way to recover the data. Be sure to upload any data to be saved to the computer via the Cellcorder Battery Analysis Software. To erase the strings, at the Main Menu, press F1. The following menu appears. _ MEMORY OPTIONS_ _ * 1. CLEAR ALL STRINGS 2. CLEAR SINGLE STRG [ESC] QUIT 1 - Clear All Strings Select the Clear All Strings option to clear memory. The unit displays a message to verify this selection is correct. 2 - Clear Single String When the Clear Single String option is selected, the screen prompts for the Batt ID#. To clear only one battery string, enter a battery ID number, then press ENTER. 27 3.8 Calibration When calibrating the Cellcorder, use a photocopy of the Cellcorder Calibration Log (Appendix C in this manual) to record the before and after readings. Doing this will help keep track of any calibration discrepancies. The following equipment is required to perform a complete calibration. EQUIPMENT DESCRIPTION 2V cell capable of 100 amps, or a 2V 100 amp source Current source for calibrating current 100A/100mV shunt, or a clamp-on ammeter may be used as an alternate Shunt for calibrating current HP8840 multimeter or equivalent 5½ digit voltmeter 10mV power supply Power supply for 10mV source LPS152 power supply or equivalent Adjustable power supply for 6V and 12V sources 3.8.1 Entering the Calibration Screen At the Main Menu, select 3 - Setup, then select 1 - Calibrate. The following screen appears: _ _CALIBRATION_ _ * Enter Password... _ _ _ _ [ESC] Quit #### 3.8.2 Entering the Password When the Cellcorder is shipped from the factory or when software is updated via the RS-232 port, the password defaults to 1234. If the password is unknown, contact Albér for a password based on the randomly generated four numbers at the bottom right of the screen. When contacting Albér, have the unit available for reference. After the correct password is entered, press ENTER. The Calibration screen appears. The password may be changed to any four digit number by selecting option 6 - New PW from the Calibration menu. 28 _ _ CALIBRATION _ _ * 1 2V CELL 4 CURRENT 2 6V CELL 5 INTCELL 3 12V CELL 6 NEW PW 3.8.3 Recording the Before Calibration Readings To simplify taking before-calibration readings, first clear the Cellcorder memory. To erase the strings, at the Main Menu, press F1. (Refer to Erasing String Data in Memory Management.) Record the before-calibration (asfound) readings onto a photocopy copy of the Calibration Log. The values of the 2 volt, 6 volt, and 12 volt sources or cells used in the following tests are approximate. Actual values may vary by a nominal amount. 3.8.3.1 Cell Readings 1) Select Multimeter mode on the Cellcorder so the actual voltage is being read. 2) Connect a 2V cell to the Cellcorder using the standard (two lead) voltage leads supplied with the Cellcorder. 3) Measure the voltage using the HP 5 ½ digit voltmeter (or equiv). 4) Record the value on the Calibration Log under Cell 2V: Actual Input. 5) Measure the voltage using the Cellcorder. 6) Record the value under the Cell 2V: Before Calibration. 7) Connect a 6V source to the Cellcorder using the standard leads. 8) Measure the voltage using the HP voltmeter. 9) Record the value under Cell 6V: Actual Input. 10) Measure the voltage using the Cellcorder. 11) Record the value under the Cell 6V: Before Calibration. 12) Connect a 12V to the Cellcorder using the standard leads. 13) Measure the voltage using the HP voltmeter. 14) Record the value under Cell 12V: Actual Input. 15) Measure the voltage using the Cellcorder. 16) Record the value under the Cell 12V: Before Calibration. 29 3.8.3.2 Current Readings 1) Select the Calibration option as described in the Entering the Calibration Screen section. 2) Using the multimeter (three lead) test leads supplied with the Cellcorder, connect the Cellcorder to a 2V test cell with a 100 Amp/100 mV shunt in series with one of the load cables. Refer to the following figure. Figure 1: Cellcorder Connections 3) Connect the small black clip to the same point the large black clip is connected to. 4) Connect the HP 5 ½ digit voltmeter (or equiv) across the shunt. 5) From the Calibration menu, select option 4 - Current. 6) To start the test, press TEST. 7) Measure the current (mV reading across the shunt) using the HP voltmeter. 8) Record the value on the Calibration Log under Current at 2V: Actual Input. 9) Measure the current using the Cellcorder. 10) Record the value under Current at 2V: Before Calibration. NOTE: This test allows current to flow for only 10 seconds before de-energizing the load relay. This prevents overheating of the load resistors and leaving the Cellcorder in a loading condition. To resume the test, press ESC and select option 4 - Current again. 30 3.8.3.3 Intercell Reading 1) Using the multimeter test leads, connect the Cellcorder as follows: Connect a 10mV source to the clips that normally attach across the intercell connector during a test. That is, connect the small black clip to the source positive ( + ), and the large black clip to the source negative ( - ). 2) From the Calibration menu, select option 5 - Intercell. 3) Measure the voltage using the HP 5 ½ digit voltmeter (or equiv). 4) Record the value on the Calibration Log under Intercell 10mV: Actual Input. 5) Measure the voltage using the Cellcorder 6) Record the value under Intercell 10mV: Before Calibration. 7) Reverse the polarity of the 10mV source. 8) Measure the voltage using the HP voltmeter. 9) Record the value under Intercell -10mV: Actual Input. 10) Measure the voltage using the Cellcorder 11) Record the value under Intercell -10mV: Before Calibration. 3.8.4 Calibrating the Cellcorder This section describes how to calibrate the Cellcorder. 3.8.4.1 A/D Reference Adjustment 1) Open the top cover by removing four screws on the bottom of the Cellcorder. 2) Attach a voltmeter to TP3 (GND) and TP6 (A/D REF). 3) Adjust RV2 until the meter reads 2.0480 volts ±0.0001 volts. 3.8.4.2 2V Cell Calibration 1) Using the two voltage leads, connect the Cellcorder across the same 2V source used in the Cell Readings section. 2) From the Calibration menu, select option 1 - 2V Cell. 3) Measure the voltage using the HP voltmeter. 4) Press the Cellcorder UP and DOWN arrow keys until the reading on the Cellcorder matches the input level (the HP DMM reading). 31 NOTE: Rapidly pressing the arrow keys changes the value displayed by large increments. If a small change is needed, press the arrow keys for about a second. 5) Select the Multimeter mode and verify the reading matches the input level. If the reading is off by more than 0.1%, return to the Calibration menu and readjust the calibration value with the arrow keys. After readjustment, return to the Multimeter mode and repeat this step. 6) Record the calibrated value displayed in the Multimeter mode on the Calibration Log under Cell: 2V After Calibration. 3.8.4.3 6V Cell Calibration 1) Using the two voltage leads, connect the Cellcorder across the same 6V source used in the Cell Readings section. 2) From the Calibration menu, select option 2 - 6V Cell. 3) Measure the voltage using the HP voltmeter. 4) Press the UP and DOWN arrow keys until the reading on the Cellcorder matches the HP DMM reading. 5) Select the Multimeter mode and verify the reading matches the input level. If the reading is off by more than 0.1%, return to the Calibration menu and readjust the calibration value with the arrow keys. After readjustment, return to the Multimeter mode and repeat this step. 6) Record the calibrated value displayed in the Multimeter mode on the Calibration Log under Cell: 6V After Calibration. 3.8.4.4 12V Cell Calibration 1) Using the two voltage leads, connect the Cellcorder across the same 12V source used in the Cell Readings section. 2) From the Calibration menu, select option 3 - 12V Cell. 3) Measure the voltage using the HP voltmeter. 4) Press the UP and DOWN arrow keys until the reading on the Cellcorder matches the HP DMM reading. 32 5) Select the Multimeter mode and verify the reading matches the input level. If the reading is off by more than 0.1%, return to the Calibration menu and readjust the calibration value with the arrow keys. After readjustment, return to the Multimeter mode and repeat this step. 6) Record the calibrated value displayed in the Multimeter mode on the Calibration Log under Cell: 12V After Calibration. 3.8.4.5 Current Calibration WARNING: Current calibration should only be performed using a 2 volt source. Do not attempt to perform this procedure with a 6 volt or 12 volt module. The Cellcorder will report an error message and not allow calibration to continue. 1) Using the multimeter (three lead) test leads supplied with the Cellcorder, connect the Cellcorder to a 2V test cell with a 100 Amp/100 mV shunt in series with one of the load cables. (See figure below.) 2) Connect the small black clip to the same point the large black clip is connected to. Refer to the following figure. Figure 2: Cellcorder Connections 3) Connect the HP 5 ½ digit voltmeter (or equiv) across the shunt. 4) From the Calibration menu, select option 4 - Current. 5) To start the test, press TEST. 33 6) Press the UP and DOWN arrow keys until the reading on the Cellcorder matches the current value (mV reading across the shunt) read across the shunt. NOTE: After the TEST key is pressed, this test allows current to flow for only 10 seconds before de-energizing the load relay. This prevents overheating of the load resistors and leaving the Cellcorder in a loading condition. To resume the test, press ESC and select option 4 (current) again. 7) Record the current reading from the Cellcorder onto the Calibration Log under Current at 2V: After Calibration. 3.8.4.6 Intercell Adjustment 1) Connect a 10mV source to the small sense clip and the large black current clip. 2) From the Calibration menu, select option 5 - Intercell. 3) Observe the Cellcorder reading. Reverse the polarity of the 10mV source and verify the Cellcorder reading does not change by more than 30µV. If the value is within this 30µV range, go to step 5. 4) If the reading changed more than 30µV, then the offset adjustment on the input preamp must be adjusted. Adjust RV3 until the value is within 30µV when changing polarity on the input. 5) Press the UP and DOWN arrow keys until the Cellcorder reading matches the input value. If the input is not a fixed 10mV standard source, then use the HP DVM to verify the input value. 6) Record the Cellcorder readings in the Calibration Log under the Intercell: 10mV and -10mV After Calibration locations. 3.8.4.7 Battery Charger Adjustment As the battery charges, the voltage drop across current sensing register R24 decreases. When the battery approaches full charge, this voltage is about 30mV (with the AC adaptor plugged in). RV1 must be readjusted periodically during the adjustment process to achieve a nominal float voltage of 9.40 volts at TP3 (GND) and TP2 (+8V BAT). This process could take from one to ten hours, depending on the initial state of charge of the battery. 34 Only make fine adjustments when the voltage across R24 is near 30mV. When making adjustments, the effect is not immediate; therefore, make the adjustment and recheck after the battery has time to respond. The battery charger should only require minor adjustments if the battery has been replaced; otherwise, no adjustment should be needed. The life of the battery is directly related to how well it is charged. 3.8.5 Backing Up and Restoring the Calibration Refer to the Battery Analysis User's Guide for information about backing up and restoring Cellcorder data. 35 4 Appendix A: Cellcorder Parts List Quantity and Description Initial 1 Cellcorder Unit _____ 1 Power Adaptor for Cellcorder _____ 1 RS-232 Cable _____ 1 Voltage Lead Cable Set (2 Leads) _____ 1 Resistance Test Cable (3 Leads) _____ 1 Cellcorder Operation Manual _____ 1 Battery Analysis Software (BAS) _____ 1 BAS Manual _____ 1 Carrying Case _____ 1 Quick Start Card _____ 1 Warranty Card _____ Ser. No: _______________________ Checked By: ____________________________________________ Date: ____________________________________________ 36 5 Appendix B: System Specifications Reading Range Accuracy Voltage 0 - 16.00 volts 0.1% of reading ±1 LSD Cell Resistance 0 - 99.99 milliohms Readings are repeatable from ±2% to ±5% (Refer to Albercorp Application Note CC-001 for details) Intercell Resistance 0 - 2.000 milliohms 0.25% of reading ±2 microhm Power Source 8V, 5 amp-hour battery (Will power unit for up to 6 hours) Display Screen 4 Line x 20 character bright vacuum fluorescent Weight 8.5 pounds (Not including leads or carrying case) Dimensions 11.5" wide; 10" deep; 4" high Warranty One year from date of purchase Note: Specifications are subject to change without notice. 37 6 Appendix C: Cellcorder Calibration Log General Information: Customer: _____________________________________________________ P.O.# _________________________________________________________ Calibration Date: ________________________________________________ Serial Number:__________________________________________________ Approx. Input Voltage Actual Input Reading Instrument Reading Before Calibration Instrument Reading After Calibration 2V cell __________ __________ __________ 6V cell __________ __________ __________ 12V cell __________ __________ __________ __________ __________ __________ 10mV __________ __________ __________ -10mV __________ __________ __________ Cell: Current: Current @2V Intercell: 38 7 cells’ internal resistances together with float voltages and intercell connection resistances. All three of these variables are rapidly measured and conveniently recorded by the Albercorp Cellcorder, the storage battery multimeter. Appendix D: Application Note CC-001 Internal Resistance and the Cellcorder (This document is available at www.alber.com) THE SEARCH The search for new approach to capacity and conduction path testing has been ongoing. Traditionally, a battery’s capacity to store energy has been specified by its manufacturers as its ability to supply a constant amount of current, or power, to the load for a defined time period to a final voltage. The real test of the battery’s actual capacity as opposed to its rated capacity frequently involves hours of manpower and load and data acquisition equipment. Unfortunately, a new approach has yet to gain industry-wide acceptance. The consensus of battery experts is still that load testing under controlled conditions is the only method with certainty of establishing a battery’s actual capacity. This is reflected in several national standards; the latest of which was issued in 1995.1,2 However, after many years of experience, studies and experiments, a wealth of information about battery behavior and measurements has been produced and some light has been shed on new tools that will help assess a battery’s condition. INTRODUCTION With the changeover from “vented” cells to “sealed,” VRLA cells, and the proliferation of UPS systems, an even greater impetus has been placed in finding economical and reliable ways to establish the state of a battery’s capacity and its conduction path. In this Application Note, the primary focus will be on a new, relatively low cost aid in determining a battery’s health by virtue of its 39 trochemical resistance. More so, as the test frequency is increased. Impedance and admittance measurements include both capacitance and inductance in their readings. As early as 1959, the equivalent circuits of cells and typical circuit values were published.3 (See Figure 1.) These circuit models of a battery’s cell, are critical to understanding how its condition relates to cell internal parameters, conduction paths and capacity. THE NATURE OF INTERNAL RESISTANCE At Albércorp, we have centered our efforts on cell internal resistance. A refined cell model has been developed which subdivides the internal resistances of a cell, as shown in Figure 2, into its metallic and electrochemical components. These resistances do not change with test frequency. Indeed, researchers have concluded that a zero frequency, DC, or extremely low frequencies, yield the best results when studying capacity relationships.4,5 THE BASICS: RESISTANCE, INDUCTANCE AND CAPACITANCE The models’ circuit elements are resistance, capacitance and inductance. Researchers have investigated battery parameters from DC through several thousand hertz and have made measurements in all units. They tried to relate those to cell capacity, often with mixed or conflicting results. In almost all typical battery applications, the inductance has no practical impact on battery performance because of its small magnitude (from 0.05 to 0.2 microhenries.) On the other hand, the actual capacitance of cells is surprisingly large, as much as 1.7 Farads per 100 Amp-Hours. This cell characteristic is put to good use by charger manufacturers. They depend on it to filter their charger output.3 However, little evidence has evolved that ties capacitance with the actual capacity of a cell. It’s worth noting that one researcher felt capacitive reactance “obscures” the predominant indicator of cell capacity, elec40 Another group focusing on internal resistance is prestigious Nippon Telephone and Telegraph. Their research and field personnel have shown that a major result of the lead acid battery deterioration mechanism is an increased internal resistance. A 500 microsecond duration pulse technique is used to measure cell internal resistance. Test results lead them to conclude that battery deterioration (capacity) can be estimated within ±10% by internal resistance measure. Note that Capacity vs. Normalized RINTERNAL curve, shown in Figure 3, is somewhat curved. Some feel the relationship between most cell internal parameters and capacity is not a simple straight line as has been described in recent times but rather a more complex curvi-linear function.6 I2 x RINTERNAL, and is not available where it is really needed . . . at the load. Thus, actual capacity is diminished. However, during discharge this reduction in capacity appears differently depending upon whether the resistance change is primarily metallic or electrochemical in nature. METALLIC RESISTANCE This portion of the internal conduction path troubles most battery test experts. It is here that deterioration of a cell can occur most rapidly and then will often go undetected between the yearly integrity tests or, even less frequently, the capacity tests. The tear down of failed batteries with abnormal internal resistances has proven that the terminal posts and the internal straps and grids are most often the victims of corrosion, poor welds or "burns."7 Where found, contact surfaces of a copper insert can corrode or loosen from its surrounding lead post. The Cellcorder easily detects these types of problems. Part of this belief that a straight line cannot describe a capacity relationship is rooted in the differences exhibited during battery discharges from cells with metallic vs. electrochemical resistance problems. The typical discharge curve of a cell at 100% capacity is shown in Figure 4. Fig. 5 clearly shows the loss of capacity due to a high internal metallic resistance. The available voltage at the battery’s terminals is reduced from the start of the discharge and continues to the end. A battery's capacity is adversely affected by an increased internal resistance. Obviously, the power is dissipated internally, 41 ELECTROCHEMICAL RESISTANCE Cell paste, electrolyte and separators form the electrochemical part of cell internal resistance. Long-term increases in RELECTROCHEMICAL can be caused by loss of active material or paste due to aging. Short-term changes also occur naturally during parts of the charge or discharge processes when the specific gravity is altered; or when the contents of the separators varies and/or the chemical composition of the surfaces change. Separator compression, clogging or shorts, and conditions like sulfation are frequently causes of abnormal, increased electrochemical resistance; however, accelerated electrolyte dryout appears to be public enemy #1 when it comes to VRLA failures. Figure 6 reveals how a battery with an electrochemical resistance problem behaves. Its reduced capacity does not become apparent until much further into the discharge, like “running out of fuel.” On the other hand, the metallic resistance problem can be viewed as pinching the fuel line! In either case, the worse the resistance, the greater the shortfall between the cell’s rated and actual capacity. 42 BATTERY AGING AND INTERNAL RESISTANCE Internal resistance provides a clue to aging. The aging process of a battery’s cells is based upon the rates at which their materials and construction deteriorate under design conditions. For example, the life of nearly all stationary cells is specified at 77°F, under particular float charge conditions and discharges of stipulated depth and frequency. Very slow corrosion of conduction paths, the loosening of active materials from plates, grid deformation and, in the case of VRLA cells, dry out of electrolyte are all natural processes that push a cell to its end life. This aging process is marked by increasing cell internal resistance and decreasing capacity. It is generally agreed that below 80% actual capacity, the cell’s deterioration will accelerate rapidly and replacement is recommended. The internal resistance increases slowly but, toward the end of a cell's life, it accelerates greatly. Its end-life value is normally about 25% or so above its initial value, but can be as high as 50%. TEMPERATURE AND INTERNAL RESISTANCE Being aware of the effect of temperature on internal resistance is important. Figure 7, for a typical AGM VRLA cell, clearly shows rapid internal resistance and impedance increases below temperatures of about 45°F.8 The battery manufacturers have customarily determined the internal resistance of cells using simple Ohms Law. They usually measure the voltage differences and current during a battery discharge. In temperate climates, VRLA cells in unconditioned temperature environments may show considerable internal resistance variation between quarterly measurements. Recording of the ambient temperatures at the time of measurement will might save you further testing and false alarms. Similarly, cells chilled by air conditioning exhibit higher readings than their sheltered neighbors. If possible, try to re-direct the air flow. THE CELLCORDER The Cellcorder is invaluable in determining what a battery or cell’s internal resistance is and in helping to identify abnormal conditions and normal aging. While a battery or cell is on-line, it accurately and repetitively measures the internal resistance using DC techniques. The AC filtering currents, stray 60 hertz fields, noise and normal float currents have virtually no effect on its readings. The authors can’t help but wonder what earlier researchers could have accomplished if they had access to microprocessor and solid state technology. The microprocessor of the Cellcorder permits it to not only control measurements, but to also precisely time the readings and performs calculations. To boot, it can tell whether a reading is valid and then records the results. 43 The Cellcorder does the same thing, but very quickly and accurately. Figure 8 reveals what happens when a battery is subjected to a load. The instantaneous voltage drop when the load is applied, or the instantaneous voltage recovery when the load is removed, is due to the internal resistance. The Cellcorder reads the current and the cell voltage just prior to removal of the load and then measures the recovered cell's voltage. The resultant resistance is simply RINTERNAL=∆V/I.9 THE MOMENTARY TEST DISCHARGE This is a feature worth your time to understand. It is, in part, what distinguishes the Cellcorder from most instruments presently on the market and will help provide readings in which you can be confident. For rated cell capacities of less than 1000 amp-hours, the discharge is short, only three to four seconds, in the order of 20 to 75 amps. For larger capacities, the duration is close to 10 seconds. To prove a point about safety and the effects of short- term high currents, we performed the following experiment. We imagined an internal conductor corroded down to the size of a dot. We found that passing the Cellcorder’s test current through a skinny wire (27 inches of #20 gauge wire) caused no damage nor barely heated it. Try it! The reason is that very little energy is involved. It amounts to only a maximum of 5 watts per 1000 microhms and lasts only seconds. In an actual test, within milliseconds of starting, the Cellcorder senses the current level. If there is a very high internal resistance, the current will be low and the discharge will be instantaneously terminated. Thus, a cell with an exceptionally corroded internal conductor will not be further damaged. After tens of thousands of cell tests, there have been no reports indicating that the Cellcorder's test discharge has caused a cell to open circuit. Interestingly, many battery specialists feel disappointed that their most severely corroded cells have not opened. They would rather have them open during a supervised test than during an actual emergency when no one is around! ALBÉRCORP RESEARCH Carefully conducted Albércorp experiments have revealed other important properties of cell internal resistance. One is the relationship between metallic resistance and electrochemical resistance. Many would expect that as the energy stored in a fully charged cell diminishes, the internal resistance of the cell would increase both proportionately and significantly. This belief is widely held because of how the lead acid cell electrochemistry is envisioned. Measured amounts of energy were methodically removed and each time the internal resistance was read. It was found that the internal resistance rose no more than 3% after removal of 32% of the cell’s energy. Upon continued discharge, the internal 44 resistance increased rapidly in a non-linear fashion. Since it is extremely unlikely that the cells’ metallic resistance could have changed while the cells were discharged, it can be concluded that: 1) the changes noted in total internal resistance were due exclusively to electrochemical resistance change; 2) the electrochemical resistance change is a small part of total internal resistance as the stored energy drops from 100% to substantially lower levels of charge.9 In the real testing world, this is good news. It means that a battery can be reliably tested by the Cellcorder at float, open circuit voltage and even partially discharged. THE “BASELINE” AND WHEN BEST TO GET IT The fantasy of a “battery literate” person is that complete capacity and internal resistance test data, from day zero, is available for analysis. He seeks to determine the typical internal resistance of cells at 100% and 80% as well as the trend from 100% through 80% capacity. The fantasy begins with the battery’s installation. An acceptance capacity test is conducted and the cells’ internal resistances measured. The results should be fairly uniform and he would safeguard this data. He knows it serves as the ideal baseline, or “reference” per IEEE/ANSI P-1188, for future internal resistance tests. He will then be able to make cut and dry decisions about maintenance or cell replacement. Unfortunately, it's a fantasy in most environments because, in the rush and tumult of getting a facility on-line, establishing a baseline usually has low priority. As a result, ASAP. Actually, the standard is expressed in the reciprocal of internal resistance, conductance (mhos.) we are then left to getting data in the best ways possible. The second best time to obtain a set of data is shortly after capacities have been determined on the same model cells of the same age. Lastly, try obtaining data on the same model cells of any age. Over time, data to the endlife or 80% capacity level will be accumulated. -CAUTIONInternal resistance data taken without the benefit of correlated known capacities is often referred to as “as-found comparative values.” This as-found data could be used to set a baseline, but be very cautious. It is not unusual to find an entire string of cells of uniform internal resistances, and normal appearance on float, but with failing capacities. In this situation, we highly recommend at least a crude service/load test be performed to lend some credence to the internal resistance measurements. THE COURSE OF ACTION If you do not have end-life or 80% baselines developed from significant samples of the same cells, age, etc., you should use the following rough rules-of-thumb based upon Cellcorder user reports and in-house experience. If the internal resistance is: 20%-50% above the 100% baseline, then the cell be load tested . . . the sooner the better if it’s towards the high end; at 50% or above the baseline, the cell be replaced. Surprisingly, the IEEE/ANSI VRLA P-1188 proposed standard is more liberal in this matter. It recommends that from 25% to about 43%, the cell’s manufacturer be contacted. Above 43%, a load test be done 45 DATA ANOMALIES Another part of the battery literates’ fantasy is also likely to be shattered: that all the data gathered for the baseline, or test readings taken afterward, would fall reasonably close to any trendline. That is, higher capacity cells will have uniformly lower internal resistances and lower capacity cells will have proportionately higher internal resistances. Even cells fresh off of a tightly controlled production line fail to completely conform with this expected behavior.5 In the course of your own testing, you will find tested, high capacity cells with an unusually high internal resistance. Similarly, there will be cells with the low internal resistance characteristic of a good cell that would fail a capacity test. Unfortunately, the current state of the art does not permit impedance, conductance, admittance or resistance testing to definitively identify the cells with anomalies - without the assistance of a load test. If you are fortunate to have large amounts of both capacity and corresponding internal resistance data, developing a baseline should be no problem. When a program is just starting, or there are few cells of a particular model, some educated “guess-timating” helps in sorting out data. If you need baseline data try calling us or the cell’s manufacturer. INTERNAL RESISTANCE TEST FREQUENCY The whole purpose of the internal resistance check is to determine whether a cell has deteriorated and if so, how much and how fast. Logically, checks are done periodically. At least quarterly, check cells that have exhibited signs of abnormality either from inspection or an earlier capacity, integrity or internal resistance test. Since neither specific gravity nor visual checks can be done on sealed cells, you would want to do much more frequent testing than on vented cells. For that reason, it’s no surprise the P-1188 VRLA proposed Standard recommends internal measurements be taken quarterly. On the other hand, the standard for vented batteries, 4501, doesn’t specify this type of check. However, it does call for annual connection resistance readings and you would want to take the internal resistances at the same time. That’s the nicest part of the Cellcorder... its “multimeter” functions measure and record both the internal and connection resistances at the same time! It saves you time and you don’t even move the test leads for single post cells. For detailed information, request Cellcorder Application Note CC002, Intercell Resistance Measurement Procedures which covers single and multiple-post cells measurements. MANAGING THE CELLCORDER’S DATA FILES As a testing program progresses, the number of computer data files will increase rapidly... as many as four yearly per battery string if the P-1188 guidelines are followed. To quickly identify these type files and manage them with minimum errors through DOS or through Windows File Manager, a file naming system can be important. Try to include in the filenames’ eight characters as many descriptors as possible to reflect the data’s date, location and battery. Thus, filename 941WPB1A.DAT would describe the first test data, in 1994, for location WPB’s battery 1, string A. 46 Whether you use numbers or characters, the important thing is to make the filename as recognizable as possible while avoiding duplicate filenames. This helps immensely in finding files and to avoid overwriting, deleting or copying wrong files, especially when using operating systems before version MSDOS 6. SAFEGUARDING THE CELLCORDER By far, the most common cause of damage to the Cellcorder is from grossly excessive input voltages, particularly when taking UPS cell readings. AWARENESS is the most important factor in avoiding these kind of problems. Before any testing begins, take five minutes to survey the battery bank to make sure that: • cells are not misnumbered; • the intertier cable routing is unmistakable; • the main battery terminals and other spanable high voltage points are identified and temporarily covered. Also, before making a measurement that includes a cable routed through a tray to another tier, use a voltmeter to identify the other end. Make sure no potentially damaging voltage is present. POWER-UP the Cellcorder before connecting it to a battery. This activates additional protective circuitry. CLEAN-UP is also important especially in preserving the jaws and clips of the test leads. Wipe off all grease and then apply an acid neutralizing solution. REFERENCES (1) ANSI/IEEE 450-1995, “IEEE Recommended Practice for Maintenance, Testing and Replacement of Vented LeadAcid Batteries for Stationary Batteries,” ANSI, New York, NY 1995 (2) ANSI/IEEE PAR #1188, “IEEE Recommended Practice for Maintenance, Testing and Replacement of Valve Regulated Lead-Acid Batteries for Stationary Batteries,” ANSI, New York, NY 1994 (3) E. Willihnganz and P. Rohner, “Battery Impedance: Farads, Milliohms, Microhenries,” AIEE, 1959 (4) S. DeBardelaben, “Determining the End of Battery Life,” Intelec ‘86, Toronto, Canada (5) S.Misra, T. Noveske, L. Holden, S. Mraz, "Use of AC Impedance/Conductance and DC Resistance for Determining the Reliability of VRLA Battery Systems", Intelec '93, Paris, France (6) Y. Konya, T. Takeda, K. Takano, M. Kohno, Et. Al., "A Deterioration Estimating System for 200 AH Sealed Lead-Acid Batteries", Intelec '94, Vancouver, B.C. (7) K. Peters, “Ten Years Experience of VRLA Batteries in Telecommunications Service,” May 1994, 8th Battery Conference & Exhibition, Solihull, UK (8) Johnson Controls, “Impedance and Conductance Testing,” Application Note Form 41-7271, Aug. 1994, Milwaukee, WI and Albércorp in-house data. (9) G. Alber, "Are Internal Cell Parameter Measurements a Substitute or Supplement to Capacity Testing?", Sep. 1994, NE Utilities Battery Conference, Albany, N.Y. 47 8 HOW TO TAKE READINGS When taking intercell connection resistance readings, it is important that: Appendix E: Application Note CC-002 Internal Resistance Measurement Procedures (This document is available at www.alber.com) INTRODUCTION Intercell resistance problems account for a great many battery system failures. In UPS or other high current applications, the failures can lead to explosions and fires that are not only costly but also represent safety hazards. Most battery manufacturers, unfortunately, do not supply baseline resistance values, so presently users must establish their own values. The recommended procedures for establishing base lines are: a) the test leads are connected properly. Measurements should include the post to intercell connector resistance. Always check your connections and connect only to posts, not nuts, bolts or straps. (See figs. 1-5. This is the main area where connection problems occur;) and, b) the test probe tips/fingers make a good connection, piercing any grease, lead oxide or crud coating the posts or straps. This is the leading cause of error messages after pressing the test button. Often jiggling the probe will lower the readings significantly and save you the heartache of unnecessarily reworking a connection. New systems . . . read all the resistance values after installation and calculate the average value. Older systems . . . disassemble 10 sets of intercell connections; burnish, neutralize and clean them; reapply corrosion inhibiting compound, reconnect, retorque, and then calculate the average of the new readings. Intercell resistance measurements should be taken once a year of all cells (IEEE-450-1995 and forthcoming IEEE VRLA maintenance recommendations). Any connection that is 20% or greater than the baseline or installation value requires corrective action. The importance of these measurements is illustrated by the new VRLA standard that recommends quarterly sampling 25% of the intercell connection resistances. If an upward trend is detected, all connection resistances should be measured to aid in determining the cause and corrective actions. SINGLE INTERCONNECTIONS Figure 1 shows how the Albércorp Cellcorder should ideally be connected to obtain the proper measurement. Note that, ideally, the reading includes both the intercell connector resistance and the post to intercell connection resistance. Figure 2A shows the connection for VRLA cells, such as the ABSOLYTE II batteries, 48 where the terminal post is accessible. Figure 2B shows the connection for VRLA cells where the terminal post is not accessible. In this type of cell, the intercell to post connection resistance is included in the internal cell resistance measurement. NOTE: Do not connect to the stainless steel bolt heads to make this measurement. DUAL INTERCONNECTIONS Figures 3A and 3B show the typical intercell connections for dual post cells. This type of interconnection requires that two readings be taken. The first one shown should be with the intercell leads connected from Terminal Post A to Terminal Post C. Take the second reading with the intercell leads connected from Terminal Post B to Terminal Post D. The positive (a red clip) Cellcorder lead should remain connected (as shown) to the same terminal post for both measurements. 49 TRIPLE INTERCONNECTIONS Figures 4 and 5 show the typical intercell connections for triple post cells. For cells arranged as in Fig. 4, three readings are made. The first one, shown, should be with the intercell leads connected from Terminal Post A to Terminal Post D. Take the second reading with the intercell leads connected from Terminal Post B to Post E. The third reading is with the intercell leads connected from Terminal Post C to Post F. For VRLA cells or flooded cells configured as shown in Figure 5, four readings are made, forming two “X’s.” Terminal Posts A to E then B to D, and B to F then C to E. In all triple post strap measurements, the positive (a red clip) Cellcorder lead should remain connected (as shown) to the same terminal post for all readings. 50 9 Appendix F: Application Note CC-003 Optimizing Cellcorder Battery Life Albércorp wants to remind all Cellcorder users that this unit uses an 8-volt, 5 amp-hour, sealed lead-acid battery for its operation. This particular battery has been used for many years in some of our other products, and we know from experience that it should last three to five years. Unfortunately, some users do not remember "Battery Basics 101," which clearly states: A lead-acid battery, if stored in a discharged condition, will suffer permanent loss of capacity due to sulfation and, in a fully discharged condition, will be ruined by hydration. Please make sure the Cellcorder is kept in or near a fully charged condition. This means charging the unit within less than 24 hours after each use. If the unit is only used to take a few readings, it is obviously not as important to charge it as it is following several hours of use. The battery was sized to last six hours in a 77oF environment, and we guarantee that it will last for at least five hours of continuous use when it leaves the factory. If you have any questions, please call Albércorp. 51 10 Appendix G: Cellcorder Connection Options 52 Index error codes..........................................22 float voltage readings ...............5, 12, 13 hydrometer .........................................19 initial system test..................................7 intercell resistance..........................5, 15 intercell type menu.............................13 internal cell resistance....................5, 14 keypad diagnostic...........................8, 25 loop back connector ...........................26 main menu......................................7, 11 maximum voltage warning.................17 memory configuration............12, 16, 27 memory options menu........................27 memory partitioning menu.................27 mode select.........................................12 mode select menu...............................12 multimeter ......................................4, 13 multimeter screen...............................13 multiple strings...................................16 no float readings screen......................14 null modem adaptor ...........................20 out-of-tolerance readings ...................20 overall volts..................................18, 19 parts list..............................................36 password ......................................20, 28 polarity ...............................................18 power ...................................................6 Rc .......................................................15 reading exists screen ..........................18 readings..............................................15 relays diagnostic.............................8, 26 reset the Cellcorder ............................24 resistance readings .............................14 Ric......................................................15 RS-232 diagnostic ..........................9, 26 safety information ...............................iv setup ...................................................12 SG/Temp/OV menu ...........................18 skewing effect ....................................13 specific gravity.........................5, 18, 19 specifications......................................37 system display......................................6 A/D channel diag menu ..................... 25 A/D channel diagnostic ................. 8, 25 amp hours .......................................... 13 asterisk (*) on menu ...................... 7, 27 auto ranging ......................................... 5 batt ID field........................................ 19 battery charging (Cellcorder)....... 11, 21 battery low (Cellcorder)..................... 21 battery maintenance........................... 10 battery selection................................. 19 calibration .................................... 28, 31 12V cell ......................................... 32 2V cell ........................................... 31 6V cell ........................................... 32 A/D reference ................................ 31 backing-up ..................................... 35 battery charger ............................... 34 cell readings................................... 29 current............................................ 33 current readings ............................. 30 intercell .......................................... 34 intercell readings............................ 31 restoring......................................... 35 calibration log.................................... 38 calibration menu ................................ 28 calibration screen............................... 28 cell capacity menu ............................. 13 cell number changing ........................................ 17 indexing ................................... 16, 18 cell selection ...................................... 18 charge indicator ................................... 7 charger module .................................. 21 clear all strings................................... 27 clear single string............................... 27 configurationSee memory configuration data extraction and analysis ................. 6 diagnostics ................................... 12, 25 diagnostics menu ........................... 8, 25 digital hydrometer.............................. 19 display diagnostic .......................... 8, 25 erasing string data.............................. 27 53 system reset ....................................... 24 system test ........................................... 7 temperature .............................. 5, 18, 19 temperature type C/F ......................... 19 test initialization message .................. 16 test initialization screen ..................... 14 test leads ............................................ 14 test modes ............................................ 4 multimeter........................................ 4 specific gravity.................................5 temperature ......................................5 voltmeter ..........................................4 test parameters ...................................20 test parameters menu..........................20 upload readings ..............................6, 19 voltmeter ........................................4, 17 voltmeter screen .................................17 warning messages ..............................22 54


