1
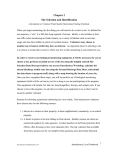
NUTRIENT TRACKING TOOL TUTORIAL By Ali Saleh, Associate Director Oscar Gallego, Assistant Research Scientist Edward Osei, Senior Research Economist TIAER Tarleton State University Stephenville, Texas PR434610 March 2014 Nutrient Tracking Tool User’s Manual TIAER CONTENTS ACKNOWLEDGEMENTS ........................................................................................................... 3 Chapter 1 INTRODUCTION ....................................................................................................... 3 Chapter 2 TUTORIAL .................................................................................................................. 7 Chapter 3 EXAMPLES .............................................................................................................. 28 References .................................................................................................................................. 36 FIGURES Figure 2.1 Welcome screen ........................................................................................................ 7 Figure 2.2 Getting Started screen showing more detail about NTT ........................................... 8 Figure 2.3 Welcome screen showing selection of State, County, and Weather Station ............ 9 Figure 2.4 Initial Management Information screen .................................................................. 10 Figure 2.5 Management Information screen showing options for defining baseline and alternative scenarios ...................................................................................................................... 11 Figure 2.6 Management Information screen showing specification of cropping system, irrigation and tillage options, and nutrient input information ....................................................... 12 Figure 2.7 Structural Conservation Practice Information screen ............................................. 13 Figure 2.8 Structural Conservation Practices screen showing selection of 20-acre wetland ... 14 Figure 2.9 Verify Information screen prior to running NTT simulation .................................. 14 Figure 2.10 Verify Information screen while NTT simulation is in progress ........................ 15 Figure 2.11 Summary Report screen showing summary output from NTT simulation ......... 16 Figure 2.12 Capture Soil Map screen to start Web Soil from within NTT ............................ 17 Figure 2.13 Initial screen in the Web Soil Survey (WSS) program prior to area selection .... 18 Figure 2.14 WSS screen after selection of State (Maryland) and County (Carroll) of interest 19 Figure 2.15 WSS screen after zooming into Maryland to select a field in Carroll County .... 20 Figure 2.16 WSS screen after zooming in to Carroll County, Maryland ............................... 20 Figure 2.17 WSS screen showing AOI creation after selecting area of interest ..................... 21 Figure 2.18 WSS screen after selecting all contents prior to copying into NTT .................... 22 Figure 2.19 NTT program prior to pasting in selected soil information from WSS .............. 22 Figure 2.20 NTT program screen after pasting in soil information from WSS ...................... 23 Figure 2.21 NTT program after capturing (importing) soil information from WSS .............. 24 Figure 2.22 Management Information screen showing multiple soils captured from WSS ... 25 Figure 2.24 Management Information screen with multiple soils after selecting options...... 26 Figure 2.25 Verify Information screen with multiple soils prior to NTT simulation ............. 27 ii Nutrient Tracking Tool User’s Manual TIAER ACKNOWLEDGEMENTS The research upon which this report is based was financed in part by a USDA-NRCS Conservation Innovation Grants (CIG) funded project. The authors would like to thank Ms. Joree Burnett, a graduate student in the Department of Chemistry, Geosciences, and Physics for her research assistance while working on this tutorial. The authors also acknowledge review comments by Dr. Ping Yang, a senior research associate at the Texas Institute for Applied Environmental Research, Tarleton State University. The authors are also grateful to Ms. Heather Simmons-Rigdon, former executive director of the South central Washington RC&D Council for useful input and assistance with data collection required for the work reflected in this report. The opinions and analyses expressed in this report remain the sole responsibility of the authors and do not necessarily reflect the views and opinions of USDA-NRCS, TIAER, Tarleton State University, or the South central Washington RC&D Council. CHAPTER 1 INTRODUCTION The Nutrient Tracking Tool1 (NTT) is a web-based computer tool that enables users to determine the impacts that alternative practices or management options have on crop yields, and sediment and nutrient losses from individual fields. Impacts of alternative practices on sediment and nutrient losses can be readily converted to water quality credits for use in a water quality trading program. Estimates of the impacts of conservation practices on water quantity are an additional benefit of NTT. Based on recent enhancements, air quality credits can also be estimated from NTT output for use in trading. 1.1. Motivation NTT was developed primarily as a tool for estimating environmental credits for water quality trading. As the interest in water and air quality trading involving agriculture has grown over the past several years, so has the need for tools that can reliably estimate nutrient and sediment credits associated with alternative practices. Reliable data on credits will equip farmers with the information needed to make wise decisions about environmental credit trading and choose the potentially most cost-effective practices required for those trades. NTT aids in the calculation of nutrient and sediment credits by providing estimates of nutrient and sediment losses associated 1 Formerly referred to as the Nutrient Trading Tool. 3 Nutrient Tracking Tool User’s Manual TIAER with baseline conditions, and the levels of those indicators for each alternative practice or scenario under consideration. 1.2. Basic Structure of NTT NTT is a web-based program. Users can access the beta version of the program by using their internet browser to go to the main NTT home page: http://nn.tarleton.edu/nttWebARS/. The current version is limited to a few sites within the US and the results are being verified. Users can select the state and county relevant for their applications and then proceed to define scenarios and run NTT to obtain estimates of nutrient and sediment losses as well as other indicators for each scenario they define. NTT is a user-friendly program. Virtually all the data required for a number of states and counties are already available on the NTT server. If users are interested in evaluating management alternatives that are typical for one of these states and counties, they need not provide any specific information other than the size of the field or land area they wish to evaluate. All other data required for these areas can be selected by users from drop-down list boxes on the NTT web pages. If users desire to estimate nutrient and sediment losses for management practices that are not available in the NTT program for one of these counties, they can easily select options to either modify existing management practices (operations) or create new ones. Data required for NTT application in other counties and states in the U.S. are being added to the NTT server and should be completed in the near future. The NTT program consists of three main components: 1. Web interface, which is visible to the user 2. Computer simulation programs, which run in the background in response to user requests 3. Supporting databases, subsets of which can be viewed and customized by the user, based on the selections they make via the NTT web interface. 1.2.1. NTT Web Interface The NTT web interface has been developed for any standard web browser. However, when using Microsoft Internet Explorer, version 6.x or later is preferred on Microsoft Windows computers. When using Netscape Navigator, version 6.x or later is preferred on Microsoft Windows computers. 1.2.2. NTT’s Computer Simulation Programs NTT was initially developed as a Nitrogen Trading Tool by United States Department of Agriculture’s Natural Resource and Conservation Service (USDA-NRCS) and Agricultural Research Service (USDA-ARS). Recently, through this USDA Conservation Innovation Grants project the Texas Institute for Applied Environmental Research (TIAER) at Tarleton State University linked the Agricultural Policy Environmental eXtender (APEX; Williams et al., 2000) model to the Nitrogen Trading Tool. The result is a tool that in addition to nitrogen (N), 4 Nutrient Tracking Tool User’s Manual TIAER estimates sediment and phosphorus (P) losses, crop yields, and flow. The new version of the tool is called Nutrient Tracking Tool, since it is no longer limited to just nitrogen. APEX was selected for this trading tool because of its capability to: 1) predict N and P losses, crop yields, and sediment losses; and 2) simulate the impacts of numerous management alternatives, such as filter strips, on predicted nutrient and sediment losses. APEX also has other capabilities that can be useful in future potential augmentations of the tool, such as simulation of pesticide losses and carbon cycles. The APEX model was developed to simulate whole farms and small watersheds. APEX has components for routing water, sediment, nutrients, and pesticides across complex landscapes and channel systems to the watershed outlet. Recently, the carbon fate and transport functions of the CENTURY model (Parton et al., 1986) were incorporated into APEX (version 2110), which now allows APEX to simulate carbon dynamics in the soil-plant system. APEX also has groundwater and reservoir components. A field or small watershed can be subdivided as much as necessary to ensure that each subarea is relatively homogeneous in terms of soil, land use, management, etc. The routing mechanisms provide for evaluation of interactions between subareas involving surface runoff, return flow, sediment deposition, nutrient transport, and groundwater flow. 1.2.3. Supporting Databases All the datasets required for running NTT in selected states and counties are housed on the NTT server for ready user access. However, users may enter management information that is different from the pre-defined set available on the NTT program for their county of interest and can also save their information for future use. The following are the NTT databases that are available on the NTT server for selected states and counties and are being developed for the remaining counties in the U.S. Weather (precipitation, minimum temperature, maximum temperature) Soils Crop parameters Tillage parameters Properties of major fertilizer and manure products Typical management practices for each major crop in selected crop management zones 1.3. Organization of the Manual This manual is organized into seven chapters. This introductory chapter gives a brief overview of the tool and the rationale for its development. Chapter 2 provides a tutorial for standard use of the tool. The tutorial is followed by four chapters that cover various aspects of NTT use including, defining scenarios, selecting pre-defined management data, editing management data, importing soils from the web soil survey, running scenarios, and output display. Chapter 7 shows users how they can save their NTT projects for future use. The manual concludes with a list of the references cited in this document. 5 Nutrient Tracking Tool User’s Manual TIAER 6 Nutrient Tracking Tool User’s Manual TIAER CHAPTER 2 TUTORIAL The following tutorial gives a general step-by-step guide through the process of using NTT. Two methods for selecting the field(s) to be evaluated are provided by NTT. Users can select a county of interest and then select one of several soil types that define the field to be evaluated. Alternatively, users can access the USDA-NRCS web soil survey (a graphical web-based soil selection tool) and select the specific tract or area of interest (AOI), which may include multiple soil types. An area selection tool in the web soil survey makes it easy to select the specific AOI. The first part of the tutorial walks users through the process of running NTT by selecting a county and then a single soil type. The second part of the tutorial shows how to use the web soil survey to select an AOI that contains one or more soil types and how to use the selected area and its soil type information in the NTT estimations. Figure 2.1 Welcome screen 7 Nutrient Tracking Tool User’s Manual TIAER When users access the NTT web site, they are presented with a Welcome screen (Figure 2.1) where they can opt to go to Capture Soil Map Information through the USDA-NRCS web soil survey, or select a state and county of interest. At the bottom of the Welcome screen, users also have the option of uploading a saved NTT project file. Figure 2.2 2.1. Getting Started screen showing more detail about NTT Running NTT with a single soil type Users can also click a help button on the Home page, to learn more about the NTT tool; an information page containing additional details about NTT is displayed (Figure 2.2). For this portion of the tutorial, select the Select Specific Soil option and select a state and county of interest. For this example, select Washington from the State drop-down box and then Yakima from the County drop-down box. Multiple weather stations may be available for a single county, so users may need to make a selection in the Weather Station drop-down box as well. In this example, there are four weather stations for Yakima County, Washington – Yakima Station is selected for use in this example(Figure 2.3). 8 Nutrient Tracking Tool User’s Manual Figure 2.3 TIAER Welcome screen showing selection of State, County, and Weather Station When users click the Continue button, the Management Information screen is shown (Figure 2.4). 9 Nutrient Tracking Tool User’s Manual Figure 2.4 TIAER Initial Management Information screen The Name and Description boxes of the screen are optional. Name this example “Test1” and enter “This will evaluate impact of wetlands” in the Description box. The soil area for this example is Yakima County Area, Washington. Now select a specific soil name. Click on the Soil name drop-down box and select “11, Burke silt loam, 5 to 8 percent slopes” as the specific soil. The slope is automatically calculated as the midpoint of the slope range for our selected soil. Users may modify this slope value to reflect the conditions they want to simulate by modifying the value in any Slope textbox (on this first Management Information screen and on the next, which is the main, Management Information screen). In this case leave the slope at the value indicated. Now in the Area input box enter the field size in acres. Type in 100 as an assumed field size and click Continue. The next Management Information screen (Figure 2.5) allows users to select Cropping System, Nutrient Management and other management information that will be simulated for the field under the Baseline and Alternative scenarios. 10 Nutrient Tracking Tool User’s Manual Figure 2.5 TIAER Management Information screen showing options for defining baseline and alternative scenarios 11 Nutrient Tracking Tool User’s Manual Figure 2.6 TIAER Management Information screen showing specification of cropping system, irrigation and tillage options, and nutrient input information Next is an evaluation of the impact of a 20-acre wetland on the downslope end of a 100-acre field. The wetland is positioned such that runoff from the 80-acre portion of the field flows into the 20-acre wetland prior to leaving the field. Select Corn-Silage from the Cropping System drop-downbox. Select Conventional as the Tillage for and click Upload. To ensure that the comparisons are valid, select the Cropping System and Tillage for the Baseline and select Copy to Alternative. The screen should look like Figure 2.6 once those selections have been made. Click on Wetlands and Ponds under the Alternative tab. 12 Nutrient Tracking Tool User’s Manual Figure 2.7 TIAER Management Information screen The Management Information screen (Figure 2.7) allows users to select any combination of several conservation practices. After clicking on Wetlands and Ponds under the alternative scenario and specify the wetland size as 20 acres. The screen should now look like Figure 2.8. 13 Nutrient Tracking Tool User’s Manual TIAER Figure 2.8 Structural Conservation Practices Information screen showing selection of 20-acre wetland Figure 2.9 Verify Information screen prior to running NTT simulation After users click Continue, the Verify Information screen appears (Figure 2.9) providing the opportunity to confirm that the information entered is what was intended. Click Back to edit the information or Continue if the information is correct. When Continue is clicked, the NTT interface calls the main simulation program and simulates the Baseline and Alternative scenarios based on the selections made. 14 Nutrient Tracking Tool User’s Manual Figure 2.10 TIAER Verify Information screen while NTT simulation is in progress While the program is running in the background, a message “Calculating … Please wait” is displayed (Figure 2.10). 15 Nutrient Tracking Tool User’s Manual Figure 2.11 TIAER Summary Report screen showing summary output from NTT simulation Upon completion of the simulations, NTT displays the Summary Report screen to users (Figure 2.11). Annual average values for the indicators selected are presented, as well as a summary of the management and other input options selected by the user. Users can click see Detail Report to see a more detailed output report, or Download Report to create and download a PDF copy of the results. 16 Nutrient Tracking Tool User’s Manual Figure 2.12 2.2. TIAER Capture Soil Map screen to start Web Soil Survey from within NTT Running NTT with multiple soils from web soil survey To perform the same kind of wetland evaluation, first select the AOI (Area of Interest) from the USDA-NRCS web soil survey. On the main NTT home page, click Soil Survey Map, to capture soil map information. The NTT program presents a new screen (Figure 2.12) that enables users to start the Web Soil Survey (WSS). After selecting the AOI, return to this same screen (Figure 2.12) and capture the soil information in NTT format by clicking Capture. Export it to NTT by clicking the Save button. At any time, the information pasted in the soil input box can be erased by clicking the Clear button to begin again. 17 Nutrient Tracking Tool User’s Manual Figure 2.13 TIAER Initial screen in the Web Soil Survey (WSS) program prior to area selection Once the user clicks the START WSS button, a new window or browser panel appears (Figure 2.13), which is the main page of the USDA-NRCS Web Soil Survey. Users may need to temporarily enable pop-ups in order for this to work properly if popup blockers have been installed and enabled on their computers. When the Web Soil Survey screen first appears, the continental United States is shown in full extent on the right panel. The left panel of the screen displays several tabs used to navigate to specific areas of interest. Navigate to the AOI by choosing from the State and County list, or alternatively by selecting from the Soil Survey Area list. For this example select State and County and choose Washington from the State drop-down box and Yakima from the County drop-down box. 18 Nutrient Tracking Tool User’s Manual Figure 2.14 interest TIAER WSS screen after selection of State (Washington) and County (Yakima) of Allow enough time for the map on the right panel of the screen to zoom in to the Yakima County, Washington area of the continental United States (Figure 2.14). Next navigate to the specific AOI by progressively selecting rectangular areas with the zoom-in feature as the active selection tool. To ensure that the zoom-in selection tool is active, users must ensure that the zoom-in button right below the “Area of Interest Interactive Map” title bar is the enabled button. The zoom-in button is typically the leftmost button on the toolbar right below the “Area of Interest Interactive Map” title bar. Once the zoom-in selection tool is active, users can select any rectangular area, making sure that they are within the vicinity of Yakima County, Washington. Any selection close enough to the center of the map will suffice. 19 Nutrient Tracking Tool User’s Manual Figure 2.15 TIAER WSS screen after zooming into Washington to select a field in Yakima County After a rectangular area has been selected, the map zooms in to that area (Figure 2.15). Figure 2.16 WSS screen after zooming in to Yakima County, Washington The next zoom level shows the street and field features more prominently (Figure 2.16). 20 Nutrient Tracking Tool User’s Manual TIAER Once a reasonable scale has been reached allowing selection of the AOI, use the AOI selection tool. The AOI selection tool is the button that displays a rectangle with “AOI” right below that rectangle. Users should now click on it to be sure it is enabled. Select a rectangular area that corresponds approximately to the field or area to evaluate. Figure 2.17 WSS screen showing AOI creation after selecting area of interest A message “Creating AOI…” appears on the map, indicating that the AOI is being selected (Figure 2.17). Once the AOI has been selected, summary soil information for the AOI will be displayed in the left pane. If the soil information is not visible, click the Soil Map tab. 21 Nutrient Tracking Tool User’s Manual Figure 2.18 TIAER WSS screen after selecting all contents prior to copying into NTT To export the soil information, go to the Edit menu tab of the browser and click on “Select All” (or press ctrl-A) and then “Copy” (ctrl-C) from the Edit menu tab of the browser (Figure 2.18). Figure 2.19 NTT program prior to pasting in selected soil information from WSS Next, move to the main Capture Soil Map Information screen and paste (ctrl-V) the information in the area provided (Figure 2.19). 22 Nutrient Tracking Tool User’s Manual Figure 2.20 TIAER NTT program screen after pasting soil information from WSS Click the Capture button so the soil information is recognized by the program and formatted in the display, as show in Figure 2.20. Then click Save to export the data to NTT. 23 Nutrient Tracking Tool User’s Manual Figure 2.21 TIAER NTT program after capturing (importing) soil information from WSS The data exported to NTT appears in the NTT window as displayed in Figure 2.21. Next specify other aspects of the scenarios, as done in the previous section. The first Management Information screen NTT displays (Figures 2.21 and 2.22) indicates that the selected AOI is 395.5 acres in size, and that it consists of 4 soil types. 24 Nutrient Tracking Tool User’s Manual Figure 2.22 TIAER Management Information screen showing multiple soils captured from WSS Define the scenarios by creating an optional name and description for this NTT project (Figure 2.22) on the first Management Information screen. 25 Nutrient Tracking Tool User’s Manual Figure 2.23 TIAER Management Information screen with multiple soils after selecting options Select the Cropping System, Irrigation types, Nutrient input information, and Tillage options for the Baseline and Alternative scenarios, as was done in the previous section (Figure 2.23). Users can then click on Wetlands and Ponds , as shown for this tutorial (so wetland information may be entered). The procedure for adding a 20-acre wetland is identical to the previous example (Section 2.1) and will not be included in this section. Users may follow the steps outlined in Section 2.1 if they choose to review that process. Click Continue if not including Structural Conservation Practices. 26 Nutrient Tracking Tool User’s Manual Figure 2.24 TIAER Verify Information screen with multiple soils prior to NTT simulation Note that on the Verify Information screen users can select which soil types they want to include or exclude by using the check boxes shown to the left of each soil type (Figure 2.24). The slope value of selected soils may be modified by clicking in the Slope textbox for the soil of interest (although this tutorial will not show this step). By default, NTT will include all soil types captured from the soil capture program in the evaluations. Once the desired soils are selected and all the information selected is correct, click Continue to proceed to run the NTT evaluation. The output display on the Summary Report screen will show the impacts by soil type, in addition to the average impact for the entire AOI. The results displayed will be in the same format as those displayed in the earlier example where a single soil type was selected. 27 Nutrient Tracking Tool User’s Manual TIAER CHAPTER 3 EXAMPLES The following pages provide illustrative examples that the user can follow to gain additional insight into how NTT can be used to evaluate alternative practices. In all of these examples the single soil option is used to simplify the process. However, users can readily use the web soil survey to select multiple soils and perform the same examples. In that case users should bear in mind that the results would not be identical to those shown here since the soil types would likely be different. Example 1: Impact of tillage: The first example illustrates the impact of tillage. We will use NTT to compare the crop yields and nutrient and sediment losses associated with conventional tillage as opposed to no-till for a corn crop. Choose the “Select Specific Soil” option from the main NTT page and select Indiana and Carroll as the State and County of interest. Then select the “FbB, Fincastle-Starks silt loams, 1 to 3 percent slope” soil series as shown in Figure 3.1. Figure 3.1. Selection of Soil area and soil series. After selecting the soil type we will click Continue to be taken to the Management Information screen where we can enter the desired management information. We will be selecting corn for each scenario. However, we will select Conventional as the tillage option for the baseline and No-till as the tillage option for the Alternative scenario as shown in Figure 3.2. 28 Nutrient Tracking Tool User’s Manual TIAER Figure 3.2. Selection of pre-existing crop management options We will then click on the Continue button where we will be taken to the Verify Information screen. At this time, check to make sure your input selections correspond to what is shown in Figure 3.3. Once you are comfortable that you have made the correct input selections, click Continue to run the NTT calculation tool. The results of this hypothetical example are shown in Figure 3.4. Figure 3.3. Verify Information screen summarizing selected options 29 Nutrient Tracking Tool User’s Manual TIAER Figure 3.4. Summary Report page showing results of NTT calculations for the tillage options Note that, as expected, no-till resulted in lower sediment losses. Example 2: Impact of slope: One of the most well documented and intuitive principles in resource conservation is that the prevailing slope of a field has significant impact on soil and nutrient losses from that field and crop yields on the field. To illustrate this we will use the same example as above but this time we will select the “HkG, Hennepin loam, 30 to70 percent slope” soil series from Carroll County in Indiana (Figure 3.5) after choosing the “Select Specific Soil” option from the NTT main page. We are using a 100-acre field size as before. Click Continue to choose the same corn management information as before with Conventional tillage for the baseline and no-till for the alternative scenario. The results are shown in Figure 3.8. 30 Nutrient Tracking Tool User’s Manual TIAER Figure 3.5. Selection of an alternative soil type (Hennepin) with high slope. 31 Nutrient Tracking Tool User’s Manual TIAER Figure 3.6. Selection of crop, nutrient, and tillage options Figure 3.7. Verify Information screen prior to simulating scenarios on high slope Brinklow soil. 32 Nutrient Tracking Tool User’s Manual TIAER Figure 3.8. Summary Report screen for simulations on Hennepin soil with 50% slope Note that all sediment and nutrient losses are higher with this new soil type – likely because the average slope is 50%, much higher than the soil used in Example 1. Now click the Soil tab at the top of the Summary Report screen to go back to the Soil selection screen and manually enter 2% as the slope instead of 50% (Figure 3.9). Click Continue three times to rerun the same management options and get back to the Summary Report page. Your Verify Information screen should look like Figure 3.10. The results presented on the Summary Report page are as shown in Figure 3.11. It is obvious that the reduction in slope led to increased crop yields and reduced sediment for both the baseline and alternative scenarios. The alternative scenario with no-till is still projected to result in lower sediment losses. However, both scenarios show lower sediment and nutrient losses relative to the high-slope situation. 33 Nutrient Tracking Tool User’s Manual TIAER Figure 3.9. Manual editing of soil information to enter 2% slope for Hennepin soil Figure 3.10. Verify Information screen showing input selections but with 2% slope 34 Nutrient Tracking Tool User’s Manual TIAER Figure 3.11. Summary Report screen showing results for Hennepin soil with 2% slope. 35 Nutrient Tracking Tool User’s Manual TIAER REFERENCES Parton, W. J. 1996. The CENTURY model. In: D. S. Powlson, P. Smith, and J. U. Smith, (Eds.), Evaluation of soil organic matter models using existing long-term datasets, SpringerVerlag, Berlin, Germany, pp. 283-293. Shaffer, M.J., A.D. Halverson and F.J. Pierce. 1991. Nitrate leaching and economic analysis package (NLEAP):model description and application. In Managing Nitrogen for Groundwater Quality and Farm Profitability. Eds. Follett et al., pp 285-322. Soil Science Society of America, Madison, Wisconsin. Williams, J.R., J.G. Arnold, and R. Srinivasan. 2000. “The APEX model.” BRC Report No. 0006, Oct. 2000. 121 P. 36